
Need metal detectorbut no desire to spend money on his purchase? I will tell you how to create a simple metal detector with your own hands.
Recently, I came across a network on an interesting and simple scheme for creating a metal detector. This scheme was based on the use of the 555th chip (timer) and several other components. So this instruction inspired me to create a simple metal detector with minor changes. The main question is whether such a metal detector will work as usual? As evidence that a home-made metal detector works fine, near the end of the instructions I am attaching a video showing the operation of my metal detector.
I can assume that it will be difficult for people who are poorly versed in the design of conventional metal detectors and in electrical circuits in general to understand my instructions. You may need to read special literature, and only then proceed with the implementation of my step-by-step instructions.
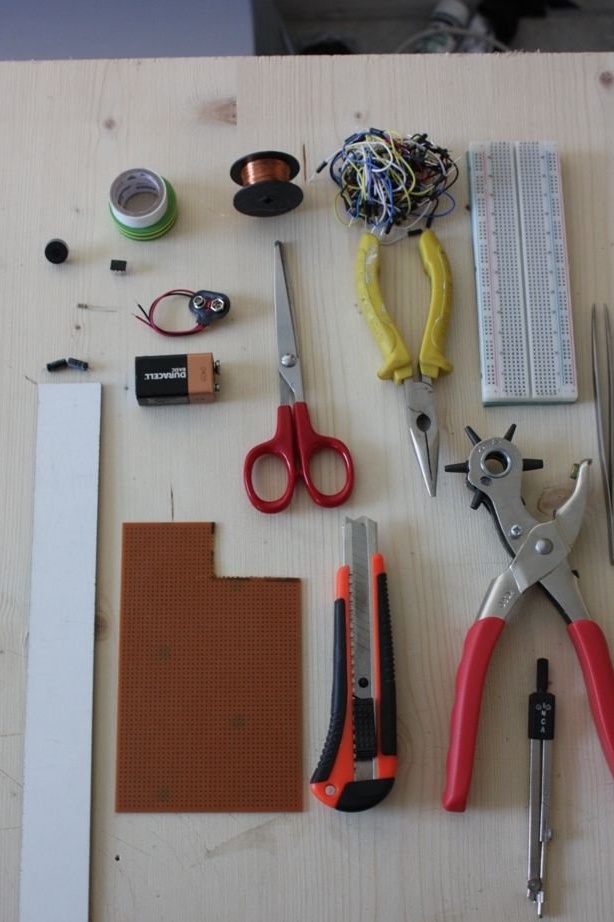
Step 1: We collect the necessary materials
• 555th microcircuit (timer);
• 47 kΩ resistor;
• 2 capacitors (2.2 μF);
• printed (circuit) board;
• 9V batteries, switch, battery cable, several wires for connection;
• “tweeter” (buzzer);
• 100 m of copper wire (diameter - 0.2 mm);
• electrical tape and wood glue;
• cardboard.
Instead of a buzzer, you can use a 10 uF capacitor and a speaker (8 ohms).
• breadboard and wires;
• pliers, tweezers, pliers with which you can make holes;
• soldering iron and solder made of wire;
• sharp knife, ruler, pencil and compass;
• glue for hot bonding.
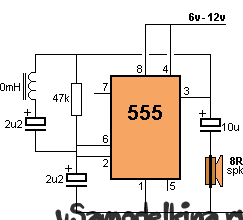
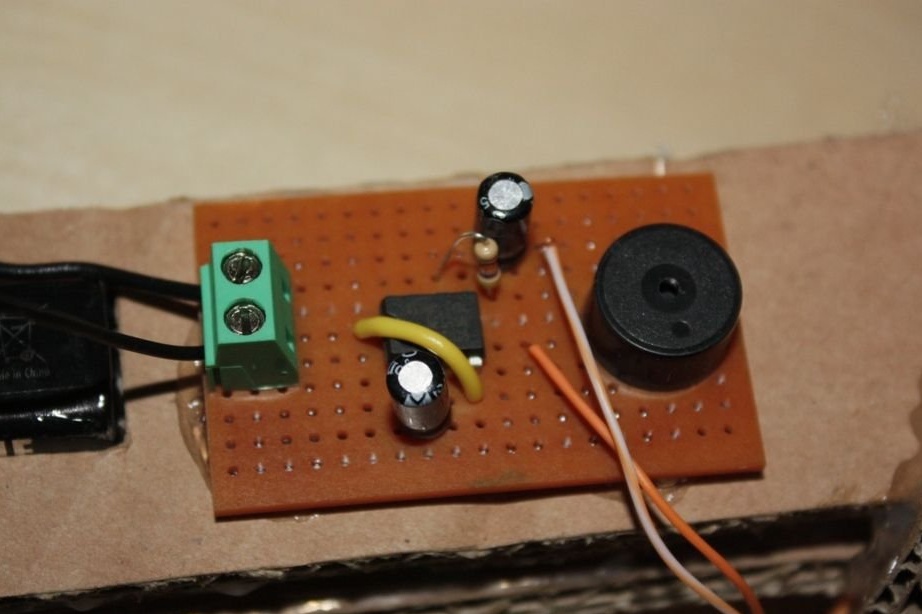
Step 2: Circuit for a metal detector
I borrowed the circuit from the network. I changed it a little - I added a switch for the battery and instead of the speaker I use the "tweeter".
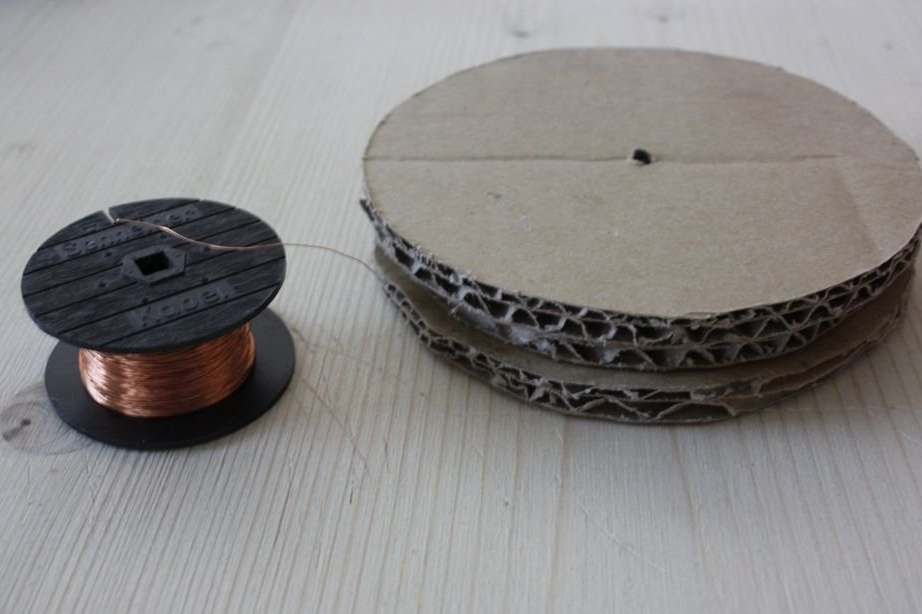
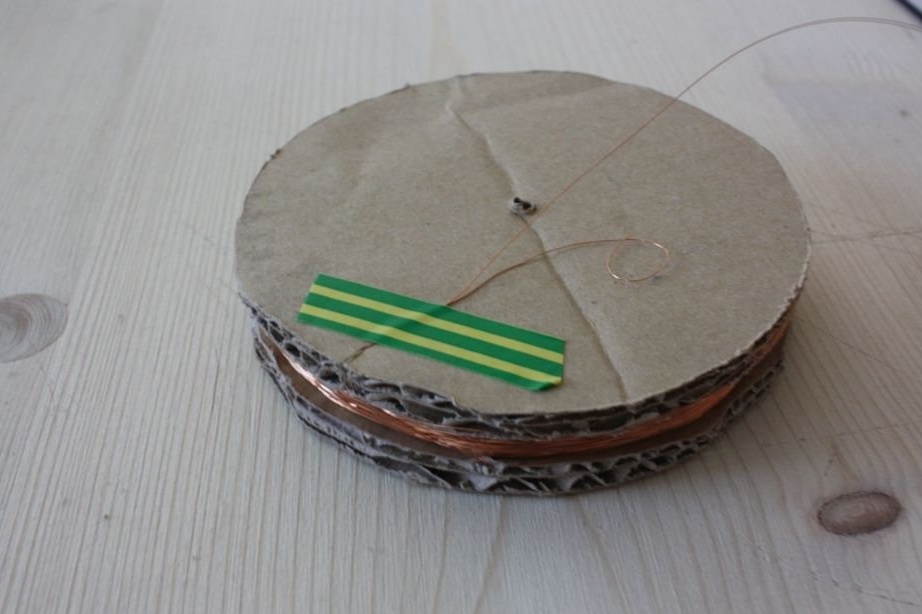
Step 3: make the coil
For calculations, I used an online calculator for air coils. Thanks to the calculator, I was able to calculate that I would need 250 turns of copper wire for a coil with a width of 90 mm (290 turns for a coil with a diameter of 70 mm) with an inductance of 10 MGN. Do not want to bother? Ready-made air coils can be bought online.
The basis for the coil was made of cardboard, and the coil itself is a varnished copper wire with a diameter of 0.2 mm. I wound 260 turns. Before soldering, both ends of the coil wire must be thoroughly cleaned. If necessary, use sandpaper.
Step 4: test the coil
At first, I tested the assembled circuit on a breadboard. I didn’t want to ruin the circuit board.
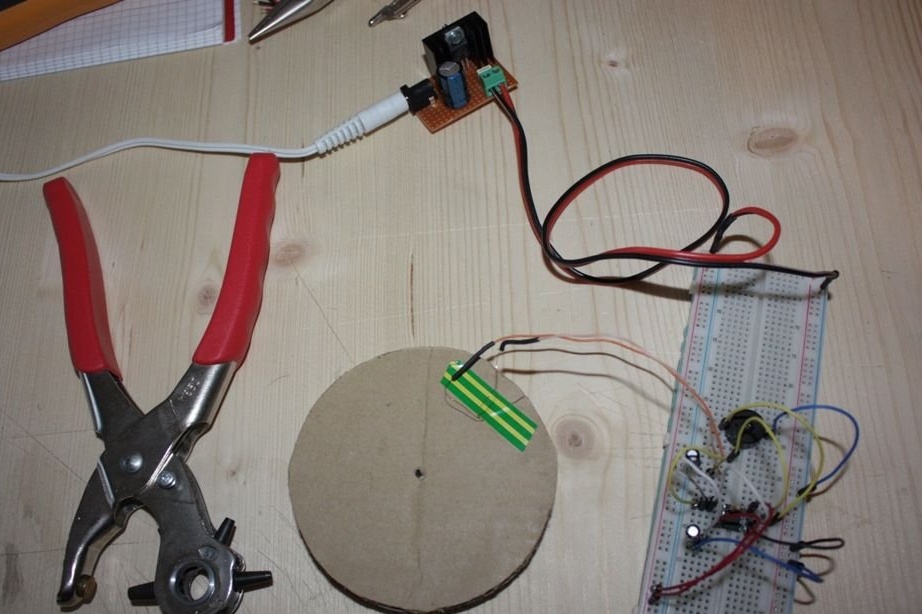
You can watch the initial testing of the coil in the video below:
Step 5: Assembling the PCB
Testing was successful. Then I made a printed circuit board. I already know how to make them thanks to my past projects. You may need to google how to do this.
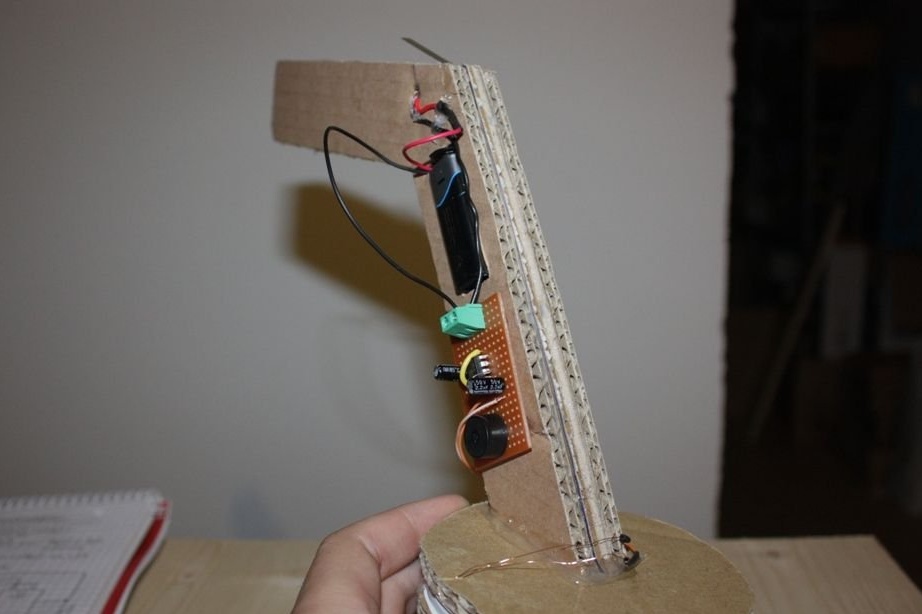
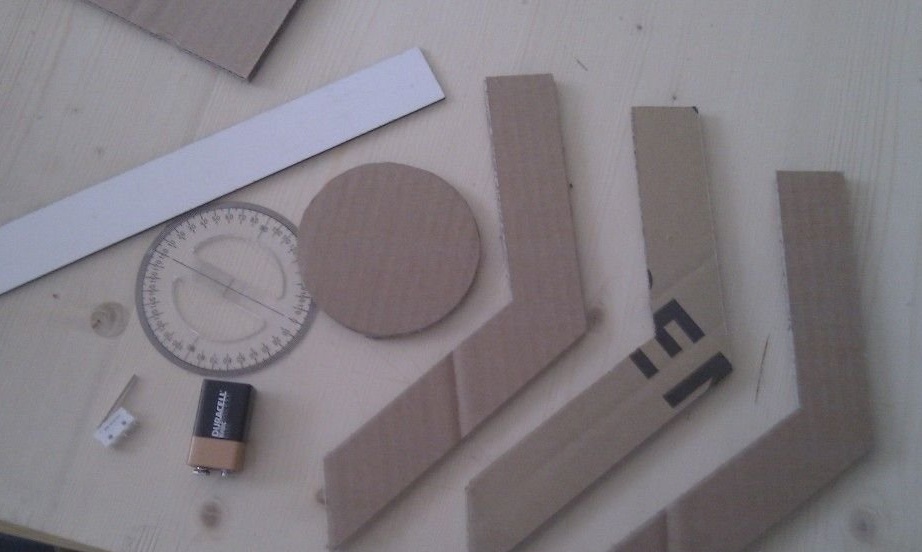
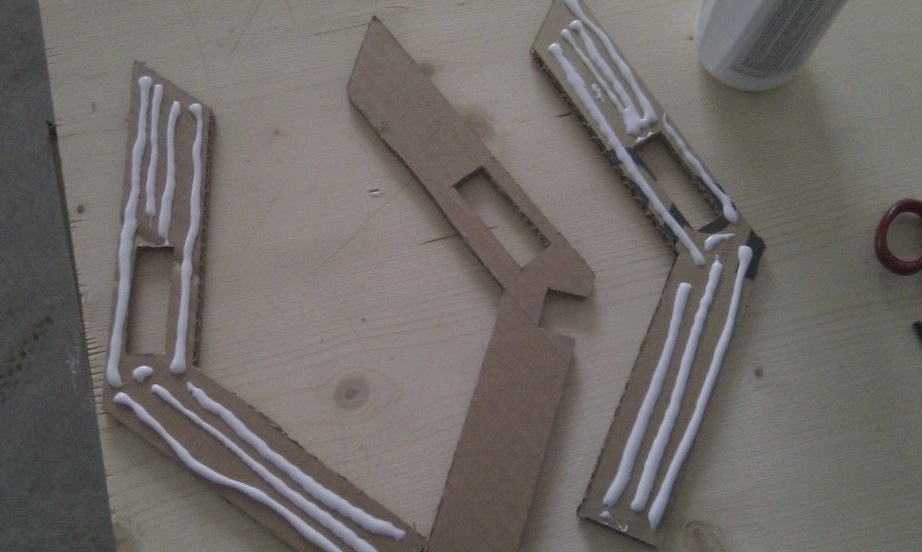
Step 6: Cardboard Base for Metal Detector
I wanted my metal detector to look beautiful. Therefore, I decided to make a cardboard base. To make such a pen out of cardboard, inside which you can put a battery, switch, circuit and coil.
At first, I sketched a sketch, no calculations — I just cut 3 pieces out of cardboard that looked like a metal detector handle. Next, cut out holes for the battery and switch. Then he glued all the pieces of cardboard with wood glue and left to dry for 12 hours (at night). When the glue dried, I made a hole in the handle next to the switch so that the wires could freely pass through this hole.
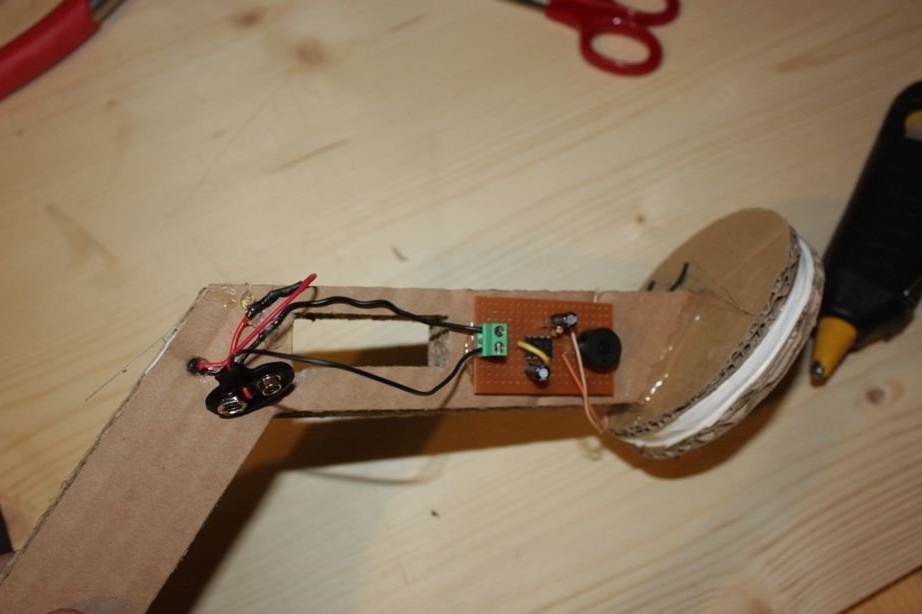
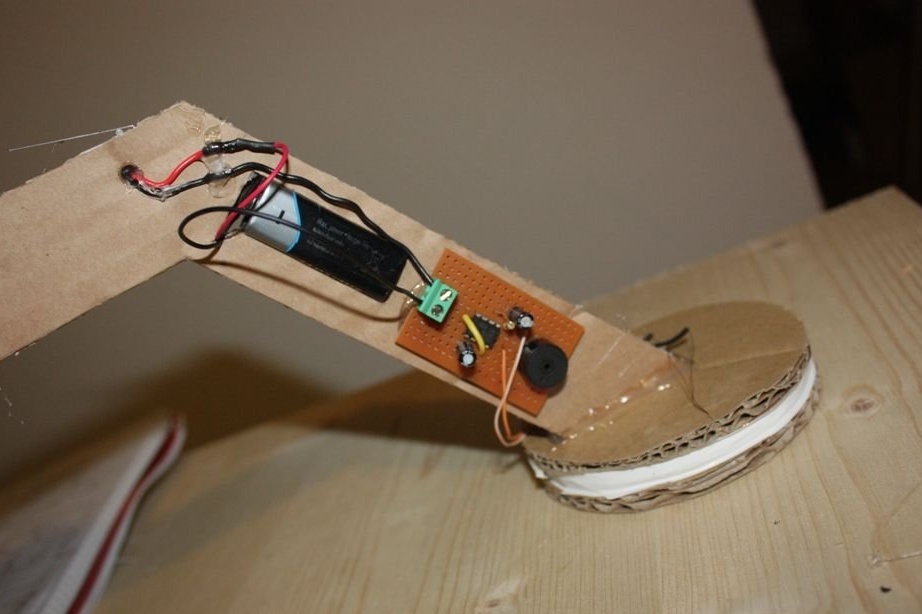
Well, finally, you need to glue the coil to the cardboard handle. I used glue for hot bonding.
Step 7: Assembling All Parts of the Metal Detector
So, I have already completed all the components individually. It remains to collect them into a single metal detector. First, I glued the switch to the handle, then inserted the battery, and finally glued the circuit board. Used, as before, glue for hot gluing. Then he connected all the components to each other and tested the assembled metal detector.
Test video below:
Step 8: Conclusion
To assemble this metal detector is not so difficult, if not new to this business. But I must say that you can use such a metal detector only at a short distance, preferably indoors. When working on the street, he can junk.
I hope the instruction was useful to you. Good luck in assembling your own metal detector!