

The following tasks were set:
- To make a device for automatic regular watering of indoor plants with adjustable duration of watering;
- Make cheap;
- Use the minimum number of tools;
- To make it simple, preferably from ready-made components, so as not to go too much into the delights of electrical engineering;
- Fit into the volume of the standard box for the REU, so as not to bother with the design of the case and 3D printing;
- Minimally disfigure the box when installing components, as much as possible;
- Use the minimum number of buttons to control;
- Use a decoupling breadboard to not design pcb;
- Design a device with a minimum number of short wires connecting components inside the case;
The following components were used (estimated price excluding delivery in Chinese stores):
- Set for irrigation (383.48 rubles) - hoses, connectors, racks;
- 12V pump, 800 ml / min (121.56 rubles);
- Prototyping board Arduino Nano v3 (126.94 rubles);
- 5V step-down power supply module (60.45 rubles);
- Green button switch with self-reset (19.48 rubles), 175.96 rubles. / set (10 pcs);
- Membrane keyboard for 4 keys (48.36 rubles);
- MOSFET IRF520 module (19.48 rubles);
- OLED display yellow-blue 0.96 inches 128x64 I2C SSD1306 (132.98 rubles);
- Power connector (module) 5.5 mm x 2.1 mm DC-005 (27.54 rubles), 187.38 rubles. / set (10 pcs);
- ABS housing with a transparent cover 115 mm x 90 mm x 55 mm (212.23 rubles);
- Power supply 12V 1A (179.99 rubles);
- 4x6 unwrapping prototype board (83.28 rubles / set (5 pcs.));
- Nylon struts (spacer) M2 white (232.37 rubles / set (180 pcs.));
- Nylon struts (spacer) and M3 nuts are black (227 rubles / set (180 pcs.));
- Two-component epoxy adhesive (56.42 rubles);
- 24 AWG wires black and red, 2 x 71.86 rub. / set;
- Silicone flexible wires 20 AWG blue and white 5m, 2 x 144.40 rubles;
- Wires Dupont female to female 10cm (43.66 rubles);
- 10k ohm resistor (5 rubles).
As you can see, the cost of the initial production of such a model without taking into account the cost of tools may exceed 2,700 rubles (excluding delivery). The second device will cost 1300 rubles (excluding delivery). You can also save on a set for irrigation, whose individual components (tees, hoses and racks) are very cheap if you buy them separately and in bulk. 50 pcs of tees cost about 50 rubles, and 20 meters of hose about 500 rubles.This hose is ideal because it fits snugly on the pump leads (5 mm) and, in principle, does not require the use of clamps. Although, for safety, clamps are still better to use (in Russia, clamps with a diameter of less than 8 mm are certainly not for sale).
Instruments:
- Soldering iron, flux gel, POS-41 solder, silicone mat, shavings for cleaning tips;
- Screwdriver;
- 8mm wood drill
- Ceramic drill 12mm;
- Set of files COBALT 247-835 (flat, 3 and 4 mm);
- A set of screwdrivers for microelectronics.
Production progress:
First, a prototype was built on the breadboard using a ready-made button module. Instead of a test pump, a 12 V ceiling lamp was used.
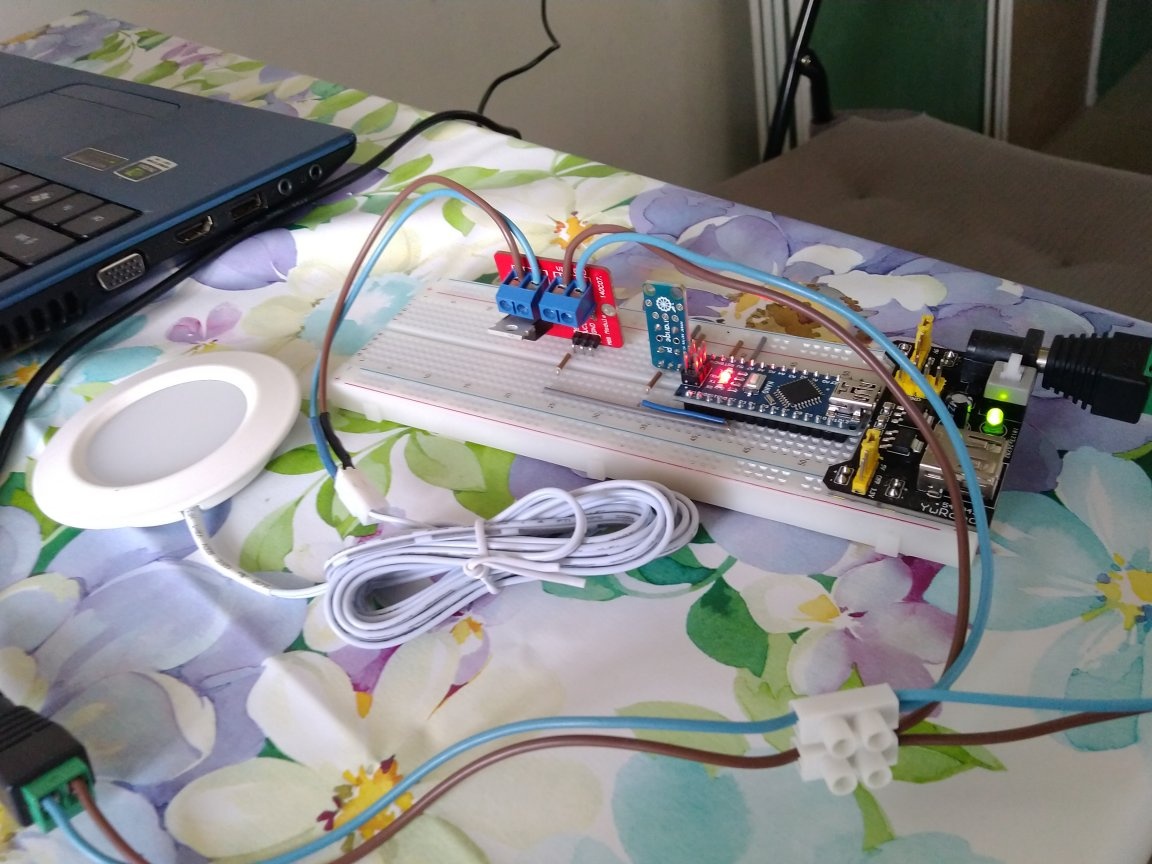
The membrane keyboard and OLED display were tested on the assembled device.
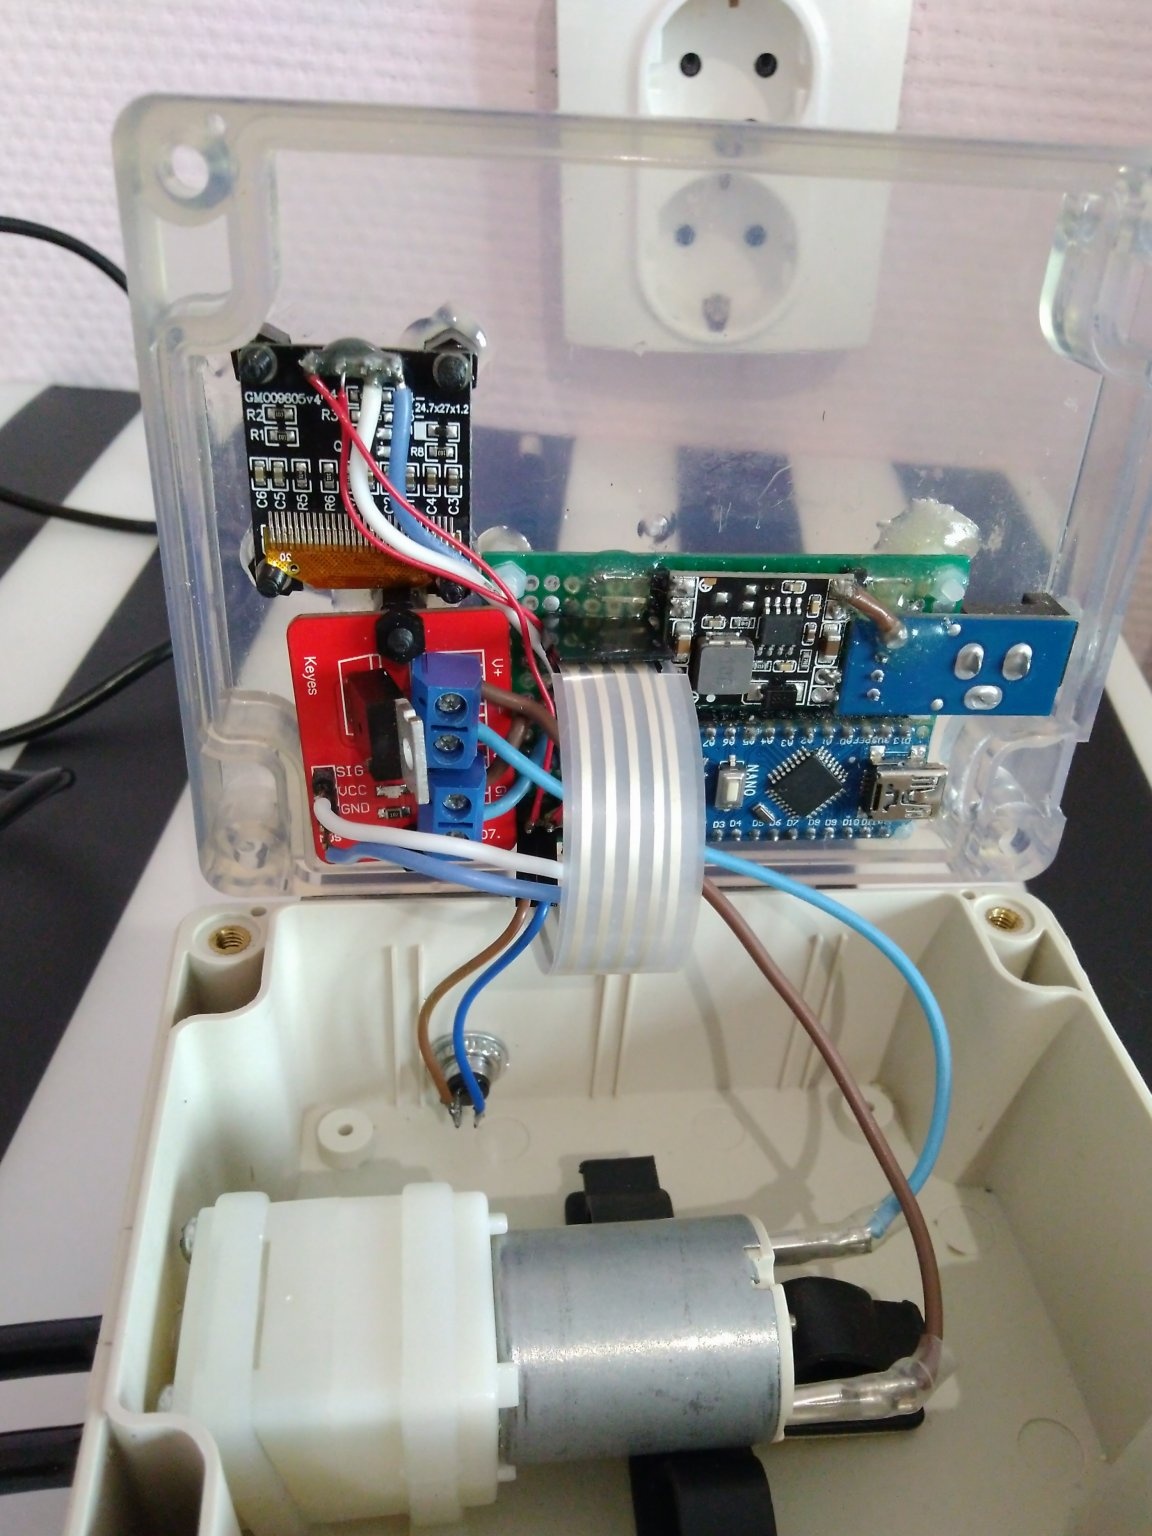
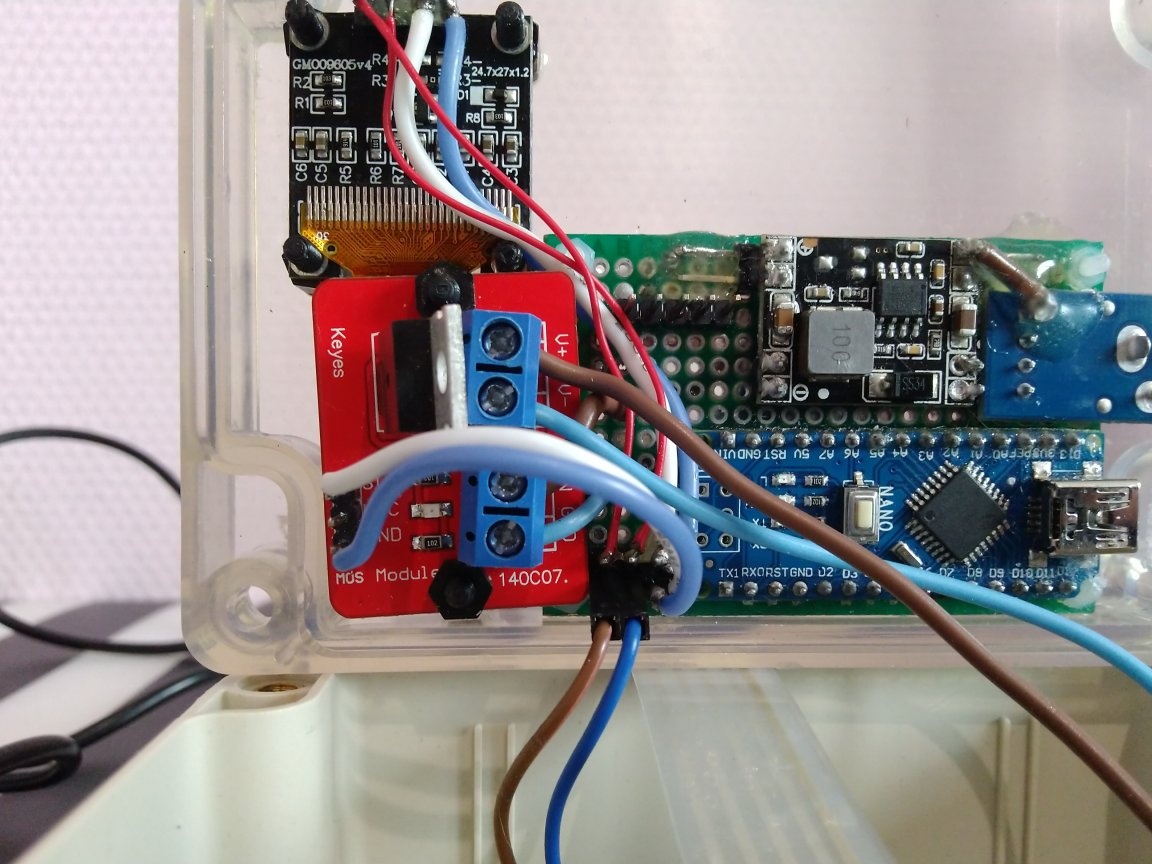
Then the soldering was done on the soldering prototype board:
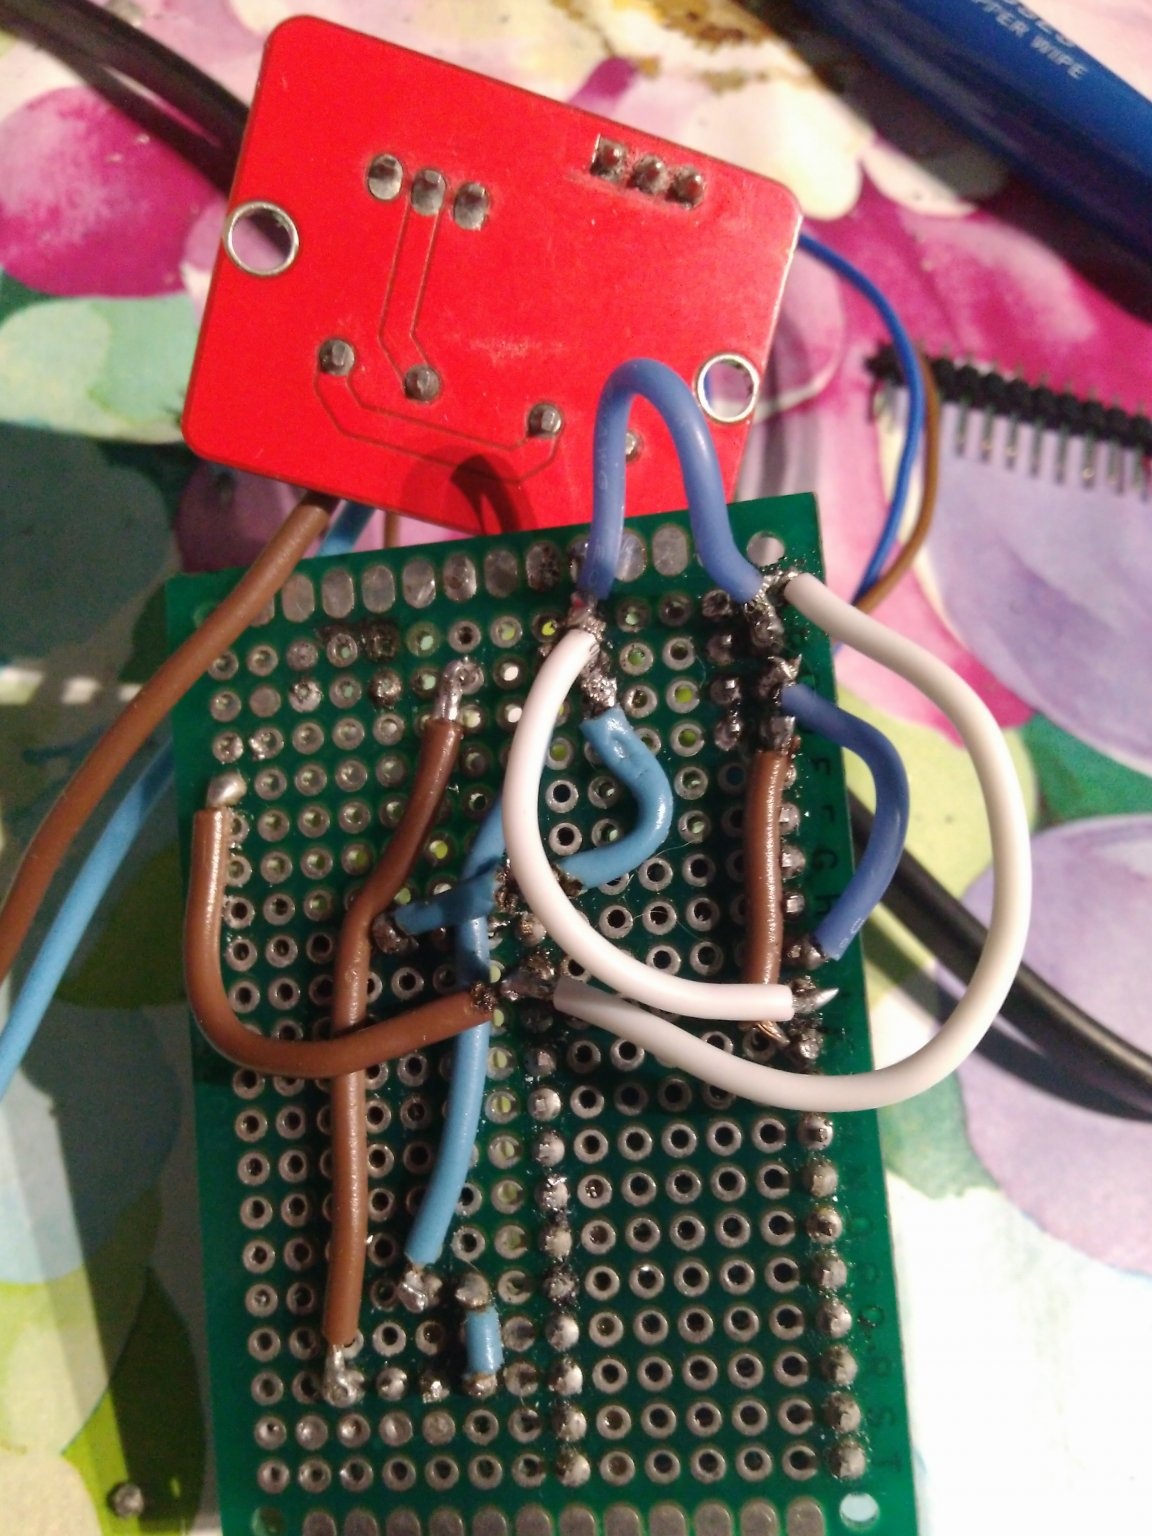
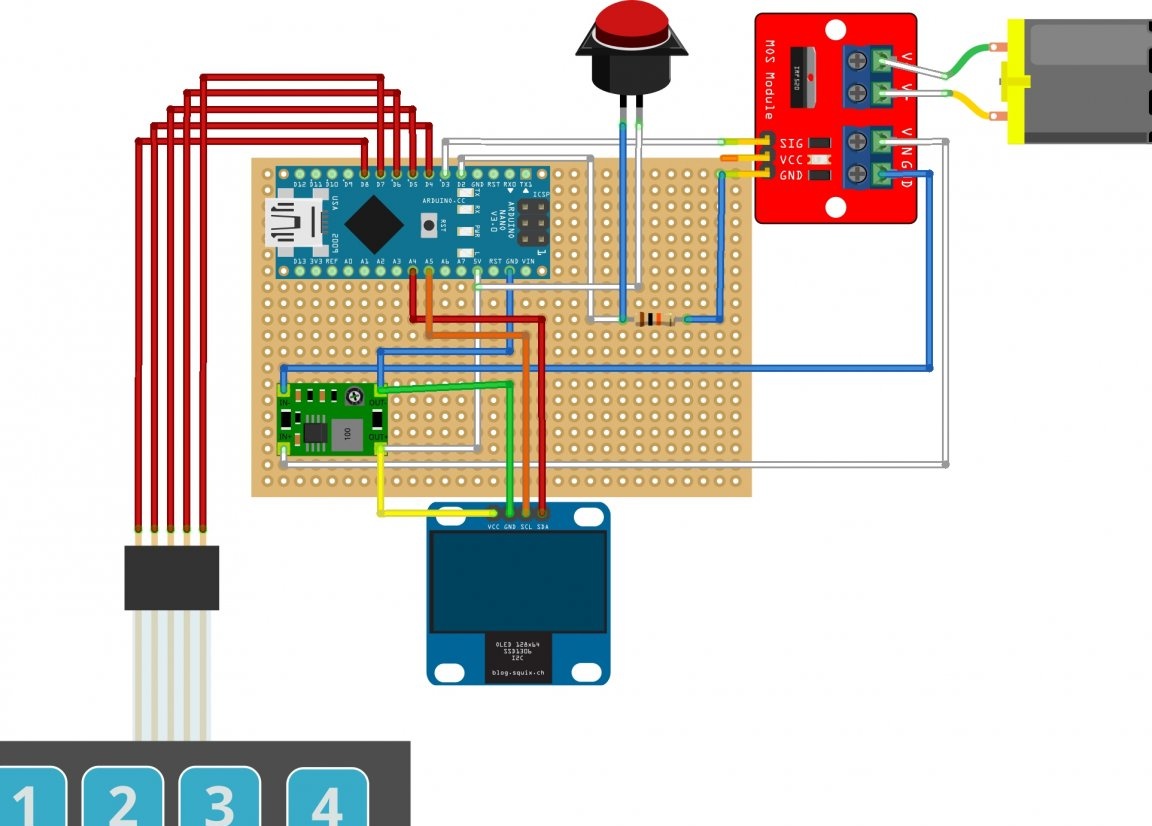
As a result, the following scheme was implemented:
Manufacturing difficulties
- It’s harder to find suitable fasteners than electronic components, and it costs more due to the widespread sale in bulk. In Russia, finding an affordable price is almost impossible;
- One box for REA was mutilated. It turned out that there was not enough free space in height, although nothing portended. Packing the elements inside a small case turned out to be a more difficult task than designing the electronic filling of the device;
- Drilling square holes is associated with great inconvenience and cost. In this project, I refused them, and a small engraver was purchased for the future;
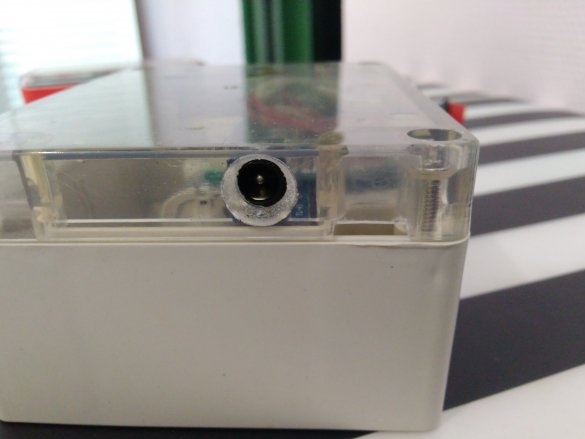
- Also related to the previous feature is the problem of outputting a power connector into the hole on the case (round connectors are sold only in Chinese stores). As a result, a module with a bright blue LED was used, mounted on the board and close to the cover. The hole in the cover for connecting the power supply is made by two different drills. Also, with the help of small files, a rectangular hole was cut in the lid under the miniUSB connector and the case was cut for the output of the keyboard loop;
- Very few small buttons for mounting in a round hole on the housing. 5, 7 and 8mm - literally on one model and only in Chinese stores;
- From the MOSFET IRF520 module, I had to solder the corner legs, and solder the straight so that it fit inside the body along the length;
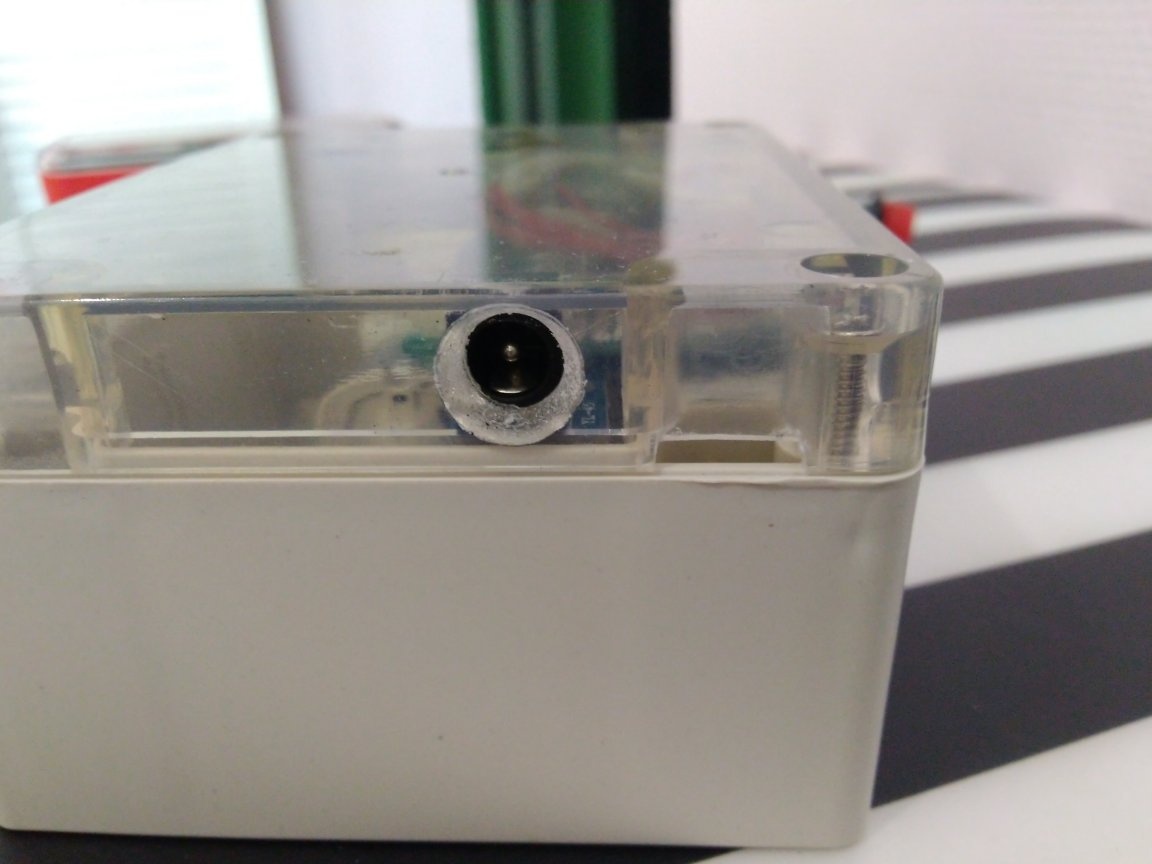
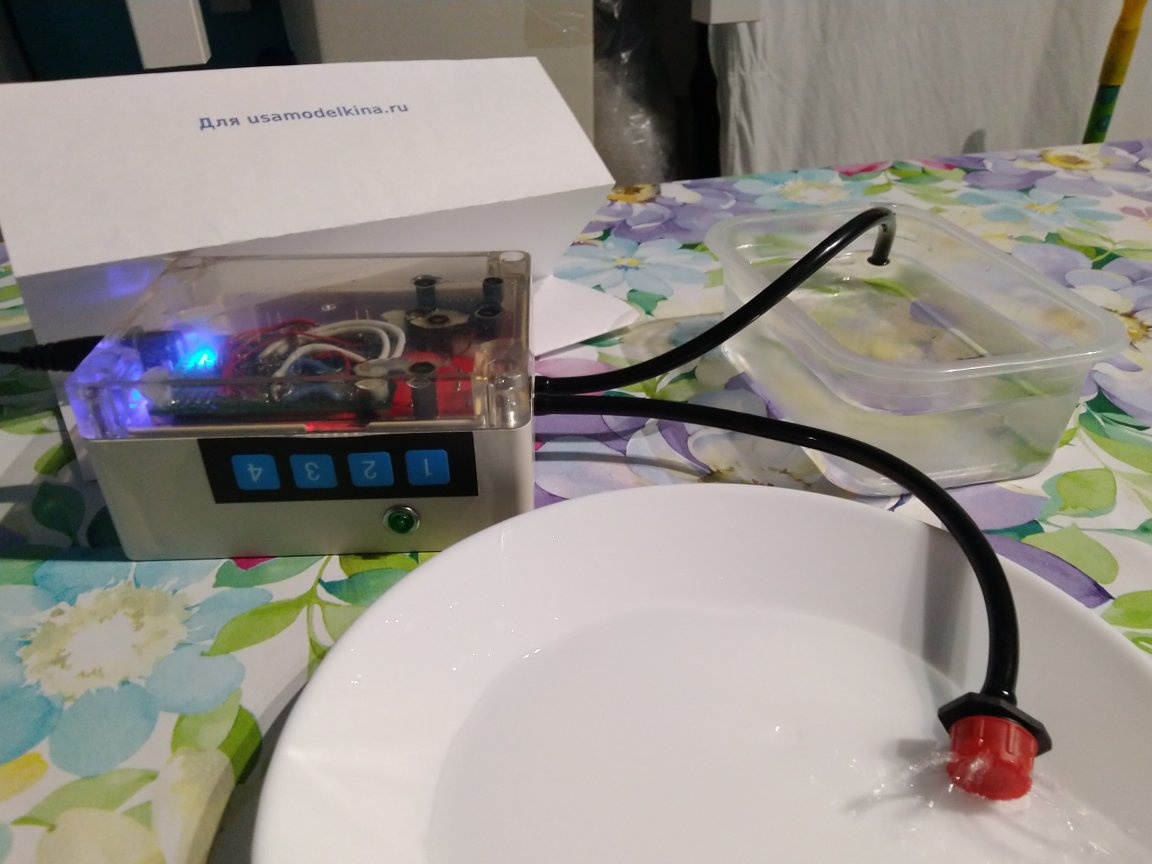
Assembled device:
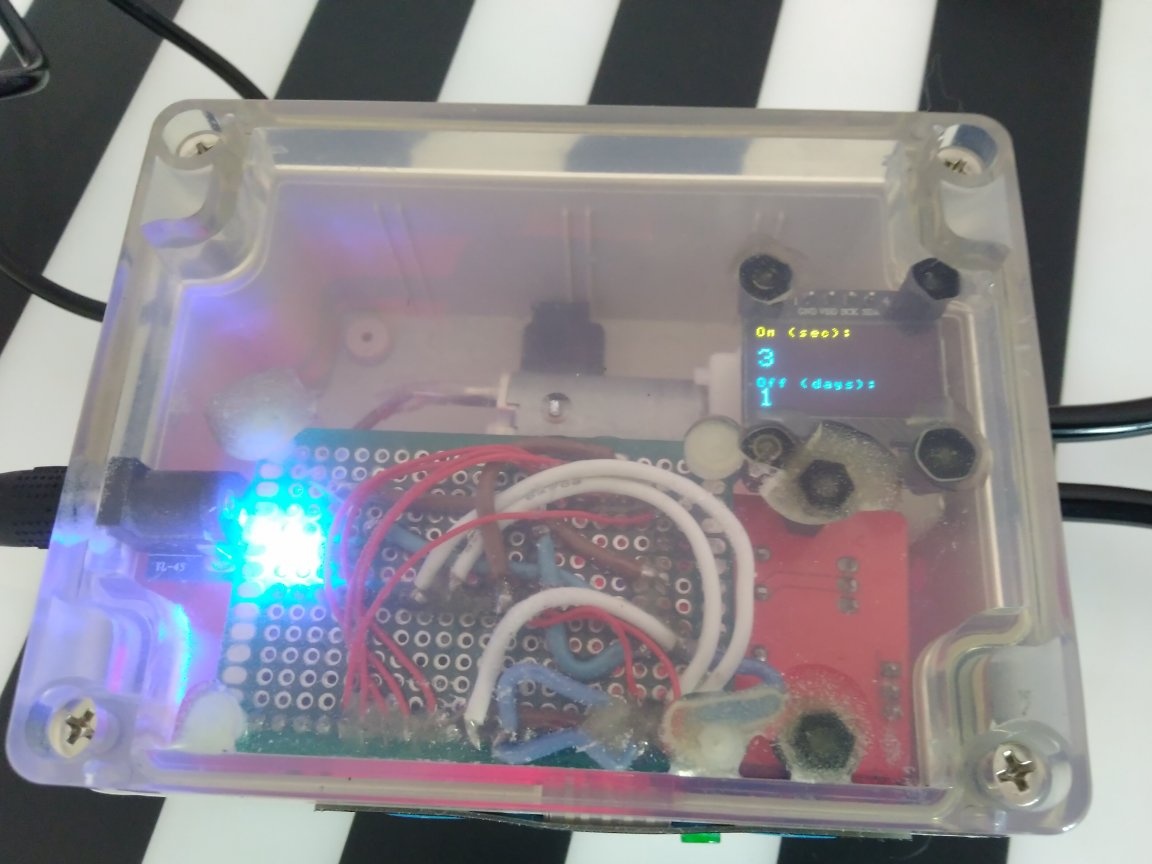
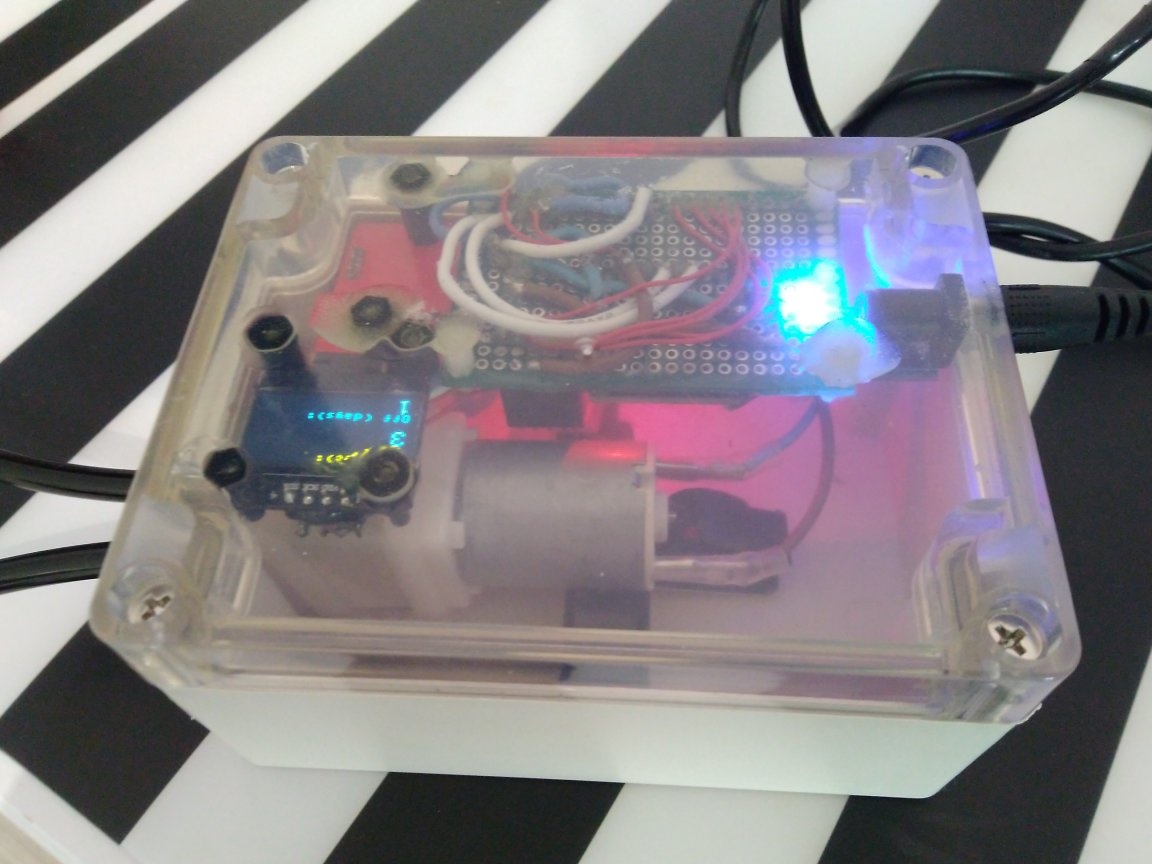
The device works very simply: by pressing the green button, watering is carried out forcefully. If you click on it during watering, it stops. In automatic mode, watering is carried out at an interval multiple of days. The duration of watering (in seconds) and pause (in days) is controlled using the membrane keypad (you need to find stickers “more or less” somewhere).
Interesting features
- Due to space saving and device simplification, I refused to use the real-time RTC module and limited myself to using the millis () function to regularly turn on the pump by timer;
- The display turns on by pressing any of the membrane buttons and turns off after 10 seconds if there are no clicks. Made to prevent rapid burnout of the OLED display. The display uses a modified library ozOLED (thanks) since adafruit exercises take up a lot of RAM. Interestingly, for the full use of ozOLED I had to implement a check of the number of characters displayed on the screen, because the missing character must be replaced with a space (for example, to display 9 after 10, you must print 9_, otherwise it will print 90);
- Moisture sensors are not intentionally used. Ensuring an ideal life for plants was not part of the project. The goal is to ensure the survival of plants in the summer, while the tenants of the apartment are in the country;
- The power supply from the 230V network is intentionally used, since the autonomy of the device in a city apartment is not required. For the same reason, the power consumption was not optimized (the LEDs did not evaporate, and deeper saving modes are not used than IDLE);
- The 1x4 membrane keyboard was chosen for one reason: a convenient library was written for it AmperkaKB, which allows you to simply use this keyboard, rather than thinking about triggers, events, sticks and rattles.Yes, I know that in this library the code for three keyboards is at once - there is enough Arduino Nano memory. The order of the contacts of this keyboard does not correspond to the order of the buttons: the first contact is common, the rest of the contacts have the reverse order of numbering on the keyboard;
- EEPROM is used to store only two values of variables - activity time and timeout (in milliseconds). Resetting these values to default states is realized by clamping the first membrane button for 3 seconds;
- The cover is only connected to the housing through the detachable connections of the green button and the power of the pump.
I hope that this review will help beginners to navigate in the manufacture of their homemade on Arduino and will not repeat my mistakes.
with code and schema in Fritzing.