Not everywhere and not always a socket is screwed over the table to the place. Sometimes you want to hide it away, despite the fact that it is functionally needed here. Then various decorative ideas come to the rescue, one of which is imitation of doors.
It's simple - the design involves a decorative wall lining with a recess for the outlet and with a door that closes the outlet when it is not in demand.
In order to make a decorative door for an outlet for three plugs, you will need:
Materials:
- triple socket with high-quality internal filling;
- electric cable;
- trimming wooden boards from non-hard woods: pine, poplar, linden, etc .;
- joiner's glue;
- paint on wood (stain, furniture tinting wax);
- loops and a small lock;
- wood screws;
- nail dowel for installing doors, if you have brick or gas, foam concrete walls;
- small screws for fixing accessories.
Instruments:
- jigsaw;
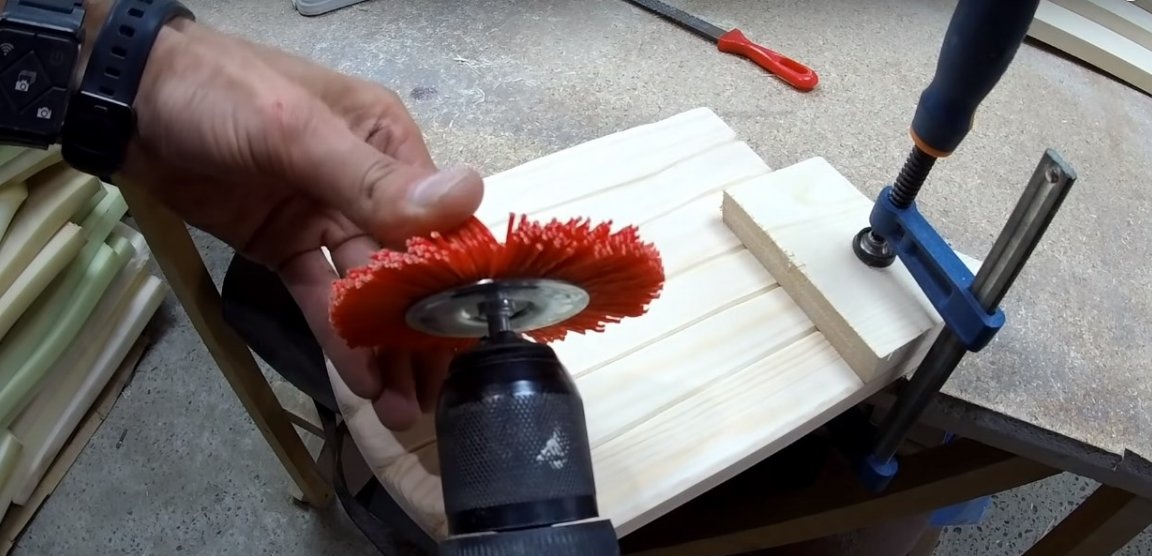
- drill and brush head for brushing wood;
- manual planer;
- screwdriver;
- awl;
- a screwdriver for small screws;
- joinery clamps or clamps;
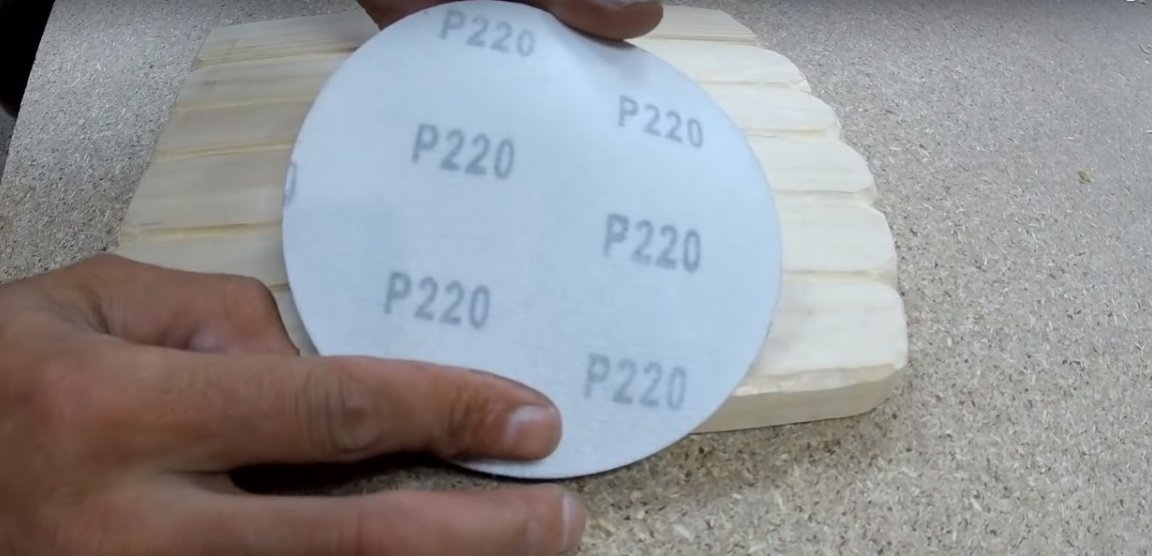
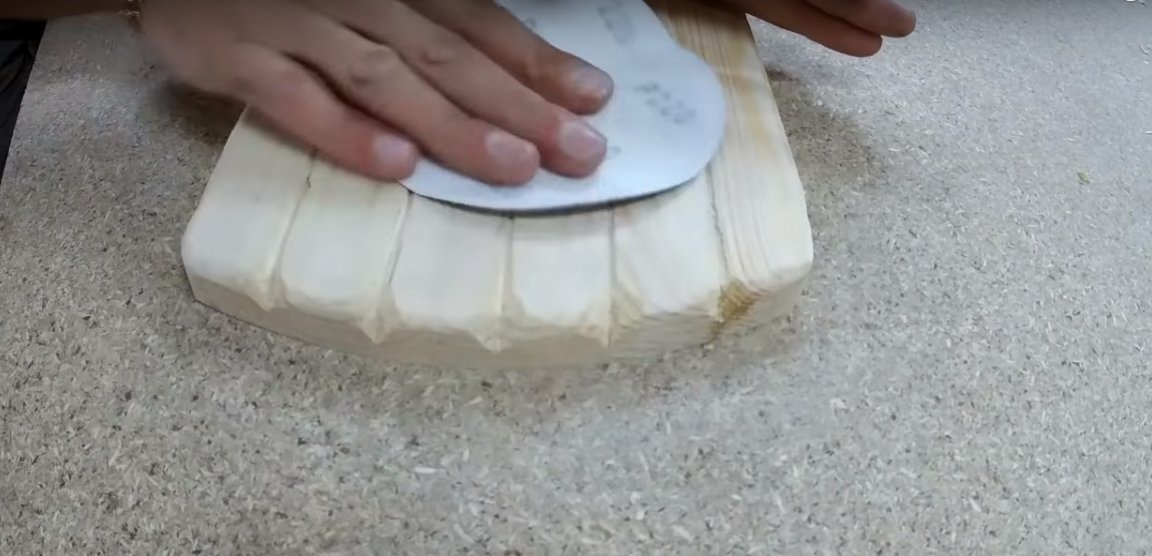
- sandpaper for finishing grinding;
- ruler, square;
- a piece of foam;
- a pencil.
Manufacturing process
Step One: Making a “Doorway"
For the manufacture of decorative stubs, the author uses trimmed boards. Choose varieties of wood that are more pliable for carving, such as linden or poplar. You can also use pine, although working with it in terms of carving is not so pleasant.
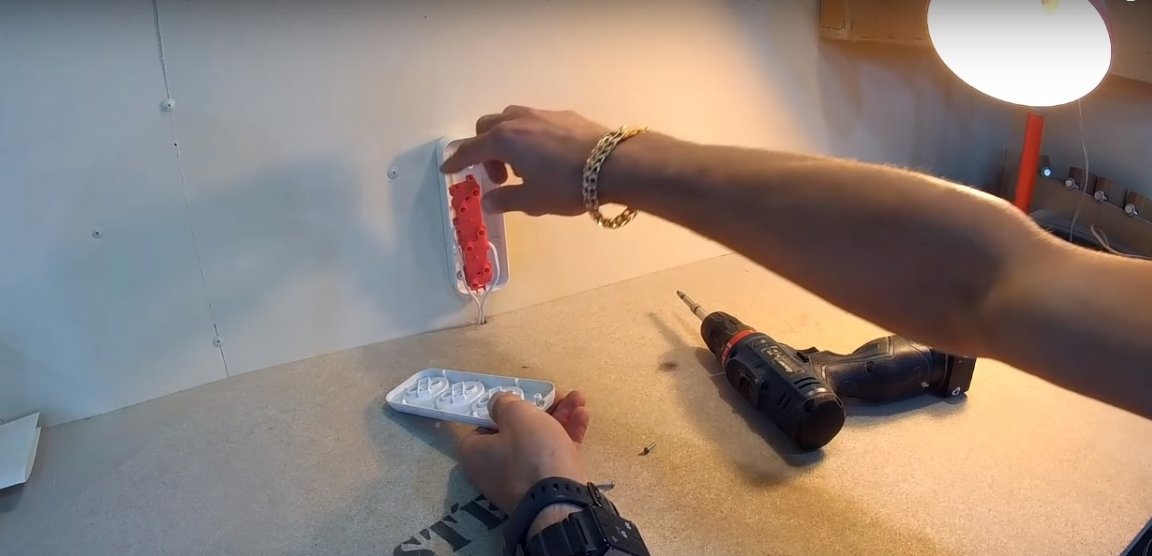
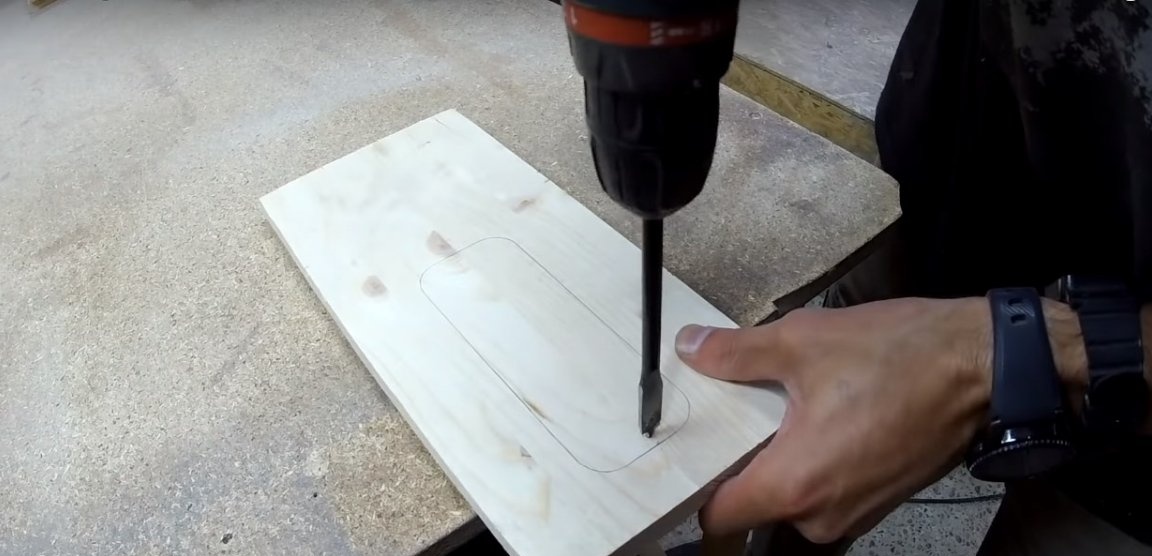
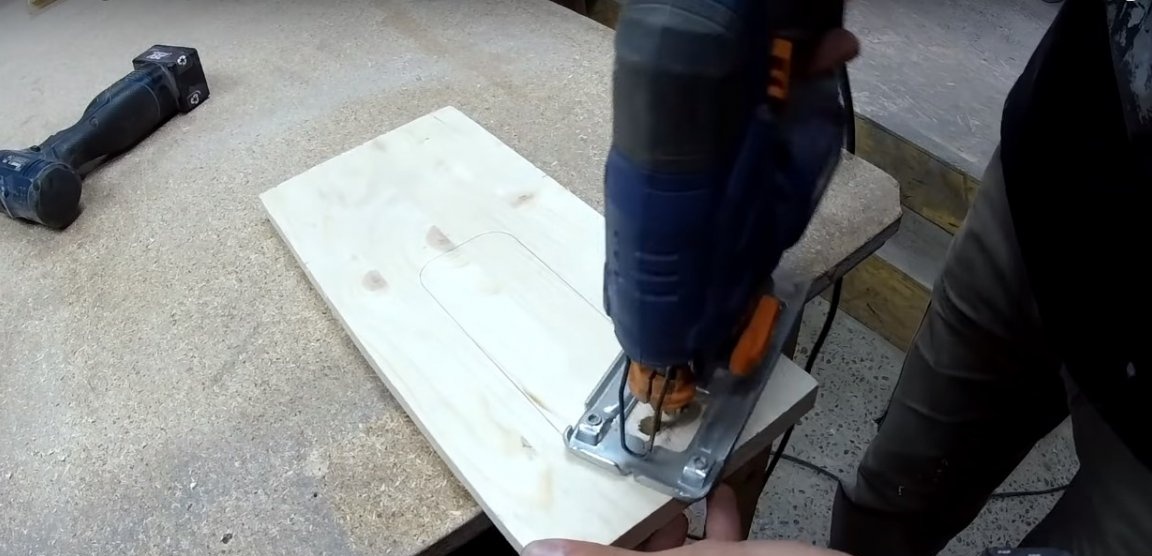
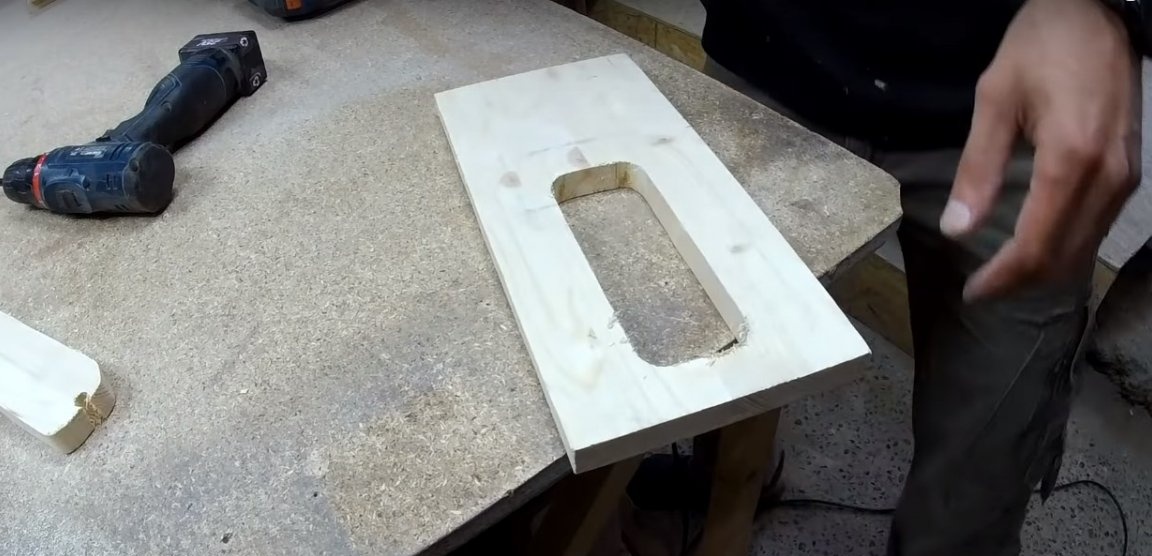
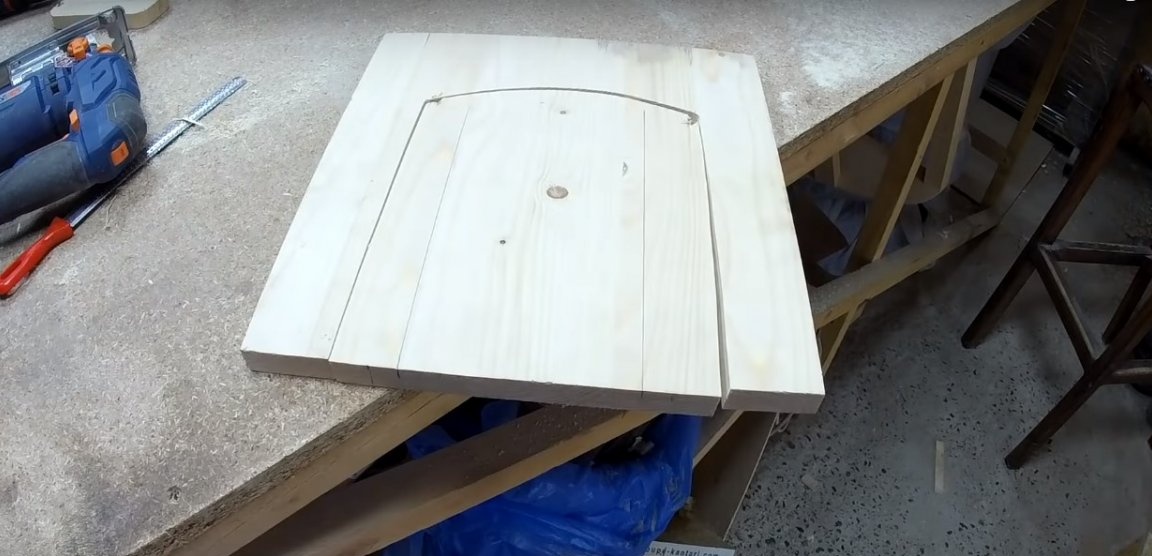
To begin, disassemble the socket housing and remove the top cover. Using it, mark the hole for the outlet on a wooden blank. Cut it with a jigsaw. Align the cutting line with a flat file, if necessary.


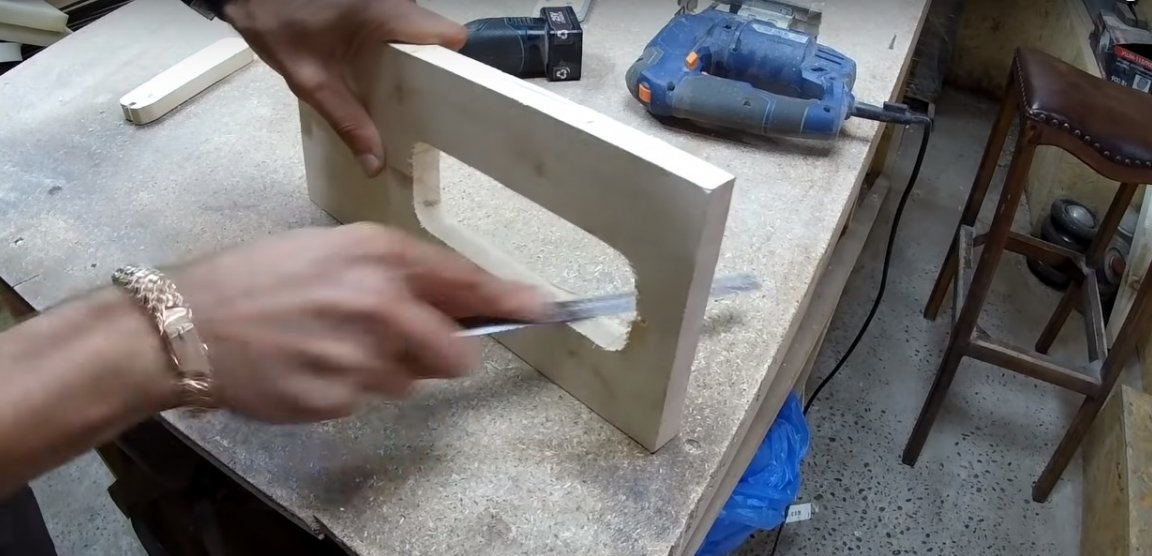
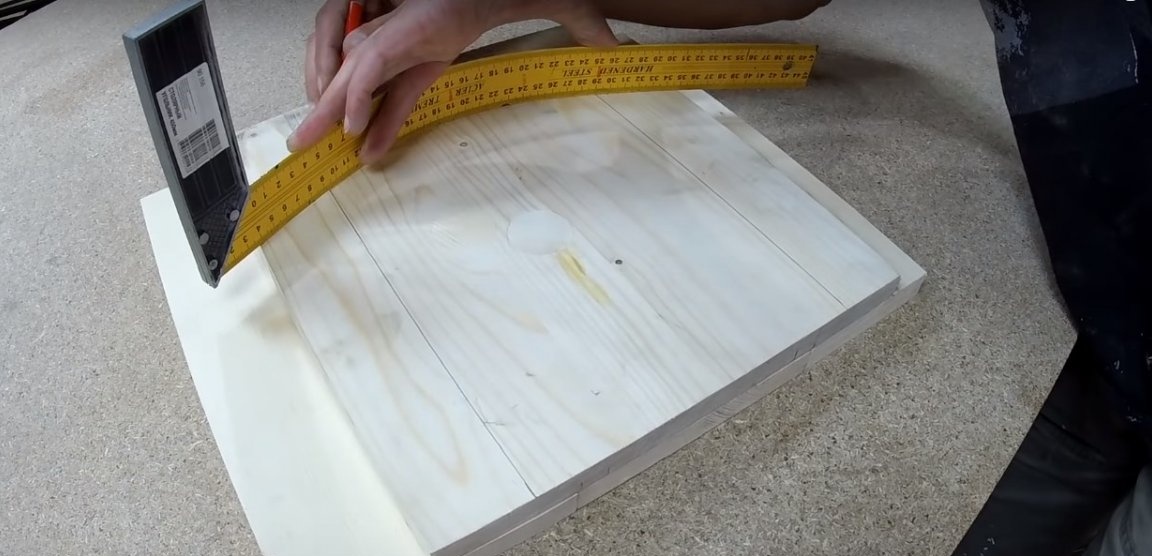
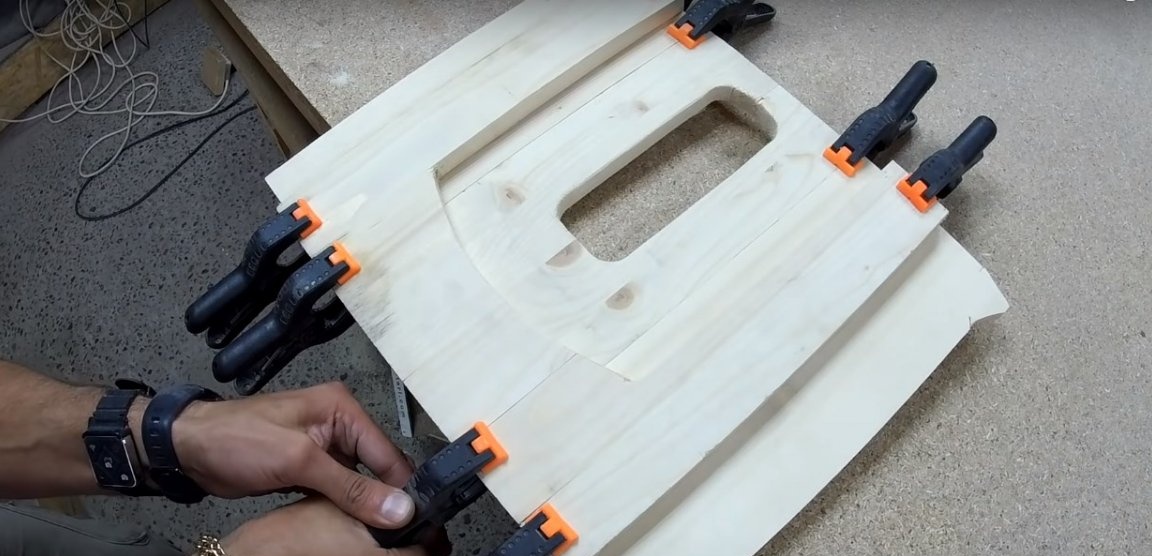
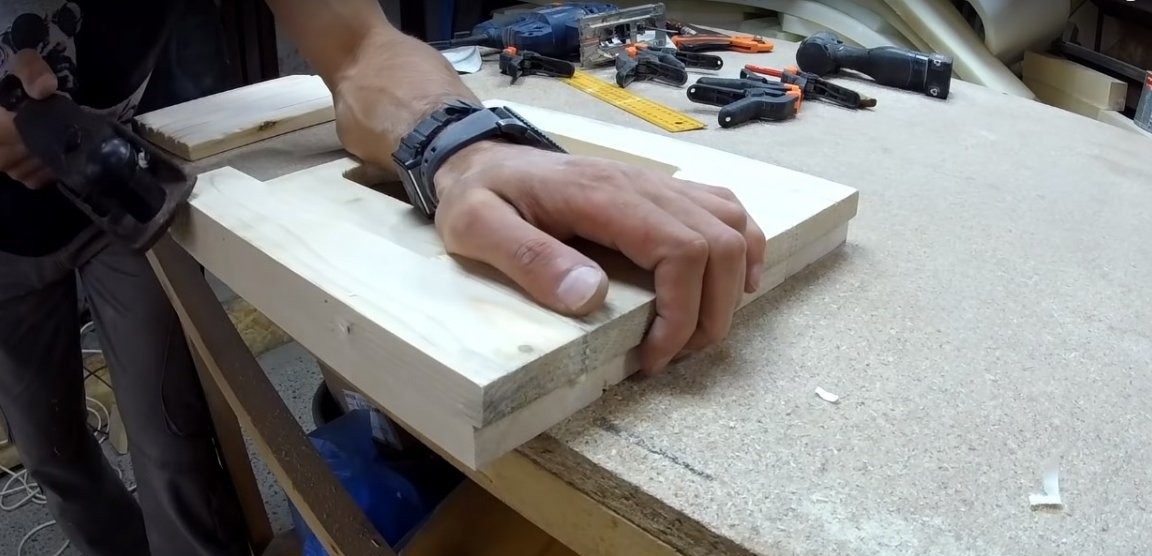
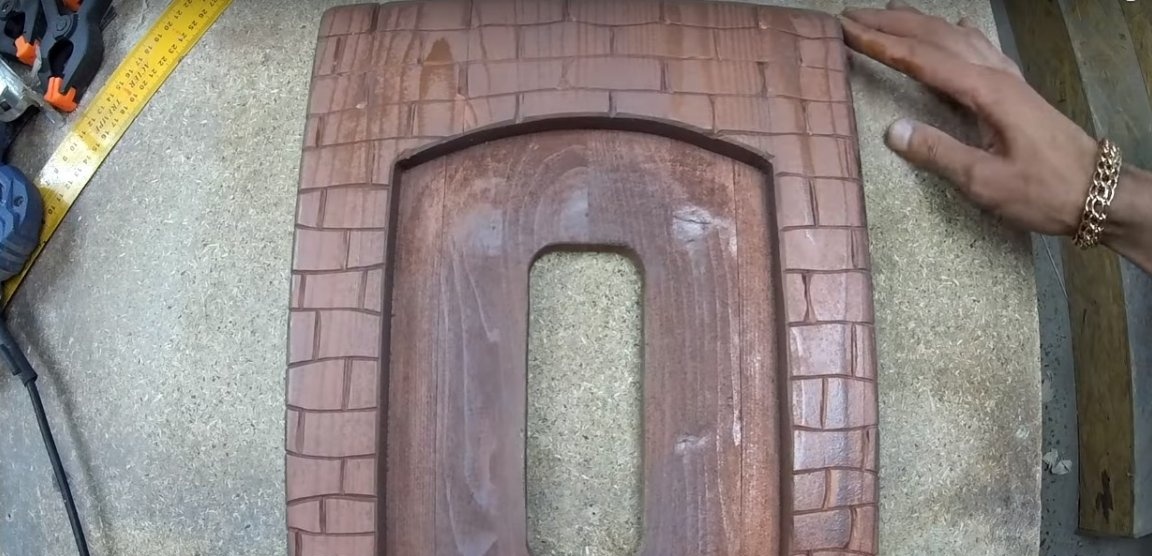
Pick up the side parts of the “doorway” as shown in the photo. Lay the blank for the door frame on top and mark the door. The author used a metal ruler, which he bent to draw the arch.
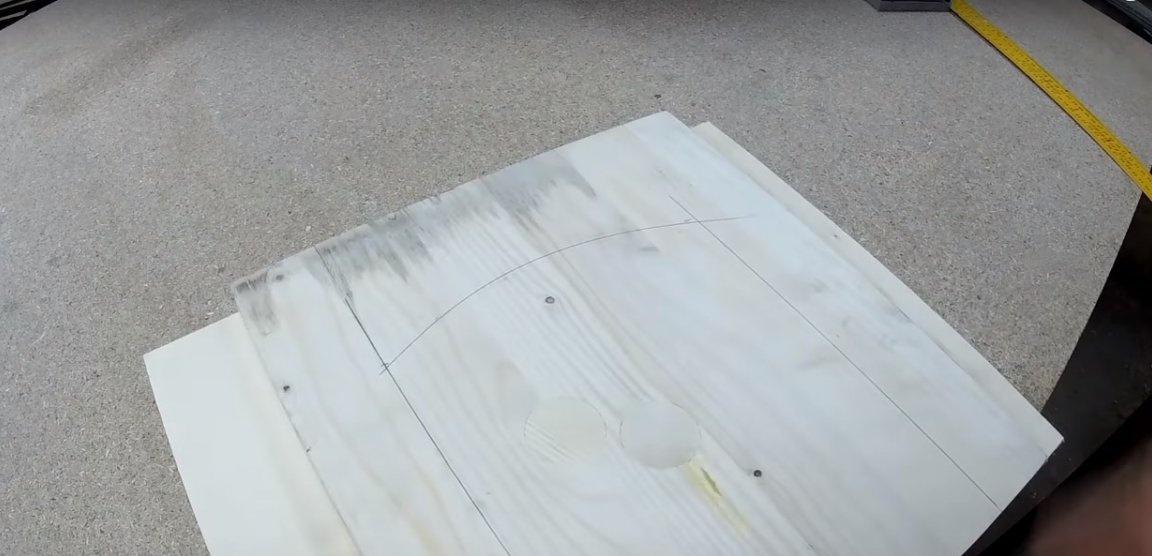
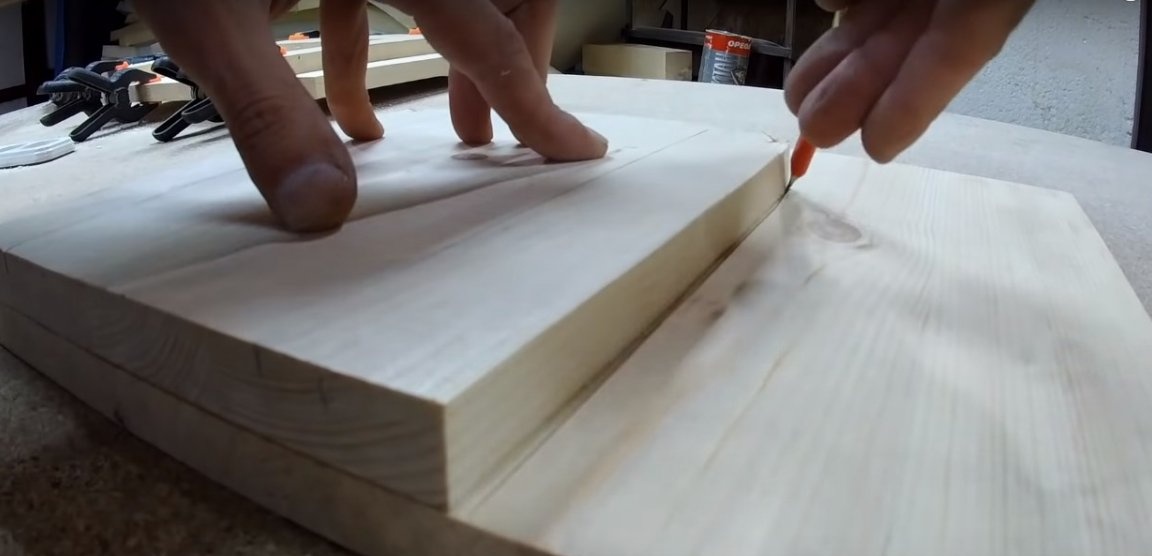
Cut the opening with a jigsaw. Glue the wood opening and the box together using wood glue. If possible, place the workpiece in clamps or carpentry clamps until the glue completely hardens, and then cut out the solid part in the shape of its upper part.
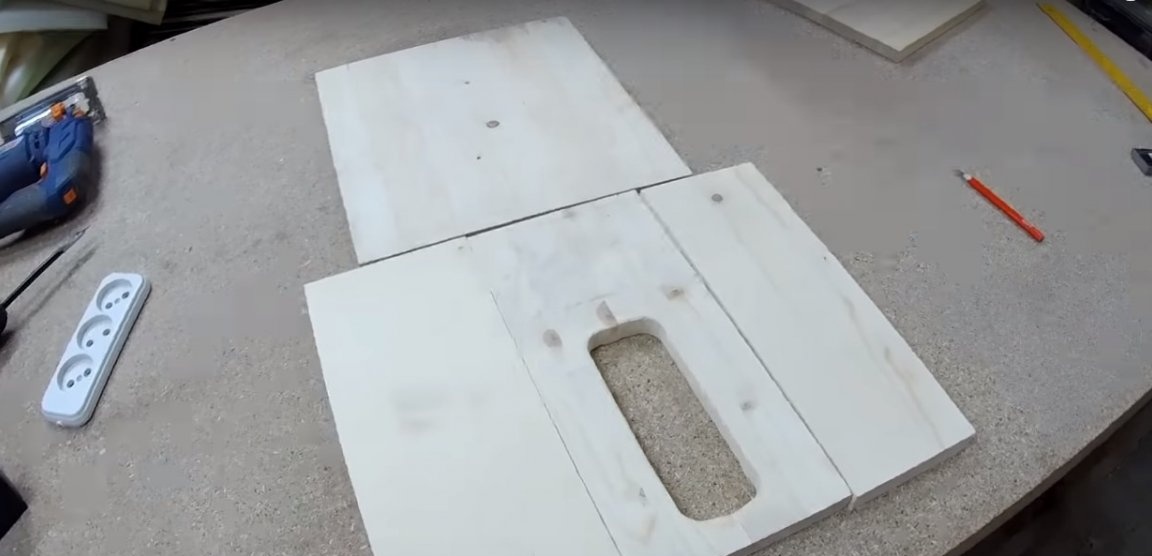
Step two: making the door
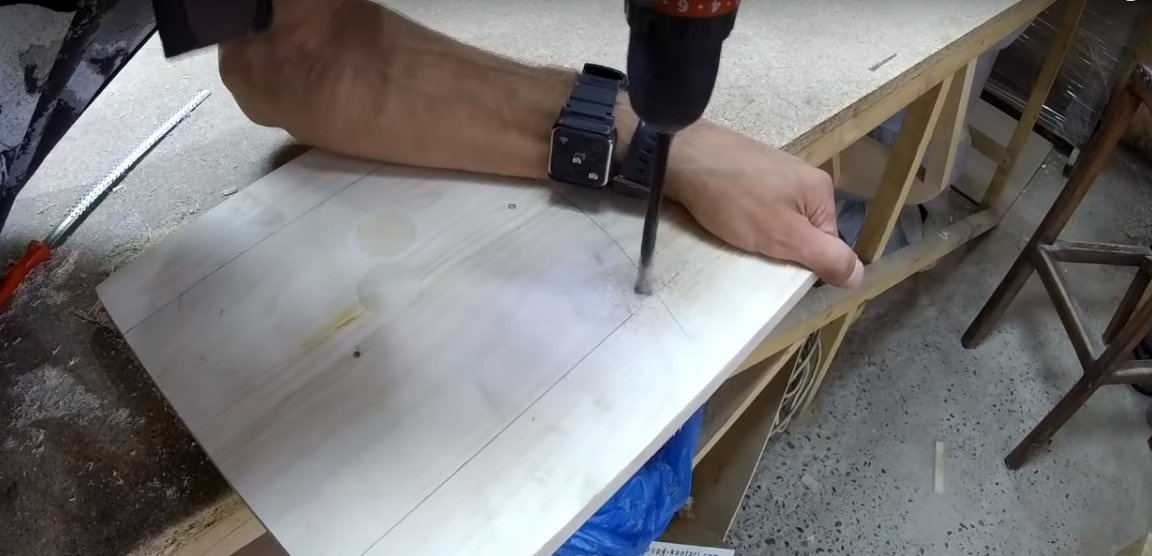
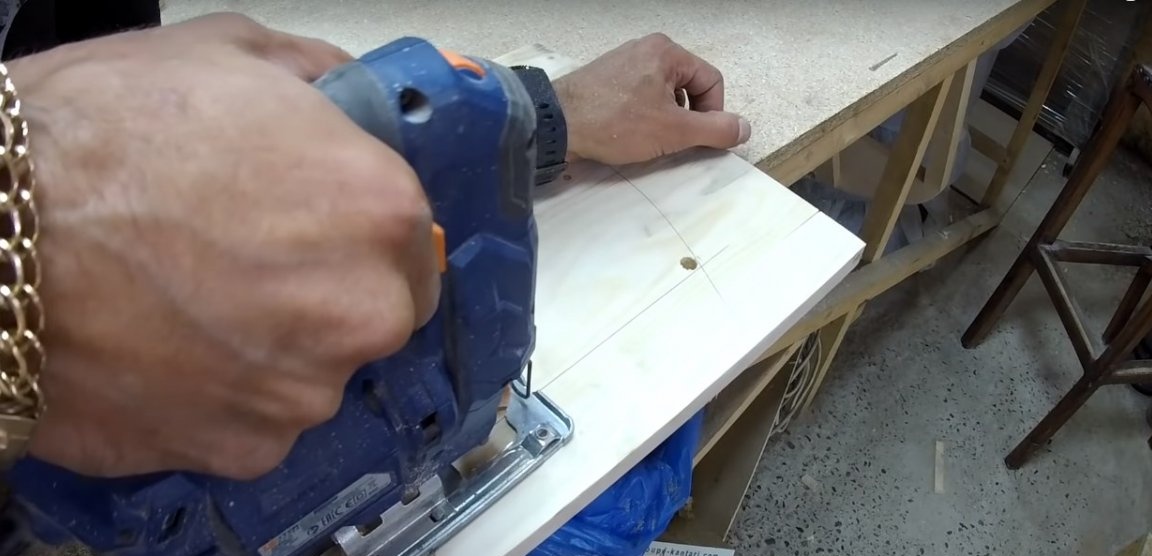
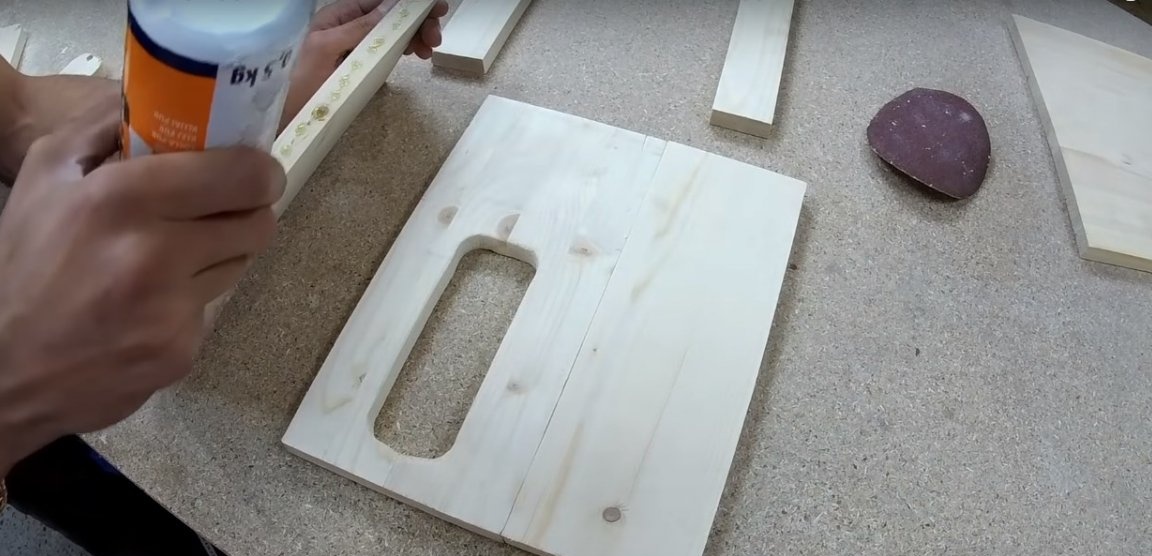
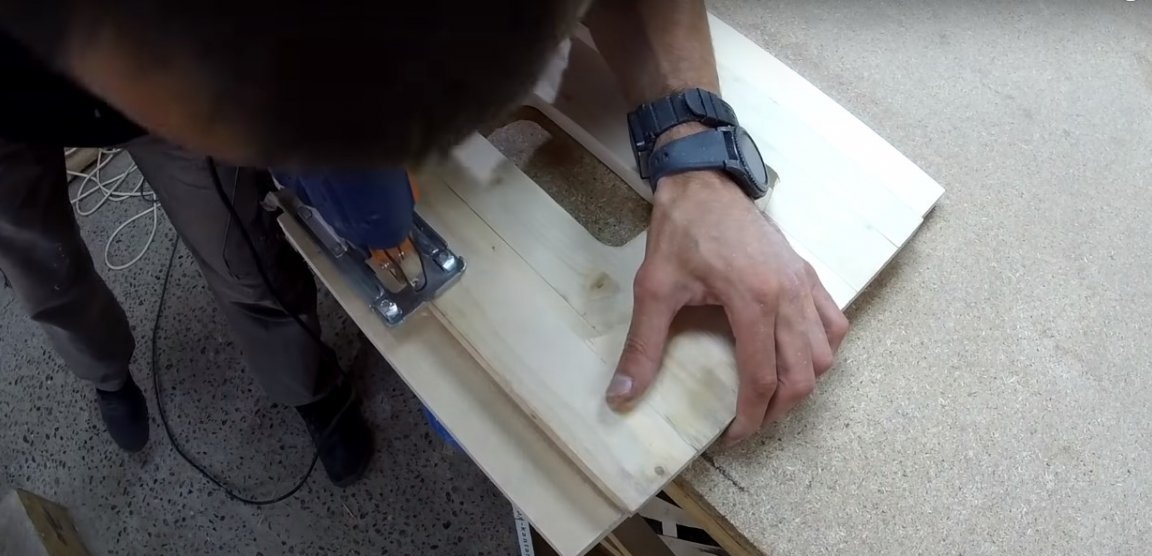
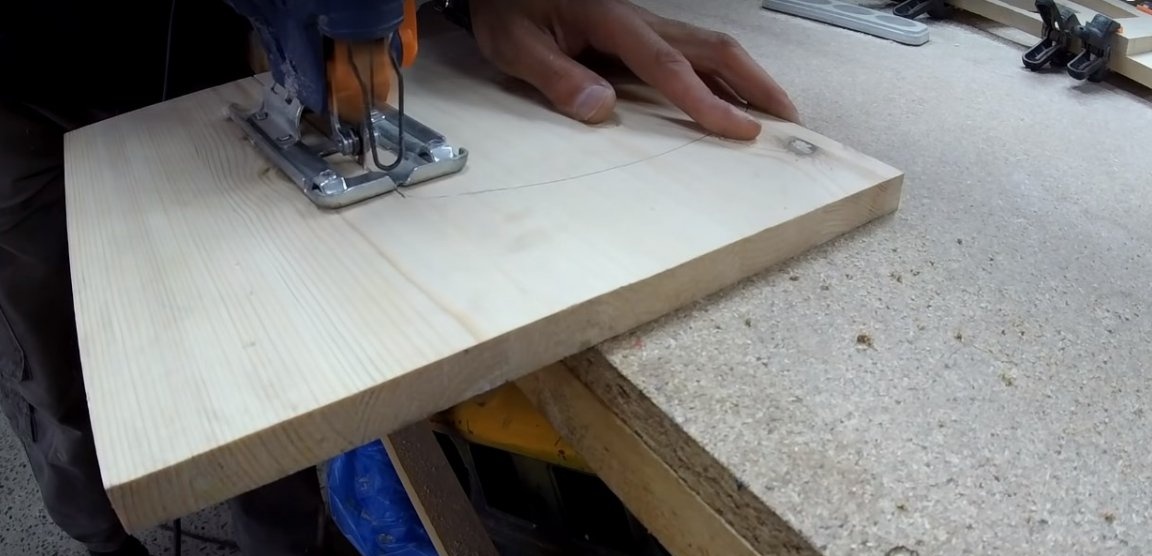
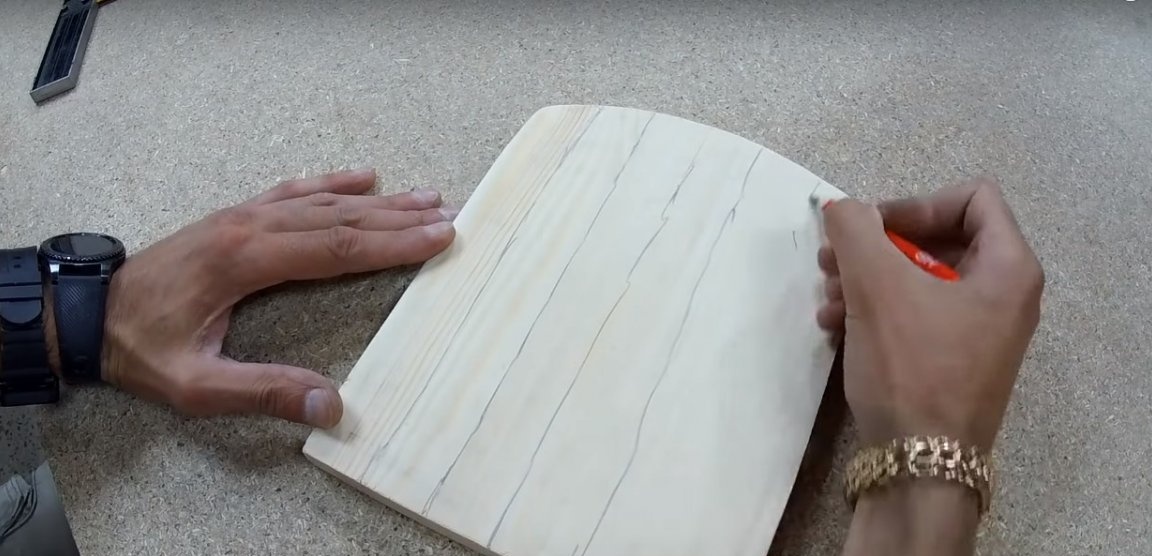
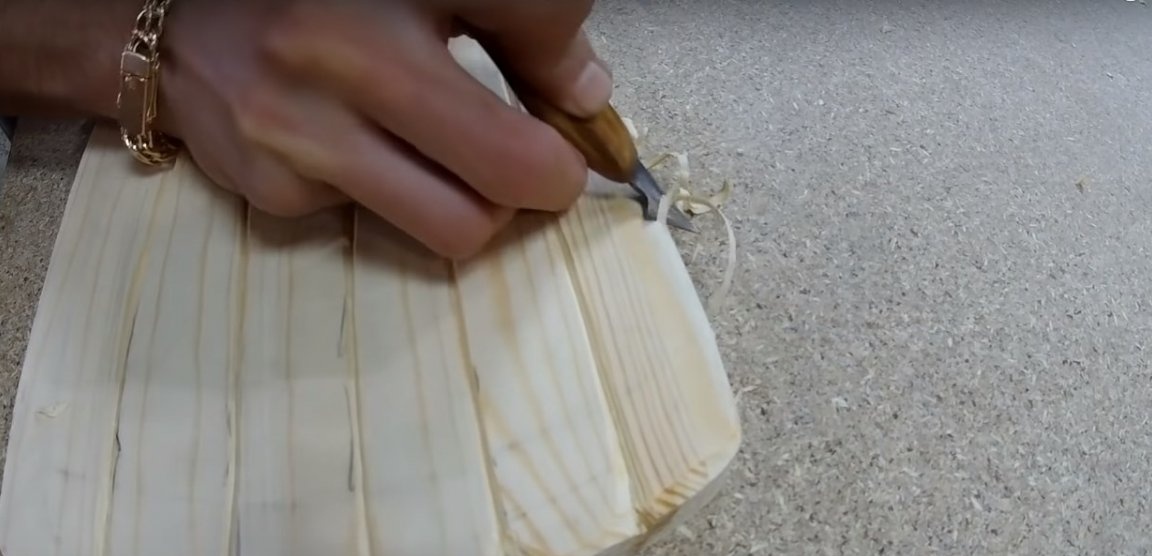
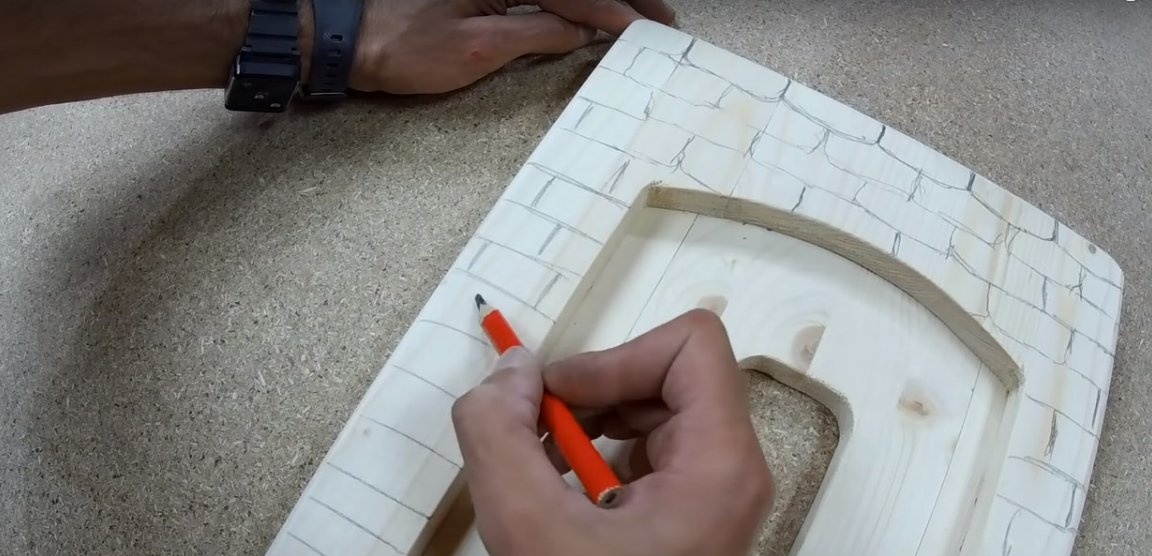
To mark the shape of the door, use the part that you cut from the doorway. Circle it along the contour and cut it with an electric jigsaw.
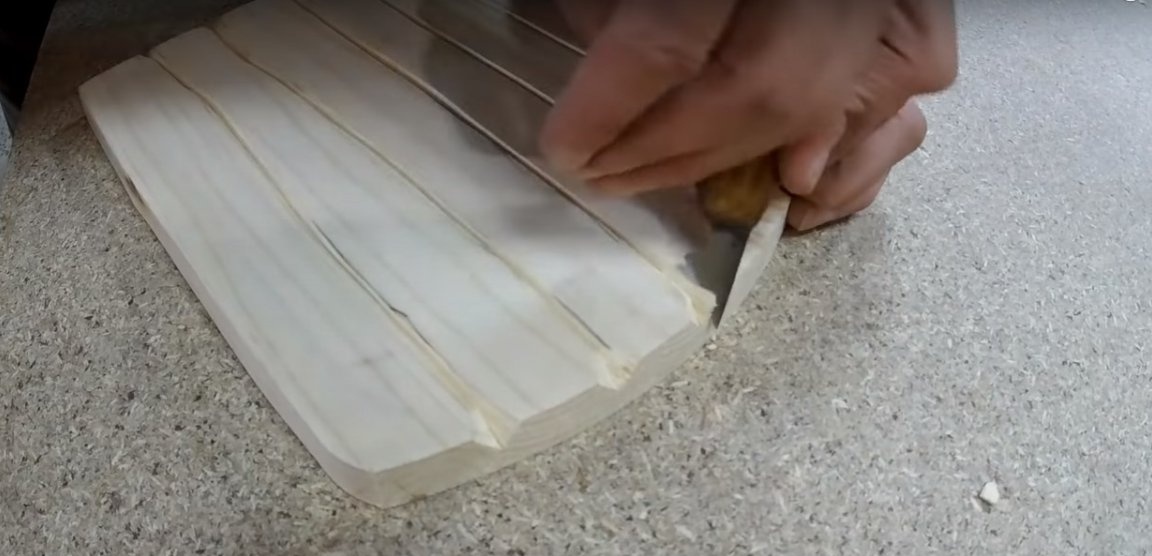
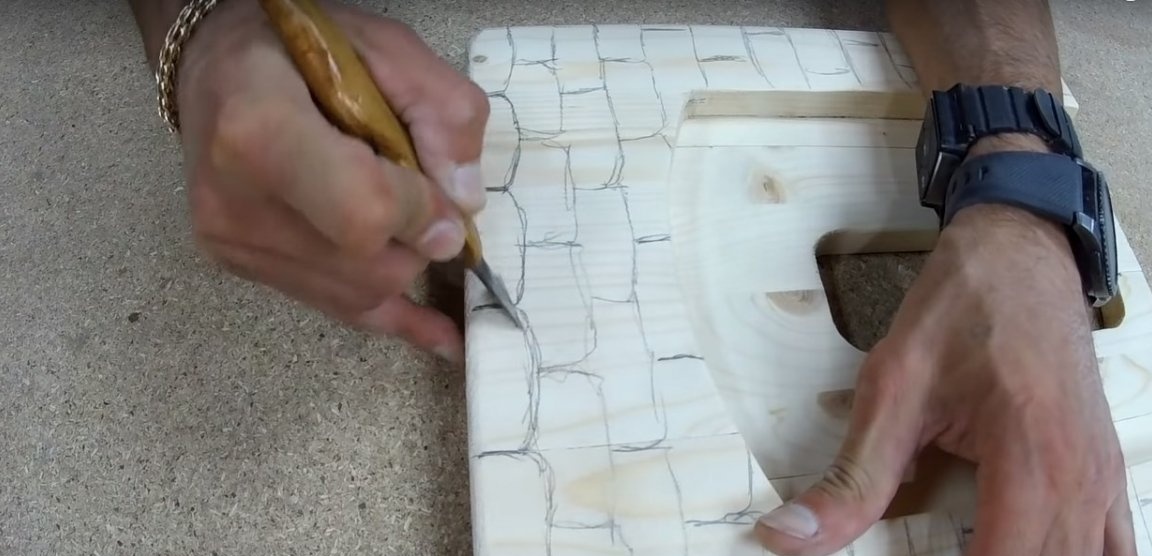
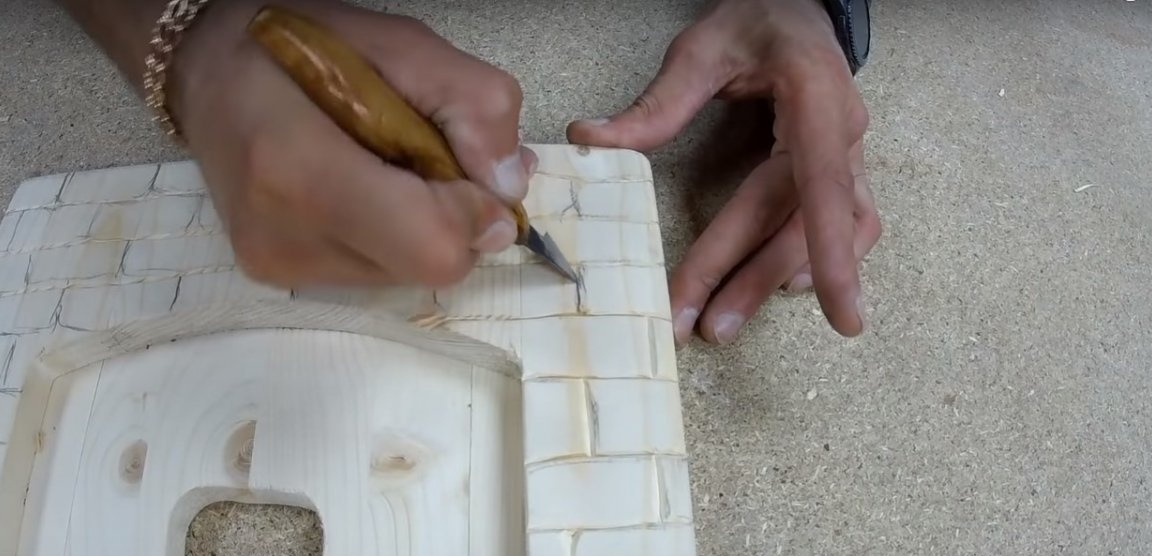
With a pencil, draw vertical lines that will imitate miniature details. To do wood carving, use a sharp metal knife that fits comfortably in your hand unless you have a special tool. In an extreme case, given the amount of work, you can always use a high-quality clerical knife.
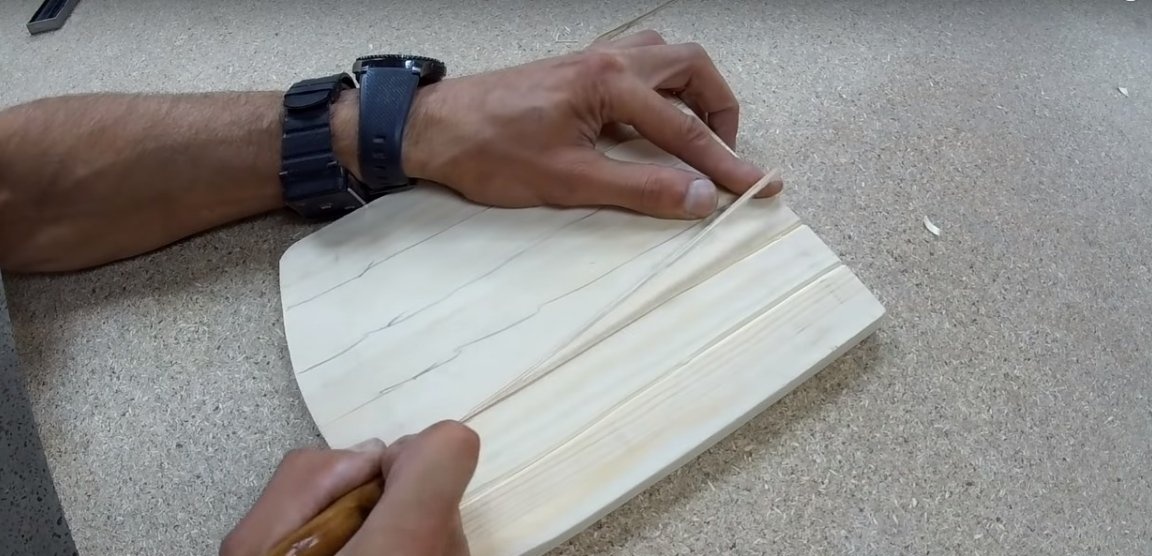
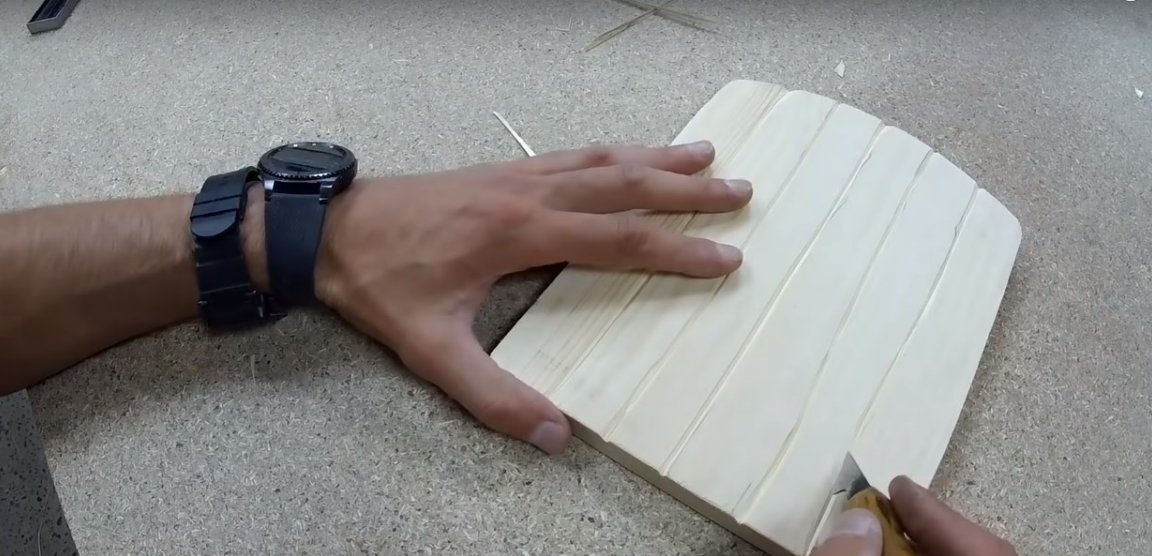
Cut through the marked grooves and round the edges of the door to give them a smoother outline. Treat the surface and grooves with fine sandpaper.
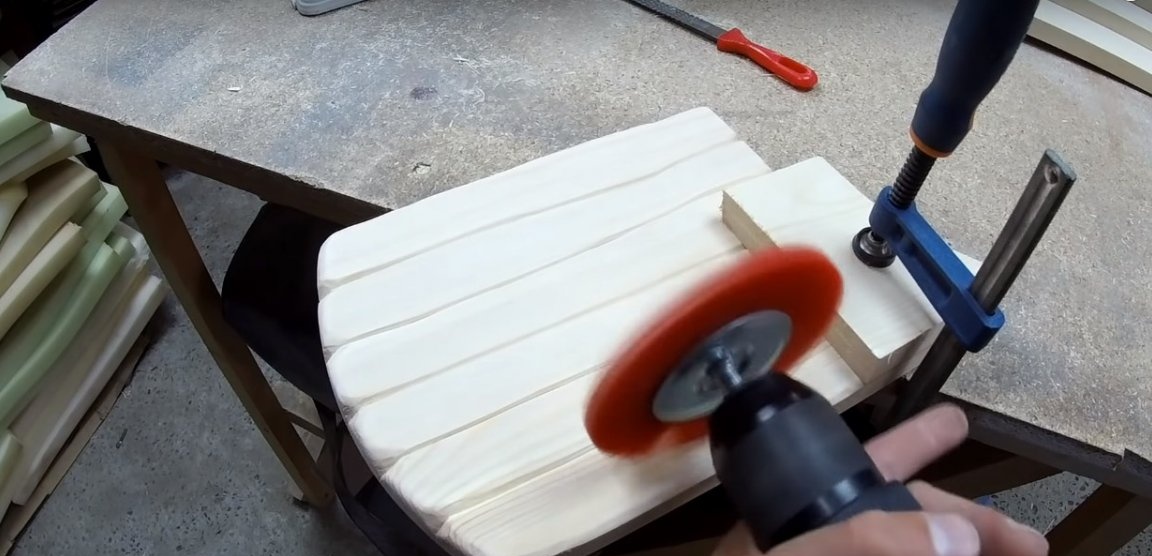
In order for the surface of the tree to show its natural relief, the author performs brushing of wood. During this procedure, the softer layers of the tree are removed, while its hard fibers remain. Thus, the wood surface acquires a pronounced texture. On soft woods this does not look so impressive.
For brushing, the author uses a drill with a brush head. In this case, working with a drill is only necessary along the wood fibers.

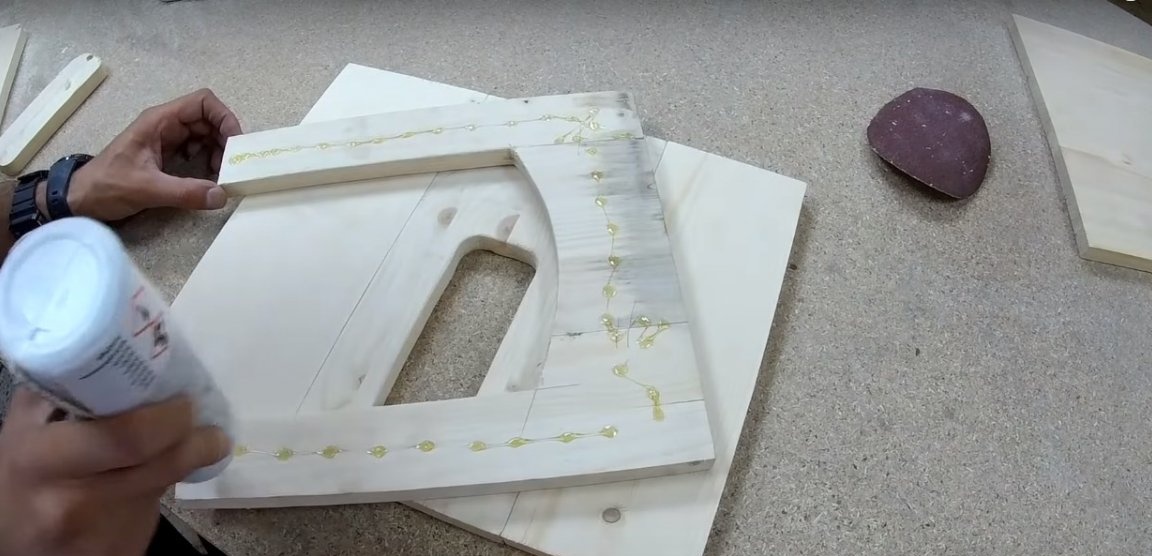
Step Three: Decorating the “Door Frame” and Door
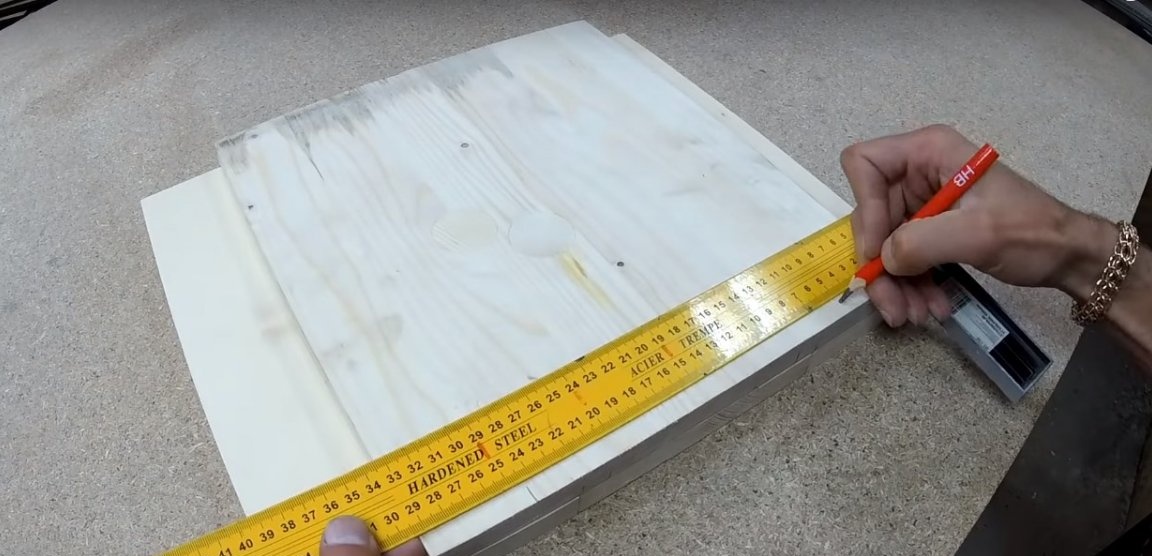
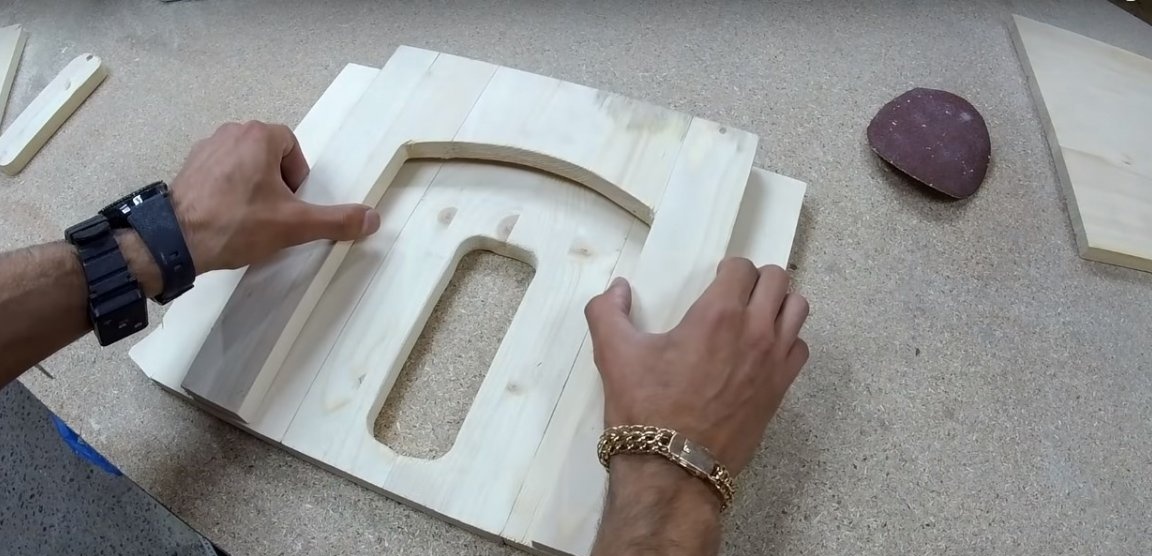
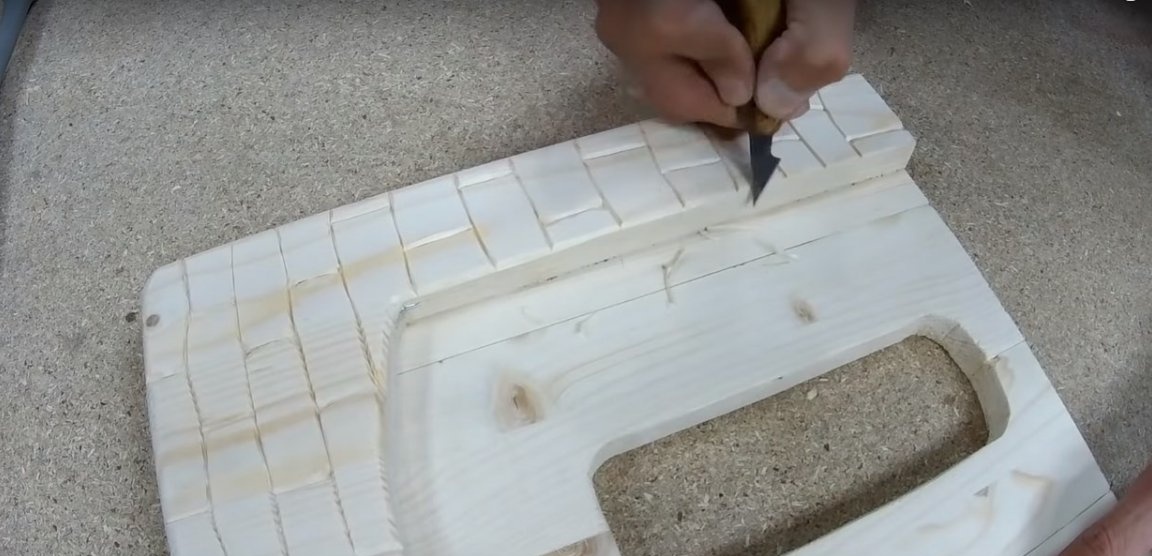
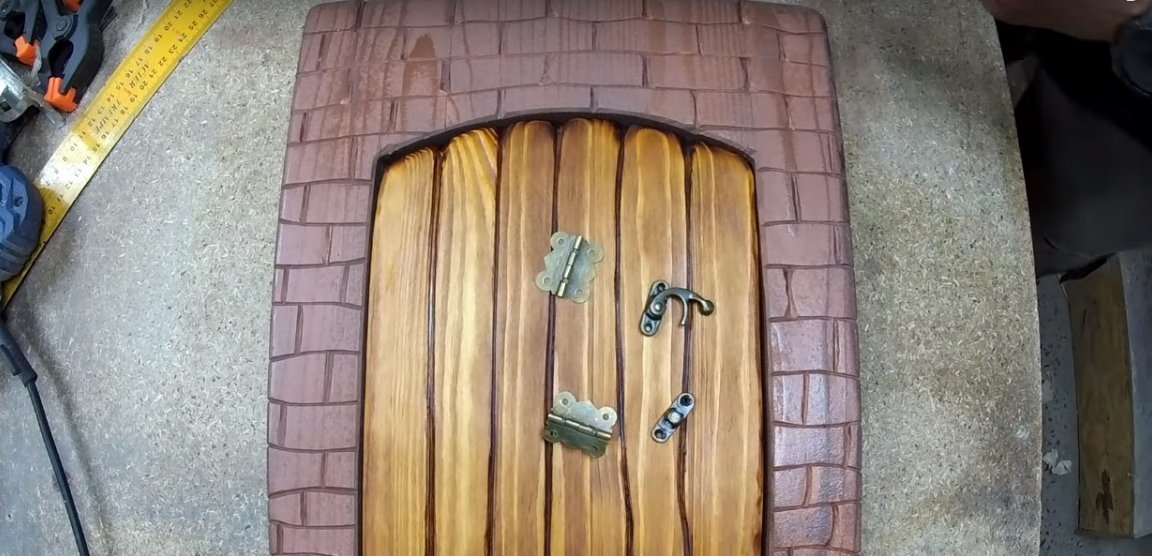
The edge of the door frame should be treated with a planer to level its surface.
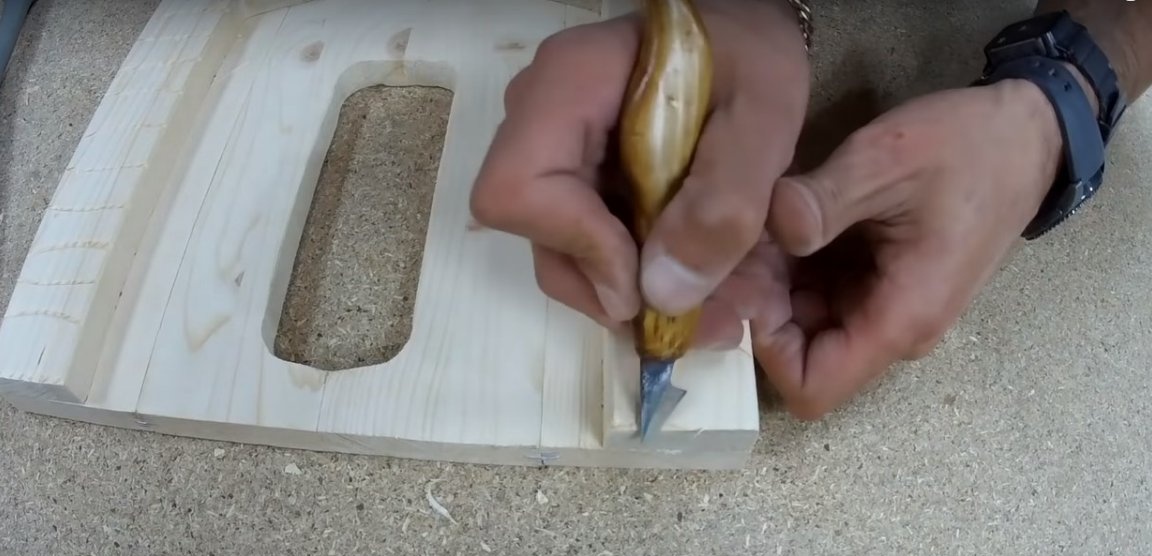
With a pencil, draw bricks on the “door frame”. Cut them using the same technology as the door. Grind the surface of the workpiece manually with fine emery cloth.
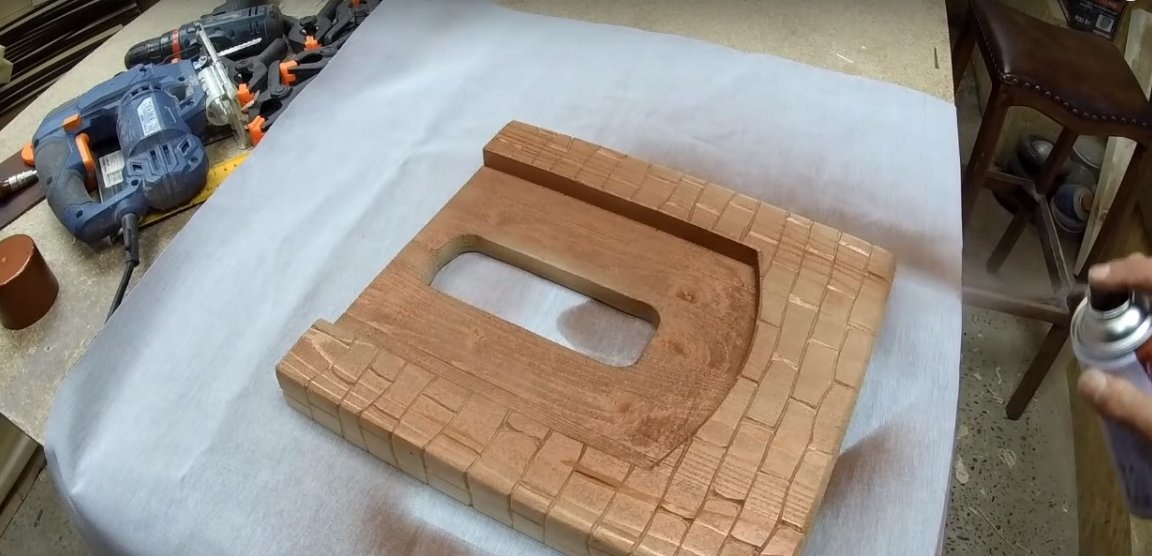
Cover the “door frame” with a layer of suitable paint or varnish and toner to simulate masonry.
Paint the door. For this, the author used an alcohol stain, which was applied with a piece of foam. For the same purpose, you can use oil stain, furniture tinting wax or varnish.

Step Four: Install Hardware
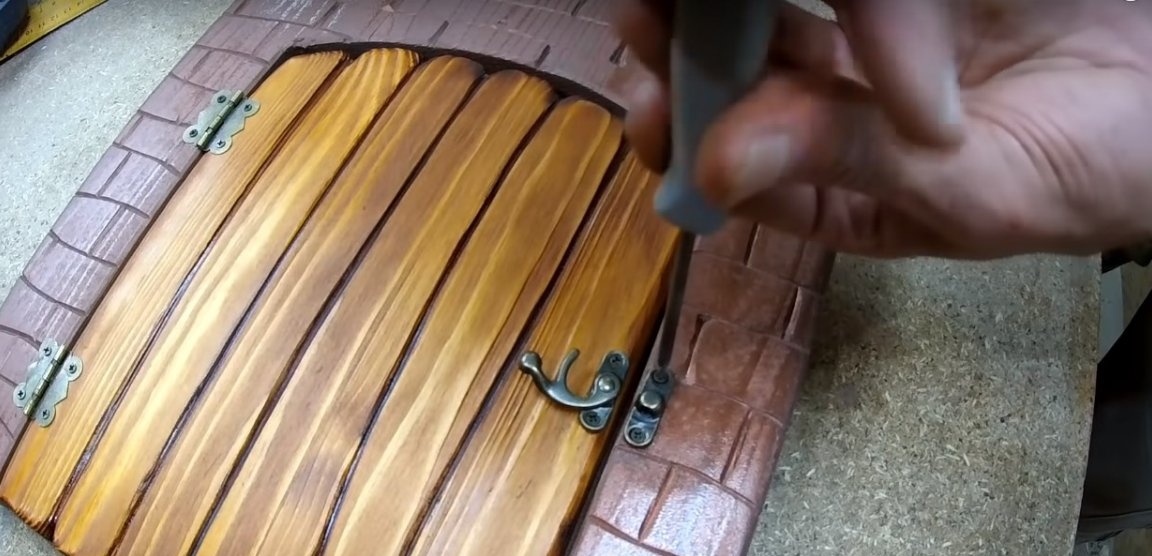
To install the door you will need hinges and a small latch-lock. All this can be found among the accessories in the online store of goods made by handmade masters. Such hinges and latches are used in the manufacture of wooden caskets, key holders, etc.
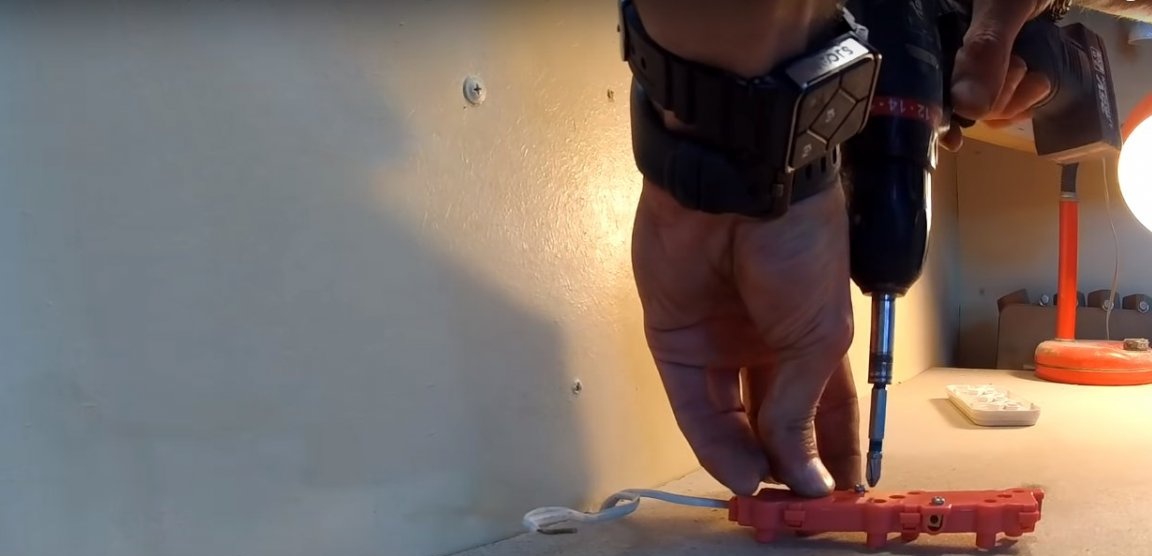
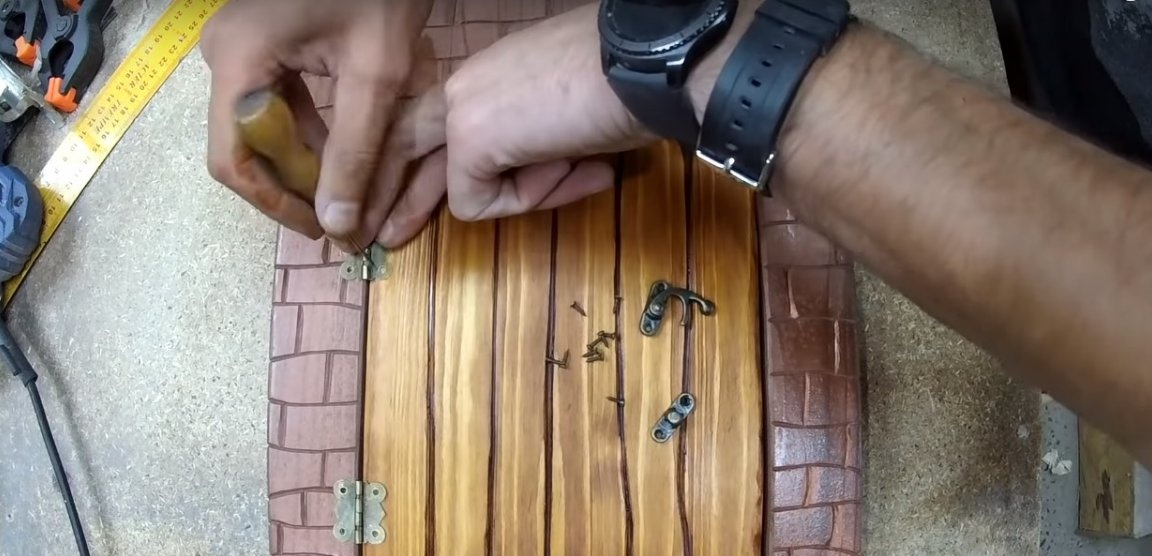
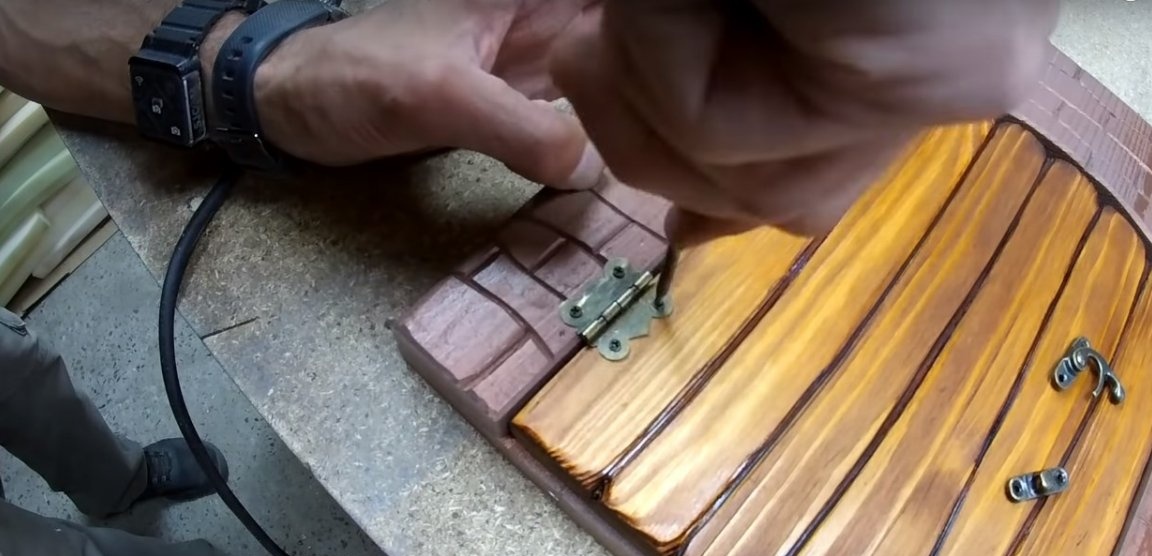
You will also need small screws. Mark the mounting points of the fittings and make holes for the screws with an awl. Install the hardware on the screws by screwing them in manually with a screwdriver.
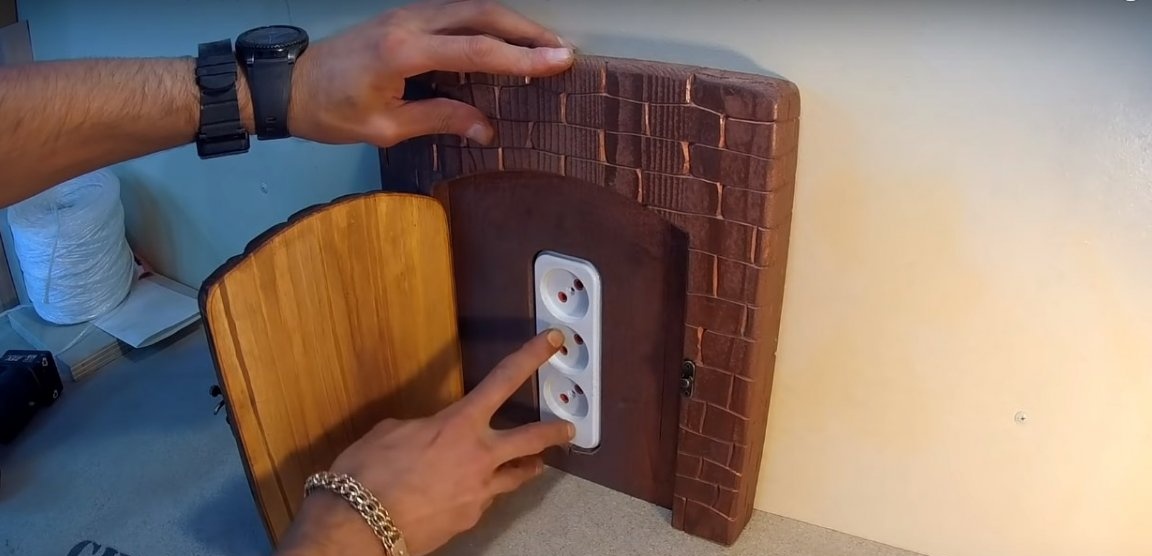
Step Five: Installing a Decorative Door
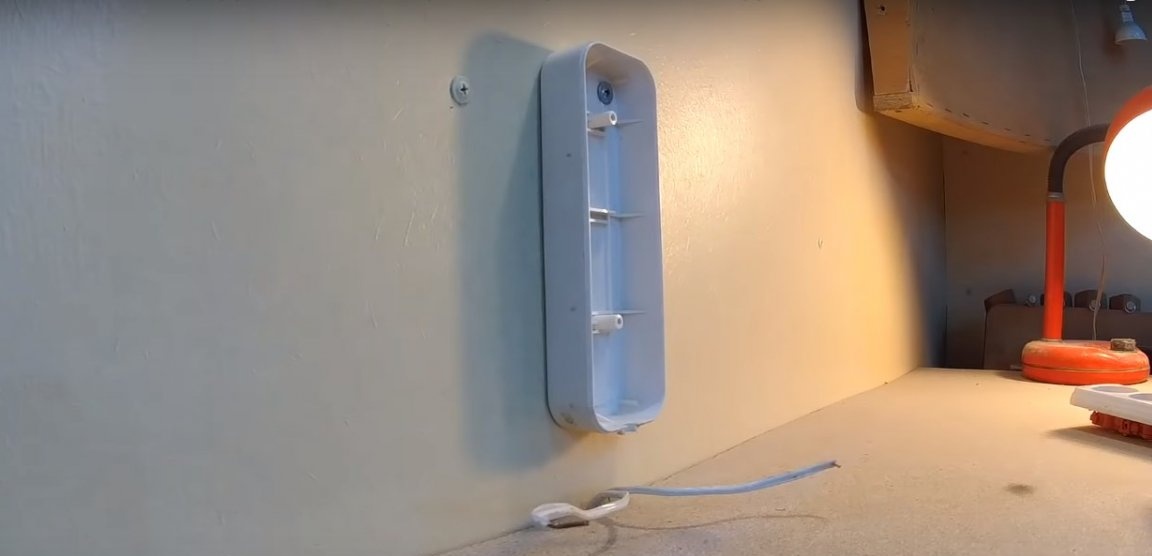
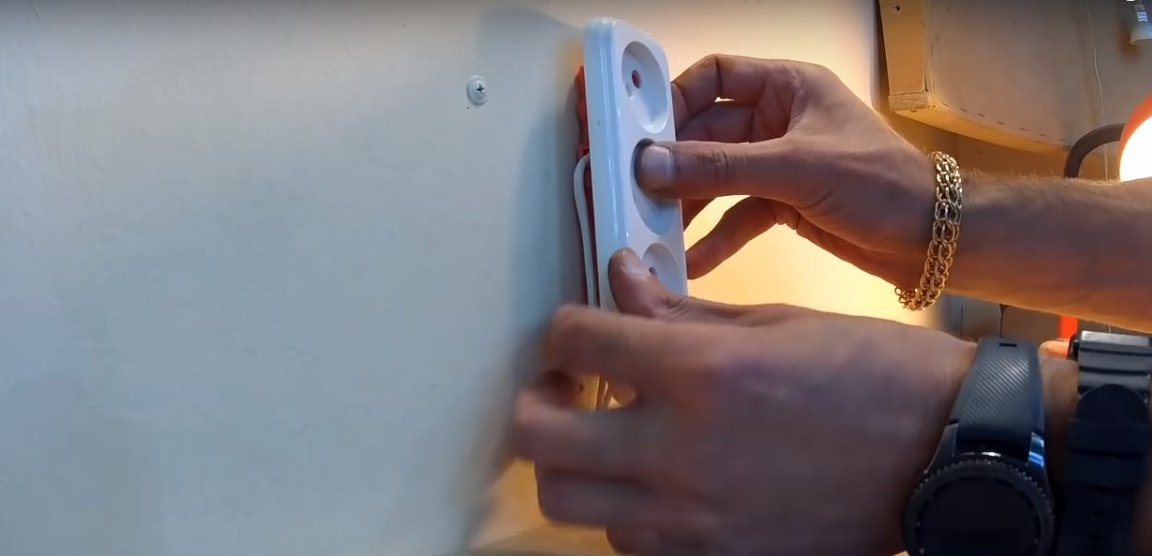
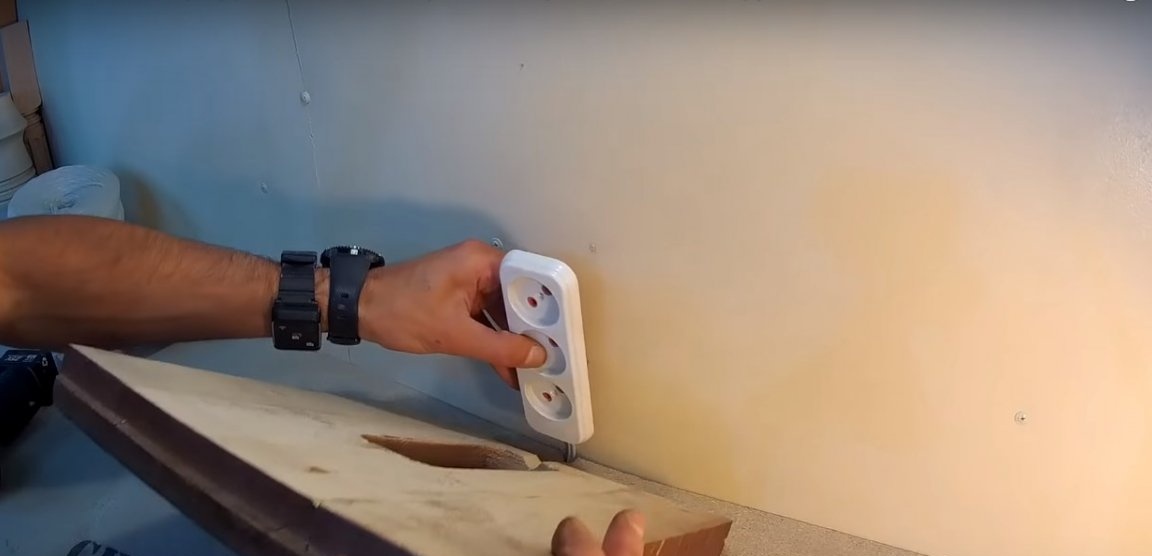
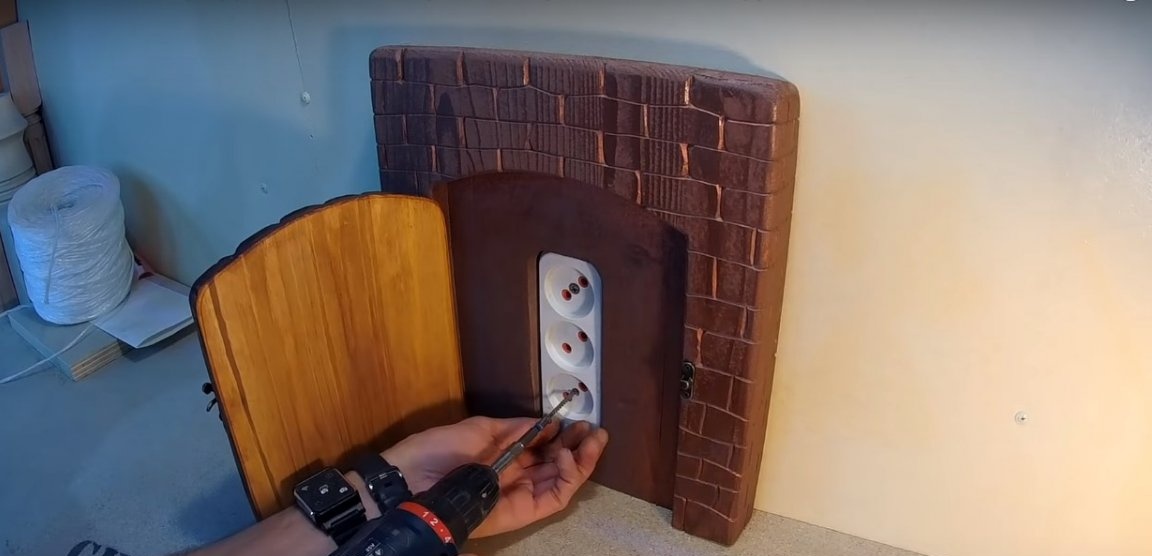
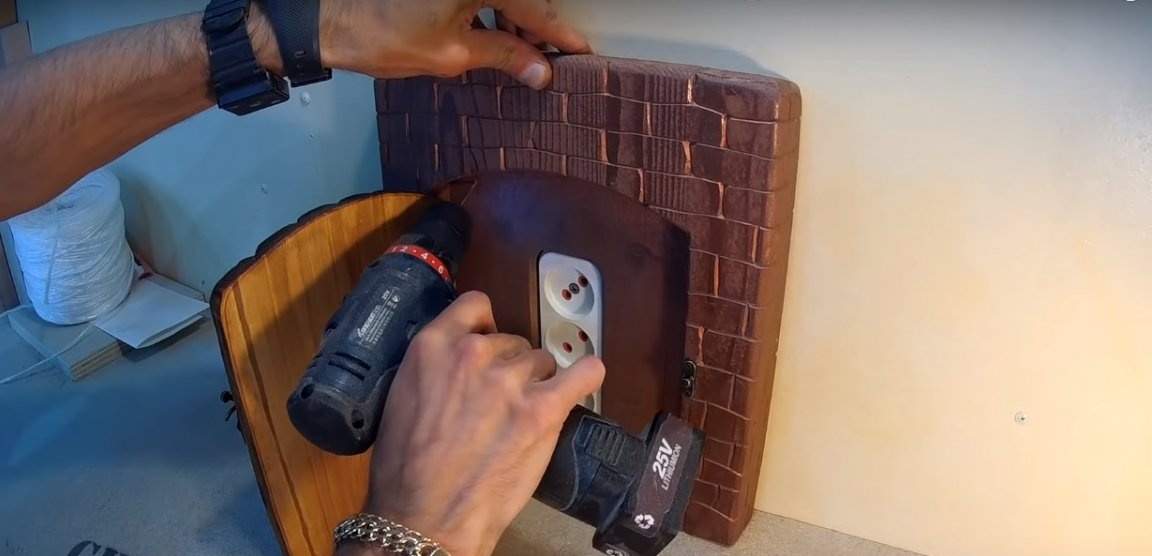
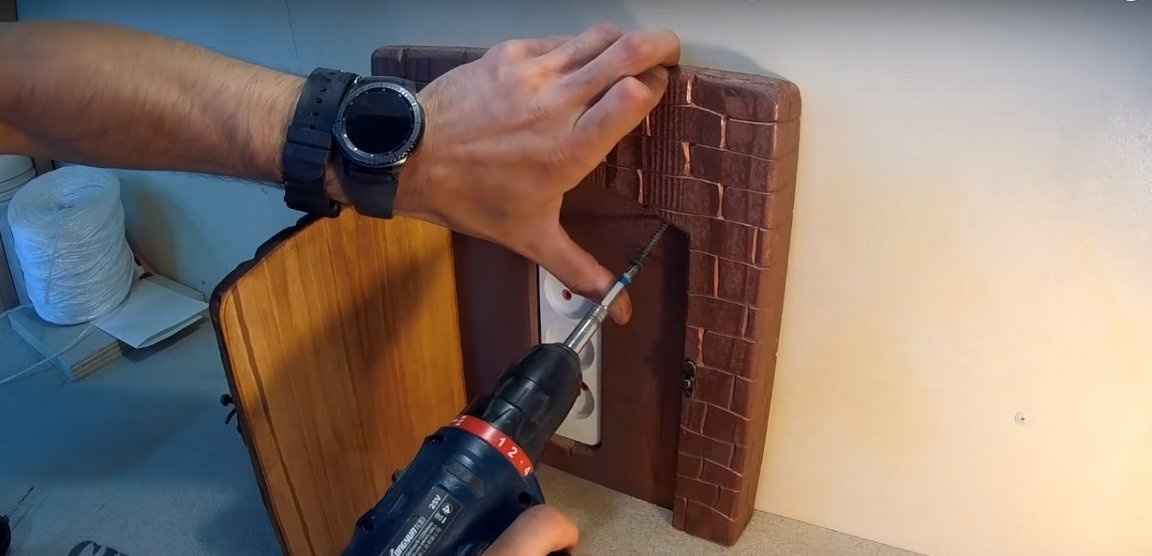
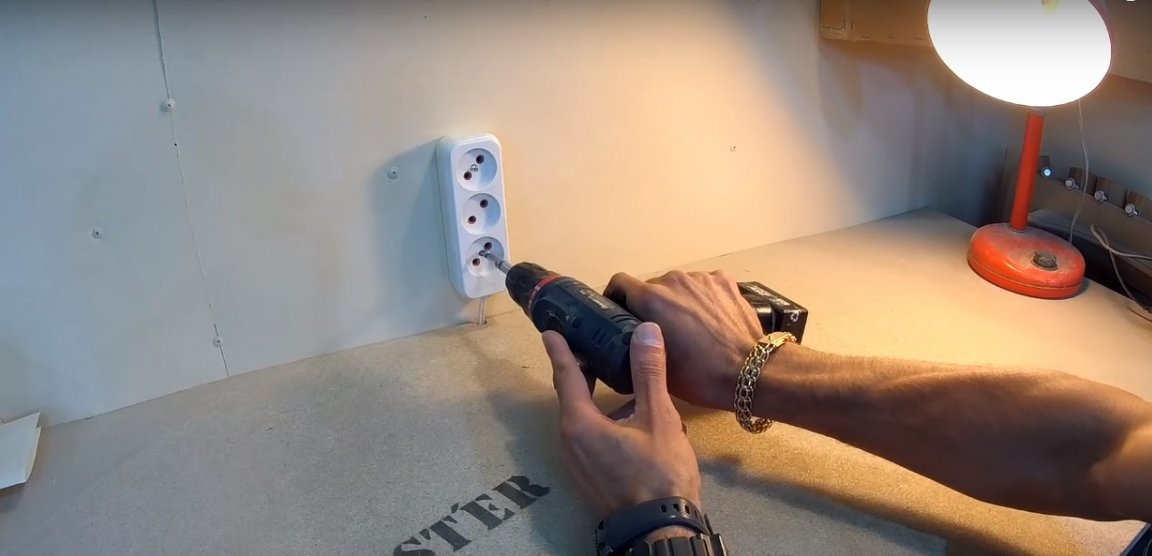
When installing a wooden door, you will not need the lower part of the socket housing. Connect the wires to the power outlet and place it on top of the chassis. Install the door on the wall so that the outlet is inside the hole. Fix the socket on the wall with self-tapping screws. Drill holes inside the door and screw a couple of screws through the tree into the wall.
If you have brick walls or foam concrete walls, use a dowel-nail instead of self-tapping screws. To do this, pre-mark the mounting points on the wall and drill holes with a drill with a victory tip. Carefully drive in the dowels, then screw in the screws during the installation of the door.