If you are a happy owner of a spacious workshop, you have probably thought about purchasing a mobile shelving unit or a table with convenient shelves more than once, because carrying boxes with self-tapping screws and power tools is a dubious pleasure.
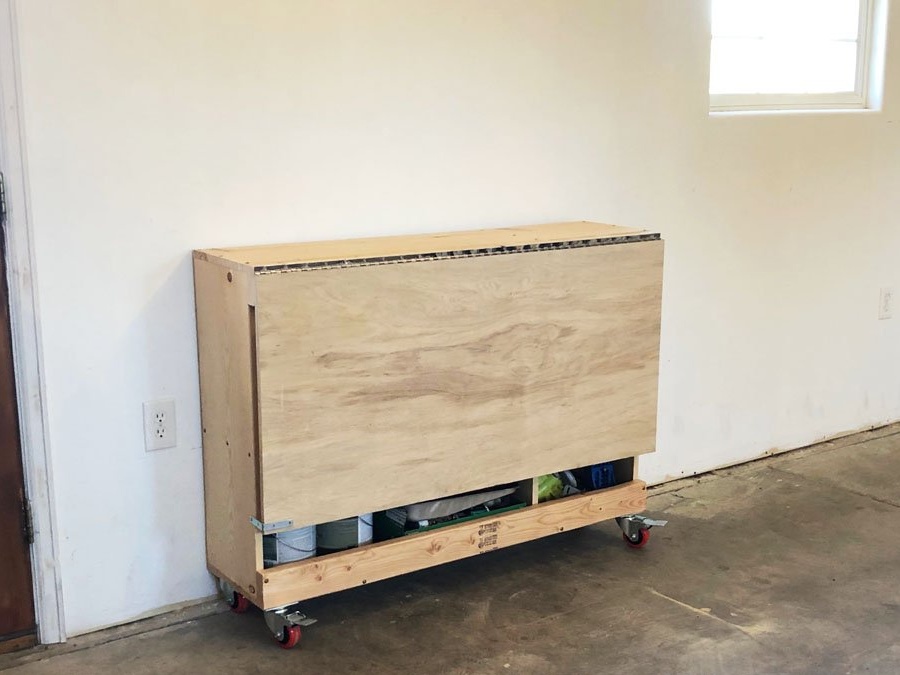
And what if the rack and table are combined into one compact product, and even make it something do it yourself? The author set the same goal, due to which this table-book on furniture wheels was born. A table-book takes up a minimum of space when folded and is easy to fold out in one direction. Moreover, the table design is as simple as possible, which allowed to significantly reduce its weight.
In order to make a table-book for the workshop with your own hands you will need:
Materials:
- plywood for the manufacture of folding countertops;
- a wide board for the manufacture of the frame of the table and shelves (can be replaced with plywood);
- narrow board for the manufacture of a drawer frame;
- bar for the manufacture of the frame;
- bar for the manufacture of legs - 40 x 80 mm;
- thin plywood for the manufacture of the bottom of the box;
- tape furniture loops - across the width of the table;
- one-piece door hinges;
- ball guides for a drawer;
- metal corners with holes for the manufacture of countertop holders;
- furniture castors (castors) with mechanical stops;
- quick-drying oil or varnish for wood processing, paint brush or foam rubber;
- wood screws;
- joiner's glue.
Instruments:
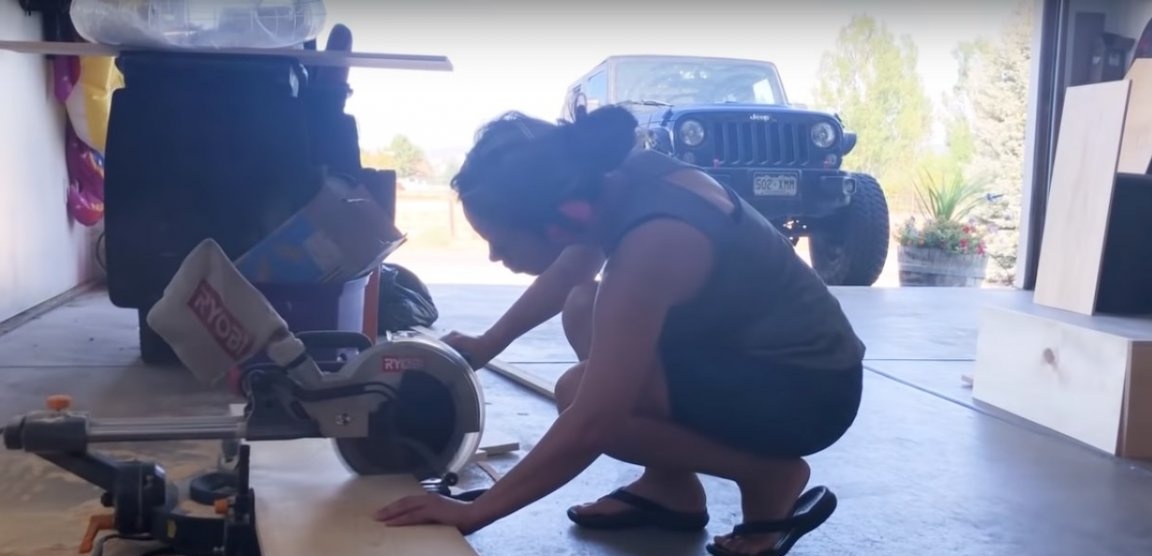
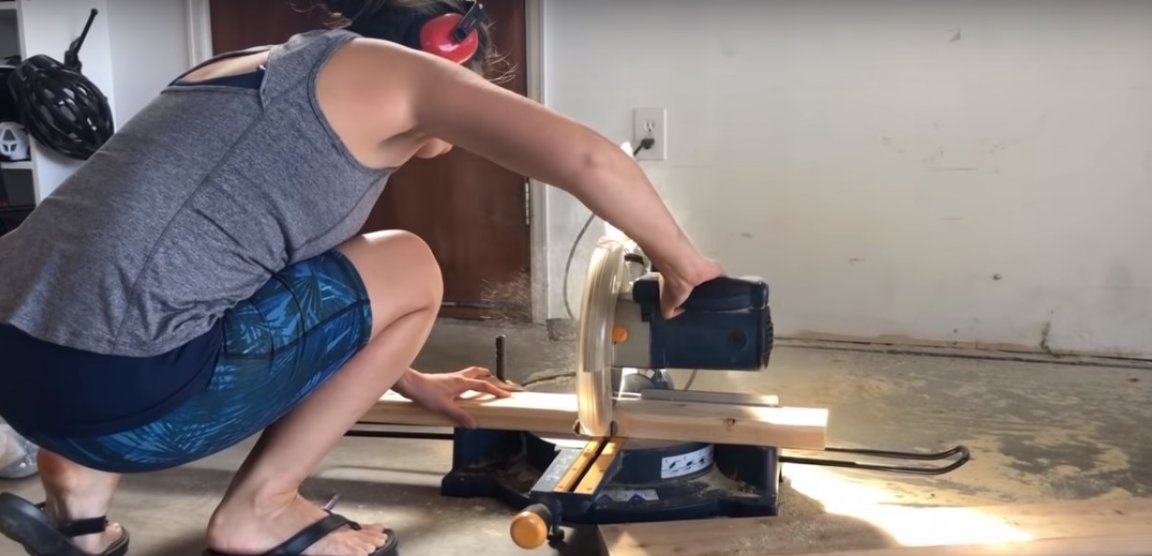
- miter saw with a broach or circular;
- jigsaw or manual circular;
- drill;
- grinder;
- screwdriver;
- a furniture pneumatic stapler for assembling a drawer on brackets or a hammer if using nails;
- square, roulette, ruler;
- marker.
Manufacturing process
Step One: Drawing Design
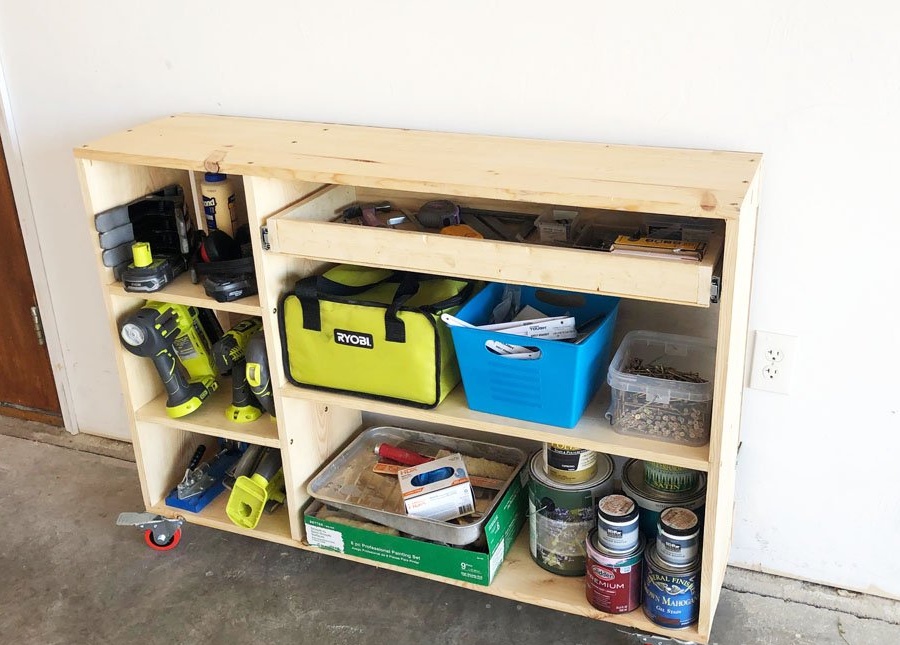
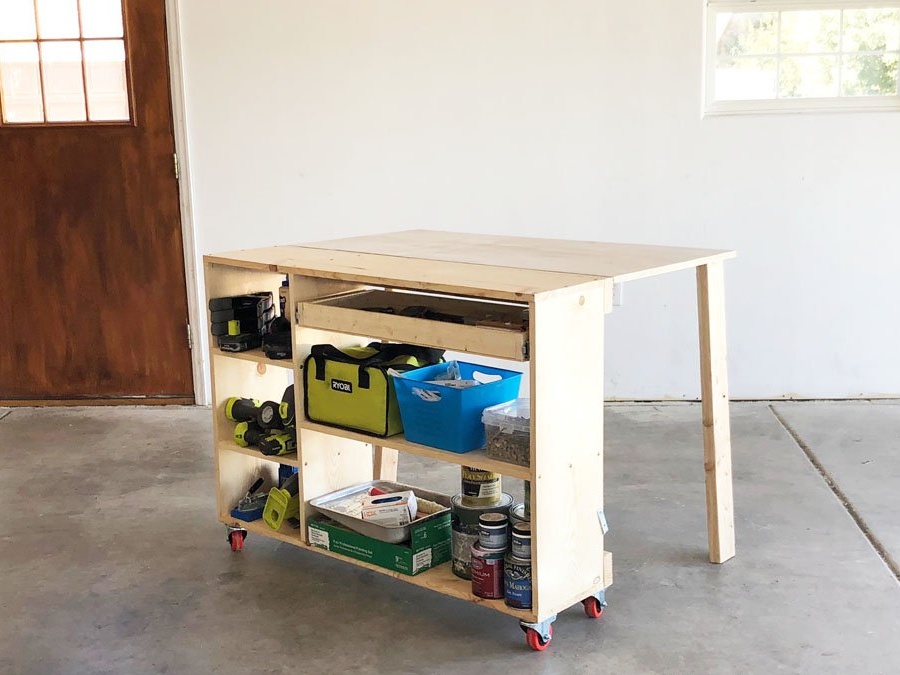
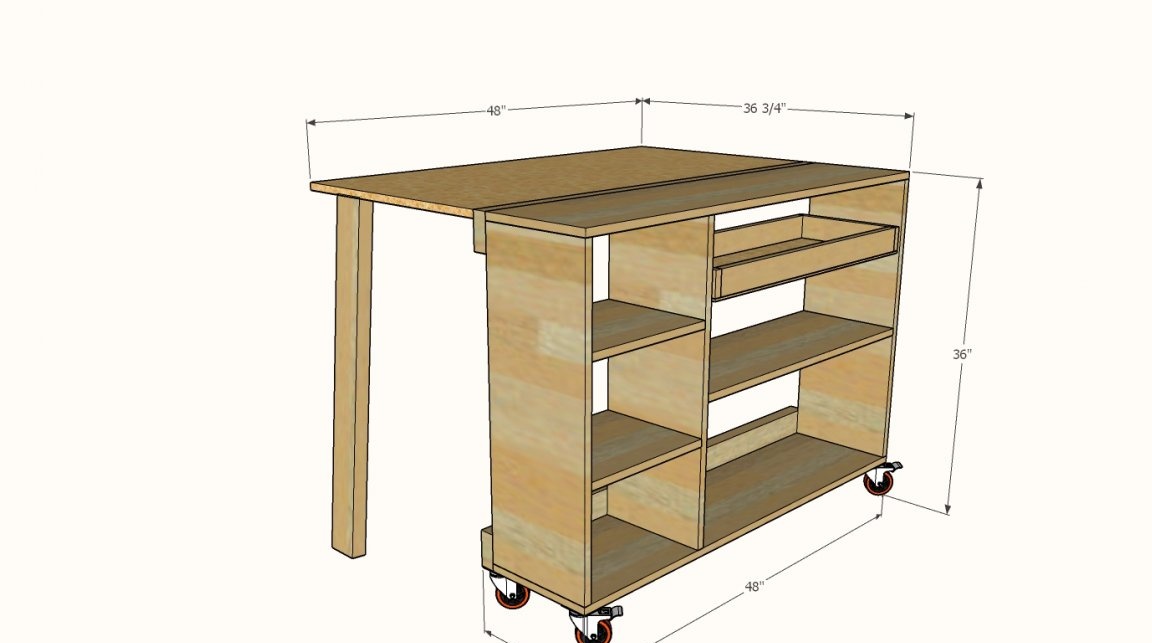
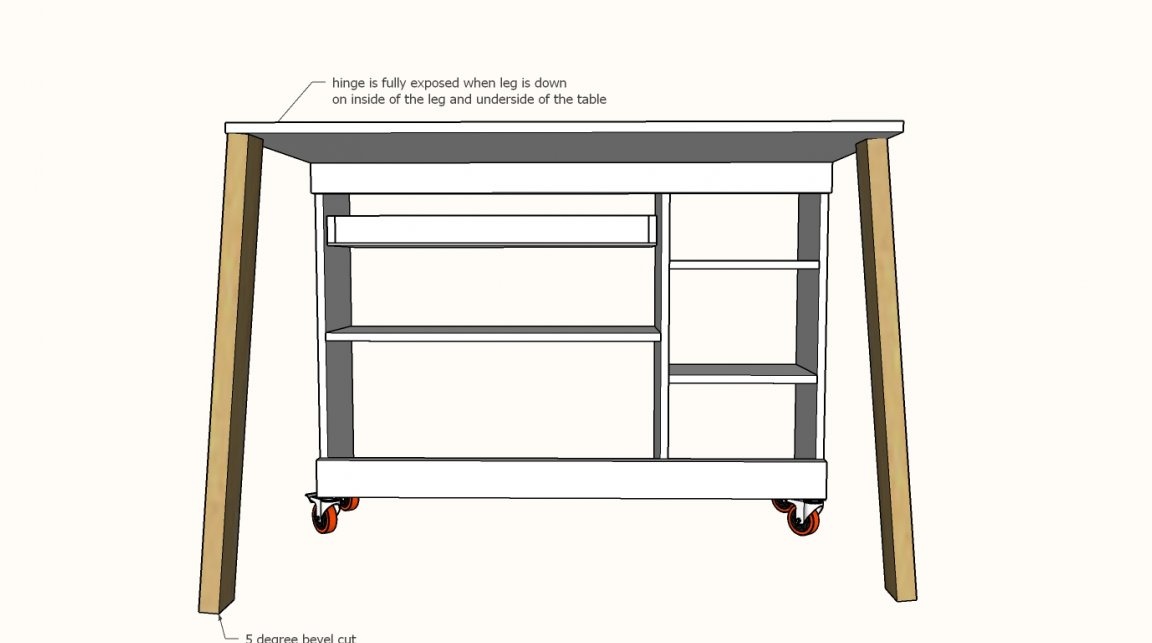
The table-book consists of a frame with its own working surface, as well as an additional folding tabletop on two legs. The table frame is open on both sides and has a width equal to the width of the shelves. The additional countertop is not designed for too much weight, so it does not have a frame-tying. For the same reason, the table is equipped with the simplest legs. Such, at first glance, the fragile design makes the table very light and compact, and most importantly, reduces its cost.
Make a sketch of your future table on paper with an indication of the main overall dimensions.This will allow you to determine the dimensions of its main elements and parts as you work. In the photo below, the design of the table is presented as detailed as possible.
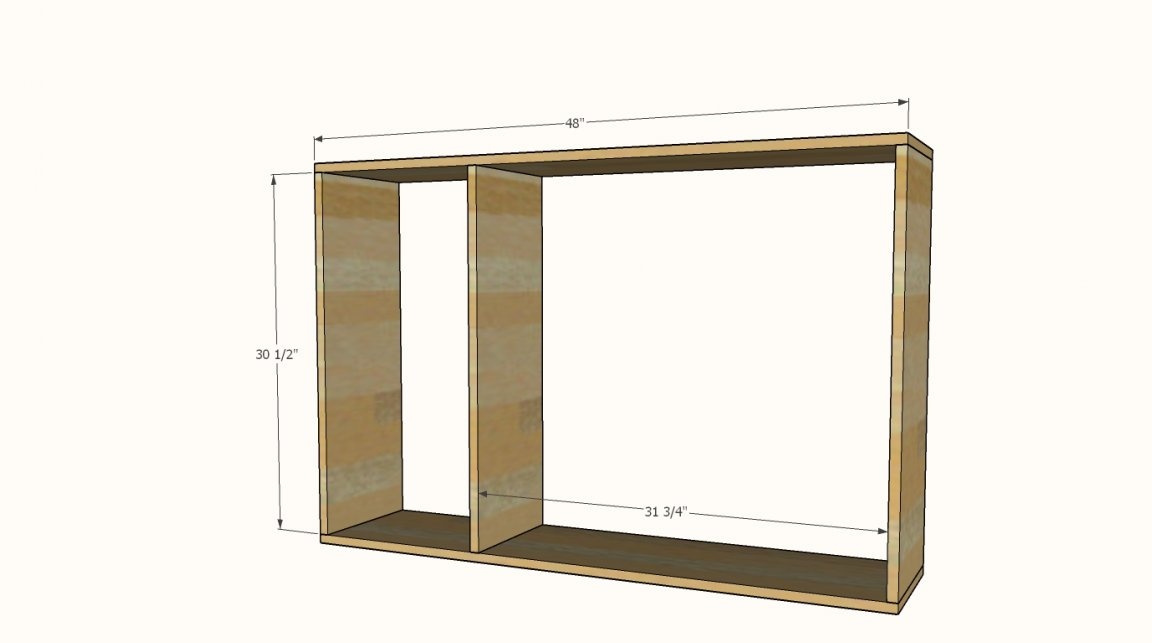
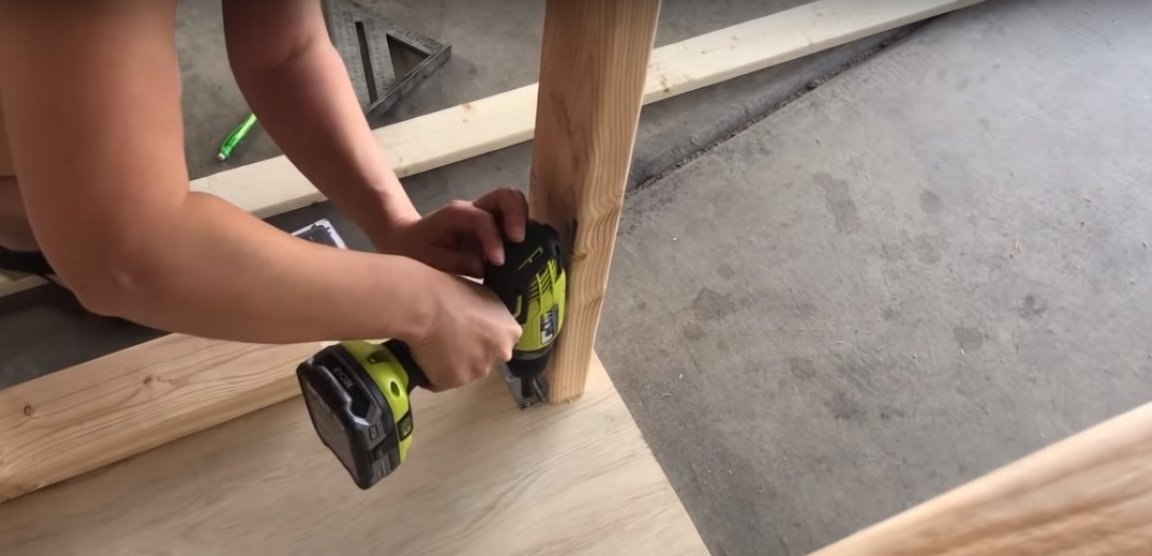
Step two: making the table frame
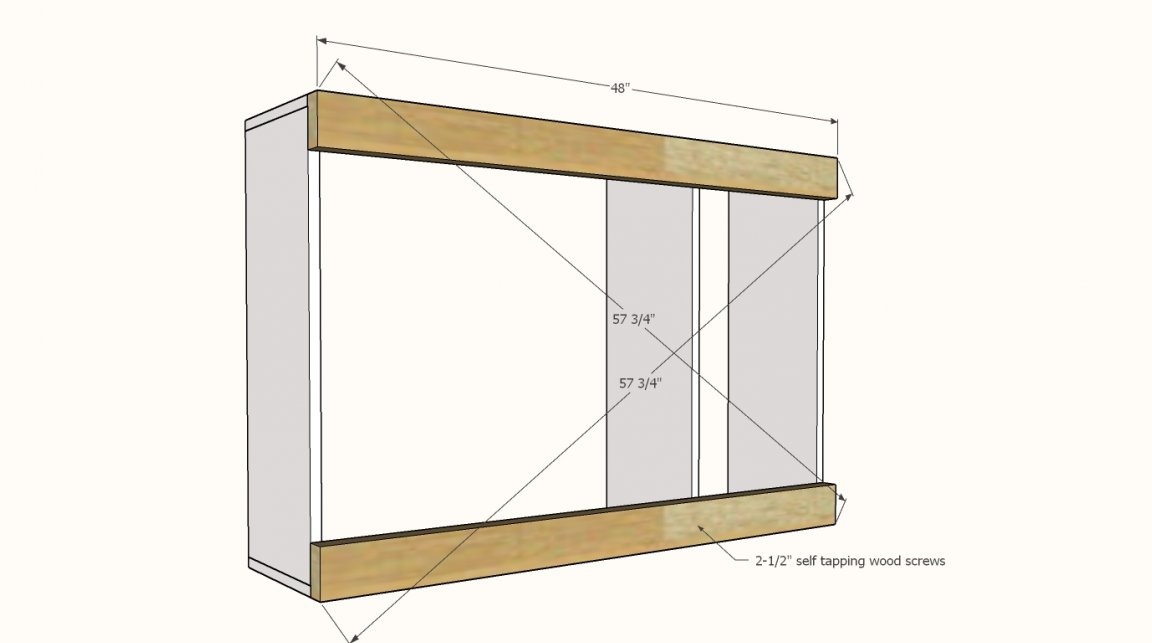
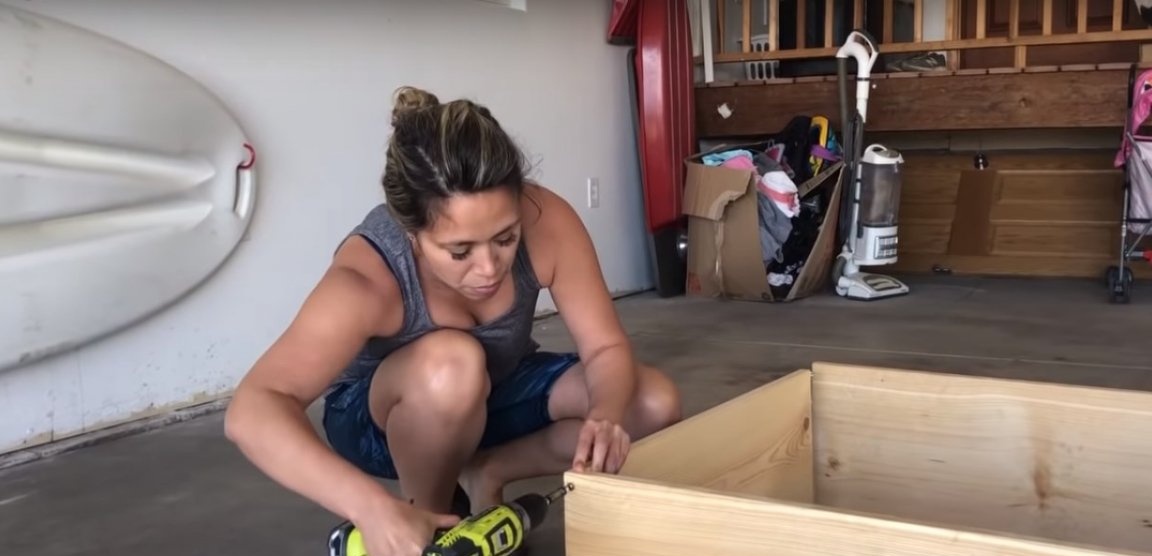
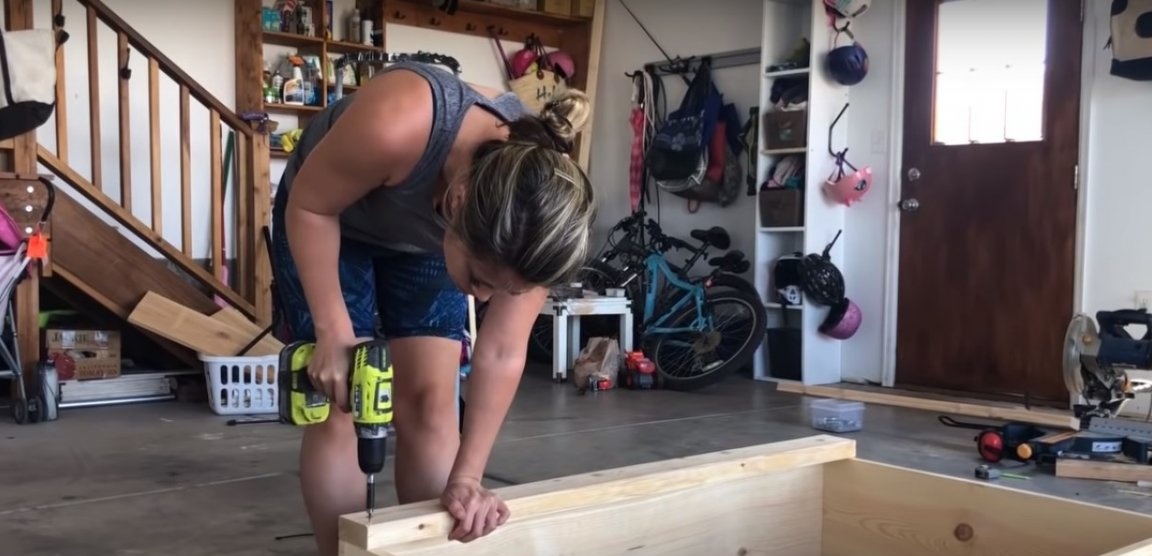
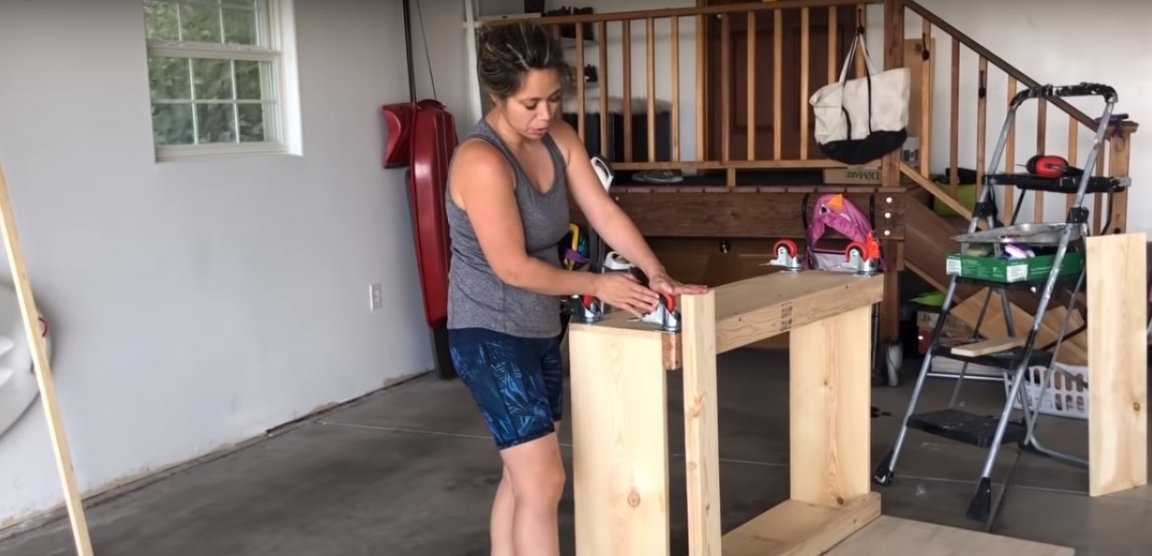
The table frame is a wide frame with three spacers from a bar. The frame parts are interconnected by joint to joint screws. Use wood glue to strengthen the joints. If desired, the structure as a whole can be strengthened by installing metal connecting corners inside the frame.
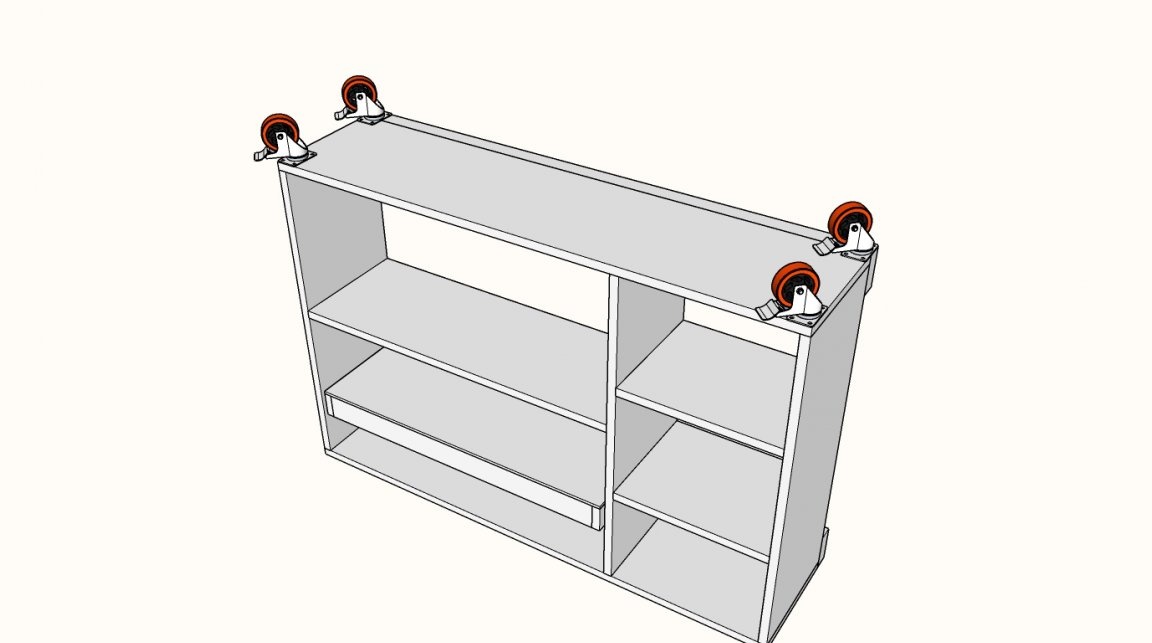
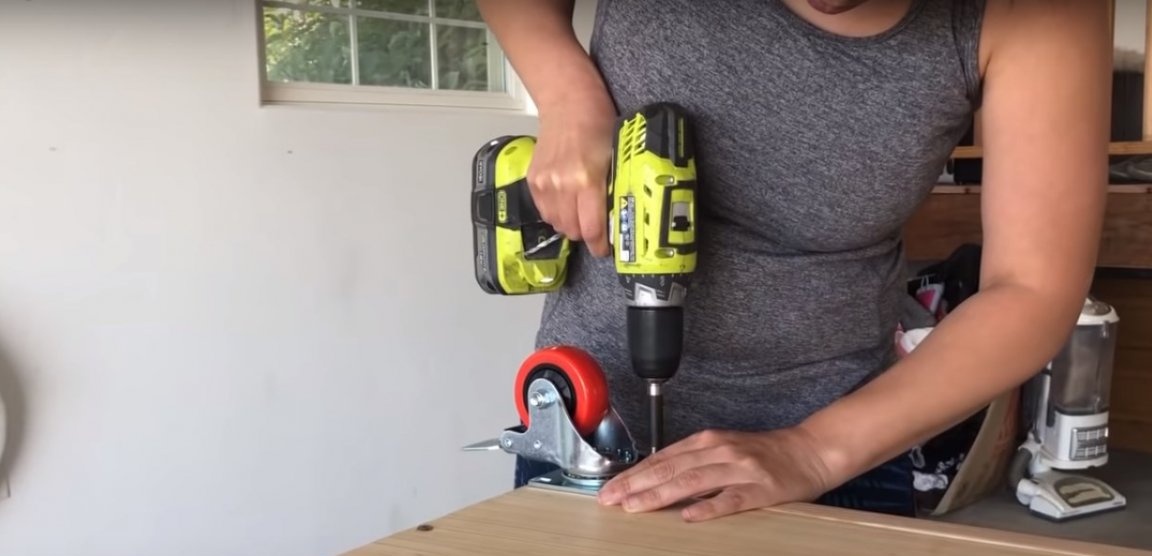
Grind the details of the frame before assembly, since it will be difficult to assemble it in assembled form. Install furniture castors on the screws. Choose rollers with a mechanical stopper.
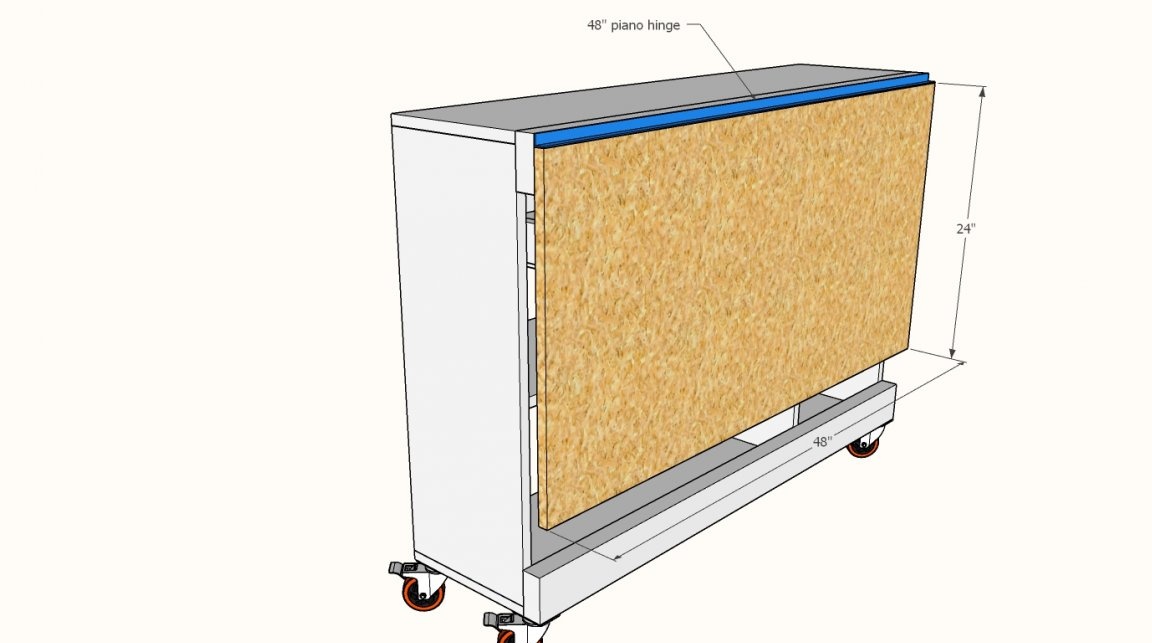
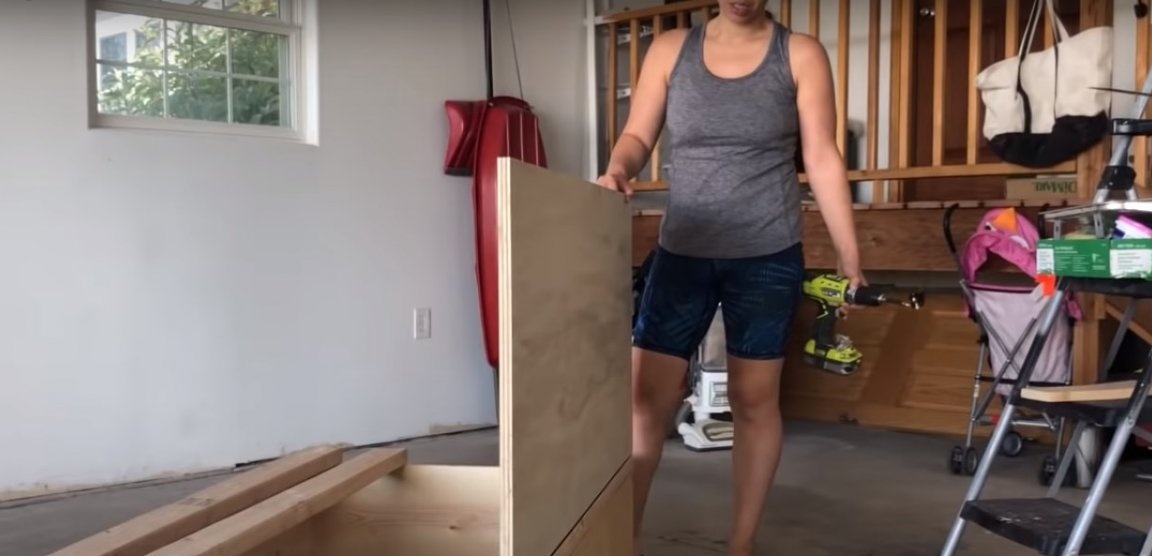
Step Three: manufacturing and installing countertops
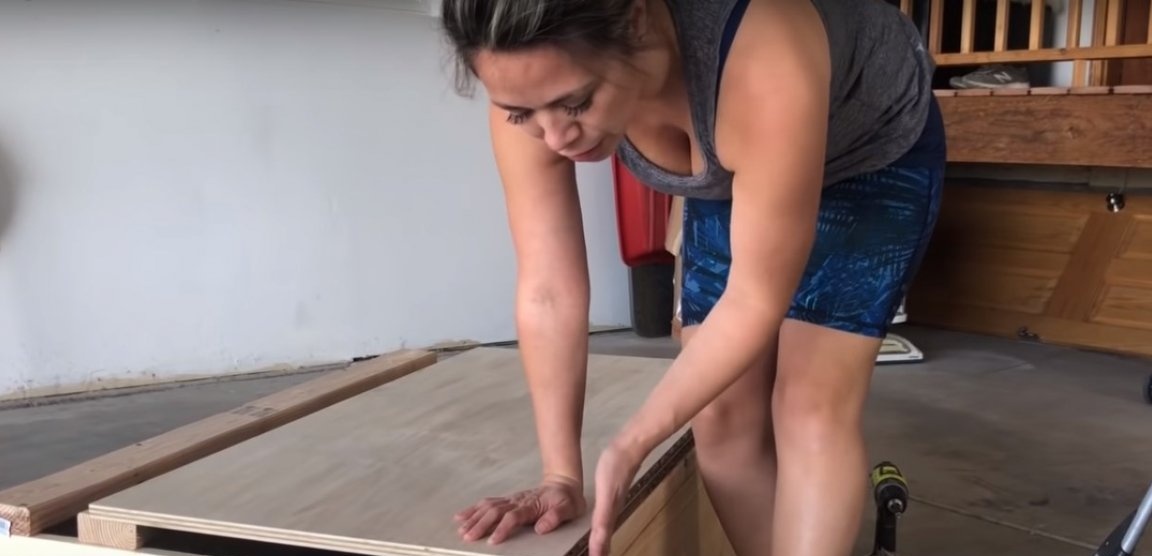
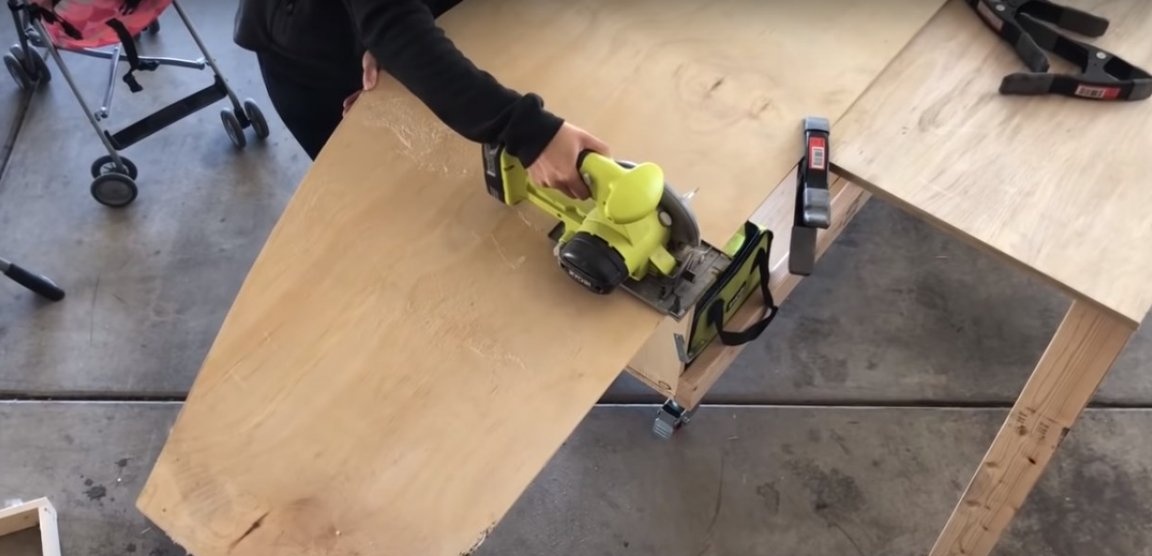
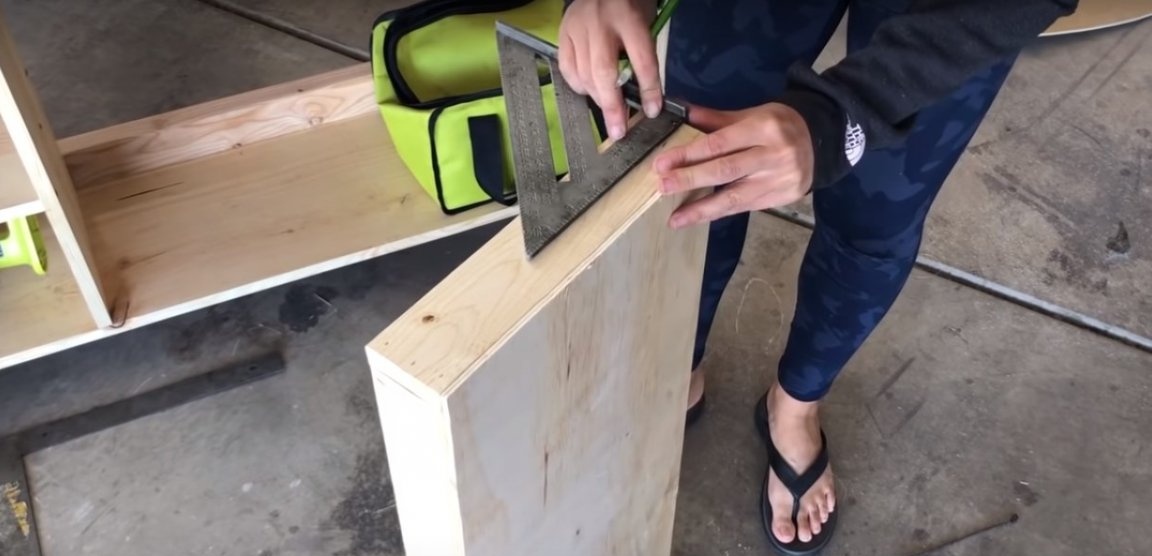
Use plywood to make worktops. It is a durable and relatively inexpensive material. Mark a rectangular part using a square. Cut the workpiece and grind the edges manually with finishing sandpaper.
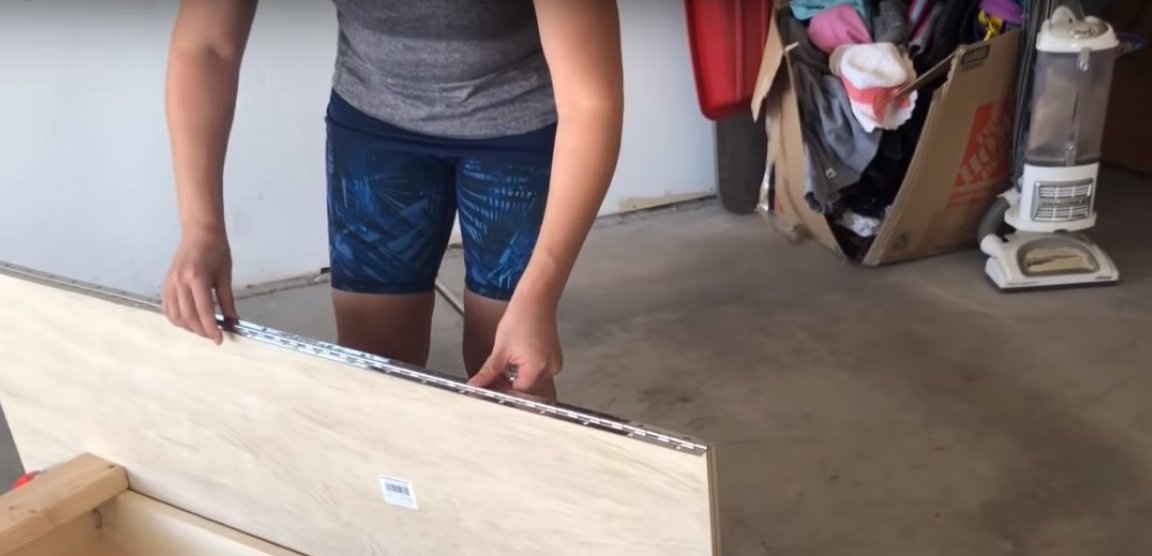
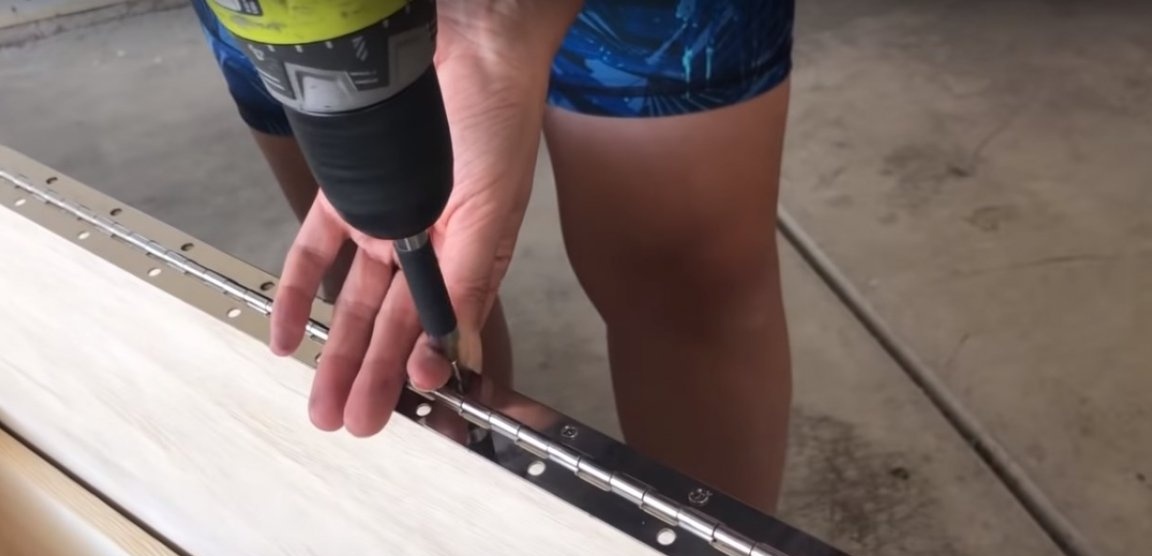
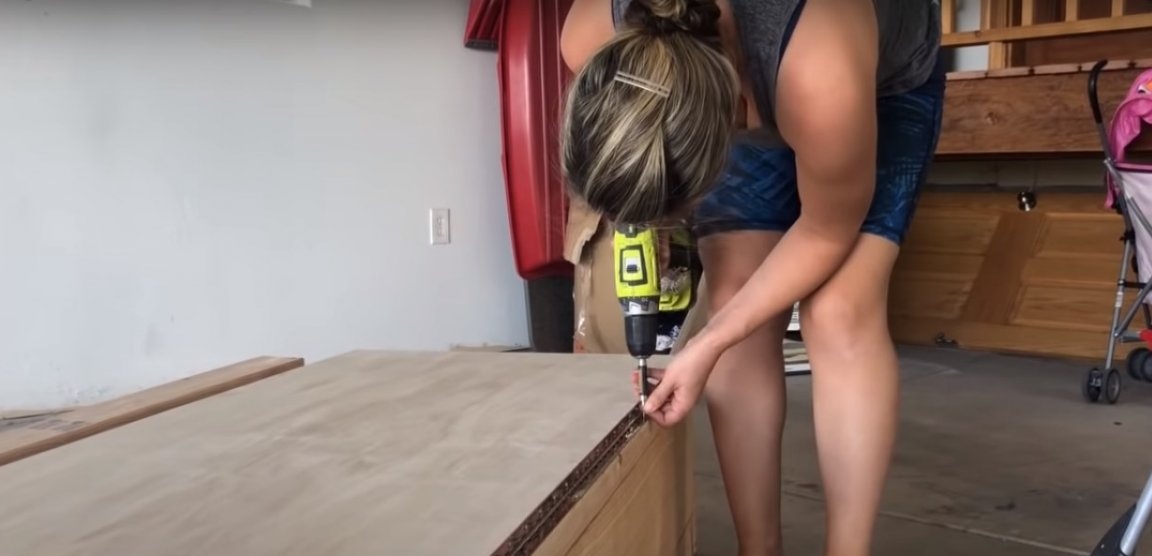
The table top is attached to the frame by means of tape furniture hinges. To begin, fasten the tape to the edge of the countertop. Please note that plywood of optimal thickness should be used for the manufacture of countertops. Firstly, it will not spring, and secondly, it will be convenient for you to fasten the loop tape.
Lay the countertop on the side surface of the frame, align and fix the second part of the loop tape on the tabletop.
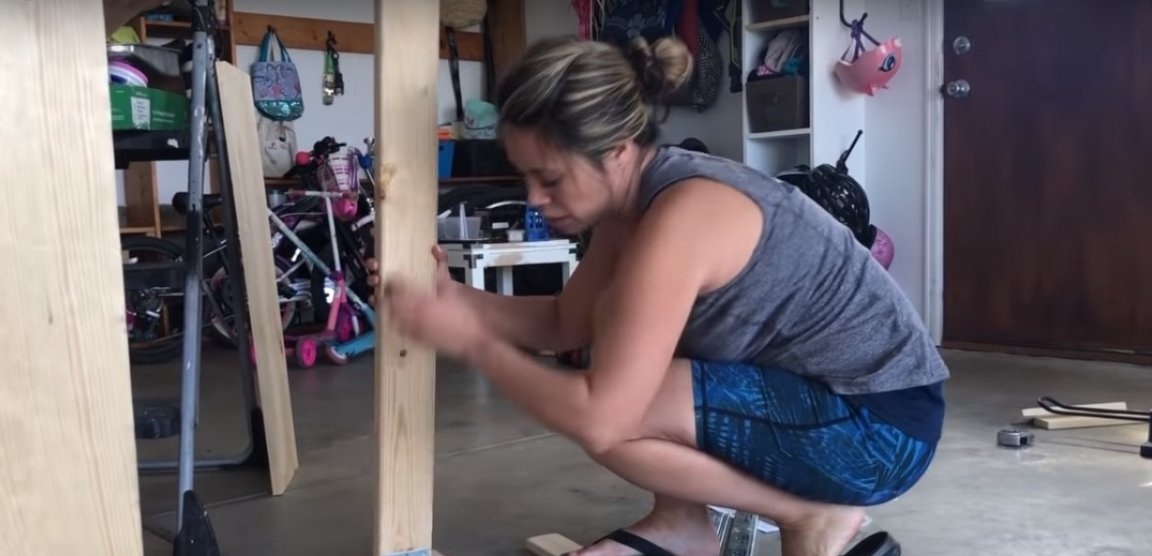
Step Four: Making and Installing the Feet
Set the table top down and measure the bar in height for the manufacture of legs. When marking, consider the height of the furniture rollers on the frame body. Saw the bar into two pieces of the desired length and grind thoroughly.
The legs are not mounted on the countertop opposite each other, so that when folding the structure forms a uniform thickness equal to the thickness of the countertop + leg thickness.
Fix the one-piece door hinges on the legs, having previously drilled holes for the screws. Set the legs on the back of the countertop and secure with screws. When unfolding the legs will diverge down. So it should be, this will give the construction additional stability.

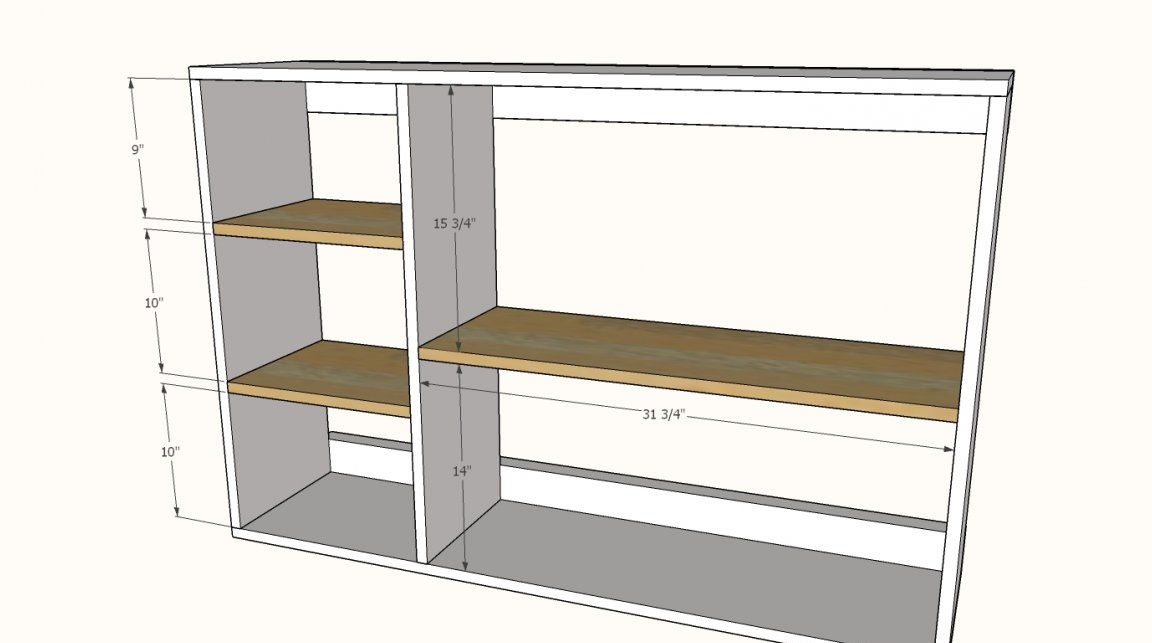
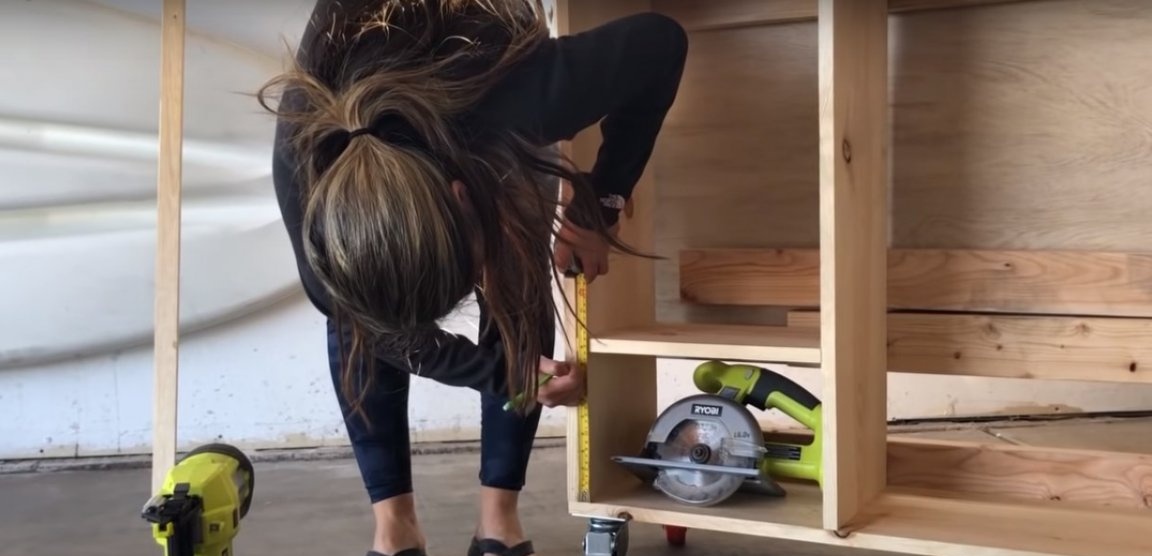
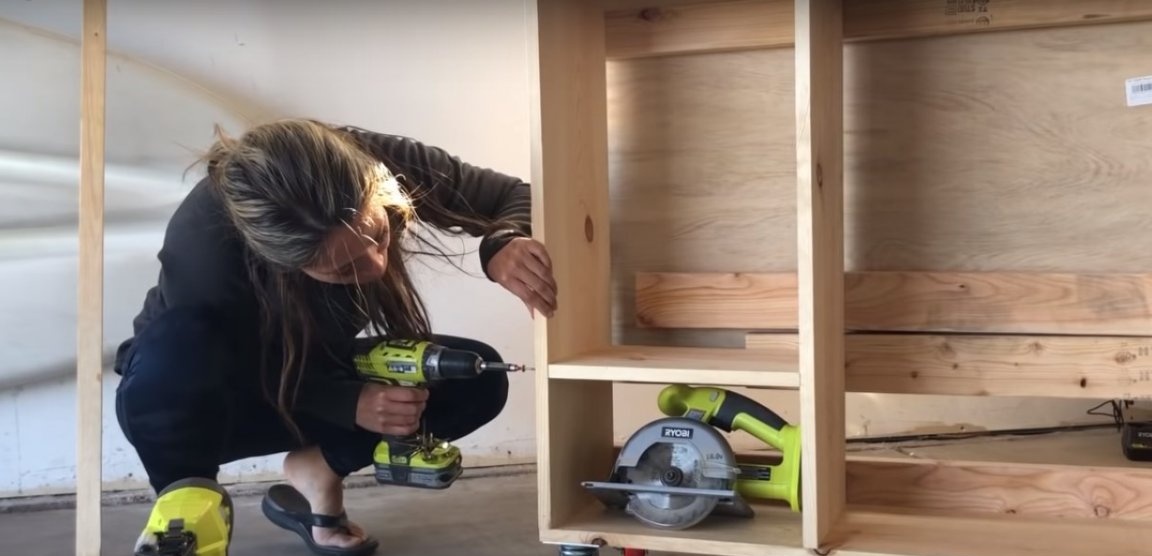
Step Five: Manufacturing and Installing Shelves
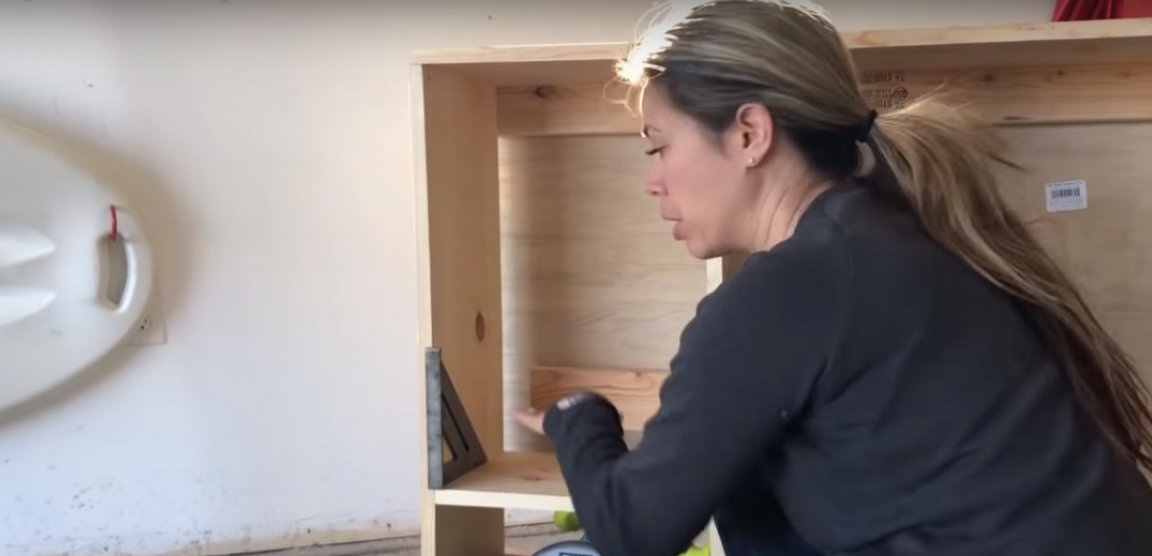
Shelves are made of boards. You can also use plywood for these purposes. Saw off the segments of the desired length and grind the edges. Install the vertical strut of the frame, then fix the shelves one by one, fixing them with screws on the back of the frame. During installation, be sure to use a square to adjust the tilt of the shelves along the horizontal axis.
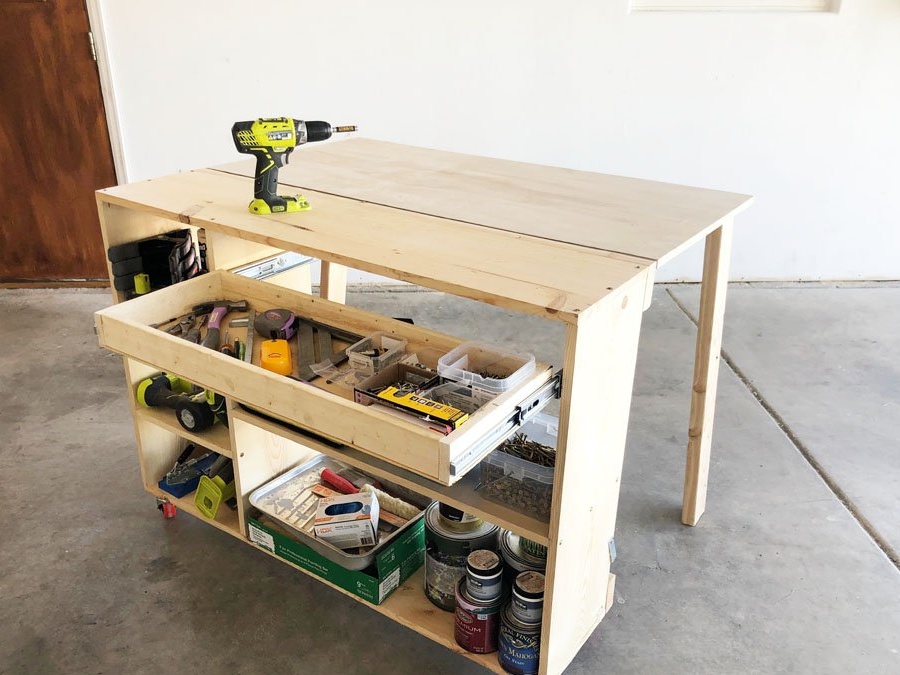
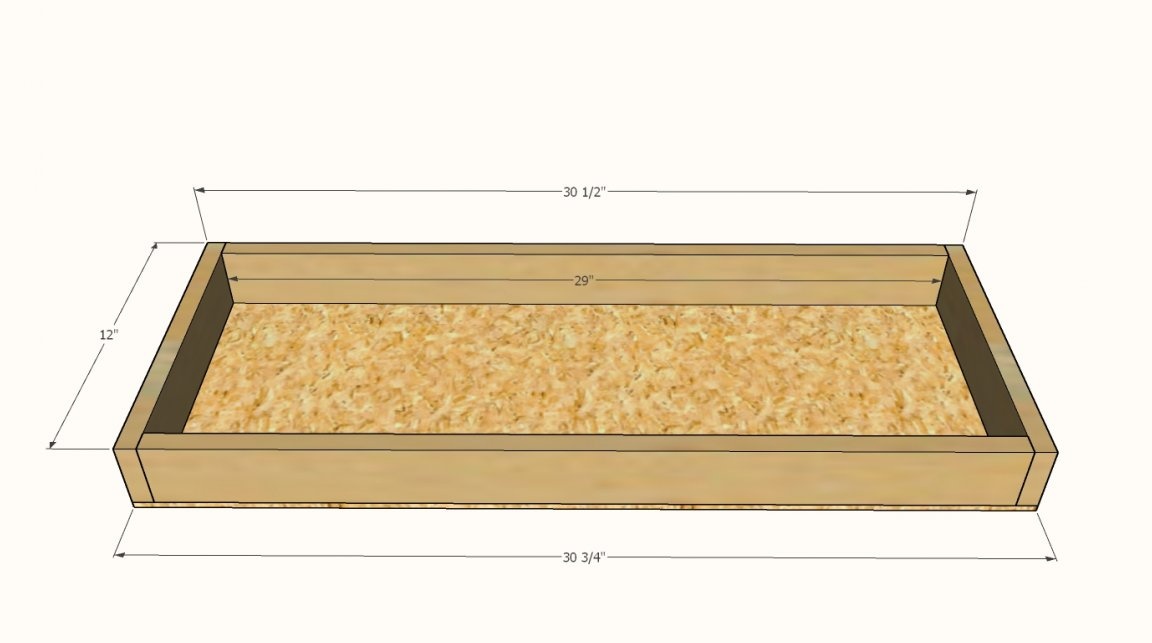
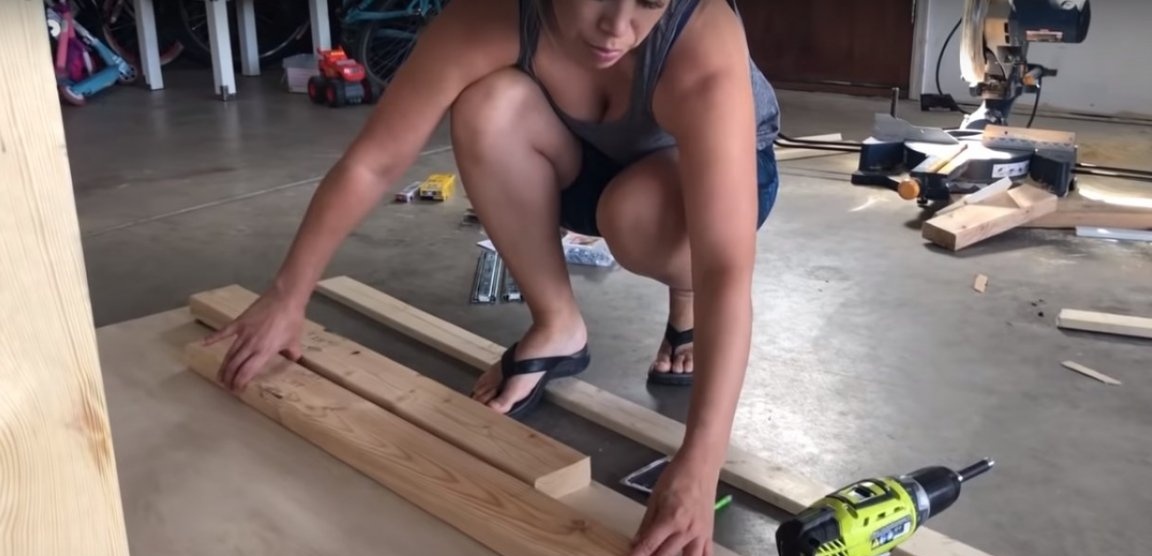
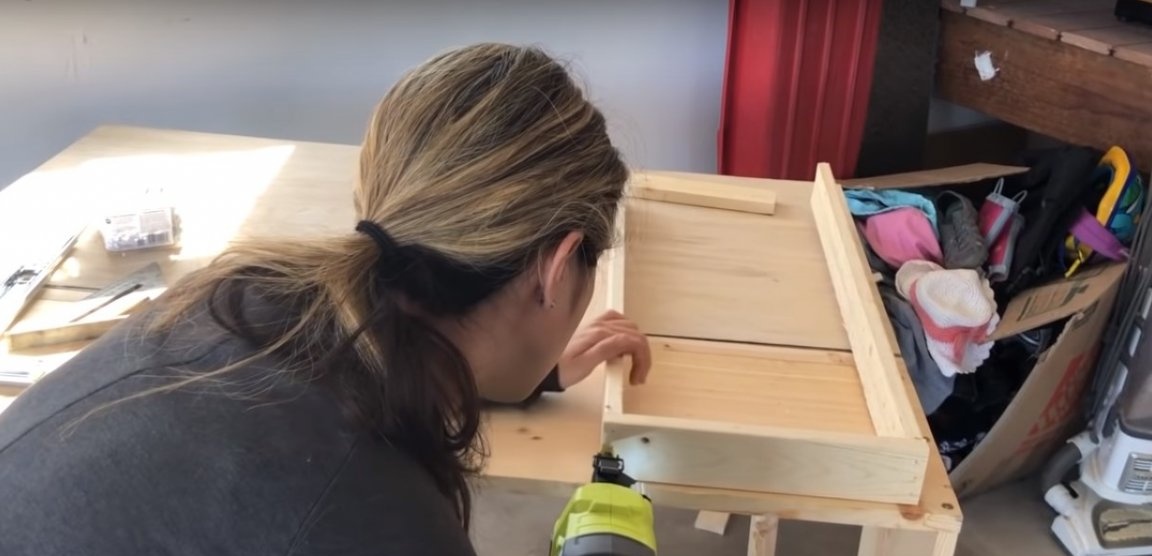
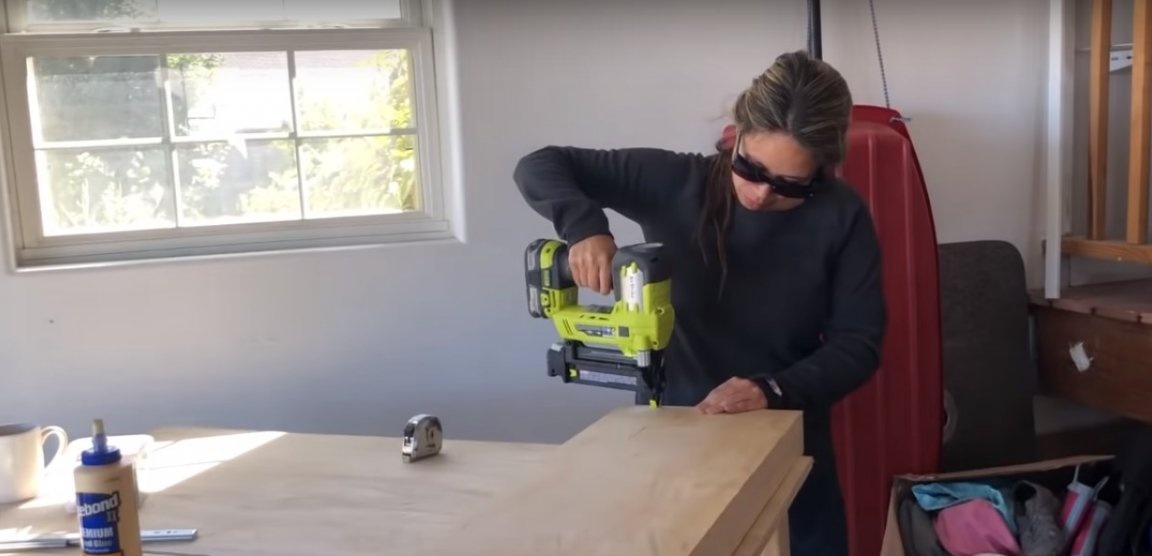
Step six: making the box
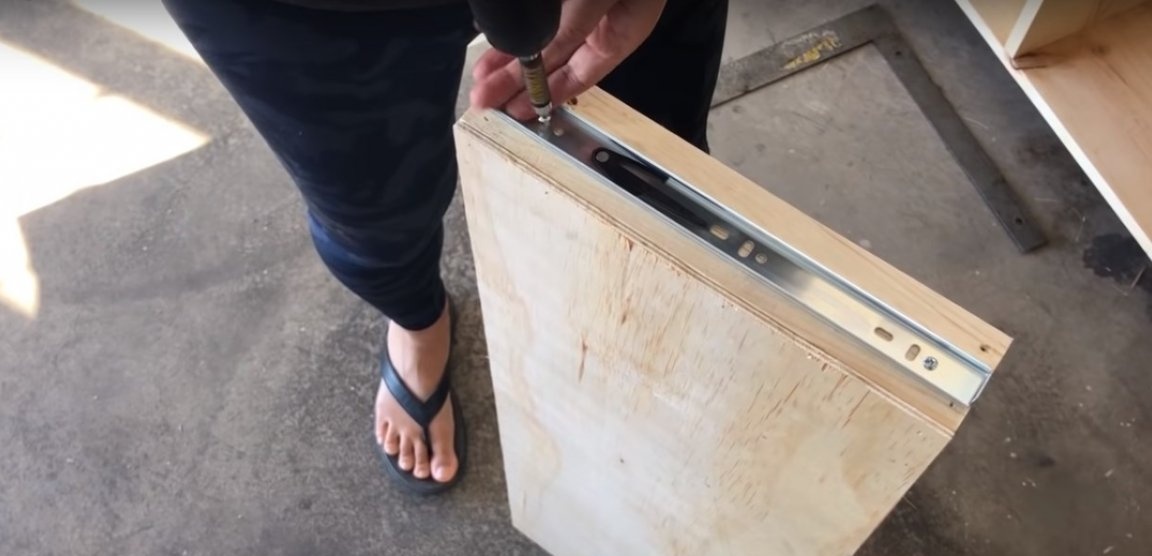
The drawer consists of a frame and a solid bottom, while it does not have a decorative facade. Assemble the drawer frame from narrow planks. When determining the width of the frame, the clearance for installing the ball guides should be taken into account. Usually it is 26-27 mm.
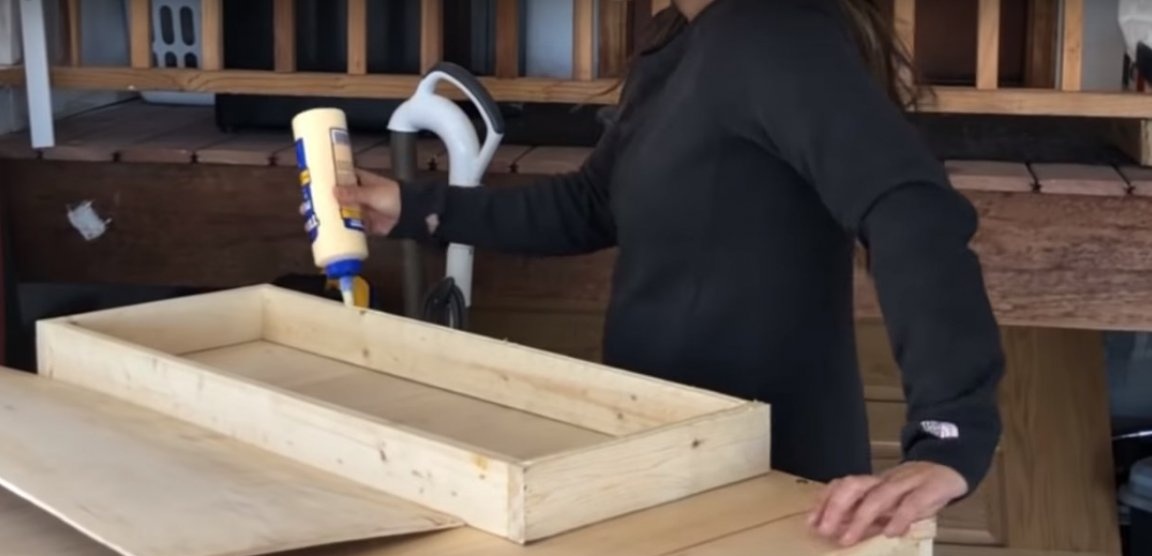
Given that the box is intended for storing heavy tools in it, use plywood with a thickness of 5 - 8 mm to make the bottom. Both the frame of the box and its bottom are assembled on brackets using a stapler. You can use ordinary nails, but do not forget about carpentry glue, which will give the box strength.
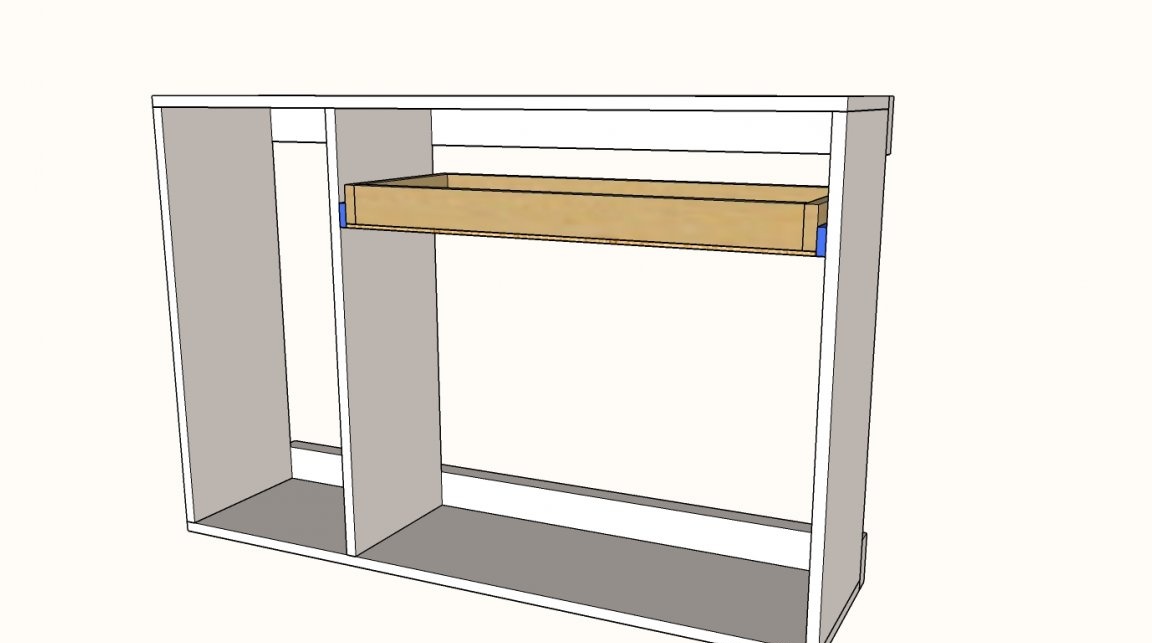
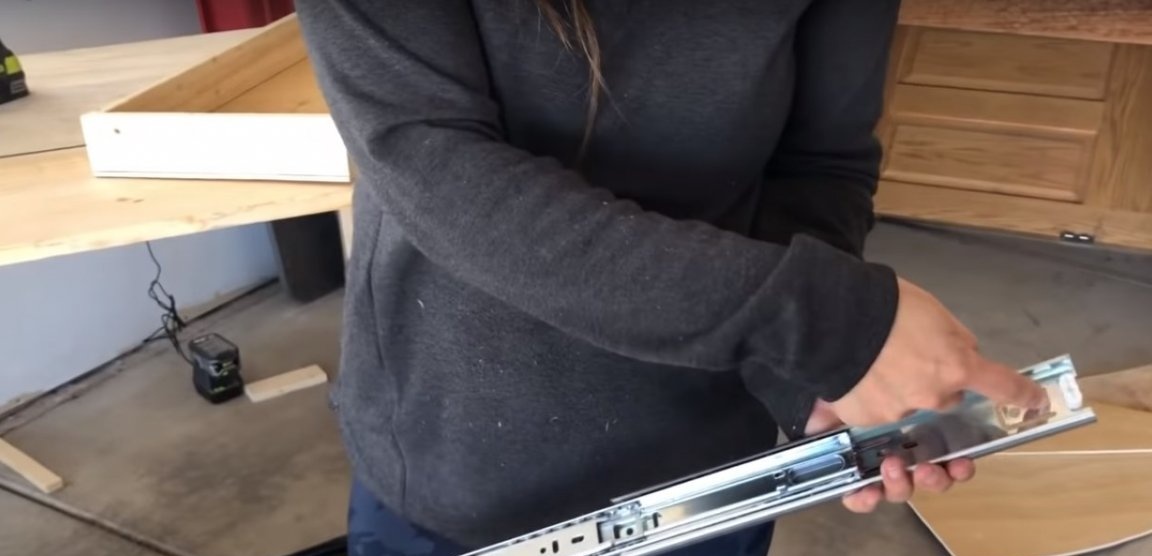
Seventh step: installing the drawer
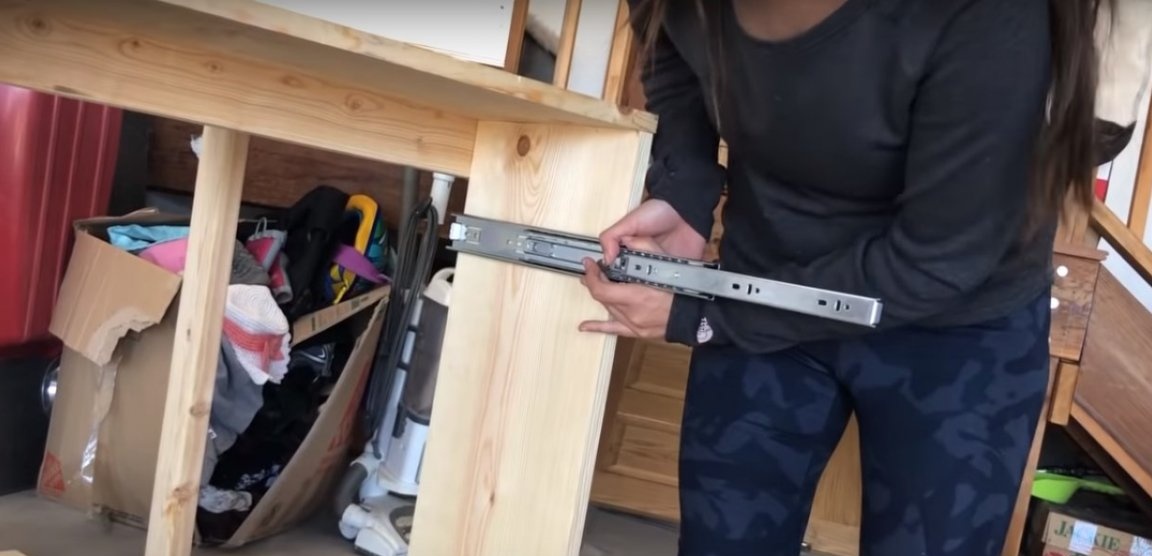
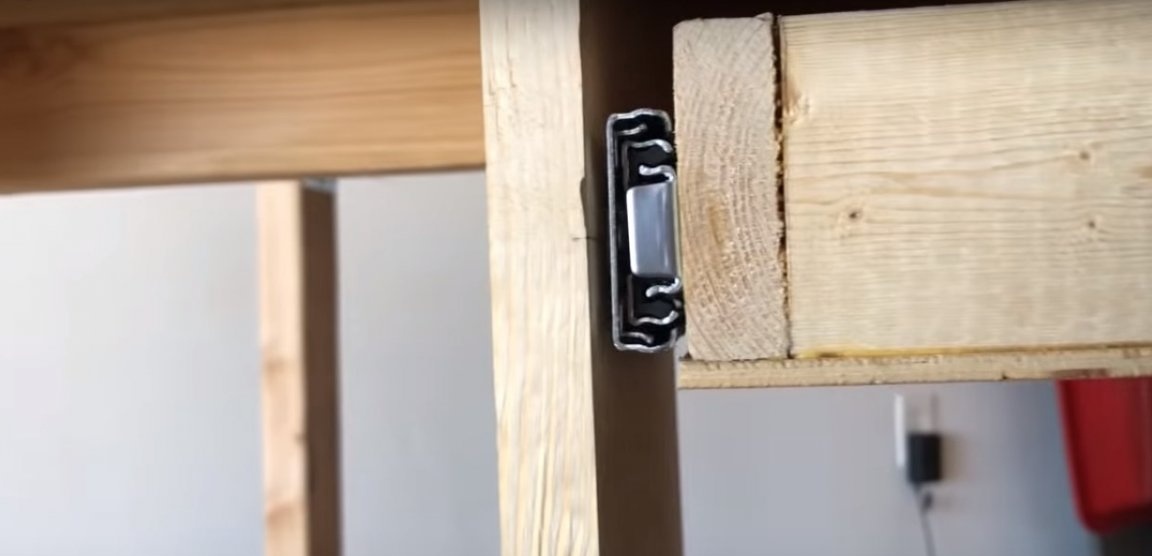
The drawer is mounted on ball guides, so the drawer closes and opens smoothly. Before installing the accessories, the guides must be disconnected from each other. To do this, press the black lever on the side.
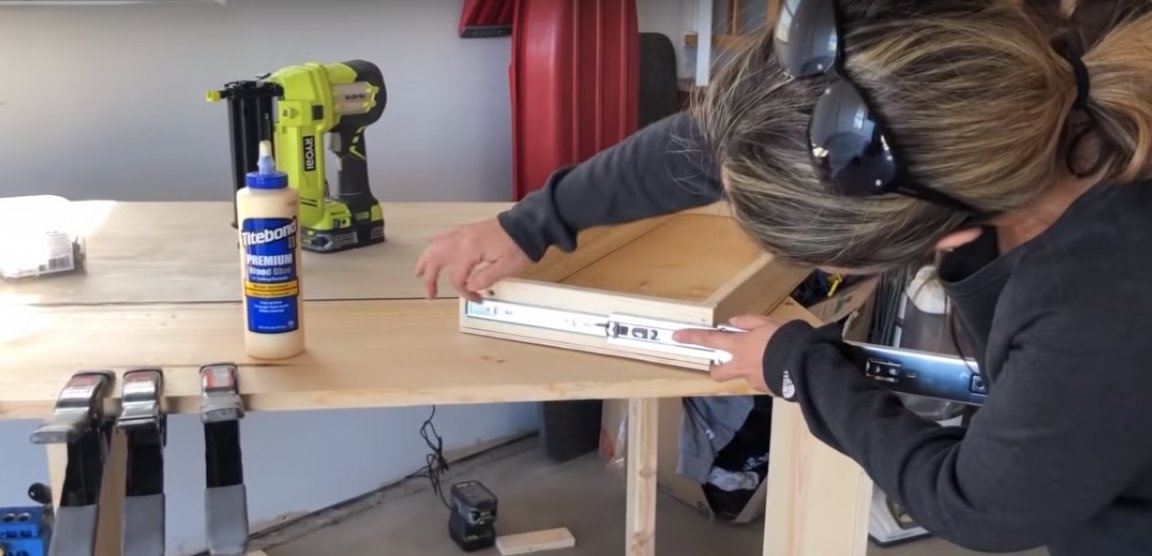
On the frame body inside and on the sides of the drawer, draw horizontal lines for installing the guides.
Start installing the rails from the drawer. There are two types of holes on the strip for attaching it to the plane, two of which fix the part along the horizontal axis, and the second allow you to set it along the vertical axis. Installation should always begin with horizontal fixation.
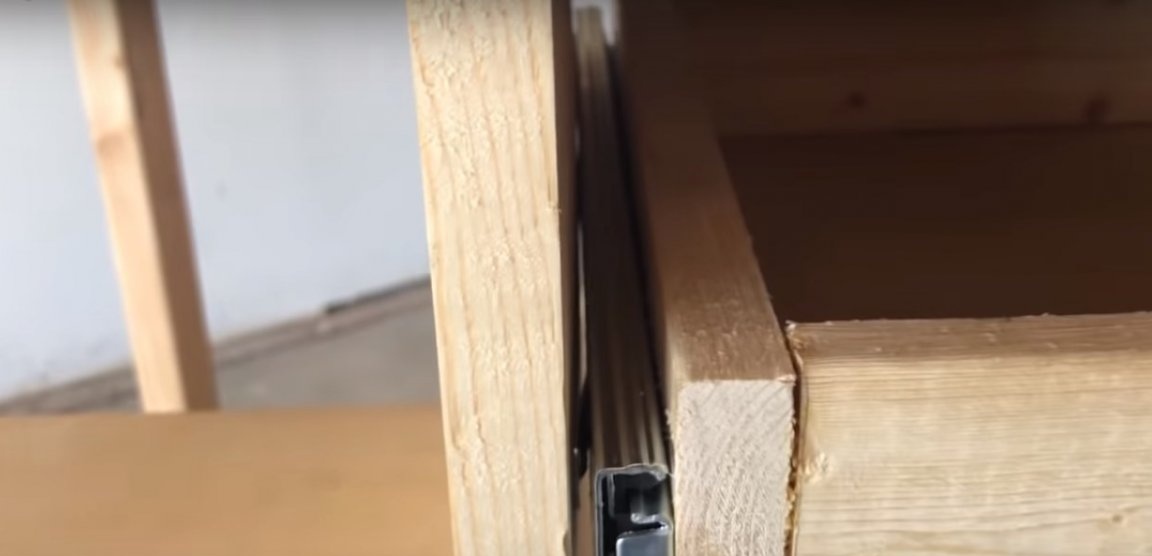
Install the guides on the frame body. If you correctly took into account the allowance for the gap between the box and the frame, the box is free and effortlessly in place. The author uses guides, thanks to which a box can be installed in the prepared cell, which turned out to be slightly smaller in width. It is only necessary to bend to the side the plate, on which there are holes for the screws. But if the box is larger, it will have to be redone.
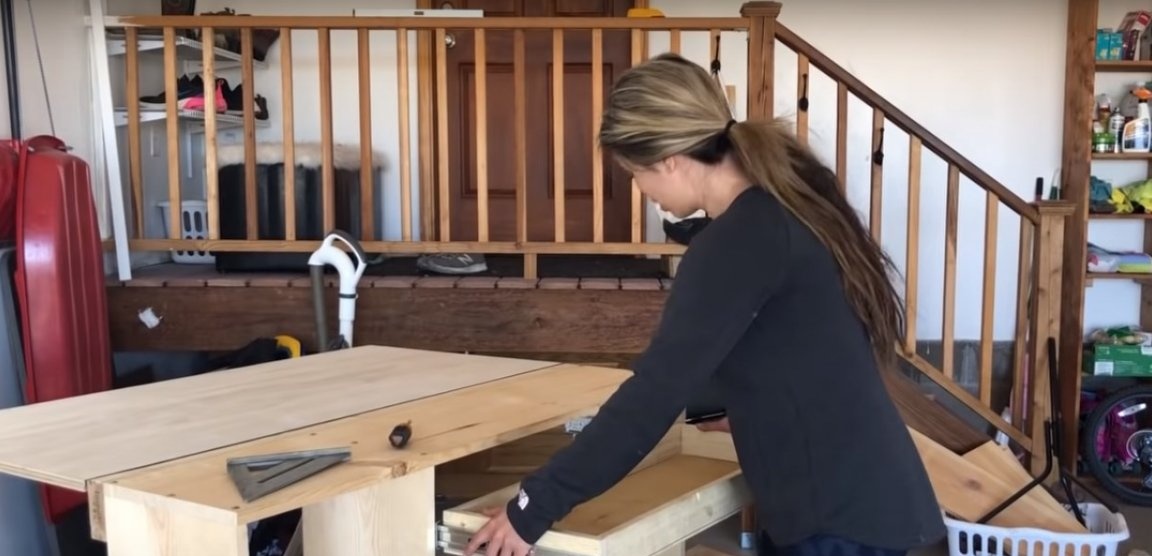
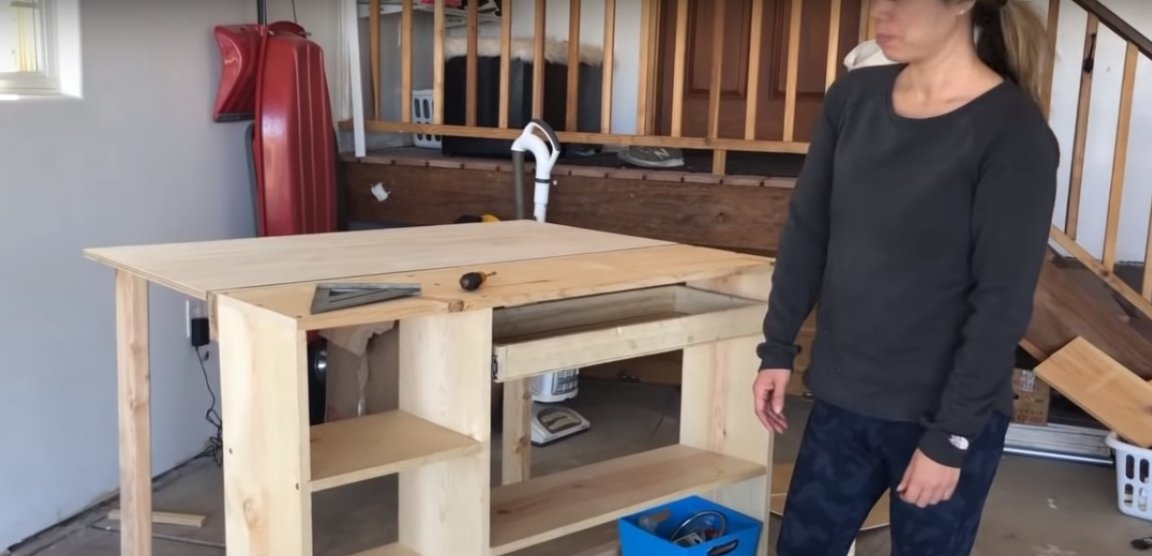
It remains only to establish the metal corners that will serve as limiters of the tabletop when folded - and the table is ready!