


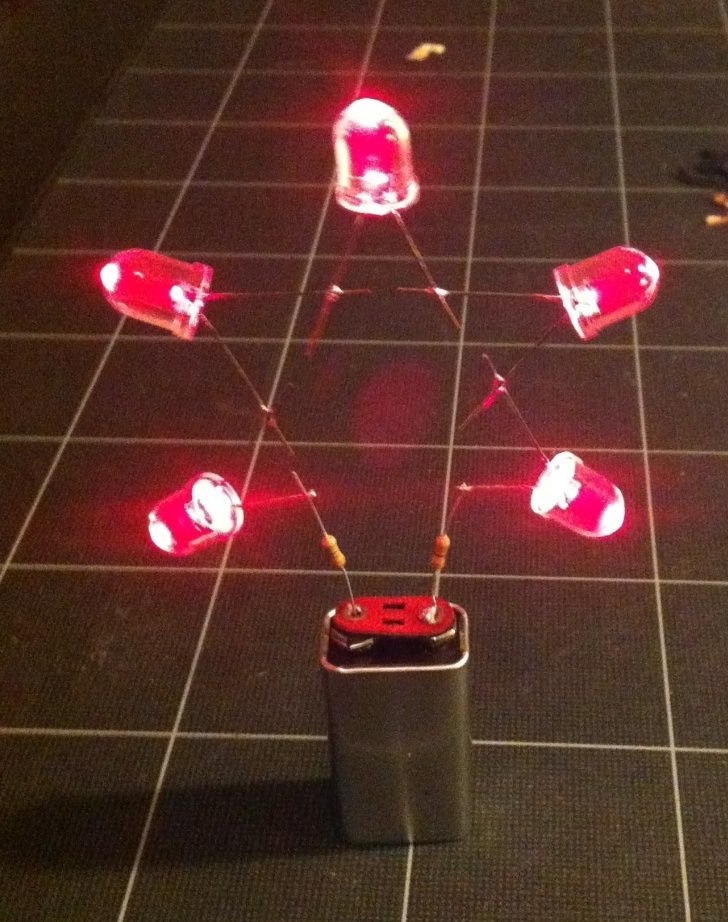
This is a small guide on how to make stars sparkle. Thus, you can create a Christmas tree without cutting in the forest. Here are the resulting Christmas trees:
You can’t watch the video - Click here...
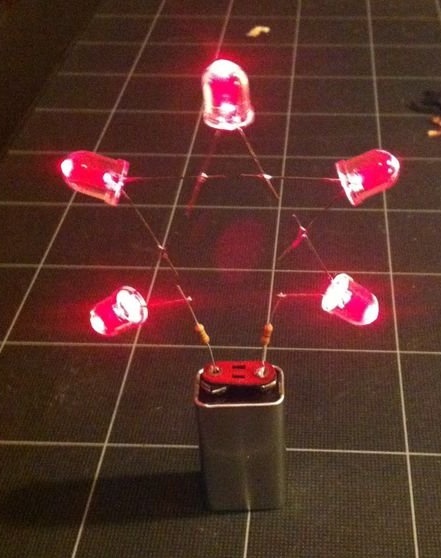
A little soldering, and you can make cute LED stars. The size can be 6 - 10 cm in width, and a 9-volt battery will be supplied.
If you need to be able to easily change batteries, see Step 5. The star can be mounted on the clip of a 9-volt battery ...
Take your soldering iron, LEDs, find some batteries and make bright Christmas decorations out of it all.
If suddenly you are not sure of your soldering iron talent, start with a simple one - stars. It's really easy craft, and you will surely handle it. Believe me.
Step 1: Materials and Tools

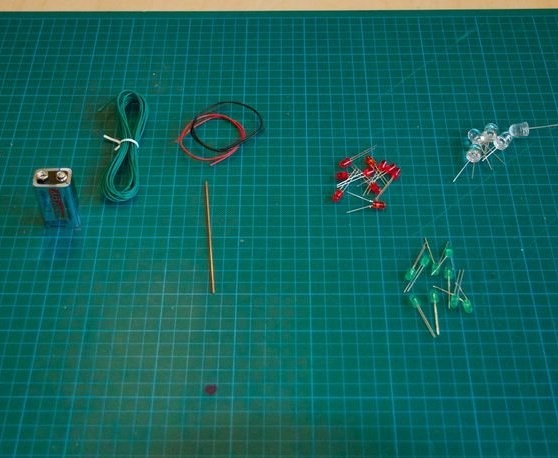
For the New Year's LED star, you will need:
- 5 red 5mm or 10 mm LEDs: the choice is yours. The bulbs should be red to shine well from a 9-volt battery. I tried both ordinary diodes and matte ones. Choose what you like more
- 9 Volt battery.
- 10 cm strong copper wire.
If you want to make a * blinking * diode asterisk, then you will need different types of LEDs:
- 1 flashing diode 5 mm red.
- 4 “low-current” LEDs with a transparent light bulb, also red.
The total cost of one flickering star is about 90 rubles, depending on the place of purchase of the diodes. An ordinary asterisk will cost 30 rubles less.
Tools you will need:
- for the template: 5 mm plywood or something similar.
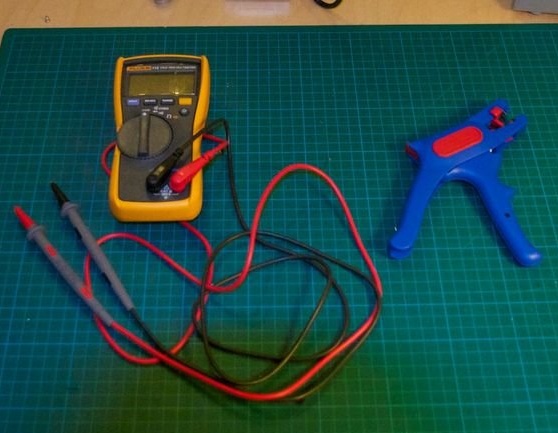
- soldering iron and solder
- pliers and pincers
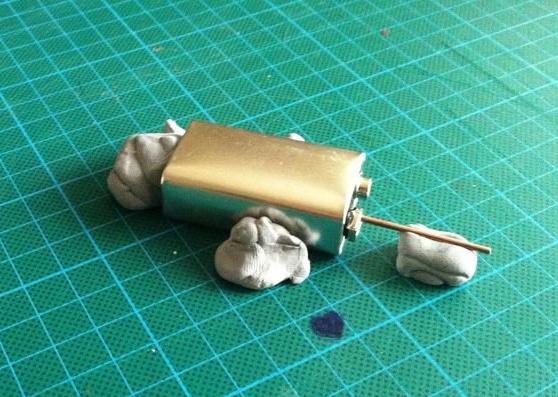
- polymer clay or a third hand to fix the parts of the star for soldering
- multimeter for debugging
Step 2: Layout
New Year's diode star:
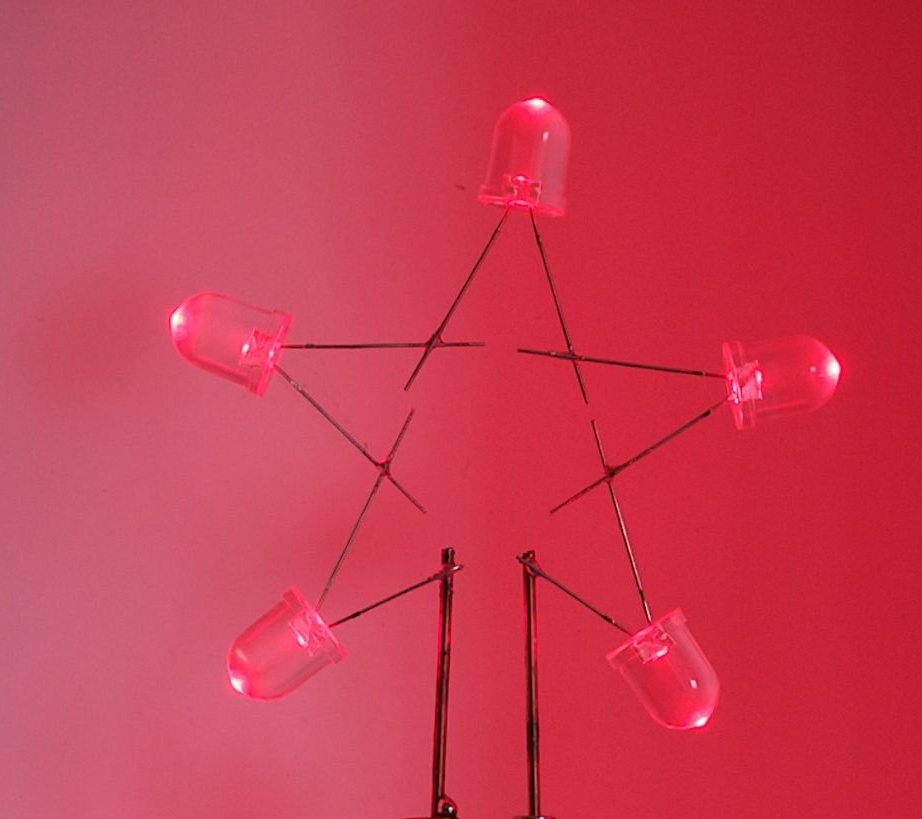
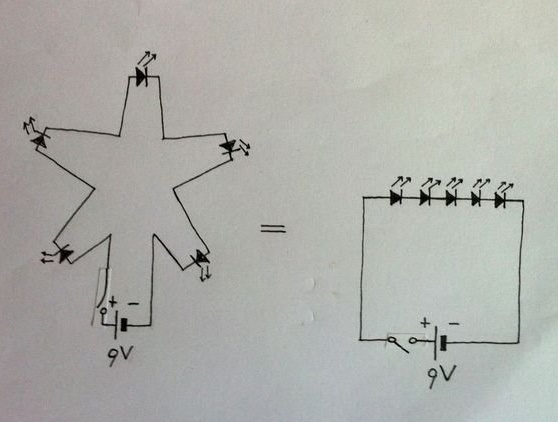
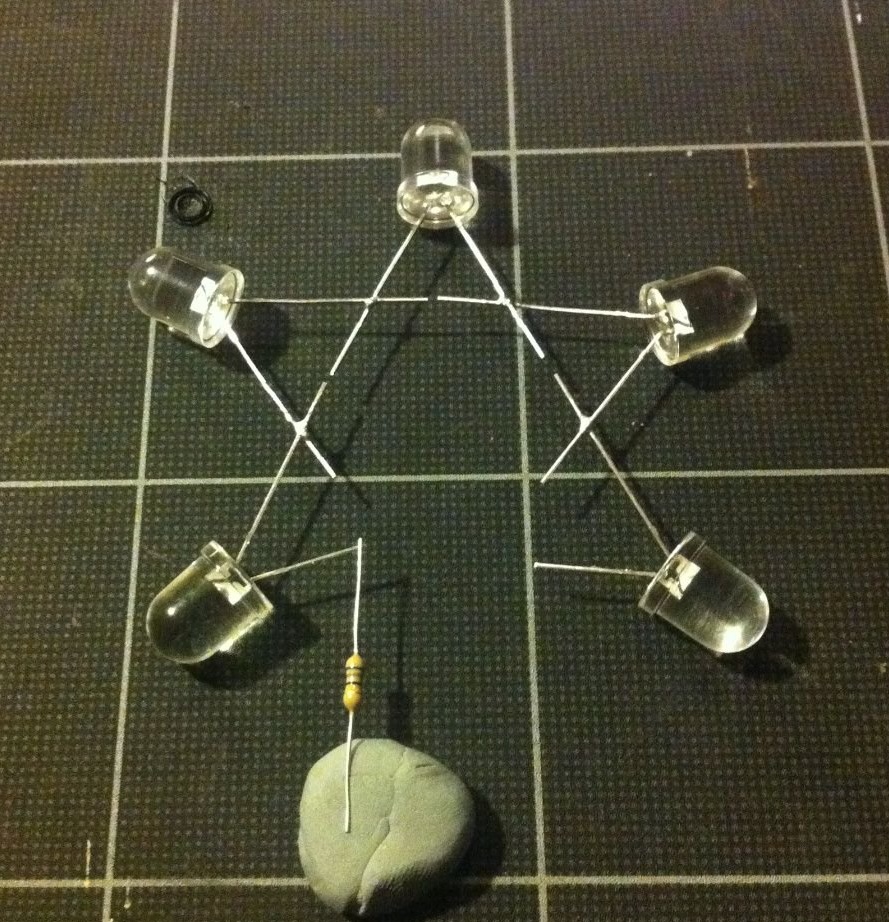
The circuit for an LED star is not very complicated. Five diodes are connected “head to tail” in one circuit.
A circuit breaker is not a physical part of a star. The asterisk lights up (the circuit is closed) when the wire is connected to the positive terminal of the battery.
Step 3: make a diode star
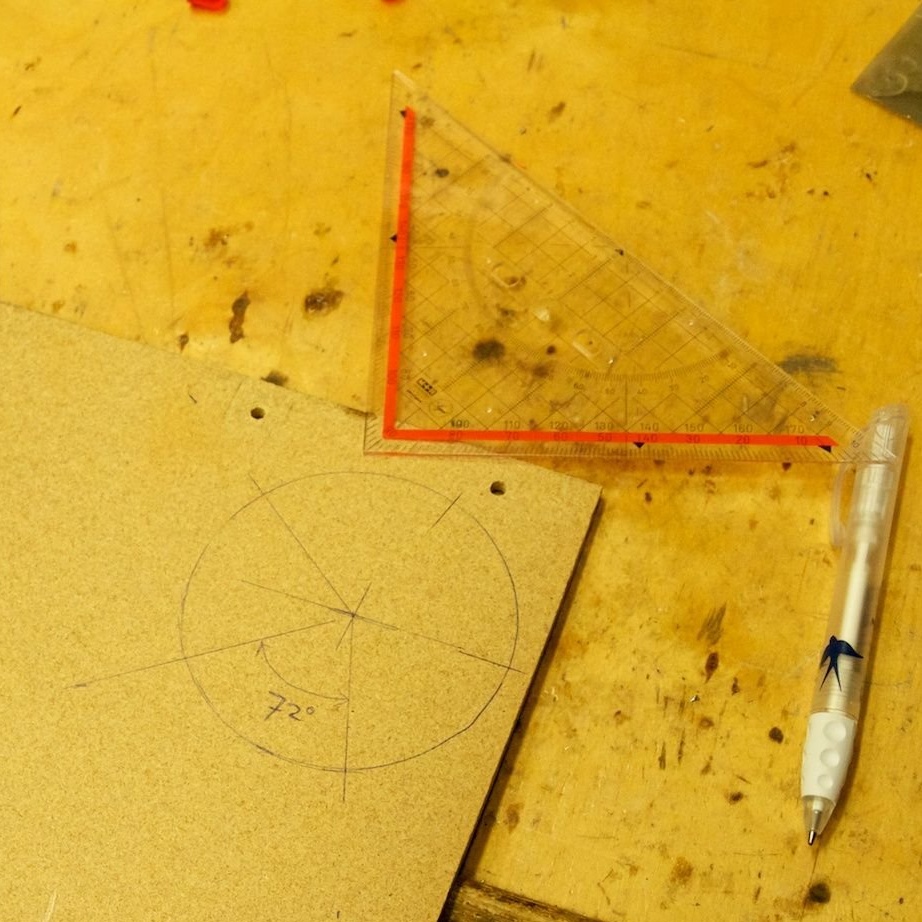
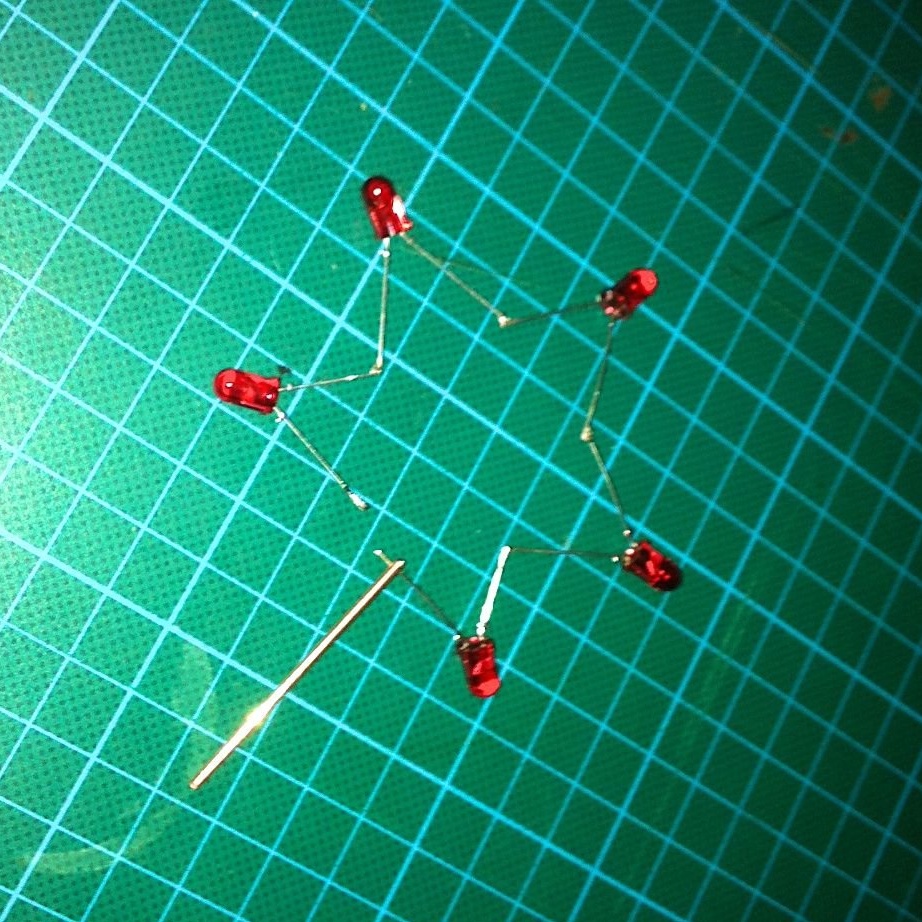
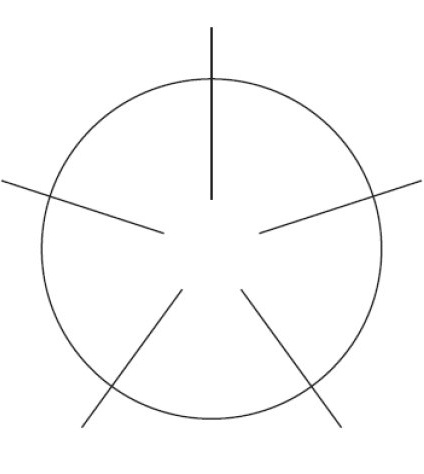
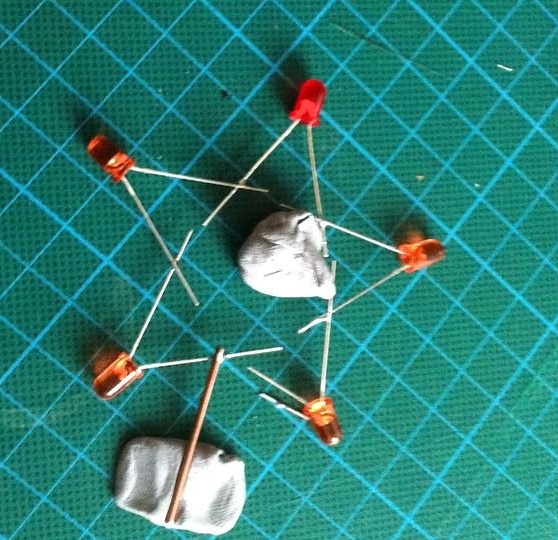
To simplify the soldering of diodes as much as possible, I made a template from plywood. This is a circle with notes for five bulbs.
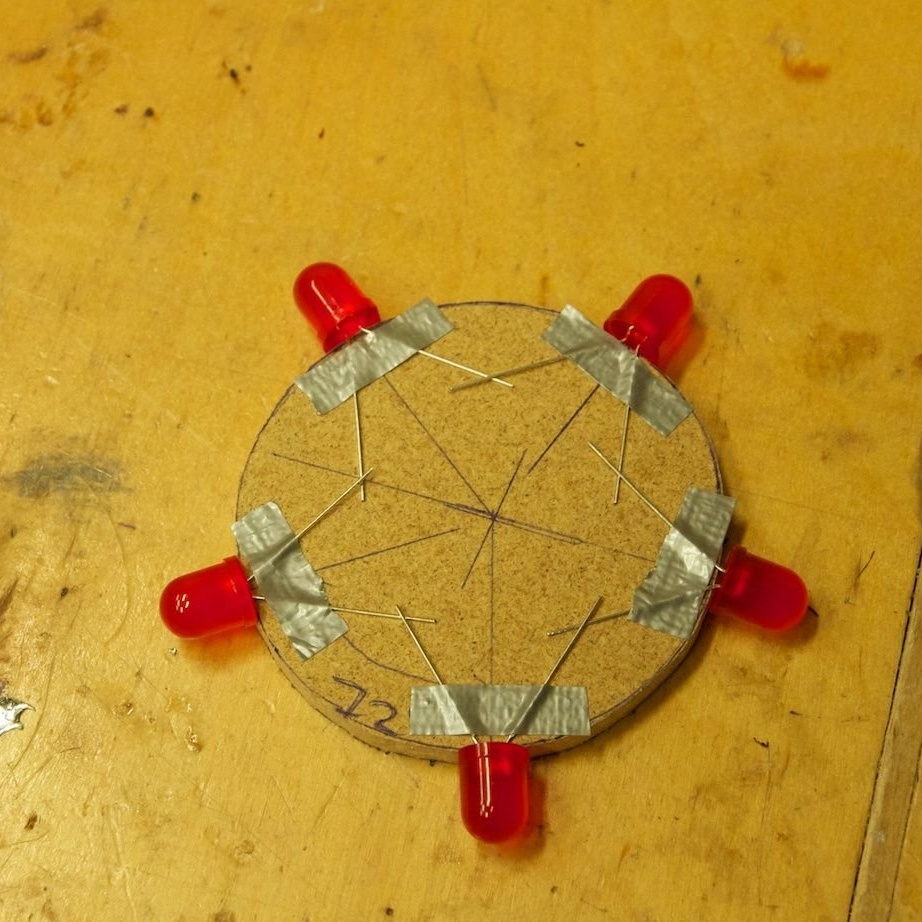
- Place the diodes on the template.
- Extend the legs of the diodes at an angle so that they coincide with the sides of the star and the adjacent legs of different diodes intersect each other.
- Lock the contacts of the diodes on the template.
- Solder connection pins
- Cut off the excess edges with small ticks.
You have a closed star.
- Cut off the most unsuccessful soldered connection.
- Now you have a cut star.
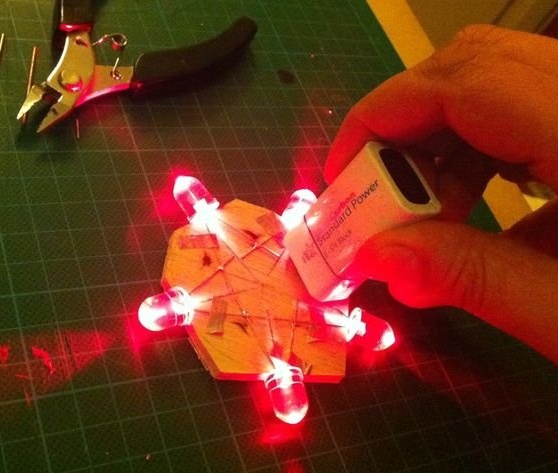
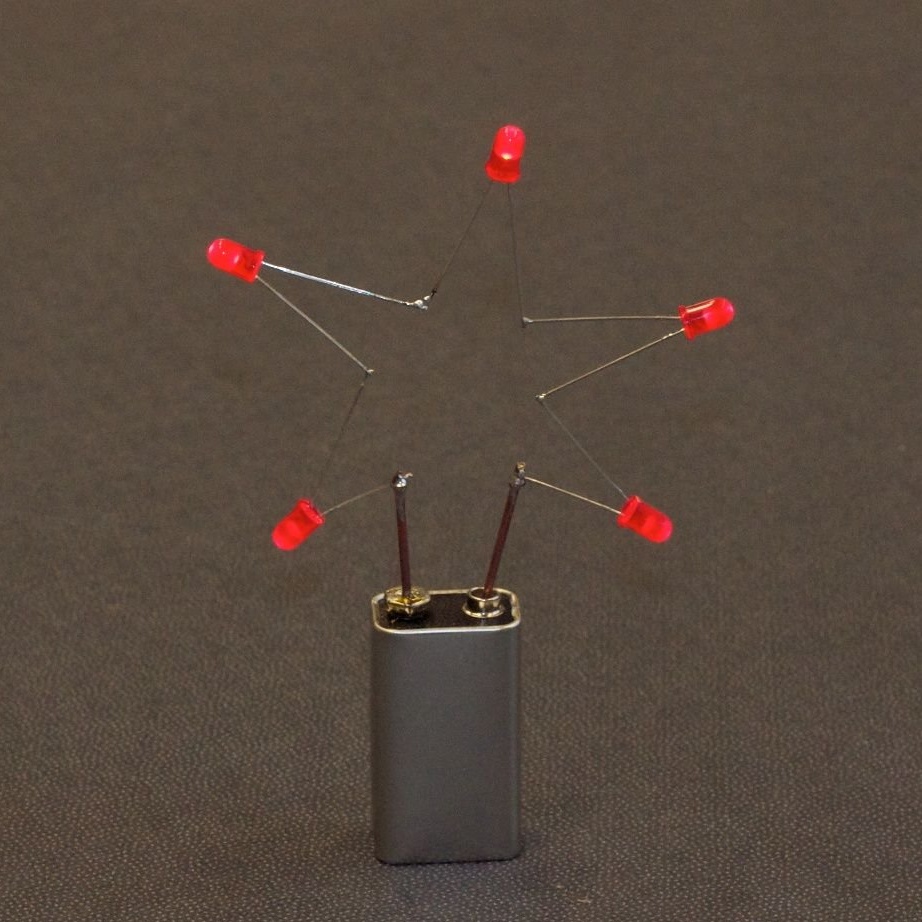
Check circuit operation:
Connect the ends of the star to the battery terminals. Do not forget about the polarity of the diodes and the battery! If the asterisk is on, you did everything right. If not:
- most likely, you connected at least one diode on a head-to-head basis instead of head-to-tail.
- If all the diodes are wired correctly and EVERYTHING does not work (this happened to me ...), most likely one of the diodes is not working. Check each diode separately with a multimeter or a 3-volt tablet battery or power supply.
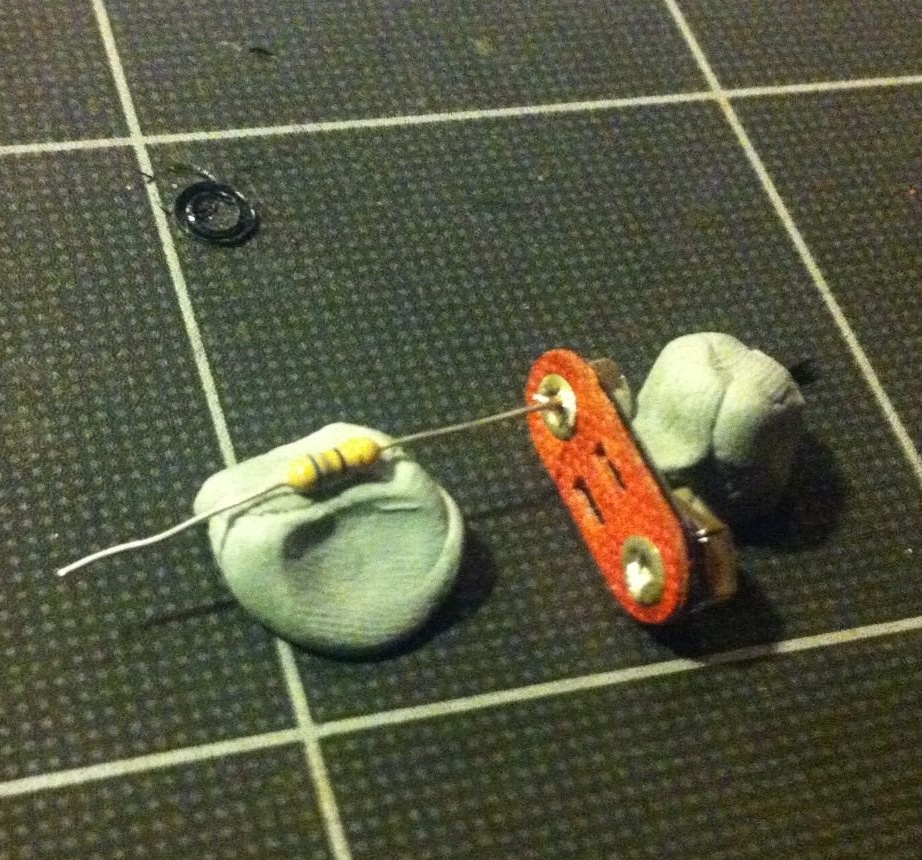
Solder a piece of copper wire (about 4 cm) to the negative terminal of the diode circuit. Figure 3 shows this step.
Step 4: Final Stage
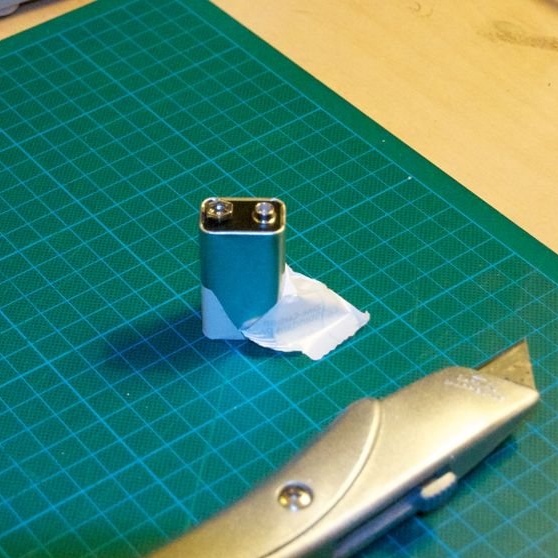
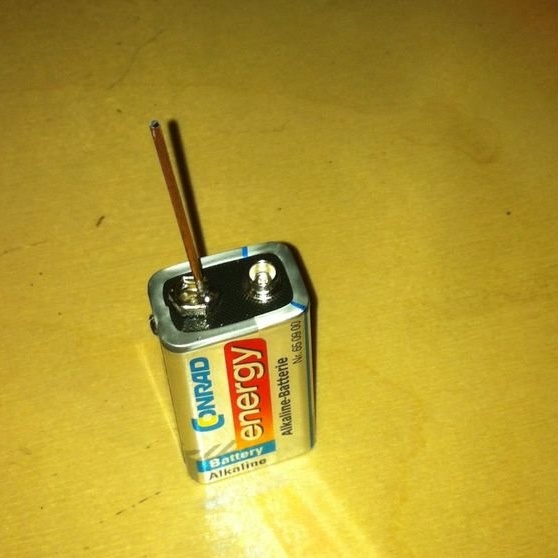
You are almost done! It remains only to solder a piece of wire to the negative pole of the battery.
There are a couple of features:
- Take a piece of wire, the same length as the one that you just soldered to the star.
- Put the battery down and attach the wire to the larger battery terminal (marked with a minus sign).
- To solder the wiring to the contact, make sure that both the wire and the contact are well warmed before adding solder.
HINT:
First fix the position of the battery and wire. Use adhesive tape, a third hand, or anything else to fix the battery and wire before soldering.
Finally, solder the other end of the wiring to the positive terminal of the diode star. Now everything is ready :-D
Liked? In the same way, you can make a Christmas tree. It requires a little more effort and patience, but the result will justify these difficulties! If you have mastered an asterisk, the Christmas tree is simply bound to turn out!
Step 5: Add Battery Clamp ...
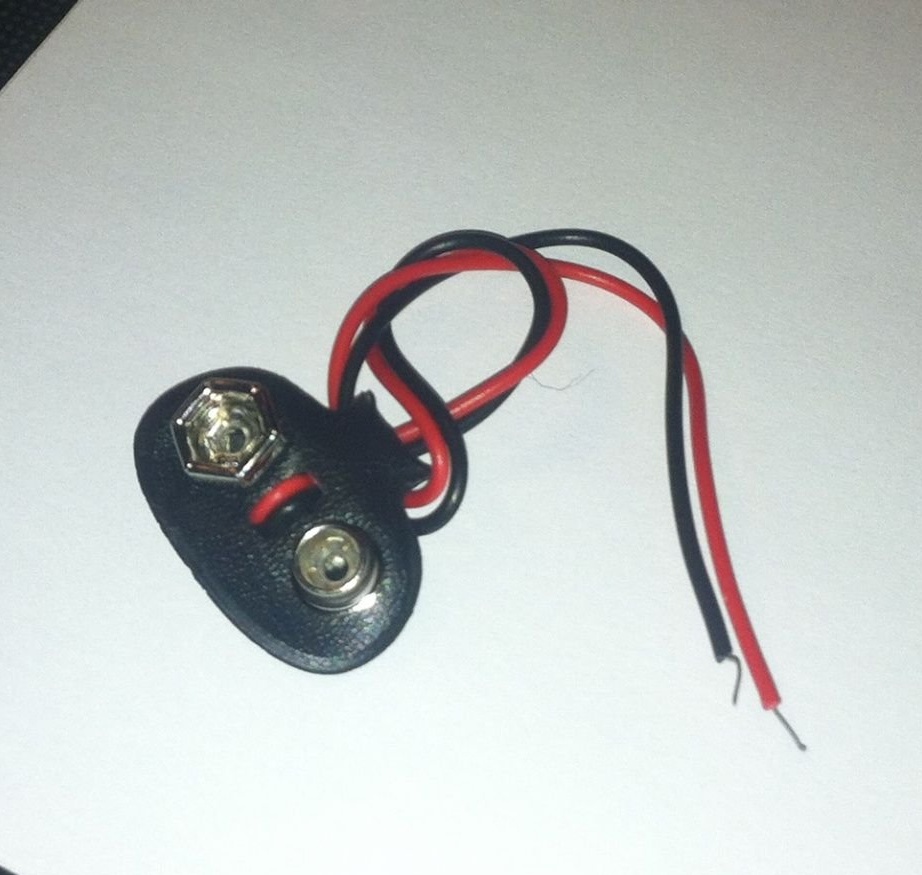
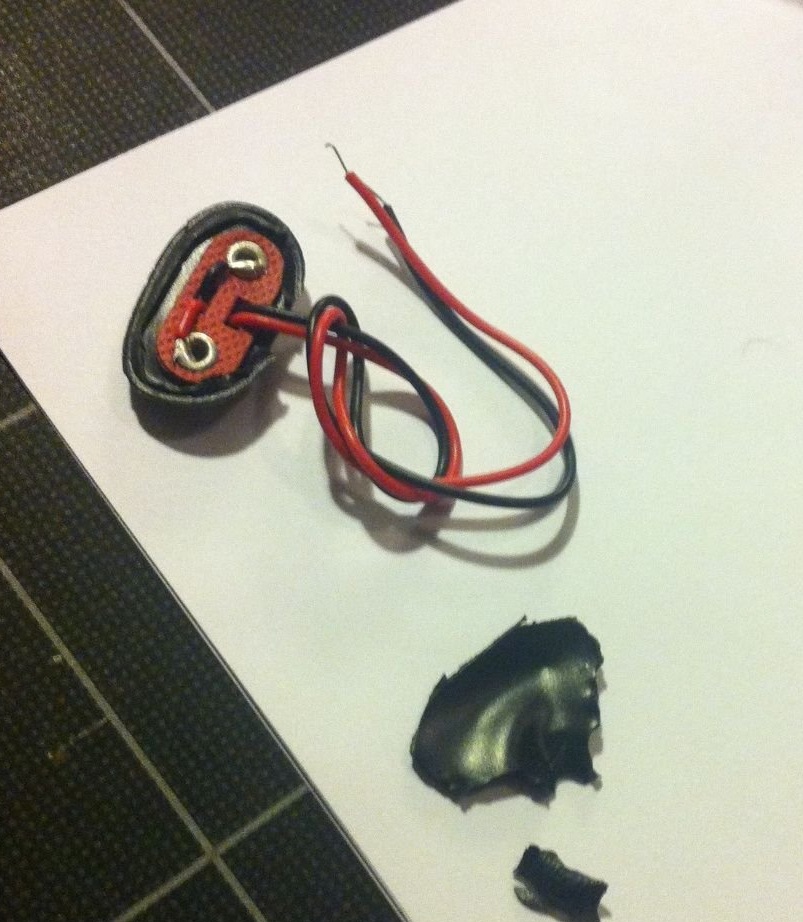
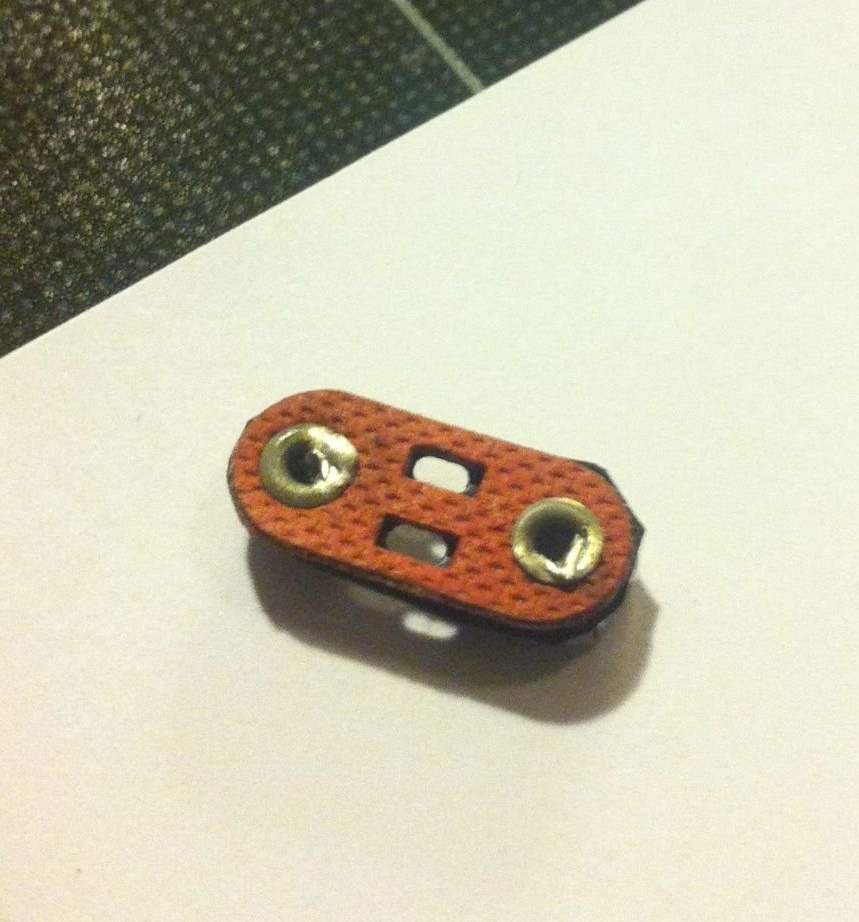
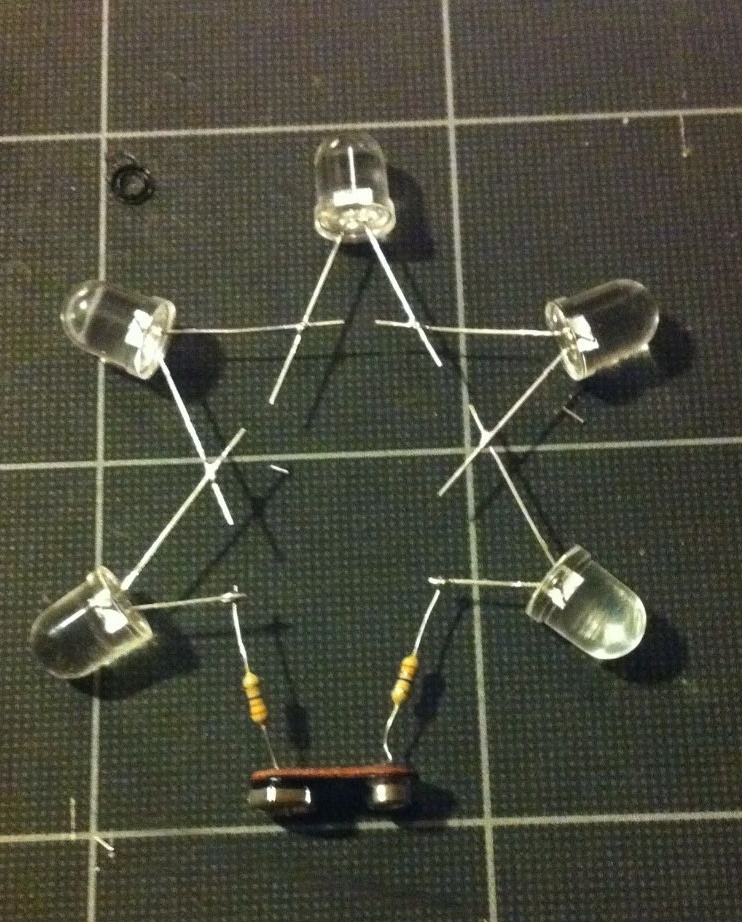
To make it easier to change the battery, I fixed the star on the inside of the clamp of the 9-volt battery. Instead of wire, I used 60 ohm resistors. Resistors limit the current flowing through the diodes, which extends the life of the batteries and the diodes themselves. Copper wire is more rigid than resistors. So this version is more fragile than the previous one.
These photos show the whole procedure with a clip, everything is pretty simple here:
- Cut the soft plastic coating with a sharp knife.
- Remove the wires from the connectors.
- Solder the 60 ohm resistor to the small connector.
- Solder the other end of the resistor to the negative terminal of the star.
- Solder another 60 ohm resistor to the positive terminal of the star
Gently attach the star clip to the batteries. And you did fine again :-)