


Hello, dear visitors of the site.
I am currently renovating an old house. In particular, I decided to make underfloor heating under the whole house. This creates comfort. This is especially true on the ground floor of the building. And in my case, this is also due to the fact that this house has very high ceilings. The "classical" heating by means of radiators is based on convection - the heated air rushes up, mixing with the cold. Therefore, with a large ceiling height, the effectiveness of such heating is reduced - in fact, in order to get a comfortable temperature below, we have to "heat" much more heavily under the ceiling. And heating through the floor works, albeit also on the principle of convection, but, in a slightly different way - unlike radiators, where the small volume of convection flow is compensated by its high temperature and speed, (It mixes with cold air) in the case of floor heating , significantly larger masses of air, heated not so much, slowly rise up. As a result, spending the same amount of heat, we get a comfortable temperature much lower! Which creates significant energy savings.
In this publication I want to share my experience and all my best practices on this issue.
As a rule, there are two types of floor heating arrangement - electric and "water".
Electric is easier to install and less expensive. But it also has significant drawbacks - higher costs for subsequent operation, less reliability and durability. In addition, its arrangement is regulated in the subsequent installation of furniture - under the furniture, the heating element may overheat and fail. There is a common misconception that the contours of the water floor can not be placed under the furniture! But this is a delusion! Water circuits do not generate heat! They just carry it! In the area where heat removal is difficult, and the floor temperature is equal to the temperature of the heat carrier, it (heat carrier) simply "will not give up heat", taking it further.
I, as you already think, have understood, I am doing it exactly "water floors".
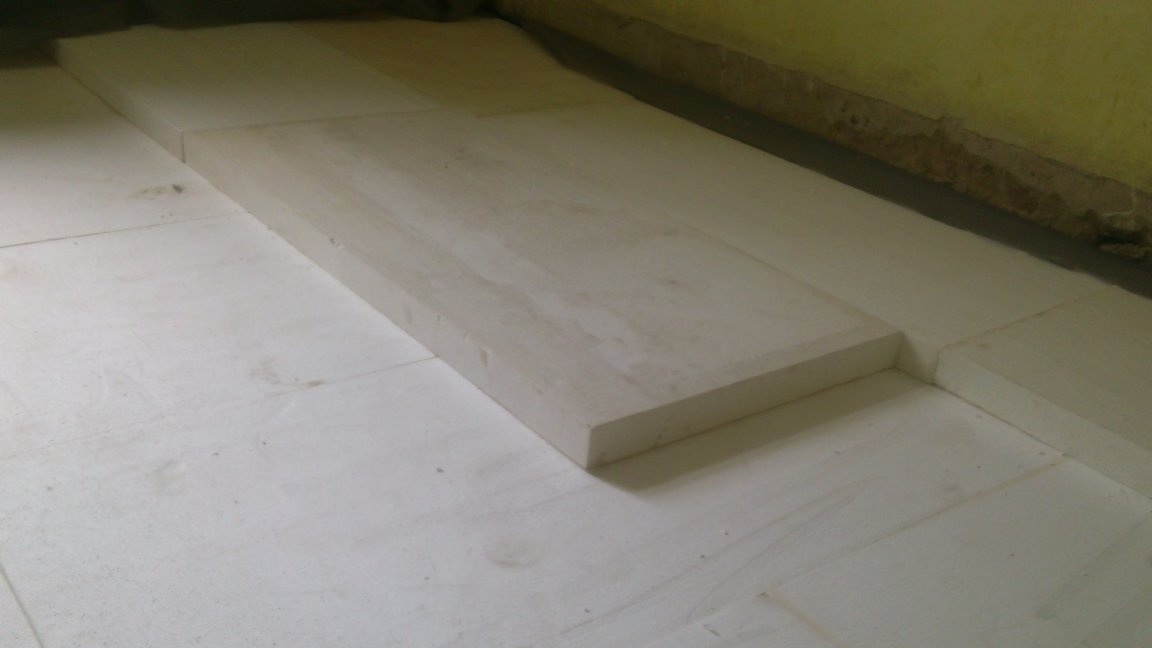
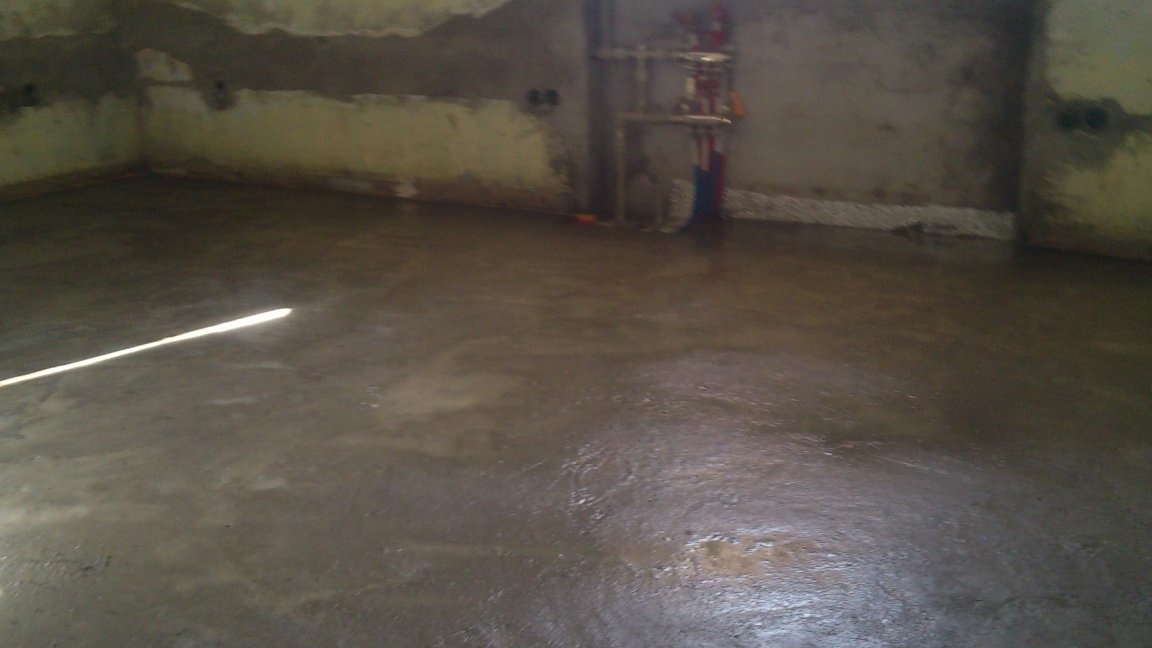
The floors in the house were wooden. I tore them off and poured rough screeds.
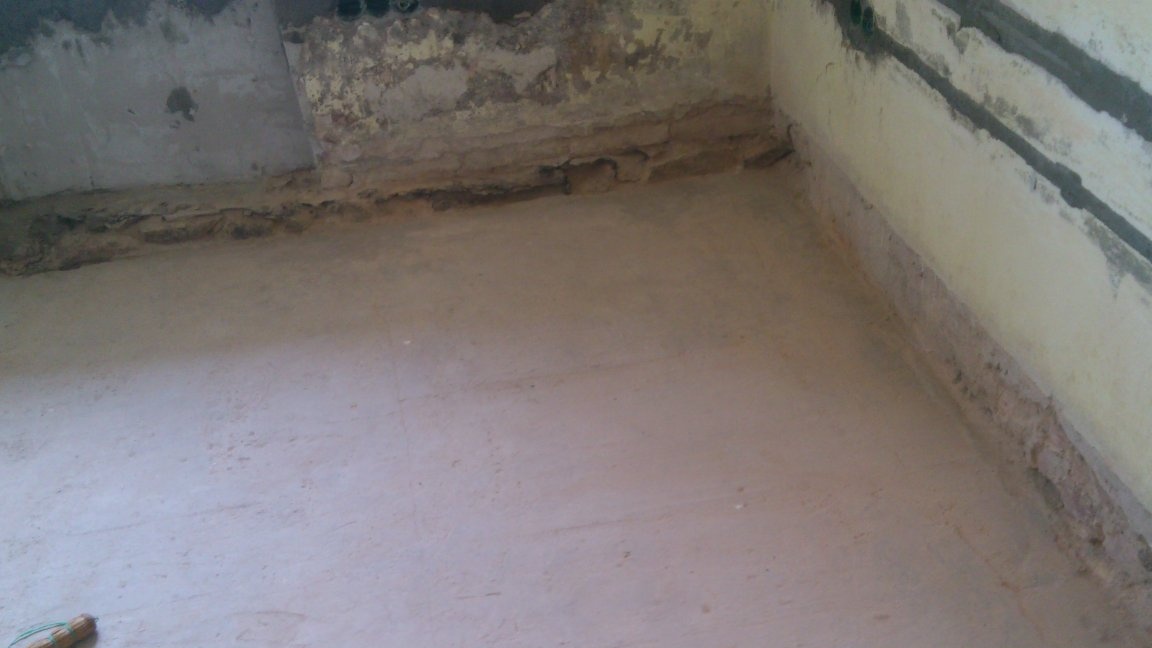
The purpose of the rough screed is to level the surface and prepare it for waterproofing.You can do this with compacted sand. But this entails high costs for waterproofing! Indeed, on an even screed, you can simply put the cheapest plastic film. And in the sand it can be subsequently damaged by the mass of the floor. We have to use more expensive types of waterproofing and spend more time and energy on this. At the same time, savings (only the cost of cement, because we use sand in any case !!) is reduced to nothing, or, on the contrary, it turns out to be more expensive!
Focus on the fact that waterproofing is needed in any case!
Even if everything is very dry and the groundwater level is very low, do not think that waterproofing can be neglected! Because when the floor is heated, condensation will form in the place of contact with cold soil !!! Accumulating in thermal insulation (and he has nowhere to dry from there!) It will nullify all its properties, and we will warm the soil! And over time, the insulating layer will completely collapse under the influence of moisture.
Therefore, I repeat once again, waterproofing is NEEDED IN ANY EVENT!
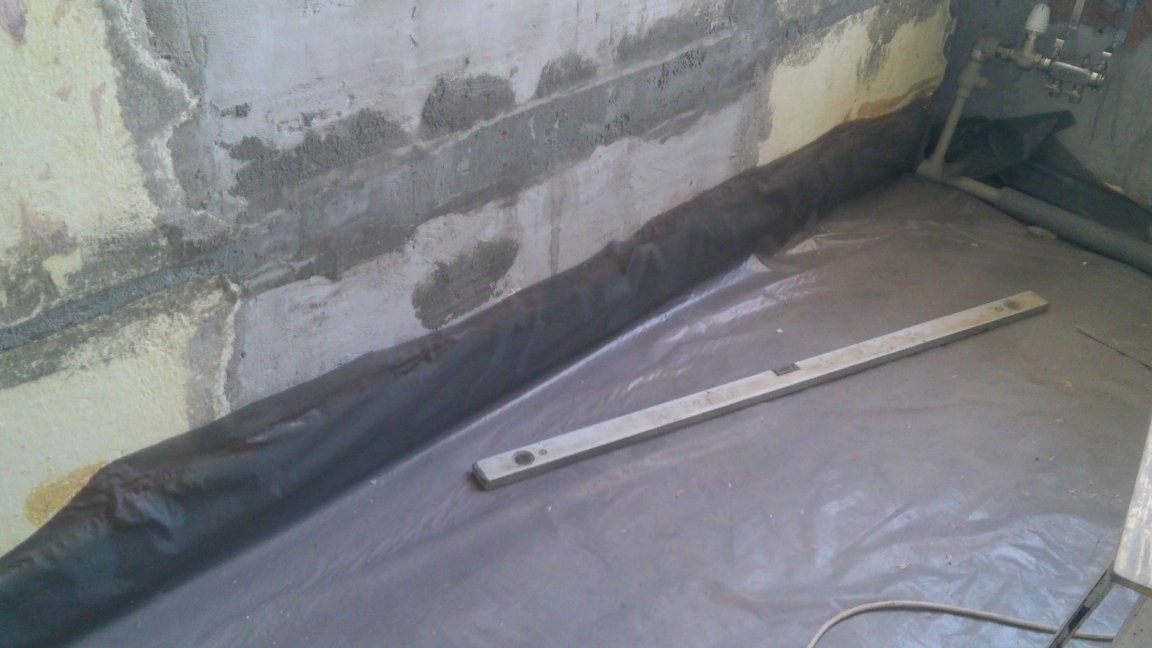
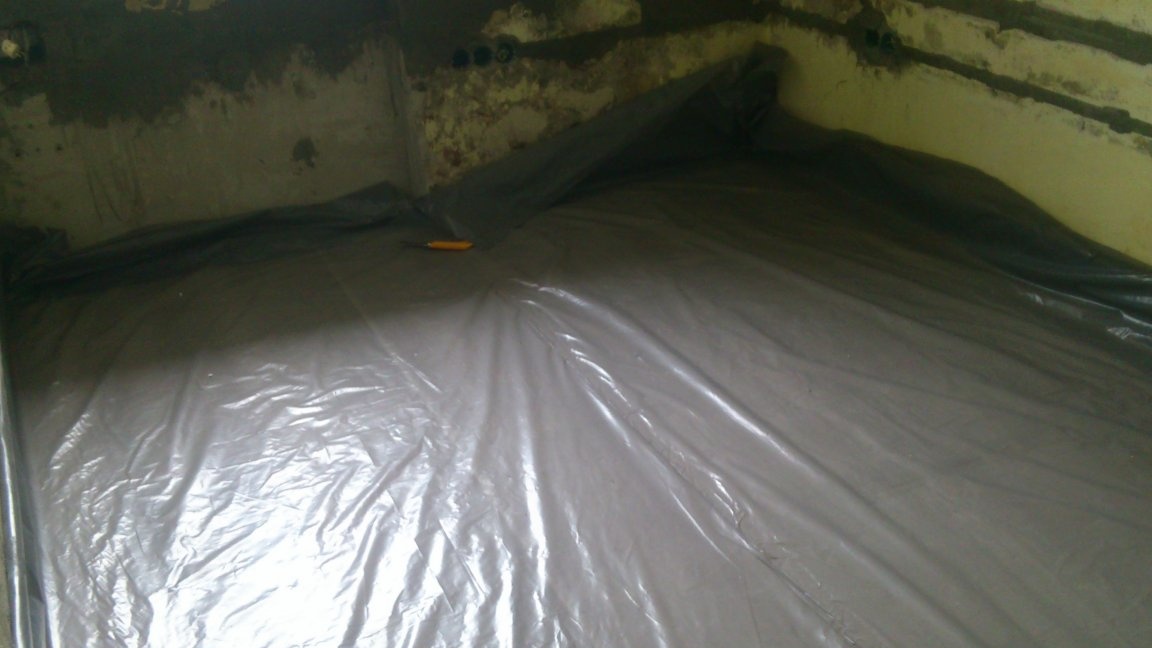
As her, I used the cheapest plastic film - the so-called “secondary” (made from recycled materials). All this will be flooded with concrete, so you should not be afraid of its "non-environmental friendliness.))) And, according to environmentalists, polyethylene in the ground, where it is completely protected from ultraviolet radiation, does not decompose up to two hundred years !!! (I wonder where they got this figure, if the material itself exists three times shorter?)))))) But we take the word ....)
I laid out the film so that the edges went onto the walls (Secured them with glue-foam). He launched the joints with a large overlap and carefully glued them with adhesive tape:
We pass above to the next layer of our "pie"!))). Thermal insulation layer.
I also heard misconceptions that strong thermal insulation is not needed, because "heat goes up" and "in any case, it remains within the boundaries of the house." Let's deal with this issue.
There are only three ways to transfer thermal energy:
1. Thermal conductivity. (direct contact transmission)
2. Radiation. (Infrared heat transfer)
3. Convection. (Heat transfer by a fluid or gas stream).
Only convection goes up !!! Only a heated stream of liquid or gas rises! Thermal conductivity and radiation transfer thermal energy in all directions evenly! If you clamp, for example, a heater between two plates, then the lower one heats up no less than the upper !!!
The same thing with a floor heating stove! If we do not make good thermal insulation under it, we will warm the soil inland more effectively than the air in the room! Because the soil has more thermal conductivity and the temperature difference is more significant! And for this we will burn fuel and spend money !!!
For thermal insulation, it is usually recommended to use high density extruded polystyrene foam (EPS).
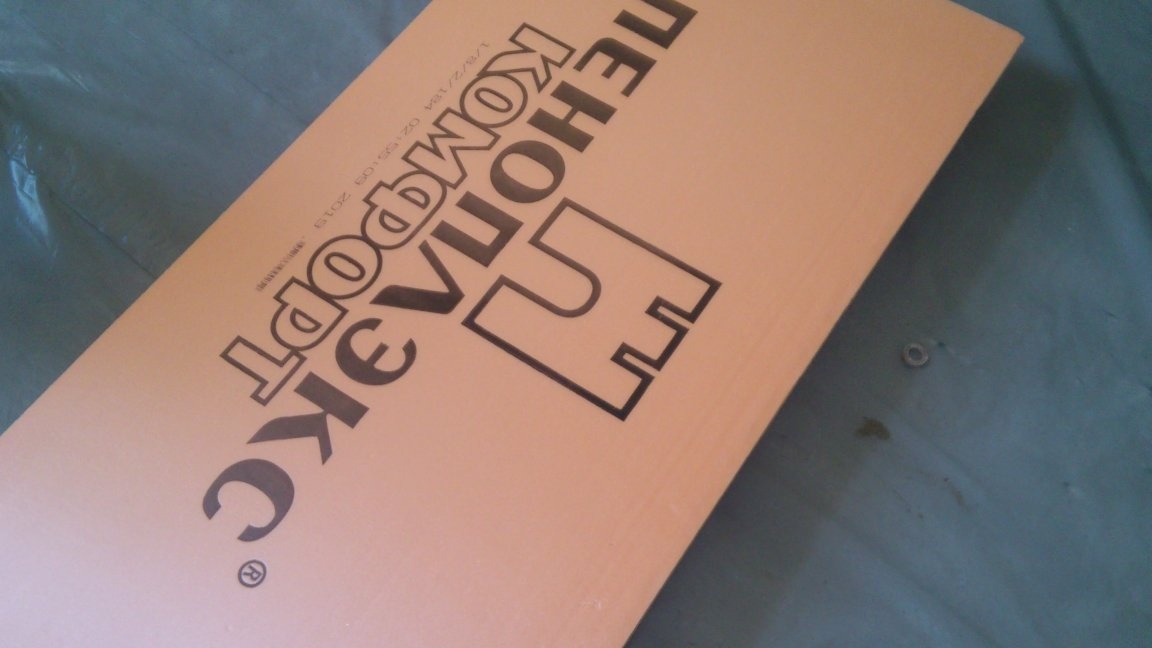
But this is optional. This type of insulation is characterized by higher moisture resistance, and also withstands greater mechanical stress compared to conventional polystyrene foam (We (Belarus), according to STB (a modern set of standards that exist along with GOSTs), it is marked PPT - "polystyrene foam plate heat-insulating ").
But, as practice has shown, the strength of a conventional PPT25 is more than enough for laying it under a screed (even according to SNIPs). I already spoke about waterproofing, therefore, this quality does not play a role either.
But compared to extrusion, it is much cheaper! And yet - in it the ants do not like to arrange their homes! ... (Yes, yes! This is not a joke! Small ants really like to settle in extruded polystyrene foam!)
The only advantage of EPPS when laying under the screed is that it has a “quarter”, which allows it to be laid without gaps. But I, for example, solve this problem simply - I lay not one thick, but two thin layers of polystyrene “with overlap”.
As my practice has shown, the PPT layer should be at least 50 mm. (I already did warm floors, and then laid 50 mm. The floor slab in the basement, as the pyrometer showed, is still 2-3 degrees warmer where the heating circuit is located above it.And this despite the fact that the air temperature in the room is the same everywhere. Maybe the fact that then I used one layer of polystyrene (without overlap) played a role. And, even at the slightest roughness of the base, it will not be possible to avoid cracks ... Just in case, in order not to warm the soil, this time I put 80 mm. (30 + 50). The first I laid a thinner layer (30 mm)
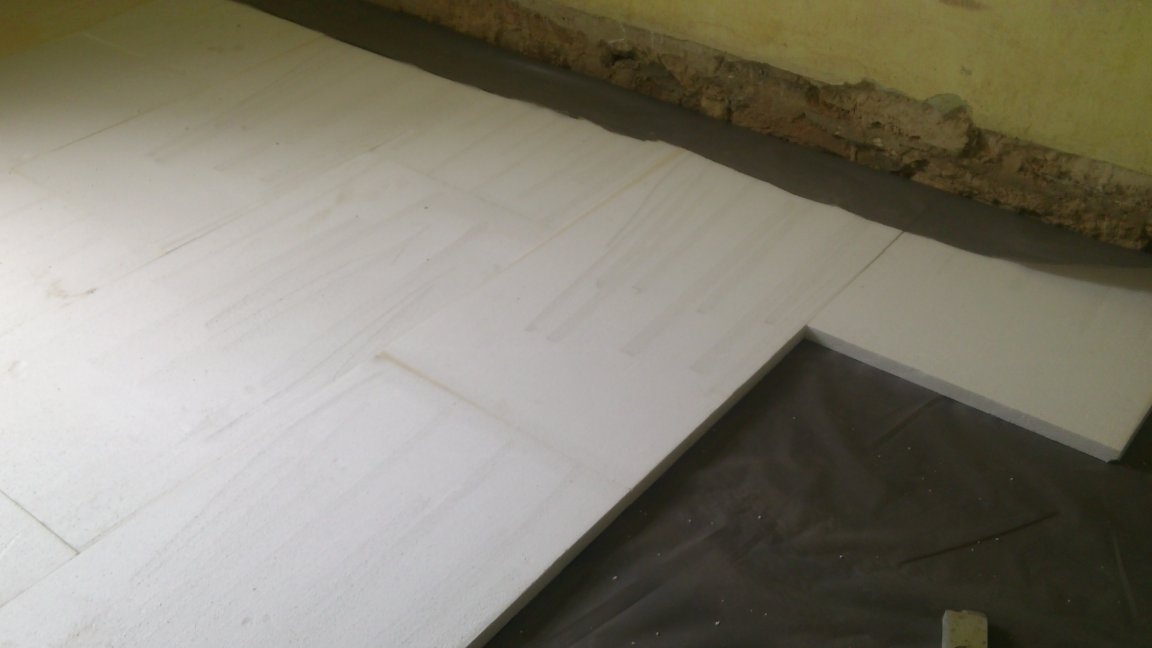
Then, on it - the second (50 mm). The thicker put on top is not casual. I was guided by the fact that in the process of subsequent work, I would have to walk a lot on it.

I worked in the evenings. Therefore, having laid one layer, I foamed the gap between it and the wall and left. For tomorrow I cut off the excess foam, laid the second layer and also foamed the perimeter. The mounting foam, expanding, squeezed the foam strongly, and the cracks almost disappeared.
Next, I put another layer of waterproofing - to prevent the penetration of moisture from the screed.
I will dwell on this in more detail ...
Recently (we, after all, live in the "era of marketing))))," sellers "are encouraged to think that directly under the heating plate of the warm floor, it is necessary to put a foil substrate made of foamed polyethylene! It is produced specifically for this, and are" sold " attributed to her a number of "irreplaceable properties":
1. Additional thermal insulation! (They offer me to buy a five-millimeter layer at the price of a thirty-millimeter PPT, which has about the same thermal conductivity))))
2. "The foil reflects heat up, which contributes to the significant conservation of thermal energy."

.... I knowingly put such a smiley.)))). Anyone who has studied at school should understand that only radiation can be reflected! And radiation is possible only in an environment that is transparent to this type of ray !!!!. Which concrete, of course, is not!)))))
There is no radiation inside concrete and cannot be !!!!! This is a lie!!!
3. "A layer of foil allows you to evenly distribute heat over the entire area, excluding the" thermal striping "of the floor ...
Again, ha ha, only a few times already!
..... Firstly, this layer is so thin that it can in no way affect the distribution of heat. (A screed made of dense concrete is much faster "dissipates heat on its own, than 0.1 mm of aluminum, which is located below, will do it !!! That is, the heat needs to go down, spread there and then warm up the entire screed evenly !!! )
Secondly, any thin layer of metal (and, especially, aluminum) in an aggressive alkaline environment, which is a cement mortar, decomposes instantly !!!! Any foil filled with concrete is oxidized in it and ceases to exist already during its solidification !!!!
(Here, the “sold” people went further ... They say: “Yes! It's true! But, you will pay us more money, and we will sell you the material in which the foil is protected from concrete with a transparent plastic layer!” ...
Uh ... But how then to be with what they repelled from? ))). Indeed, in terms of thermal conductivity (which is "very necessary for heat distribution"), it is now no different from ordinary plastic film! )))))
And finally, the most important thing ... This is not aluminum at all !!! This layer does not even conduct electricity !!! It's just "paint for metal"))))
(Comrades, we disagree, they are deceiving us!
 )
)So, in the role of the substrate for the screed, I use the same ordinary film.
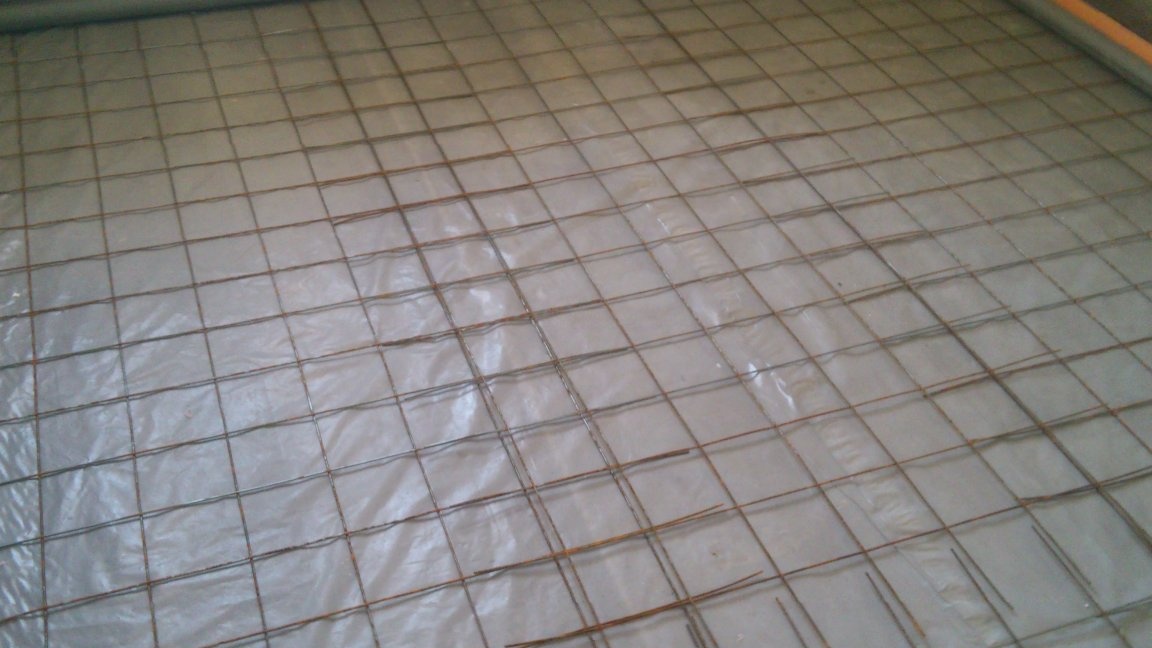
I laid out the reinforcing mesh on the film. Special spacers should be placed under it, so that it slightly rises above the base and fits completely in concrete. But, since I will fill myself, I will just shake the mesh in the solution. This is enough to make a thick solution fall under it and it does not sink to the base. (The fact that the mesh should be at the very bottom of the screed is due to the properties of concrete. Concrete is practically not compressible, but cannot stretch at all. It bursts immediately. And the reinforcement is needed in that layer that will tend to stretch when the load is applied from above - t. e., at the very bottom!)
Many, in order to save, do not produce reinforcement. A screed of this thickness can easily withstand the required loads. But I, nevertheless, use a grid. And it increases the strength of the screed at times, and it is convenient to fasten the pipe to it.
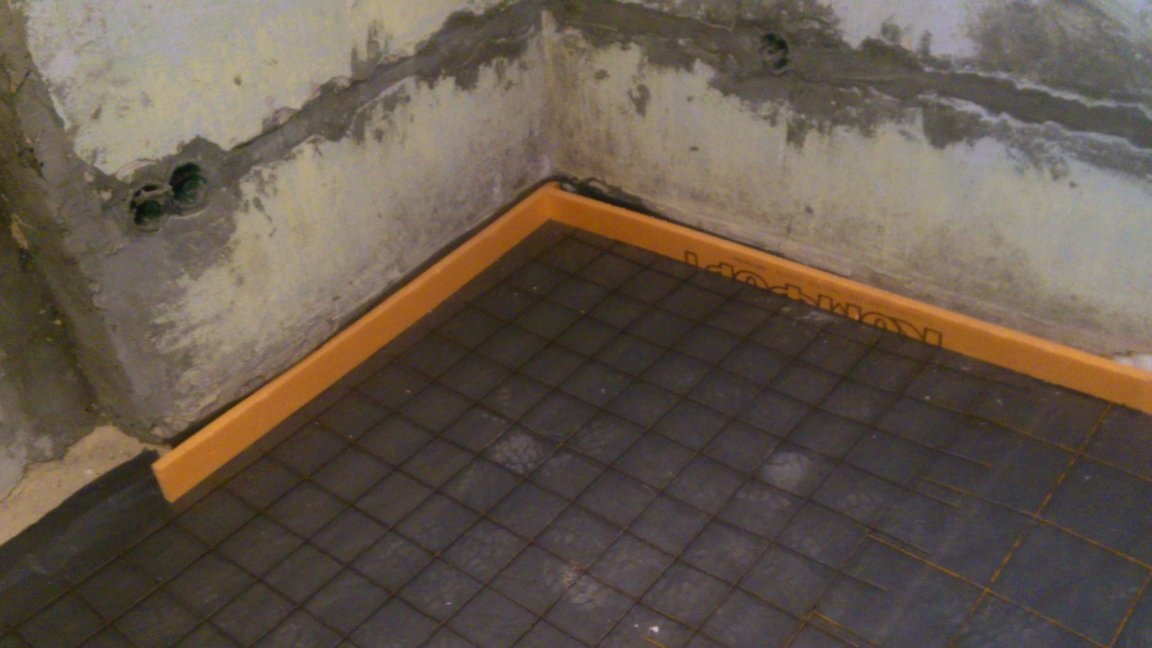
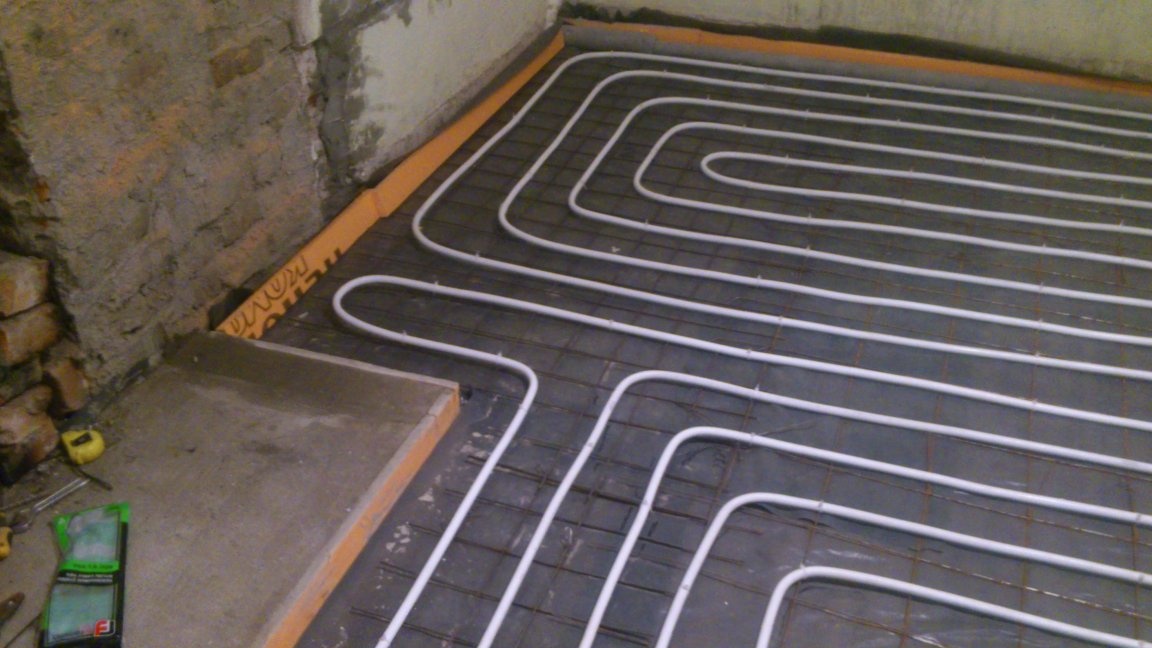
A damper layer is required along the perimeter of the room! After all, the stove will expand, heating up! Usually, everyone uses a foam polypropylene damper. I use EPPS strips, 20 mm thick:
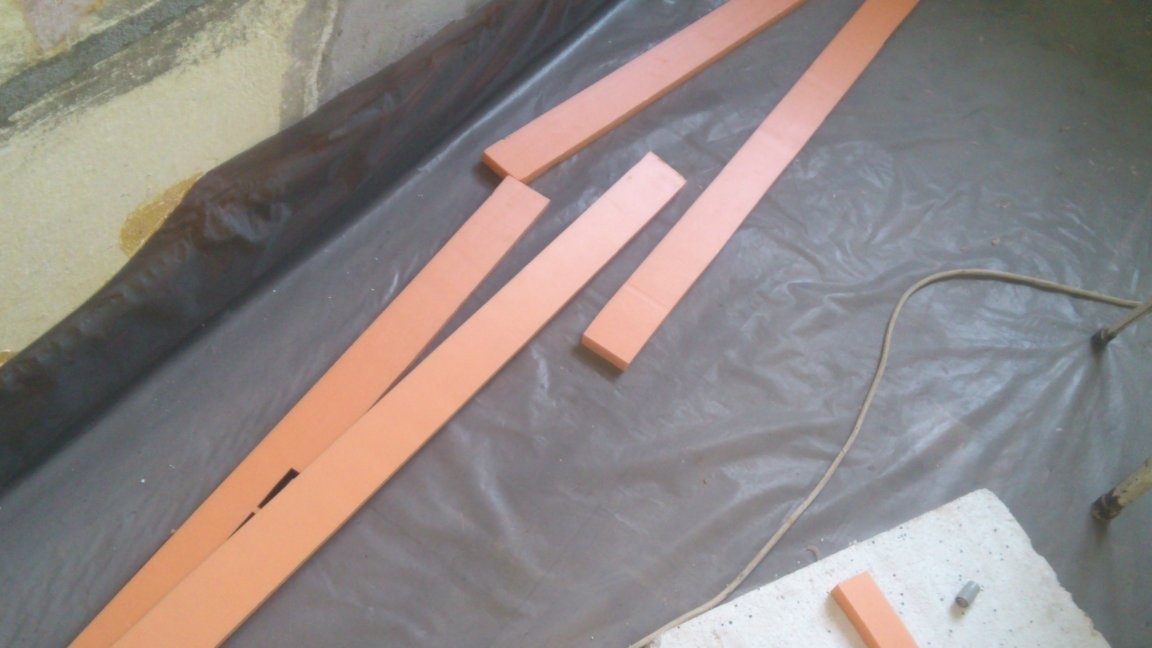
I cut them immediately to the width I need, glue the foam onto the walls immediately to the level, and they serve me immediately as dampers, and thermal insulation from the external walls, and additional beacons for screed:
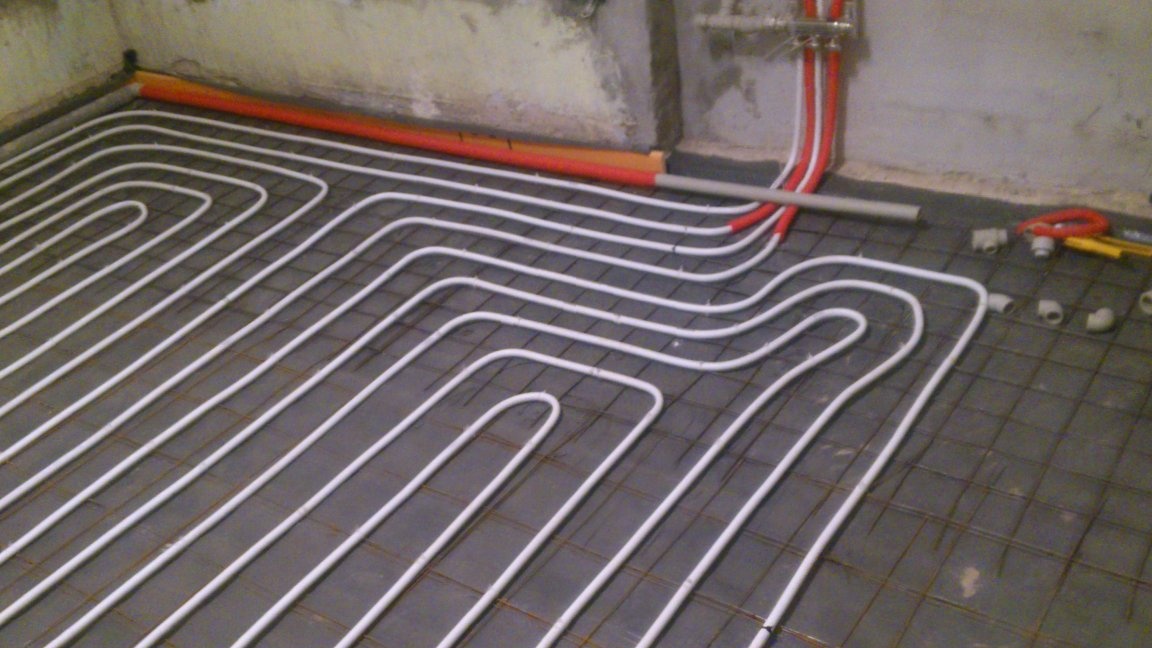
You can lay the pipe. When installing underfloor heating, a pipe is made of cross-linked polyethylene, metal, or corrugated pipes of stainless steel ("stainless steel"). Copper is not recommended because it is highly susceptible to corrosion in concrete. Polypropylene is not suitable for another reason - it cannot be laid on the floor without joints. And, since it has a very high coefficient of thermal expansion, it expands linearly (there is nowhere else in concrete))), it will immediately break the fittings!
Cross-linked polyethylene pipe is cheaper than metal-plastic. (I didn’t make a reservation! Not only any metal plastics can be used in floors !!! Only some manufacturers position certain types of their products as a pipe designed for use in underfloor heating systems! And such a pipe is several times more expensive than a conventional one designed for "classic" heating and water supply!)
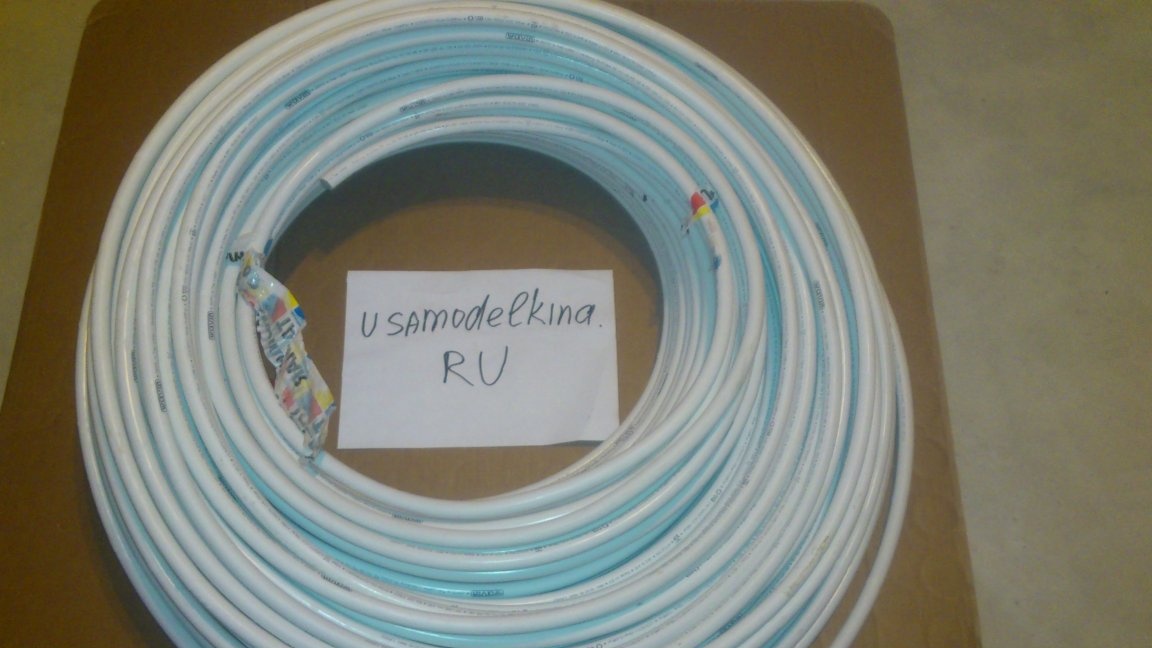
But it is much easier to work with metal, due to the lack of elasticity, and it can be bent at smaller radii! So, I chose the "classic version" - metal.
Now let's talk about styling methods.
If hired labor is used, the pipe is usually attached to polystyrene with so-called anchor brackets. (It is simply much faster and easier for them to attach so than to pull it with nylon ties to the reinforcement, and then also trim their ends.) But this is another case when marketing goes against quality !!! I do not understand the meaning in the waterproofing layer, if in the future it will be punched up to thirty times per square meter !!! So, I fastened the pipe to the reinforcing mesh using nylon cable ties:
When laying out the contours, it is important to follow a number of rules.
1. The circuit should not exceed a certain length (for a pipe of 16 mm - this is 80 meters). In general, the shorter - the better! Because this means a higher flow rate of the coolant (as a result, a smaller temperature difference) and a decrease in the load on the pump. So, it is better to make two circuits of 40 meters each and connect them in parallel through the collector ("comb")
2. The length of the contours should not differ much, otherwise it will then be difficult to balance the system.
3. You can lay "snake" and "snail". But, at the same time, it is desirable to alternate the pipe ("feed" and "return") - this ensures the greatest uniformity of heating the screed.
4. If the room is large, and it is necessary to make damper seams in the plate, the pipe should be laid in a corrugated pipe at the intersection of these seams. The same thing must be done at the place where the pipe exits the concrete.
5. The pipe must not cross.
6. There should be no joints in the screed! Only a single piece of pipe. (A fitting that will serve for decades "in the air" will burst in concrete very quickly !!! This is due to the fact that the pipe clamped on all sides during thermal expansion can only lengthen, squeezing the fittings!)
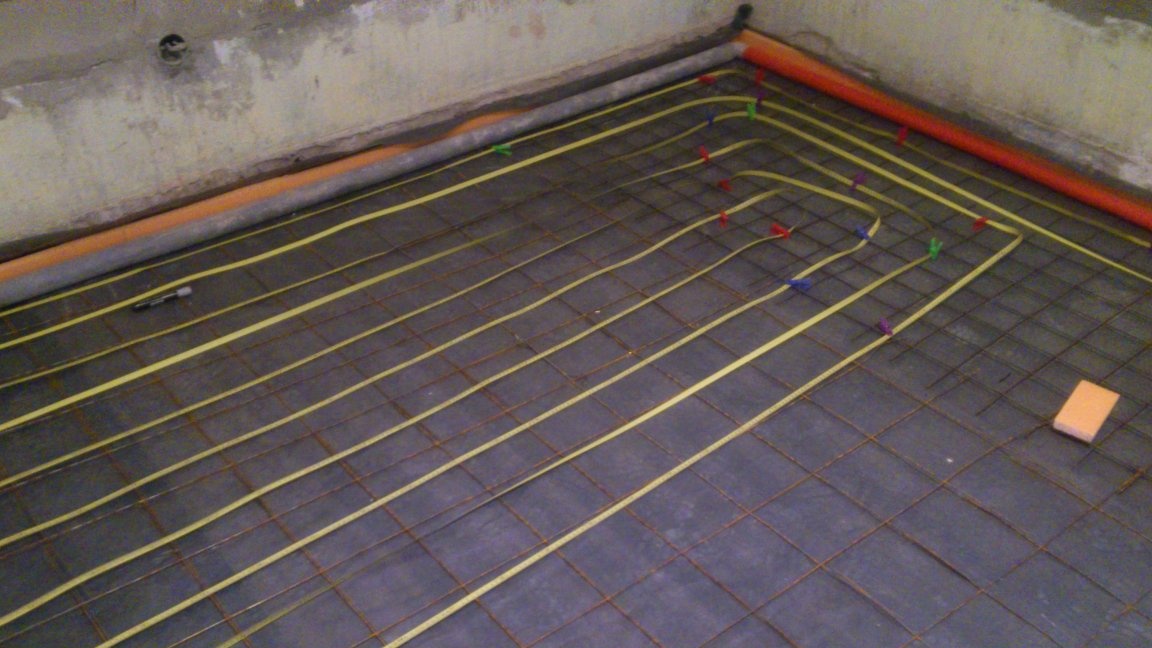
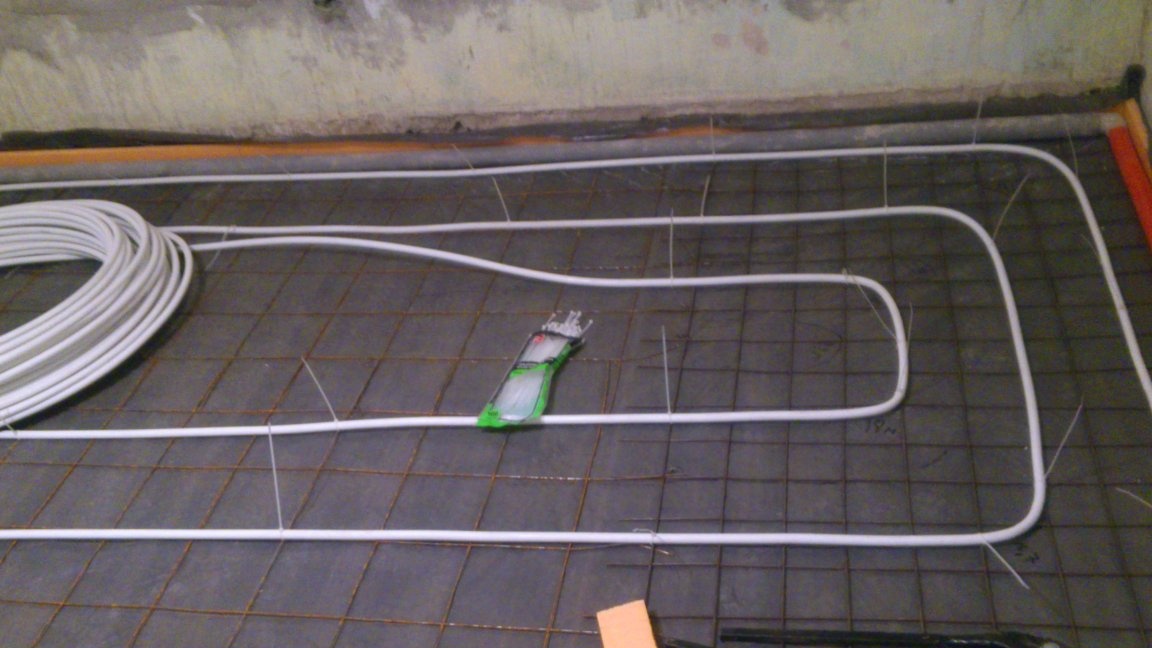
I lay with the double snail method. First, I lay the pipe with a step twice as large, and, having reached the middle of the room, I return back between the laid turns. I chose the “snail” method (aka “spiral”) based on the fact that in this case the circuit, as it seems to me, will have less hydrodynamic resistance, since in it only in two places the pipe turns 180 degrees, and in the rest - by 90. (If the room is rectangular in shape. If it is square - in only one!). And in the "snake every turn - 180 degrees.
In order to simplify the work of hired workers, the owners usually have to go to huge material costs. None of the mercenaries will bother with the layout in such a way that the contours are exactly the same length! (This is very, very difficult! I personally know!).Therefore, they are laid out "in fact." And the owners, at their request, buy very expensive collectors equipped with a valve and flow meter for each circuit! (As an example, I bought a stainless steel manifold for three circuits for $ 30. It is simple and equipped only with ball ("shut-off") valves. The same, but with valves and flow meters on each circuit, I saw for sale for $ 120 !!! (And this is so that ONE TIME, when starting the system, the plumbing could easily balance the contours!).
In addition, with such a folding inevitably waste pipe !!! After all, even a piece of pipe, 20-30 meters long, will not be used anywhere later !!!
I came up with a very simple method with which you can achieve the same contour length with an error (as I did) +/- 10 cm !!!
To do this, I use a long surveying tape measure and a set of the cheapest clothespins from the store with a fixed price!)))

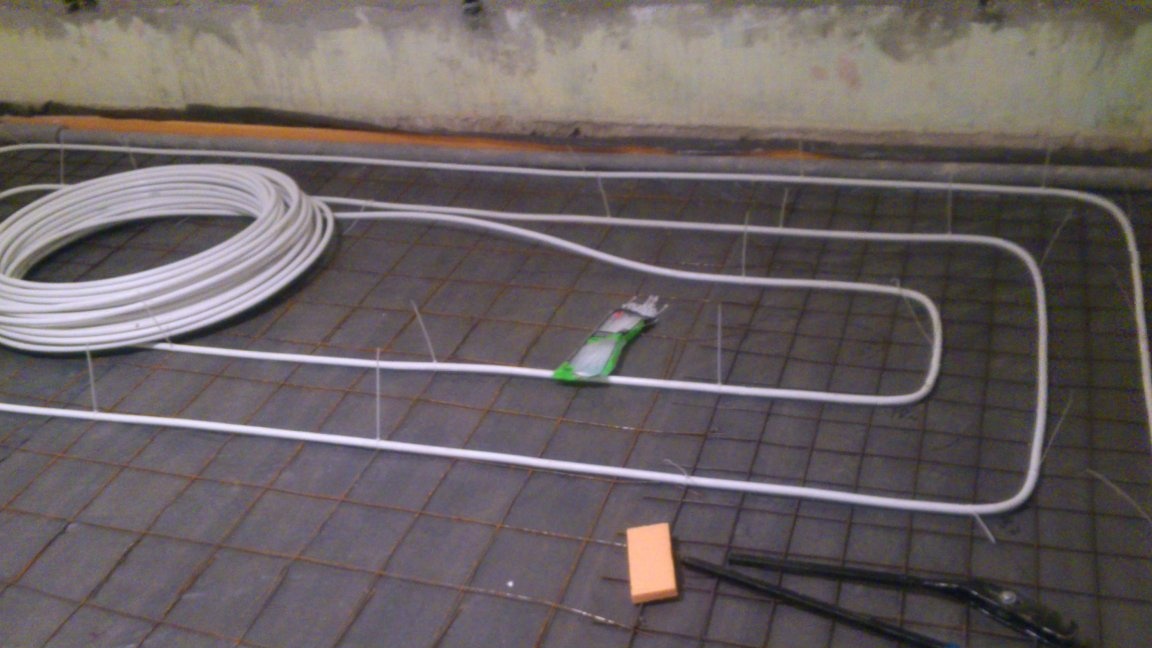
Having preliminarily estimated the “general layout map”, at first I do not lay out the pipe, but the roulette, fixing it on clothespins with clothespins.
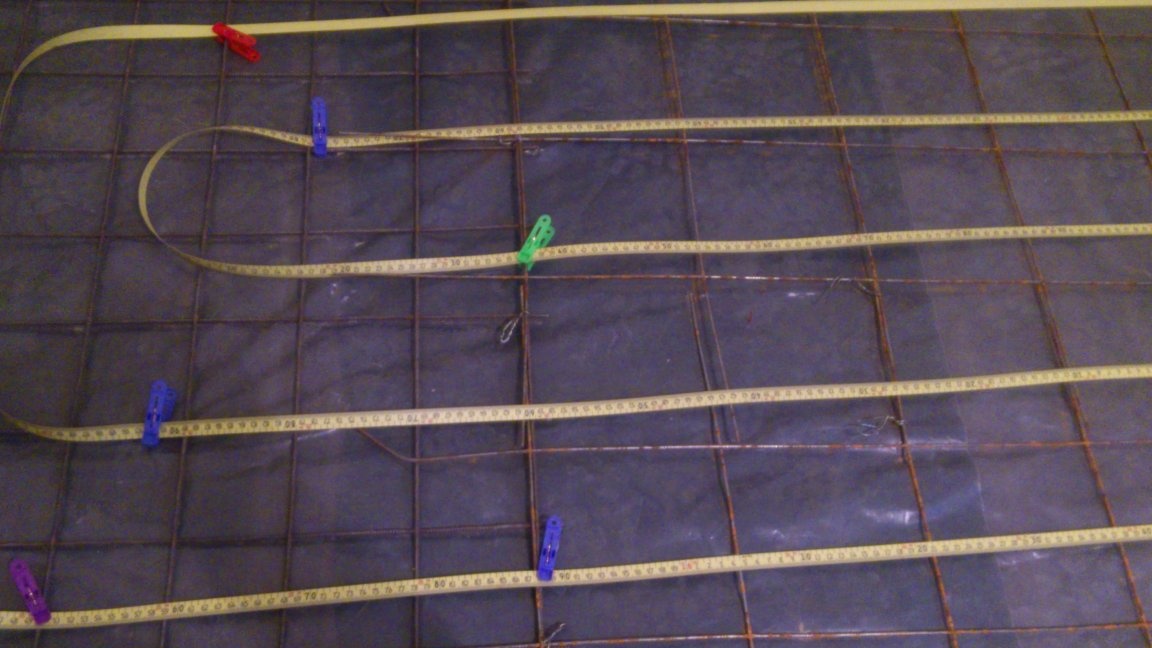
The fact is that turns and bends give a very large error. Since there are a huge number of them, then bending at an almost right angle (which helps me homemade pipe bender), or hollow, over a large radius, I can easily throw / remove a few meters! Of course, this takes time, but it saves a lot of money (as described above). In addition, having achieved the length of all the contours under all the rooms exactly forty meters, I completely, without residues and waste, used three pipe coils. (exactly 200 meters in one bay). This gave further savings - when buying in whole bays, the price per meter is much lower than when the pipe is measured and cut!
After the roulette is laid in the way the pipe will then lie, I marked all the turns on the film with a marker and marked the meter in all corners (so that later, when laying out the pipe, to check the correct laying. If anyone does not know, there is every meter on the pipe a figure indicating its length from the beginning of the bay)
We remove the tape measure and begin to lay out the pipe. (At the same time, it cannot be pulled out of the bay! The bay must be deployed and moved!):
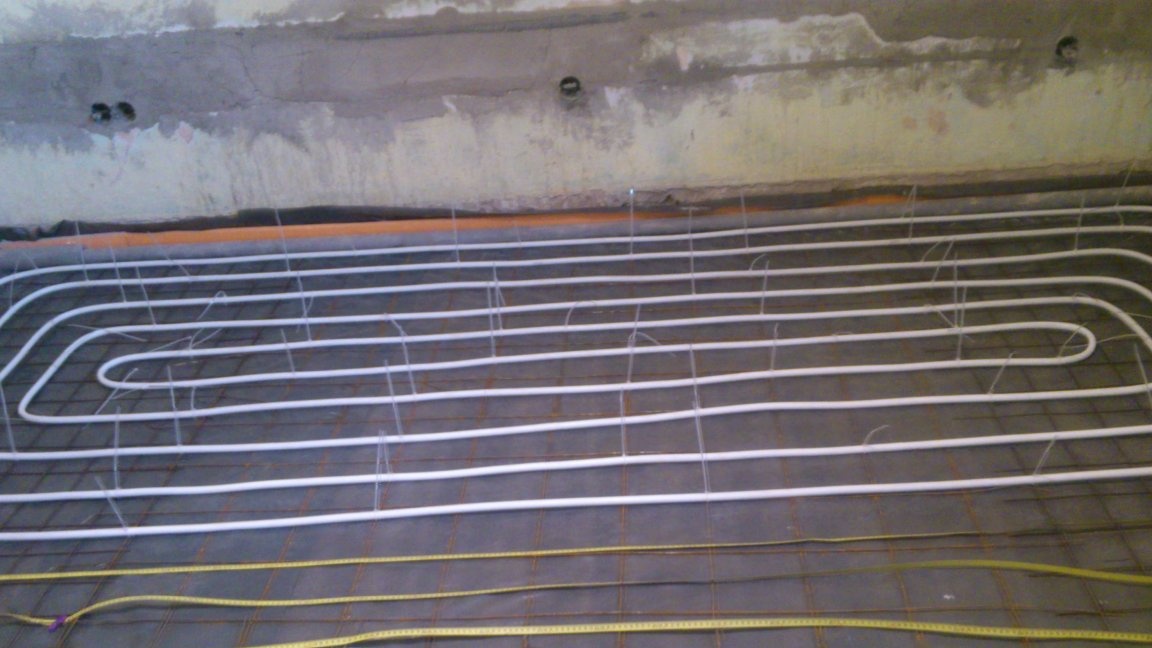
The photo does not transmit, but the step near the outer walls is 10 cm. In other places - 15 cm. As practice shows, such a step is most acceptable. It avoids the "striping" of the floor with a total screed thickness of 70 mm. (40 mm above the pipe). And such a thickness of the screed is a good compromise between the energy and heat capacity of the system! If you make it thicker, a “recall” for temperature adjustment will occur only after a few hours. If it is thinner, it will weakly "keep warm" and cool quickly.
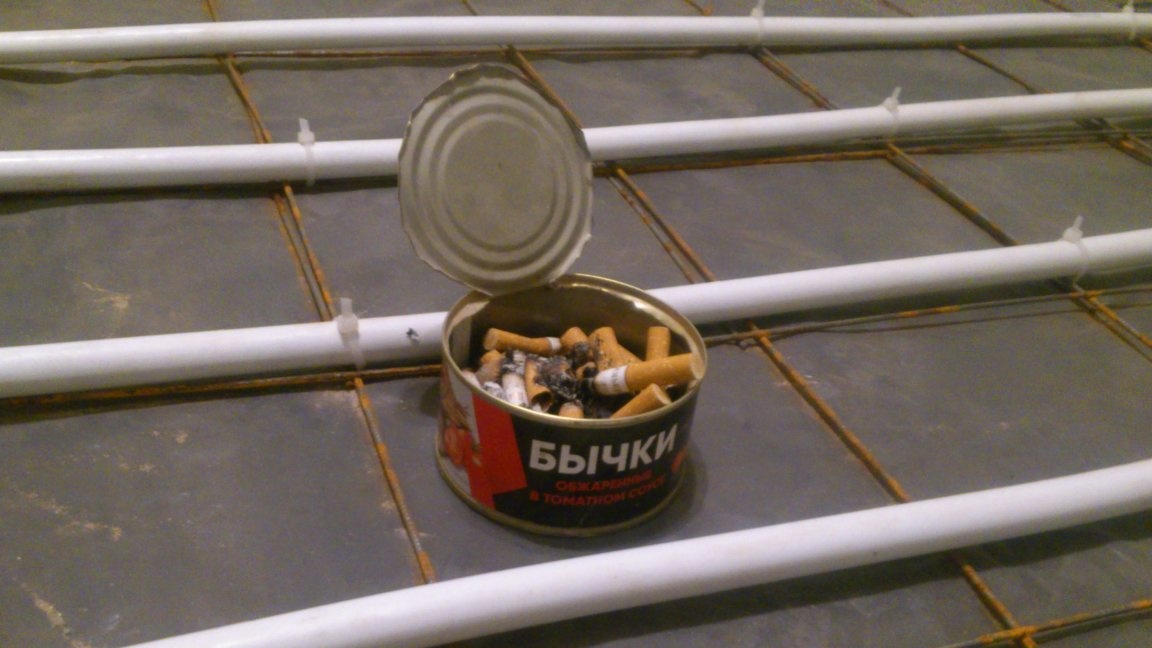
After laying the first contour - a smoke break! ))))
Let's go further!
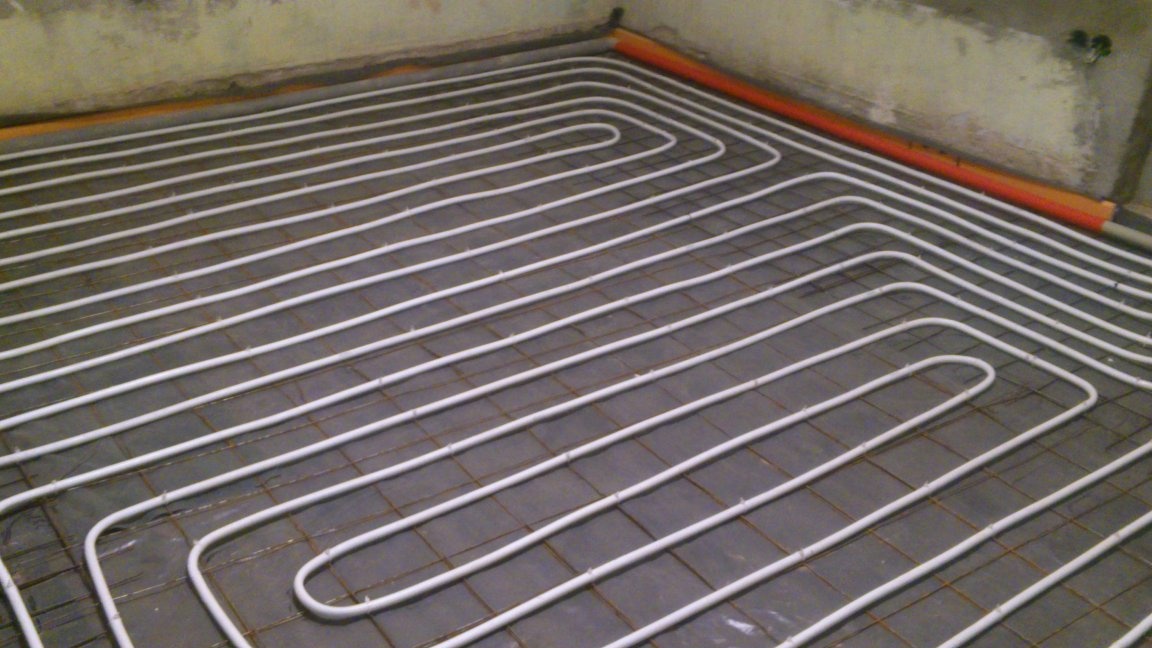
As you can see, this method allows you to achieve not only the equality of the length of the contours, but also the uniformity of the layout! In this room, for example, three circuits, exactly forty meters. And the pipe is laid out very evenly. There are no "cold" zones.
All. The pipe is laid. You can start pouring.
Yes, I almost forgot one more moment. Immediately after laying the pipe, it must be filled with water under working pressure! This is necessary to check the tightness, and so that the pipe during pouring is not deformed by the mass of concrete, or your boots))))). Since I do not plan to start the system this year (I do not have time to do all the required work in the room where the boiler will be located before frost), I have not yet connected the pipe to the combs, and, leaving the pipe ends longer, I mounted compression fittings on them and screwed on each on a ball valve. Through one I, through a hose, supplied water from a pumping station, through another I blew air. When the water went without bubbles, I tightly closed both taps, and transferred my efforts to the next circuit. After the screed is completely hardened, I simply cut the pipe to the required size, with the help of the compressor I blow out the water from the circuits (so that it does not freeze in winter), and then use the taps in the water supply system.
I did all the preparatory work in the evenings, after work. And he planned the screed on Saturday.If someone did not make screeds, I will explain - filling a room with an area of 18 square meters to a thickness of 70 millimeters alone is very hard and long work !!!! Enough work for the whole day!
A screed of a heat-insulated floor is categorically impossible to fill in several stages !!! Only at a time !!! Otherwise, then, when it warms up, cools down, it will certainly crack along this border! And, with it, the pipe will crack !!!
Therefore, in order to cope in one day, I, figuring out as much as possible exactly, the right amount of materials, drove into the house a wheelbarrow of sand, pouring it in the corridor in front of the door and stacked the right amount of bags of cement right in this room.
My old concrete mixer, who has already built one house for me, will help me in the work.)))) I also put it right in the room, making sure that the wheels and support do not get on the pipe:

I will dwell in detail on the composition of the solution. When using hired labor, it is advisable to do the so-called semi-dry screed. It is carried out by a semi-automated method (the solution is supplied by a concrete pump from an automatic mixer), therefore it is done quickly and work on its manufacture is cheaper than the work of filling the classic screed with the “wet method”. In addition, a semi-dry screed practically does not shrink, and its surface, remaining flat, can be a ready-made basis for the final coating.
The usual ("wet") screed after hardening is never even! Therefore, it requires surface leveling with self-leveling compounds.
But I decided to make the “wet” screeds, because, firstly, I don’t need to pay for the work, and secondly, they, unlike the “semi-dry” ones, have several times higher density. And, although I’m not going to drive a truck around the rooms, but a higher density and hardness contribute to higher thermal conductivity and heat capacity! (The “stone” warms up much faster than the “porous pumice” and accumulates more heat.))))
I will dwell on the composition of the solution. Many, in its manufacture, neglect a number of very important "little things."
The first (and most common) is a neglect of the quantity and quality of water. Many people think that this does not play any role, clean water is not necessary (anyway, it pours into the “dirt”, and excess does not hurt - it “dries”!))))
Firstly, "greasy" substances can be dissolved in dirty, muddy water, which significantly reduce the concrete grade (such as clay), and secondly (and most importantly!) The water from the solution does not dry out anywhere !!! She connects and stays connected there. Therefore, its excess is very (very, very)))) significantly reduces the brand !!!
Correct is the ratio of water to cement (M500) 1: 1 By weight! But with such a hard solution it’s very difficult not only to work - it’s even difficult to prepare it! Because it sticks in the concrete mixer and rotates with it in one lump!)))) ...
By the way, thorough mixing of the solution is also one of the most significant factors of its quality! At its core, (roughly) cement is "glue for grains of sand." And the final result depends very much on how much each grain of sand is uniformly lubricated with this glue !!!
For this reason it is necessary to add a plasticizer!
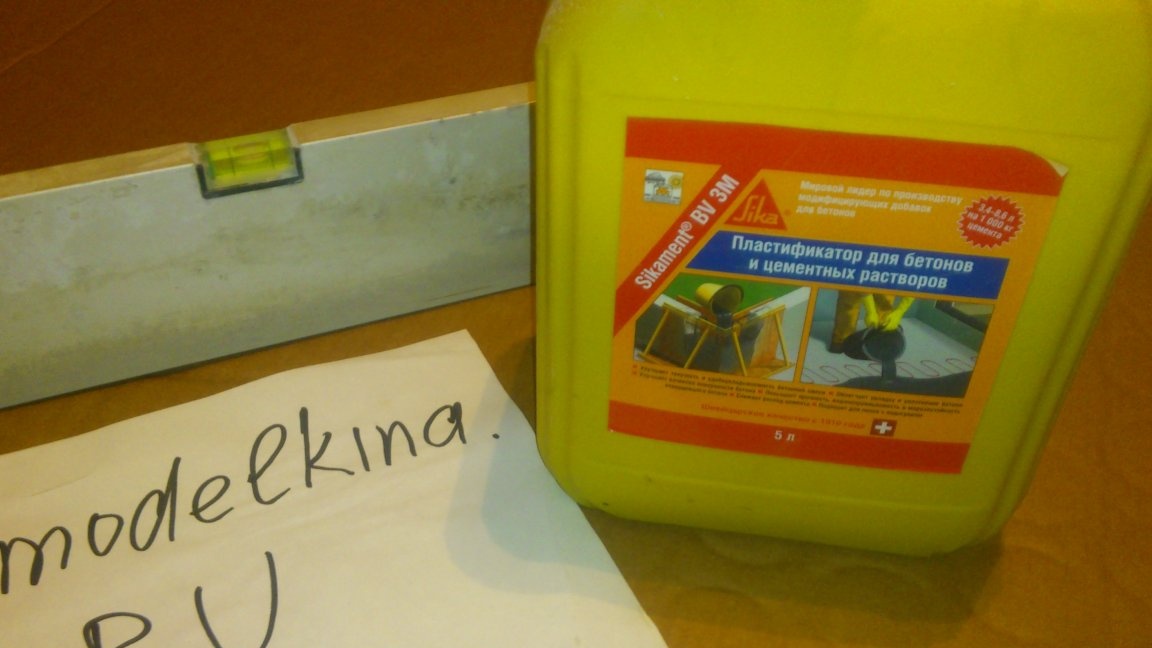
Many people think that a plasticizer has certain “chemical” properties, giving concrete frost resistance and density. In fact, a plasticizer is just a very effective “sand grain lubricant”. And all of the above properties are achieved due to the fact that we have the opportunity to prepare a plastic and well-mixed solution using less water! (That's why it will be of a higher grade and frost-resistant).
In addition, when laying, it is much easier to seal! With increased fluidity, it quickly condenses itself ("sits")!
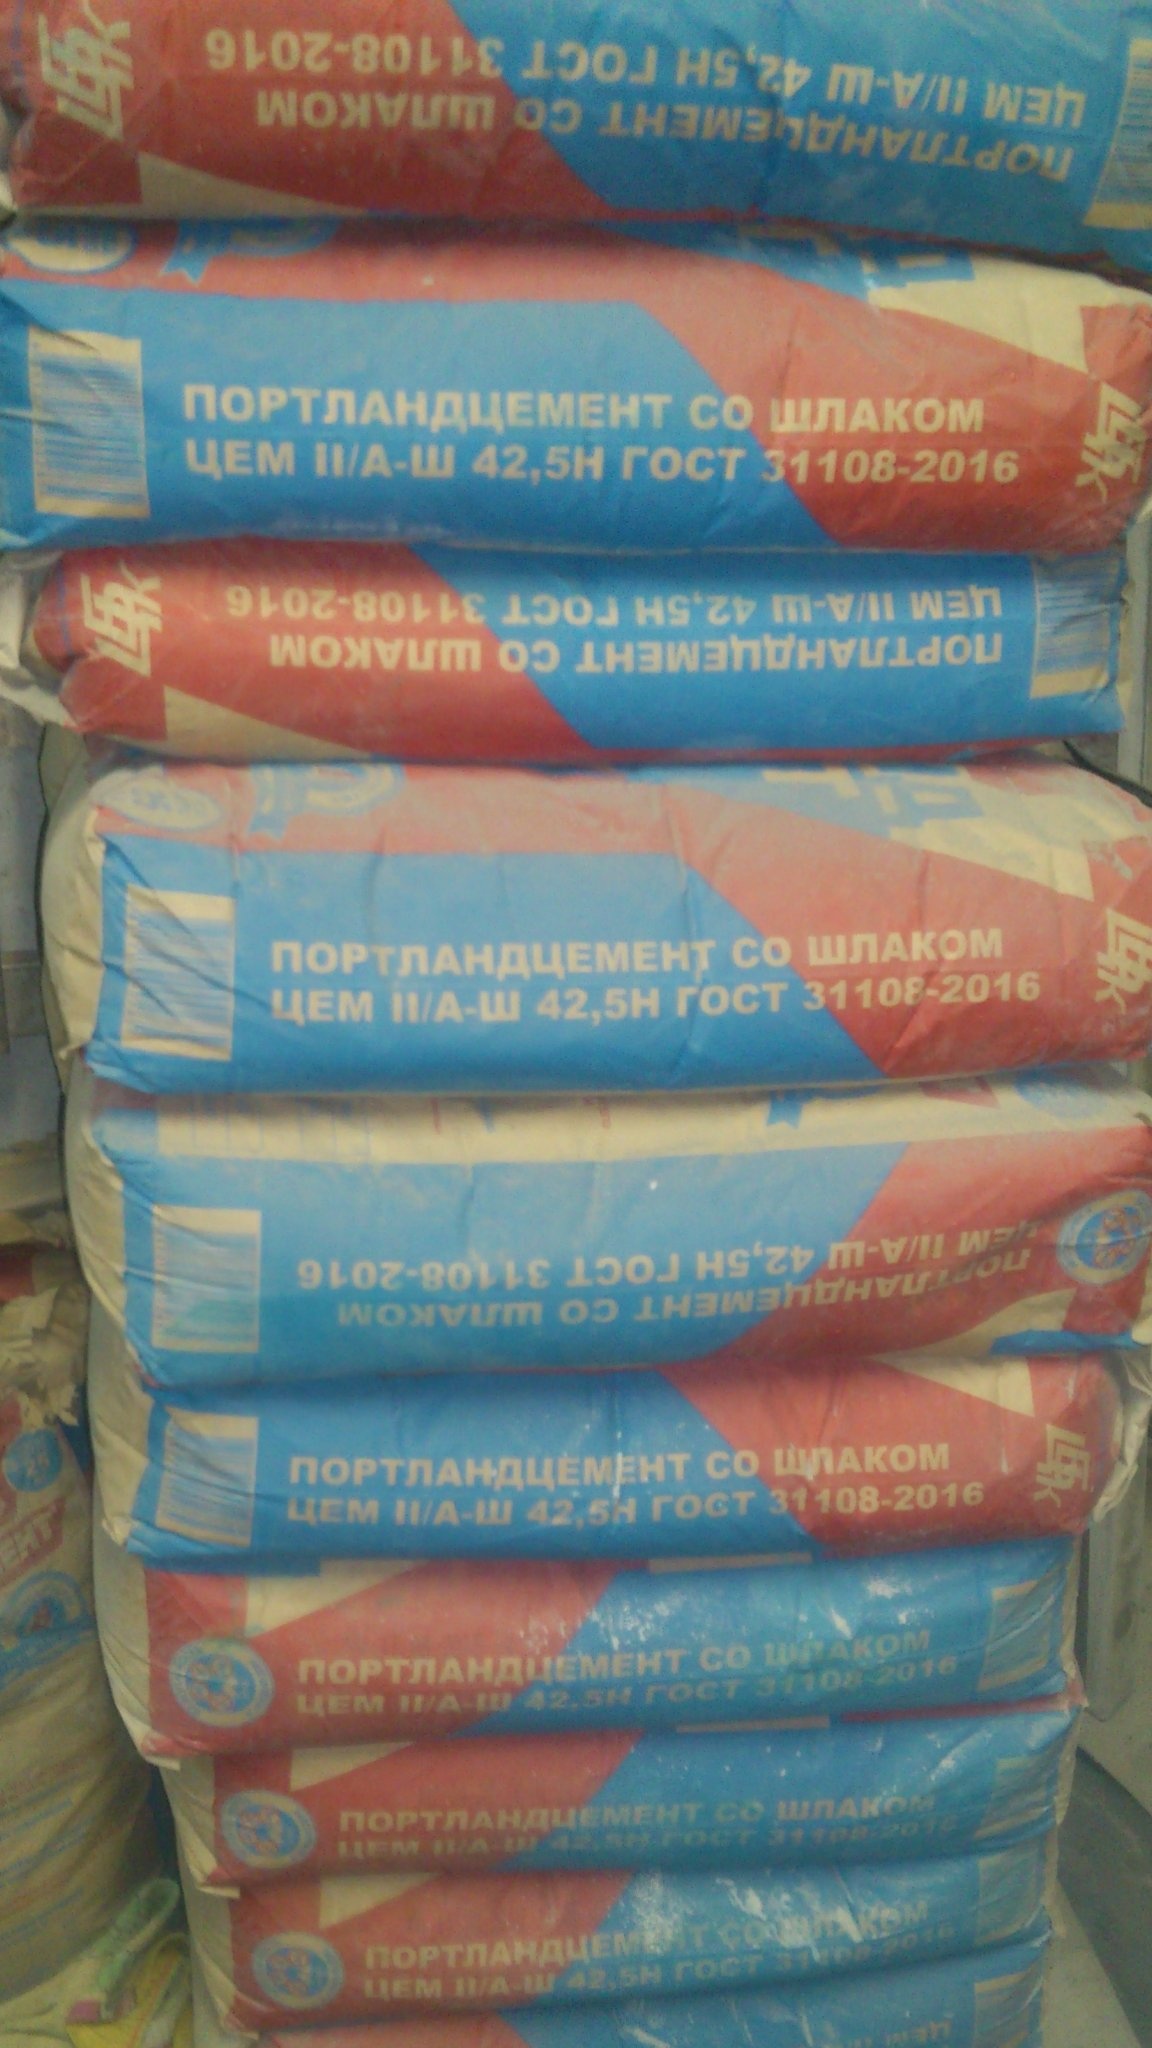
We have two types of cement on sale: M500 D0 (it is without additives) and M500 D20 (it contains 20% of additives). Once upon a time, the 400th came across for a long time, but in the last ten years it has not been seen, so let's talk about the "500th".
There is a common misconception that concrete prepared on D0 cement is stronger than on D20. Therefore, everyone is trying to buy only "zero".Without analyzing, people attribute this to the fact that “diluted is not needed! We only take clean! Although it is more expensive, concrete will be stronger !!!” And the "Particularly gifted" say that "you can sprinkle it less." When you try to explain to them that he is not stronger (after all, the strength mark of both is the same - M500), they motivate their position with the fact that "why then only D0 goes to paving slabs and monuments? !!!"))))
It's true. By production of a tile and monuments only pure cement is used, without additives! But it is not a matter of durability at all !! And, just, in the time for which he gains this calculated strength! "Zero" stiffens the very next day !!!
That is why, for screeds, I always use cement M500 D20. It is cheaper, and the screed can be wiped the next day, corrected with a spatula along the walls! Yes, and in a day you can still!
So, this is his quality in this case - only for the benefit! But, in the manufacture of tiles, on the contrary, no one wants to keep their molds filled for several days! ))))
Now about the sand. As you know, the stronger and harder the grains of sand - the stronger and harder the screed. The dust particles are porous, therefore, the sand should be washed if we want a very strong screed. The best quarry sand gives the best result, but the river sand is cheaper (the river sand is round, so the concrete made of it is not so strong.). We have not far from here the largest sand and gravel mix in Europe. There is an enterprise that sows ASG in fractions, rinses and sells sand, sifting out different fractions and rubble stone. (That is, ASG disassembled into fractions!)))).
A few years ago I bought washed sand of the highest category from them, since I needed to fill the floor above the basement, and I needed very strong concrete. Since transportation costs make up the lion's share in the price of sand, I bought 10 tons at once. (Although I needed one and a half). But one and a half no one is lucky, and five out of ten at a price differ by 10-15 percent!))). So then I decided to take a lot - it’s useful at a construction site. Used then as needed, carefully covered the rest with a film, in order to avoid hit of garbage and seeds of plants. Now I worked for him.
The proportion of the solution is 1: 3 (cement: sand). Water, as already said - by weight of cement. Plasticizer - according to the instructions on the package. As practice has shown, concrete from coarse-grained washed sand with such proportions and good mixing is stronger than stones. (I’m not joking. I had to peck after two years the plate I had flooded with me))). When I met a stone - work accelerated! It is easier to break it with a perforator than "blue" concrete!))))).
A concrete mixer stood right in my room. I measured everything with buckets (I specially bought four identical plastic buckets at the Traffic Light)))). First he poured a measured portion of plasticizer into a bucket, then he poured up to half a bucket of water from a hose. I poured it into a concrete mixer, turned it on and added a full bucket of cement. while preparing "milk", poured sand into buckets. He poured out three buckets with interruptions, otherwise he would “crumple”. When the solution was thoroughly kneaded (this can be seen from the fact that the “cool” hard solution showed fluidity that was not characteristic of it before!), Dumped it directly onto the floor! Under the concrete mixer.
The concrete mixer was “charged” again (fortunately, the buckets were full while the first portion was in the way). And he, with a shovel, carried the solution.
He worked in rubber boots. At first, he spread the solution evenly, throughout the room, until he completely concealed the pipe. In this case, after laying the solution, shook the grid. The solution got under it and back it did not miss, even if you put pressure on the mesh with your feet.
This room, which is in the pictures, was already the last. In the first I used foam dampers along the walls (mentioned above) and profile pipes with a section of 40 by 25 mm as beacons. I laid them on embankments from the mortar, set them with a rubber hammer, and pulled a screed over them. Then he took them out and filled the caverns remaining from them .....
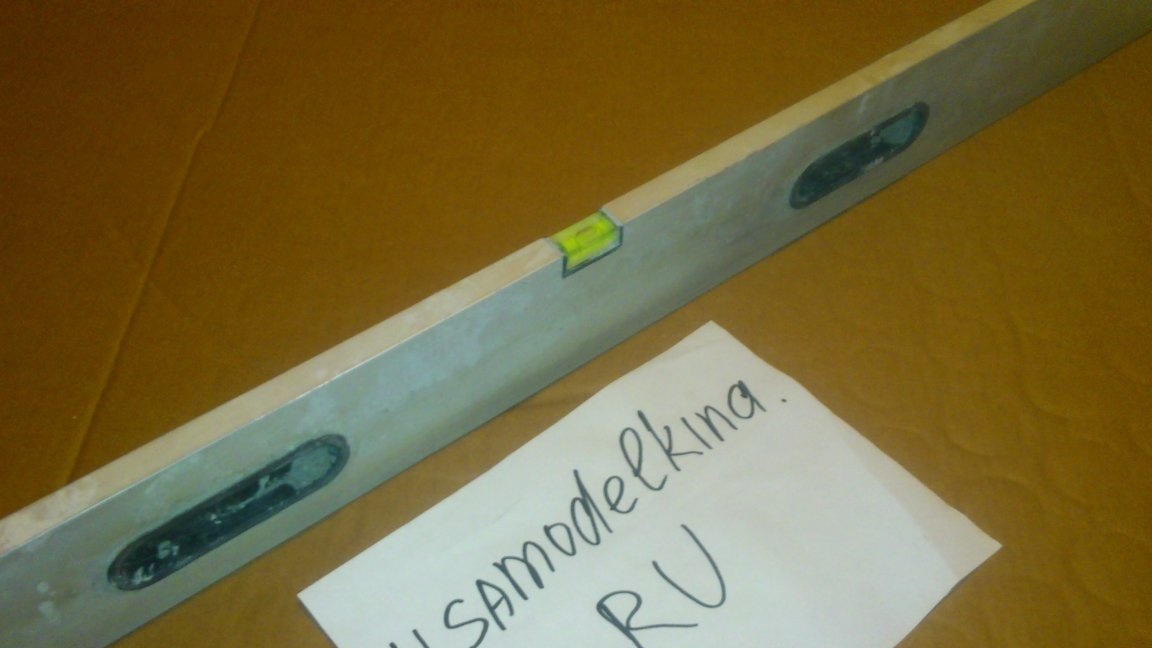
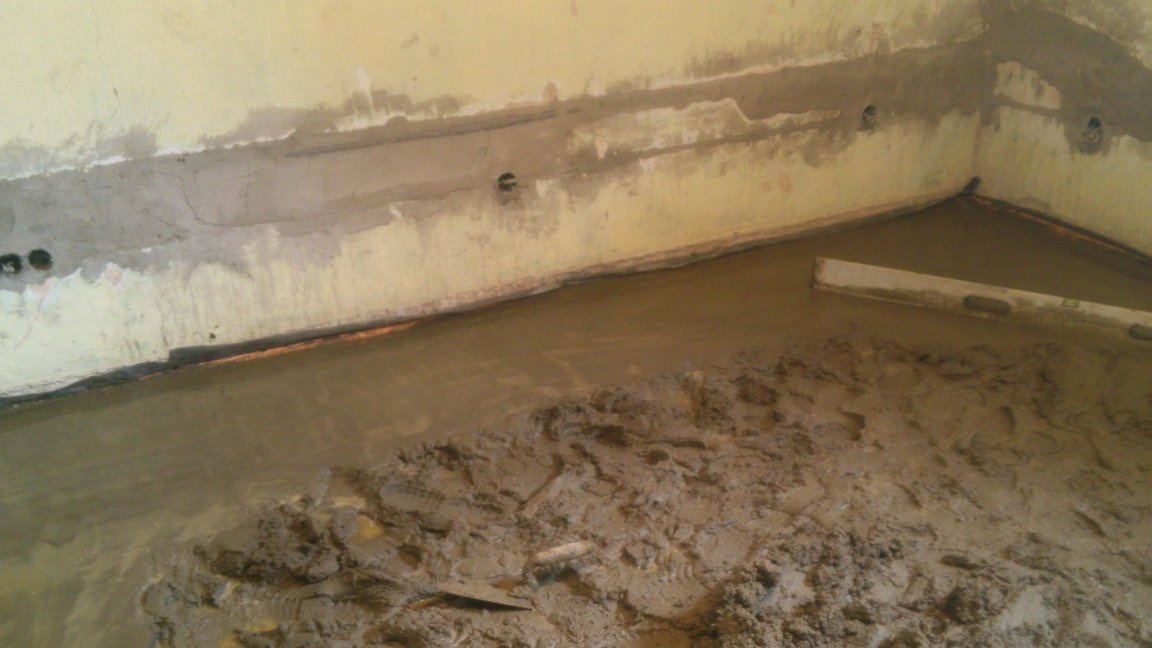
Then I realized that you can do without pipes, using only pieces of polystyrene that are placed on a level along the walls and such a level:
And in the end, it was so lazy that I didn’t do any lighthouses at all!))))).Even the foam along the walls was too lazy to stick to the level. Just attached it as it happened and that’s all.)))). He managed without any beacons.
When the whole pipe was hidden, I began to lay the mortar along the walls. At the same time distributed and compacted it foam grater so that it was "about a little higher than necessary")))) So, in a few hours, went around the whole room in a circle. By this time, that solution that I put first, already sat down well and I began to level it, rubbing the level with an even area of the required height. As a "starting point" in height, I had a doorway, behind which a screed was already ready, and also, the foundation under the fireplace, which I had flooded earlier, served as a lighthouse.
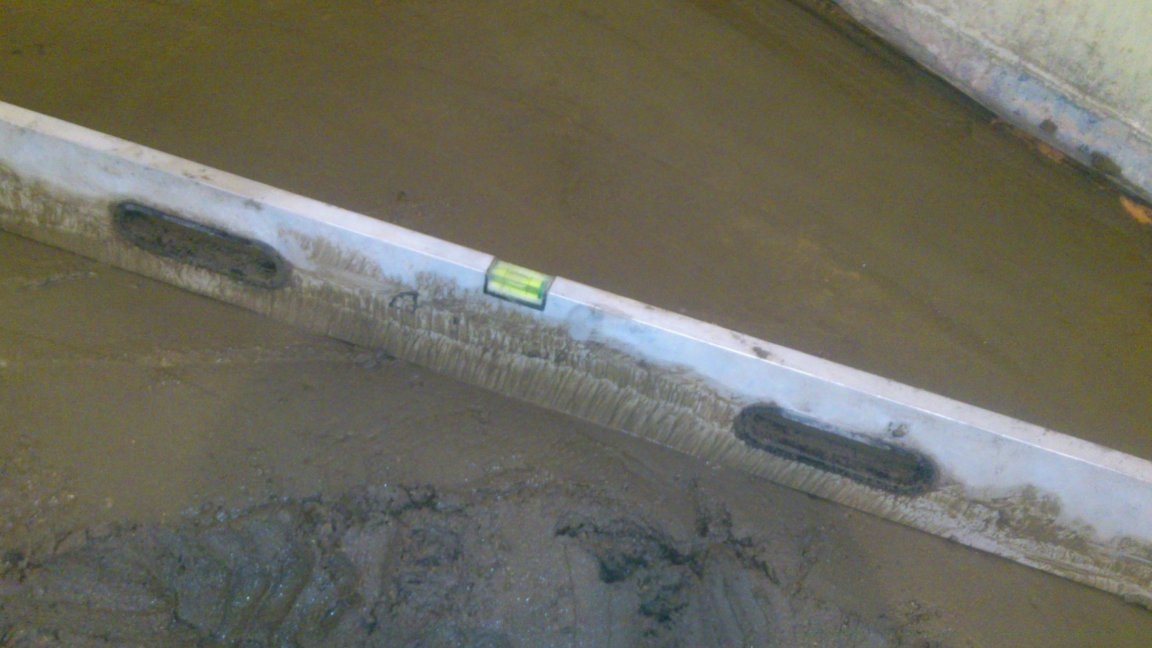
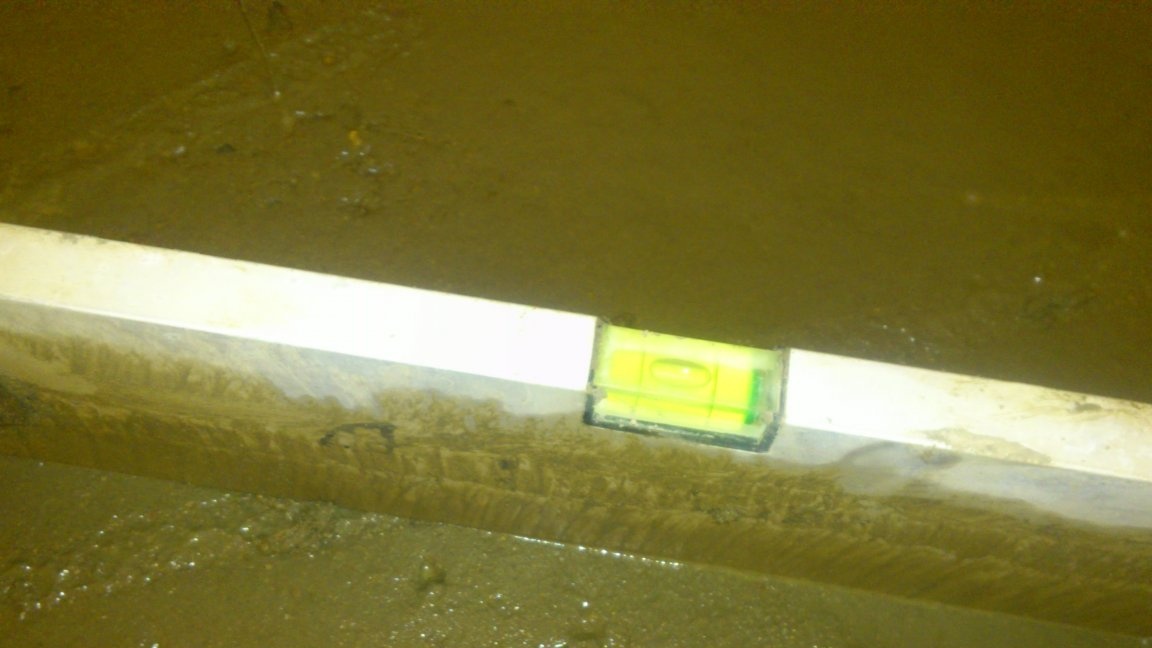
The technology is simple, but requires constant tension on the hands (it is necessary, after all, to always keep the level so that the bubble is exactly in the middle, while moving the mass of the solution. And not always it (the mass) is located symmetrically. More often you have to move it with one edge of the level So, loading a concrete mixer, dragging and turning buckets with sand and cement, I can say it was a rest!)))).
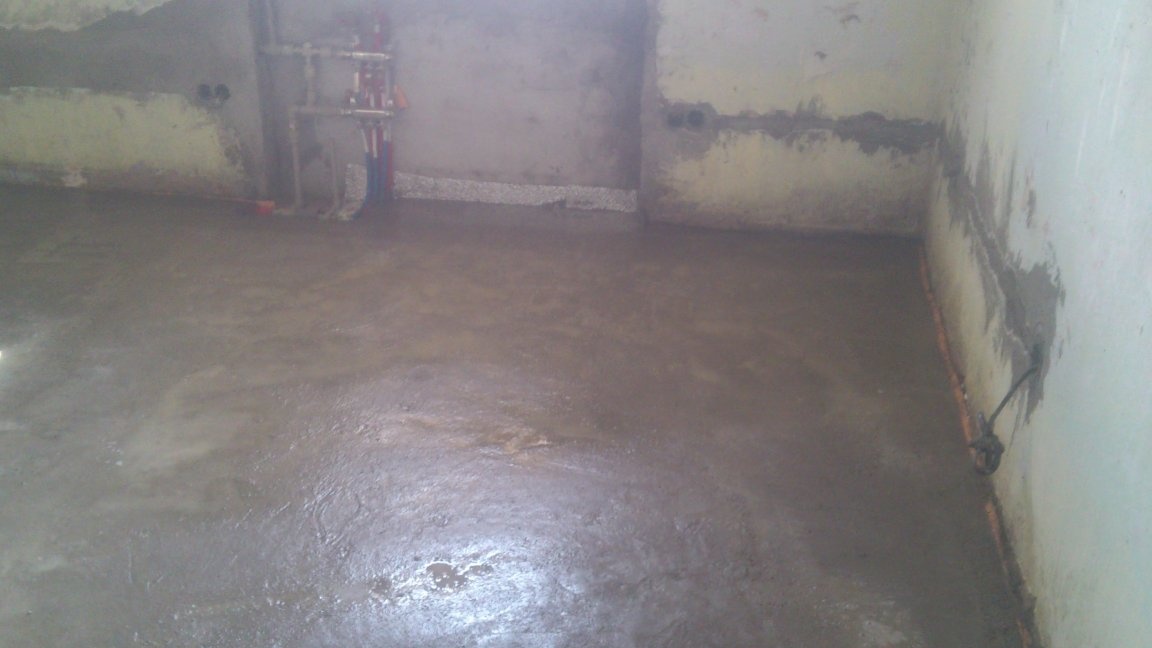
So I walked around the perimeter of the whole room. It all came together. Moved the concrete mixer in the doorway and began to tighten the remaining space. It was already even easier to level the middle. After all, the level could now reach the edges to the already flooded areas.
So, lighthouses are superfluous))))). Moreover, you should not "fence" some complex structures made of wood.)))) The maximum (if there is absolutely no experience, or weak wrists), you can do as I do in the first room - put the pipes on the humps from a hard solution.
The next day I came and trimmed the flaws. (At the point where the screed adjoins the wall, sometimes there are “flavors” pressed down against the wall, which form behind the level when you press it into the solution. Also, at the place where you finished work, the solution was already saturated with “expelled” from it is in the process of equipping with moisture and often there are “sides” that formed the end of the level when moving. Also, small flaws are sometimes obtained in the corners and in the places where the pipes exit. It’s not worth the effort and time to redo if this happened. As I already wrote, the solution on cement with the addition of slag Will of the day it is all correct. I just carefully cut all the excess with a spatula and poured screed water. (I do not need to talk about that after installation, you need to tightly close all doors and windows! The solution must not dry out!)
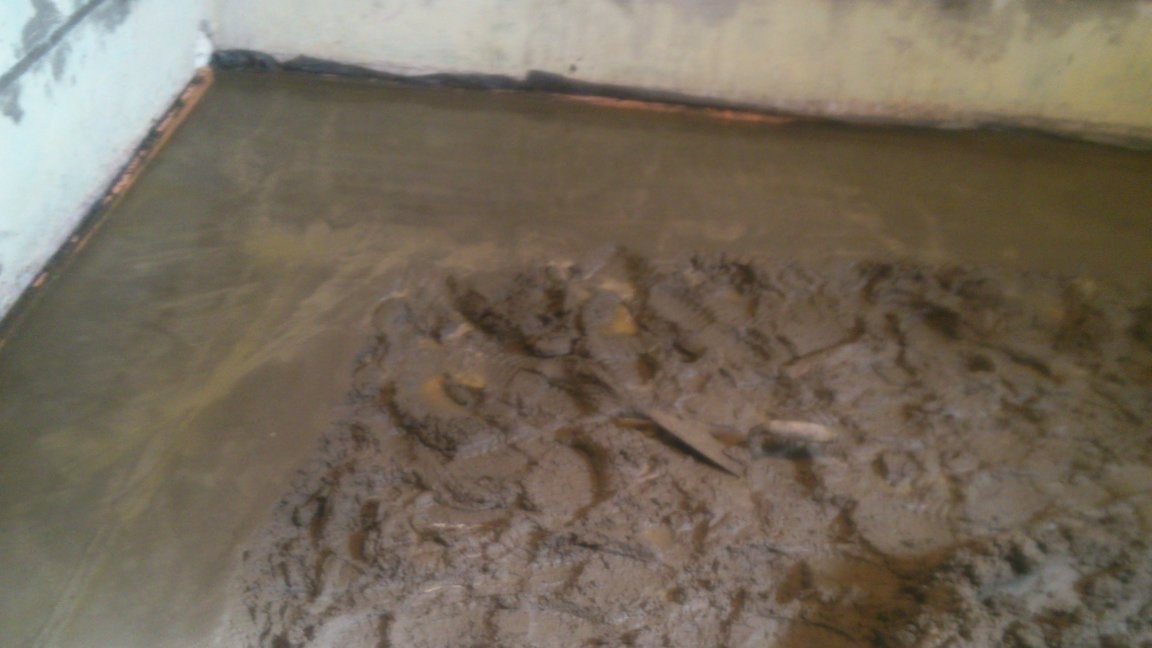
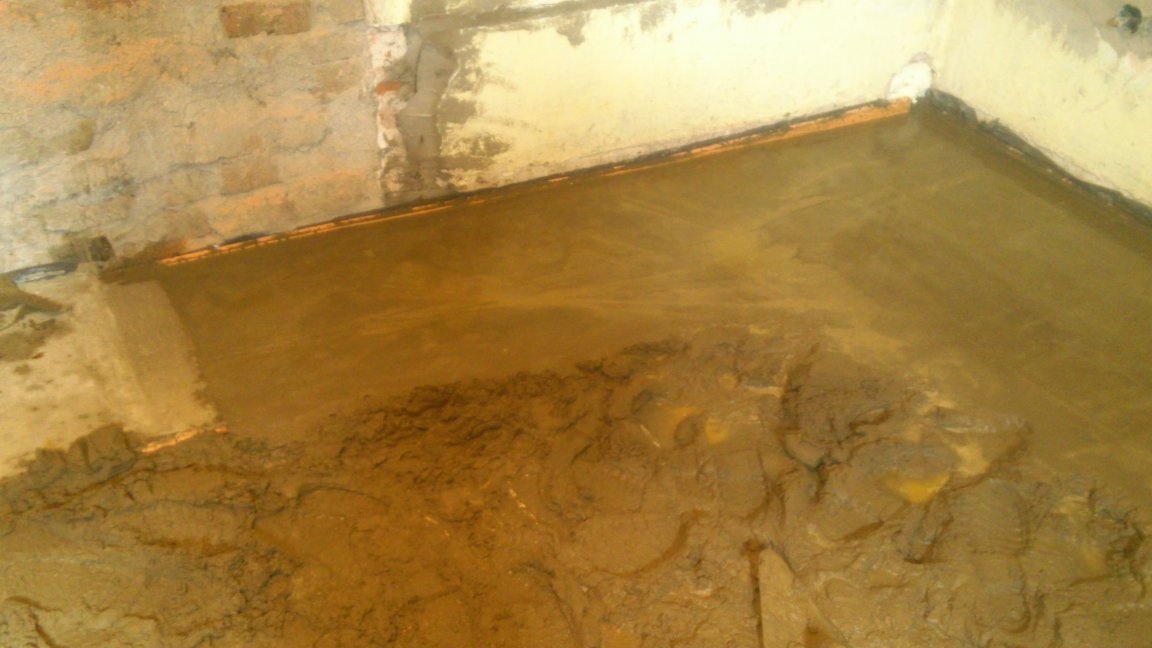
Of course, the screed has already ceased to be as perfectly smooth as it looked yesterday. “Wet” screeds always give uneven shrinkage when hardening:
But, having applied the level, I did not find a gap anywhere, more than one and a half millimeters. And, therefore, very little self-leveling composition will go!
For an ordinary floor, I would not use it at all - I would put a three-millimeter substrate made of foamed polyethylene under the laminate and it would hide all the bumps! But I, most likely, will lay vinyl laminate or vinyl tile as the final coating (until I really decided). The first is placed without a substrate (to conduct heat well), the second is glued to glue! So, in any case, you need a perfectly flat surface!
That's all for now! About connecting circuits, wiring pipes, pumps, combs and batteries, apparently, then I will write a separate publication.
P.S. On this site there was an article about how you can economically do warm floor. There, people saved on under-supply of materials and skipping important points! I think this approach is not true! I did not calculate the cost per square meter of my floors, but, reading his article, I automatically noticed to myself that the insulation is cheaper (and not weaker), the pipes are cheaper (and longer), I have no costs for lighthouses, concrete volume I have less than a third (at the same time, the floor will be less inert and the heat transfer from it more.)
You need to save on improving technologies, but not on materials!