If you still do not have a home lamp made of natural wood - it's time to make it do it yourself. Wooden lamps and bedside lamps have flooded the market in the past few years and have long gained popularity along with metal and plastic products.
The use of wood in the manufacture of lighting fixtures was greatly limited by the widely used incandescent lamps. They actively radiated heat, heated the wood strongly and could cause a fire. However, the situation changed dramatically after manufacturers were finally able to offer their consumers a new generation of lamps - LED. This is what laid the foundation for the production of wooden lighting fixtures.
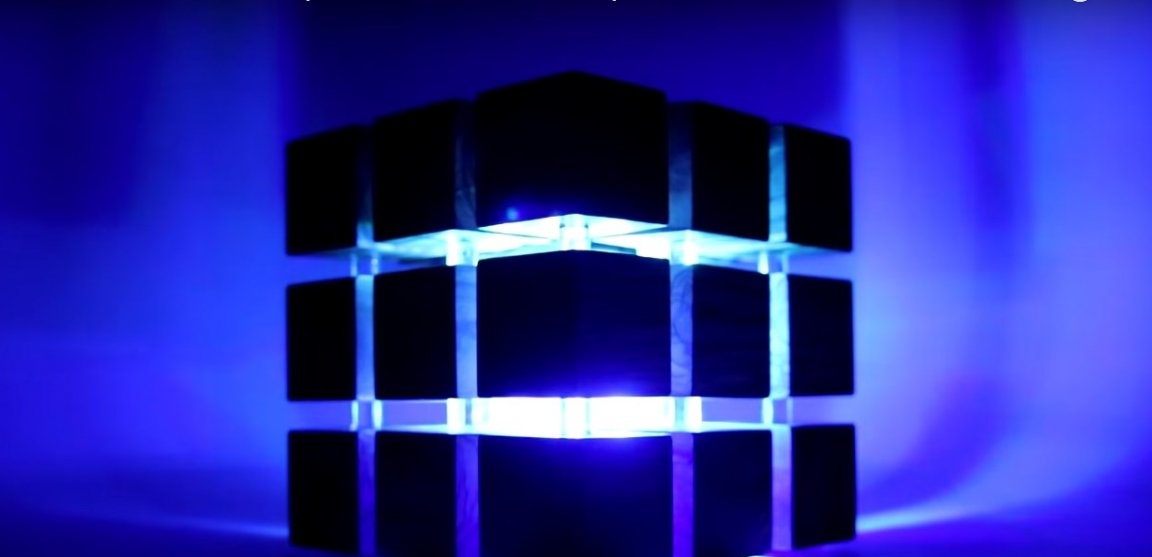
The author of this video made a wooden nightlight, the design of which has long won the hearts of social networks. And now I’m ready to share my experience.
In order to make a nightlight out of wood with your own hands you will need:
Materials:
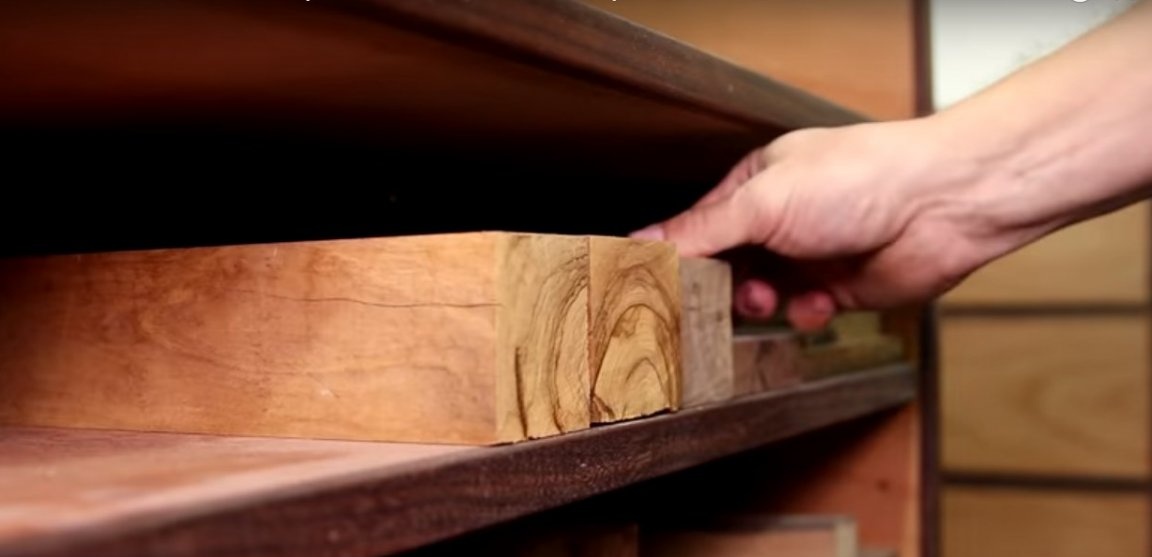
- a wooden block of square section, better planed and calibrated (the author uses a valuable species of wood);
- acrylic rod with a diameter of about 10 mm;
- epoxy adhesive;
- oil for wood processing;
- LED Strip Light;
- control unit and remote control;
- ready-made legs for a night lamp, for example silicone;
- a pair of beech dowels.
Instruments:
- circular or miter saw;
- Thicknessing machine;
- grinding machine;
- drill;
- rubber mallet;
- a pair of joinery clamps;
- square, ruler;
- a pencil.
Manufacturing process
Step One: Choosing Materials
The author uses valuable species of wood in his work, however, even a pine block is suitable for creating a lamp, although working with a pine will not be so pleasant.
However, the degree of processing of the material is more important. If you do not have special wood skills, use a planed bar calibrated on a surface planer. The same applies to the situation when you do not have suitable electrical equipment for independent processing of lumber.
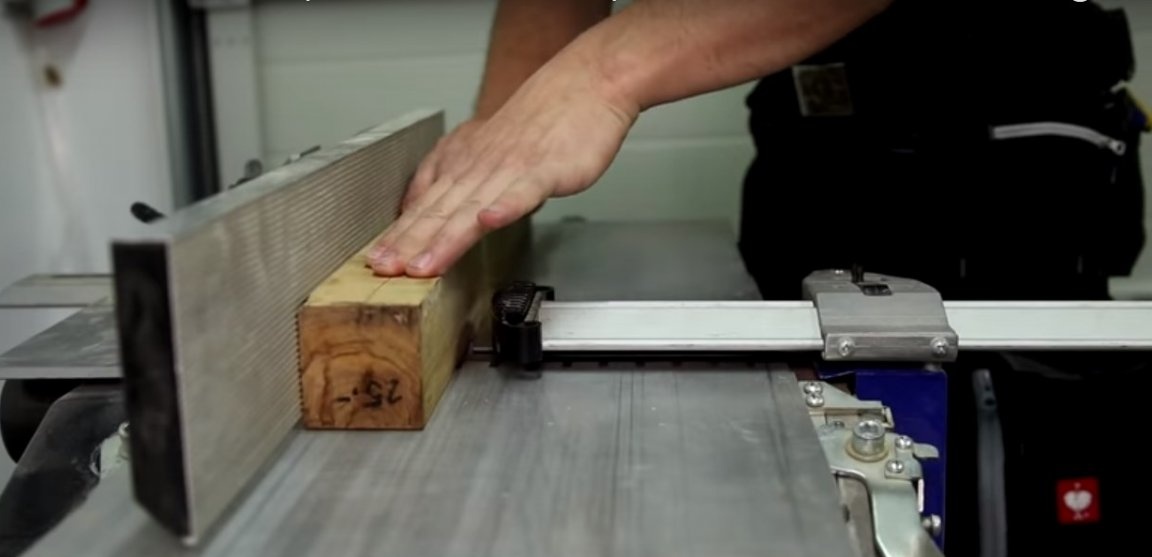
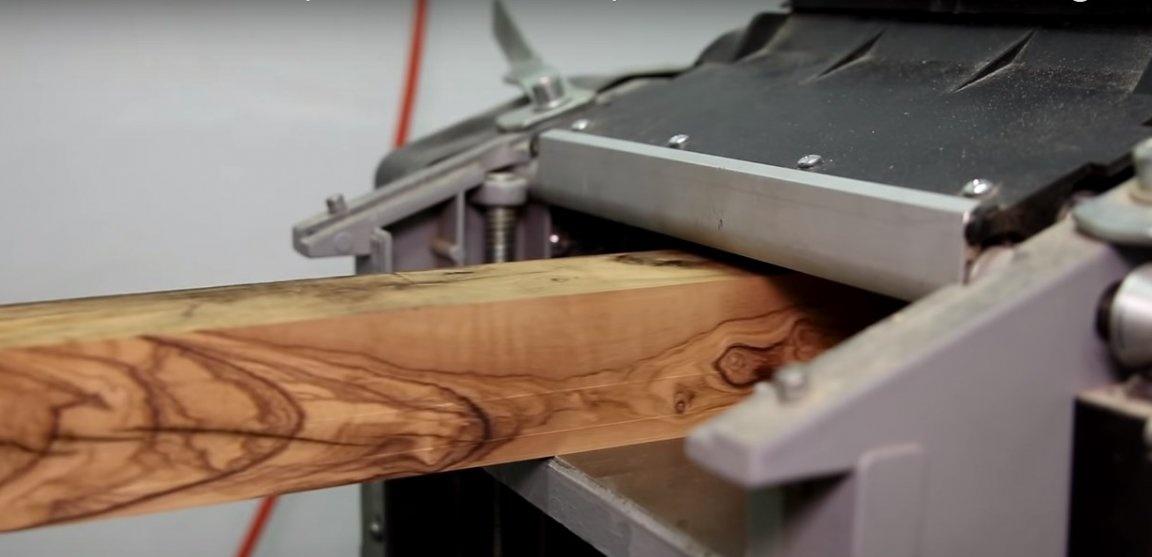
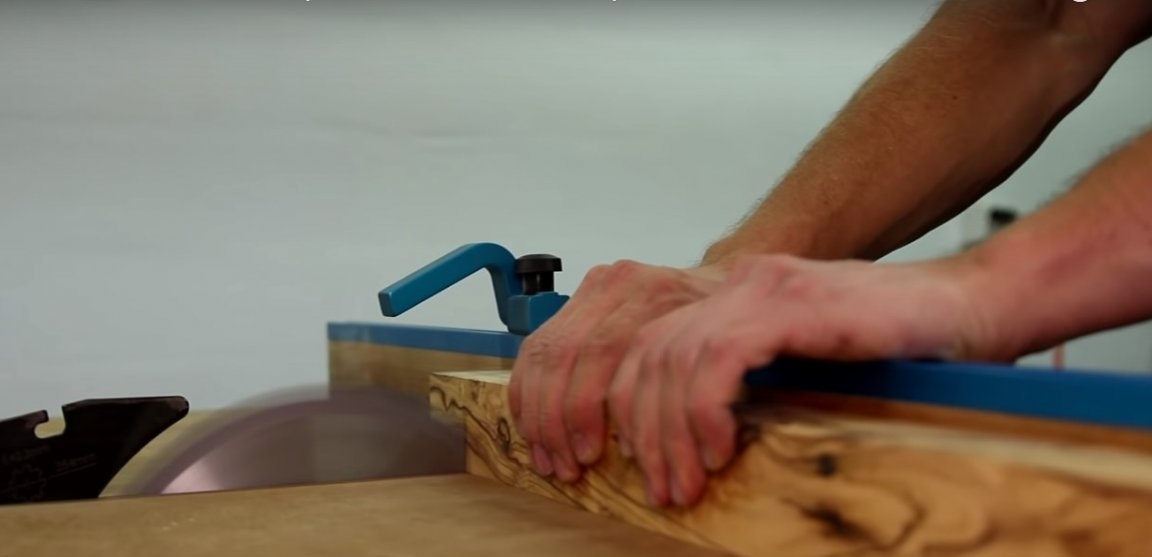
In any other case, use a floorboard or a softwood board with a thickness of 40 - 50 mm. Dissolve the board on square bars and calibrate on a surface planer. Grinding will take place already at the stage of work with sawn blanks of the night lamp housing.
Step Two: Making Wooden Cubes and Acrylic Parts
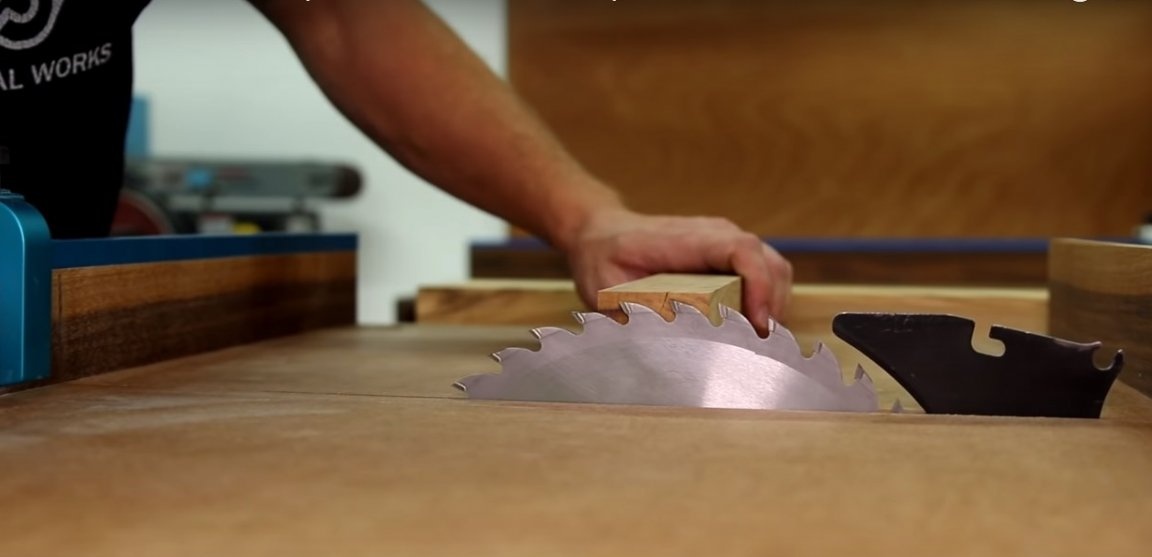
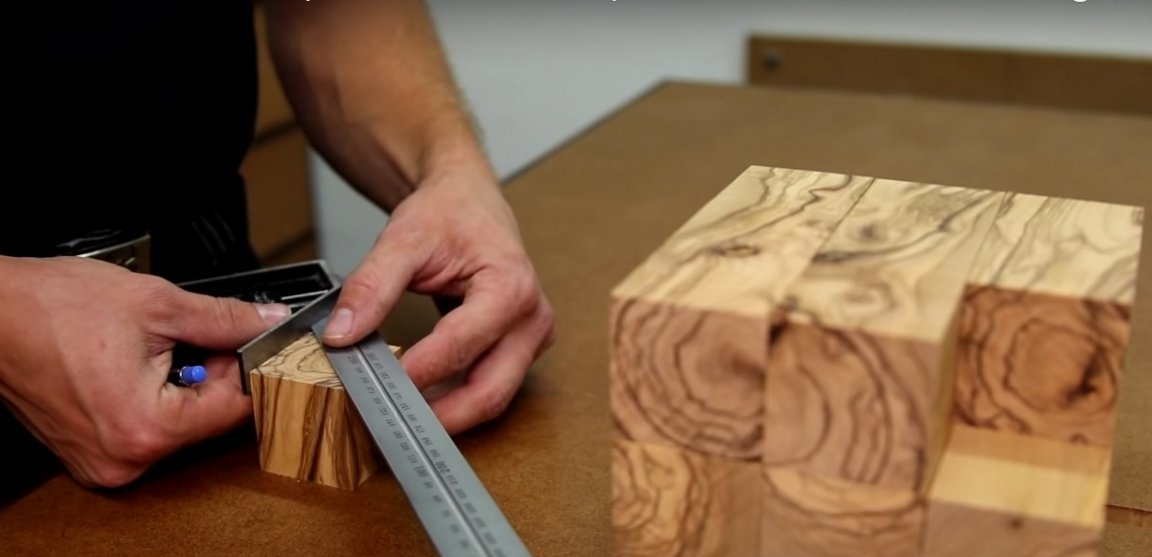
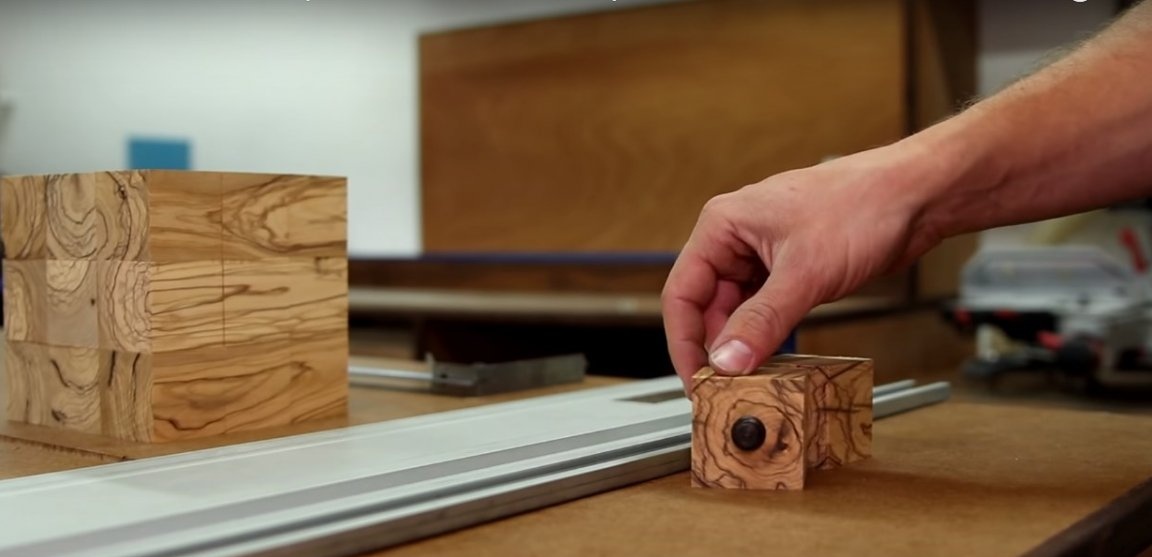
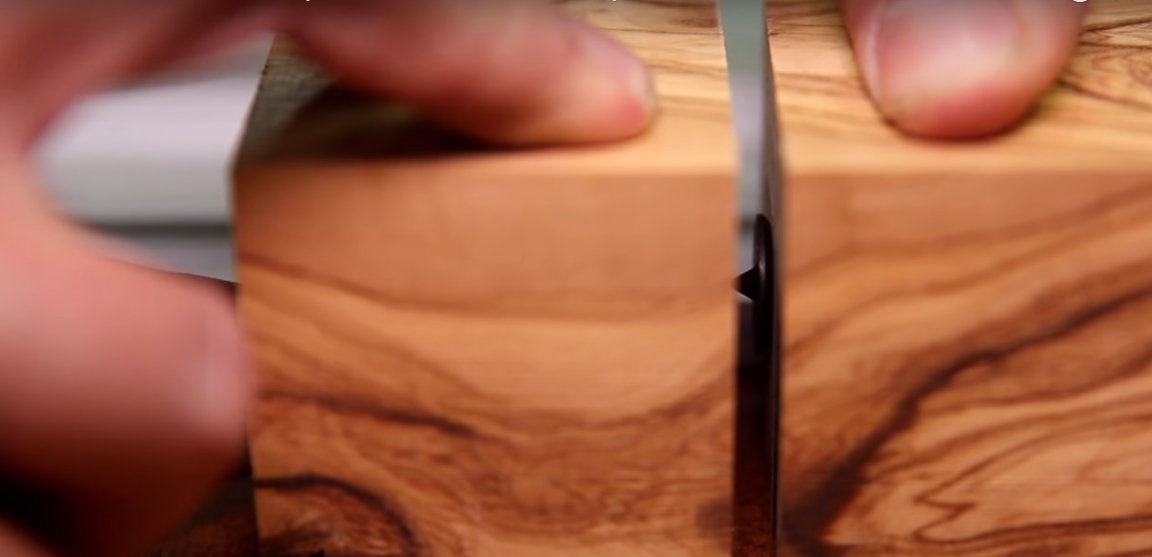
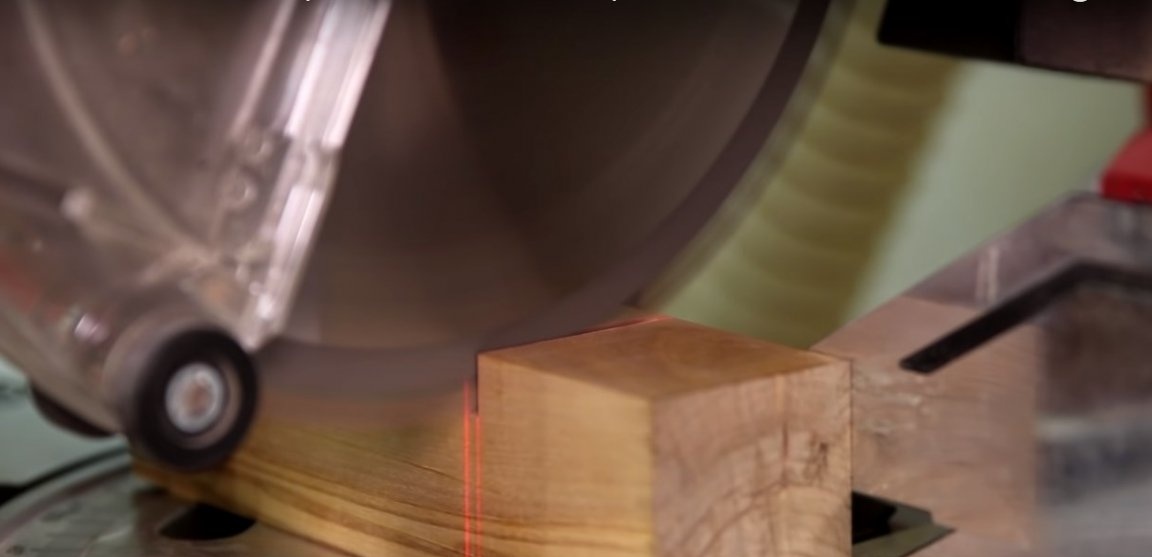
The author duly prepared the bar before work. After that, he sawed wooden cubes using a circular.The resulting blanks should be folded together and checked, thus, the accuracy of the cut. If the size of the cubes differs by 1-2 mm, collect the layers of the lamp so that the length and width of all sides are equal.
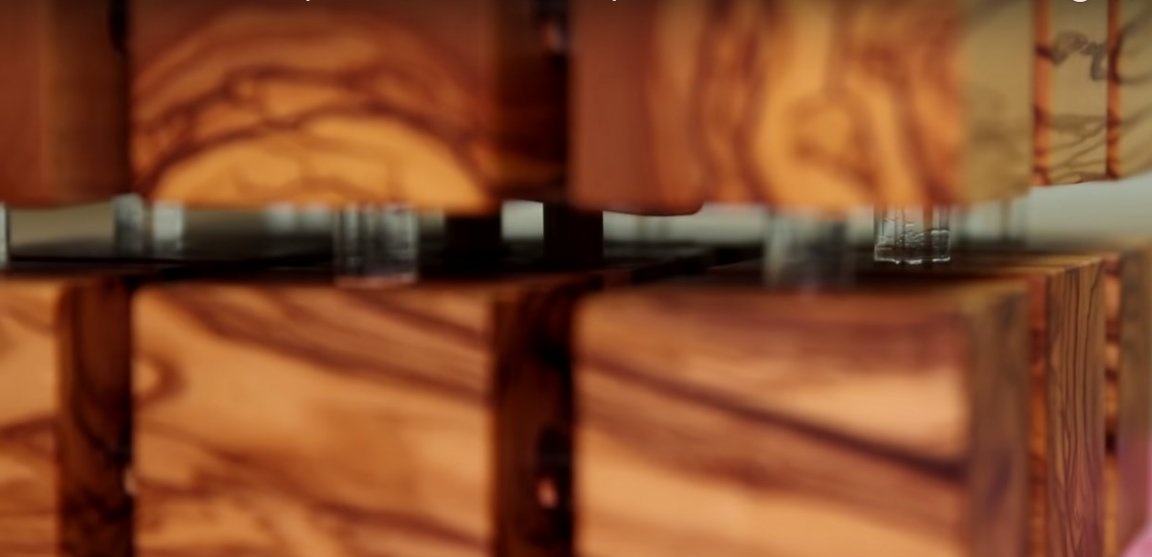
To connect the cubes, the author uses an acrylic rod. This is an easy, cheap and affordable material, which can be easily purchased on the Internet. Depending on the size of the cubes, you will need a rod with a diameter of 8 - 10 mm.
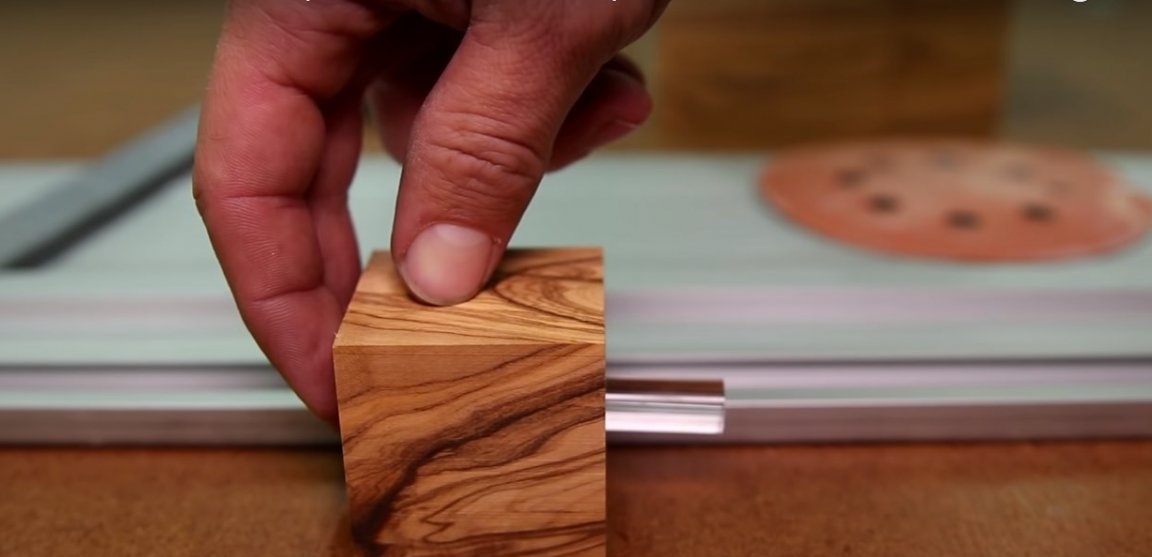
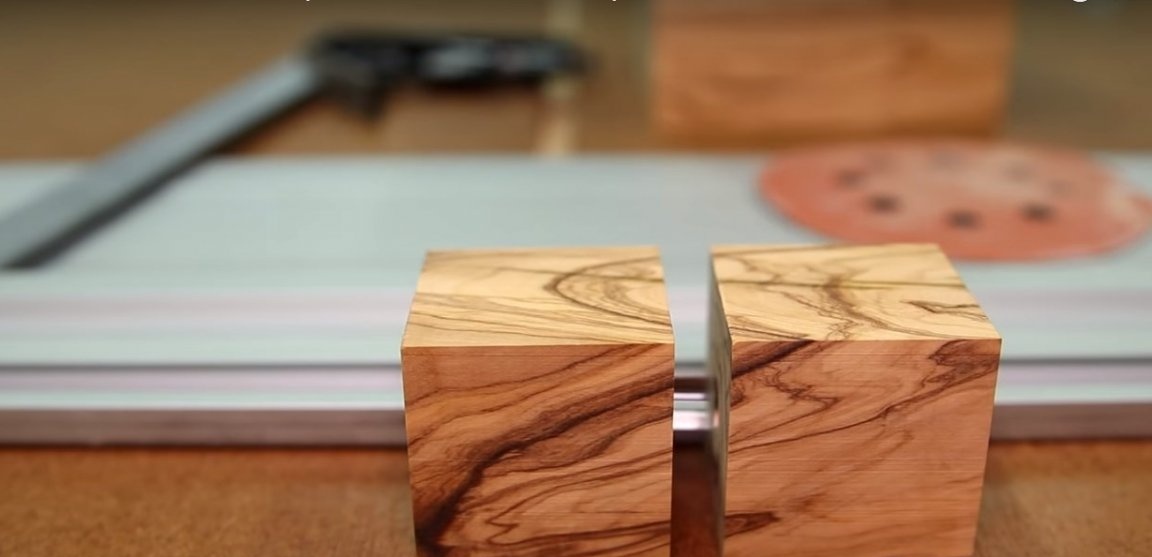
Cut the pieces of the rod of the desired length in any way convenient for you. The author used a circular for this. Grind the ends of the workpieces by hand.

Step three: assembly of the lamp housing
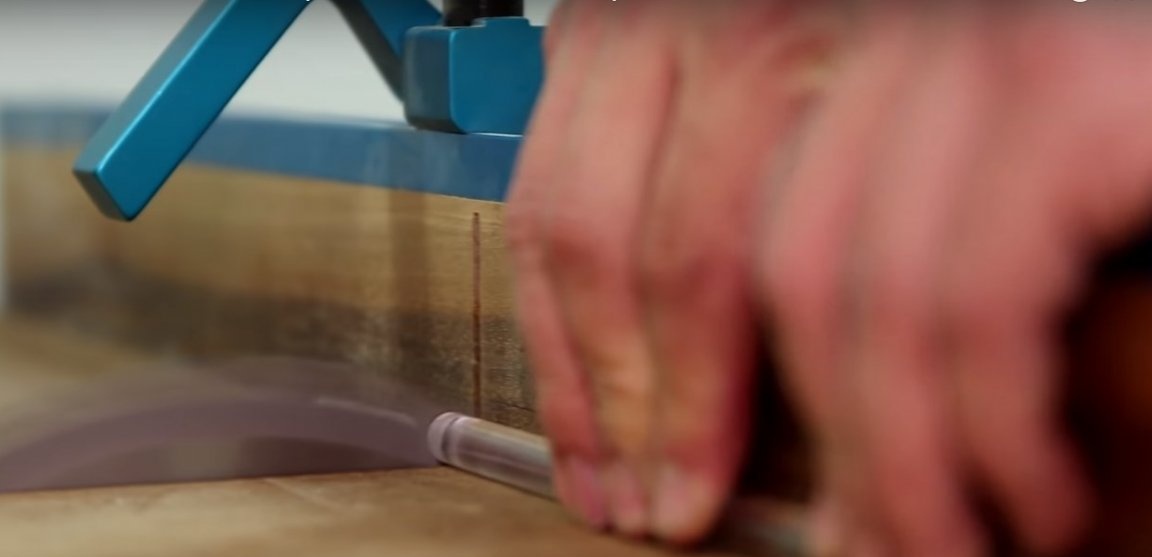
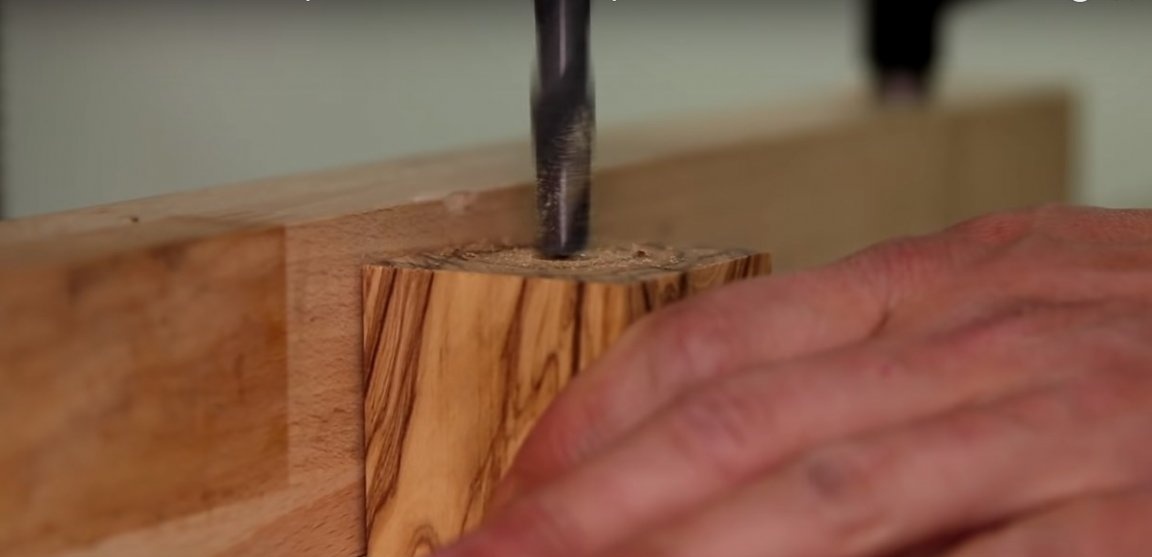
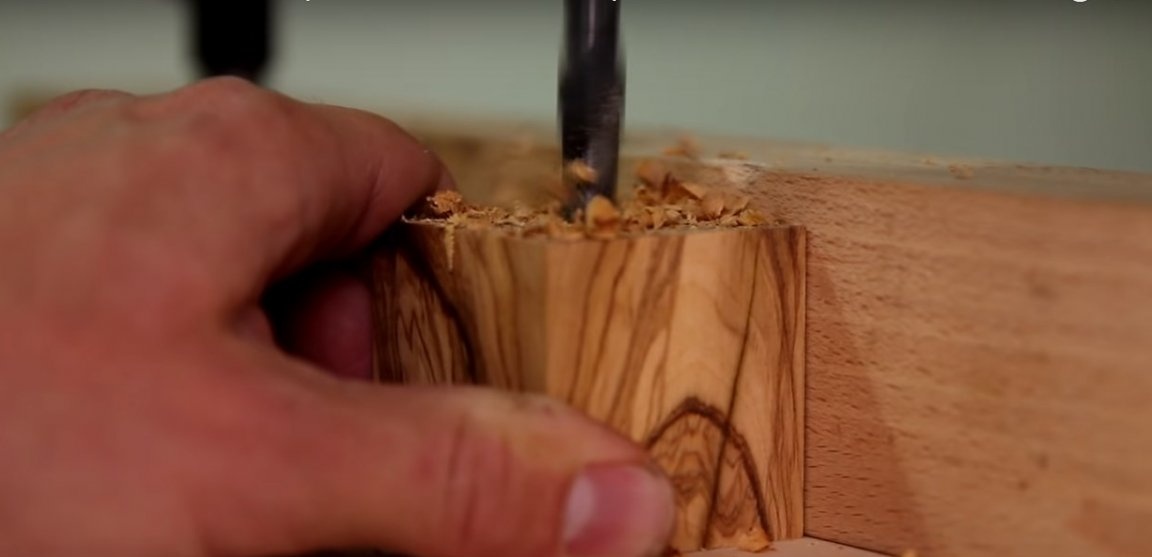
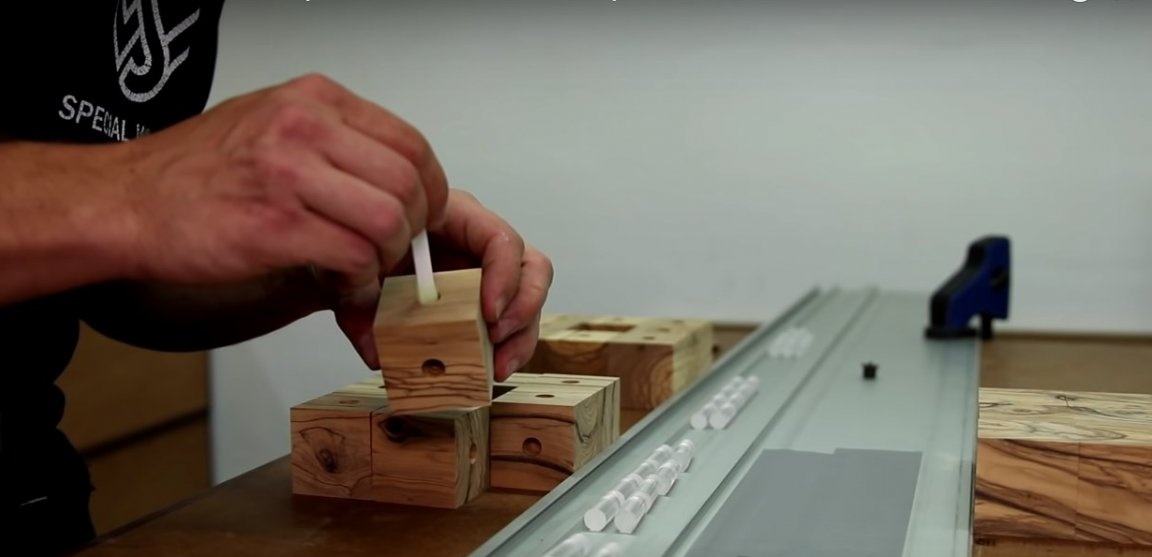
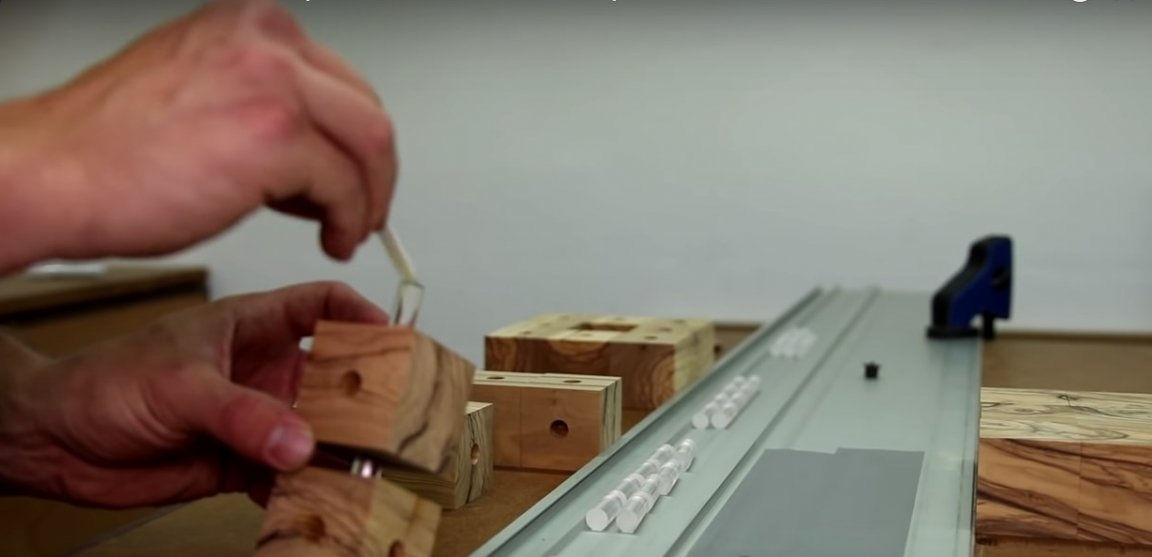
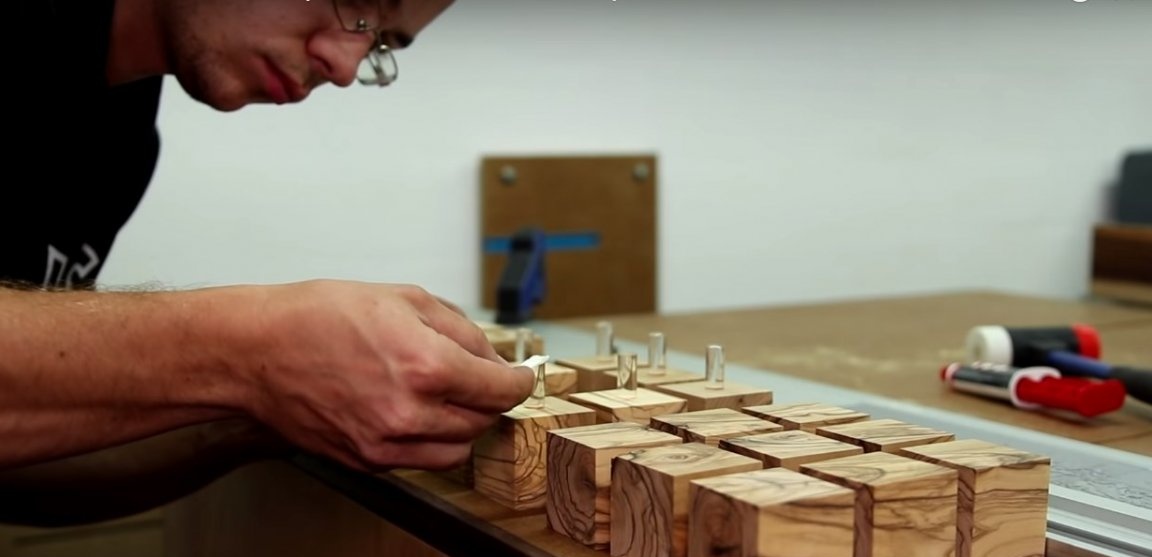
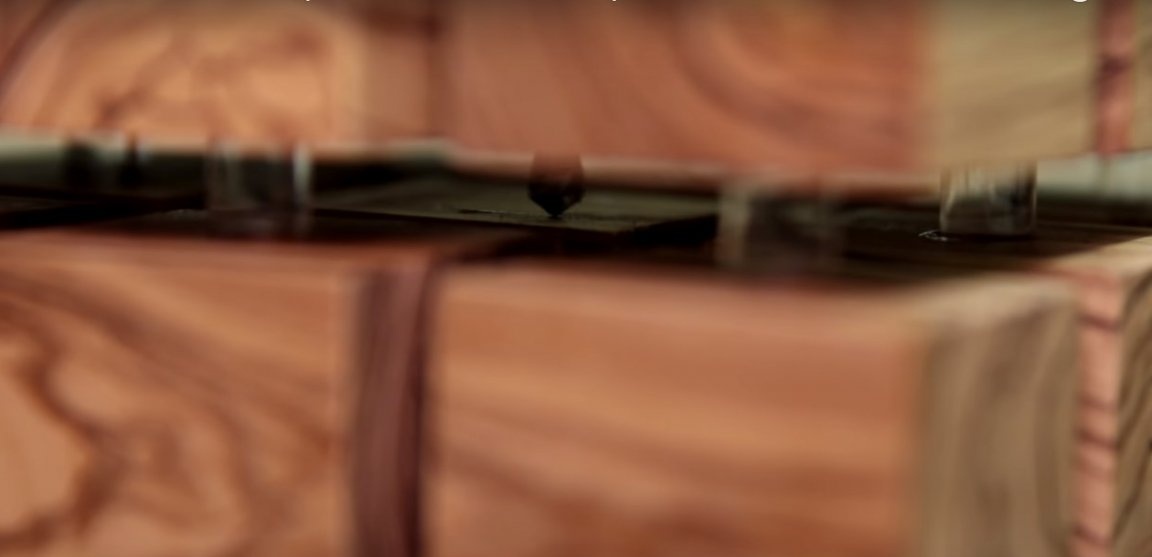
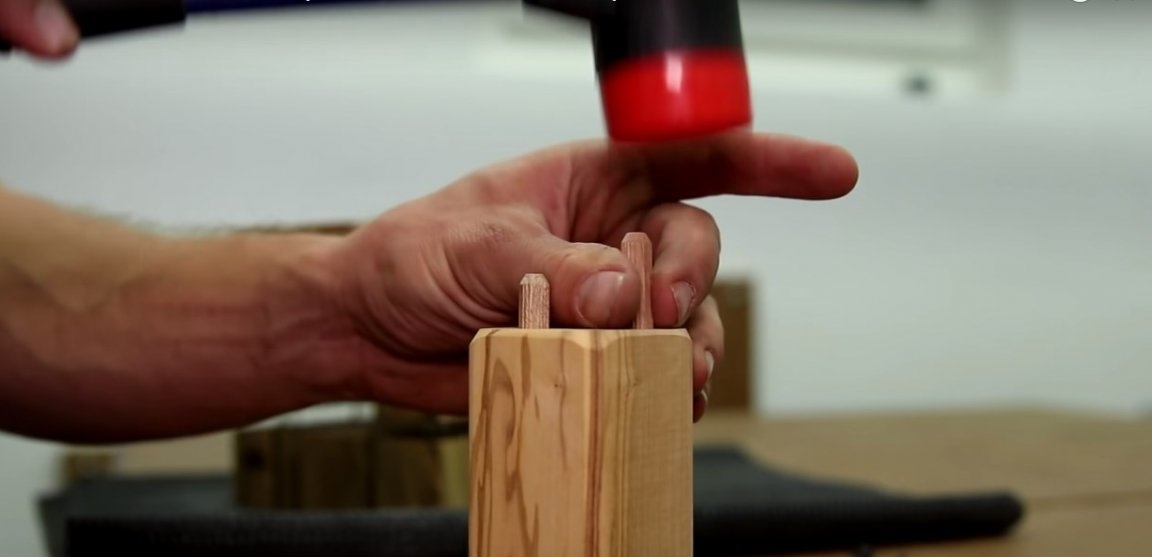
Mark on the cubes those sides where the connecting holes will be. To mark the drilling location, draw two diagonal lines and mark a point at their intersection. Drill holes in the diameter of the acrylic rod.
To transfer tags, the author uses a special device, which you can do yourself if you wish. The holes on the cubes must be clearly aligned.
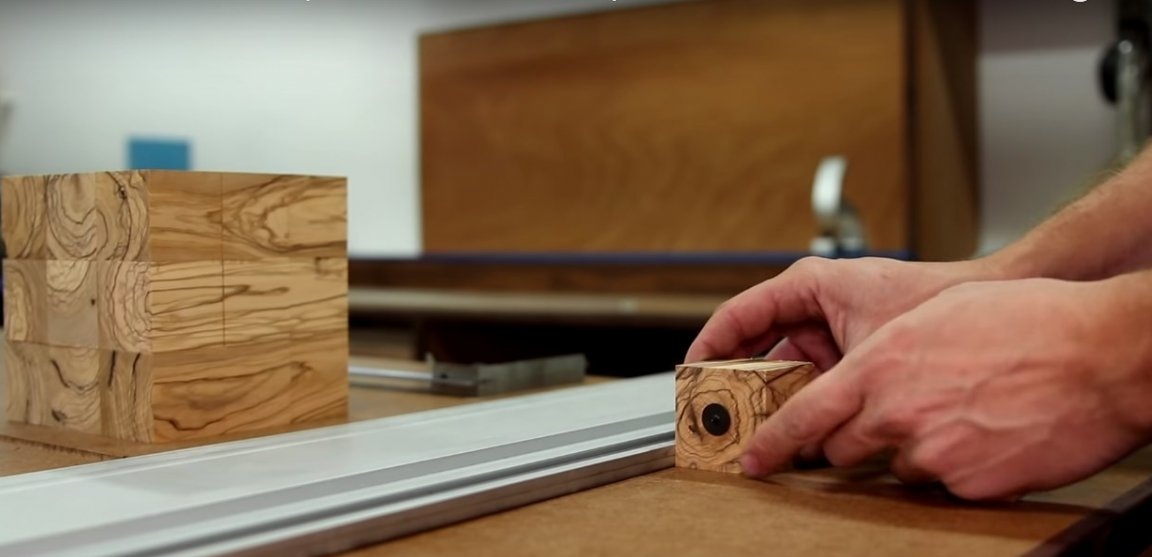
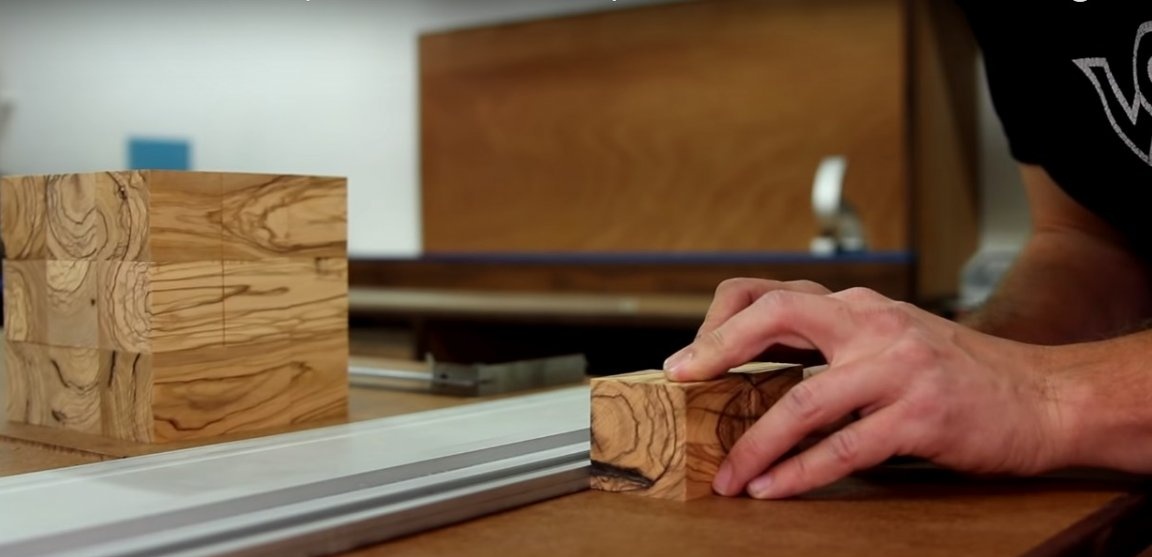
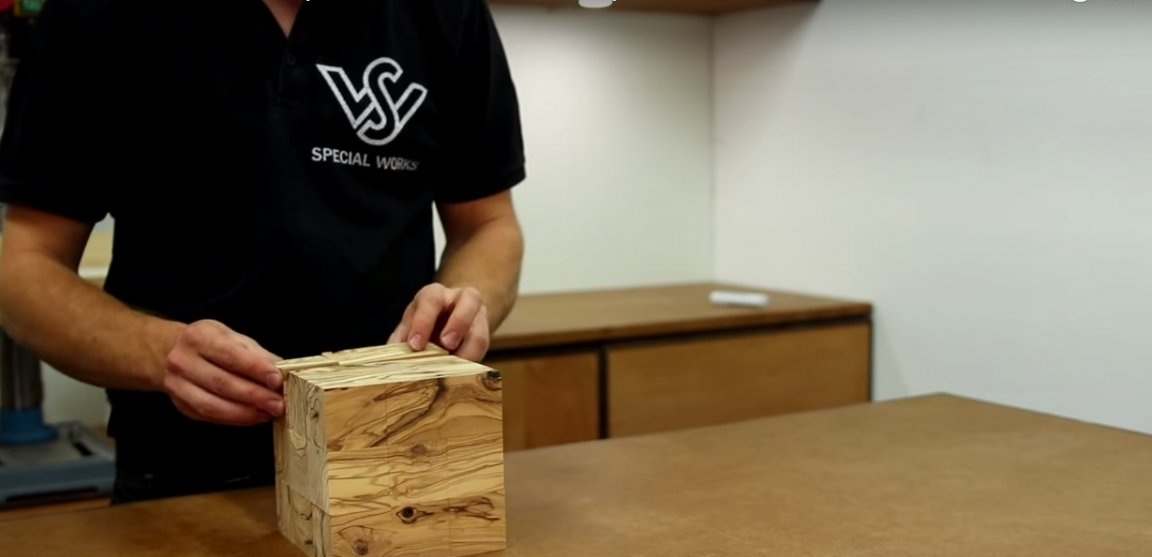
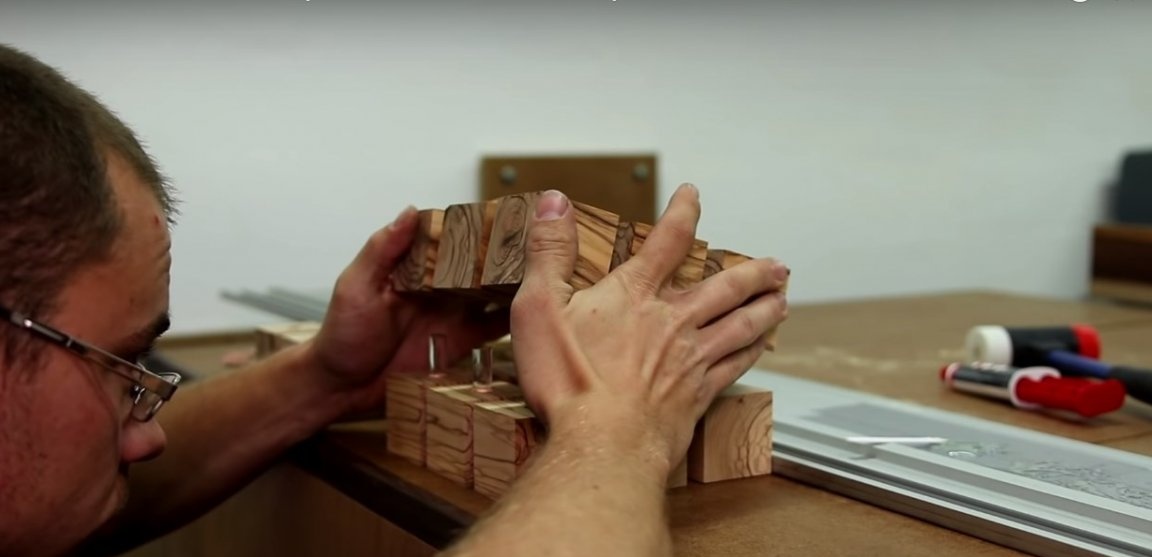
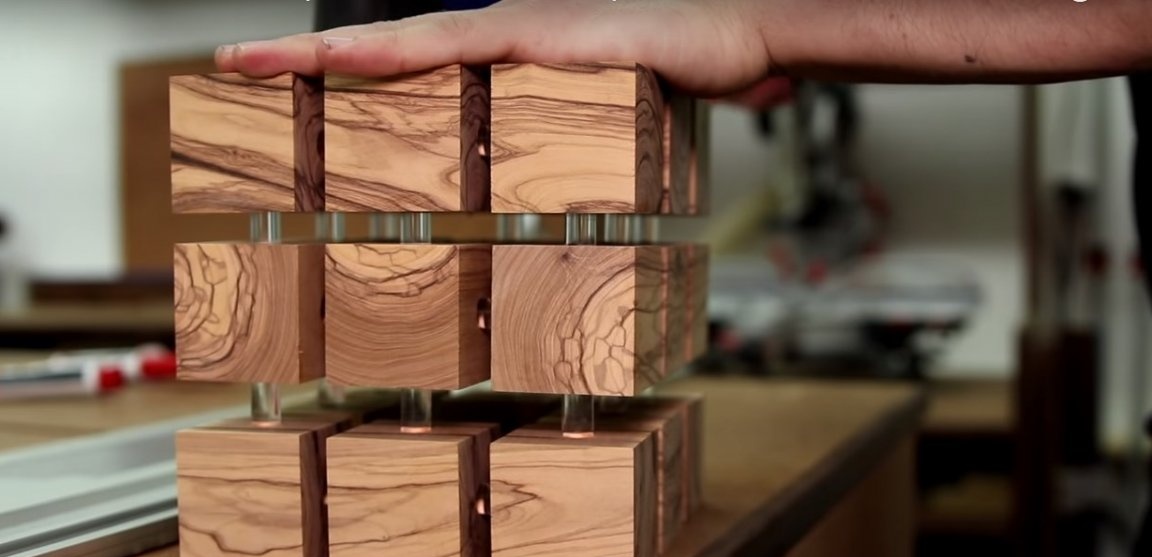
Assemble each layer of the casing one at a time. The upper layer has 9 elements, while the middle and lower layers have eight. Connect out among themselves. Use epoxy adhesive to install the rods.
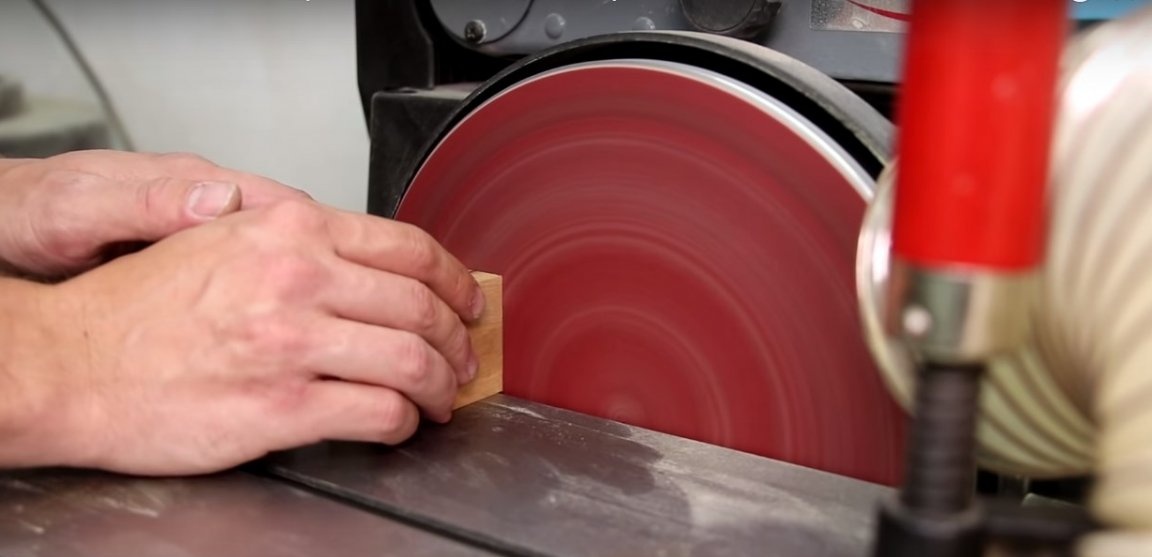
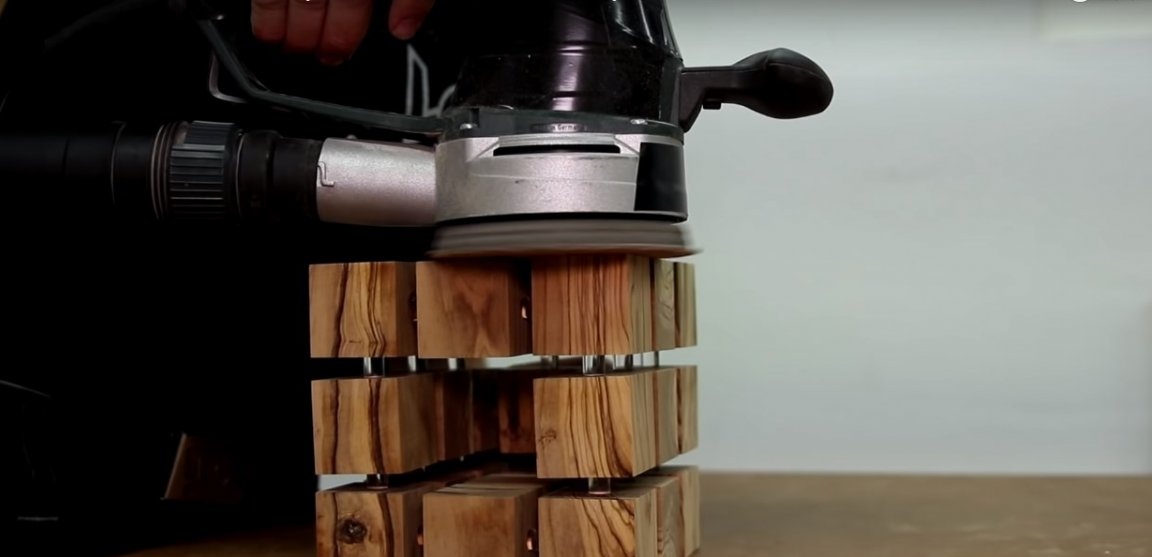
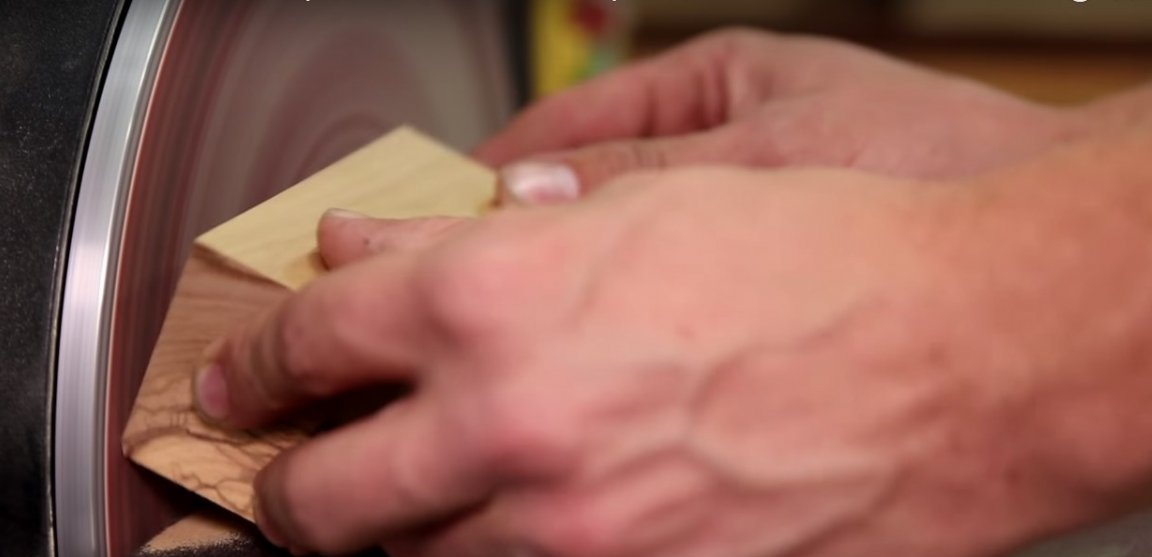
Grind each side of the night light with a grinder. Thus, you can correct errors when sawing cubes.

Fourth step: manufacturing and installation of the lighting element
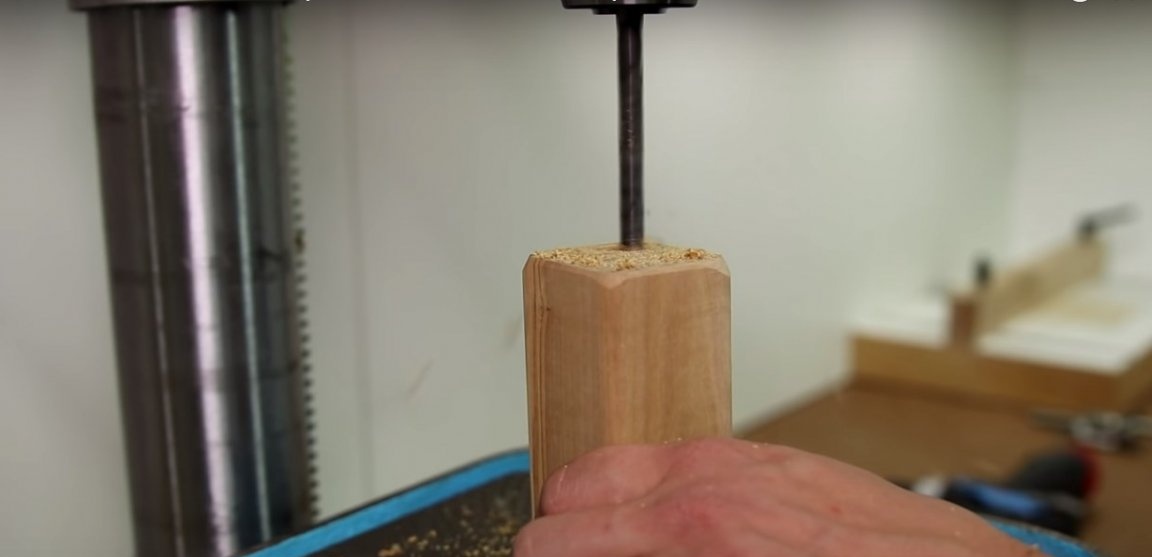
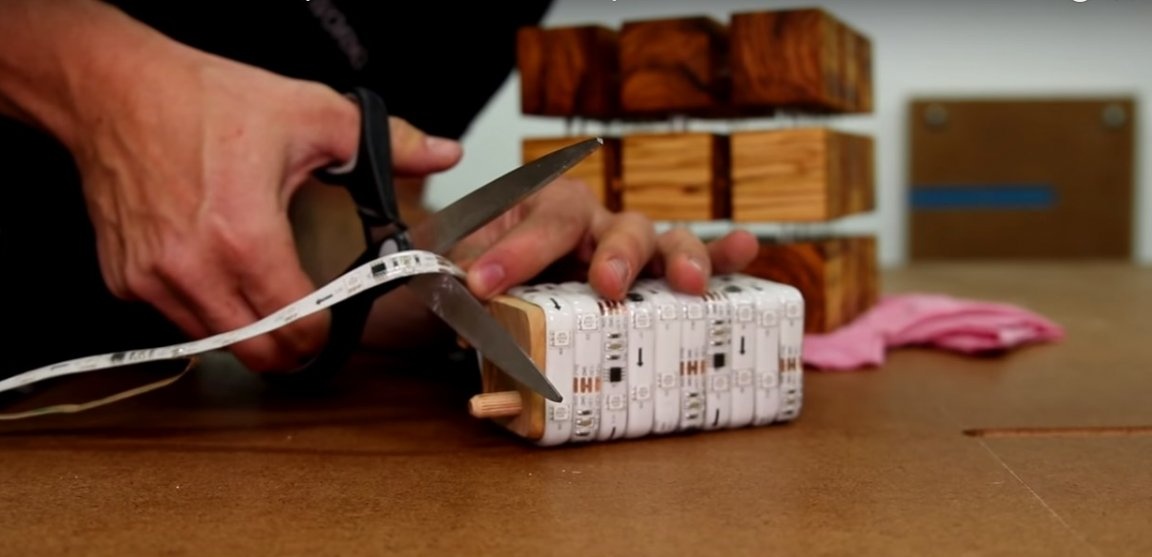
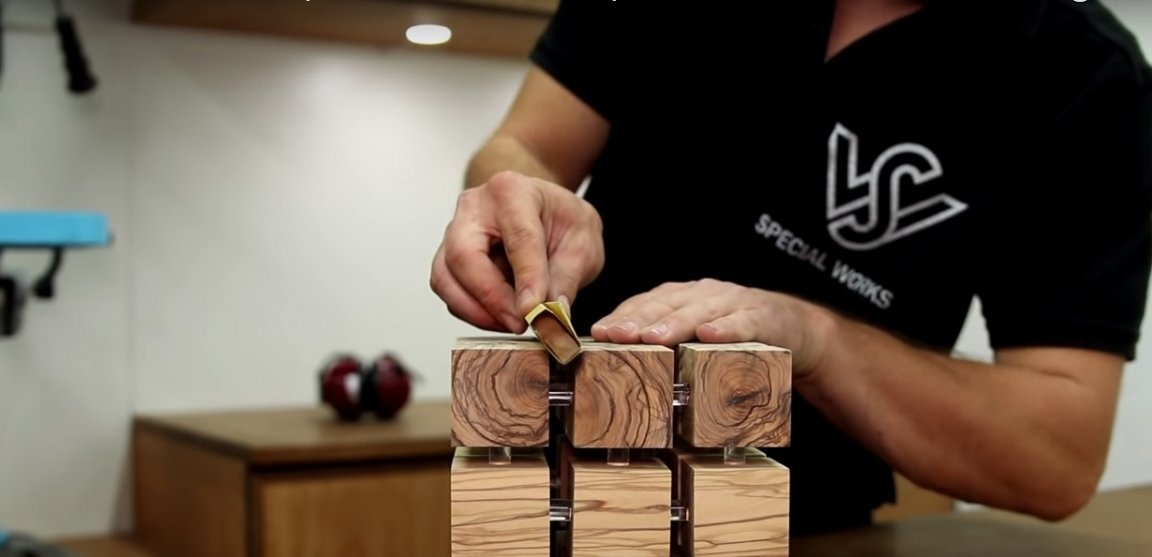
In the two lower rows of the case there is no one central element. Thus, a cavity is formed there for the lighting element. The author made it from the same bar that he used for the manufacture of blank cubes.
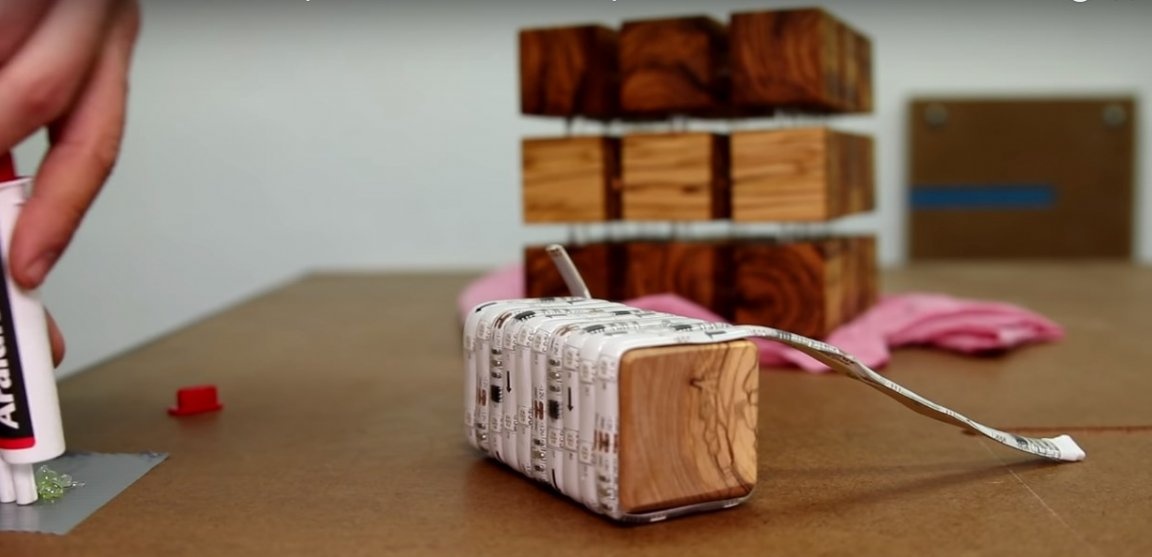
Install the night light housing upside down and drill a couple of holes under the wooden dowels in the upper cube. Place metal marks in the holes and transfer the markings to the part of the lighting element. Drill dowel holes.


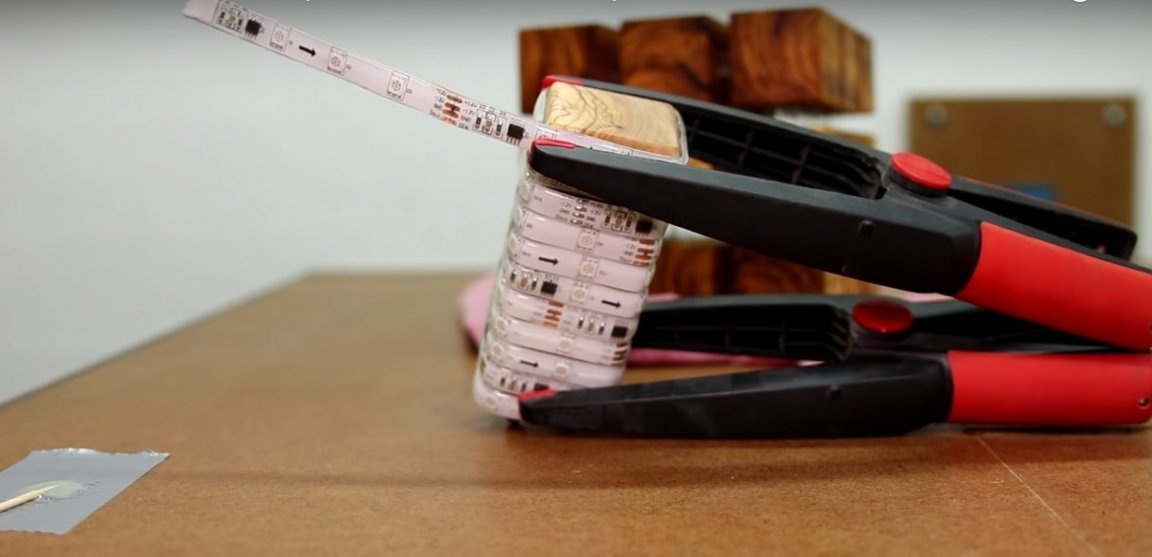
Prepare the LED strip. Wind it on the workpiece as shown in the photo. Press the inner end to the bar and secure with glue. Fix the outer end with glue and leave a segment of such a length so that you can bring the tape out through the housing.
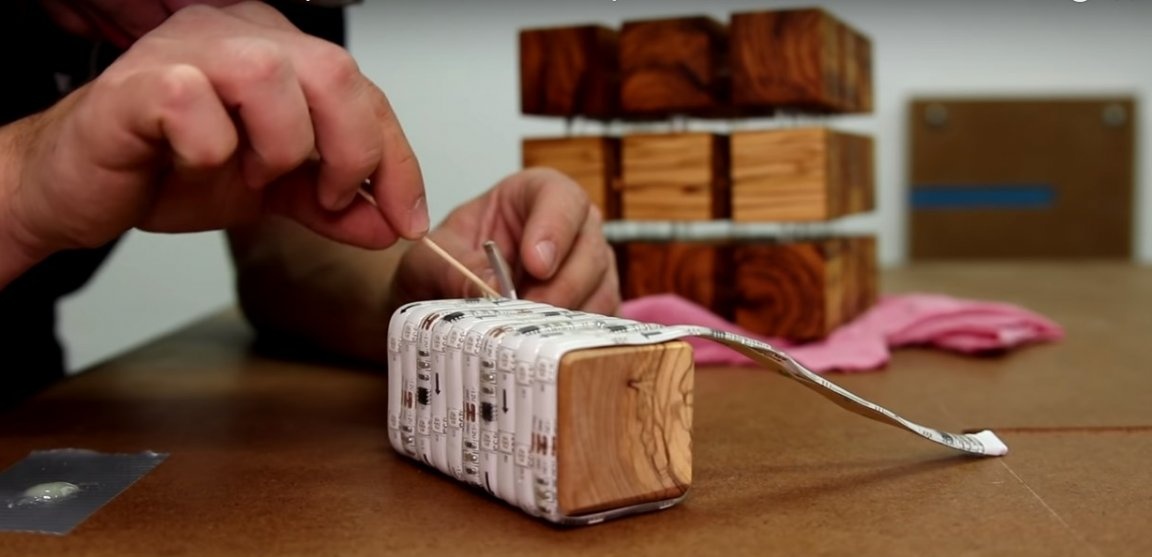
Place the lighting element in the night lamp housing, connect the control unit and check the operation of the LED strip. If everything is installed correctly, fix it on the dowels inside the case using glue.
Grind and round the edges of the cubes. For this, the author uses sandpaper wrapped around a wooden battens.
Fifth step finishing touches
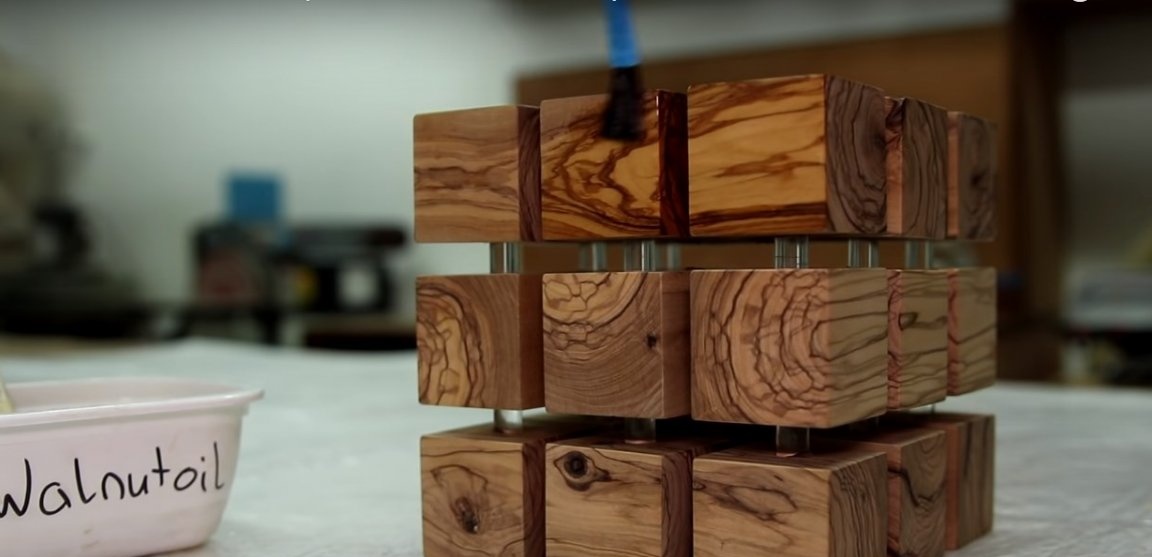
At this stage, you can treat the body of the night lamp with oil. The author uses peanut butter for this. You can also use linseed or teak oil. If you are used to using quick-drying oils, pay attention to Danish oil. A quick alternative is furniture quick-drying wax without dyes.
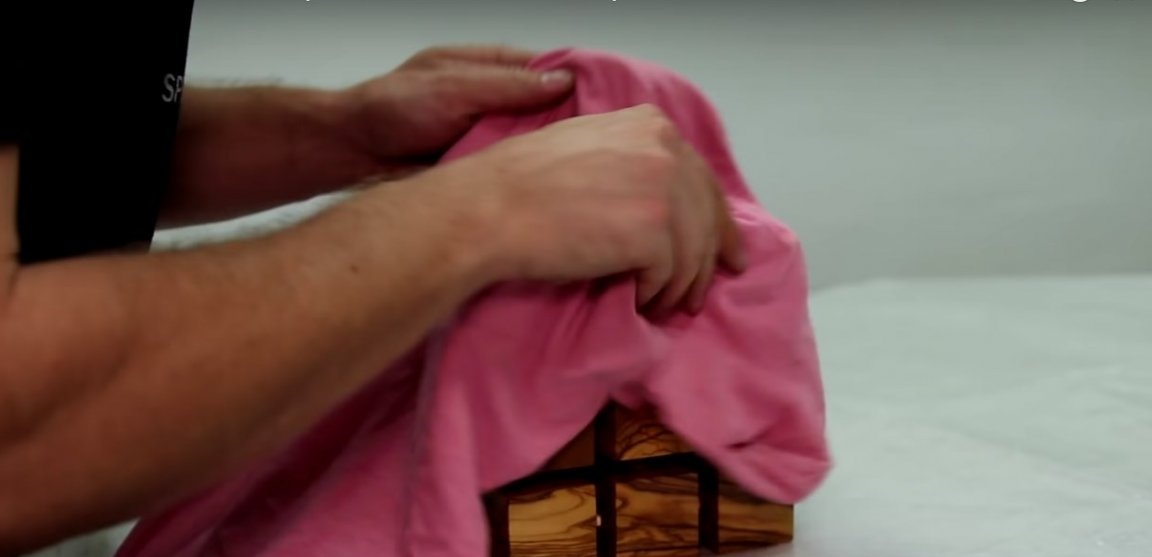
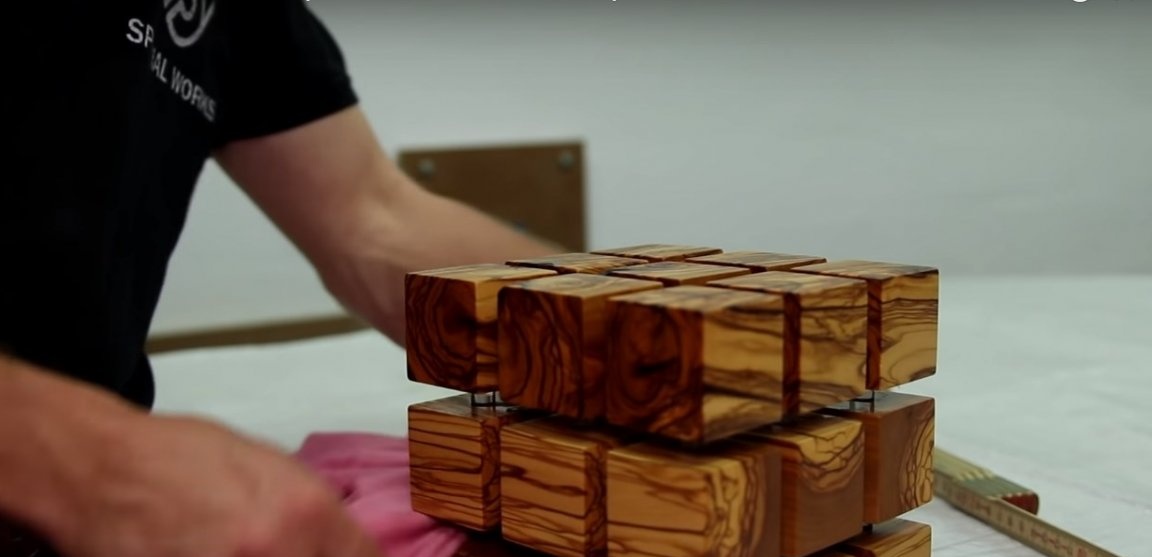
Coat the night lamp housing with oil and distribute it evenly over the surface. Oil that is not absorbed in the first minutes must be removed with a lint-free cloth. By the way, finding such a fabric is quite difficult, so leave the rest for your next work.
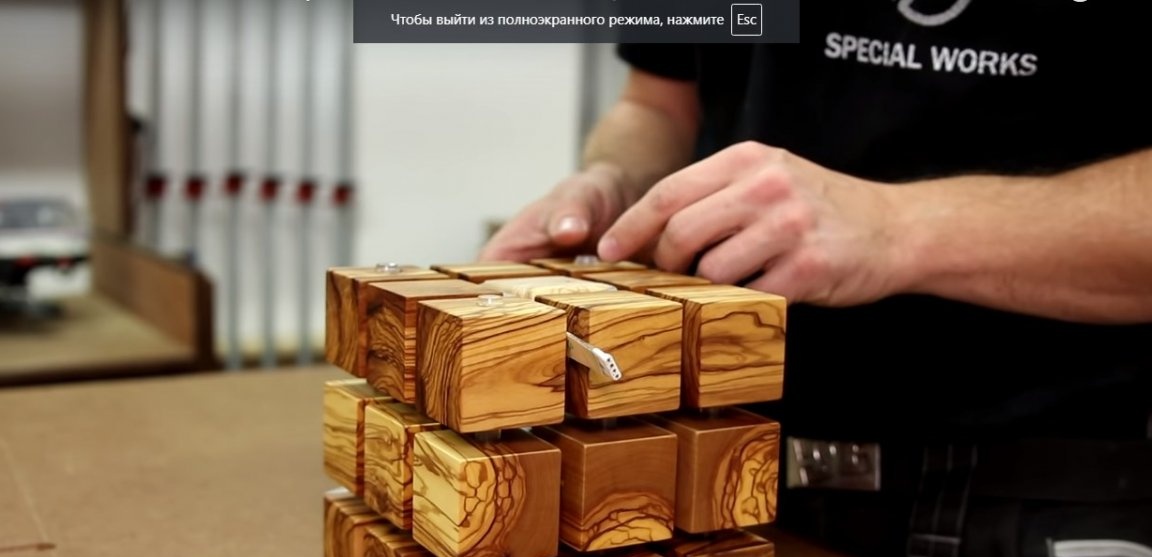
It remains only to install silicone self-adhesive legs at the bottom of the night lamp.