


I think I'm old enough to love real books, how they feel in my hand. But I also love reading on my iPad mini. Having made a compromise, I decided to make a paper case for my electronic gadget. To cut a case from a book, a band saw is used. All cutting is done with a saw, but you can also use a jigsaw. This is a very fun project!
Material List:
- Hardcover book
- Glue - superglue, polyurethane glue, PVA glue. You do not need all three glues, but personally it seemed to me more convenient to use different ones.
- glue brush
- wax paper
- electrical tape or elastic
- rare earth magnet and quarter-inch bolt washer (optional)
- Triangle ruler with a right angle, pencil, tape measure
- tool knife
- Jigsaw or band saw
- hacksaw blade 3/16
- nail gun or construction stapler
- shellac
- a set for flocking (applying pile) - mini-flocker, adhesive underlayer, flock
Step 1: Preparing the Book and Securing the Magnet
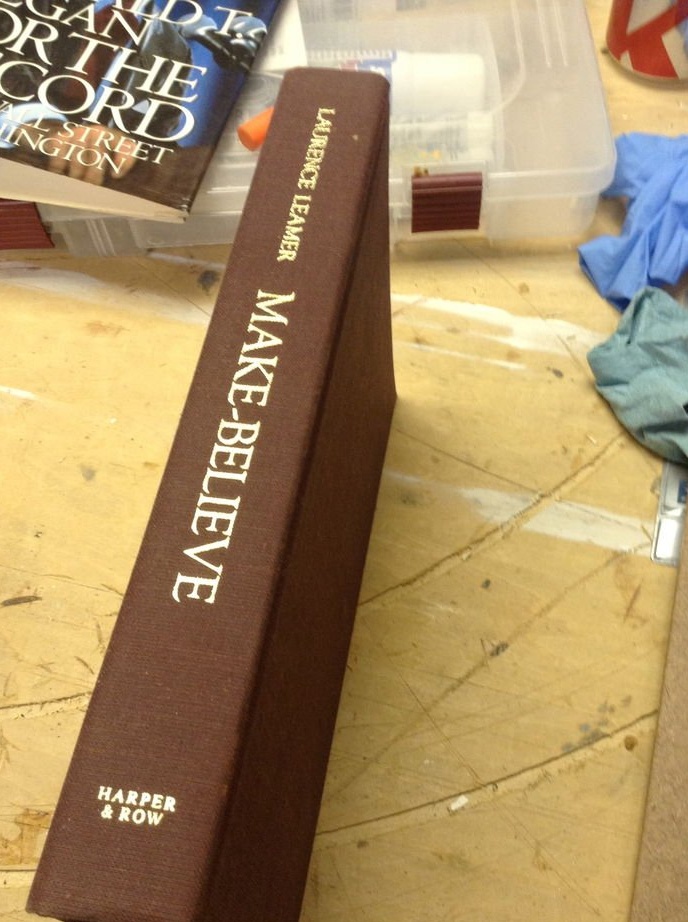
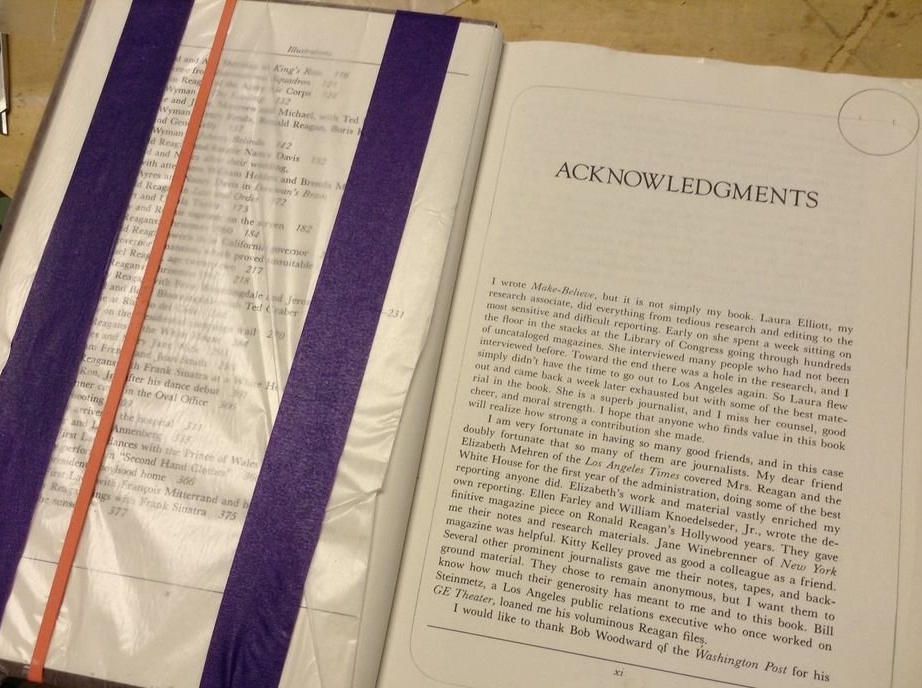
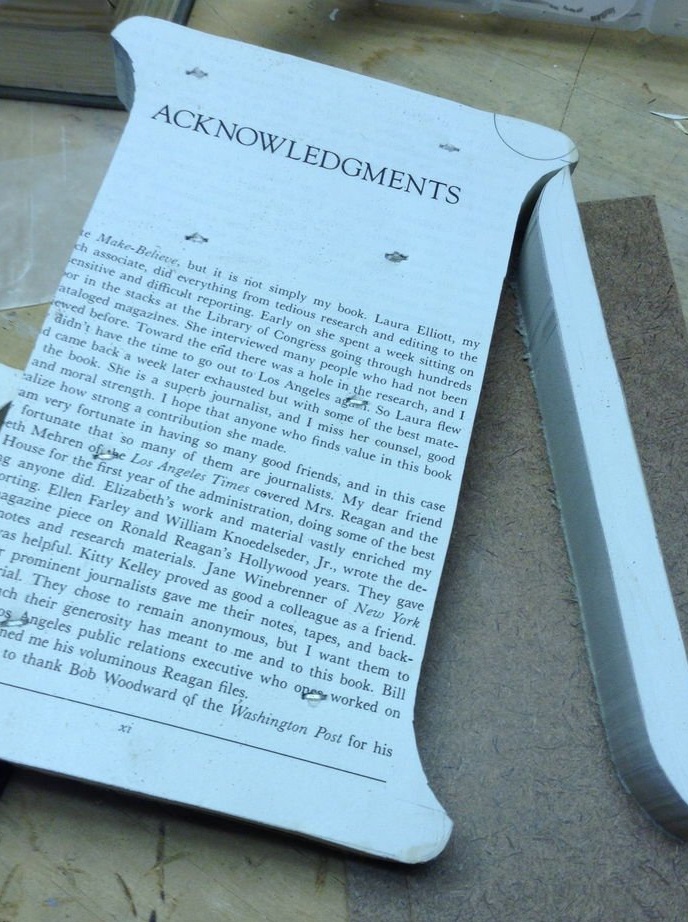
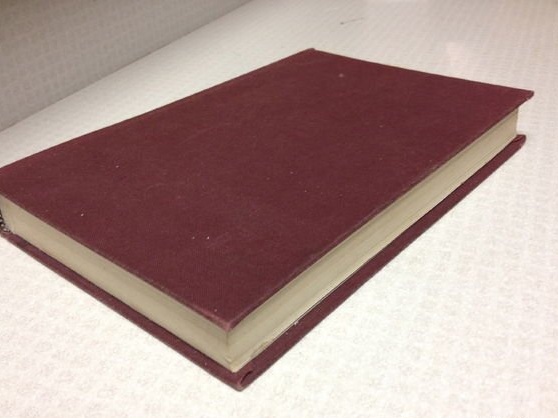
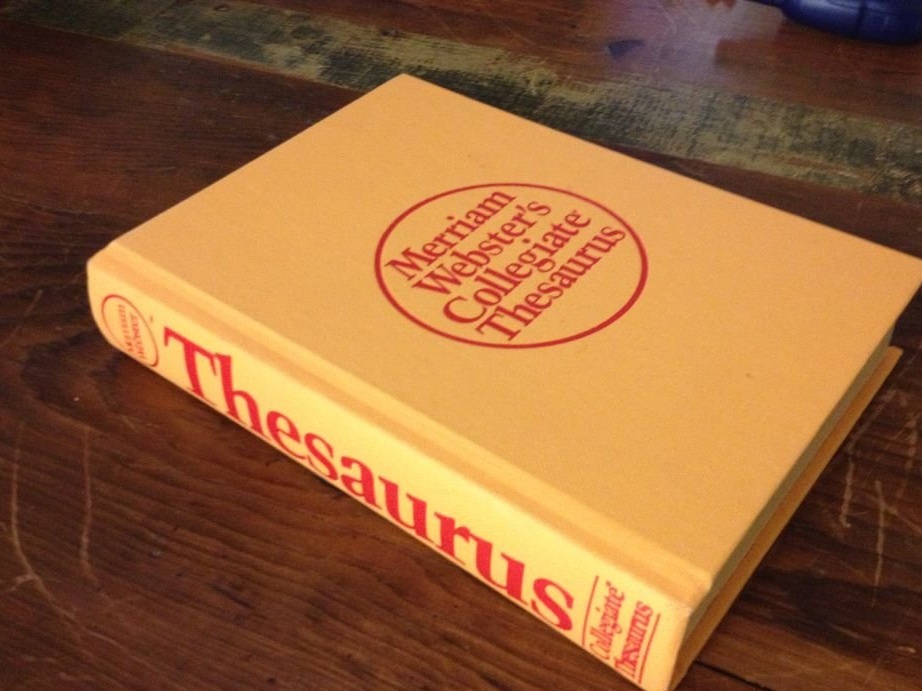
The choice of a book is a personal matter for everyone, and there are no restrictions. Ideally, this should be a hardcover book so that the iPad screen is securely protected and lasts longer. I chose a thicker book because I wanted to provide a place to store glasses, headphones, a chain for glasses, etc. Also, this book sits comfortably in your hand, the size is comfortable enough to carry with you. Apart from the cover, the book is about 2.5 cm thick. (Nevertheless, it is not so large as to accommodate a white charging connector, which is about 2.5 cm thick. If you need to carry it in a case, you need to take the book about 3 -4 cm).
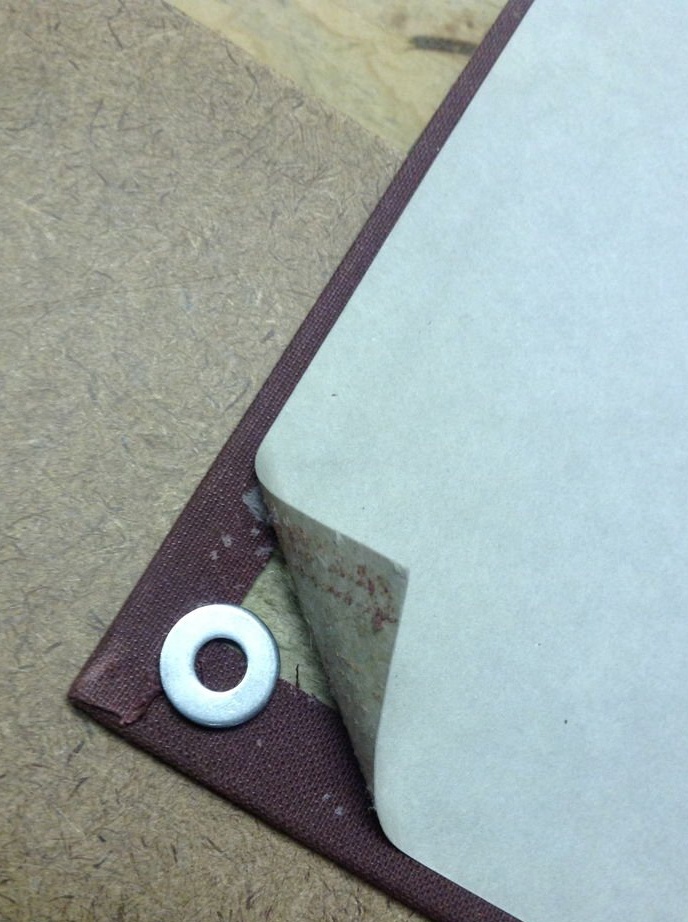
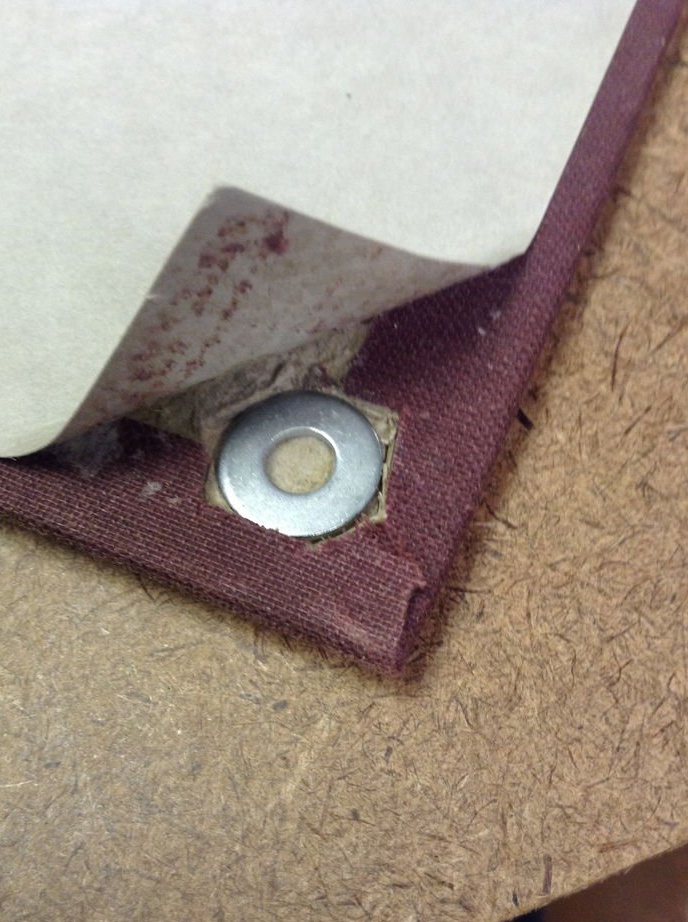
To make a lock for a future case, it is better to fix a magnet and a metal washer before all other operations. In the corner of the cover, move the cover and mark the location of the washer with a pencil. Make sure that this place does not extend beyond the edge of the pages, since a magnet for the lock will need to be built into the thickness of the pages, exactly opposite the washer. The center of the washer should be approximately 12-15 mm away from the edges of the cover. Cut the cardboard cover of the book with a knife and glue the washer inside, then glue the cover back.
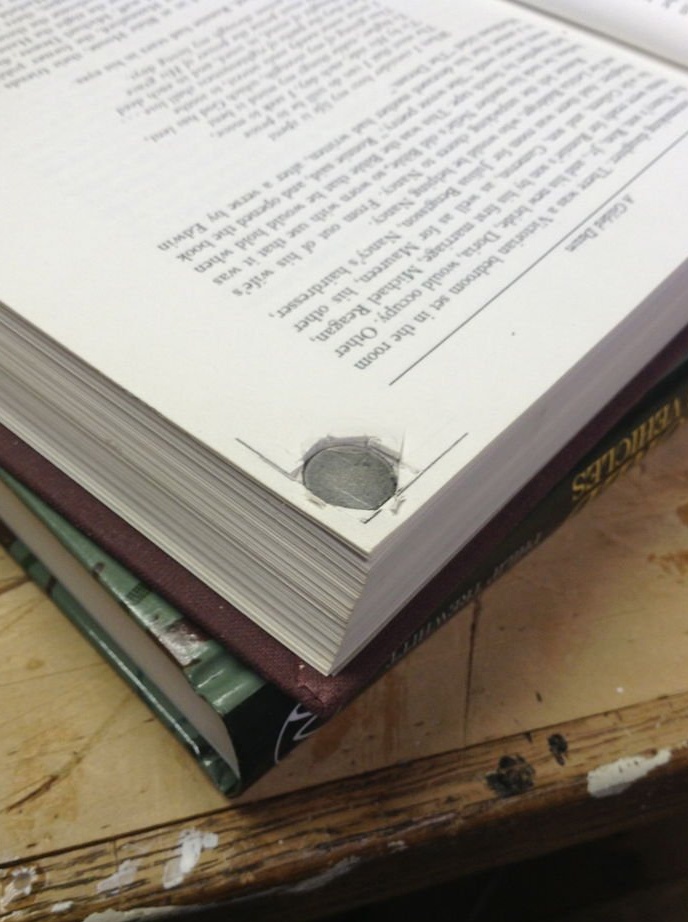
For a magnet, start cutting a hole on about page 8 of the book. For a magnet, 3-7 mm is sufficient, depending on its thickness.Since the pages are smaller than the cover, the center of the magnet should recede by about 9-10 mm from the edges of the pages. In my case, the book is not much larger than the tablet itself, so the magnet is pretty close to the edges. In principle, it can be placed anywhere, if only it does not stand on the cut line with a saw. When the magnet is fixed, glue 3-4 pages on top of it to hide and prevent it from falling out. In the next step, we glue the edges of the book.
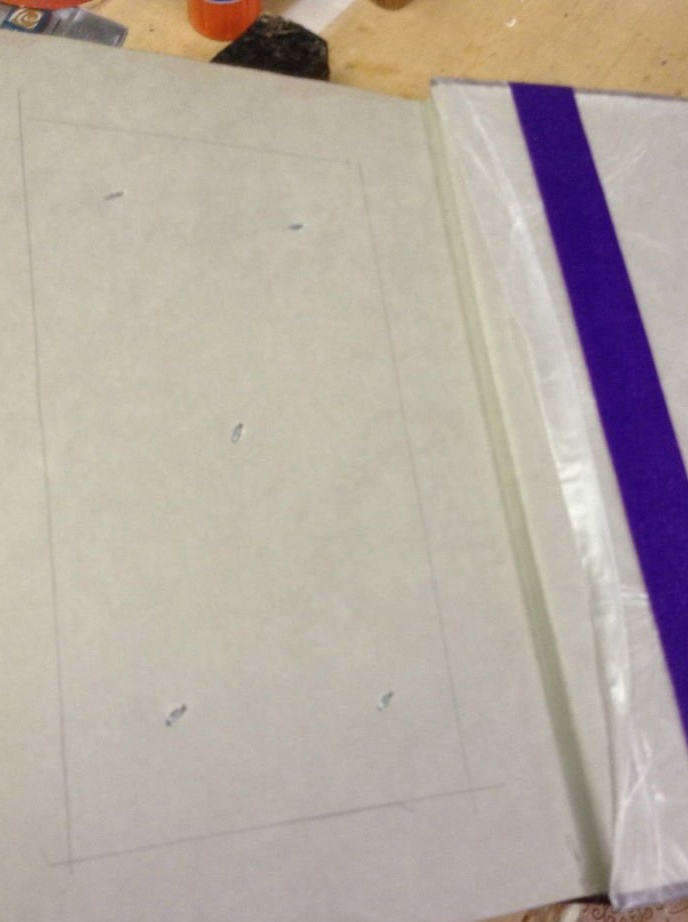
Step 2: Designing the insides and sizing the outer surfaces
Next, you will need to draw a layout design for the inside of the cover and decide which pages to cut. I leave 3-4 pages in front of the book, so I’ll start after about the content. You will need at least 1 free page to stick all the marks and inscriptions of the drawing. Clearly define the location of the buttons on your tablet in order to provide for the recesses for them. The on / off button at the top right should be easily accessible, so I cut a half-inch circle for her for her. This notch also makes it easy to remove the tablet from its cover or adjust the volume.
To protect the outside of the cover and to prevent the whole book from sticking together, wrap the covers on the front and back with wax paper. You can fix the paper with tape or rubber (or both and the way I did it).
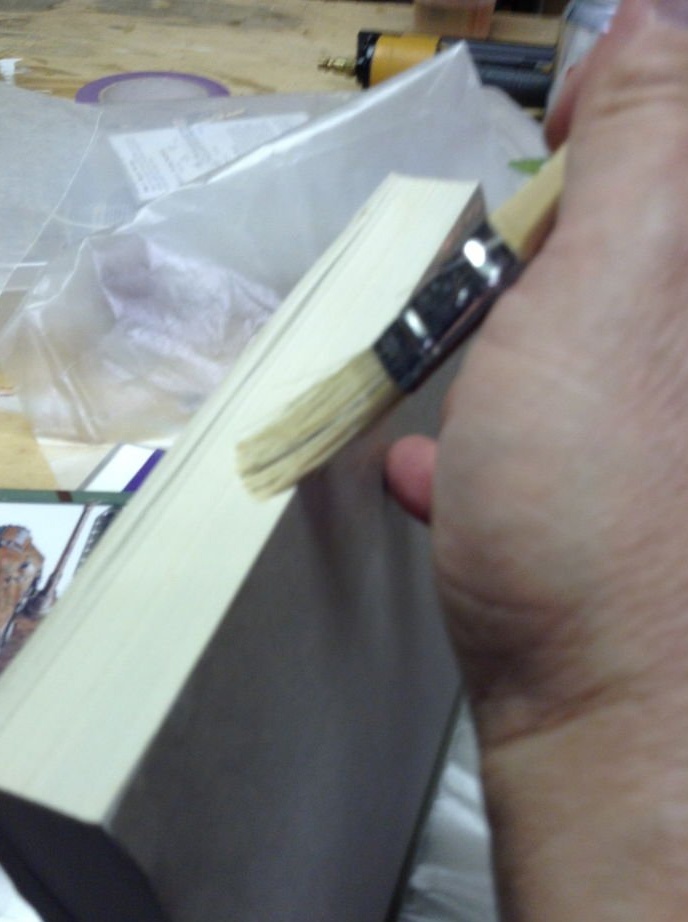
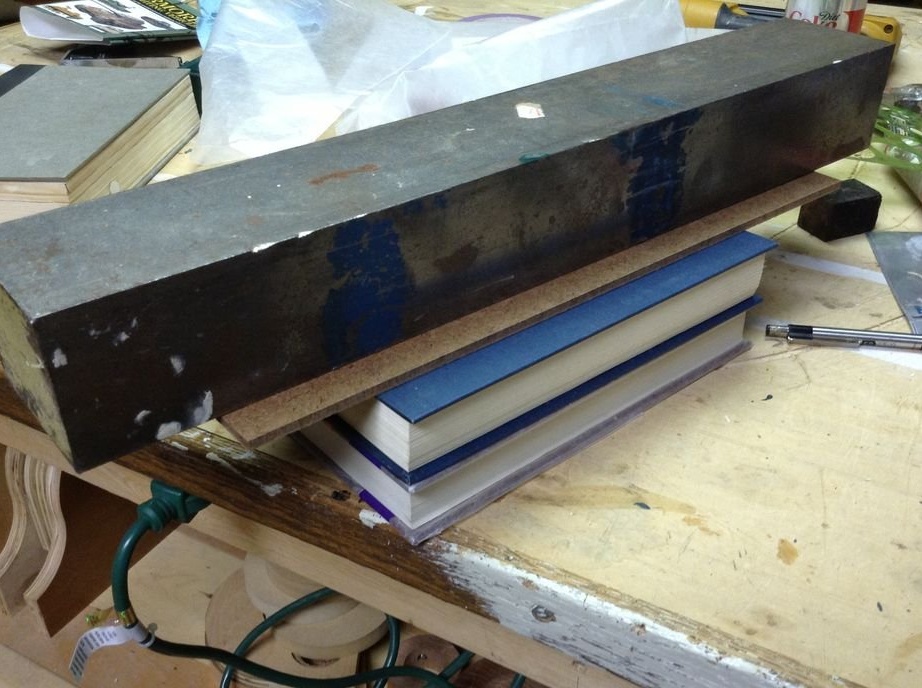
When the covers are protected, mix 2 parts PVA glue and 1 part water. We need to get liquid glue, and the proportions of this mixture are not critical. Simply apply this mixture with a brush to the outer ends of the pages. I do this in several layers, abundantly wetting the edges of the pages with glue. When this process is over, close the book and put something heavy on top so that the pages do not start to be bristled with accordion. In this position, the book should dry completely; it would be best to leave it like this for the night.
Step 3: Fasten the book

Before you pick up your hands, decide on the shape of the notch under the iPad. It could be any design idea, but I just decided to make a couple of sides on the sides of the recess for fixing the tablet inside. If you are also planning such a solution, it is better to draw these sides now, while the book is still solid.
Now I would combine a circular recess for removing the tablet in the upper right corner and the right retainer. It would be easier to glue one continuous fragment, and the form of the case itself would be more complete in appearance. Check out how I embodied this option in another book. Look at the photo at the end of the article.
To prevent pages from scattering after cutting, you need to fasten them together with brackets or nails. I spent 6-8 staples, which were enough for about ¾ of the thickness of the book. Therefore, it is better to fasten the thickness of the pages in front and behind.
Step 4: It's time to saw!
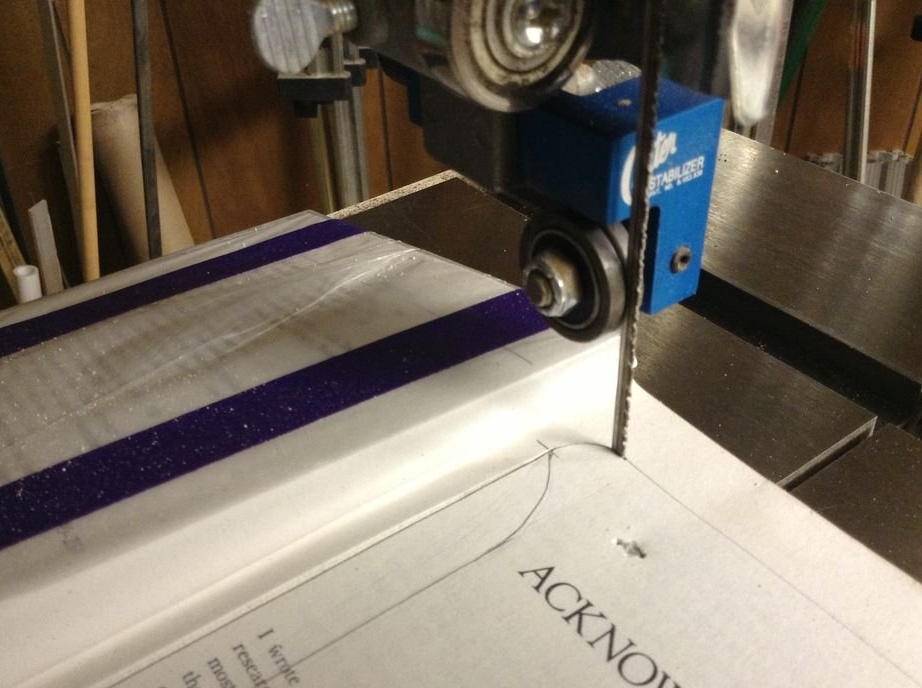
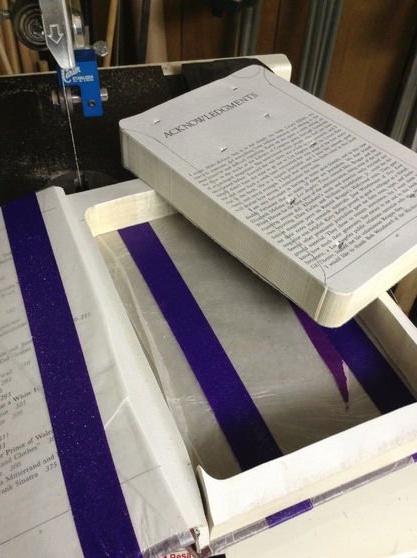
Start cutting from the bottom edge, closer to the binding of the book. Finish to a rounded edge on the outside. It would be possible to start cutting directly from the notch angle, but then the angle might look slightly shabby. This input cut provides more surface for gluing our workpiece. Simply guide along the marked lines to cut the core of the book.
Step 5: Glue the Book Case
Before you start decorating the "interior", glue the pages of the book at the entrance to the saw cut with PVA glue or super glue. Any glue that works with paper will do. Remove the wax paper from the back cover and glue it to the pages. For this, children's glue in sticks is well suited, since it does not spread and perfectly fixes. Again, set the book aside with something heavy on top to dry.
Step 6: making the inner shoulders
Make another mixture of liquid glue for the outer edges of the sawn pages. Work them on the outside and let them dry under something heavy.
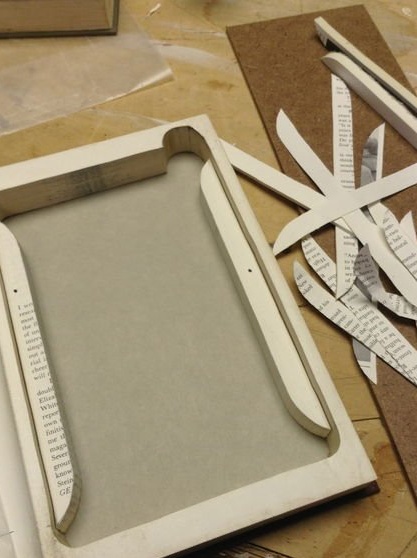
When the pages are dry, take out your saw again and cut out the tabs for the book that you previously outlined. Next, you need to remove part of the sheets on top of the cut sides to the height of the tablet itself. Tear off a little. If you suddenly go too far, return a few pages back and glue them to the rest. When you reach the desired height, glue the inner edges of the sides with the same liquid glue.
When the glue dries, the time has come to glue the sides inside the case along with the inner edges of the case itself. Fully glue the lower and outer surfaces of the sides and place them in their place. In my case, I glued a round hole, which I made to take out the tablet. After glue, glue the entire inner surface of the case and leave to dry.
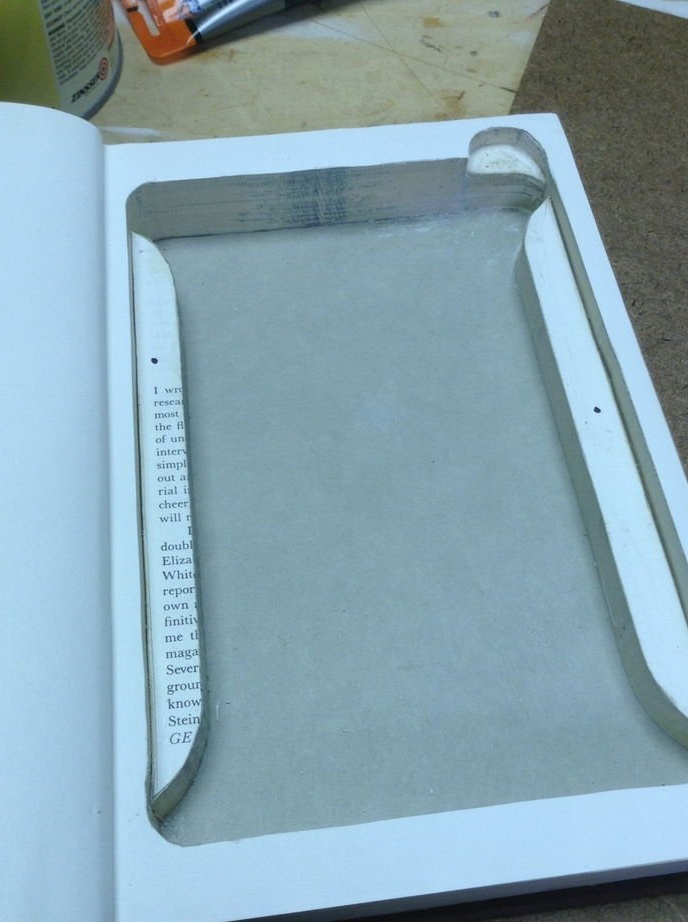
Step 7: Finish
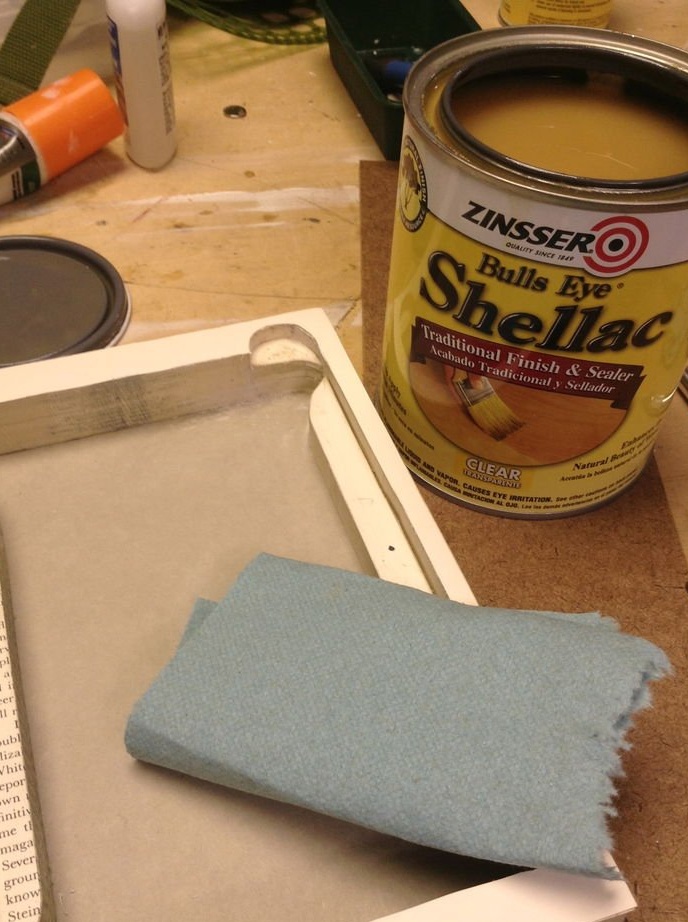

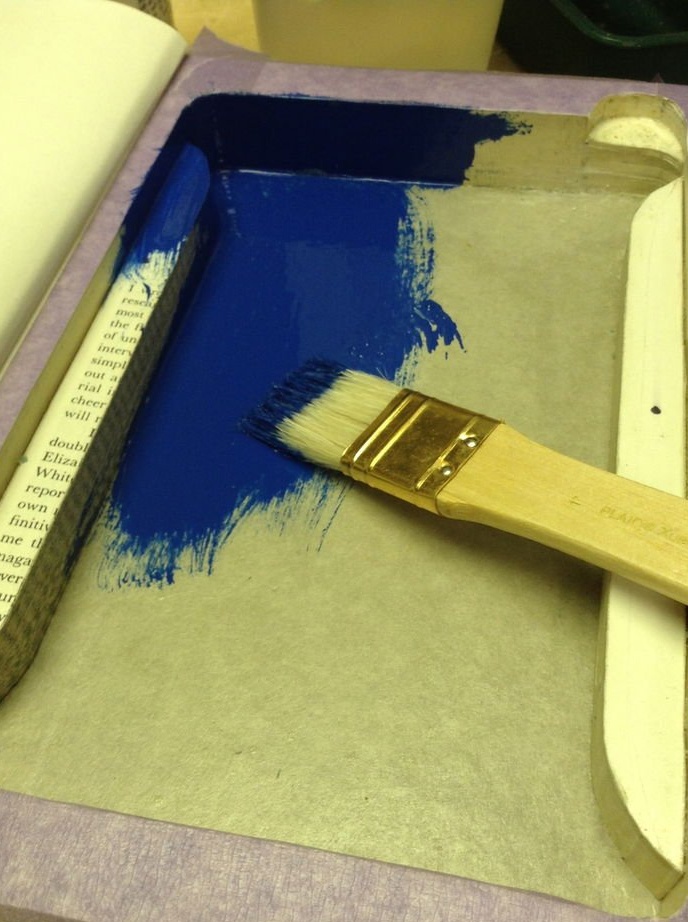
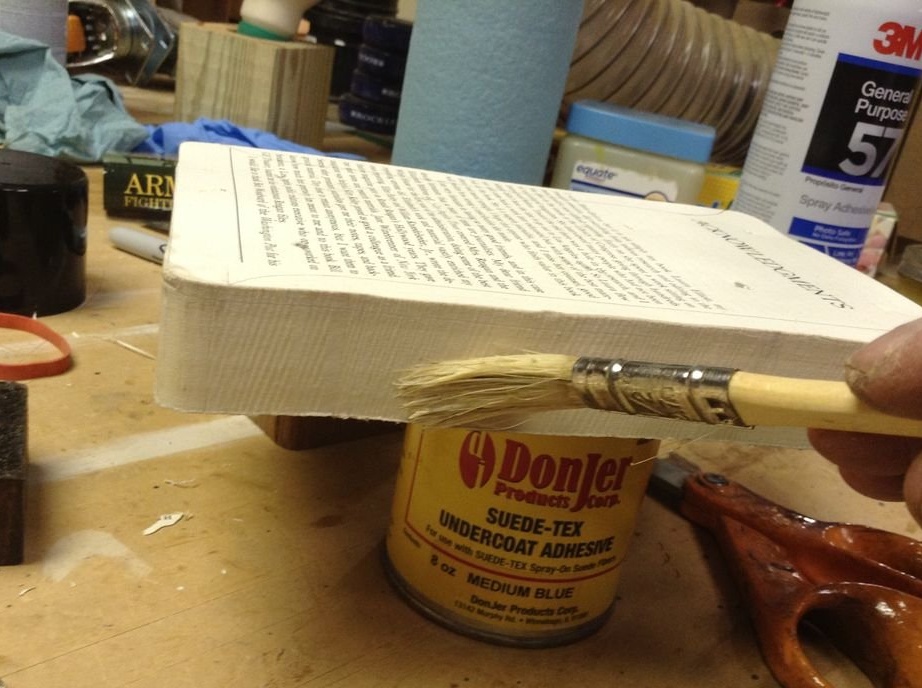
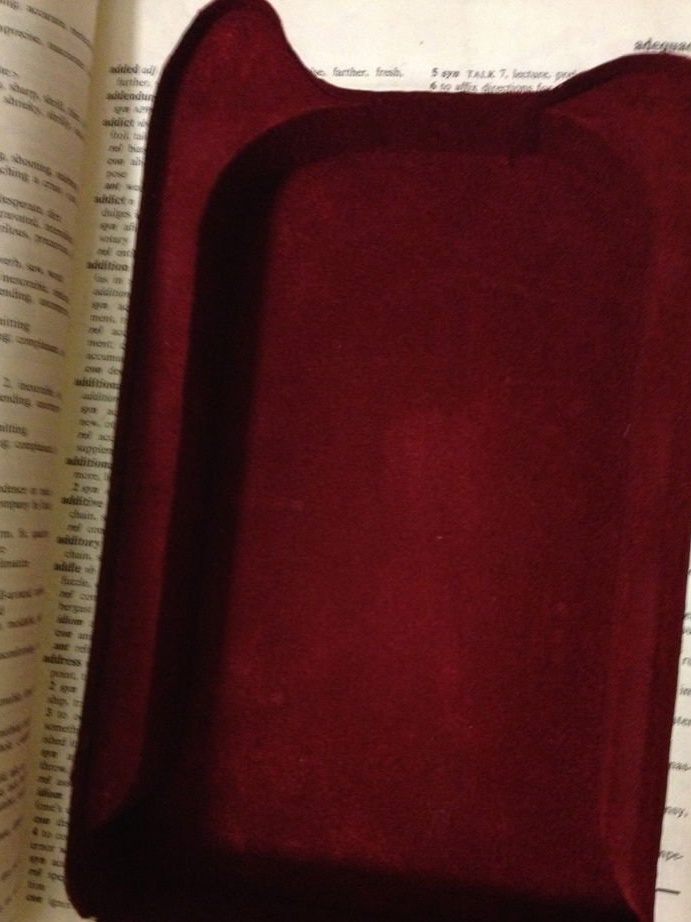
It’s very simple to give our iPad a beautiful look. It's all about the finish. First you need to treat the entire interior with shellac or a polished primer. This is necessary to consolidate the flock. A couple of layers will be enough.
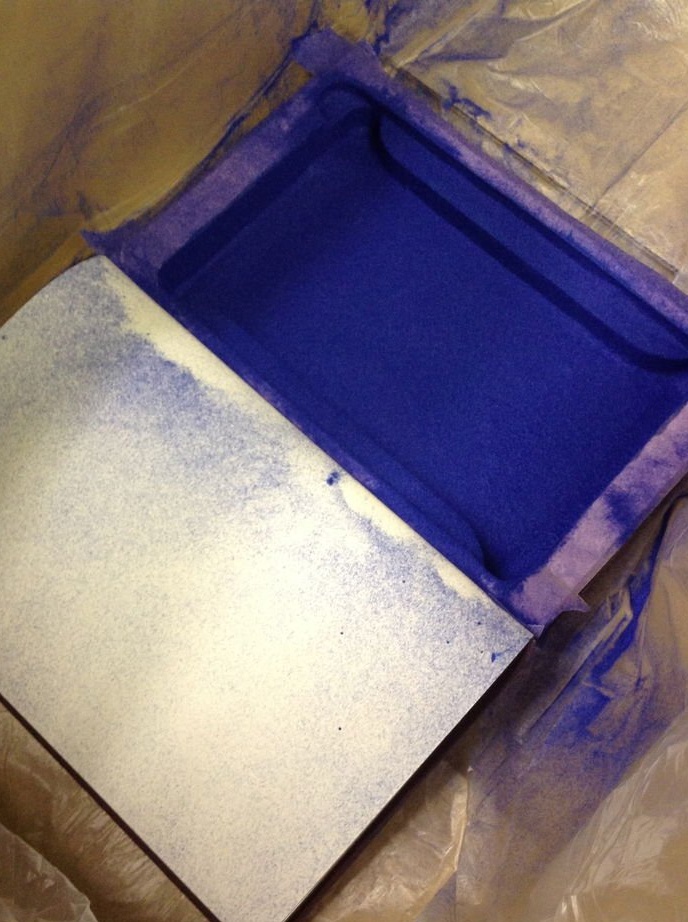
The next step is to flock the surface. This is done very simply. First you just need to cover the adhesive undercoat with paint and then cover the surface with flock. Flock is available in different colors - red, green, blue, black, etc. I had a special device - a yellow mini-flocker, with holes at the end. Fill the bottom half with flock, and when you again connect the two halves of this device together, villi will shoot from the holes on the end. Thus, it is easy to process surfaces of any shape. Before applying the adhesive undercoat, everything should be at hand, because it dries in 10-15 minutes. Leave the flock for 12-24 hours, and only then can the excess be removed.
In the photographs, you see that I used a purple masking tape in the hope of keeping the case covers clean. This did not work. A blue sticky sublayer seeped under my “protection”. In the next step I will show how to fix it.
Step 8: notice the marks
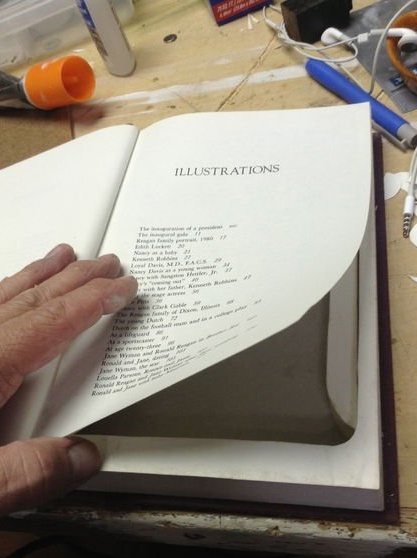
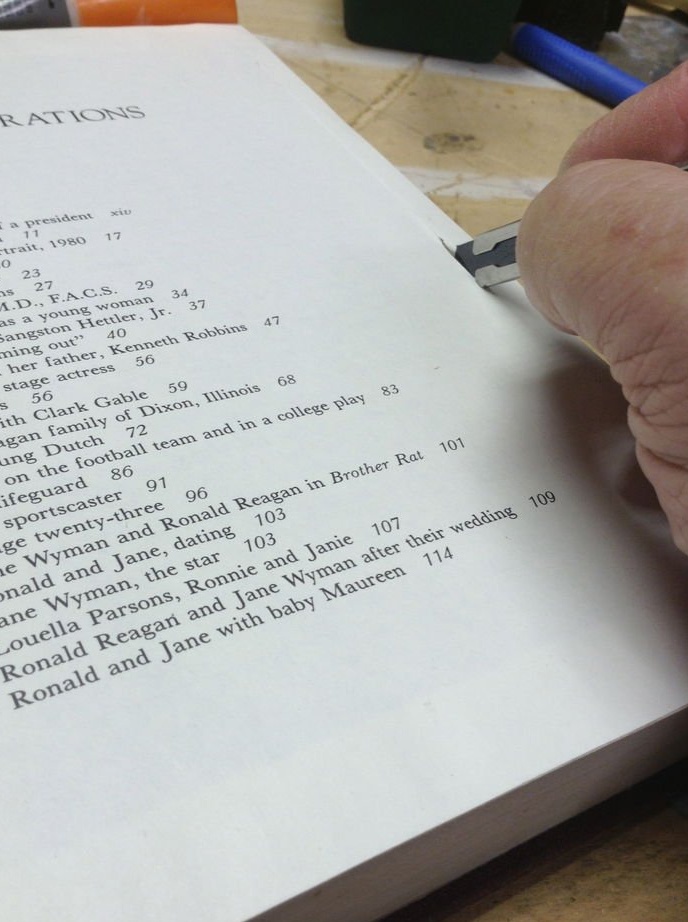

I have done this step twice. Once before applying the flock and once after applying the flock. I thought that cutting off an unnecessary part of the page would damage my coverage, but it turned out to be completely invisible. So it’s enough to just take this step after flocking, if you couldn’t keep the sides of the case clean.
This trick allows you to hide notes for paper cuts and stains of glue. For this step, I again used baby glue in the stick. Glue the page and let it dry before you cut the middle with a knife. That's all!
Step 9: Find a quiet place and go!
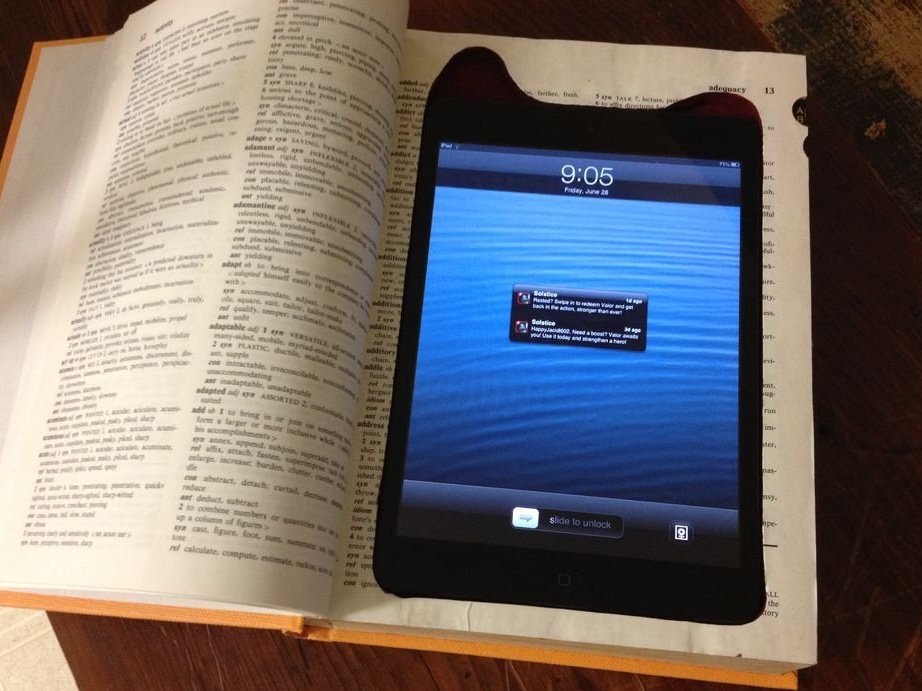
It is fascinating and uncomplicated. craft. I have been using my iPad book for several weeks now and I really like it. It is very light, it is easy and convenient to carry. My son wanted a bigger book for his tablet, and you can see the second option in the last photos.
Do it yourself and you will like it!