
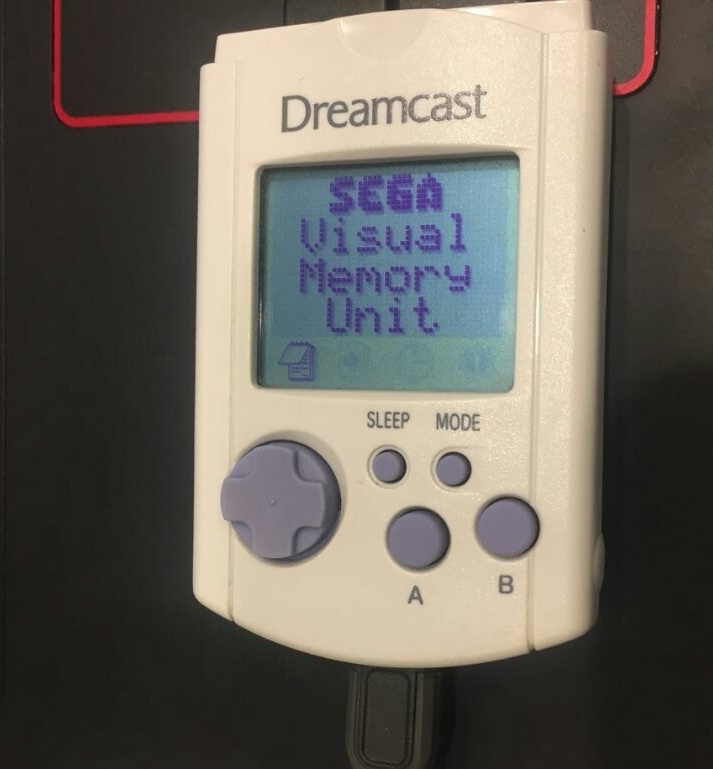
Many readers managed to forget that once a memory card was called a device for storing not in files, but in console games. The ability to save not with intermediate passwords, but "like in a PC" came to the liking of appendants. And the Sega engineers decided to make a memory card for Dreamcast in combination with a minimalist handheld game console. So I saw the light of Visual Memory. You can upload minigames to it not only with Dreamcast. There are free homebrew games, homemade adapters and programs for downloading such games from a PC, and emulators of Visual Memory itself for various platforms - from Android to ... DOS. But if you prefer real hardware, then the need to power a miniature console from two CR2032 elements that need to be changed approximately once a week will probably not suit you. The author of Instructables under the nickname UncleVlady came up with how to remake the device powered by a 138 mAh LiPo battery. The modern Micro USB connector on this vintage thing looks, of course, unusual - it’s the same as meeting such a connector on, say, a classic Ericsson A1018s cell phone. Cognitive dissonance in action!
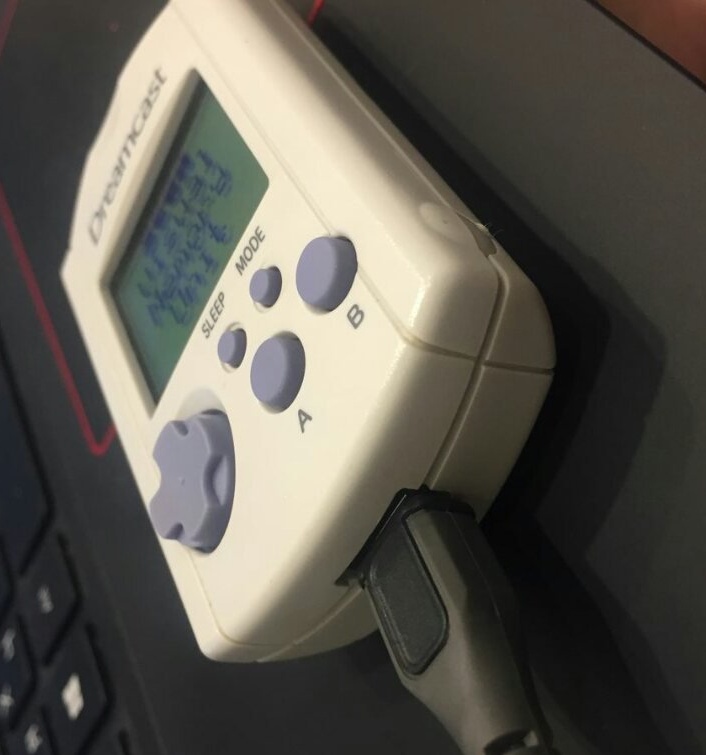
But there is no deception, the Master remade the piece of iron for real. Here he connects the cable and charges the battery:
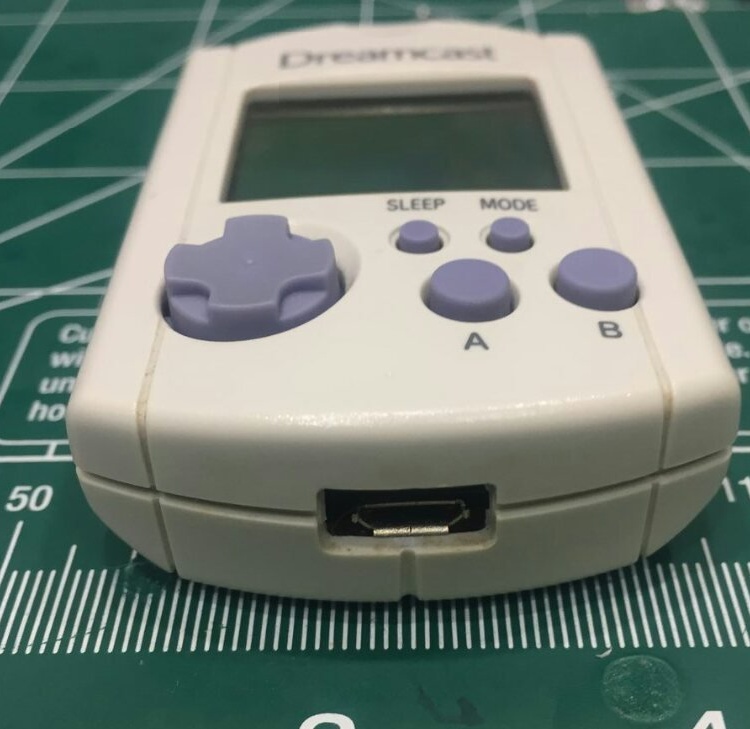
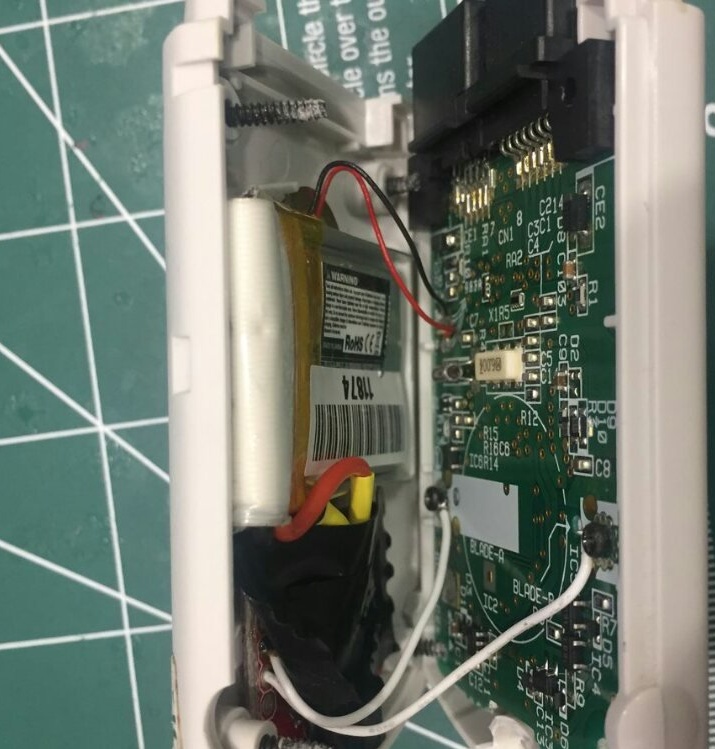
To modify the device, the master, in addition to the 138 mAh LiPo battery already mentioned (the larger capacity does not fit, but the current consumed by the console), takes a combined SparkFun board that combines a charge controller and a boost converter with 5 V output. If you take the board only with a charge controller, without a converter, the console will still start, but it will constantly display a message about a deep discharge of those two CR2032 elements that it was designed to work from initially. The master installs the combo board so that the Micro USB connector is pointing down, and carefully cuts a rectangular hole in the appropriate location on the chassis to connect the cord to it. The best tool for such delicate work is a needle file. The master connects, observing the polarity, to the corresponding contact pads on the board the battery and the load - the console itself, disconnecting the standard battery compartment from it. Elements of CR2032 are no longer needed in it, they will also serve in the motherboard, talking or LED wrist watches, and some remote controls.
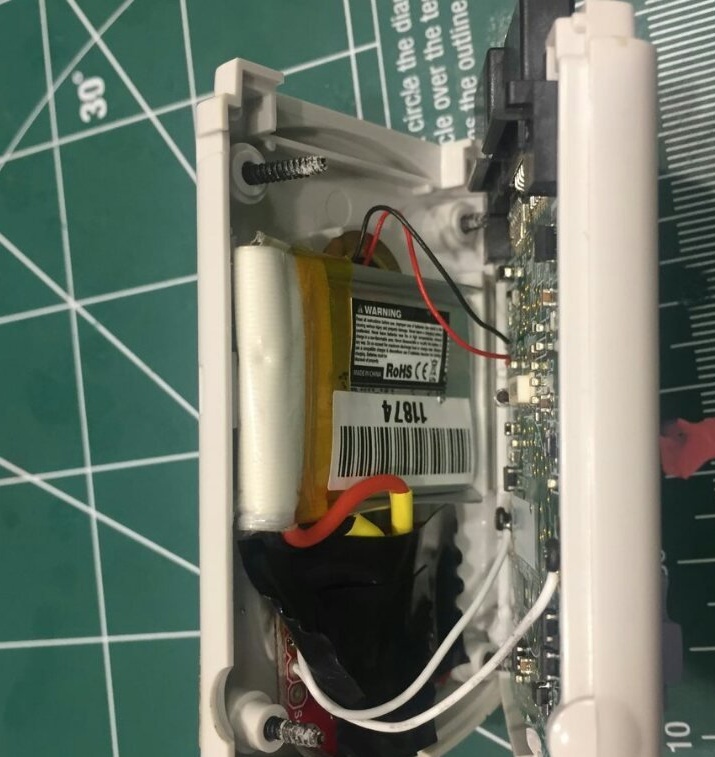
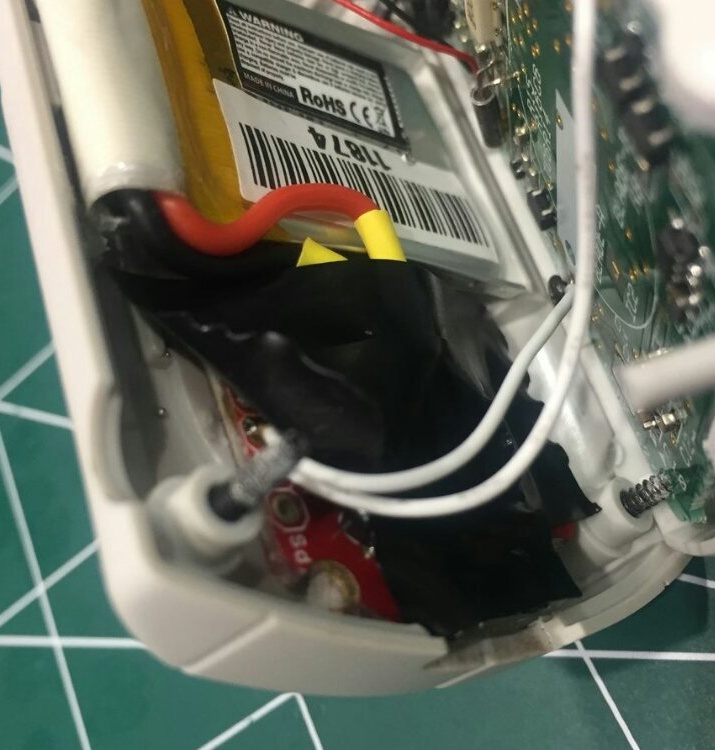
The wizard securely secures all newly added components. After isolating everything that is possible, and making sure that nothing closes when closing the case, he collects everything as it was.

Turns on, and everything works.You can play minimal games again - both downloaded from Dreamcast and so on. homebrew - home-made games and demos, including quite long, downloaded via an adapter from a PC. And all this without the inconvenience and expense associated with replacing the batteries.
