
One morning I woke up with a new idea for a project in my head. I went to bed thinking about the presentation that I had to give for teachers of middle and high school works in a couple of weeks. I wanted to come up with simple and inexpensive projects that they could use in teaching schoolchildren some aspects of technology. I really hoped that my ideas would inspire them to create their own. I dreamed all night how I did different fixtures From paper clips, this project was born. As for the cost - a piece of wood and paper clips cost me about 15 rubles.
I already worked on several projects at that time, so it took a couple of months to think it over until I actually sat down at the table with a bundle of paper clips and began my attempts to build something from them. While I was busy with other projects, I thought over the design and manufacturing process of the parts of my car, as well as the way they were assembled. To do this, I needed very few tools and materials. It seemed to me that the process would be quite simple. Staple mechanisms are very interesting to create, and it is also interesting to “play” them later. It seems to me that the sculptural forms of these creations are also a kind of art.
For educators, this project is a great way to teach children the physics of mechanical machines, including concepts such as leverage, knee, pivot, circular and linear motion. Products from this project can be used as a miniature work model or as a prototype in the production of various designs. Also, similar mechanisms can be used for students studying energy. A similar project helped me a lot, in which groups of participants, as well as individual inventors created separate mechanisms, and then combined them together to create a chain reaction. It seemed to me that something similar could be done with staple mechanisms. This will enable each student to create their own part of the general mechanism, and then connect everything into a large chain, and also simulate a chain reaction.
This video shows how I constructed my mechanism from paper clips:
Step 1: Such a versatile clip

As a lifelong Creator, I always loved to take apart even the simplest devices. At meetings, I constantly disassemble and assemble my pen. In the cafe, I constantly play with my straw and the wrapper in which it was brought. One of my favorite activities is to play with paper clips. I was always fascinated by their original, but simple form, as well as their principle of work. I know that this is just a piece of wire, bent in a certain way, and nothing more. My quick internet search reveals that I'm not the only fan crafts from paper clips. My fellow community members have already posted a ton of paperclip projects. These are toy helicopters, and earrings, and even chandeliers, of various geometric shapes. I met lock picks, catapults and trebuchet. So my post will be just another item on the list of what can be made from paper clips.
Step 2: What you need.

From this we will create today:
- A box of large paper clips (mine were made of wire with a diameter of 1 mm).
- Two small pieces of wood. I bought two samples of flooring from the nearest hardware store. Each cost me no more than 10 rubles.
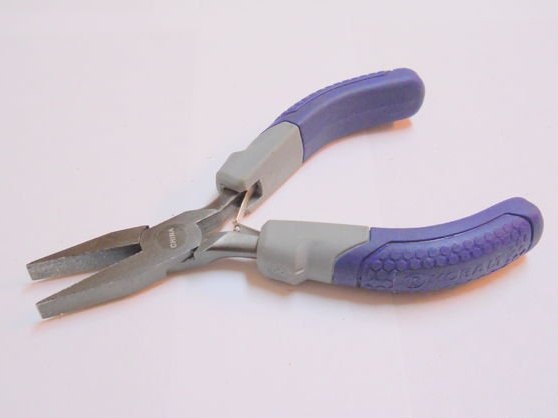
- A pair of nippers and a pair of long-nosed pliers. I recommend such as in the photo above. If you have pliers with long round tongs and a cutting edge, they will work too.
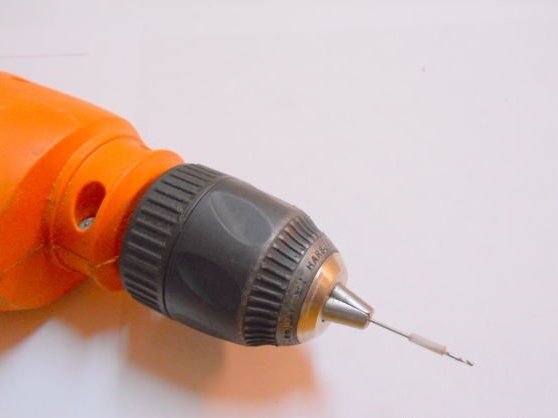
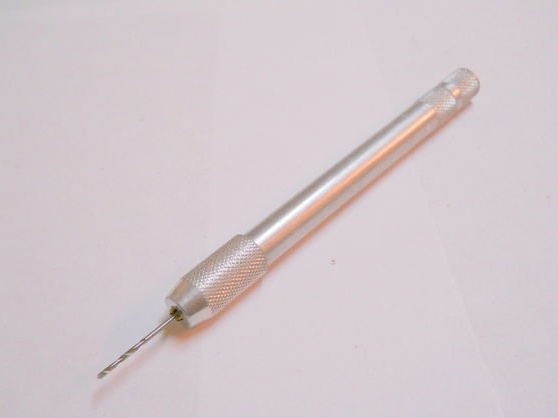
- A couple of drills at 0.8, 1.0 and 1.2 mm.
- A grinder with a cutting wheel to cut off one of the drills.
- Drill to drill holes in wood. A hand or electric drill doesn’t matter.
- A small ruler and pencil for measurements and markings of places for holes.
You can use paper clips of other sizes. Small clips are easier to bend, but the design will be smaller due to the shorter wire length of each element. Also for clips of a different size, you will need other drills.
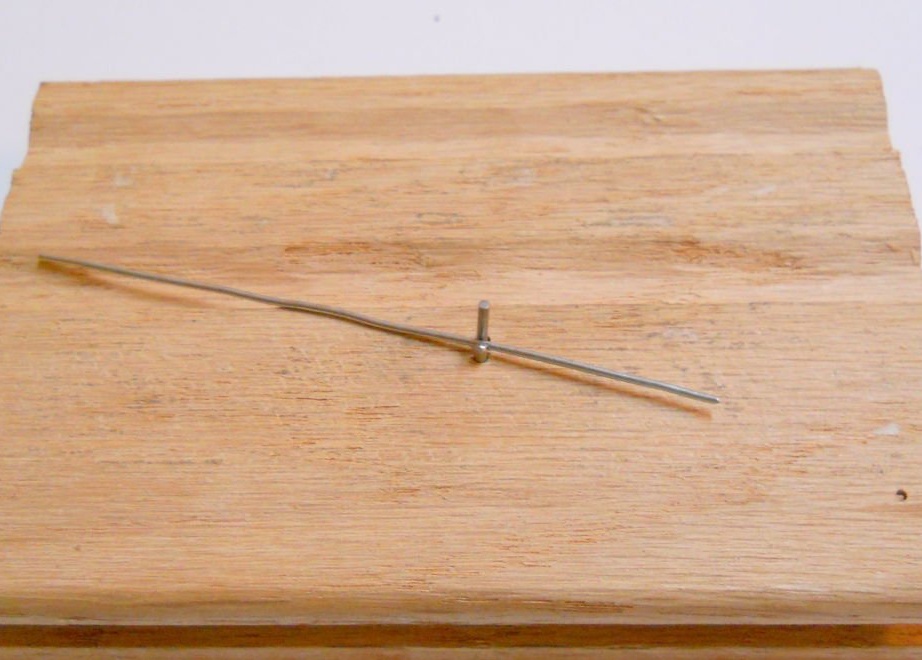
Step 3: We make the device for bending staples.
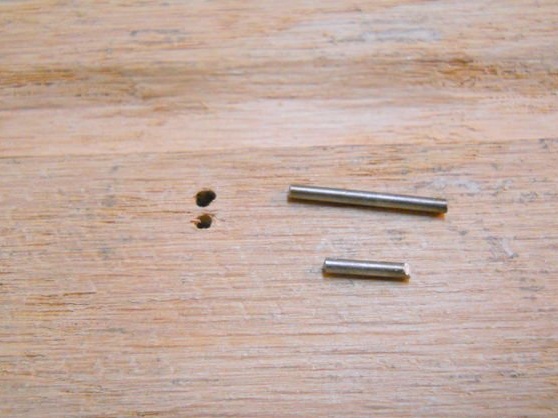
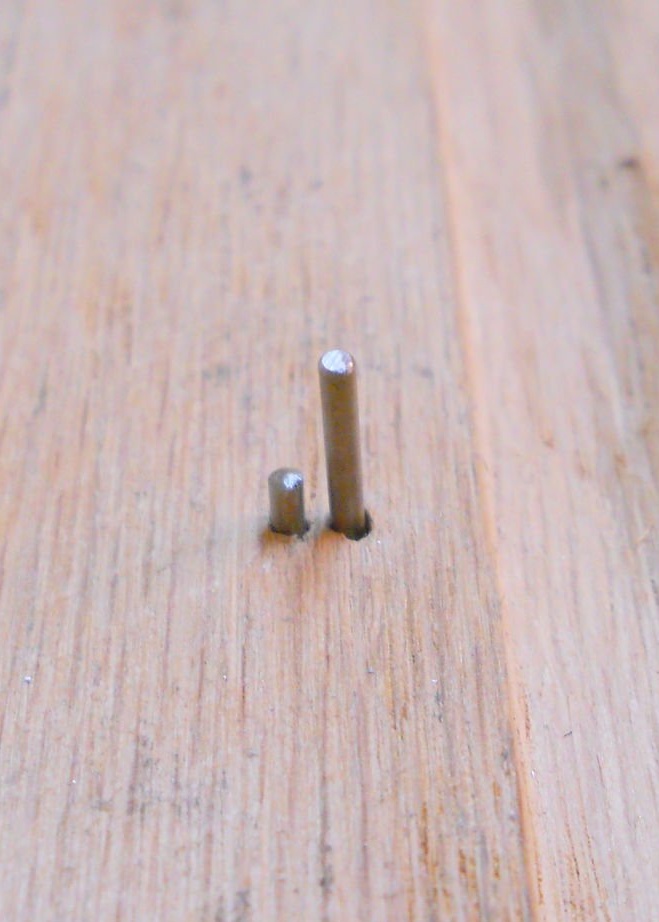
From the non-sharpened end of 1.2 mm drill with a grinder, cut two pieces. One segment should be approximately 10 mm and the other 20 mm. Grind the edges so that they are smoother with a grinder.
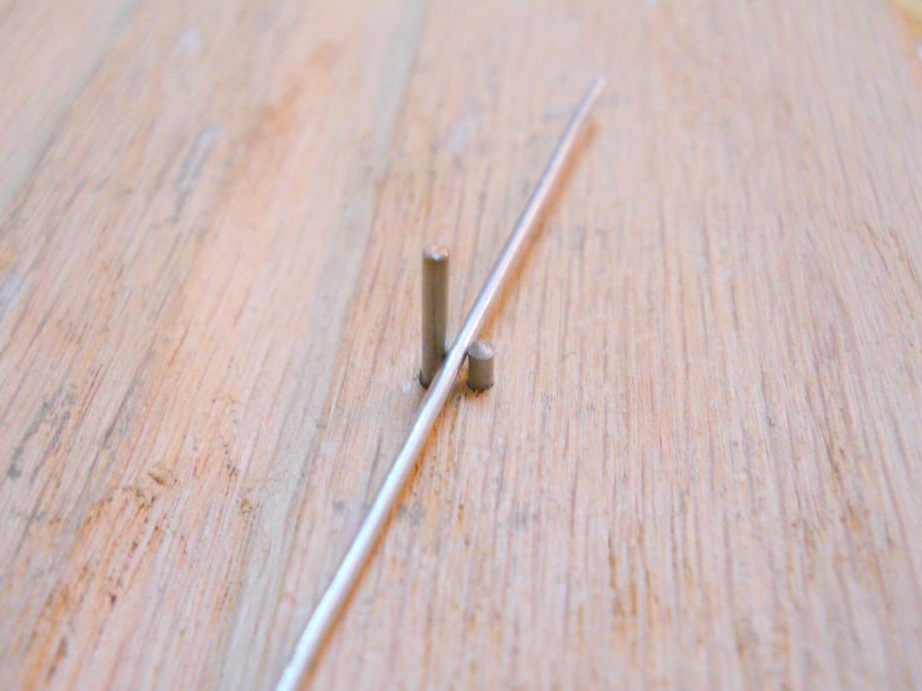
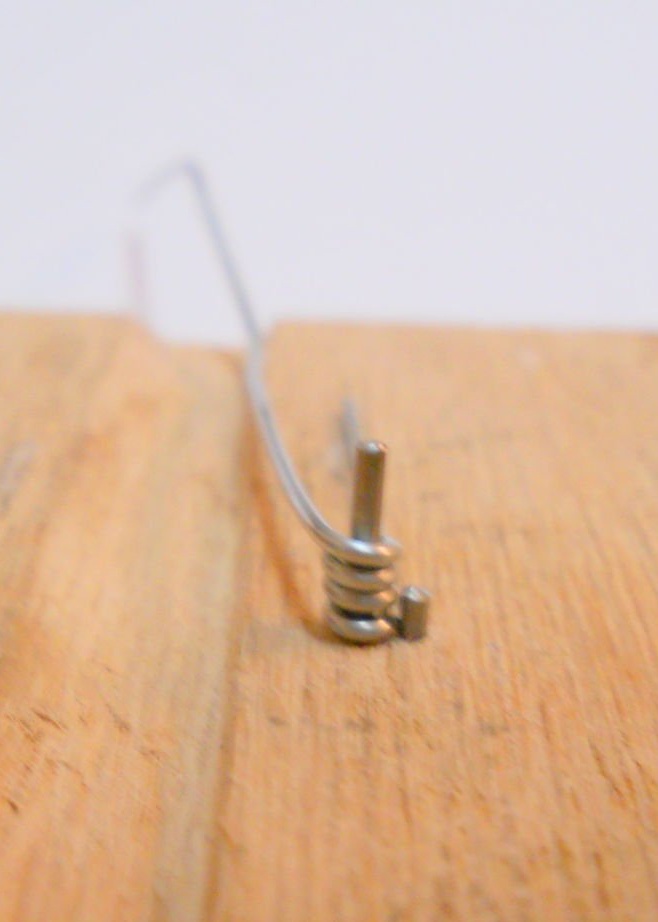
Drill a 1.0 mm hole in one of the pieces of wood. The hole depth should be 8 mm so that a 10 mm piece of drill protrudes 2.0 mm above the tree. The metal should fit tightly into the wood.
Make a second 1.0 mm hole of the same depth approximately 1 mm from the first. The paper clip in thickness should fit snugly between the two metal posts. Stick a 20 mm piece firmly into the tree.
Step 4: Practice twisting the coils.
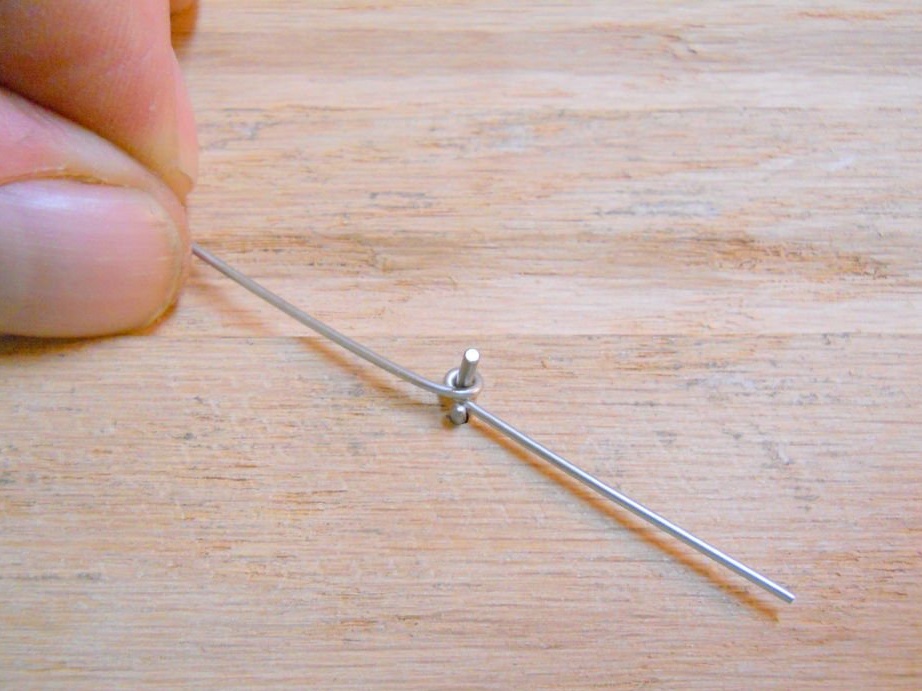
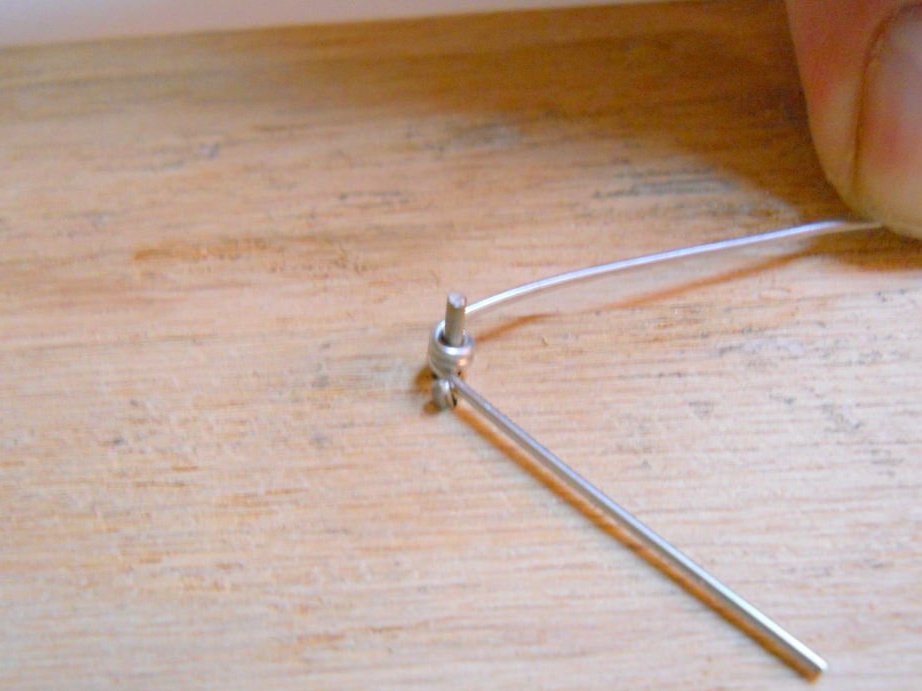
Almost all the details that we will have to do will have one or more turns, so it’s better to practice and learn how to do them well.
- Flatten the clip completely with pliers.
- Place a paper clip between the two sections of the drill of your bending tool, which we built in the previous step.
- Gently wrap the paper clip around the longer column, while the short one will simply hold the wire in place.
- Continue to rotate the paper clip around the long piece of the drill until you have 4 turns of wire around it.
- Carefully remove the twisted paper clip from the bending “machine” and check the turns. They should fit snugly together. If the turns do not turn out equal and dense - practice yet.
Here's how to do it:
Step 5: We make different details.
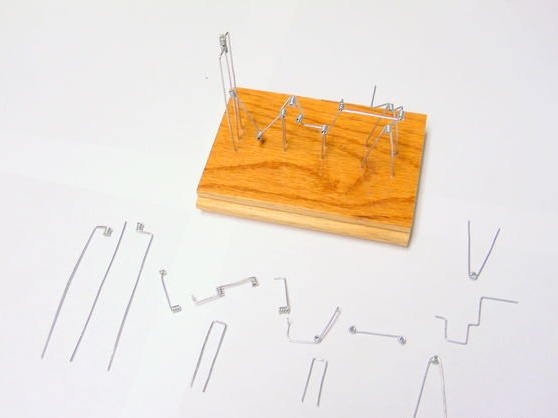
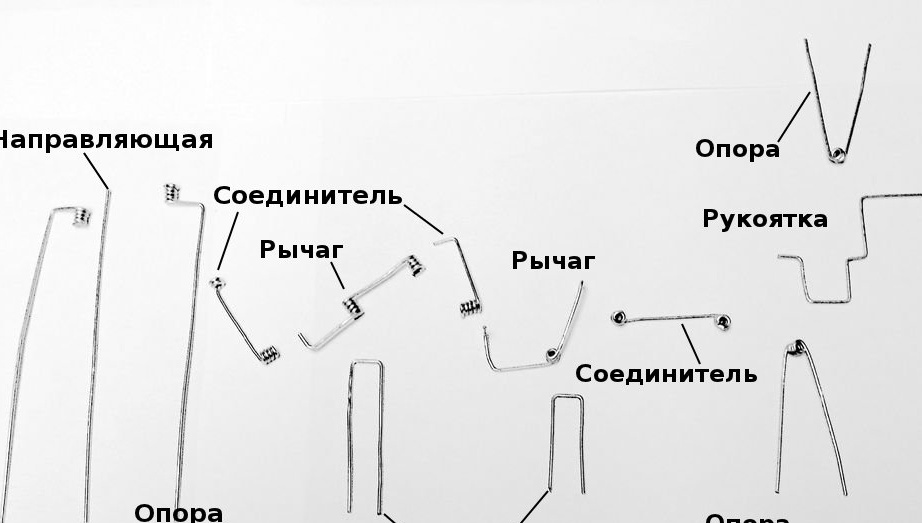
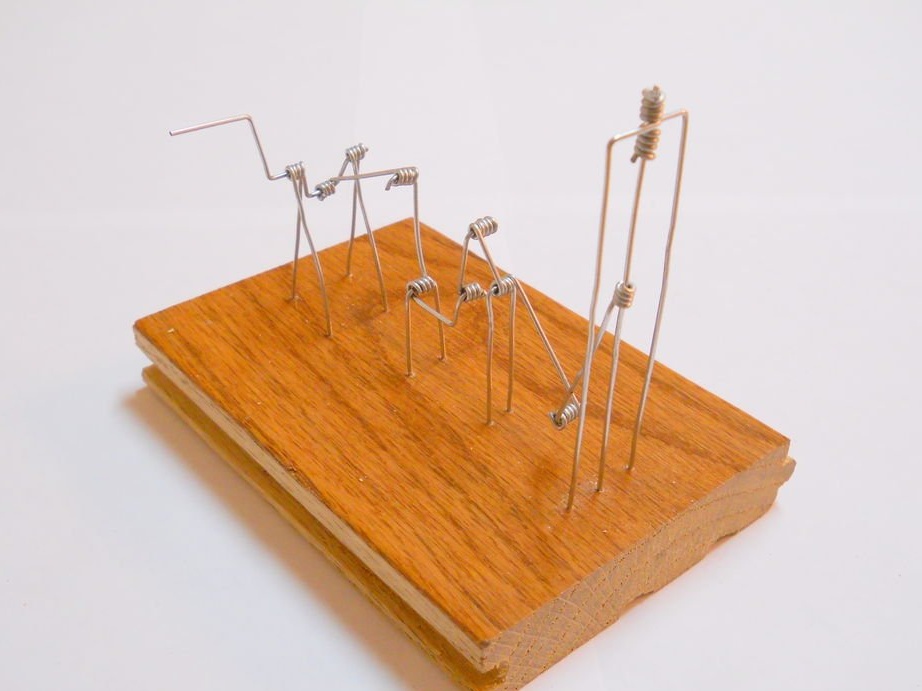
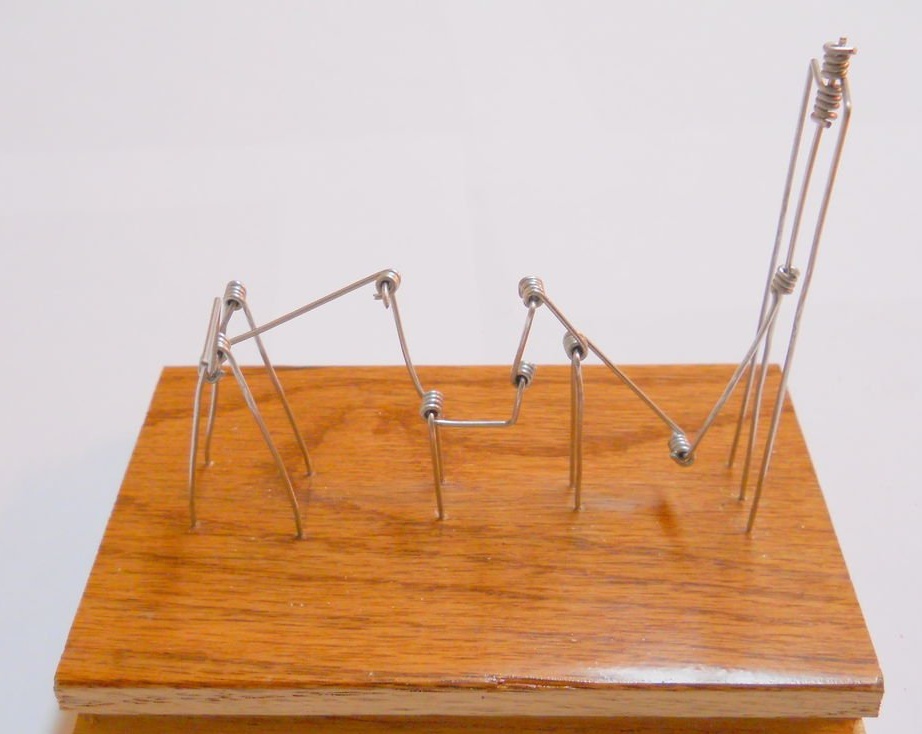
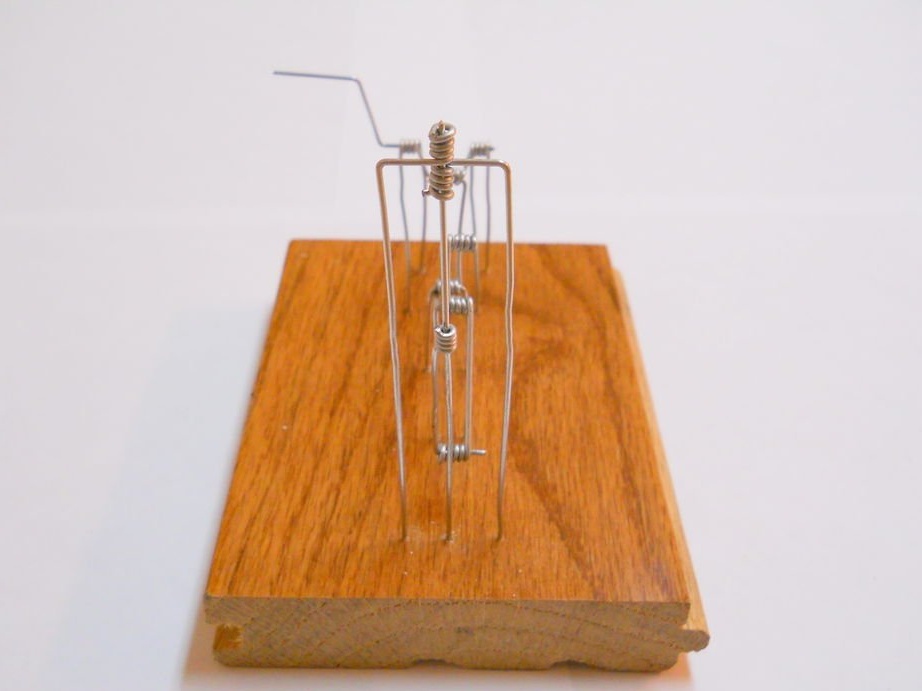
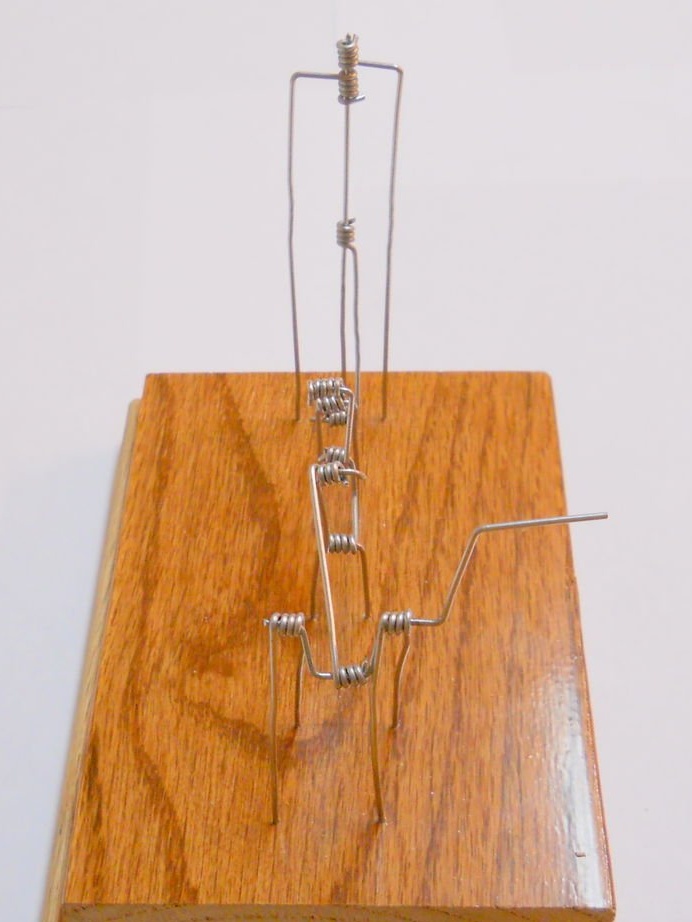
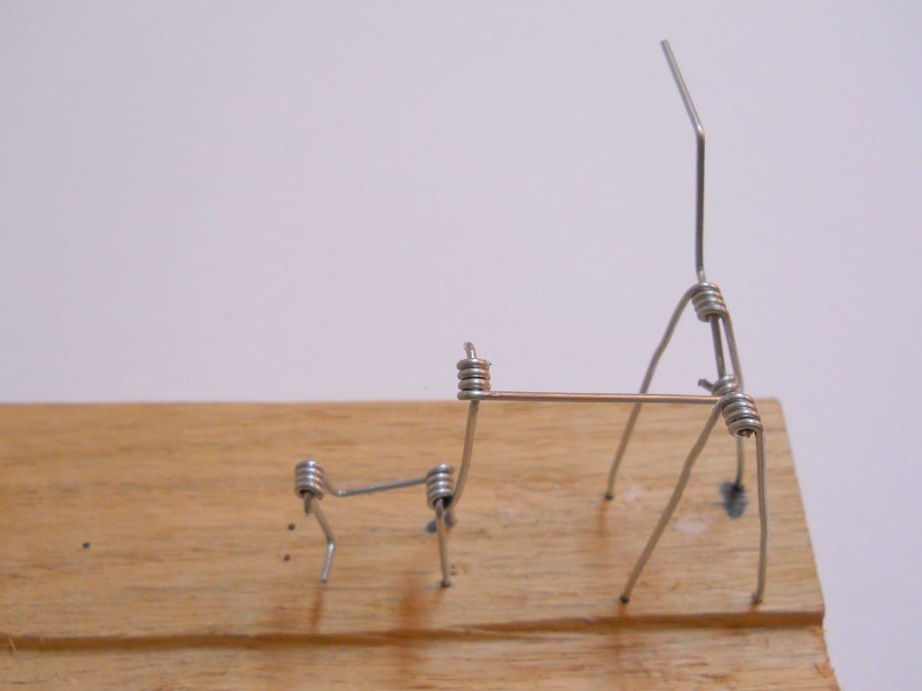
Here is the complete set of staple parts I made for this design. There is a connecting rod, two-legged and four-legged bearings, connectors and levers of different shapes and sizes. There can be an infinite number of other details and modifications. Only your imagination limits the choice.
The second photo below shows each spare part with its name.
Step 6: Make a foundation for installing the machine.
I used one piece of wood for the bending device, and the other to assemble my invention. I first tested the assembly on the back side, and when I debugged and measured everything, I began to drill holes on the front side. The beautiful texture of the finish looks very advantageous for the base of the machine.
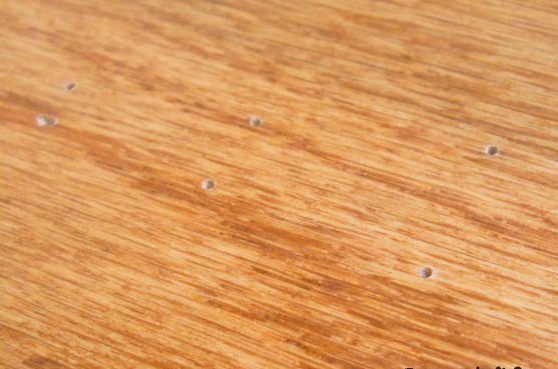
I used a 0.8 mm drill to make holes in the tree with a depth of 10 mm for each of the supports. A little effort with pliers, and legs legs in place. I think you can make a lot of holes with a mesh pattern, like on electronic circuit boards. So it will be possible to easily change the position of the supports in the assembly, testing and debugging the design. I decided to drill holes only where necessary, so it seemed to me better in appearance.
Step 7: Assemble the structure on the go
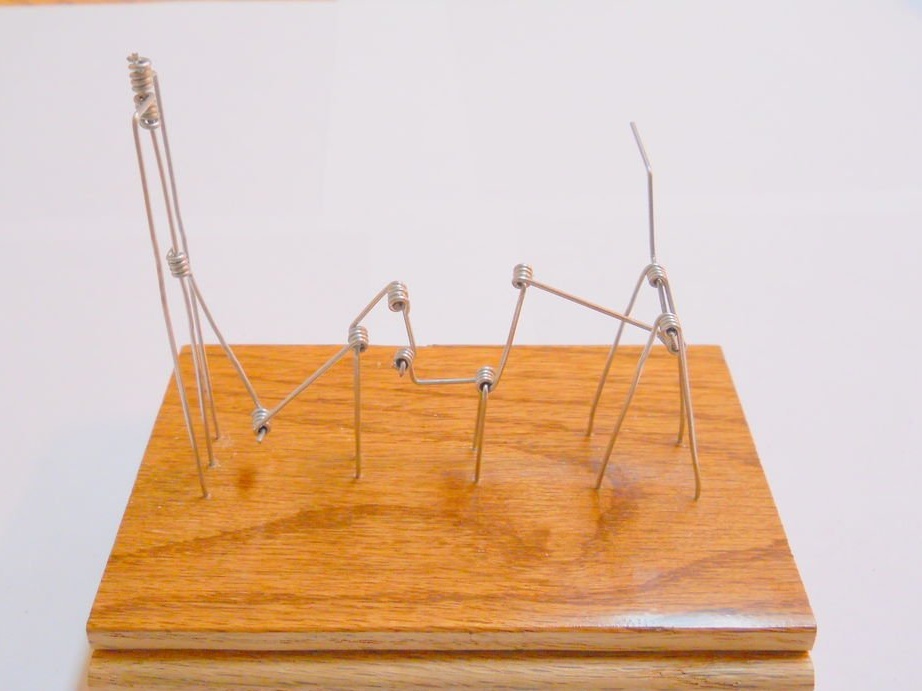

You will have to assemble the structure by changing the angle of bending of the wire on the go. There is no one way to design such machines. I just made a set of different parts and tried different options until the plant worked and I got a coordinated mechanism. My car is quite simple, but there is no reason to abandon a more complex and long construction with a bunch of levers, bearings and axles. You just need to experiment
Step 8: move on.

I think, by this moment you have already decided to make your paper clip design. Go ahead, it's time to get started. When done, return to this post and share your achievements in the comments.
Maybe you’ll make a set of parts and let your child play with this constructor. It may take them for hours ...
I hope that someone will think of creating a design that, in addition to the aesthetic side, will also do something useful.
The possibilities will expand significantly if you begin to create parts from several paper clips. You can make wheels, gears, chains and clutches. Small ferris wheel or robot - great ideas to get started.
I can’t come up with a cheaper and more universal way of constructing interesting machines, which, moreover, will be beautiful works of art. This is a great way to show children the principles of mechanics. This is no less a good way to learn something new yourself. Enjoy your mechanical engineering!