

The beginning of creating such a knife is an idea. You need to sketch your knife on paper and bring it to perfection. When the result is pleasing to the eye, cut out the shape on a dense multilayer cardboard with a clerical knife.
Materials
- Bristol cardboard
- Joiner glue (waterproof)
- good two-component epoxy adhesive 5 minutes
- sandpaper (60, 80,100,150 and 220 caliber)
- high quality varnish for outdoor work
- double-sided adhesive tape
- medical alcohol
- reinforced cutting wheels 1.25 inches
- a piece of steel sheet 80 x 500 x 3 mm
- solder bar 3 mm
- four pieces of wood 80 x 180 x 3 mm
Instruments
- 1X30 grinding machine
- polishing compounds
- polishing wheels (for punch)
- compass
- polishing wipes
- punch
- drum grinding machine
- patterns
- masking tape
- manual grinding machine
- pencil
- plain or checkered paper
- chisel
- quick clamp
- mill
- jigsaw
- nippers
- spring clips
- knife
- various bench saws
- drill
Remedies
- ear plugs
- mask for the face
- leather gloves
- protective glasses
Step 1:
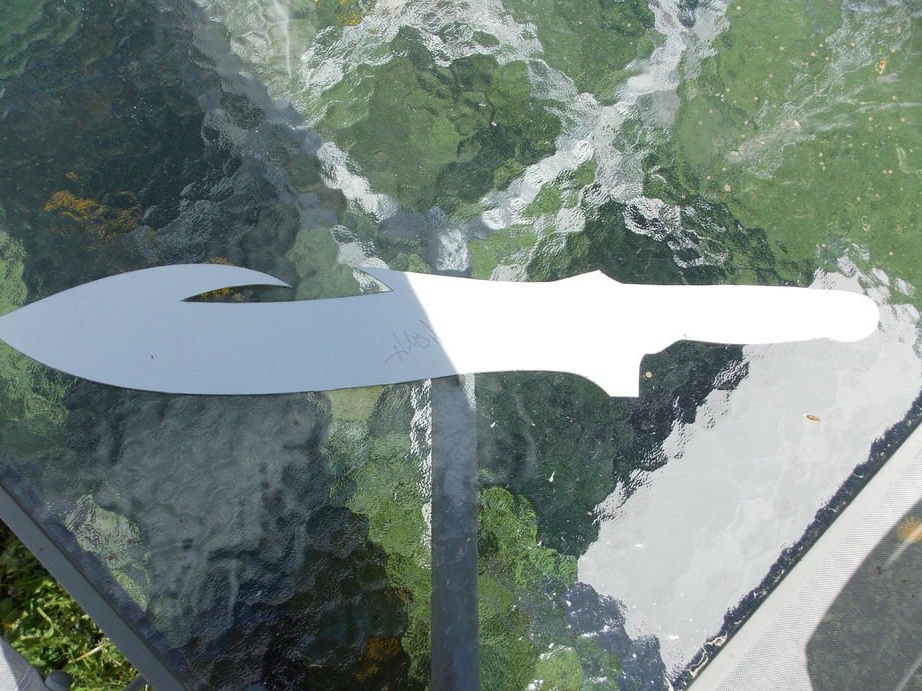
The beginning of creating such a knife is an idea. You need to sketch your knife on paper and bring it to perfection. When the result will be pleasing to the eye (it may take days), cut out the form on a dense multilayer cardboard with a clerical knife. Hold the template in your hands to see if it sits well in your hand. If not, modify the template yet.
Step 2:

Now we have a sample. Cover the steel piece with masking tape, place the template on top and circle the contours with a pencil.
Step 3:
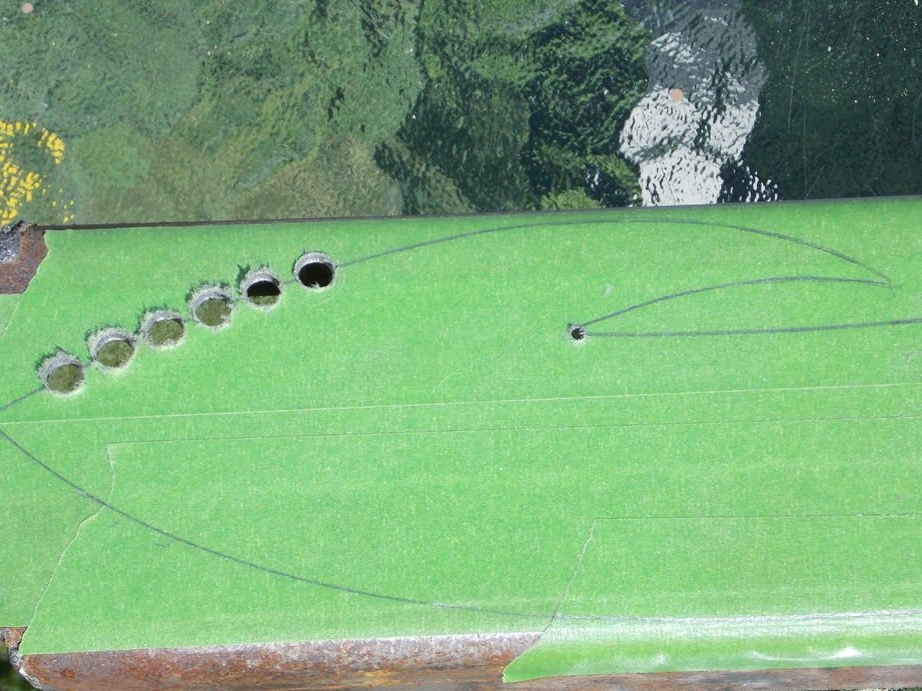
For the teeth on the upper edge of the knife, use a chisel to mark the center points on the pencil outline and drill holes before cutting the workpiece under the knife.
Step 4:

Start cutting a steel knife with a cutter and reinforced cutting discs (the cheap ones will not last long, but you can take some cheap ones and cope with this task). Start at low speed until you cut through the steel, and then you can gradually accelerate (keep the cut as close to the intended contours as possible, this will save a lot of time in future stages). Do not press too hard, just let the tool put pressure on the steel.
Step 5:
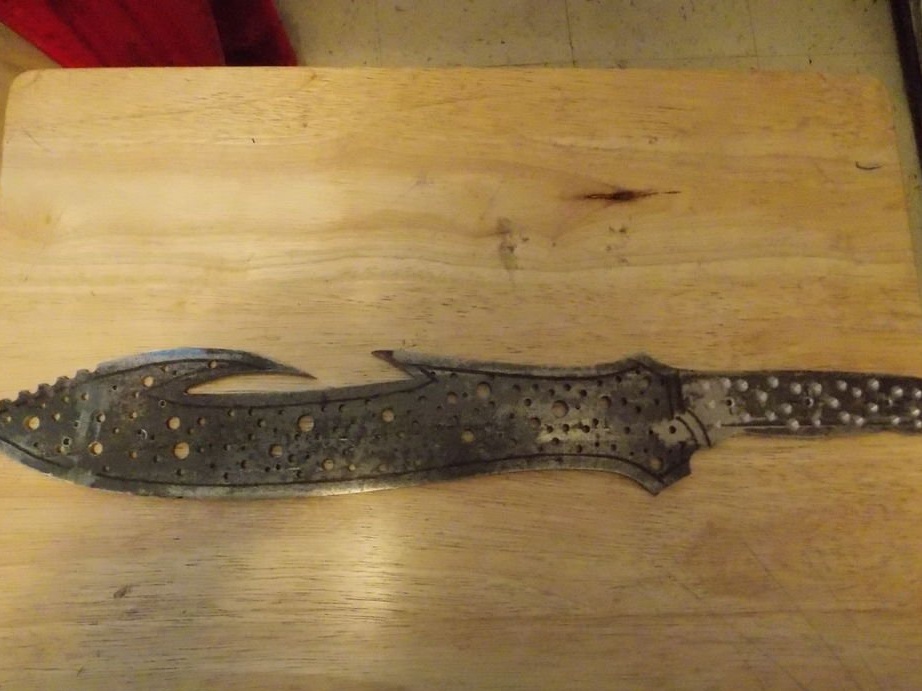
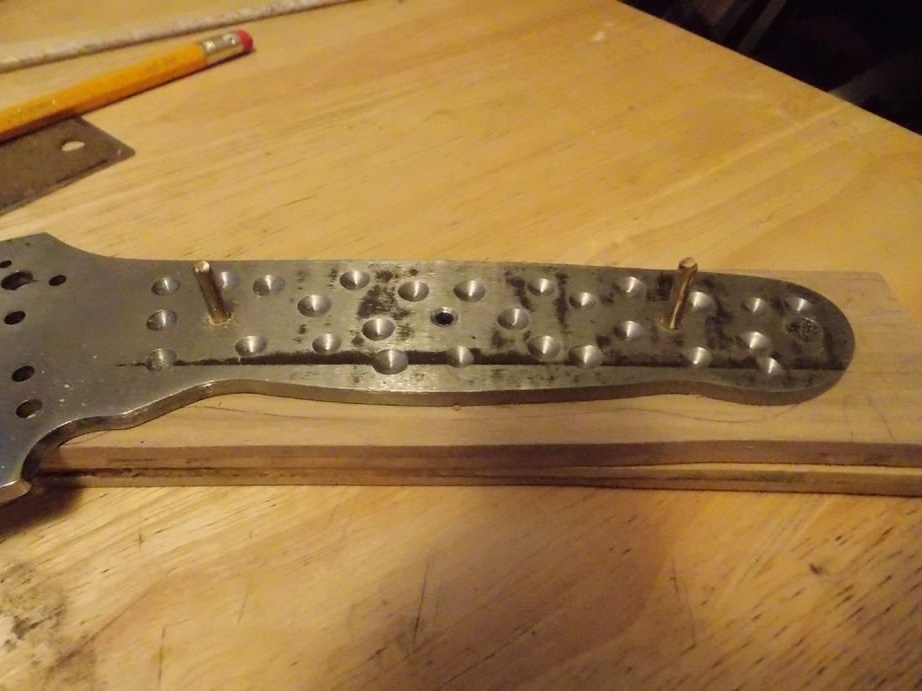
Finally, the knife is cut out; Now it's time to grind the workpiece with grinding machines, as well as adjust the contours of the knife with a file.Mark the holes for the handle, and drill holes ⅛ inch (about 3 mm). Also drill small recesses on the surface of the iron handle (this will help the epoxy to better adhere to the surface and glue the iron rod with a wooden handle). I wanted to make a bunch of decorative holes on the blade of my knife. I used different diameters of the drills, so I drilled them with different diameters.
Now you need to clean the iron base. Using a 1X30 grinder, set the angle to 22 degrees for the blade and one side of the upper edge of the knife. It is necessary to clean the knife from rust, plaque and scratches with sandpaper with a grain size of up to 150 (I usually use sandpaper of caliber 800, but for this knife I wanted a rougher look at the end). Grind the handle itself with the 80th, because there we need just a rough surface, because it doesn’t stick well to glossy epoxy.
Step 6:
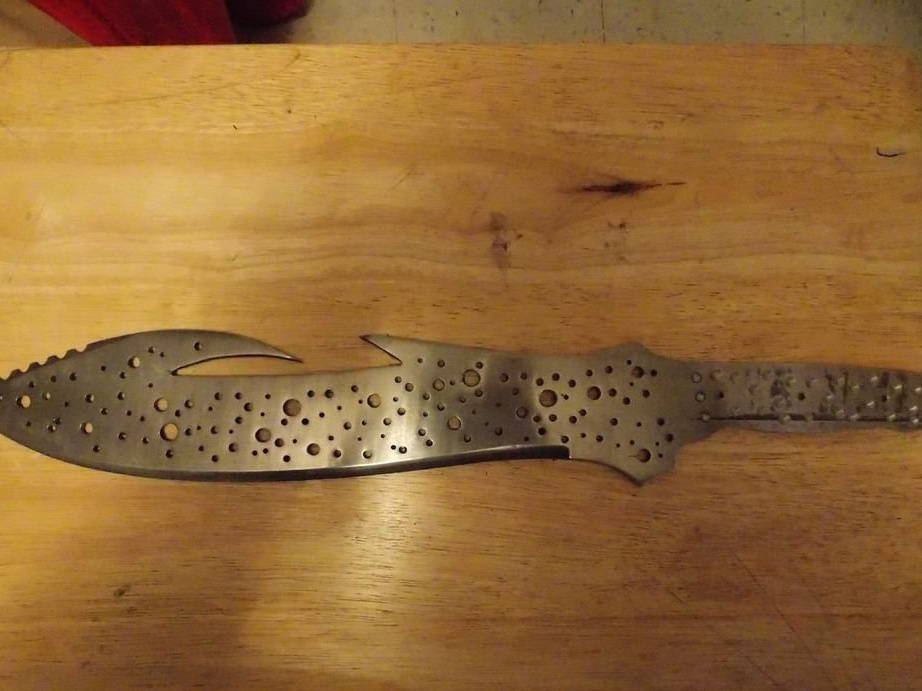
Next, you need to finish the steel using a black polishing compound and a bast polishing wheel on a perforator (use medium pressure, going against the direction of rotation of the circle). Then you need to use a white polishing compound and a spiral polishing wheel (also use medium pressure, going against the direction of rotation of the circle). The latter needs to use a blue polishing compound and a blank polishing wheel with medium pressure and movement against the movement of the wheel.
If this is not a decorative knife, and it is supposed to be used for its intended purpose, then at this stage it is necessary to repeat polishing after thermal hardening of the steel base.
Step 7:
At this stage, we begin to manufacture the handle. Cut three pieces of a solid solder bar about 2 cm long, round the edges. Take two pieces of dye oak 3 mm thick and two birch pieces of the same thickness. The size should correspond to the size of the handle (in my case it is 2 x 17 cm). You can also just take two pieces of wood 6 mm thick.
Sand the bars on both sides using sandpaper No. 80. Saturate the wood on both sides with carpentry glue and clamp in a vice until completely dry.
Then use double-sided tape to fasten the two halves of the handle together. Place the handle of the steel billet on a stack of planks and draw a pencil around the outline. Cut the shape of the handle from the planks using a jigsaw, leaving a couple of mm on each side so that you can then correct the shape.
Step 8:
Place the substrate and the stack of blanks on the drill press, and attach the iron blank of the knife on top to mark the place for the first pin, then drill through the hole on steel with a 3 mm drill in the stack of wooden blanks. Drive one of the pins (a piece of solder) into the hole through the iron and wood blanks to fix the position. Drill the next hole in the same way, drive in the second pin, and make the same third hole.
Step 9:
Separate the two wooden halves of the handle, clean any glue remaining from the adhesive tape, and wipe the steel knife with medical alcohol.
At this stage, it is necessary that the front half of the wooden handle has a finished shape and is polished, since after gluing it will not be possible to finish with this surface.
Also wrap the blade with masking tape to the beginning of the handle. This will eliminate the extra spots of glue, and also protect against accidental cuts during operation.
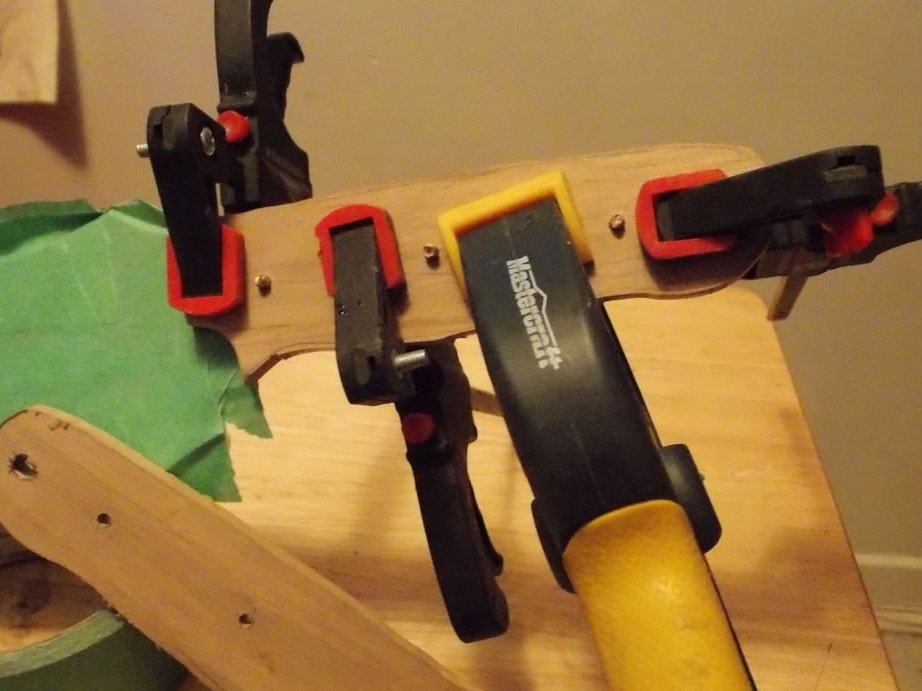
Mix a sufficient amount of two-component epoxy glue, and cover one side of the handle with this compound. Place the steel workpiece on top, glue the pins lightly with glue and push them so that they protrude about one and a half millimeters over the wooden half. Clamp the handle and set aside until it dries completely.
Do the same with the other half of the wooden handle, again squeeze all the parts of the handle and let dry.
Step 10:
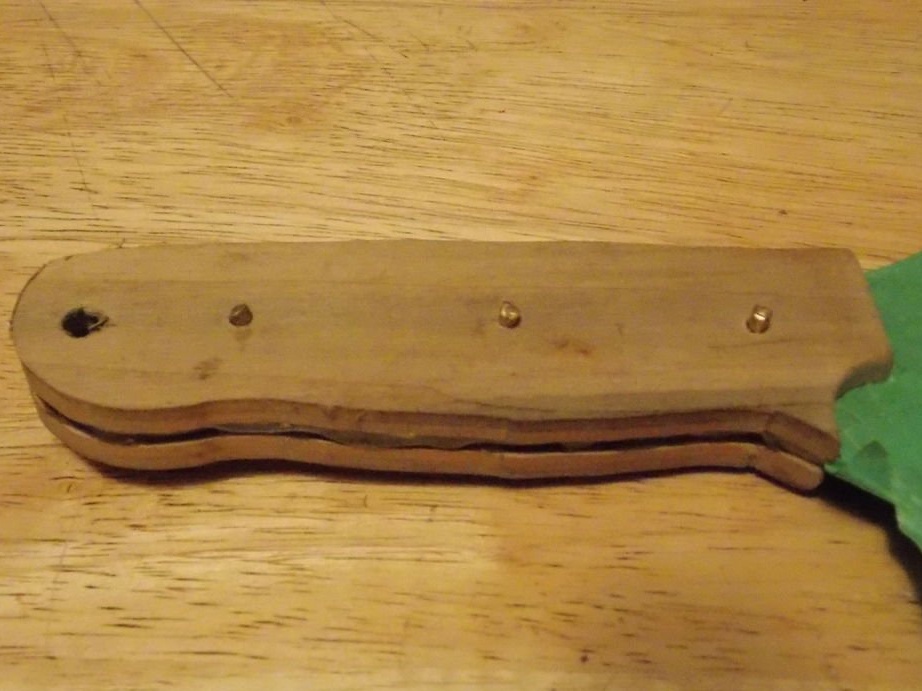
Now you need to finish the shape of the handle. Again, use a grinding machine, you need to grind the pins to the level of the wooden lining (do not rush because the pins can heat up and ignite the wooden lining). Some people prefer to pin the pins, but I like to comb them and then cover with epoxy.
Using a grinding drum and a different grit of an emery coating, achieve the desired level of polishing so that it is pleasant to hold the knife in your hand. For polishing, use at least 220 gauge (I usually get to 400).
Cover the handle with at least 4 layers of varnish (lightly polishing each layer), remove the adhesive tape from the blade, sharpen it, polish it, and your job is done!
Step 11:

This knife is about 50 cm long with a 35 cm blade. Weight is approximately 1 kg.
The work would not be so long if I had a sawmill for metal or my dream is a laser engraver. But even without this equipment it is quite possible to handle.