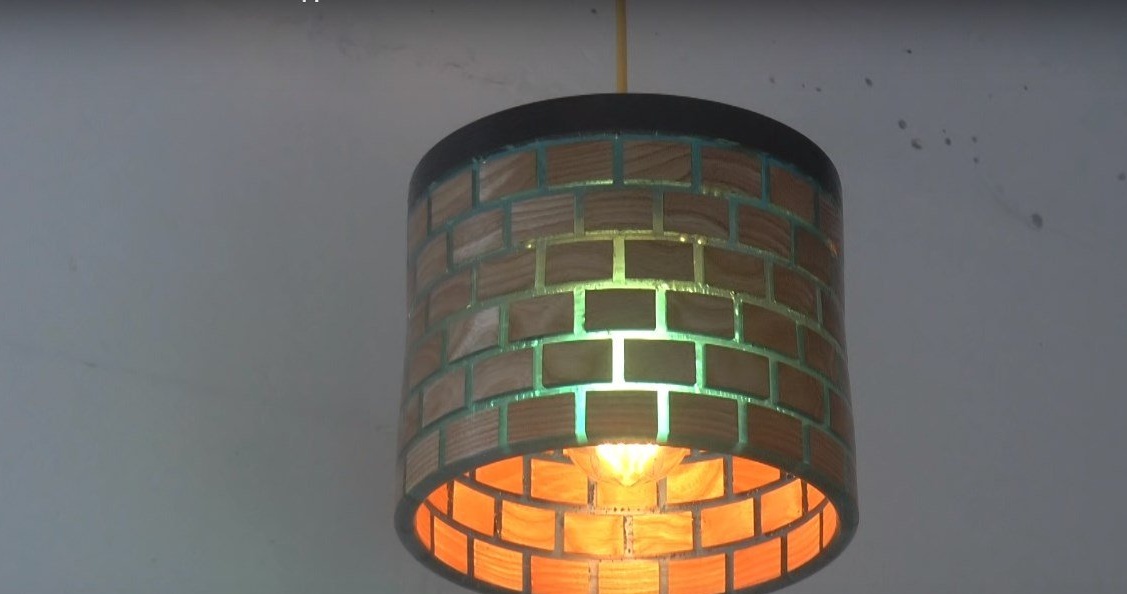
Epoxy resin allows you to work wonders and translate into reality the most unusual ideas. Some original technologies are becoming available for implementation in home workshop. So this lampshade made of saw cuts and epoxy - it would be impossible to make it without using epoxy. However, having a lathe, repeating the author’s technology will not be difficult.
In order to make a lampshade from saw cuts of wood and epoxy you will need:
Materials:
- bar for the manufacture of saw cuts;
- valuable wood for the manufacture of the edging of a lampshade or stain to simulate a Wenge tree;
- a board of suitable thickness for the lampshade interior;
- several scraps of the board and a wooden rod for the manufacture of a sub-holder;
- carpentry glue;
- Super glue;
- epoxy glue for gluing saw cuts;
- acrylic for making patterns;
- plywood for making patterns;
- acrylic varnish for processing wooden workpieces before pouring with epoxy resin;
- masking tape;
- silicone sealant;
- tung oil;
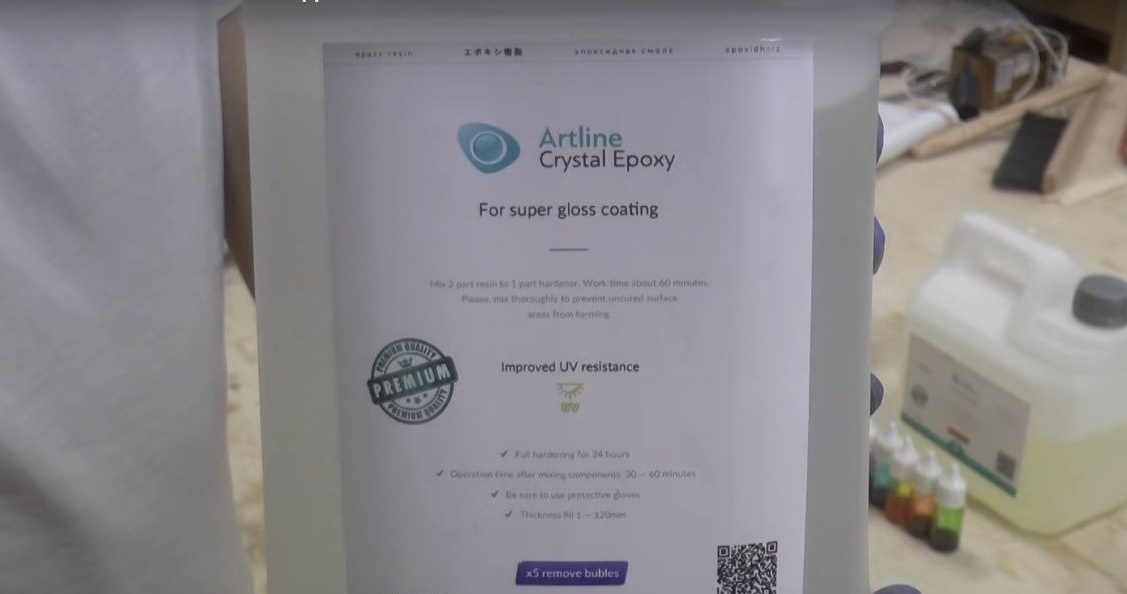
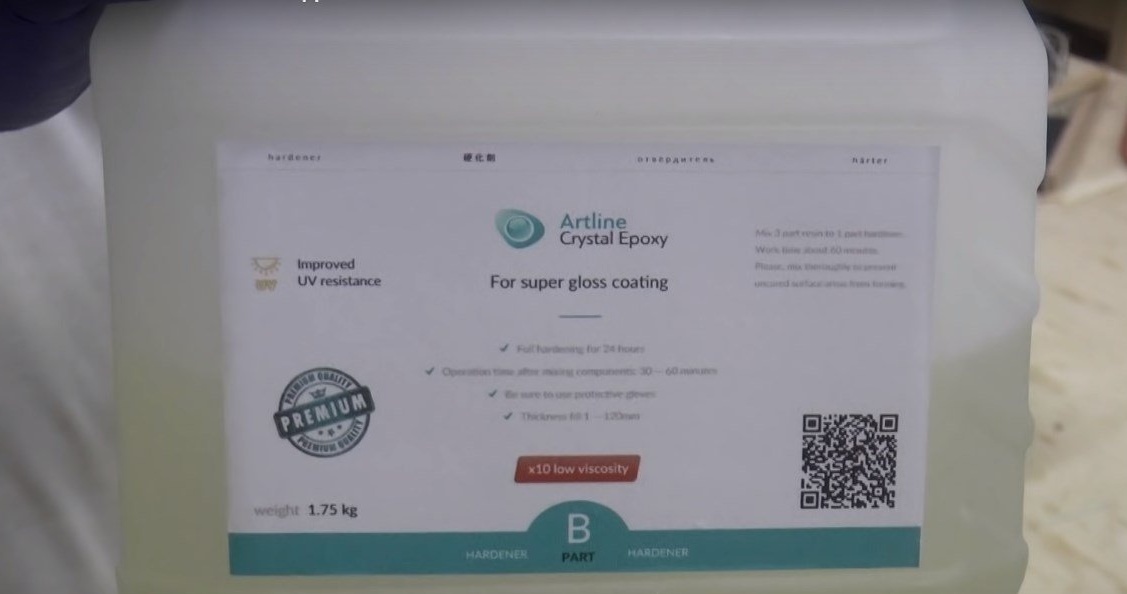
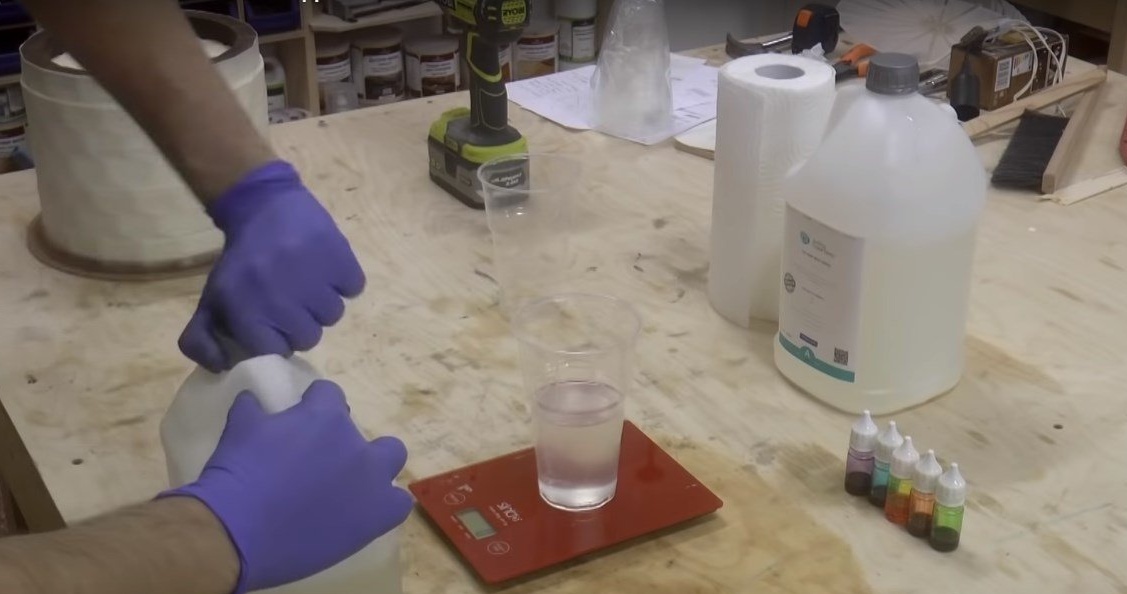
- epoxy resin and hardener - according to the proportion of the manufacturer;
- pigment for epoxy;
- shade;
- a lamp for a lamp.
Instruments:
- circular;
- grinding machine or grinder;
- Thicknessing machine;
- a drilling machine, a conventional wood drill and a Forstner drill;
- lathe and cutters;
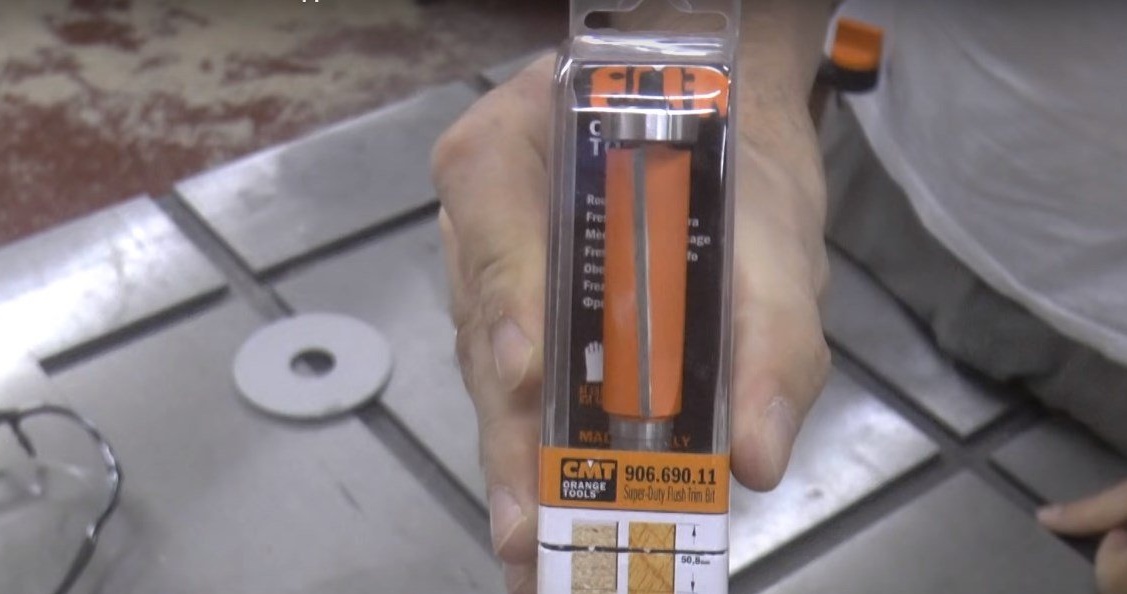
- a milling machine or a manual milling machine fixed permanently;
- tape saw machine or jigsaw machine (jigsaw);
- clamps;
- metal clamps of large diameter;
- plastic dishes for kneading epoxy;
- fabric for processing lampshade oil;
- paint brushes;
- ruler;
- a pencil.
Manufacturing process
Step One: Calibrate and Prepare Materials
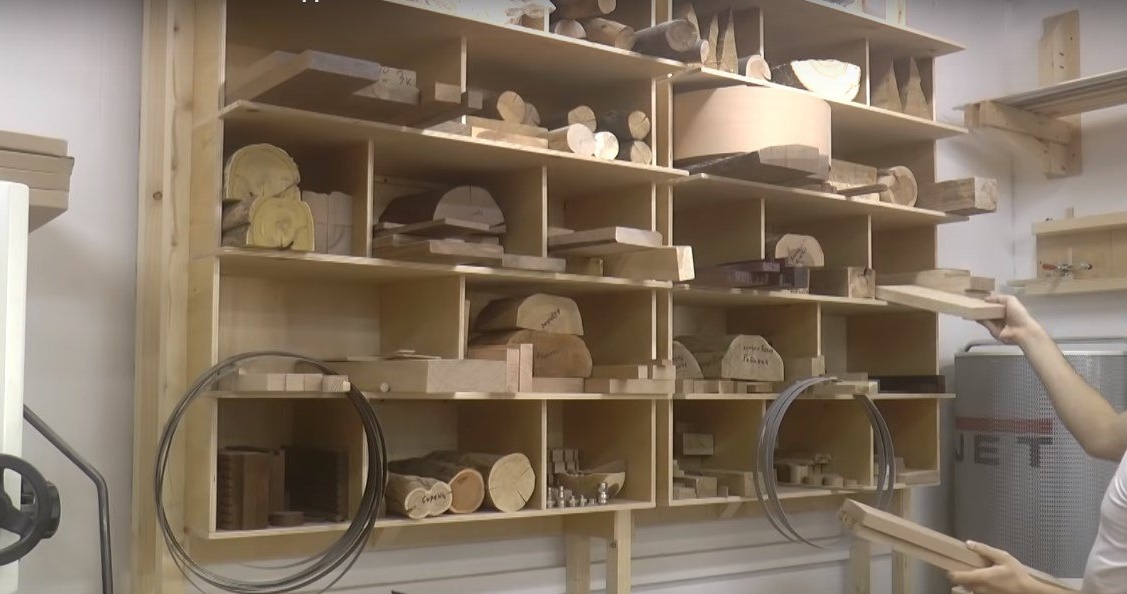
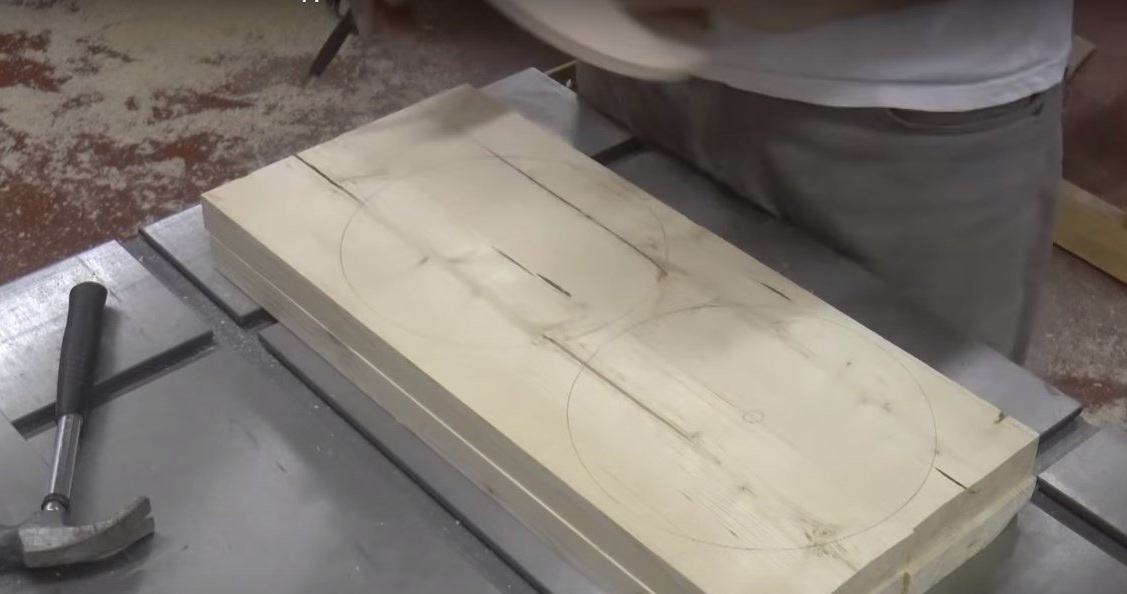
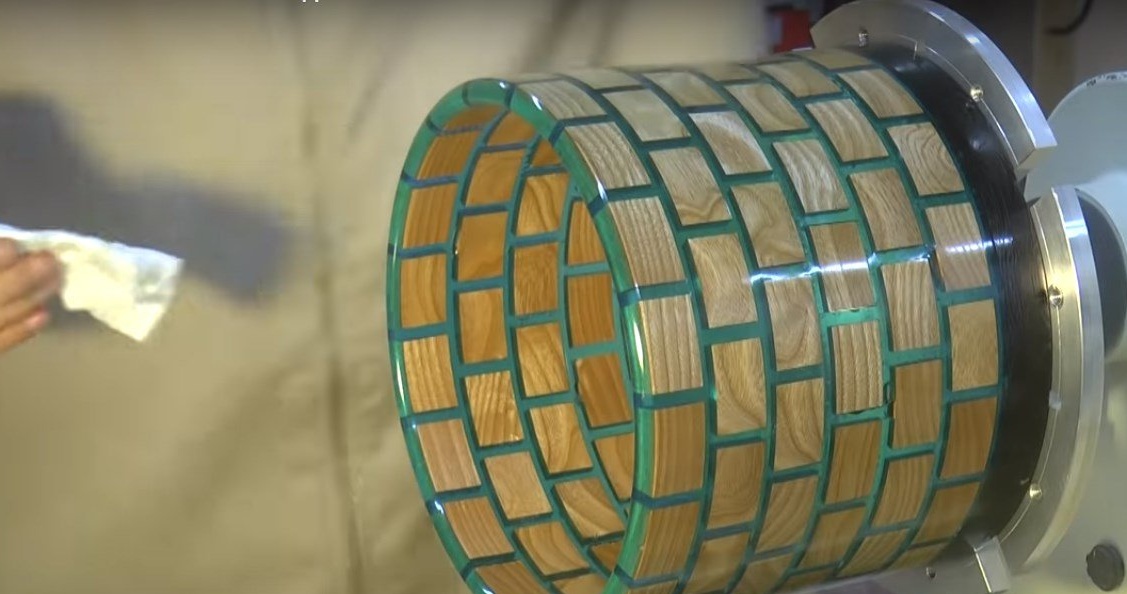
The author made a lampshade from a single blank. The product is quite voluminous, therefore, in order not to pour epoxy in the river, it was decided to fill its inside with wood. To do this, he used boards that had previously been rejected and lay idle.
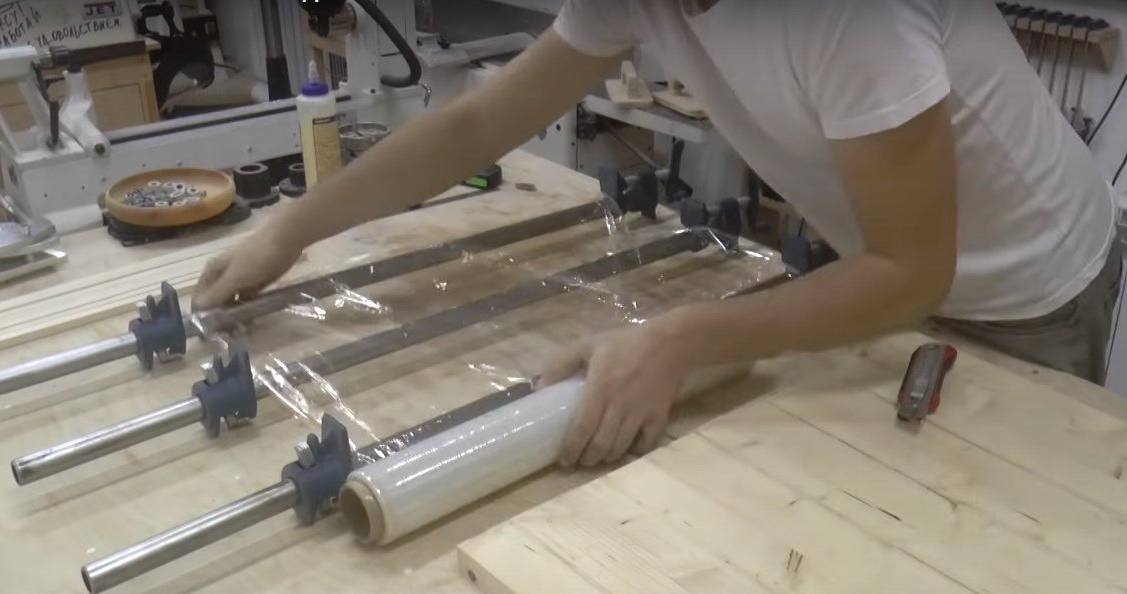
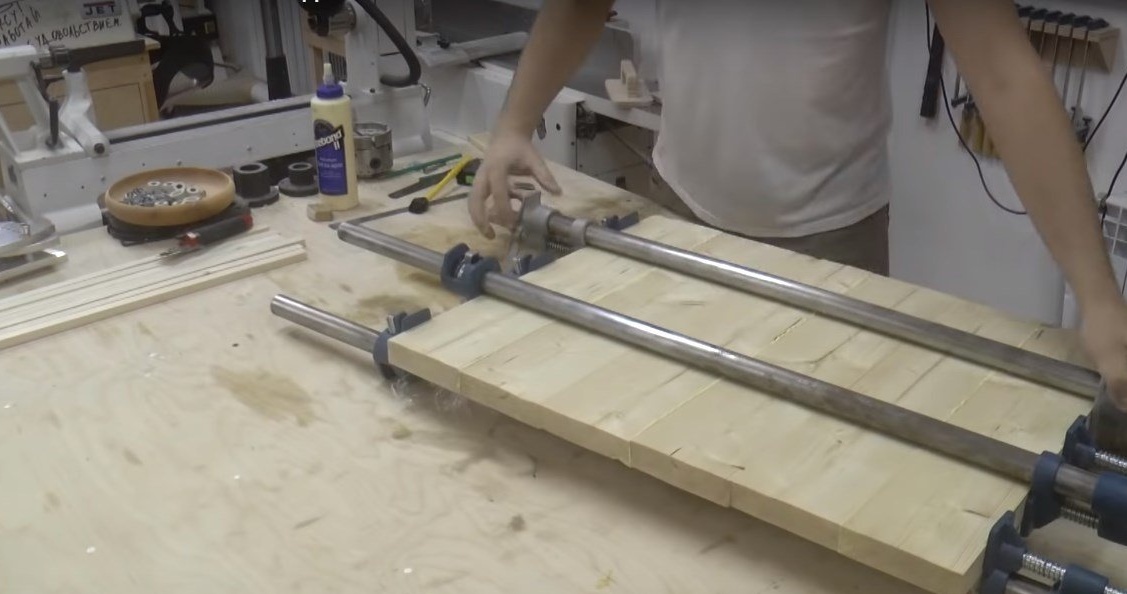
The central part of the ceiling was wide, and the boards had to be glued together in pairs to wooden boards. Subsequently, the author will make circles from them, and they will form the core of the disc.
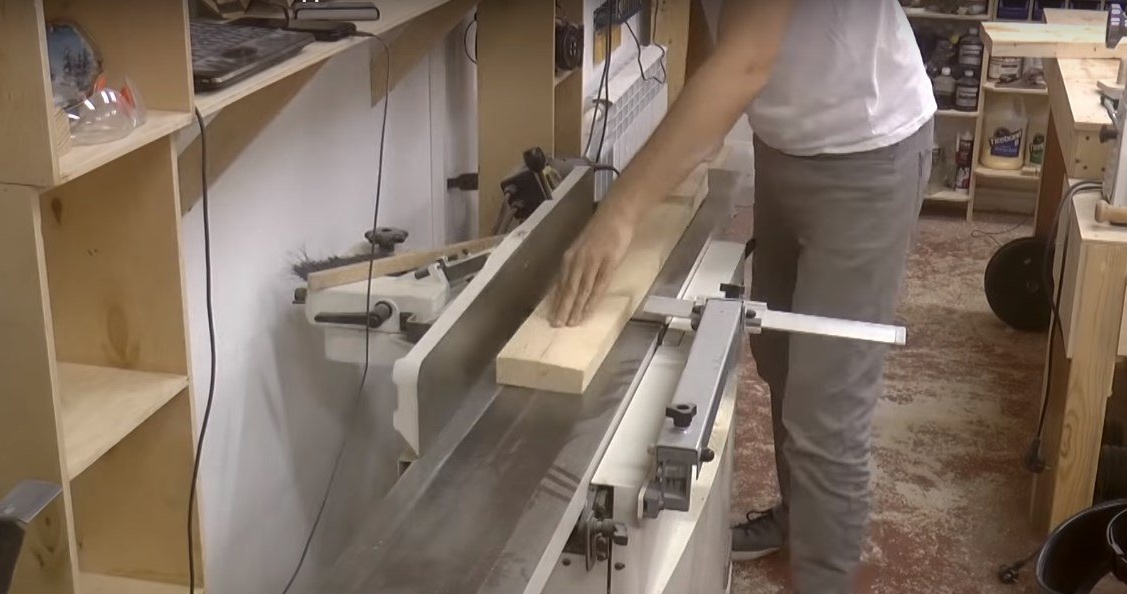
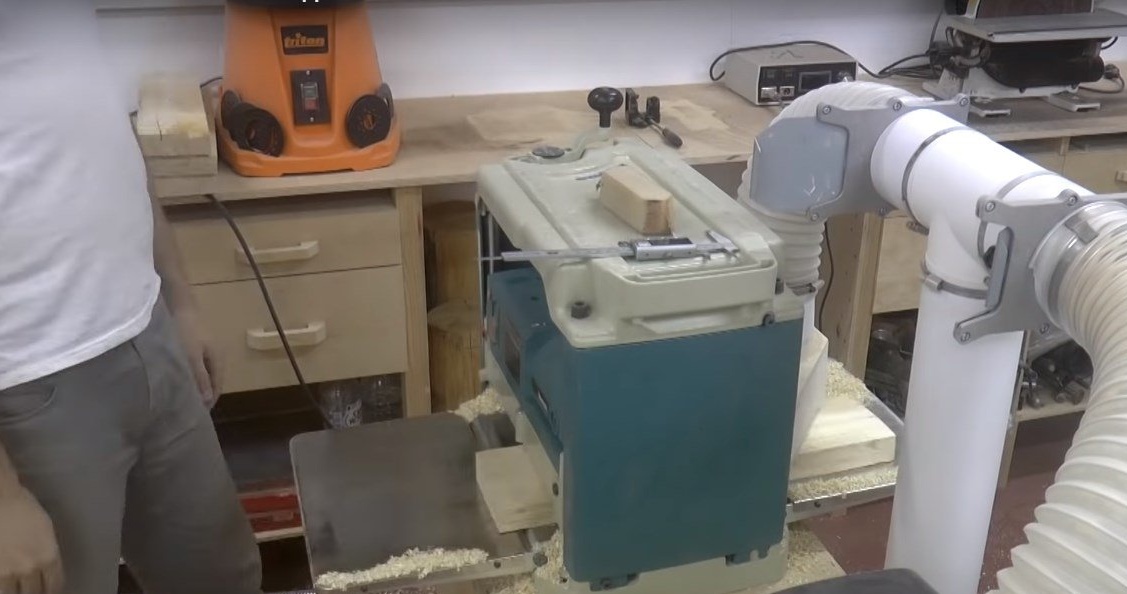
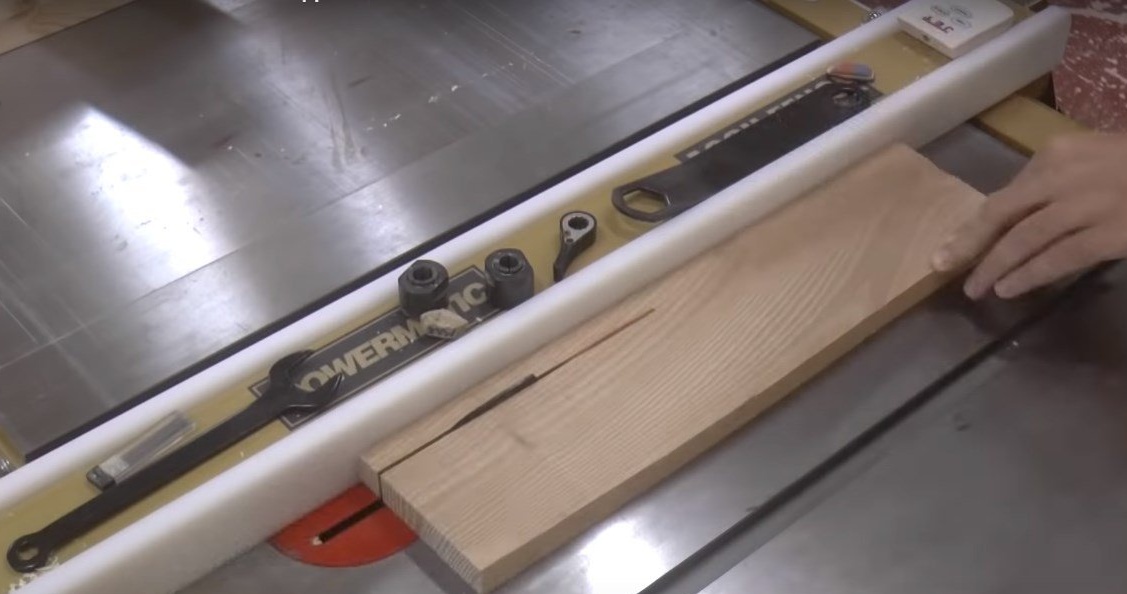
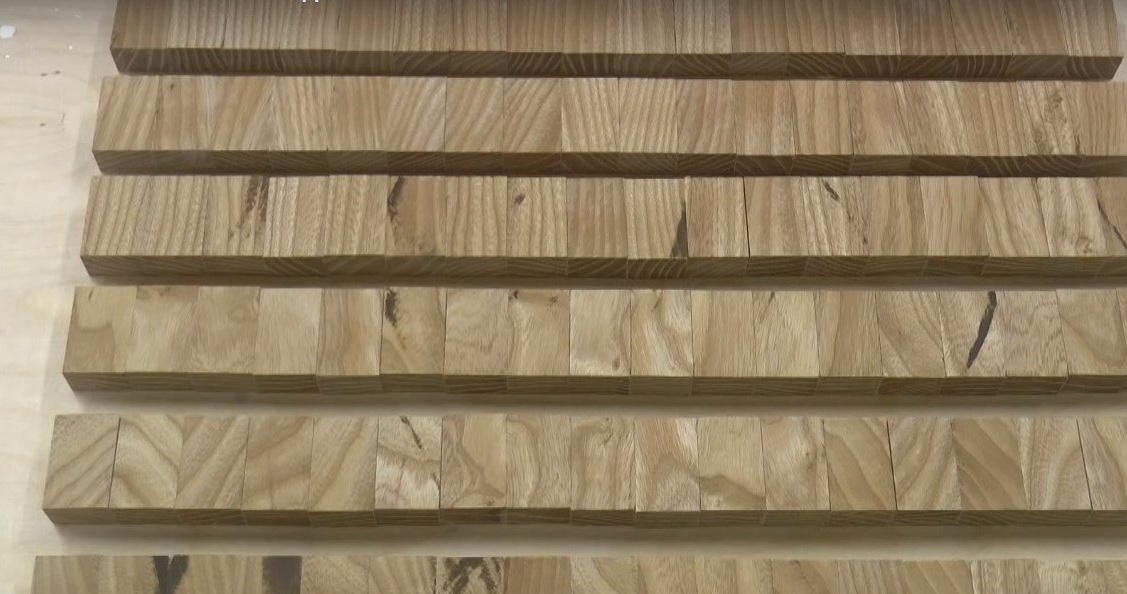
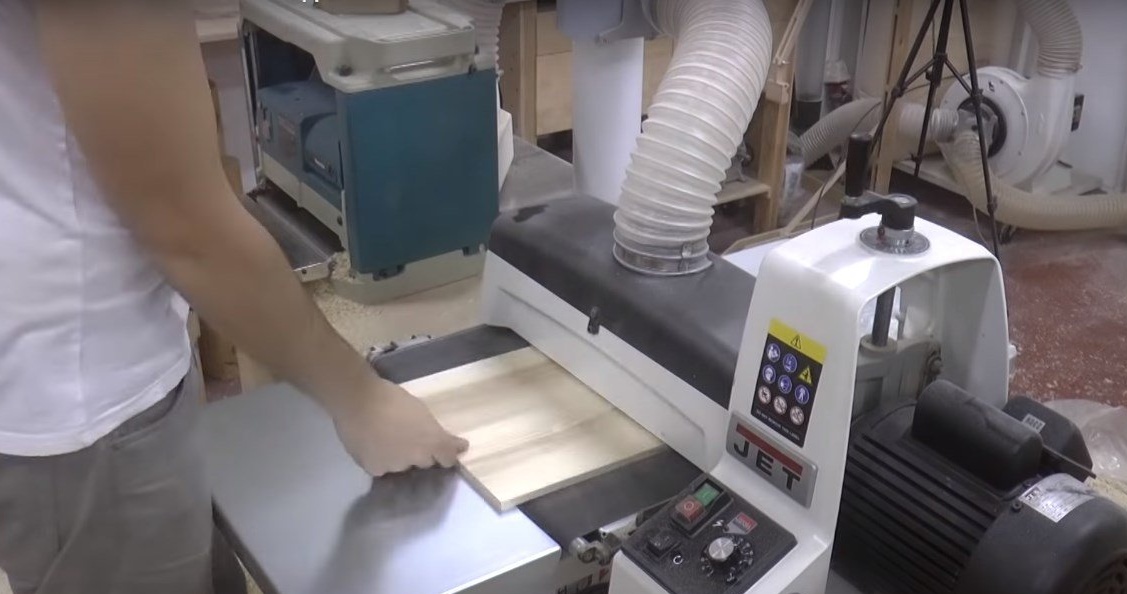
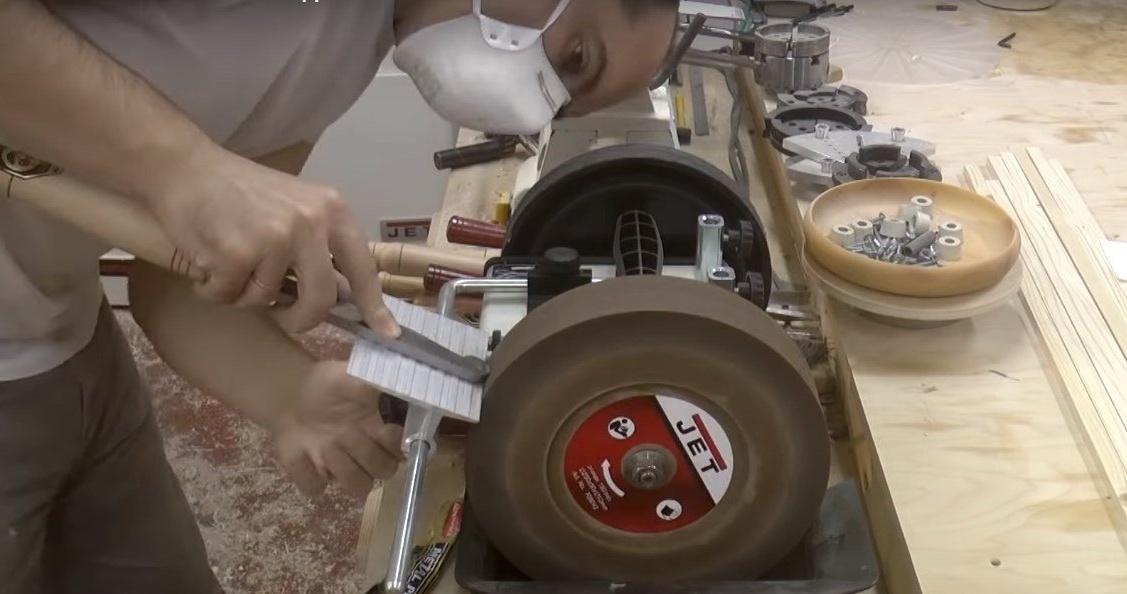
The bars for the segments of the ceiling must be planed and calibrated on a surface planer. For the manufacture of these parts, the author used ash with dense and fairly strong wood.


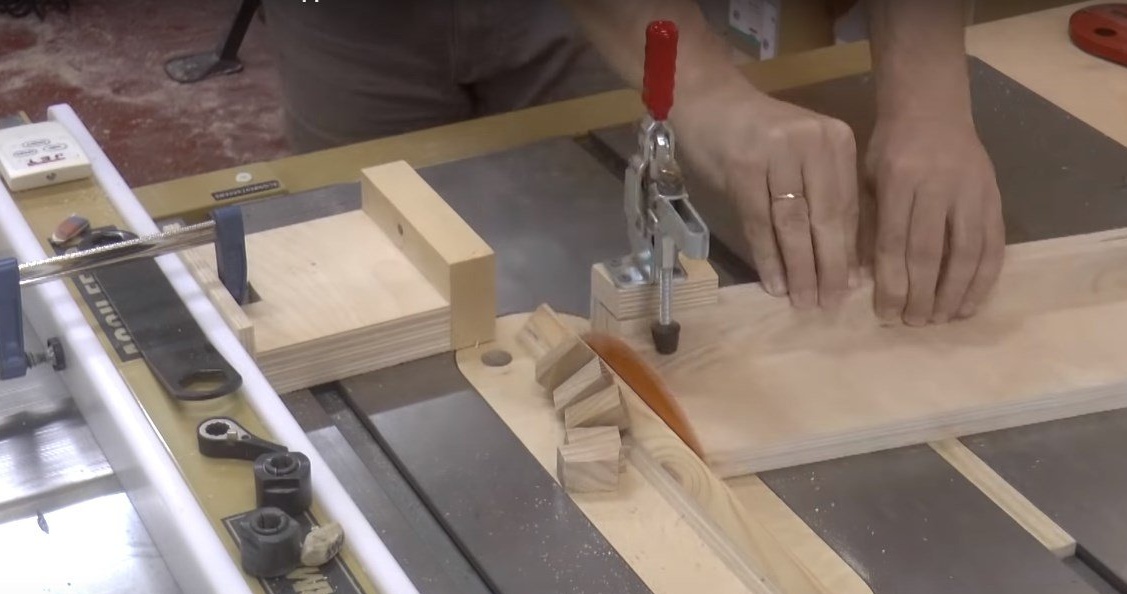
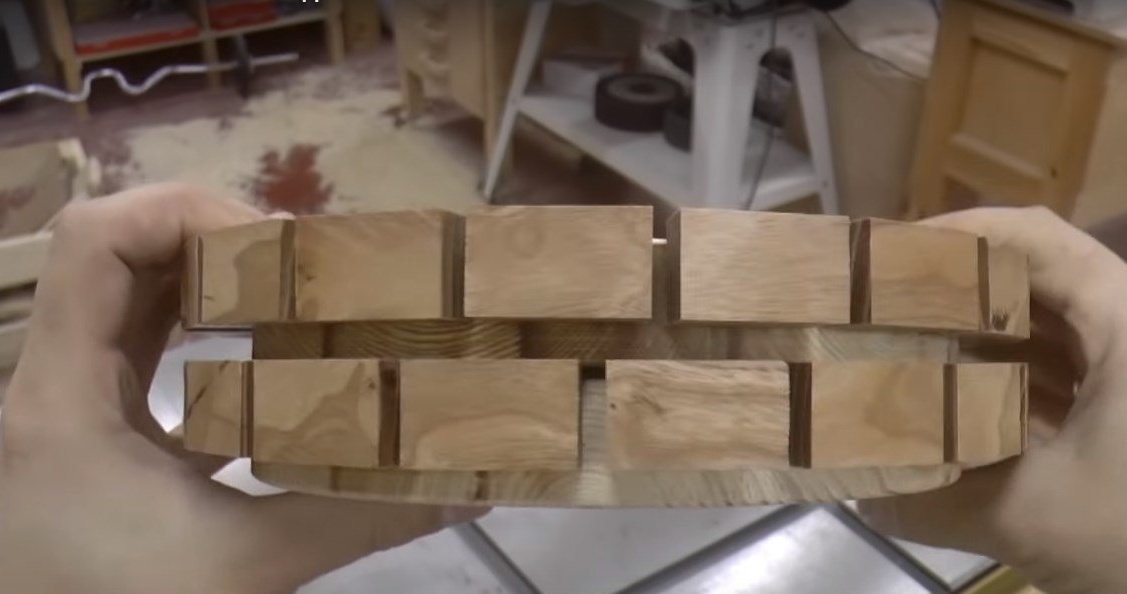
Step Two: Making Segments
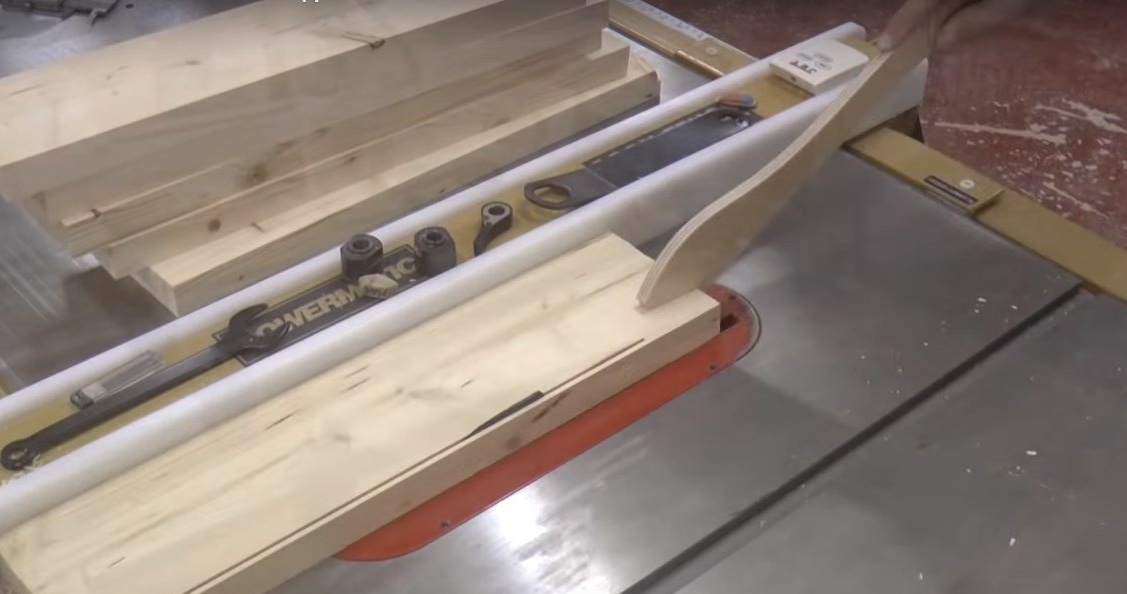
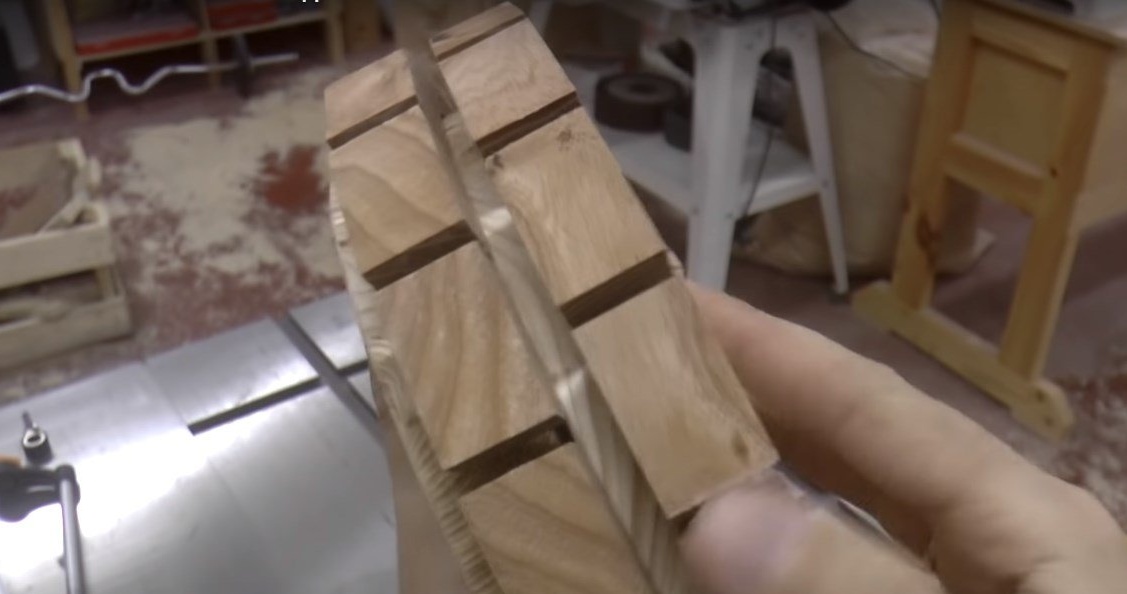
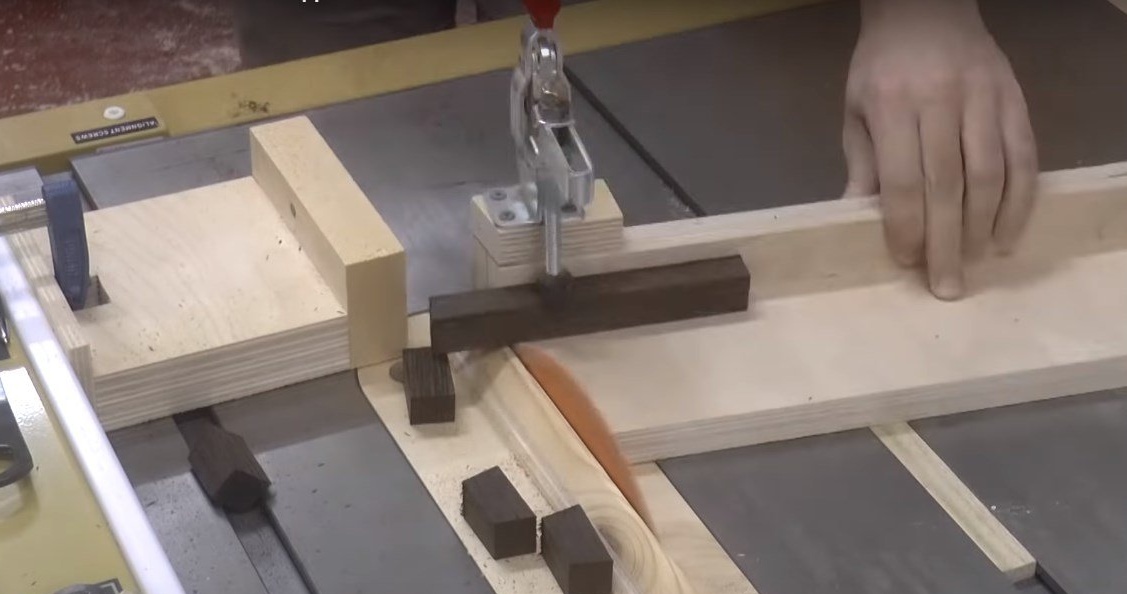
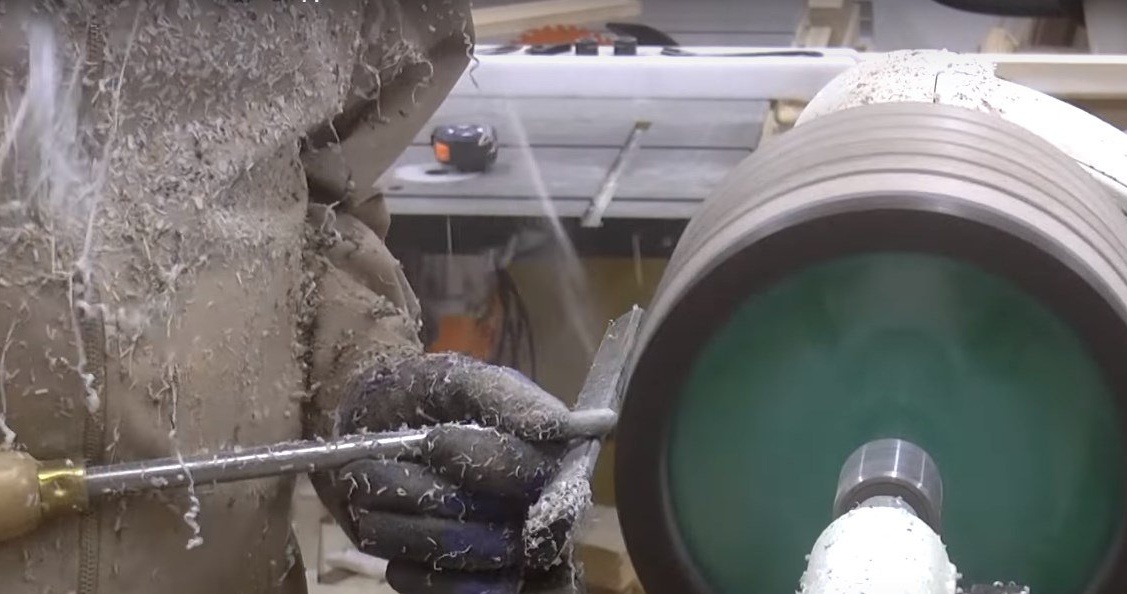
The future product is a turned cylinder with a simple cylindrical shape. The side of the segments that faces the center of the disc is shorter than their outer side. In order for all segments to be the same, the author installed an impromptu carriage.

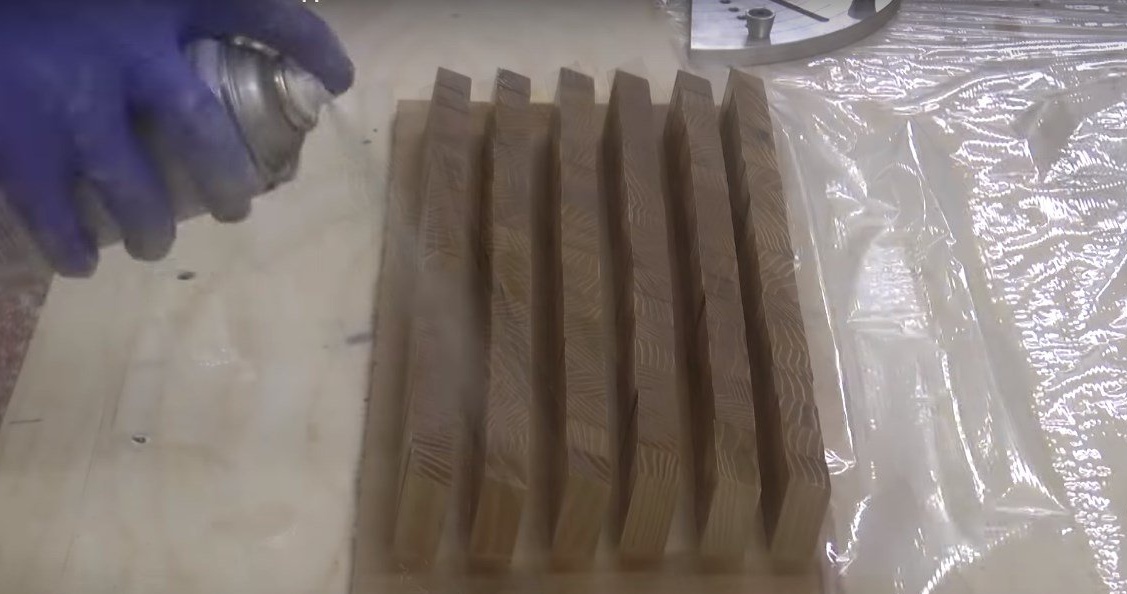
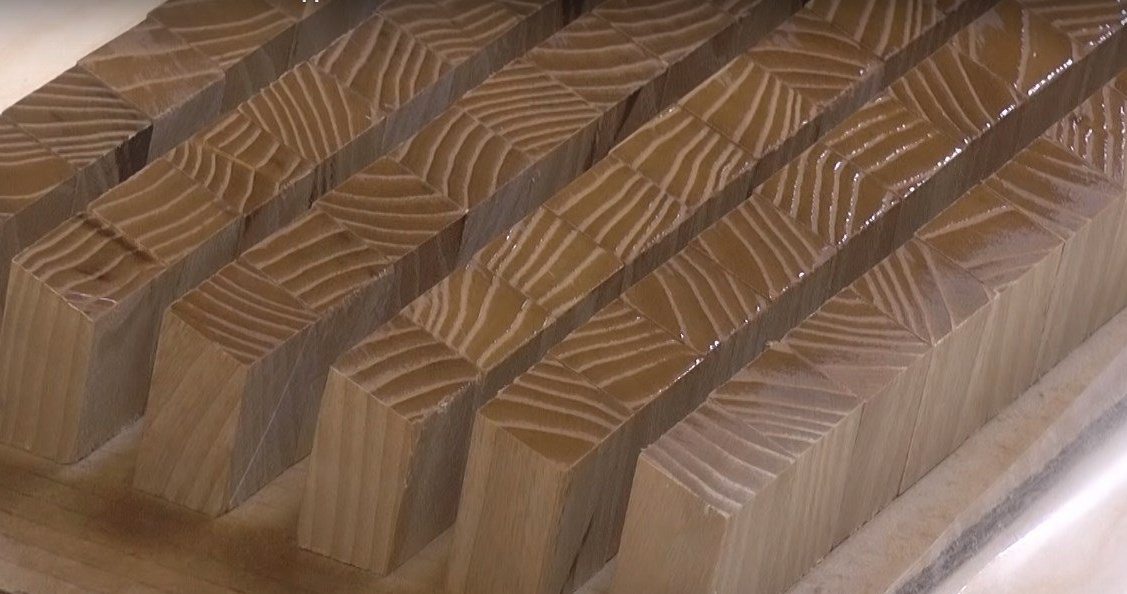
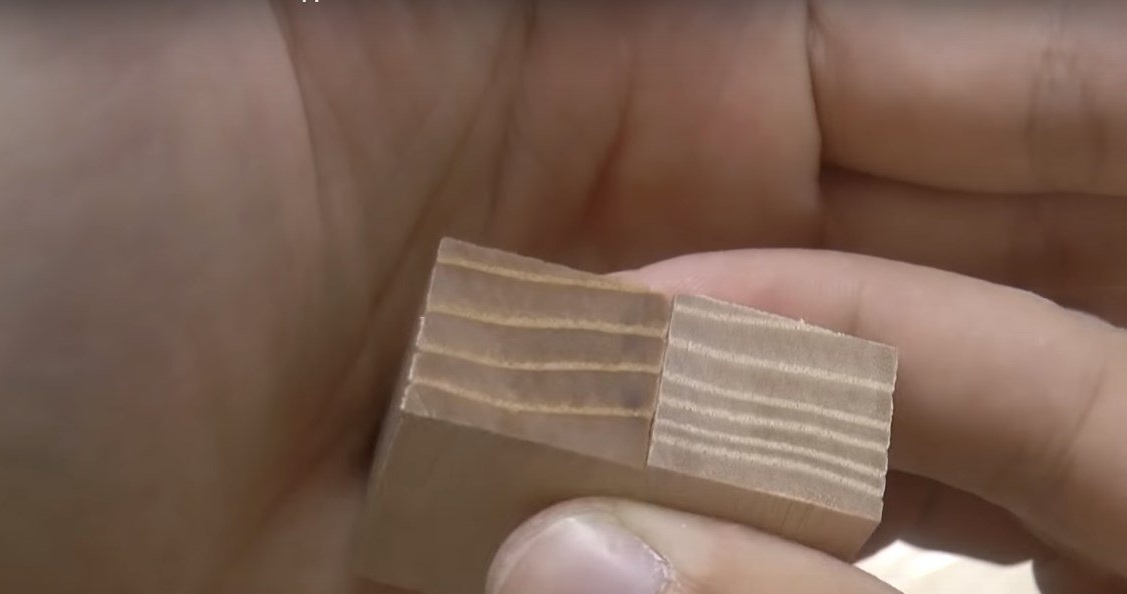
He covered the ends of the segments with varnish so that the air did not come out of them during pouring with epoxy resin.
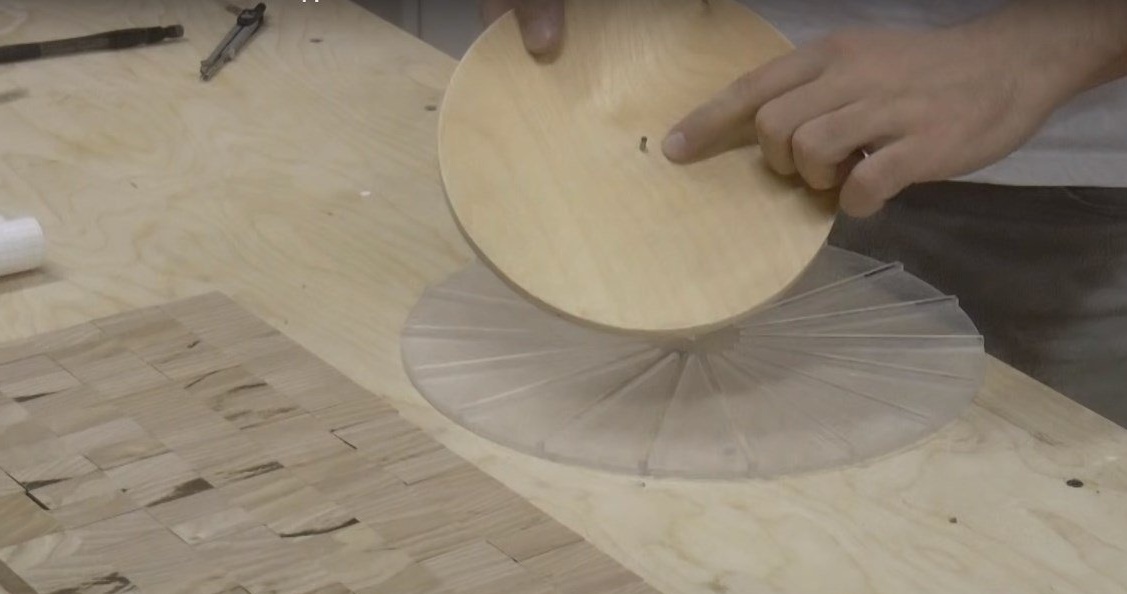
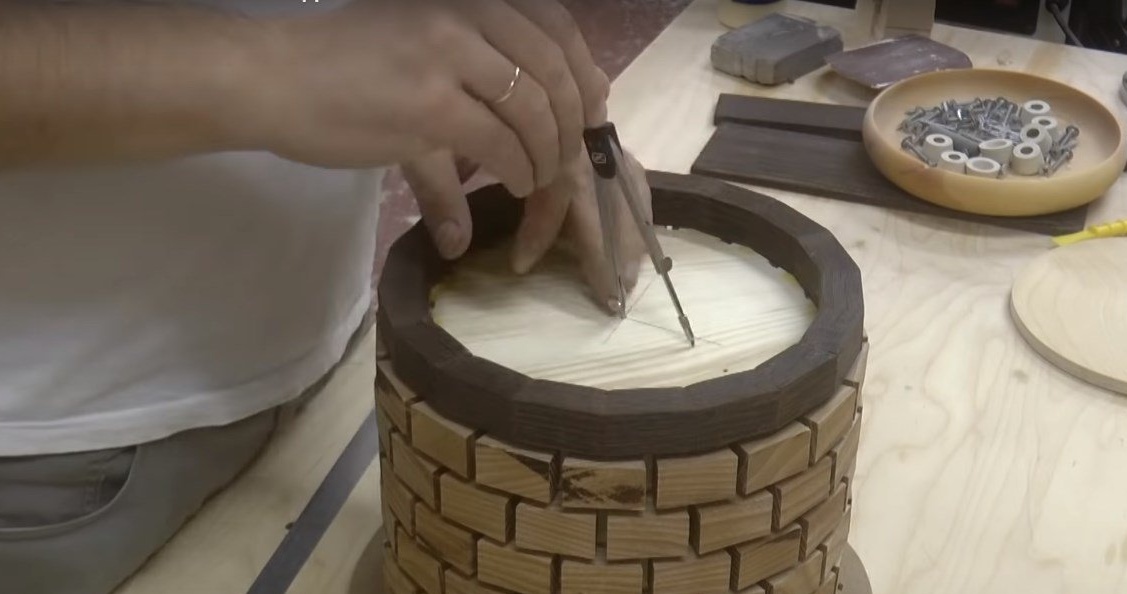
Step Three: Making an Acrylic and Plywood Template
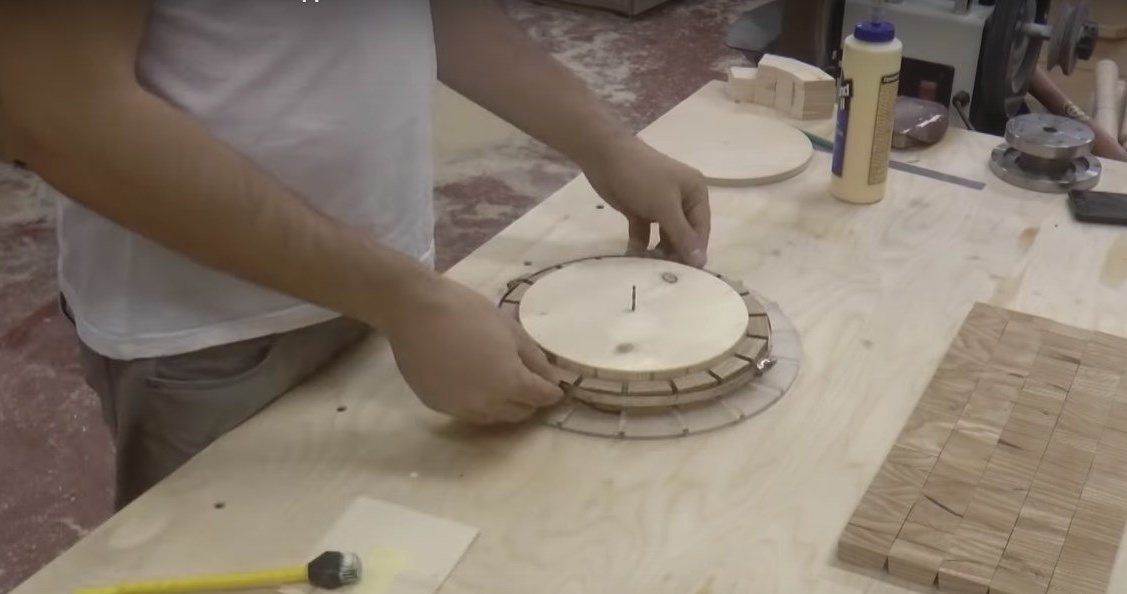
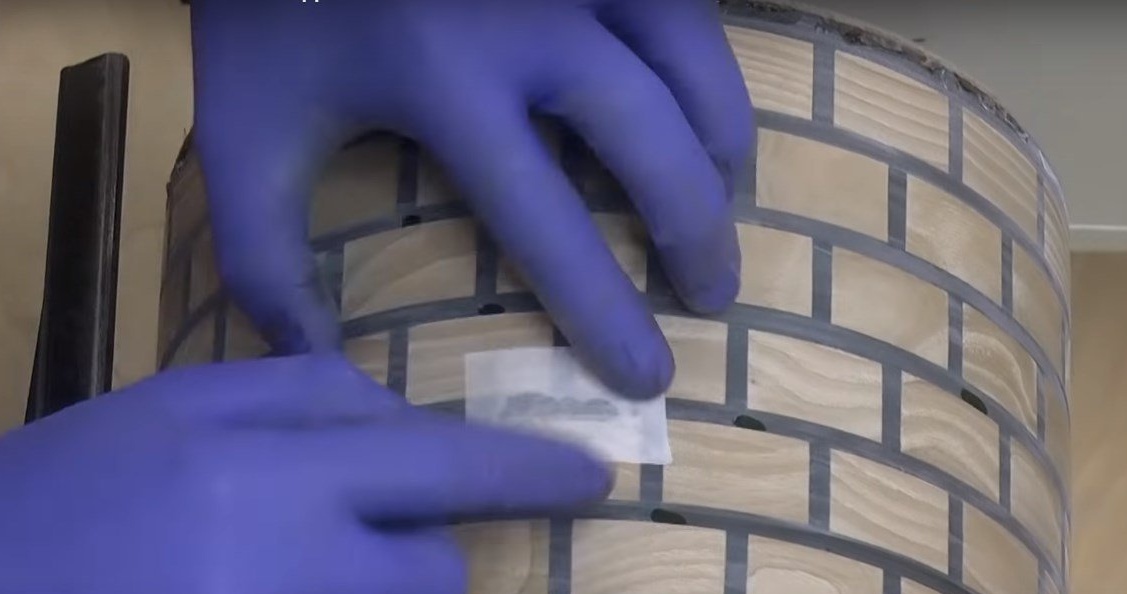
After the opportunity appeared to arrange the segments in a circle, the author calculated the diameter of the wooden circles. He made a template from plywood, which will be needed to make circles. A hole has been drilled in the center through which the plywood template will be installed exactly in the center of the template made of acrylic.
The acrylic template is intended for assembly of circles of the lamp shade and represents an acrylic plate of a round form which is divided into segments by partitions.
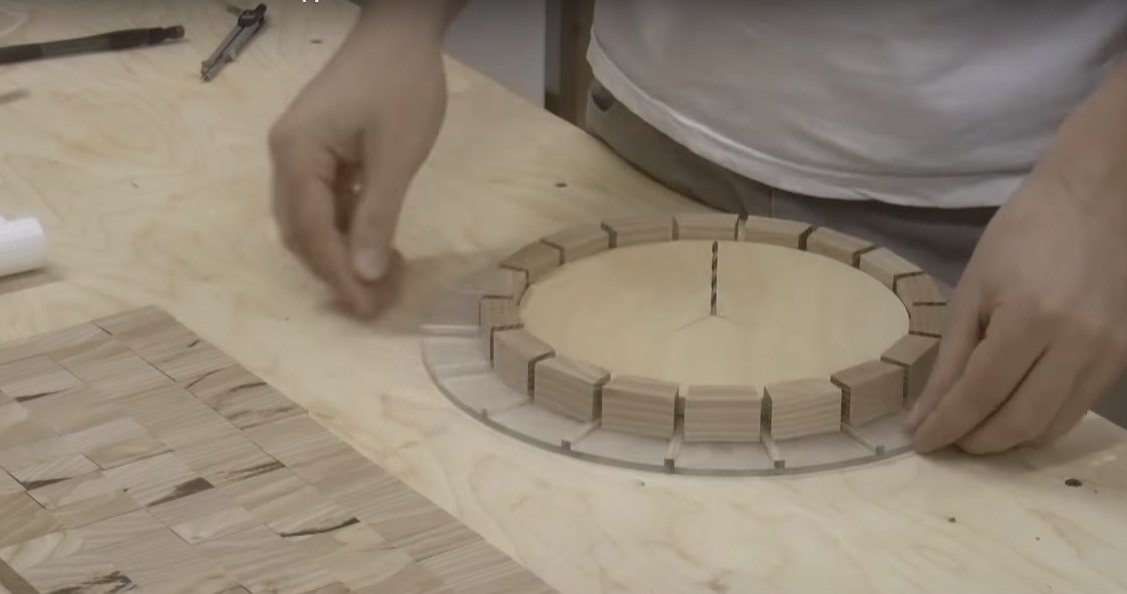
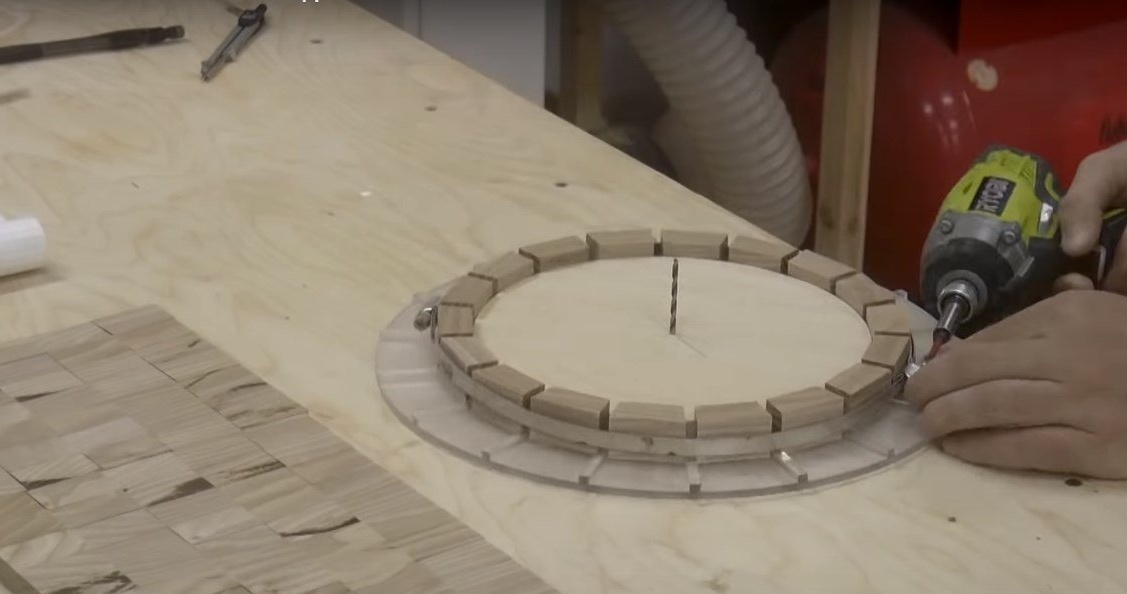
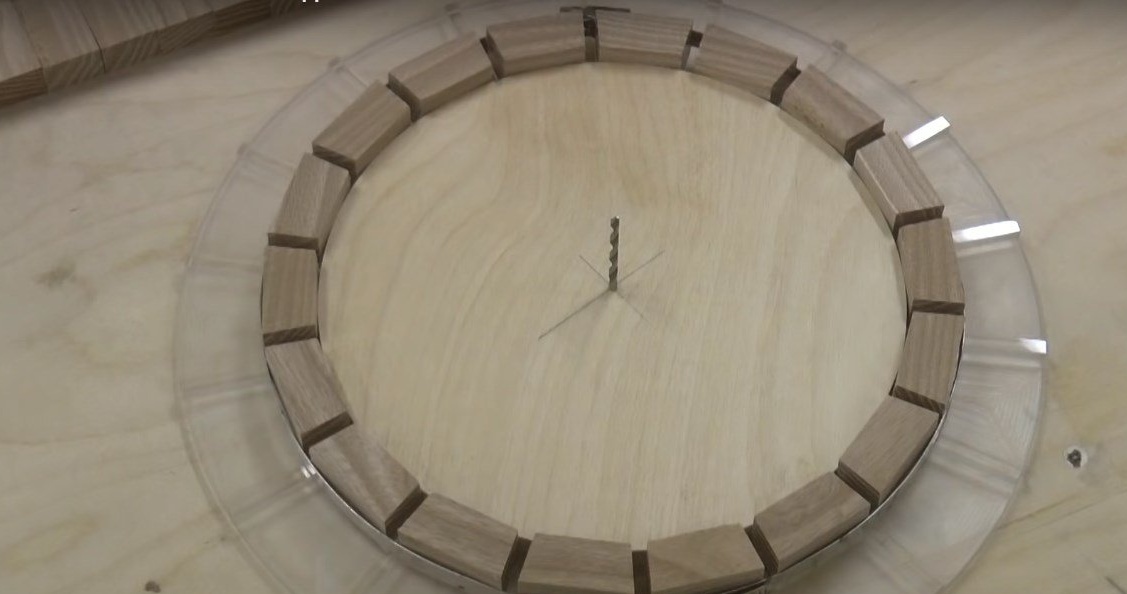
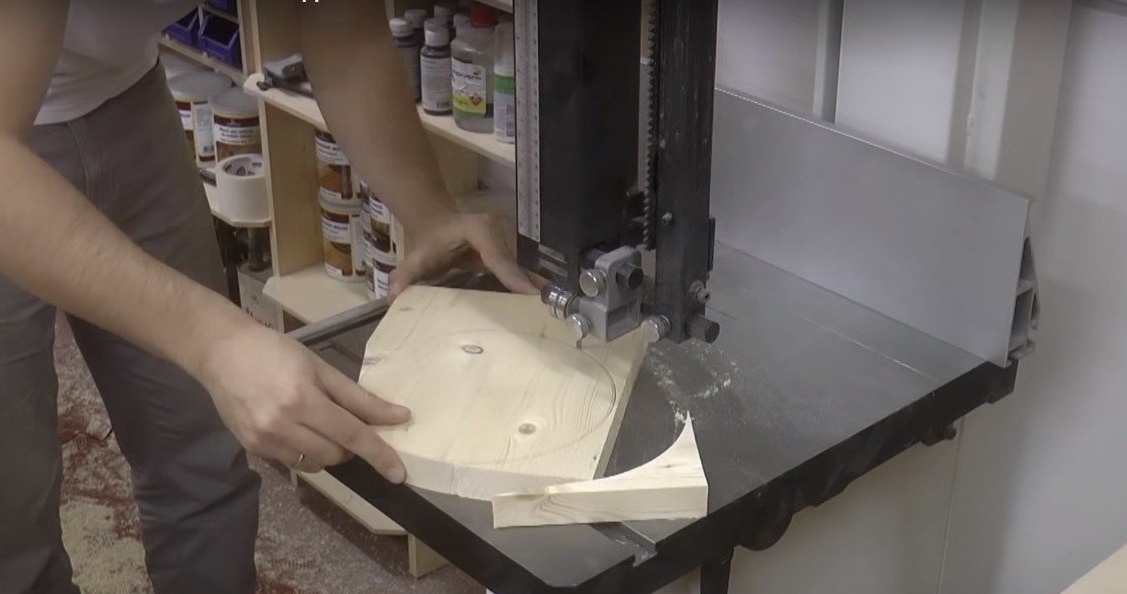
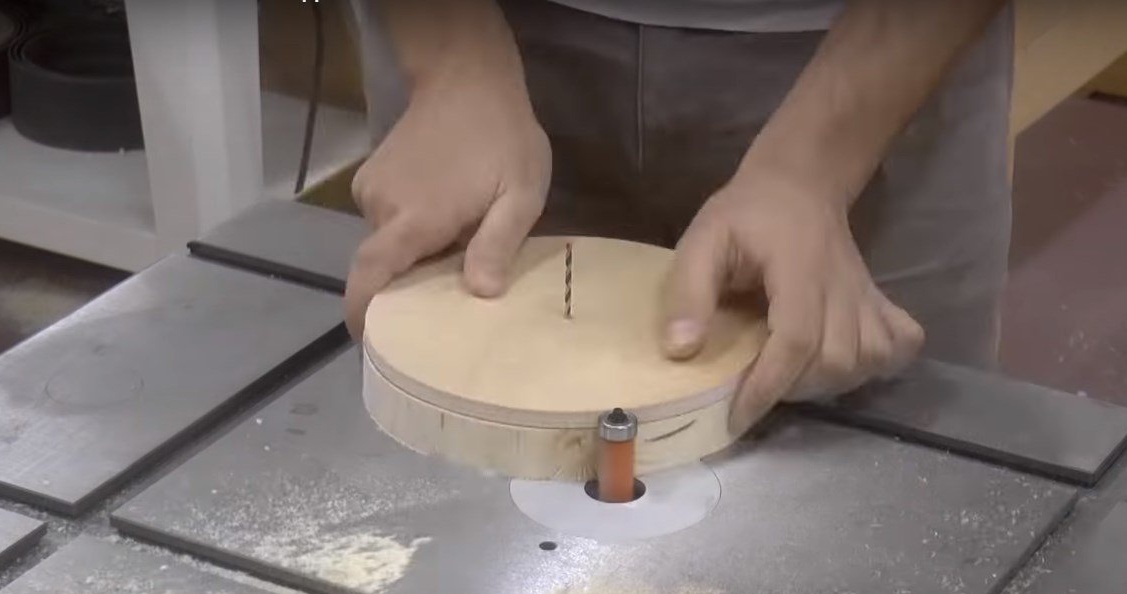
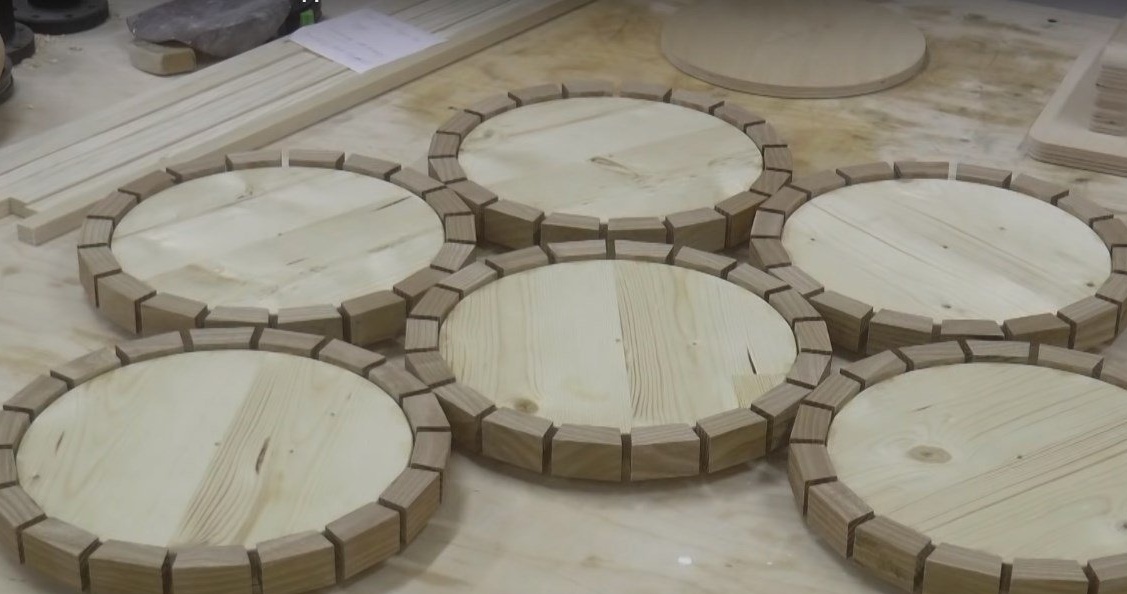
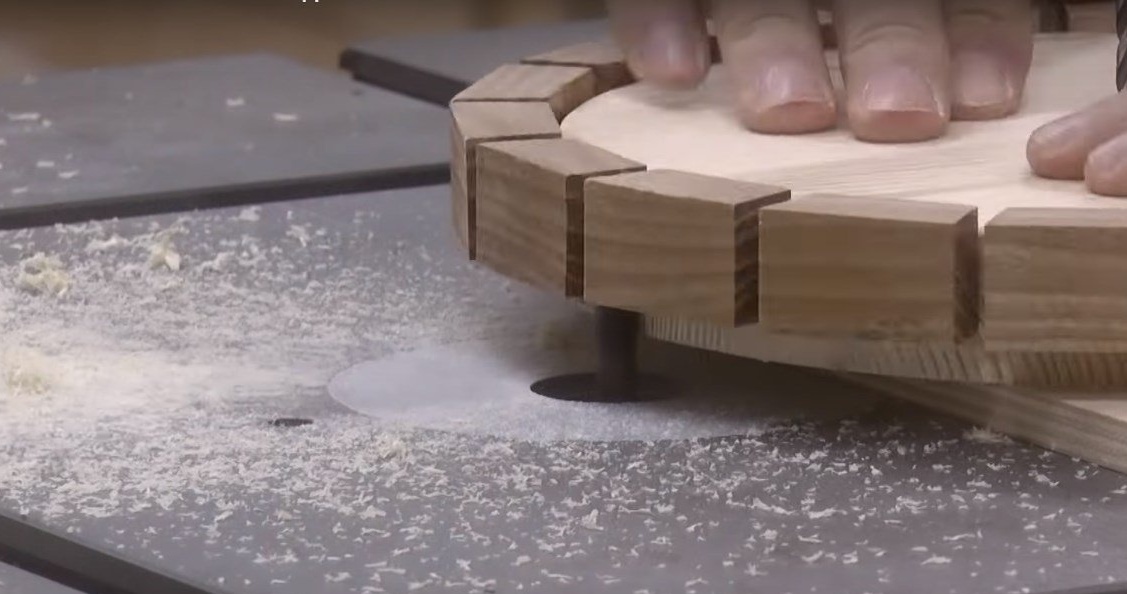
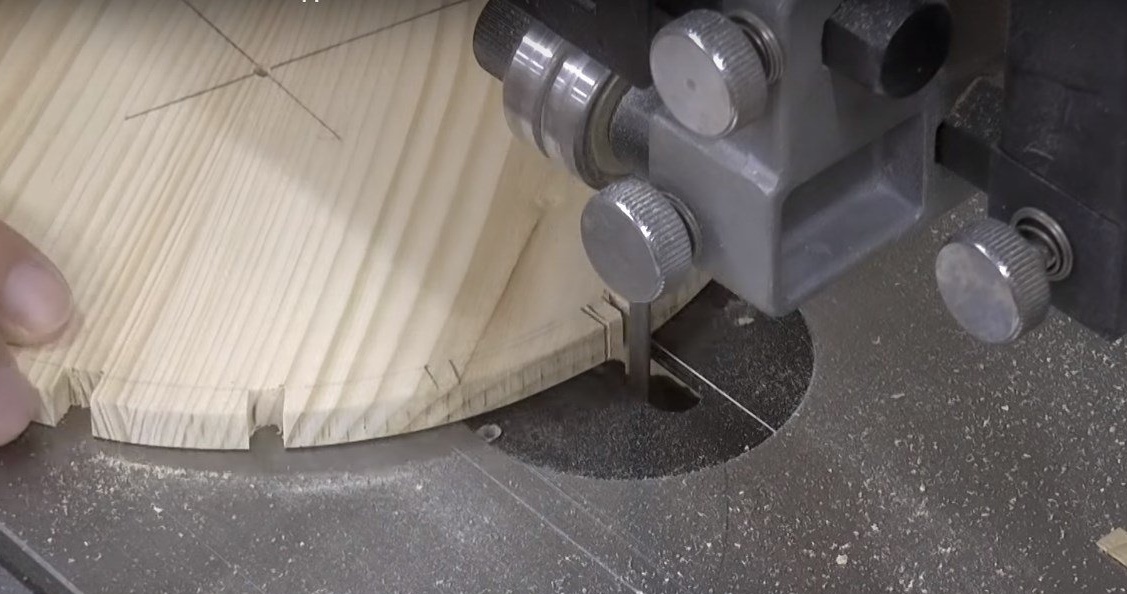
Fourth step: making circles for the inside of the lampshade
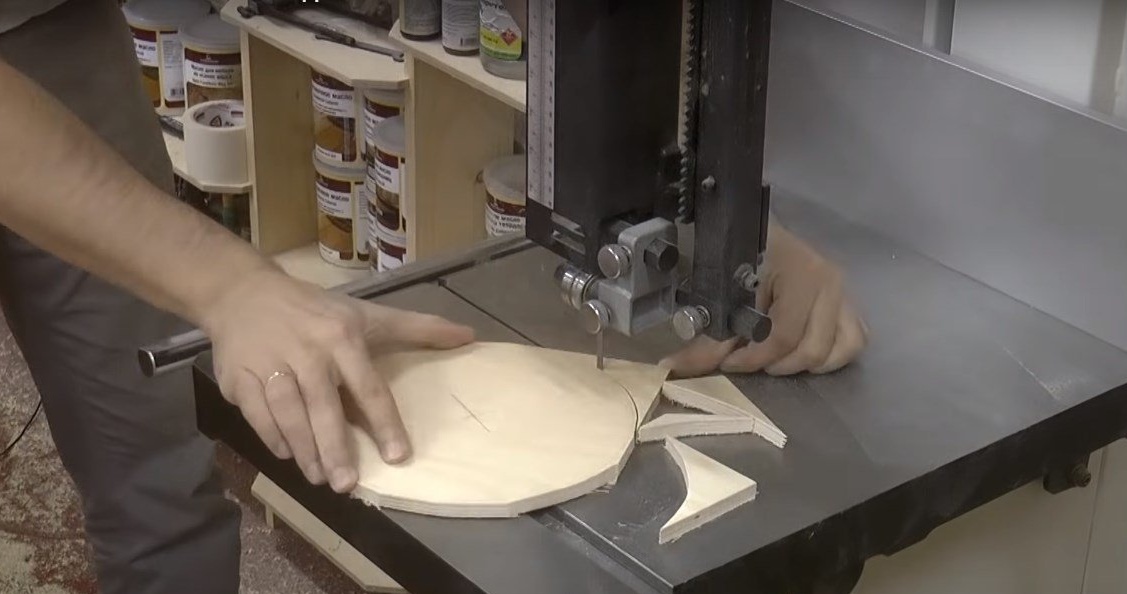
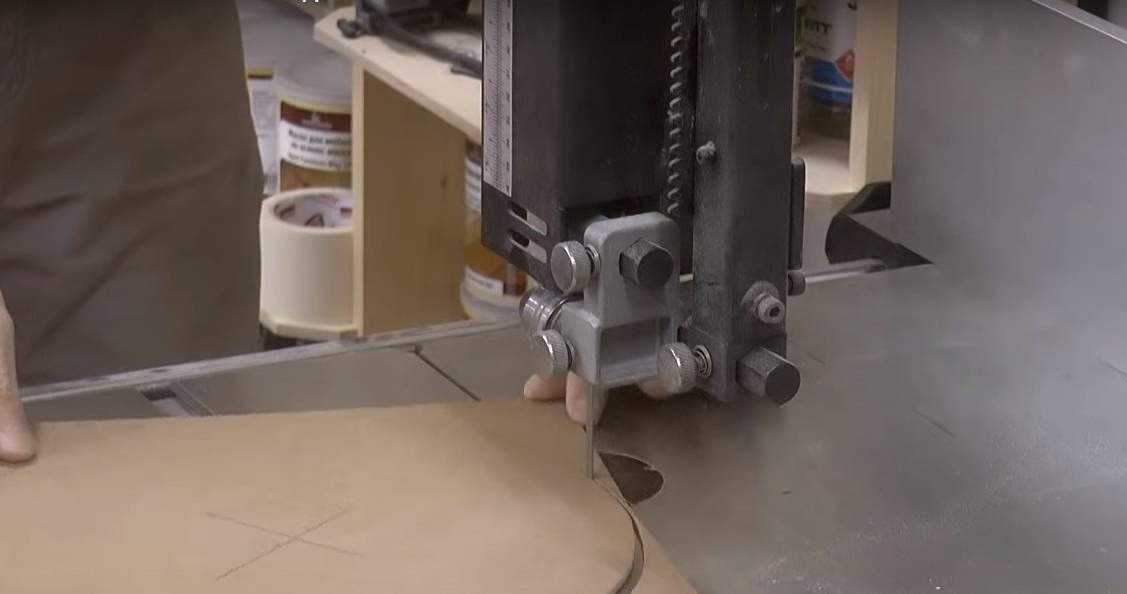
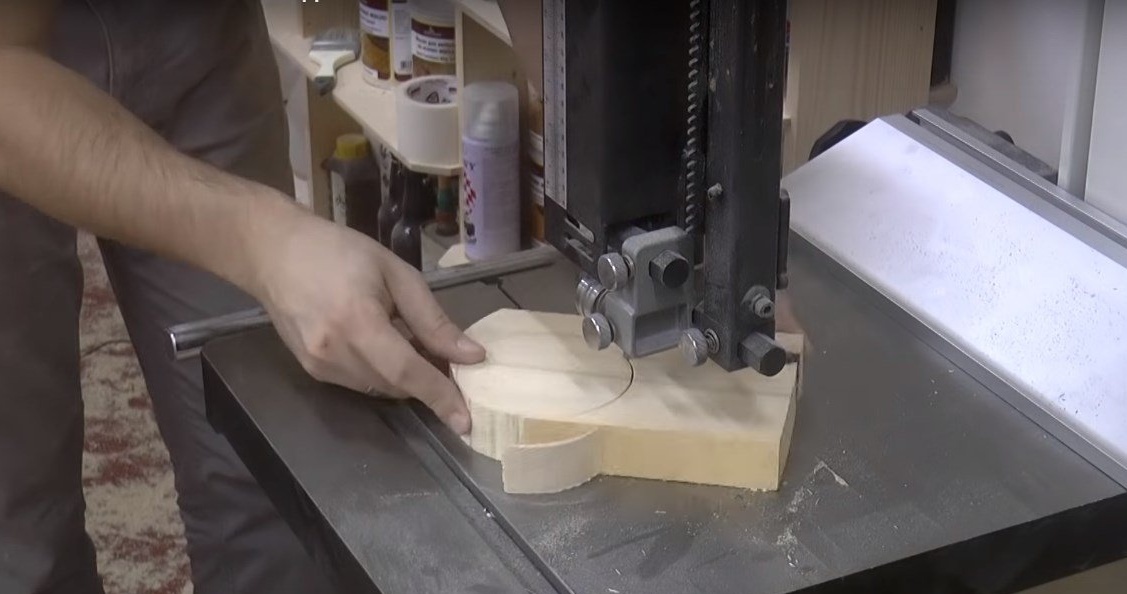
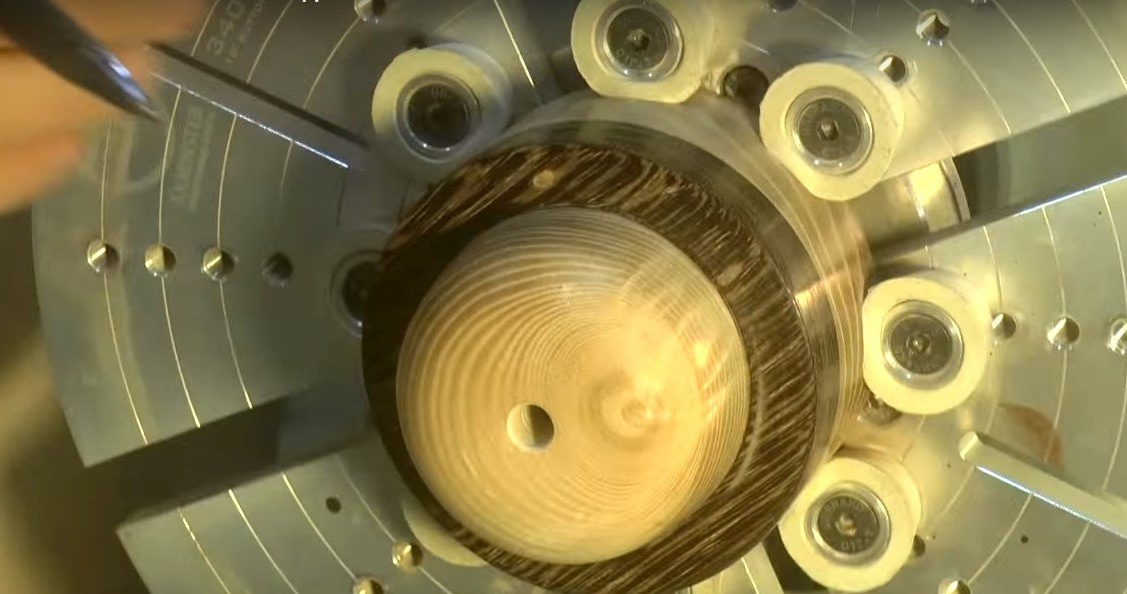
The author marks the wooden circles according to the plywood pattern on pre-glued shields. Circles are cut with an allowance for finishing milling on a band saw machine. In the center of each circle, a hole was drilled through which it can be combined with the pattern.
During milling, the template and the workpiece are connected with a thin drill and metal brackets. While the working area of the cutter passes through the tree, its non-working part rests on the plywood pattern.
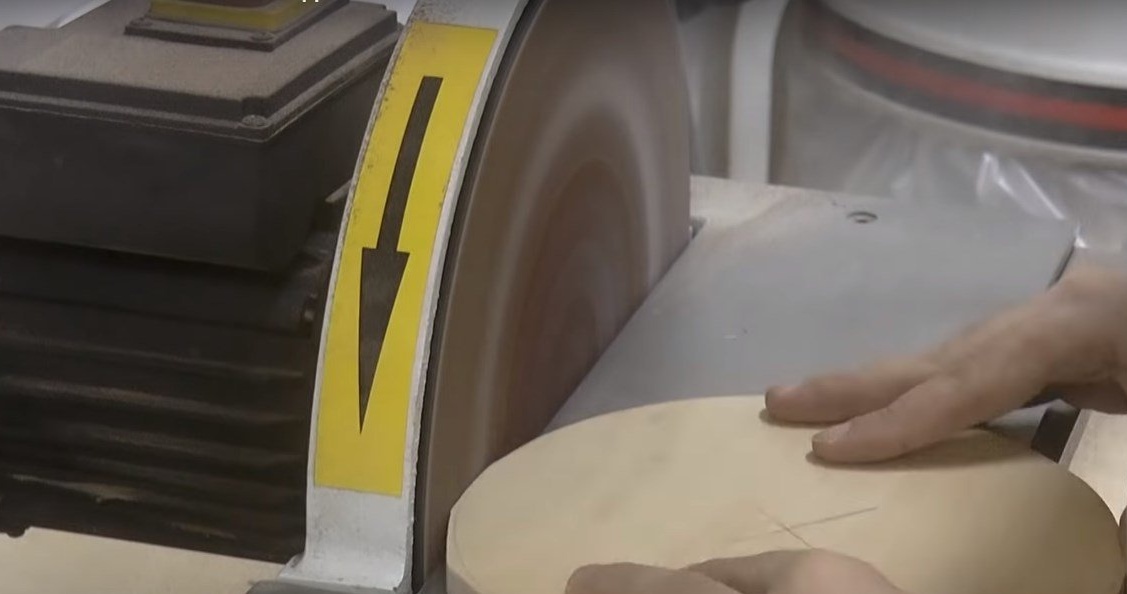
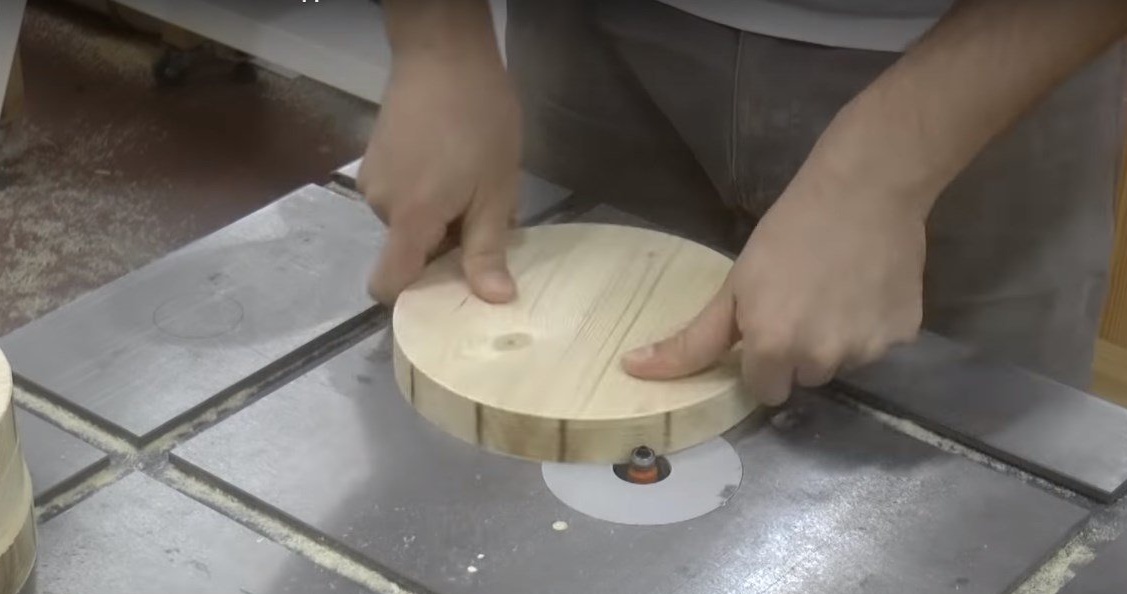
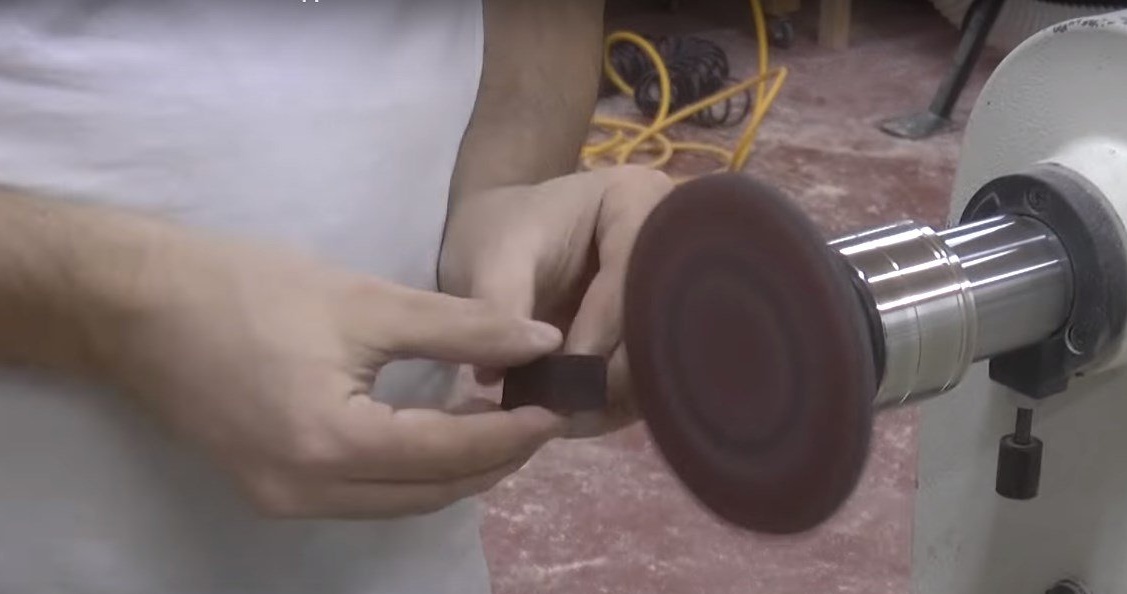
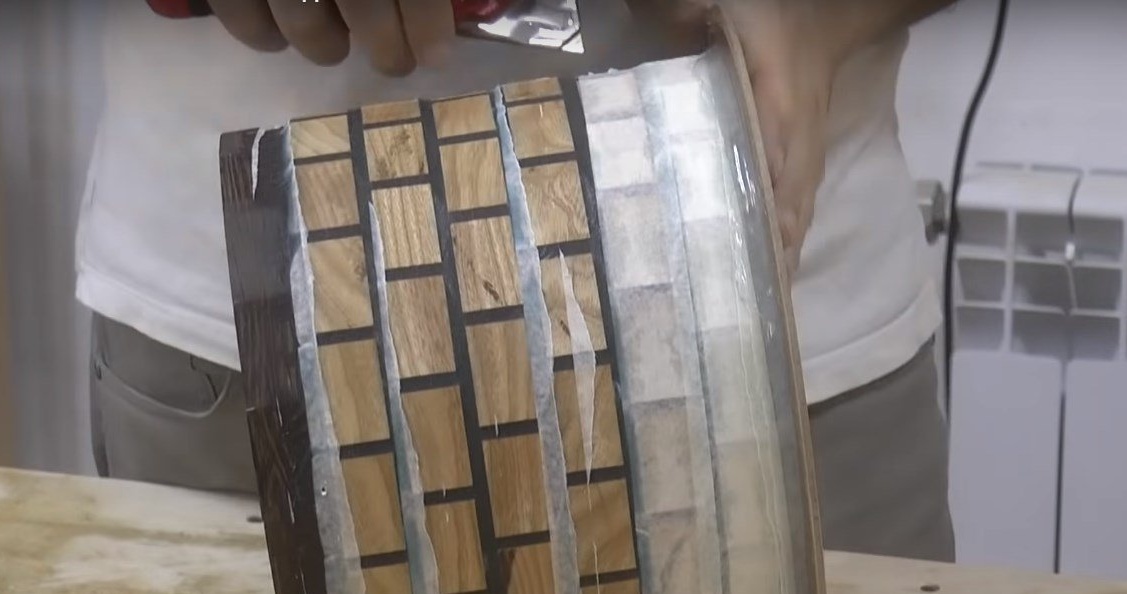
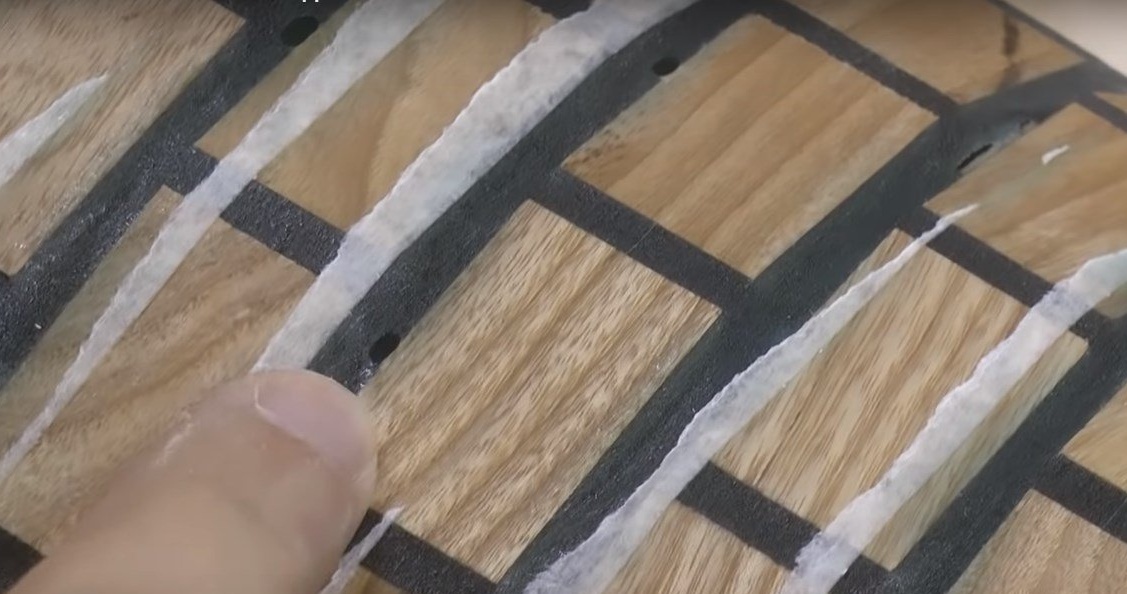
According to the idea, the segments will protrude beyond the edges of the circles, and the circles will stick together flat, so that all this is connected, it is necessary to remove the chamfer.
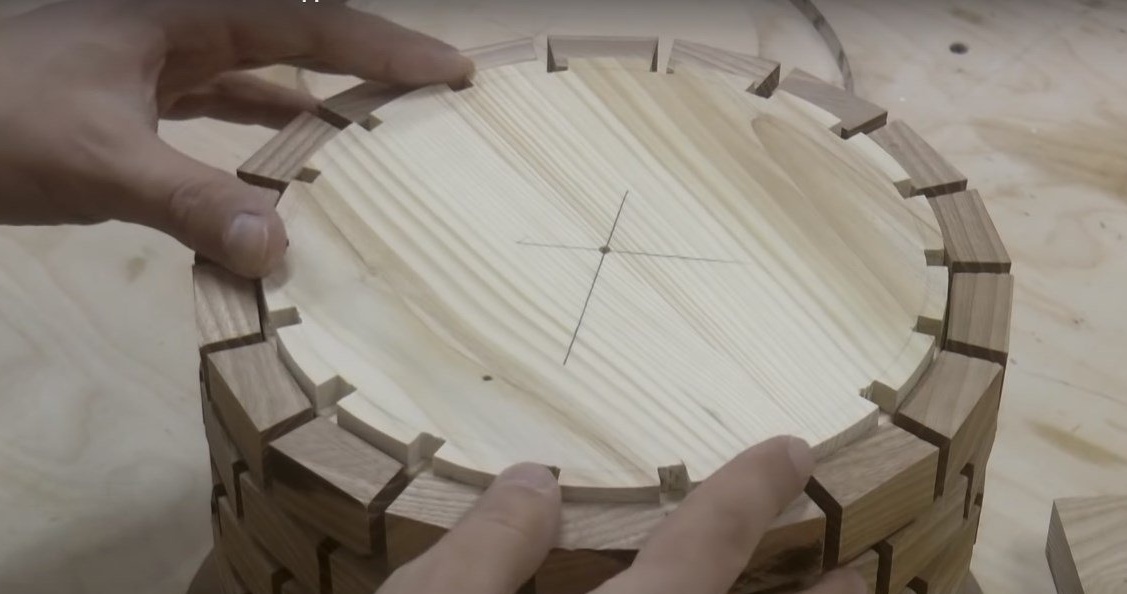
Step Five: Assemble Lampshade Layers
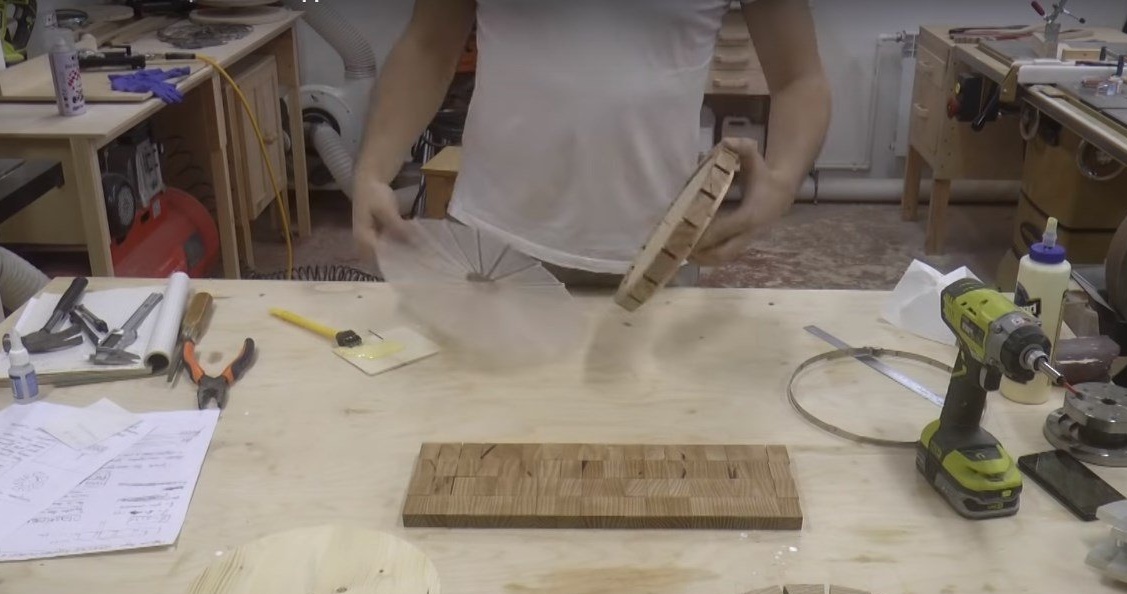
The author previously laid out the segments according to the pattern in each ring so that the assembly does not look chaotic. After that, you can proceed to the assembly of circles.
For assembly, the author uses epoxy glue. In this case, the glue spot is small, otherwise the glue will leak onto the acrylic template and it will be extremely difficult to detach it from the workpiece. The author places each circle in a metal clamp until the glue hardens properly and the structure gains strength. To be sure, he additionally dripped superglue at the junction of each segment with the circle, however, he assures that this is an extra precaution.

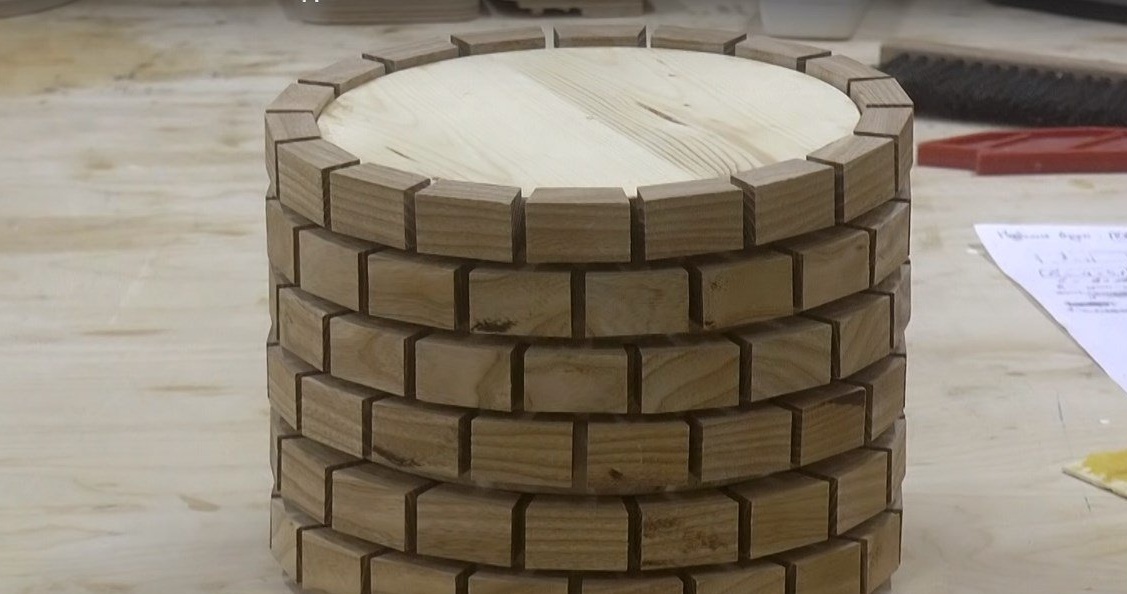
Step six: assembly of the lampshade
In the process of connecting circles formed a problem. The fact is that the segments stretched with clamps after drying did not stretch into circles. Therefore, I had to remove a quarter in a circle so that the parts docked without problems.
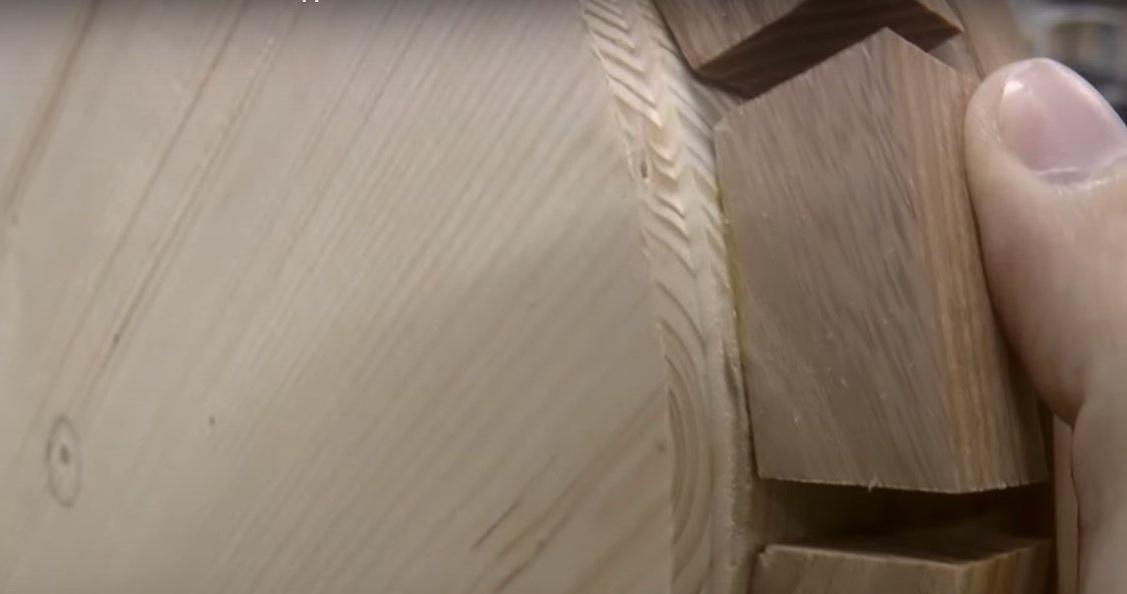
The author also made segments of the starting ring, in which the sub-holder will be mounted. This ring is made of Wenge, which can be replaced using a stain and your base tree.
The author collected the ring with glue on a flat surface of the table and placed it in the clamp until it dries.

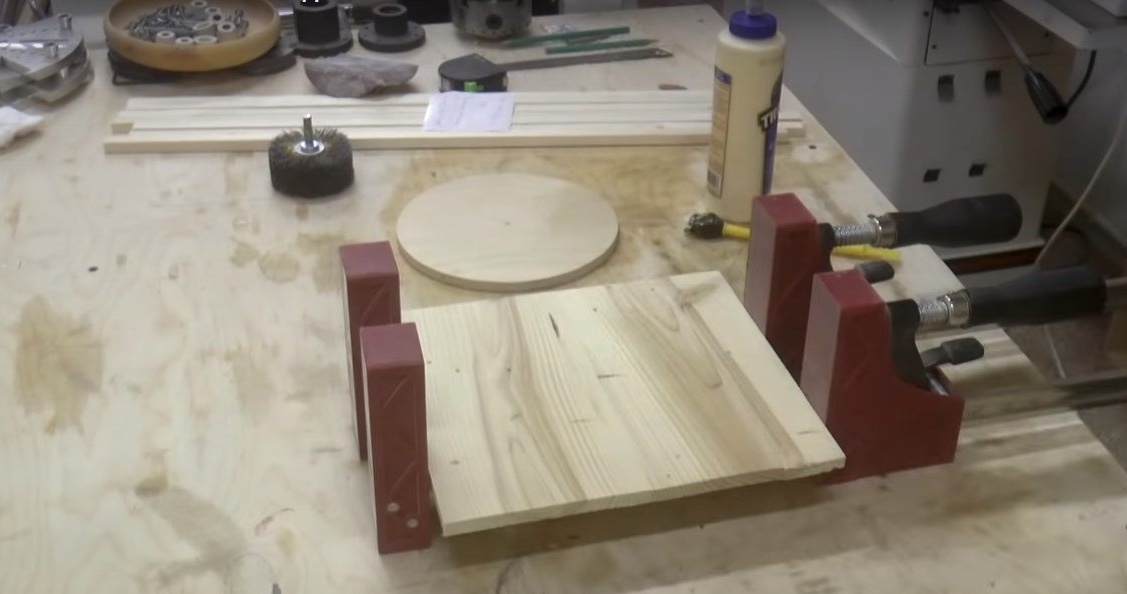
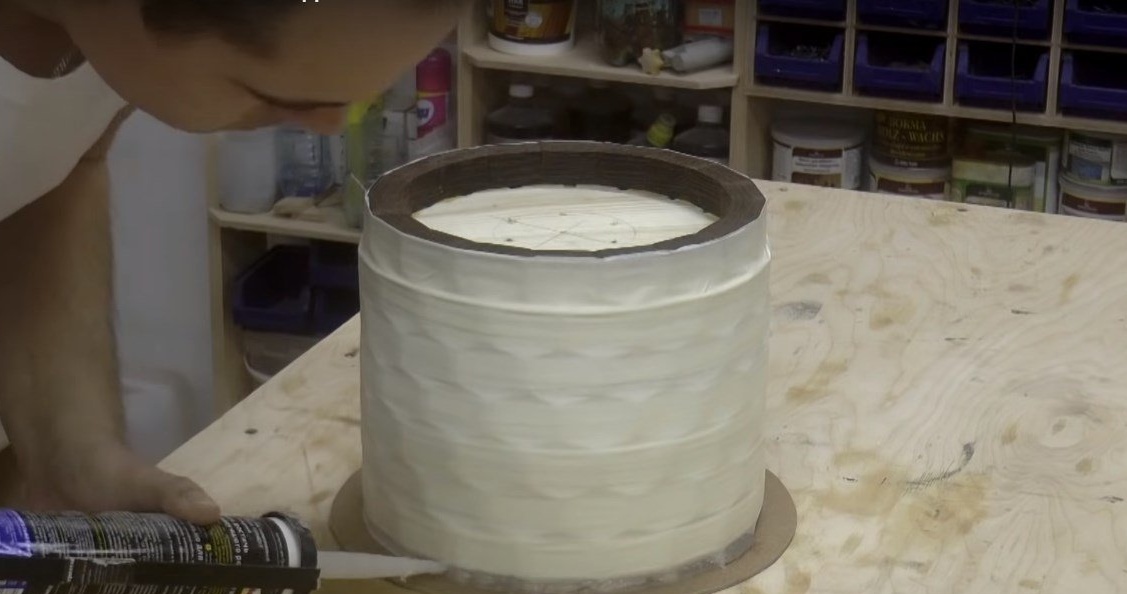
The author also prepared the “bottom” of the lampshade for epoxy casting from a thin 3mm MDF. It has a slightly larger diameter for sealing joints with silicone.
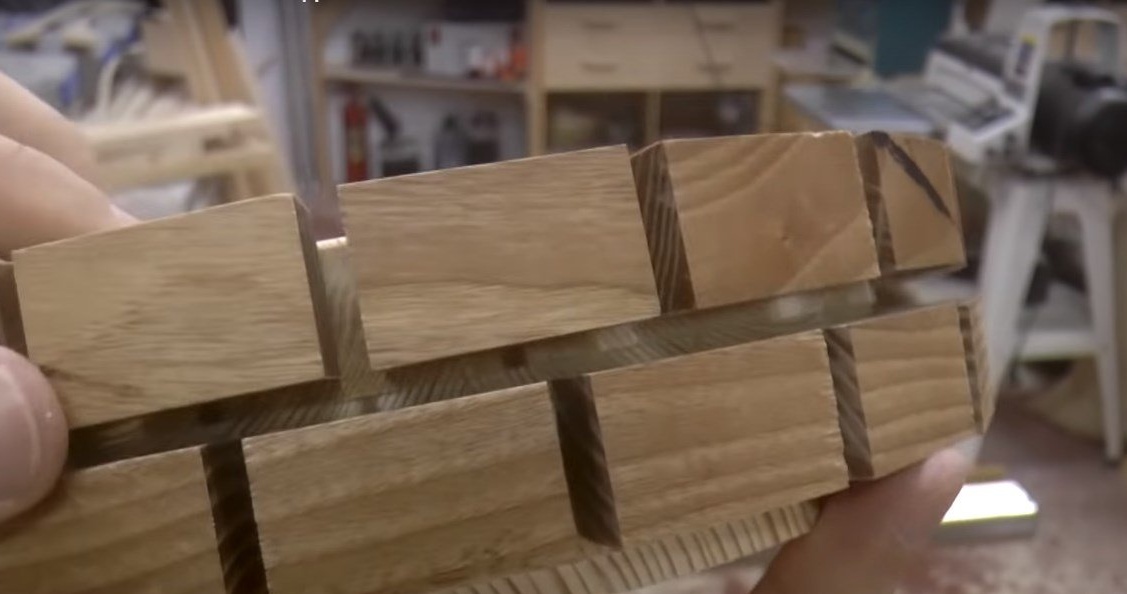
Among other things, the author cut another ring from plywood, which will create a gap between the segment circles and the ring from Wenge. In it, he cut holes through which the epoxy will better penetrate into the lampshade body and which exactly coincide with the vertical gaps.

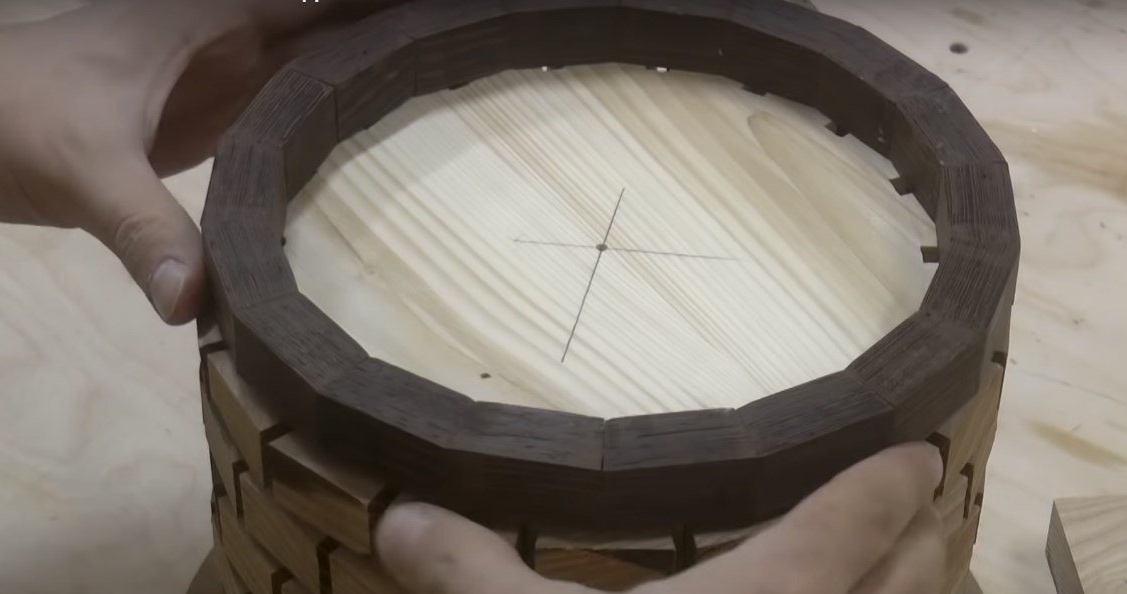
After that, the author glued all the rings into one blank.

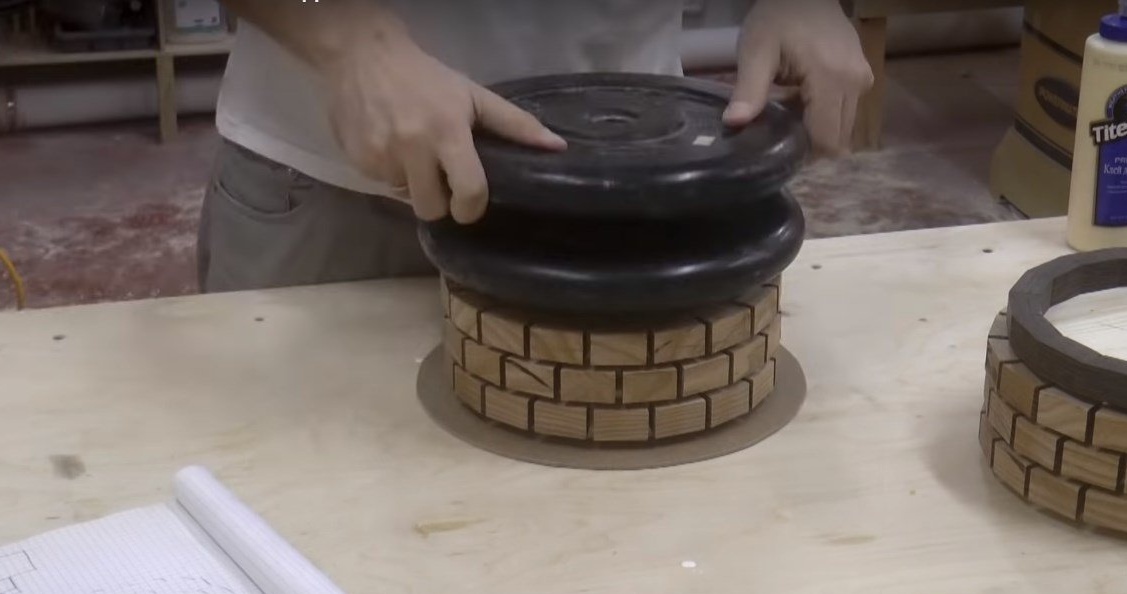
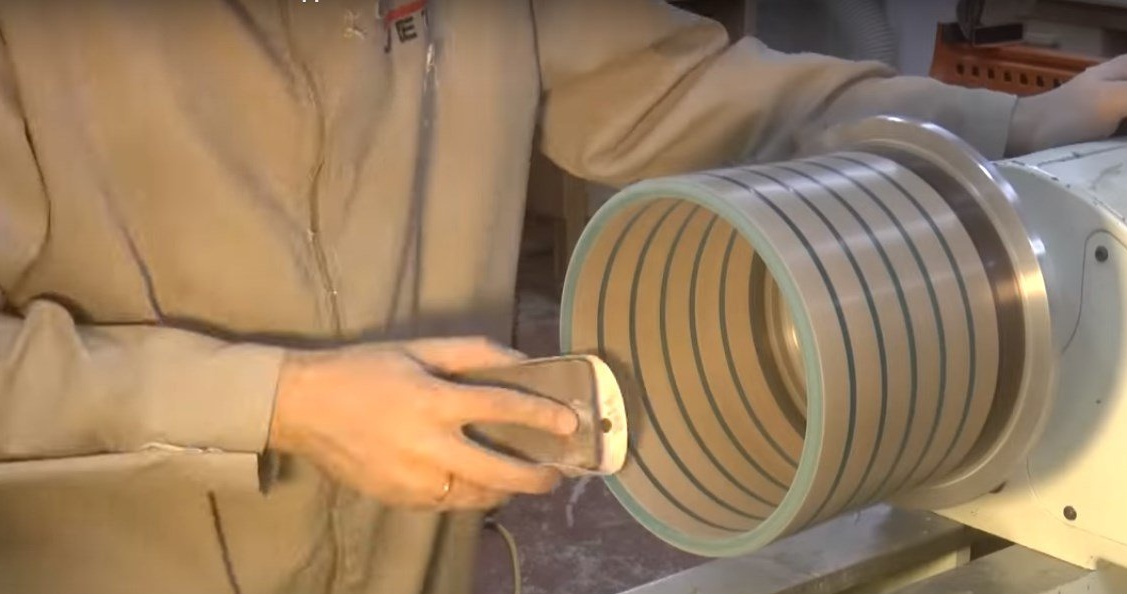
Step Seven: Epoxy Fill
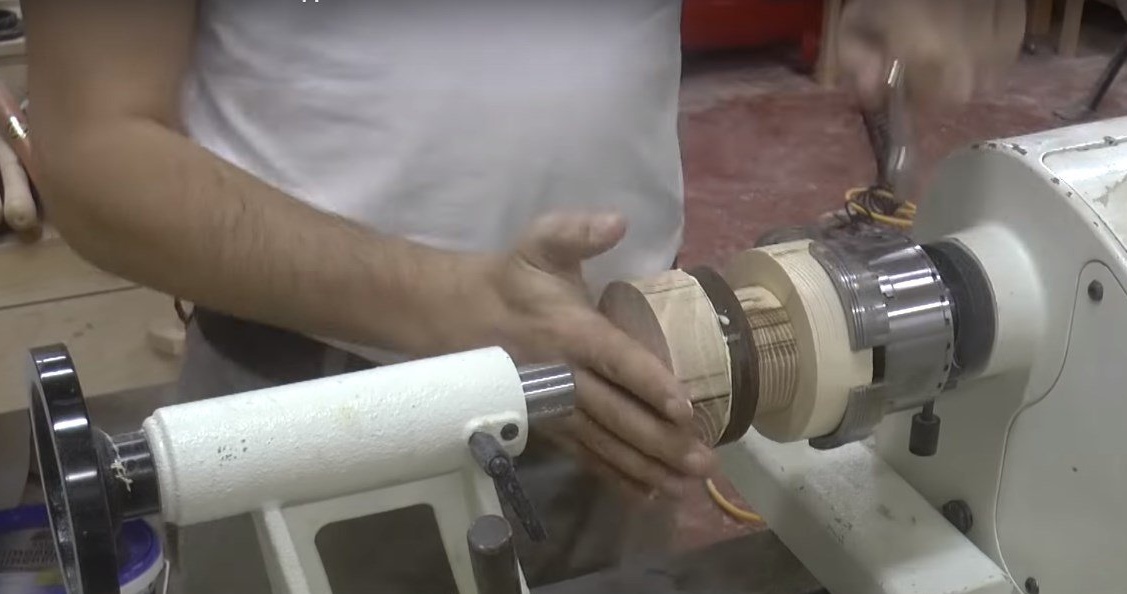
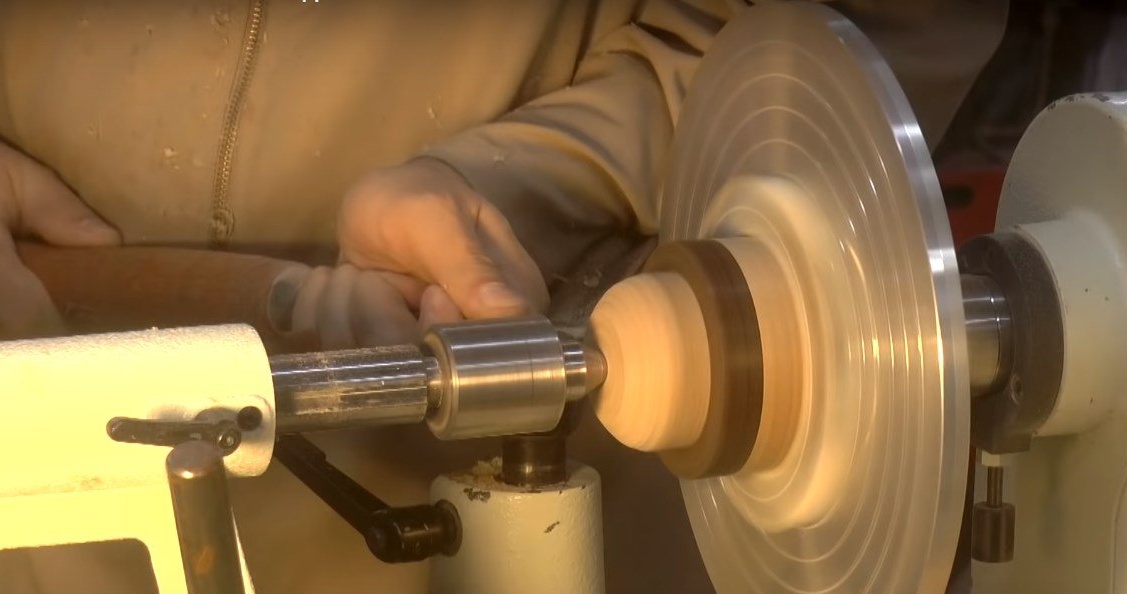
The author sealed the disc with masking tape, installing it on a lathe.
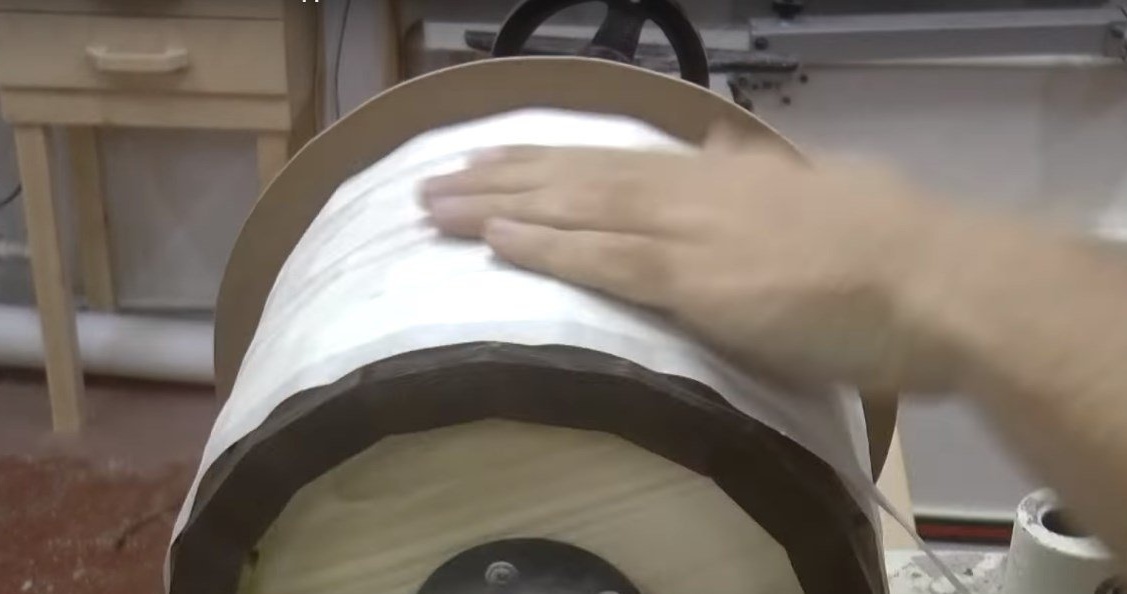
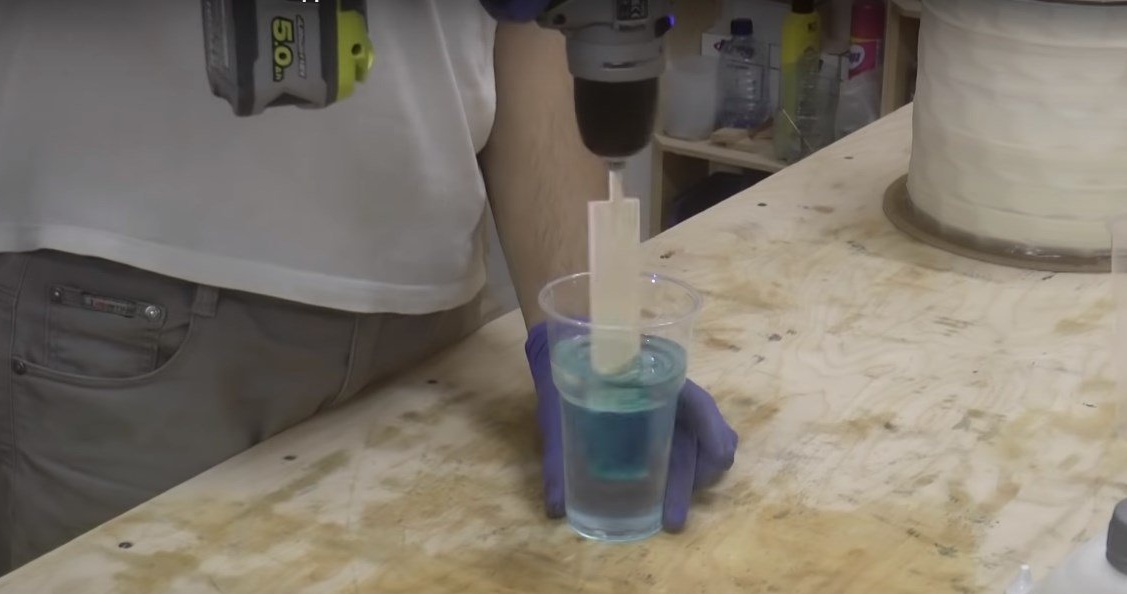
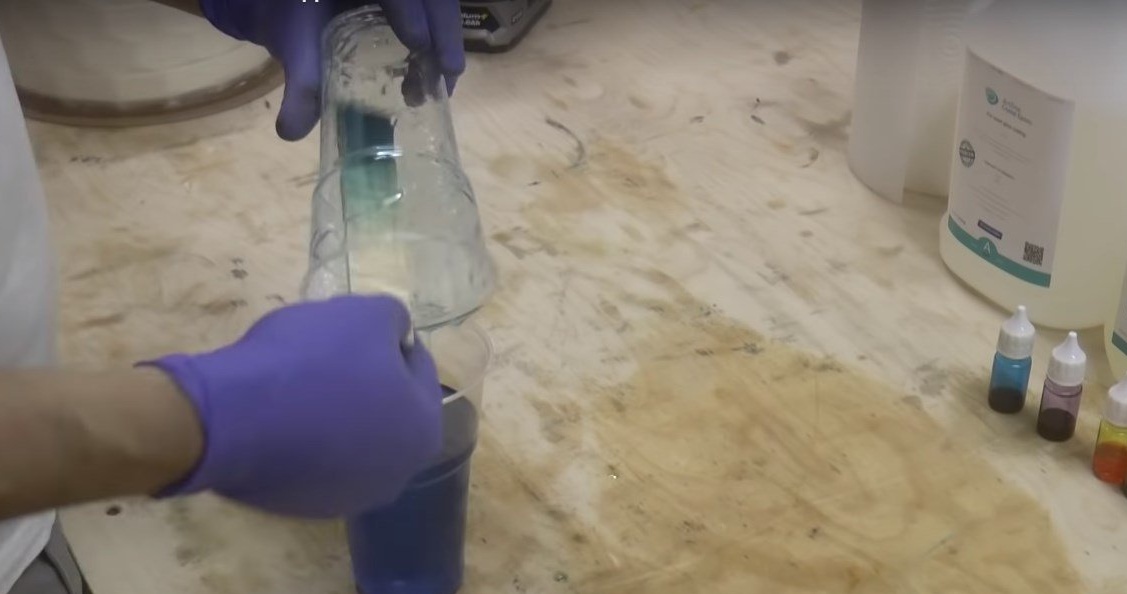
While the silicone solidifies, it is necessary to mix the base composition of the epoxy and add pigment. Use clear epoxy to fill medium-sized areas. After mixing the resin and hardener, pour the composition into a clean glass and stir well again.
Fill the disc with epoxy and tap on the sides so that air bubbles come to the surface.The author needed about 900 g of epoxy.
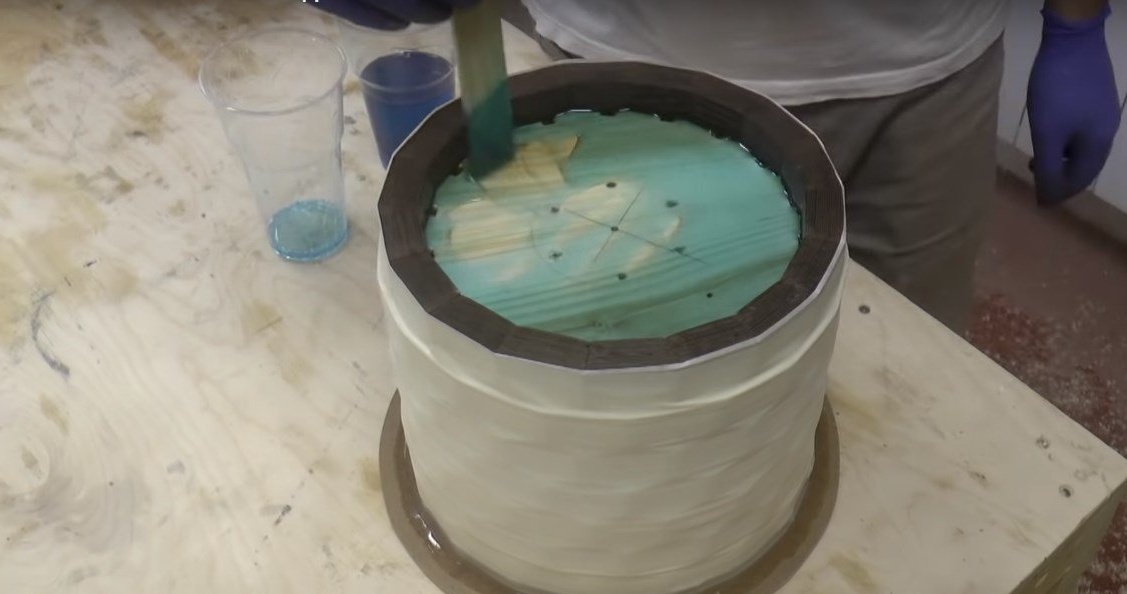
After the epoxy was solidified, the author found holes on the surface from air bubbles. He filled them with epoxy and sealed them with masking tape for drying.
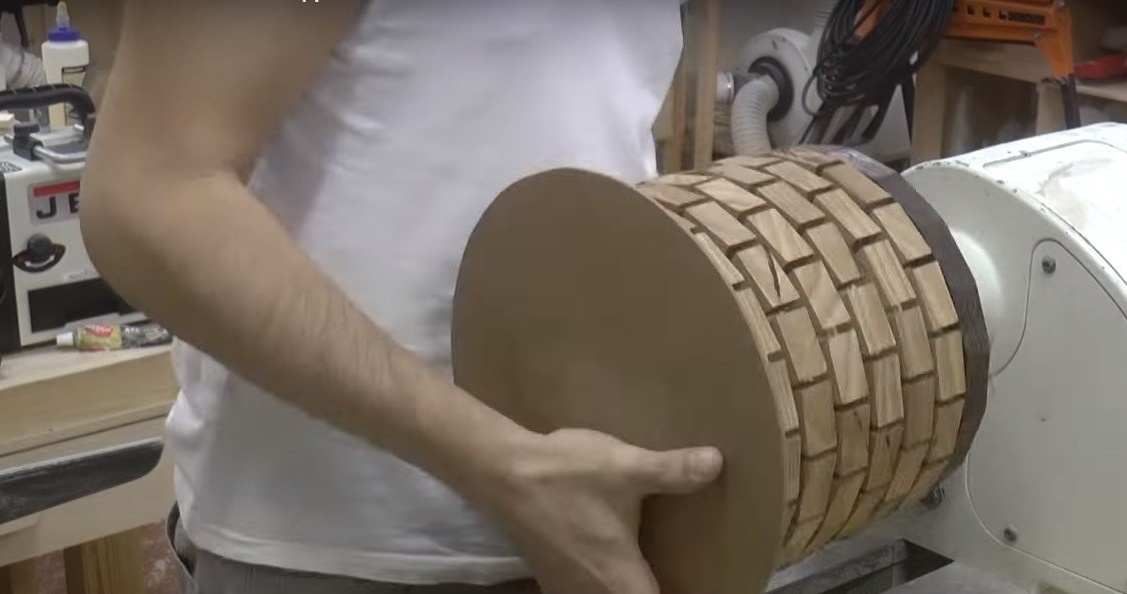
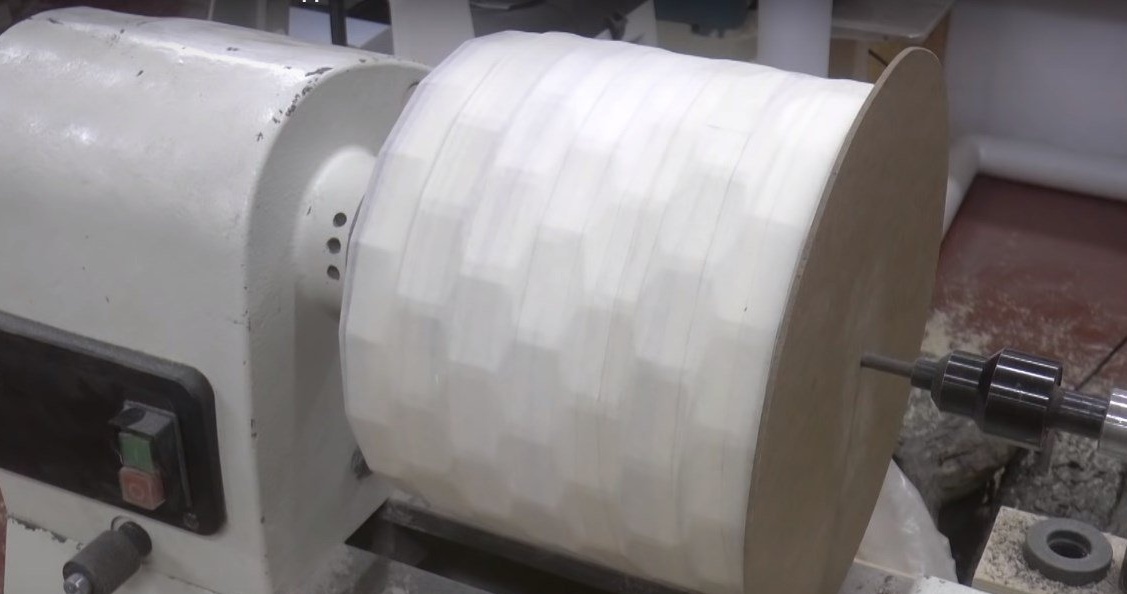
Step Eight: Forming the Lampshade and Decorating It
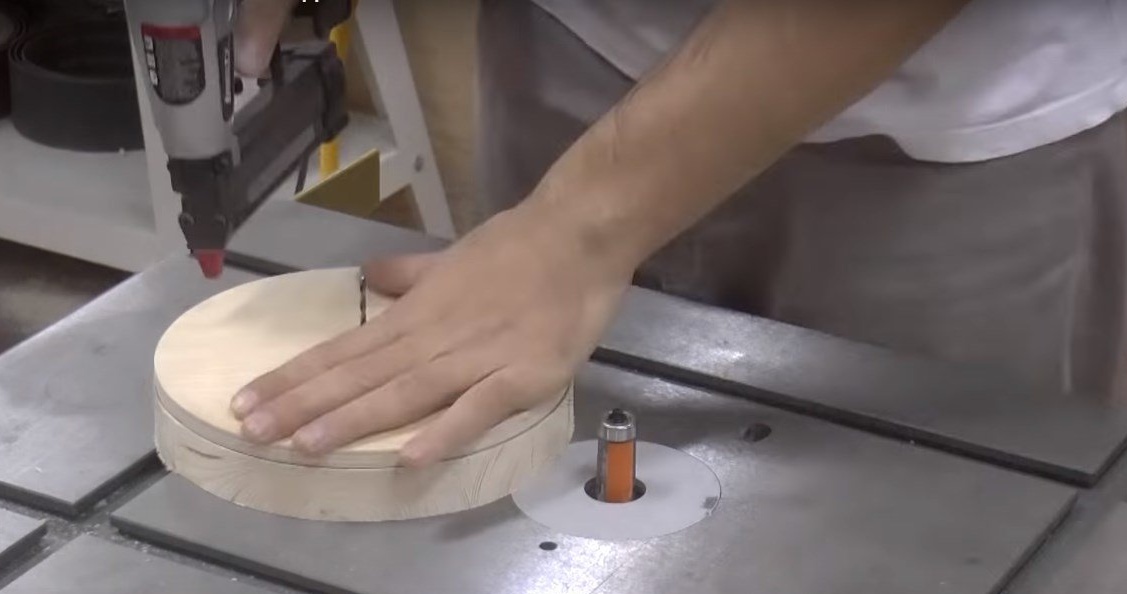
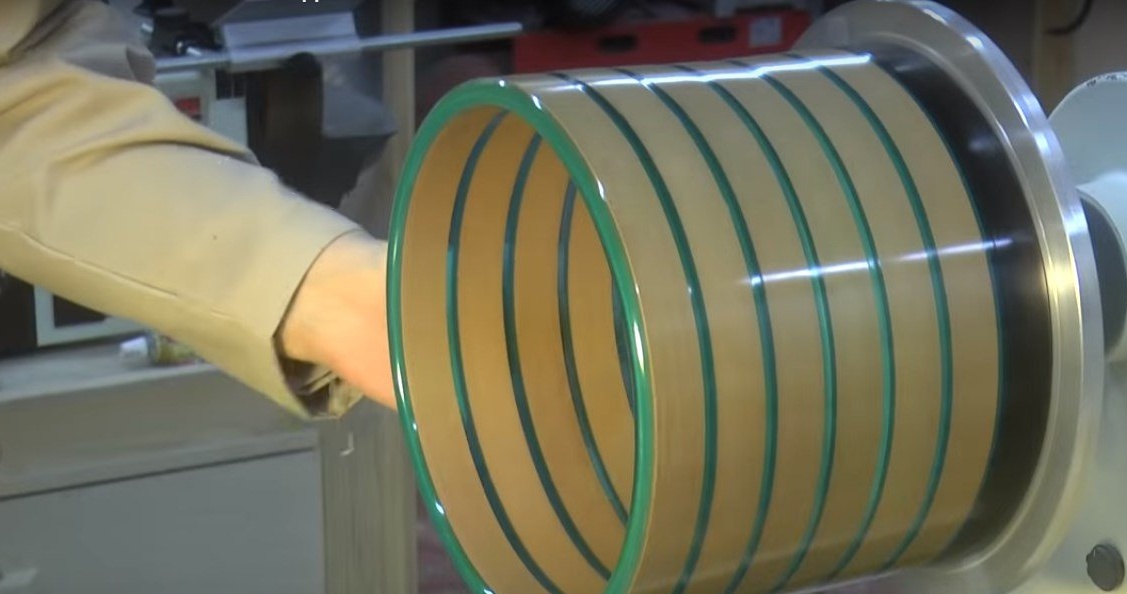
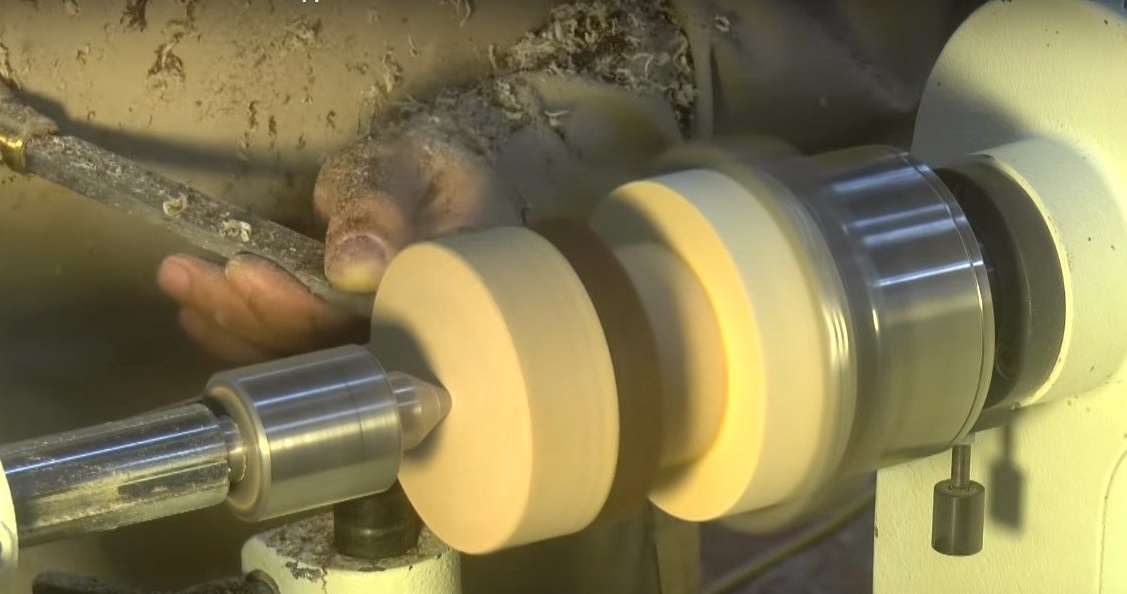
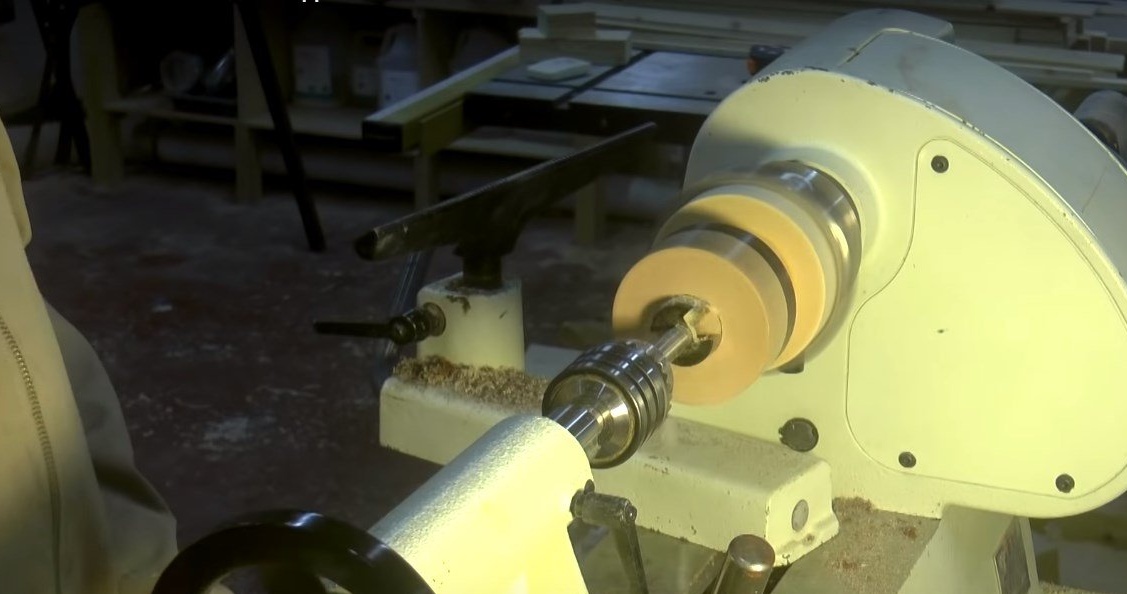
After the epoxy has completely hardened, you can proceed to grooving the product. The lampshade is a straight cylinder. The vnutryanka is selected first on one side, then on the reverse.
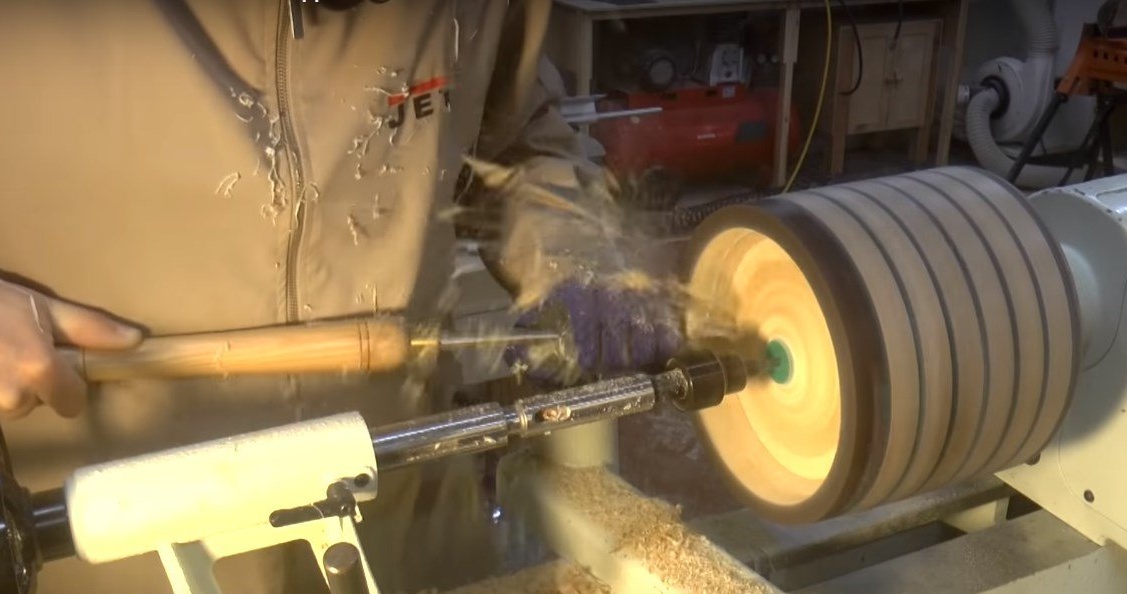
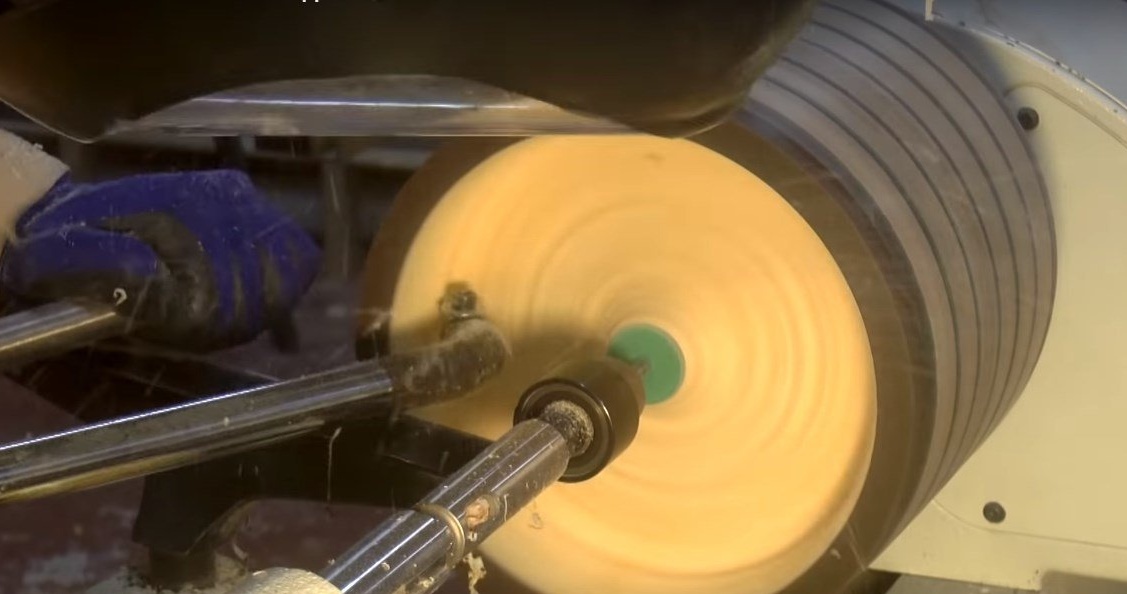
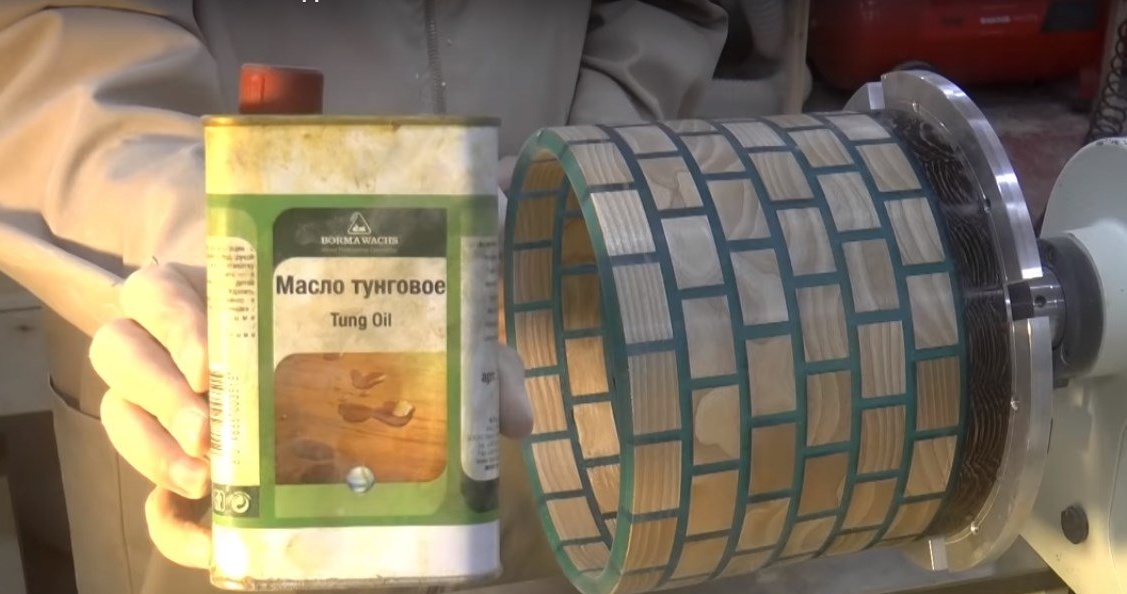
Directly on a lathe, the author treated the lampshade with tung oil. Residual oil must be removed. Polishing is done right there.
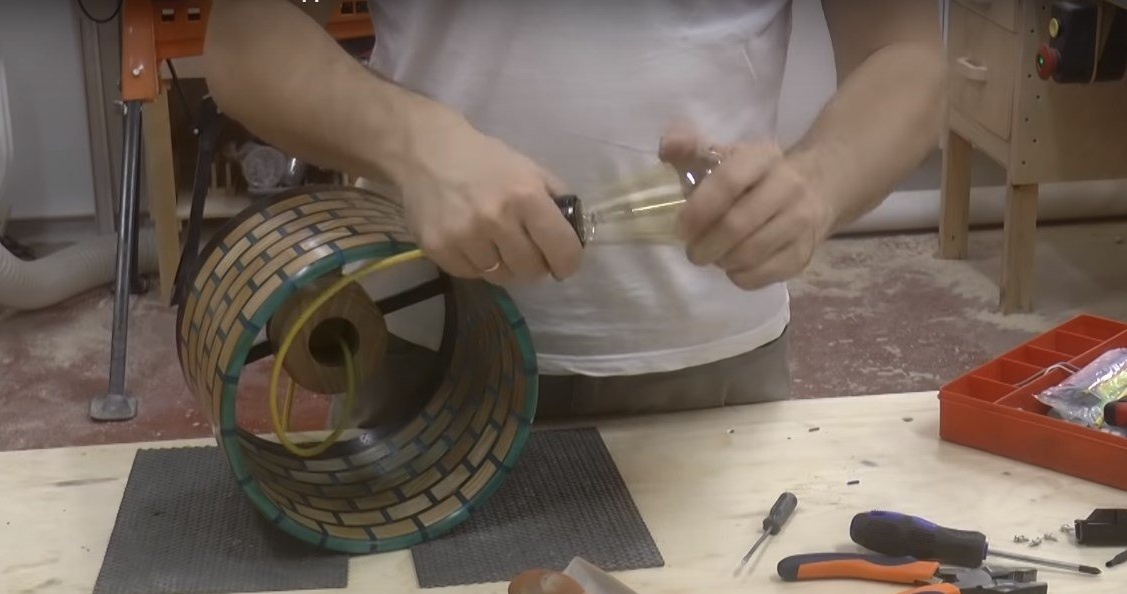
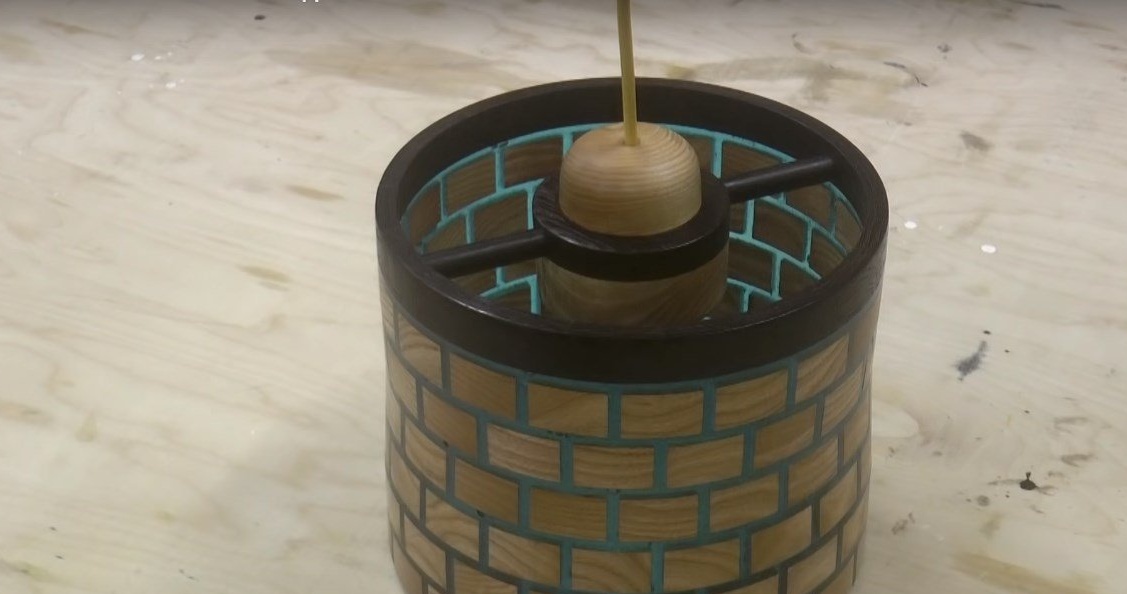
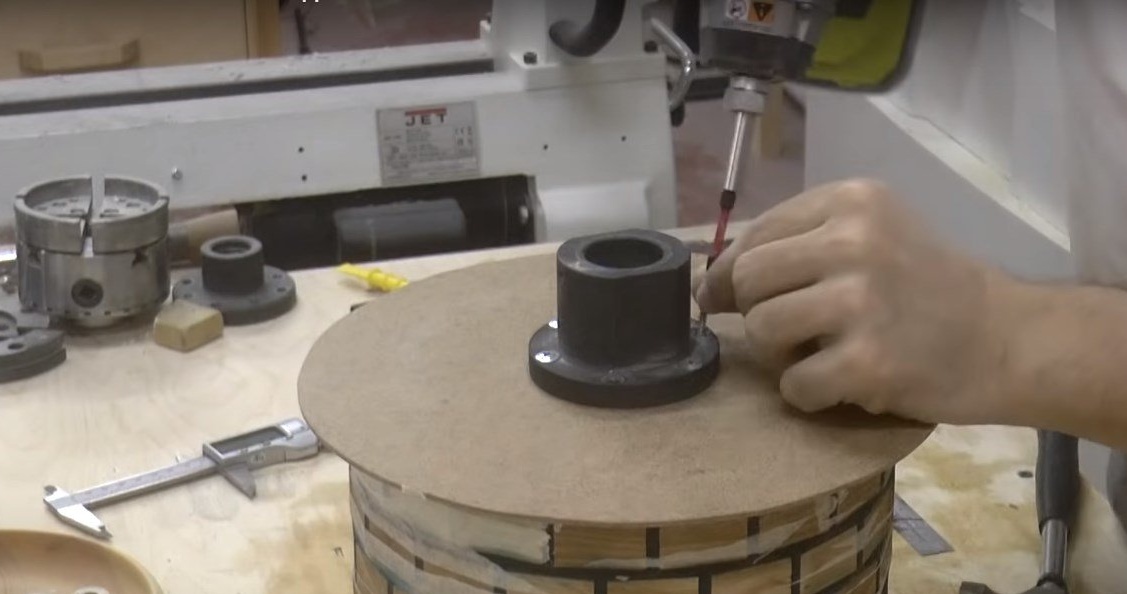
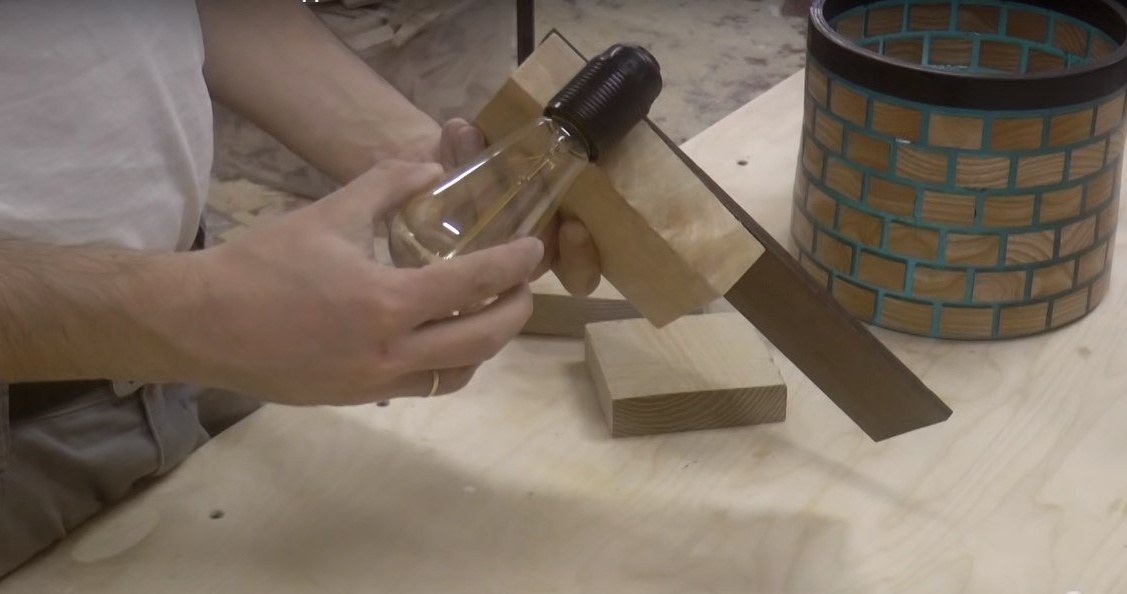
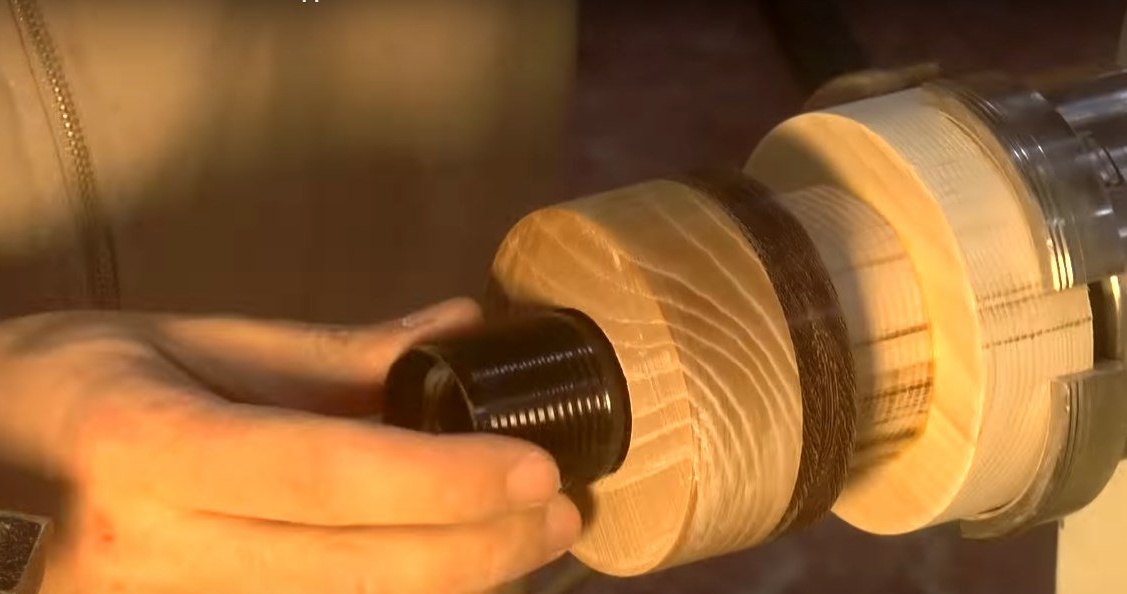
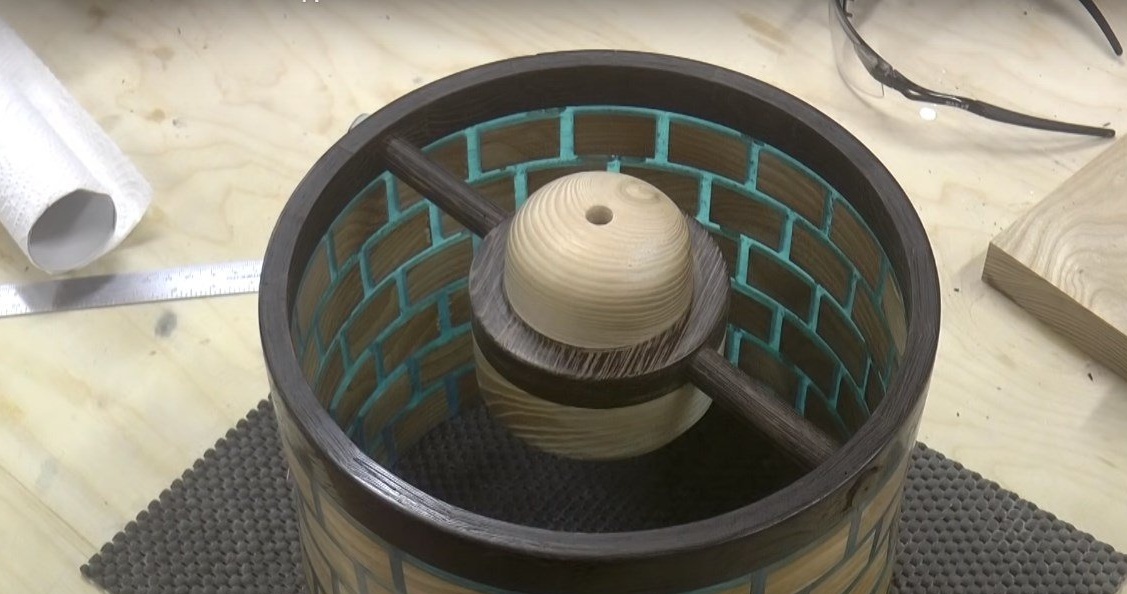
Step Nine: manufacture of a sub-holder and finishing assembly of the lamp
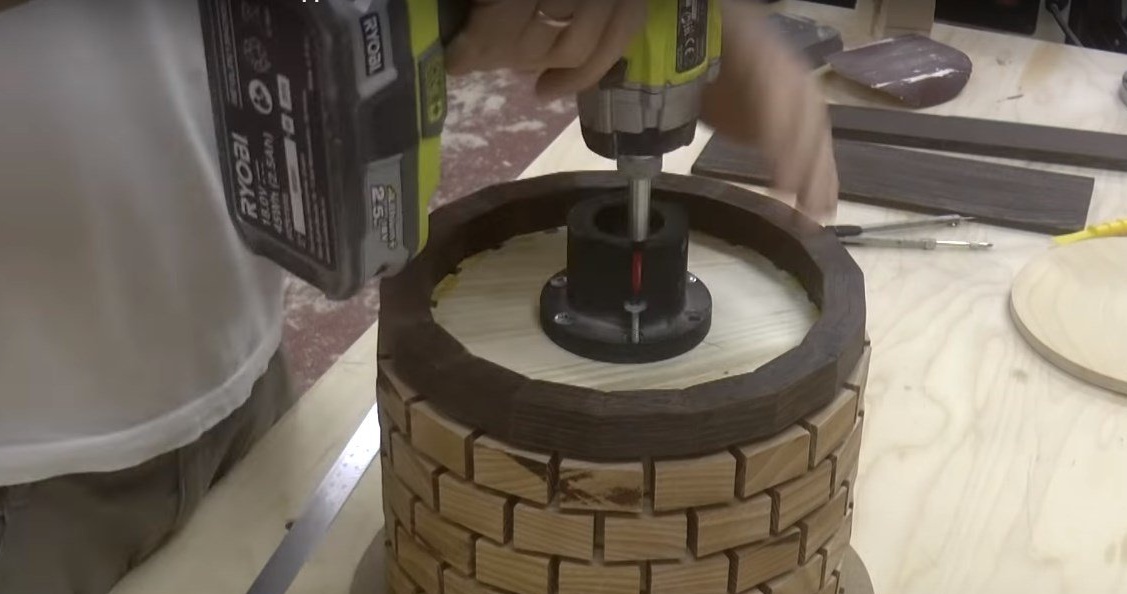
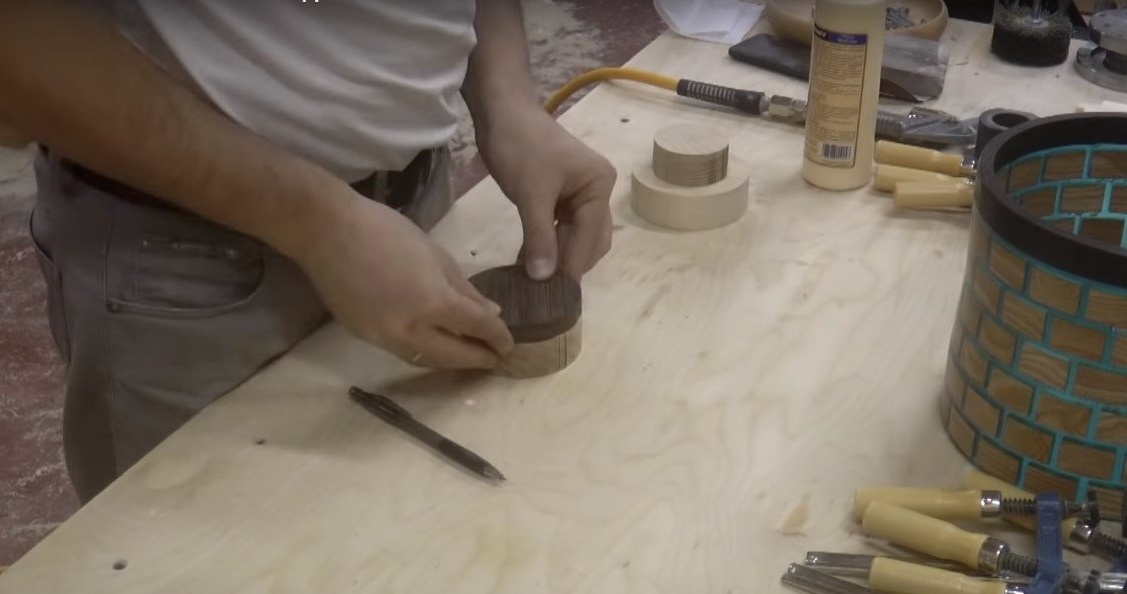
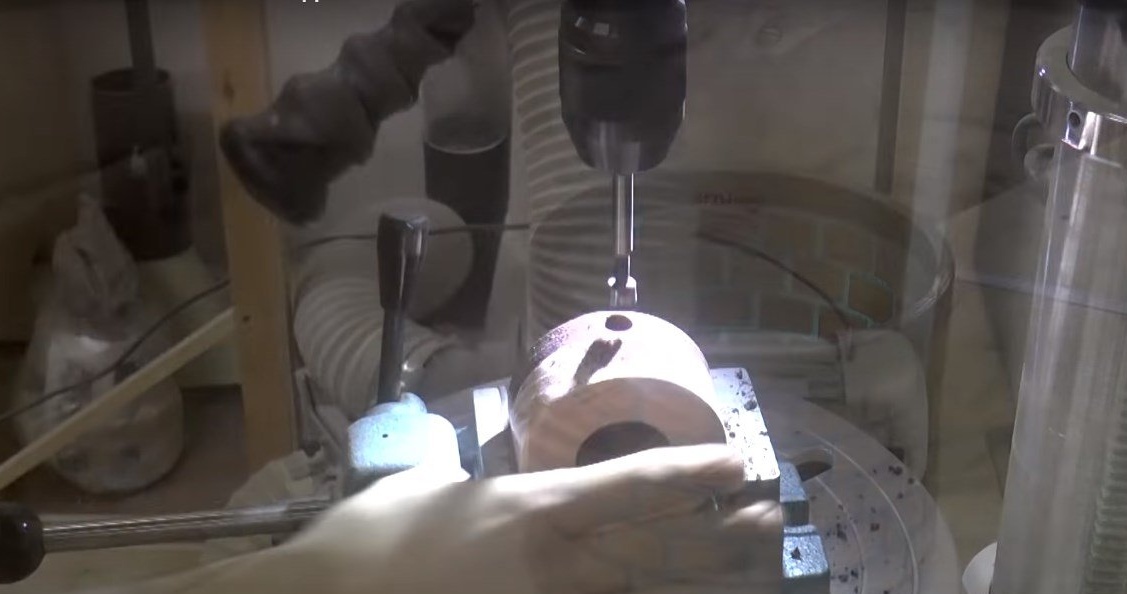
The podpatronnik is connected to the ceiling by two chiseled chopsticks from Wenge. The casing itself is assembled from several wooden circles interconnected by glue. At the end, the author drilled a blind hole under the cartridge with a Forstner drill. In it, he made a hole of a smaller diameter under the wire. After that, the author turned the other side.

The author drilled holes for wooden rods and with the help of them connected the plafond to the sub-holder.
It remains only to install the lamp in the cartridge!