

general description homemade:
For many, it would be easier to just buy a finished design and install on bikebut this option is not for us. It’s much more interesting to do everything do it yourself, and even without spending a dime. Plus, a child can actively participate in this process, which is also a plus. In general, let us leave the discussion of pros and cons and proceed to the manufacture of a children's saddle on a bicycle frame.
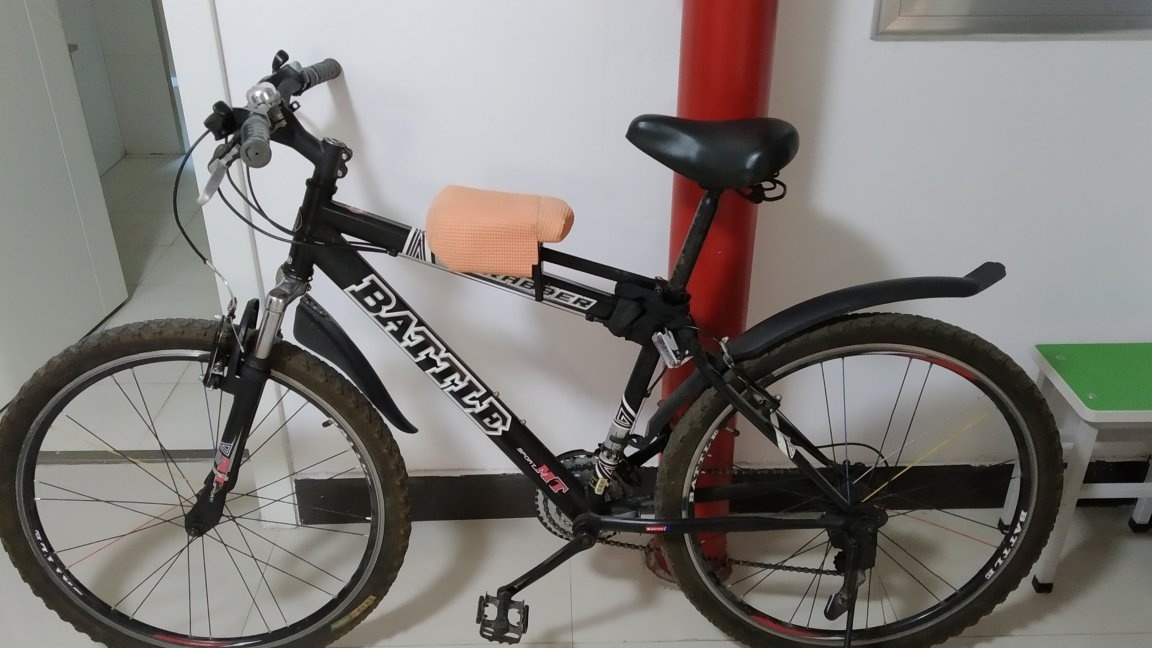
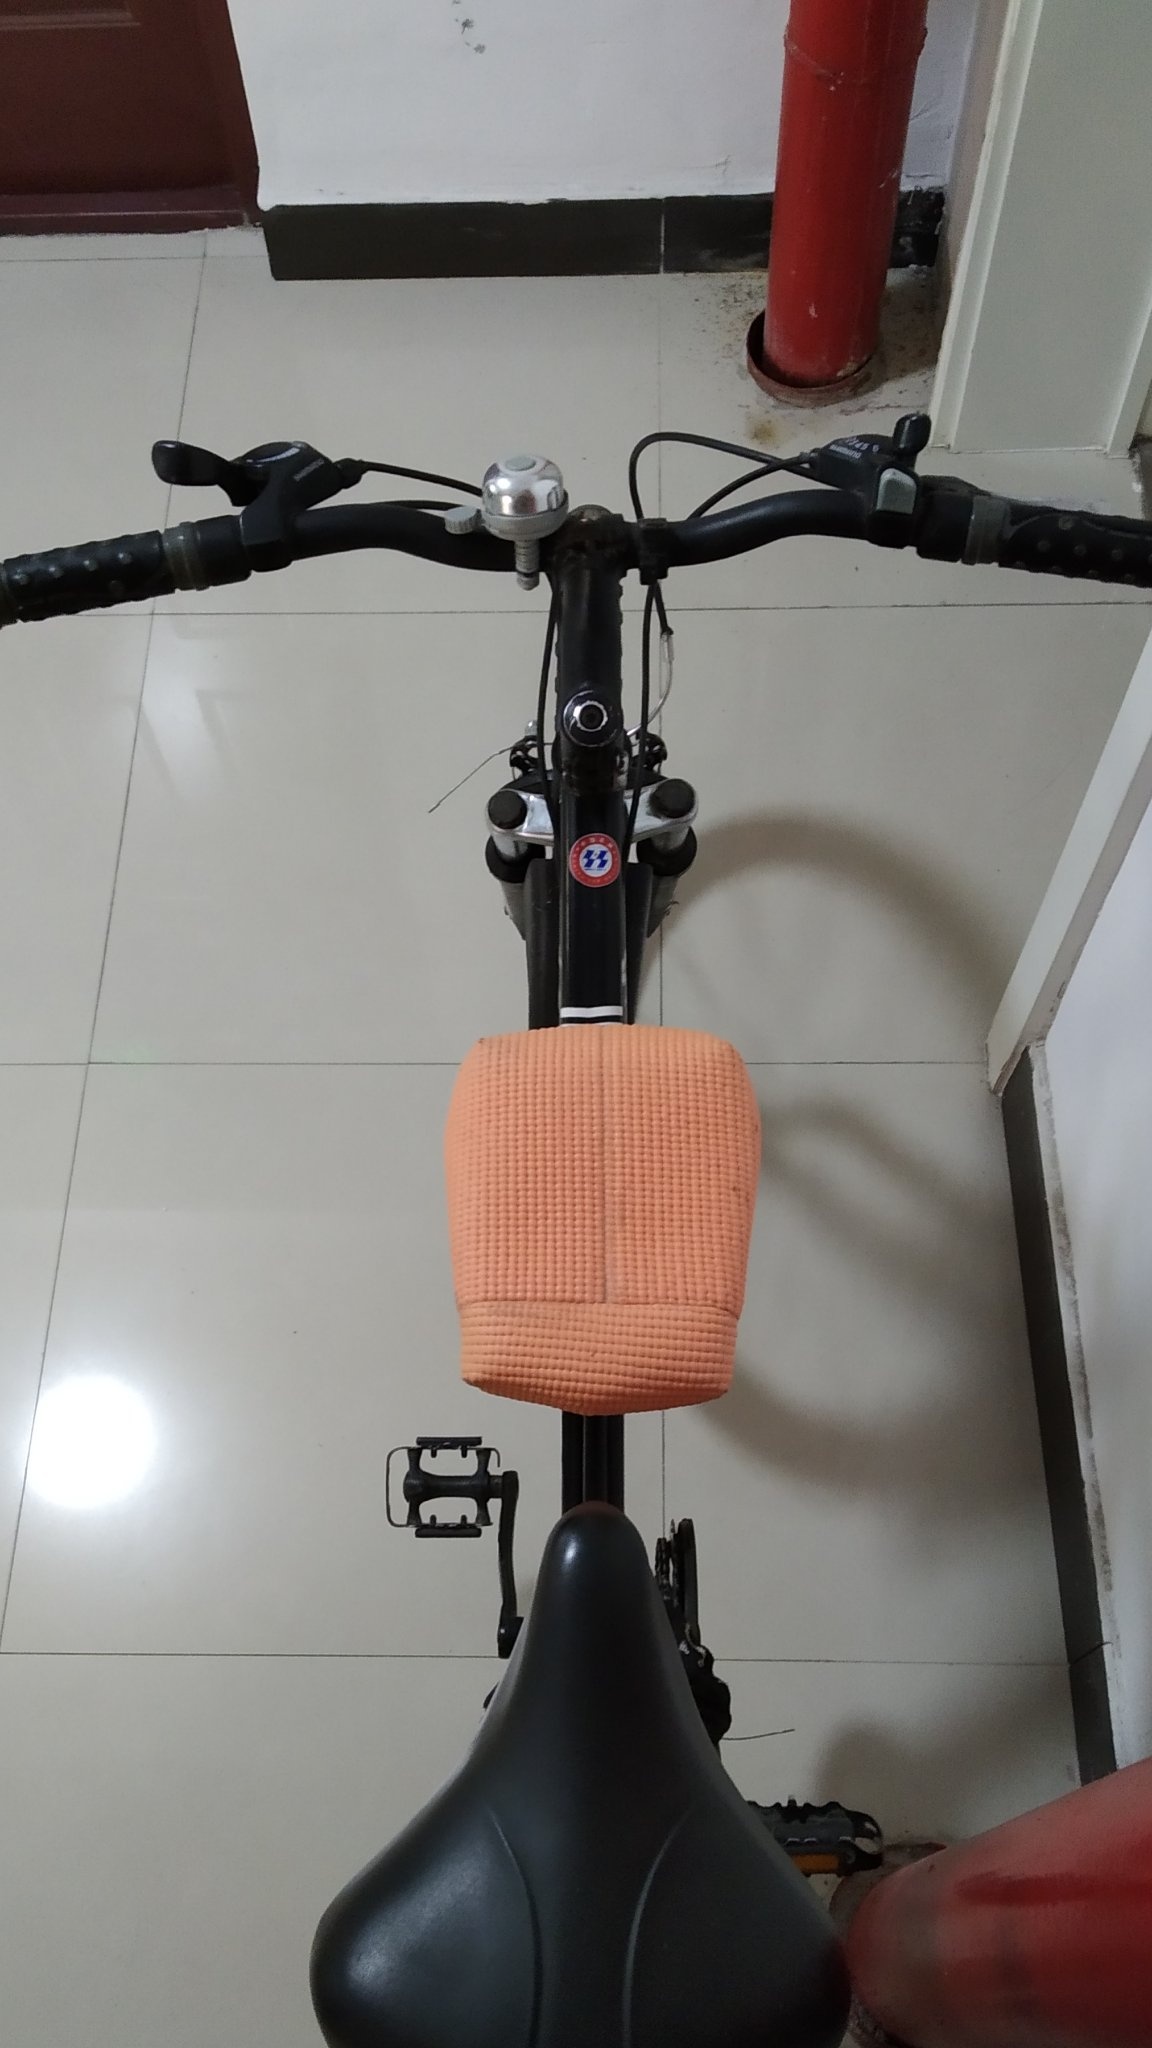
We need the child to sit comfortably, be able to hold the wheel with his hands, and he had where to put his feet. Difficulties arose only with “legs”. Looking ahead, I’ll say that when I tried on the seat for the first time, my son himself dealt with this problem by simply placing his feet on the top of the fork. Perhaps for other bicycles this place looks somehow different, but I will not describe this nuance, for lack of statistics.
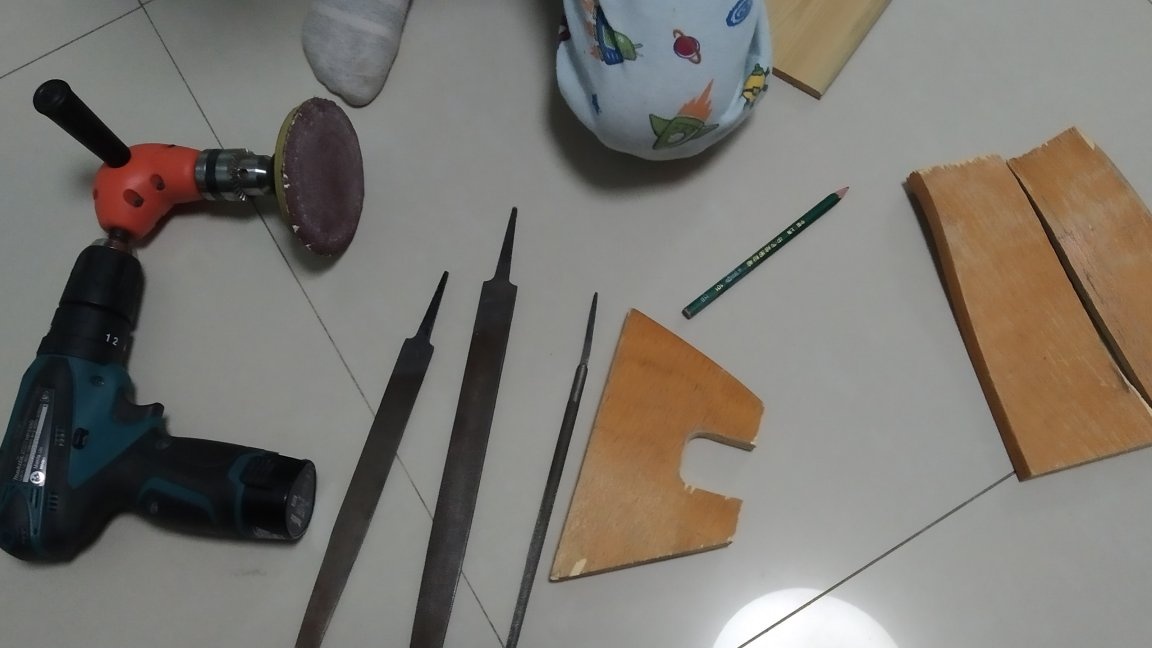
Materials and tools:
- metal tube
- Plywood
- bar
- Metal corners
- Foam rubber
- A piece of gymnastic rug
- Self-tapping screws
- Files
- Hacksaw
- Hacksaw for wood
- Stationery knife
- PVA glue
- Glue for foam rubber
- Furniture stapler (you can do without it)
- Ruler
- A simple pencil or marker
- Drill with drills
Detailed manufacturing description:
Step 1:
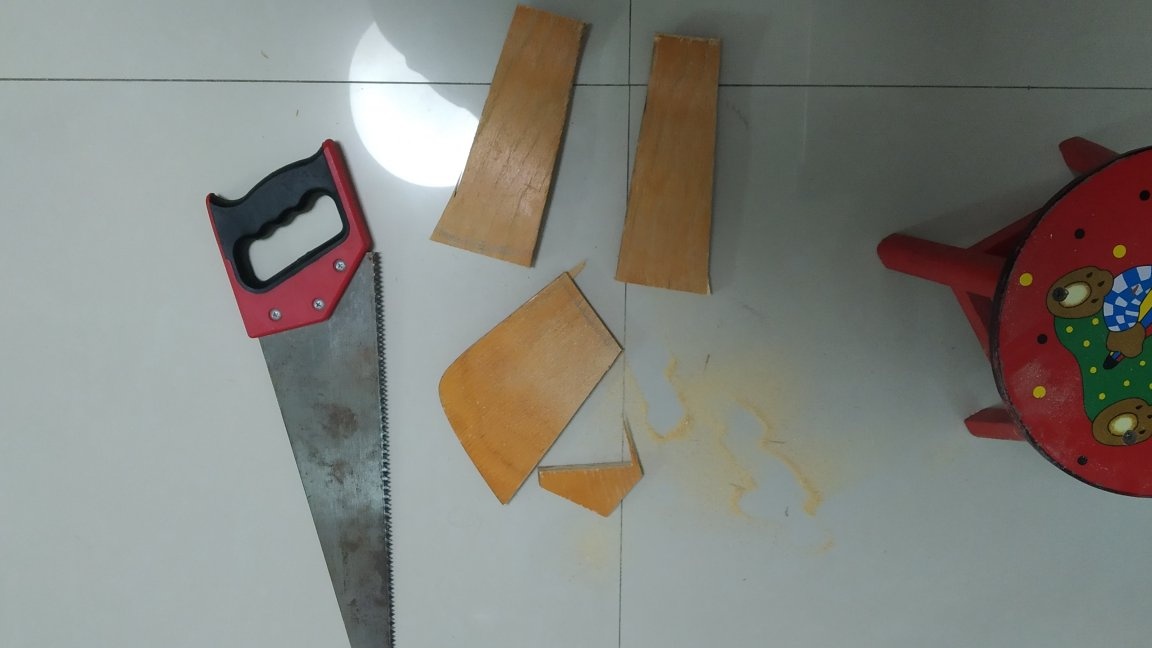
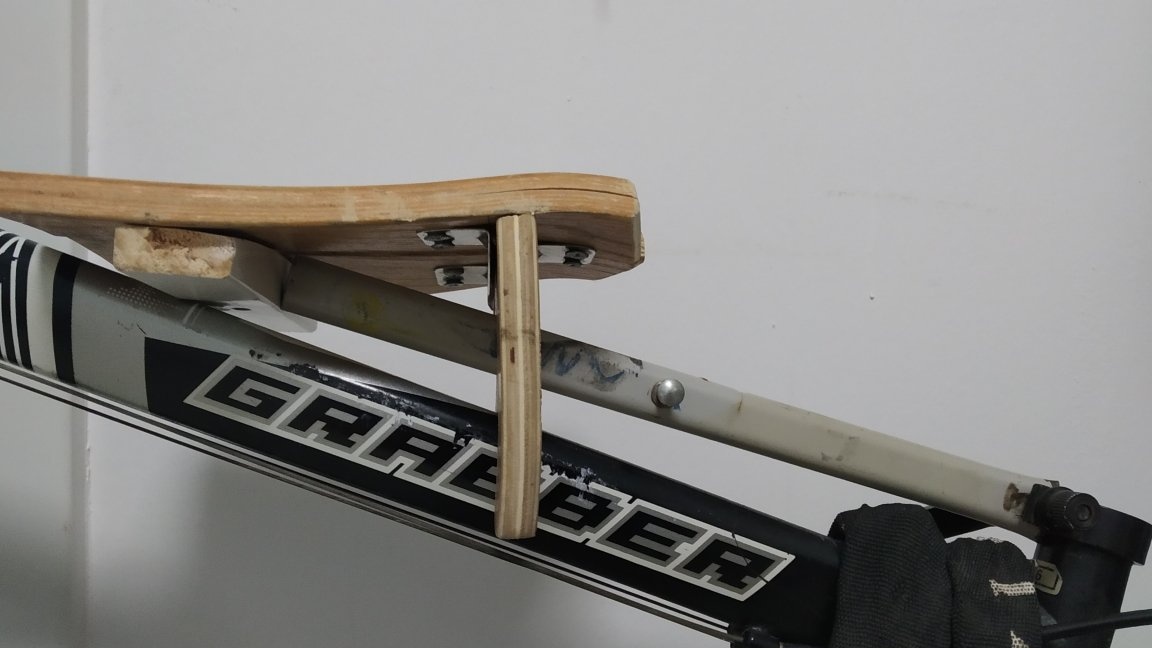
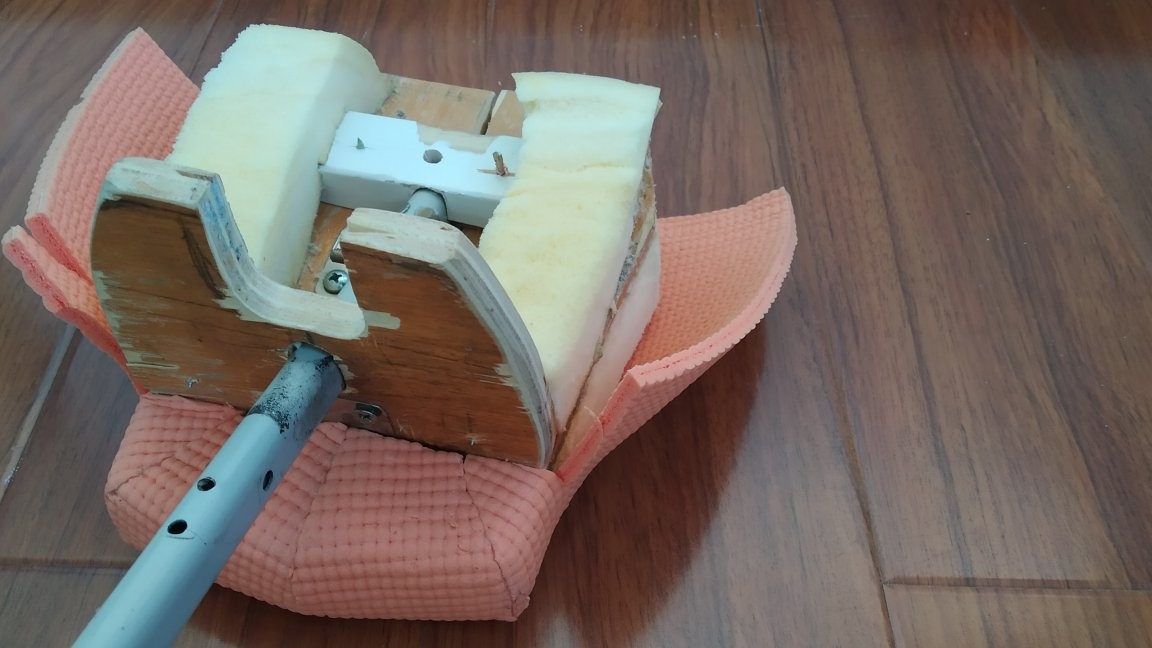
As a frame, I used plywood trimmings and a birch bar (also trimmed). The main characteristic from which we will build on is the width of the seat - it should not be too wide, otherwise it will interfere with pedaling. But on a too narrow saddle, the child will be uncomfortable to sit. I decided so - the seat should be slightly narrower than the "width of the child." It is long, it does not matter much. The most important thing is that the saddle is firmly attached to the frame, does not move and does not interfere. I tried to make the design as simple and quick as possible. At the same time, without making any changes to the bicycle frame. Aesthetically, of course it turned out to be so-so, but if someone wants to make something like that, then my experience can be a good help.
First, we collect an approximate frame and try on the frame with the passenger. If both of you are comfortable, then you can continue to work.
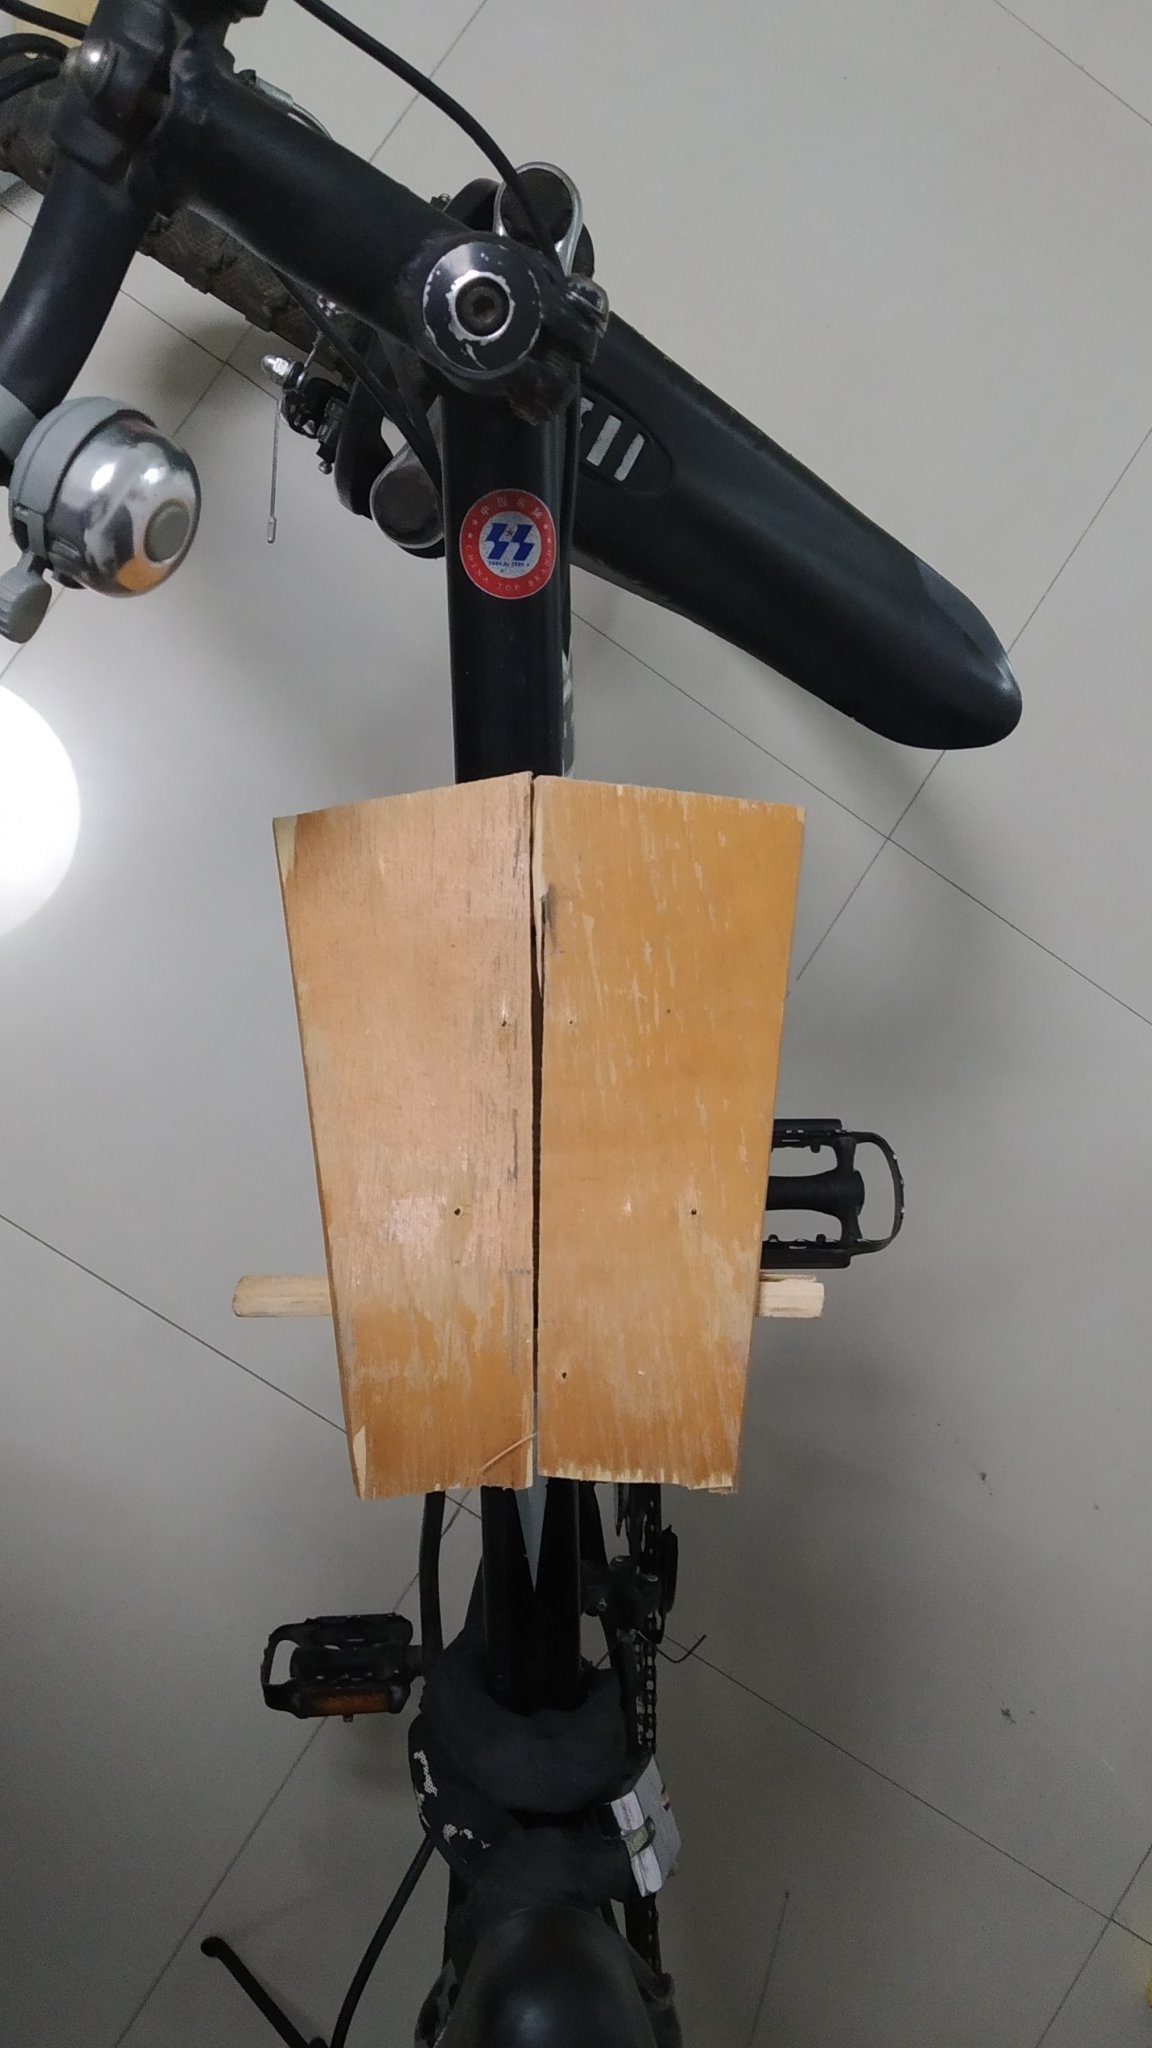
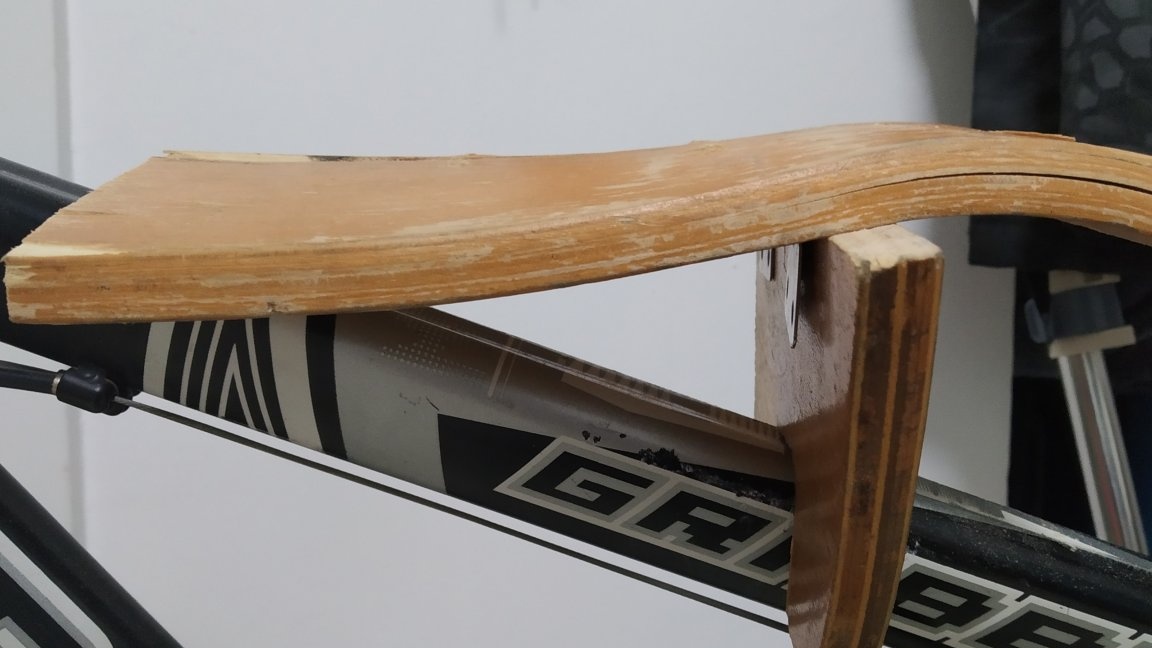

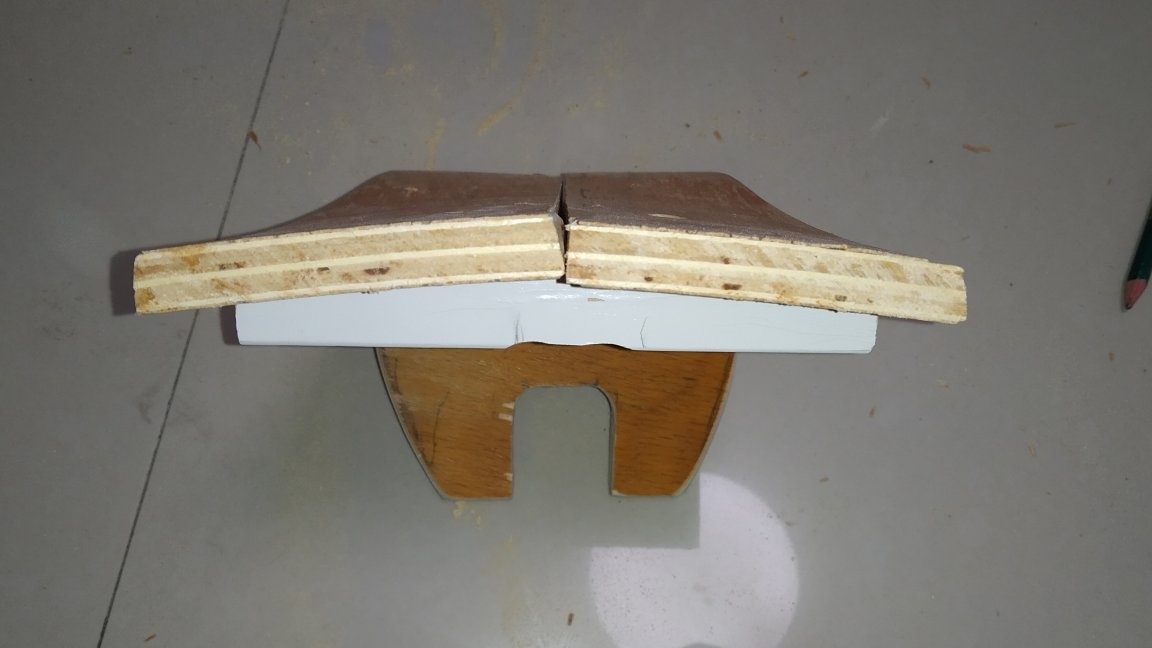
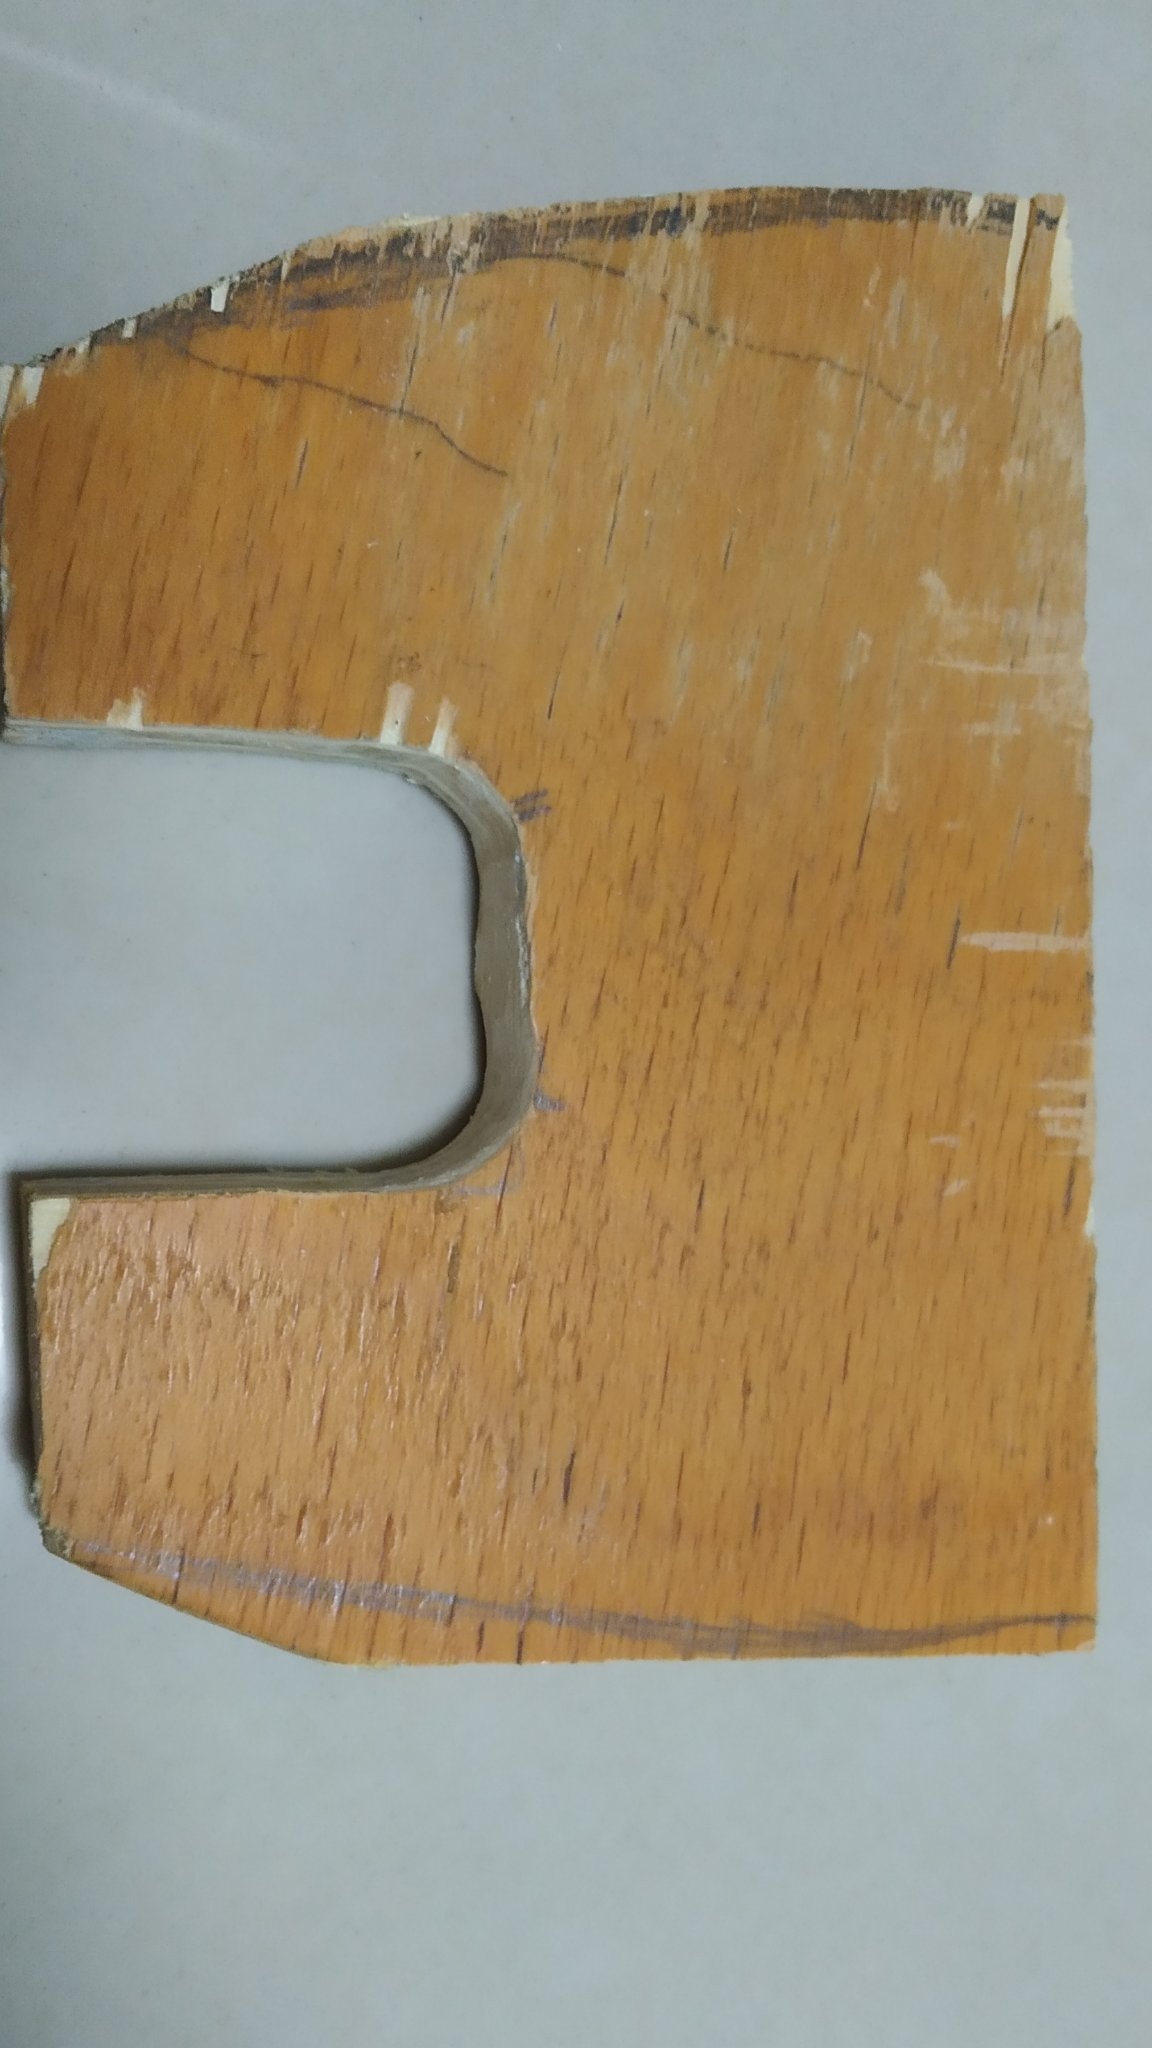
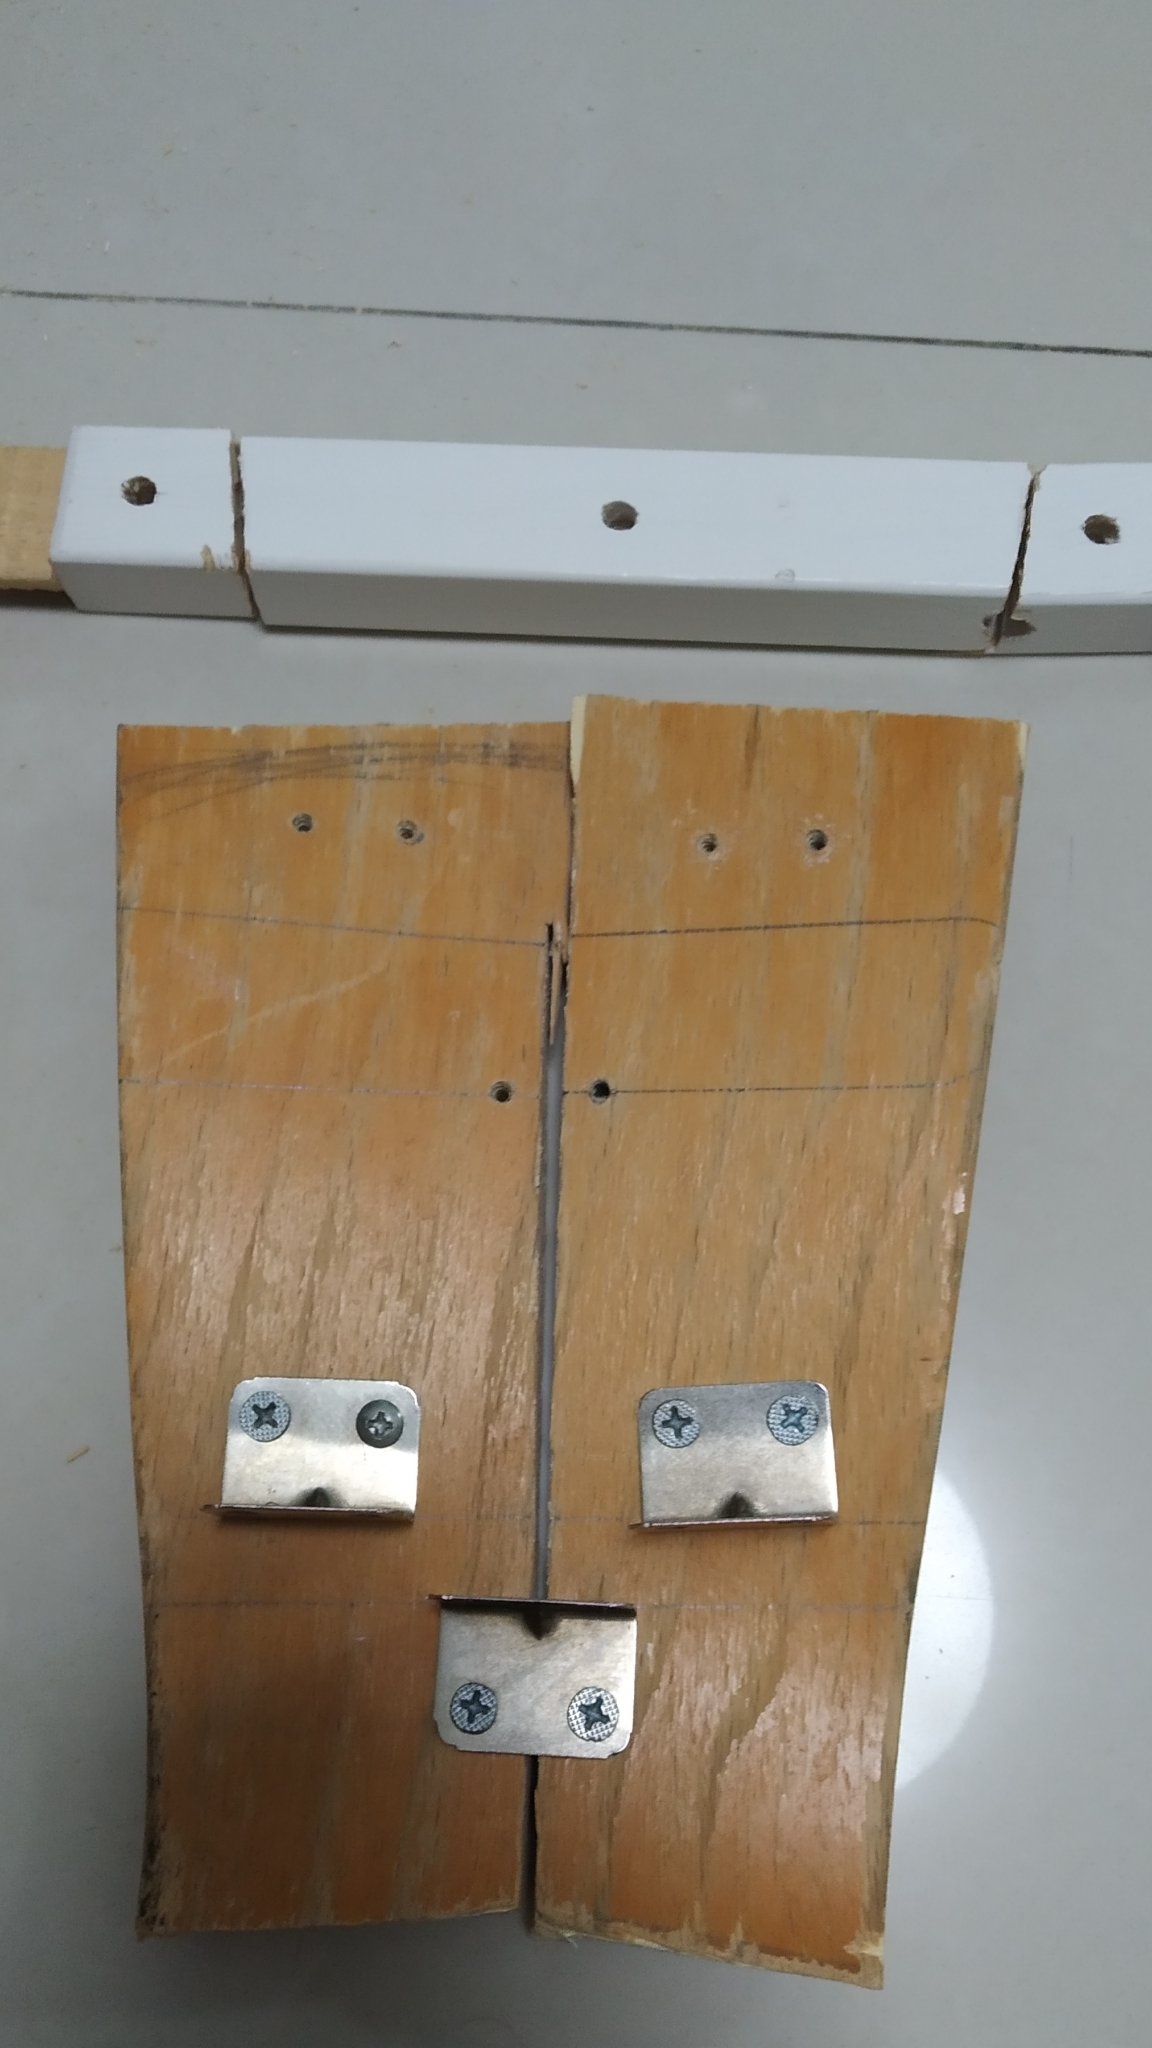
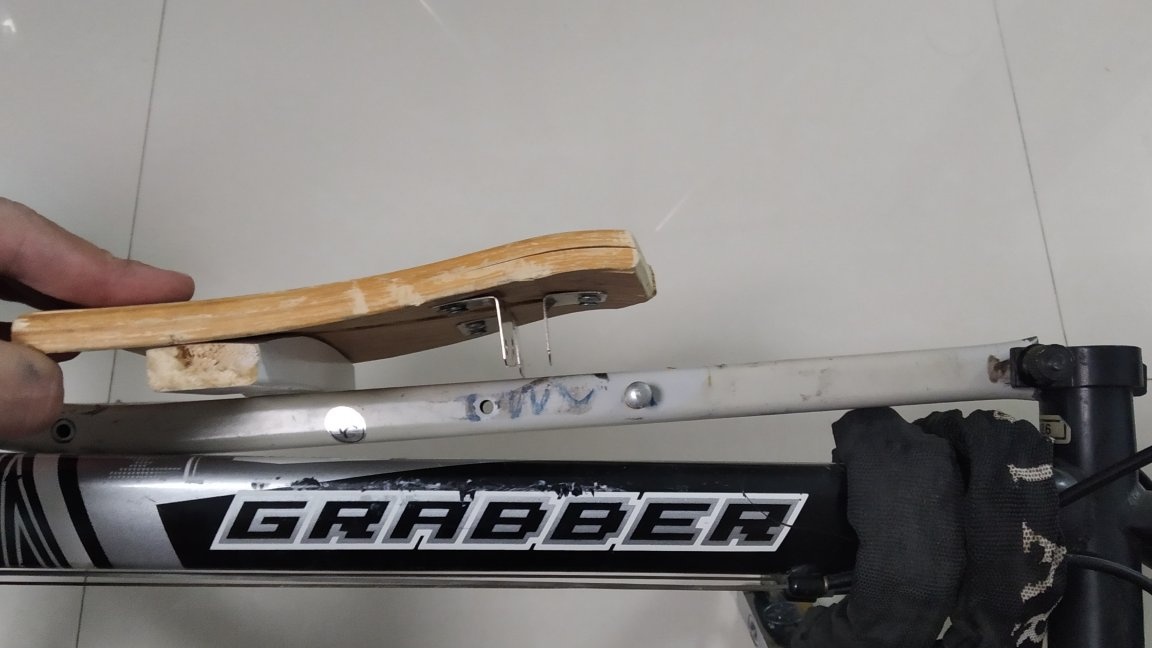
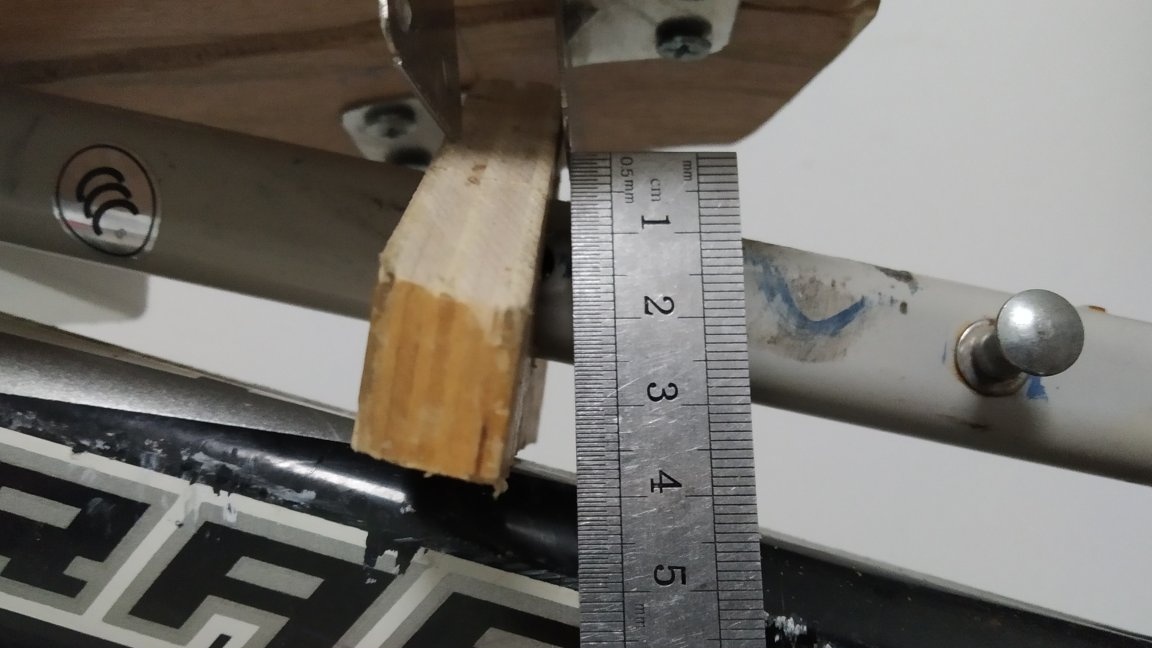
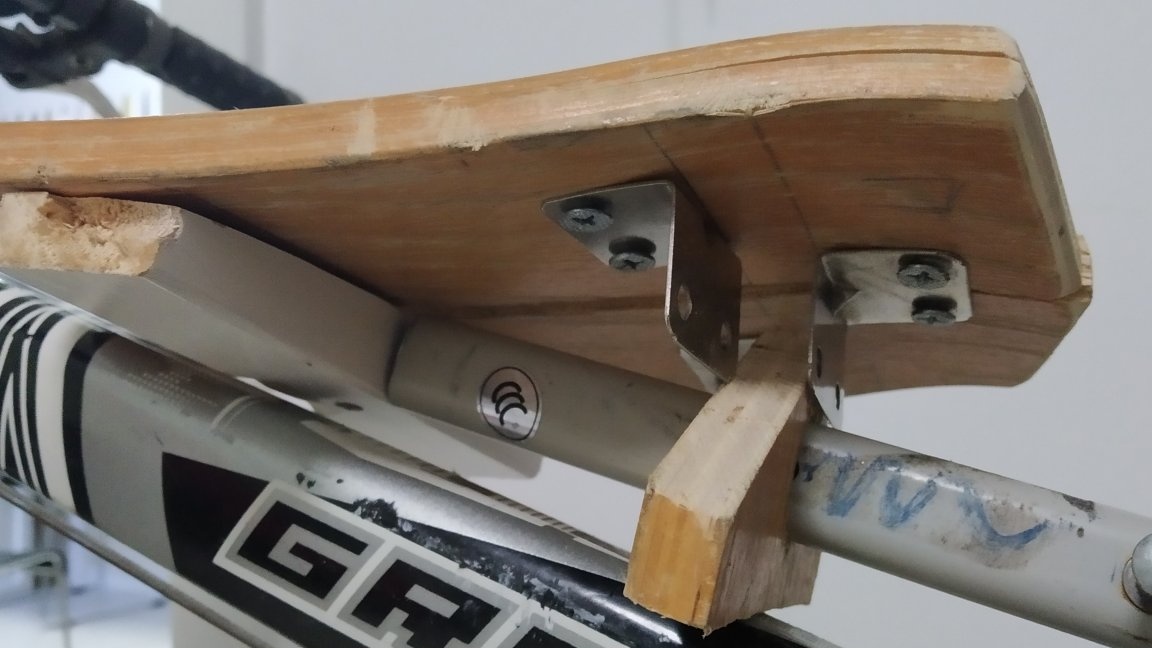
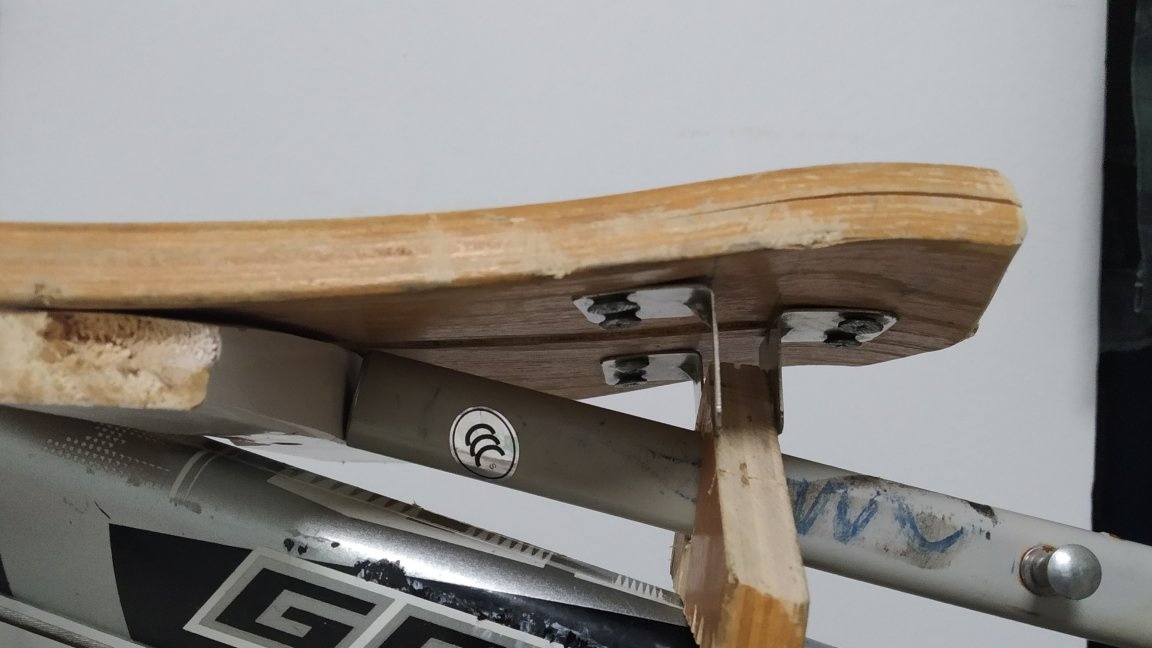
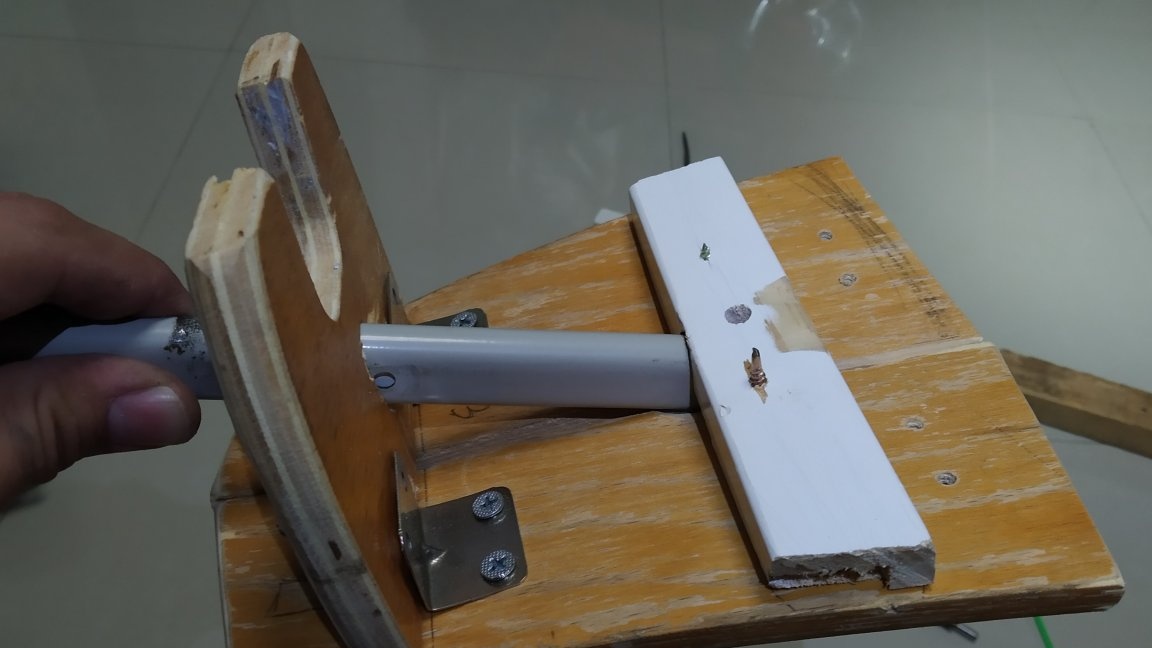
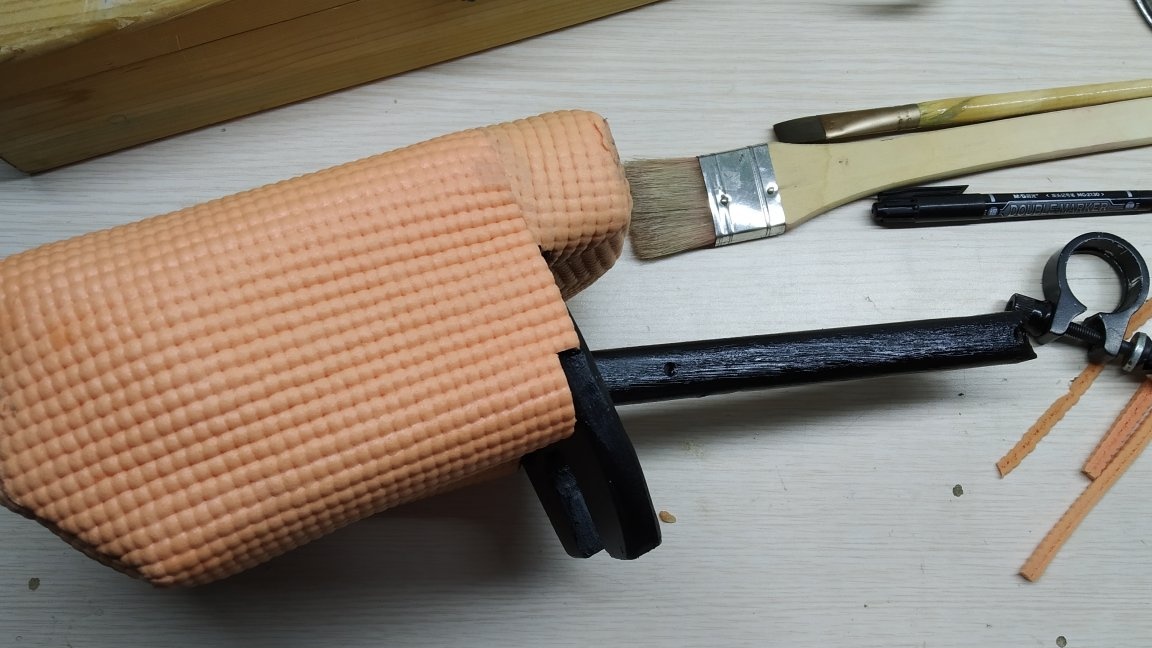
Now proceeds to strengthen the frame. I have a composite upper plane, so I screwed a block from the bottom. It will also be the front support. He made small indentations in the bar, for a closer contact with the frame of the bicycle. He made the back support from the remnants of plywood, she will effortlessly dress on the frame like a bracket and at the same time connect the seat halves. All parts are fastened together by metal corners and self-tapping screws.

Step 2:
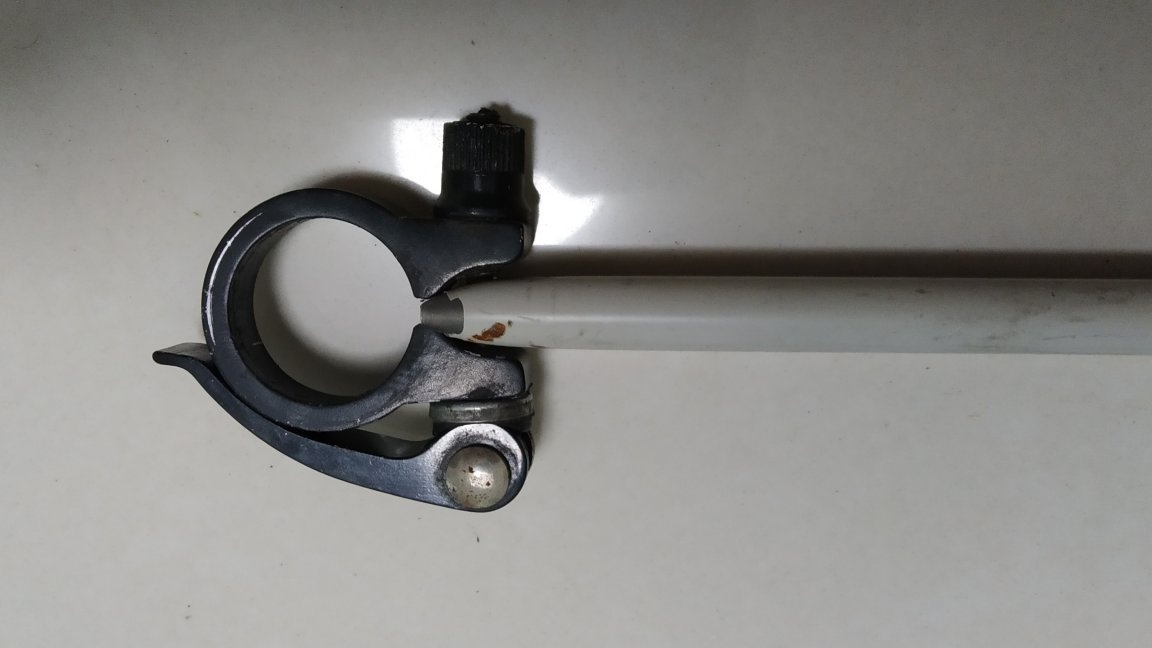
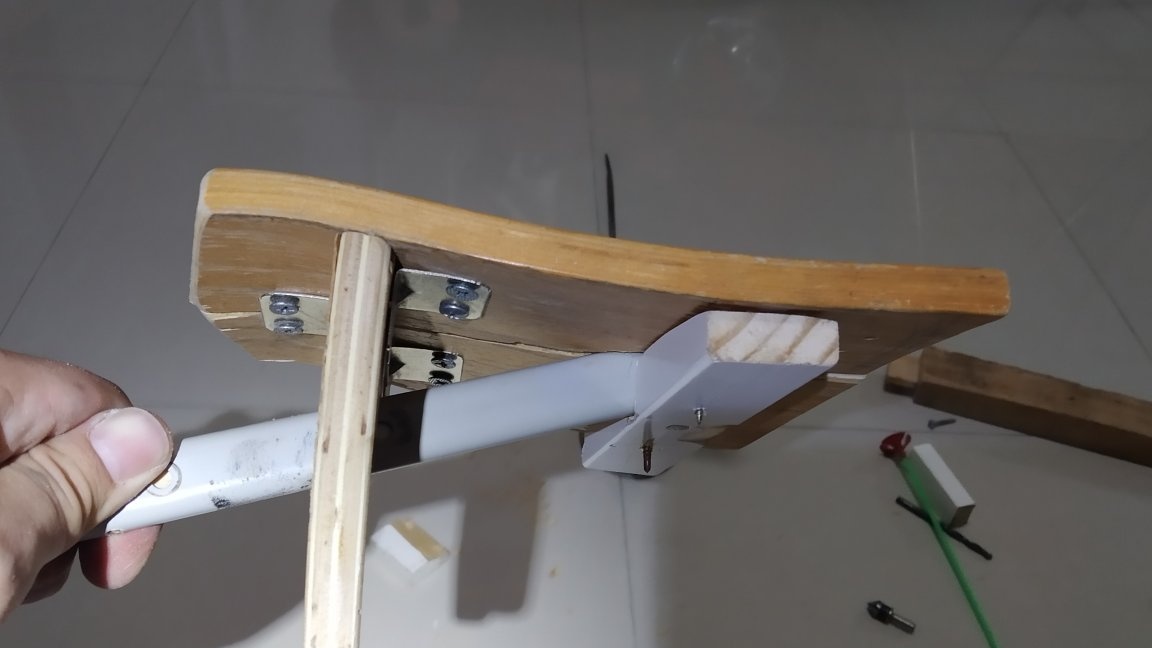
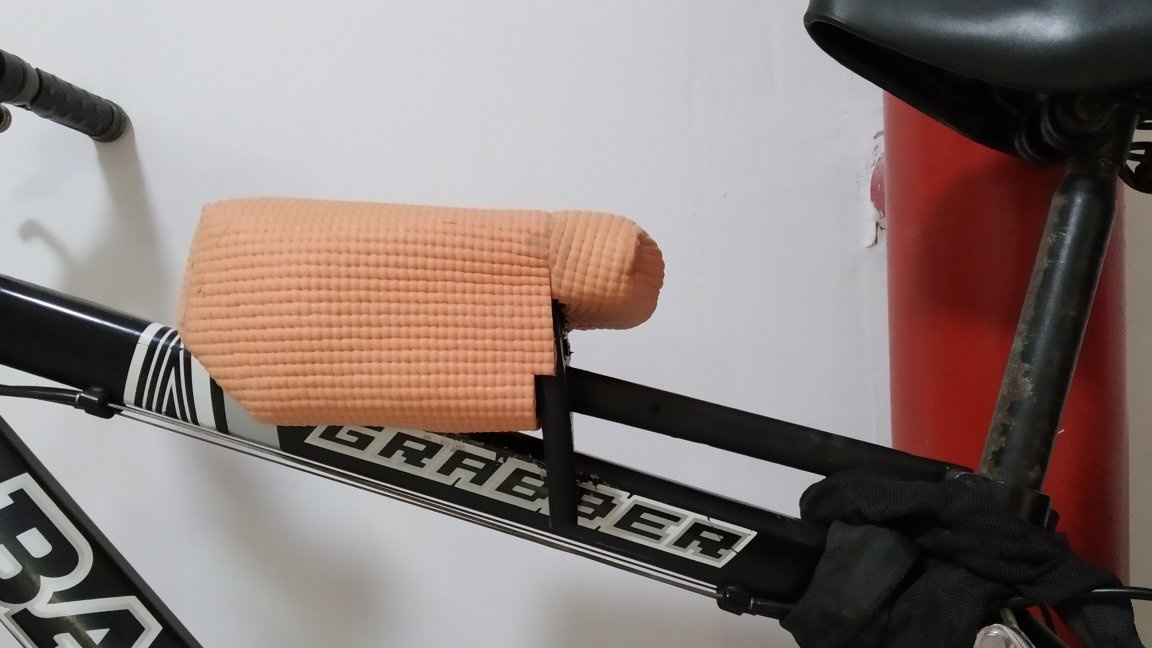
Next, we make jet thrust, with fastening to the saddle post clamp. But it is better to make fasteners on a separate clamp, so that the thrust forms a triangle with the frame (the thrust clamp would be 10-15 cm higher along the saddle tube). For me, traction runs parallel to the frame. In principle, the rigidity of the entire structure with such a scheme turned out to be quite sufficient, but it would not be superfluous to strengthen it.

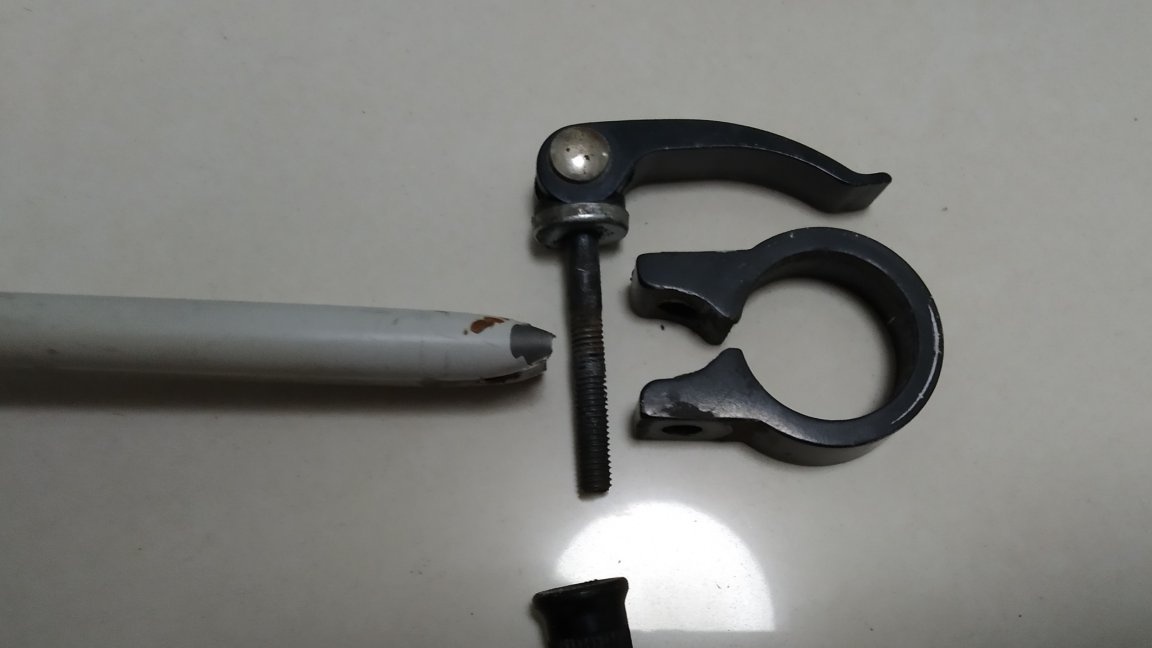
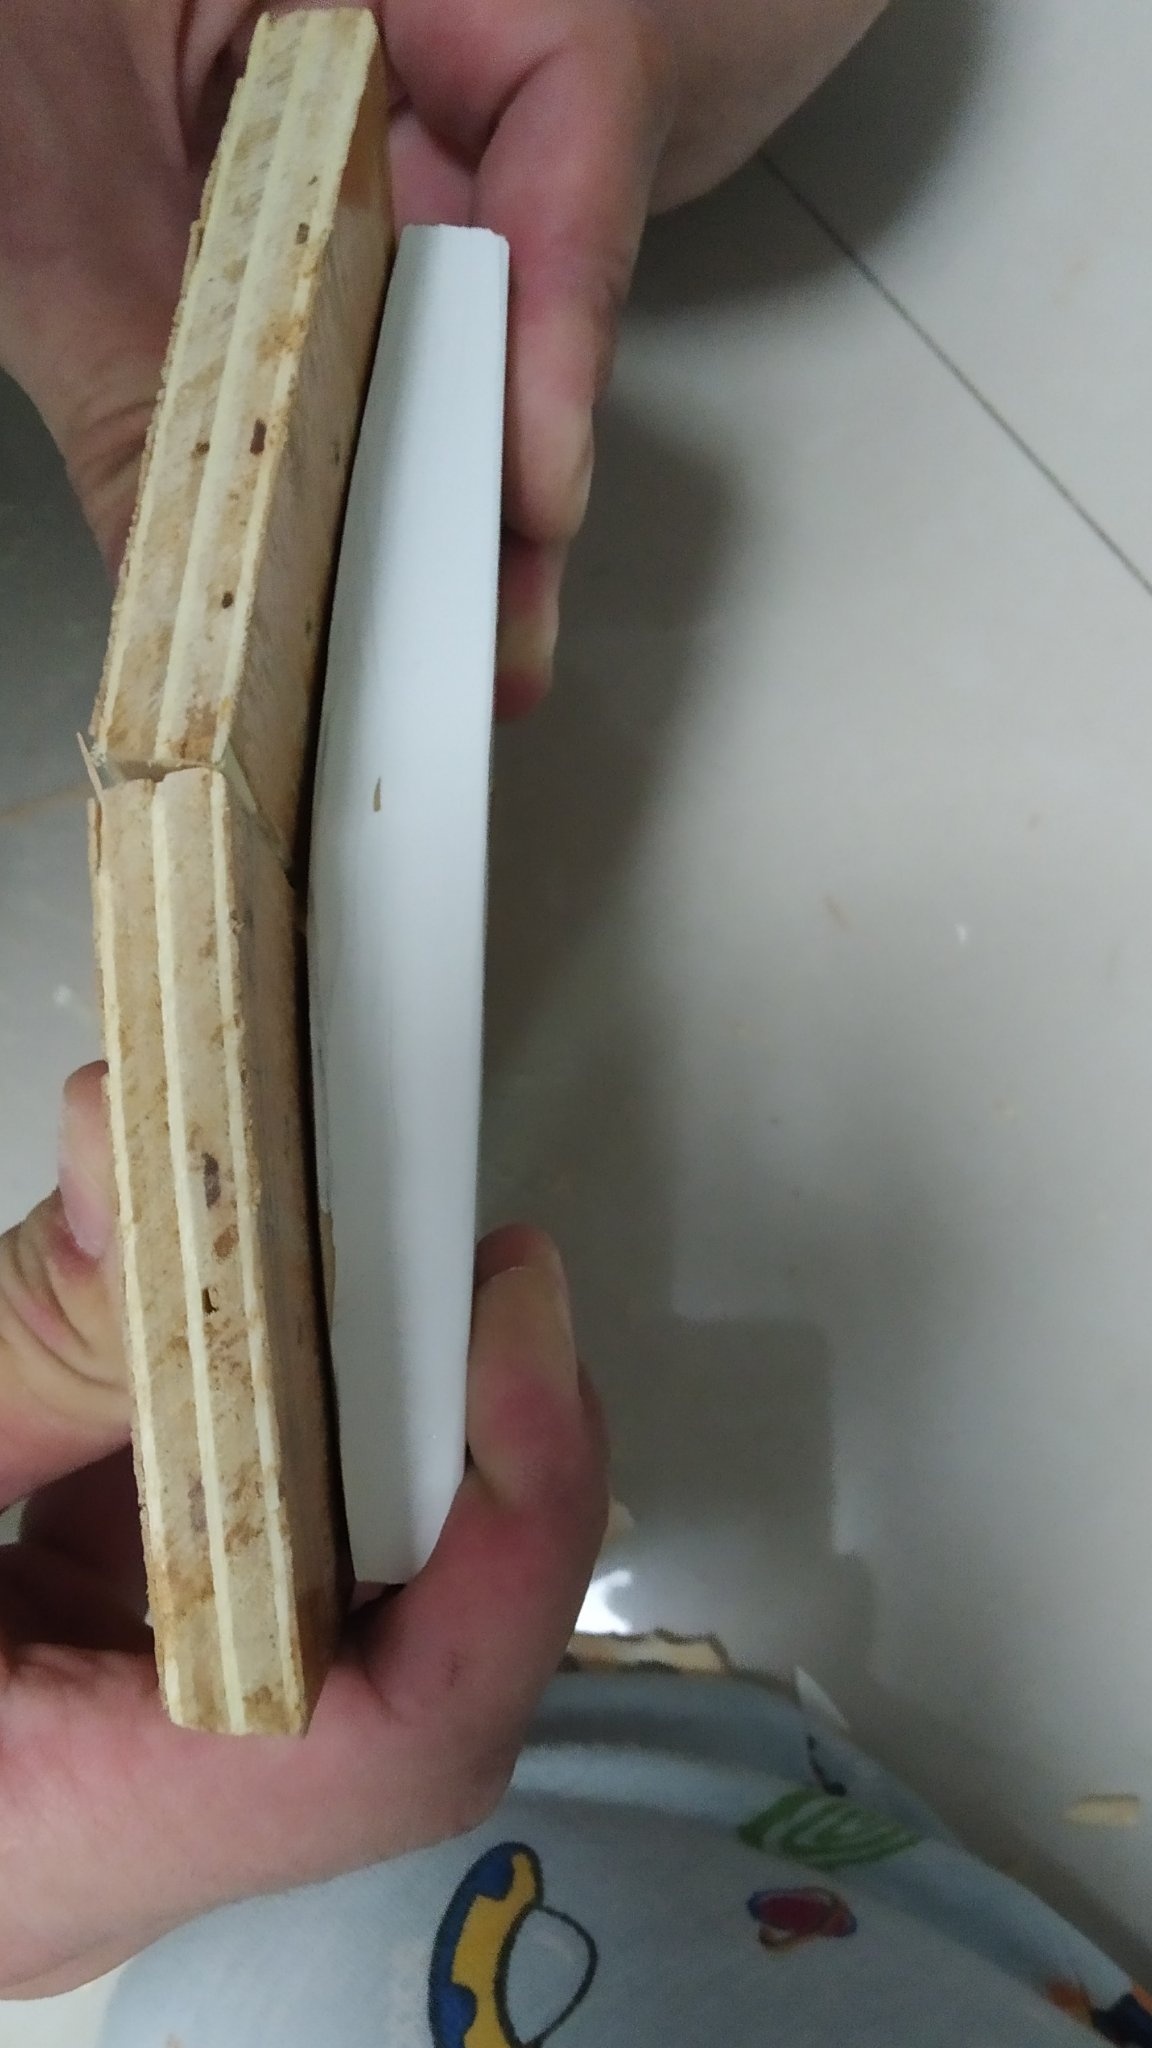
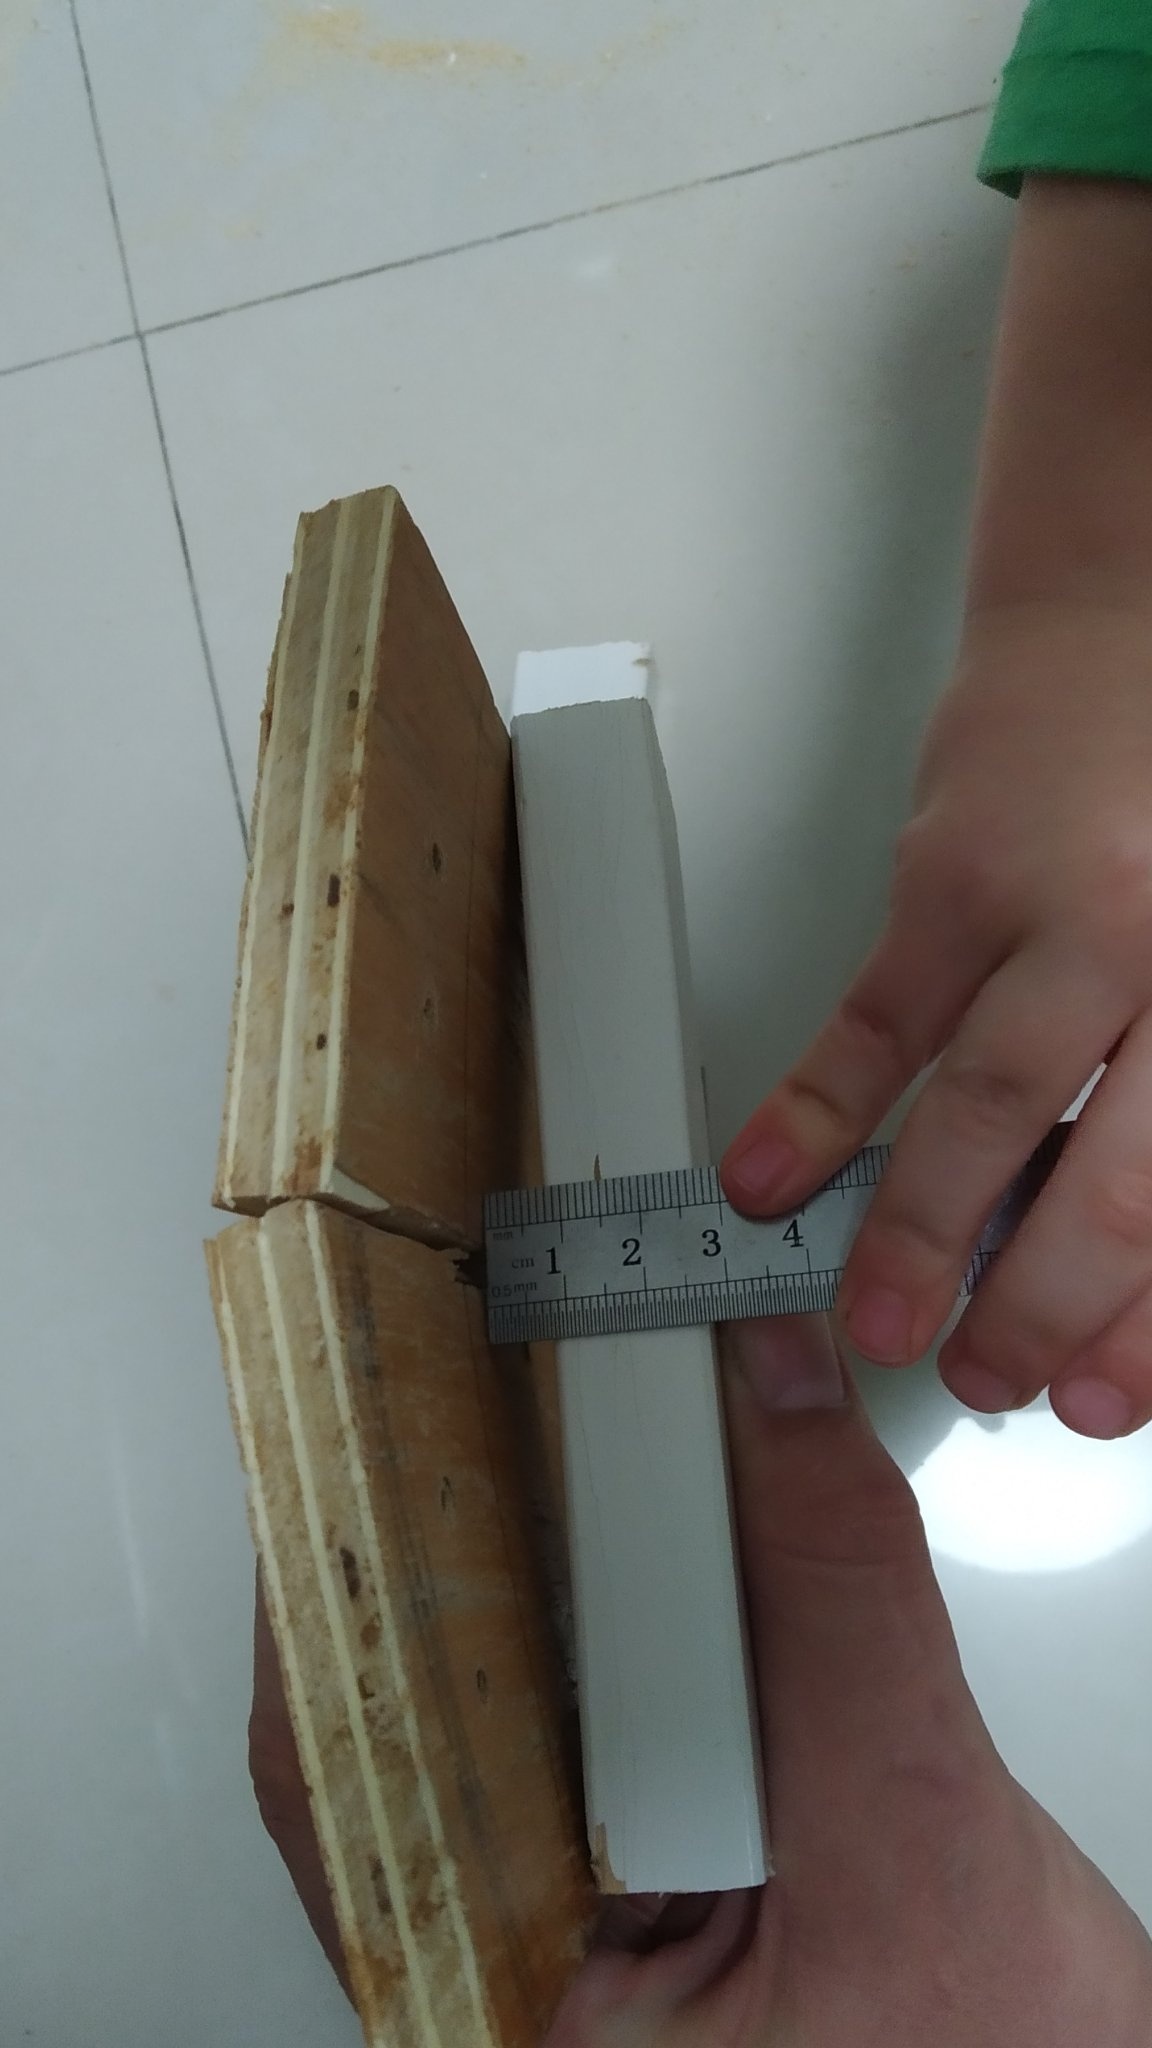
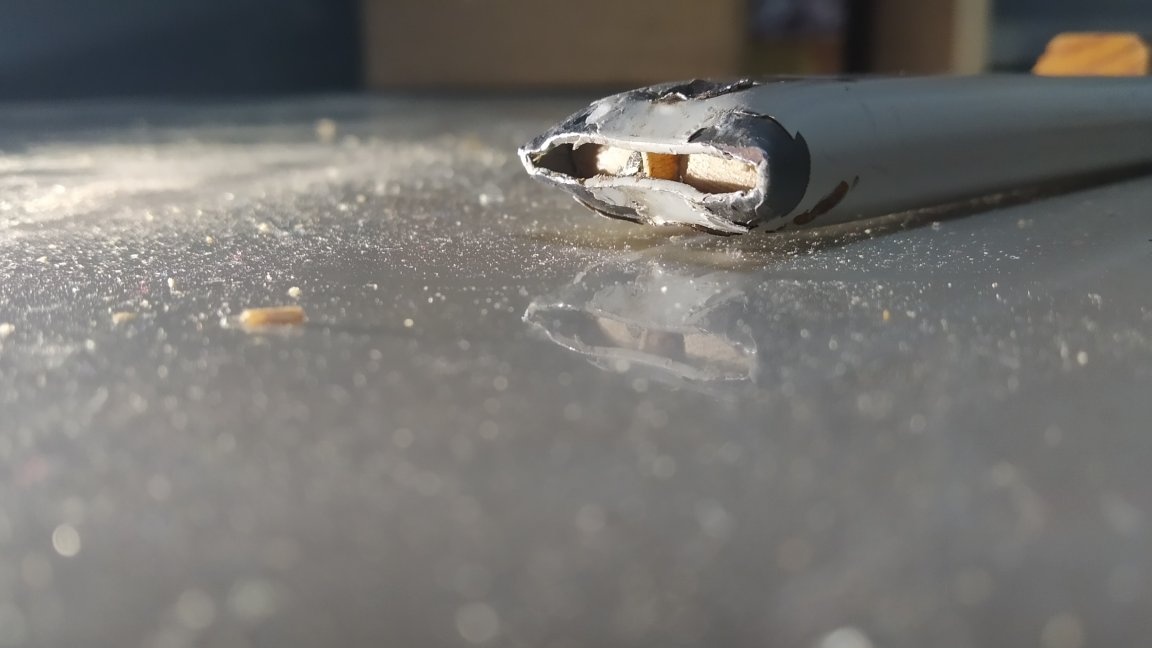
In the “support bracket” and in the birch bar, we drill holes in the shape of a pipe (I used an oval profile pipe) so that there is no play between the design of the child seat and the pipe (traction). Since I had a limited amount of material, for the sample I drilled a piece of plywood, thus finding out the exact shape of the hole, its angle of inclination and height relative to the frame of the bicycle.
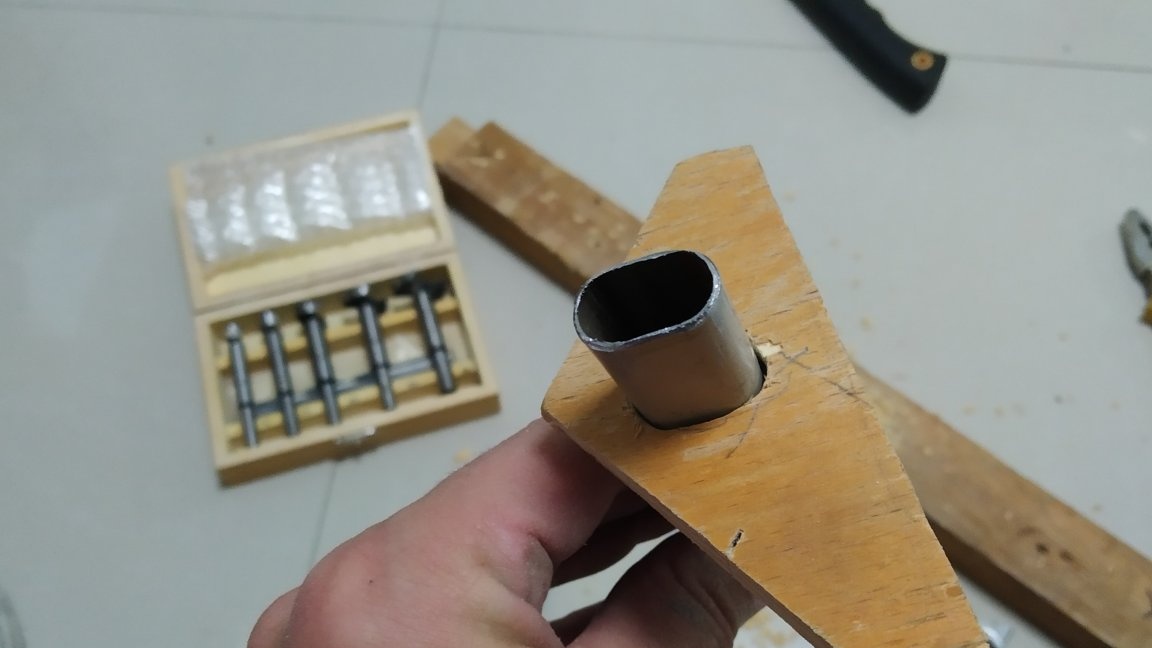
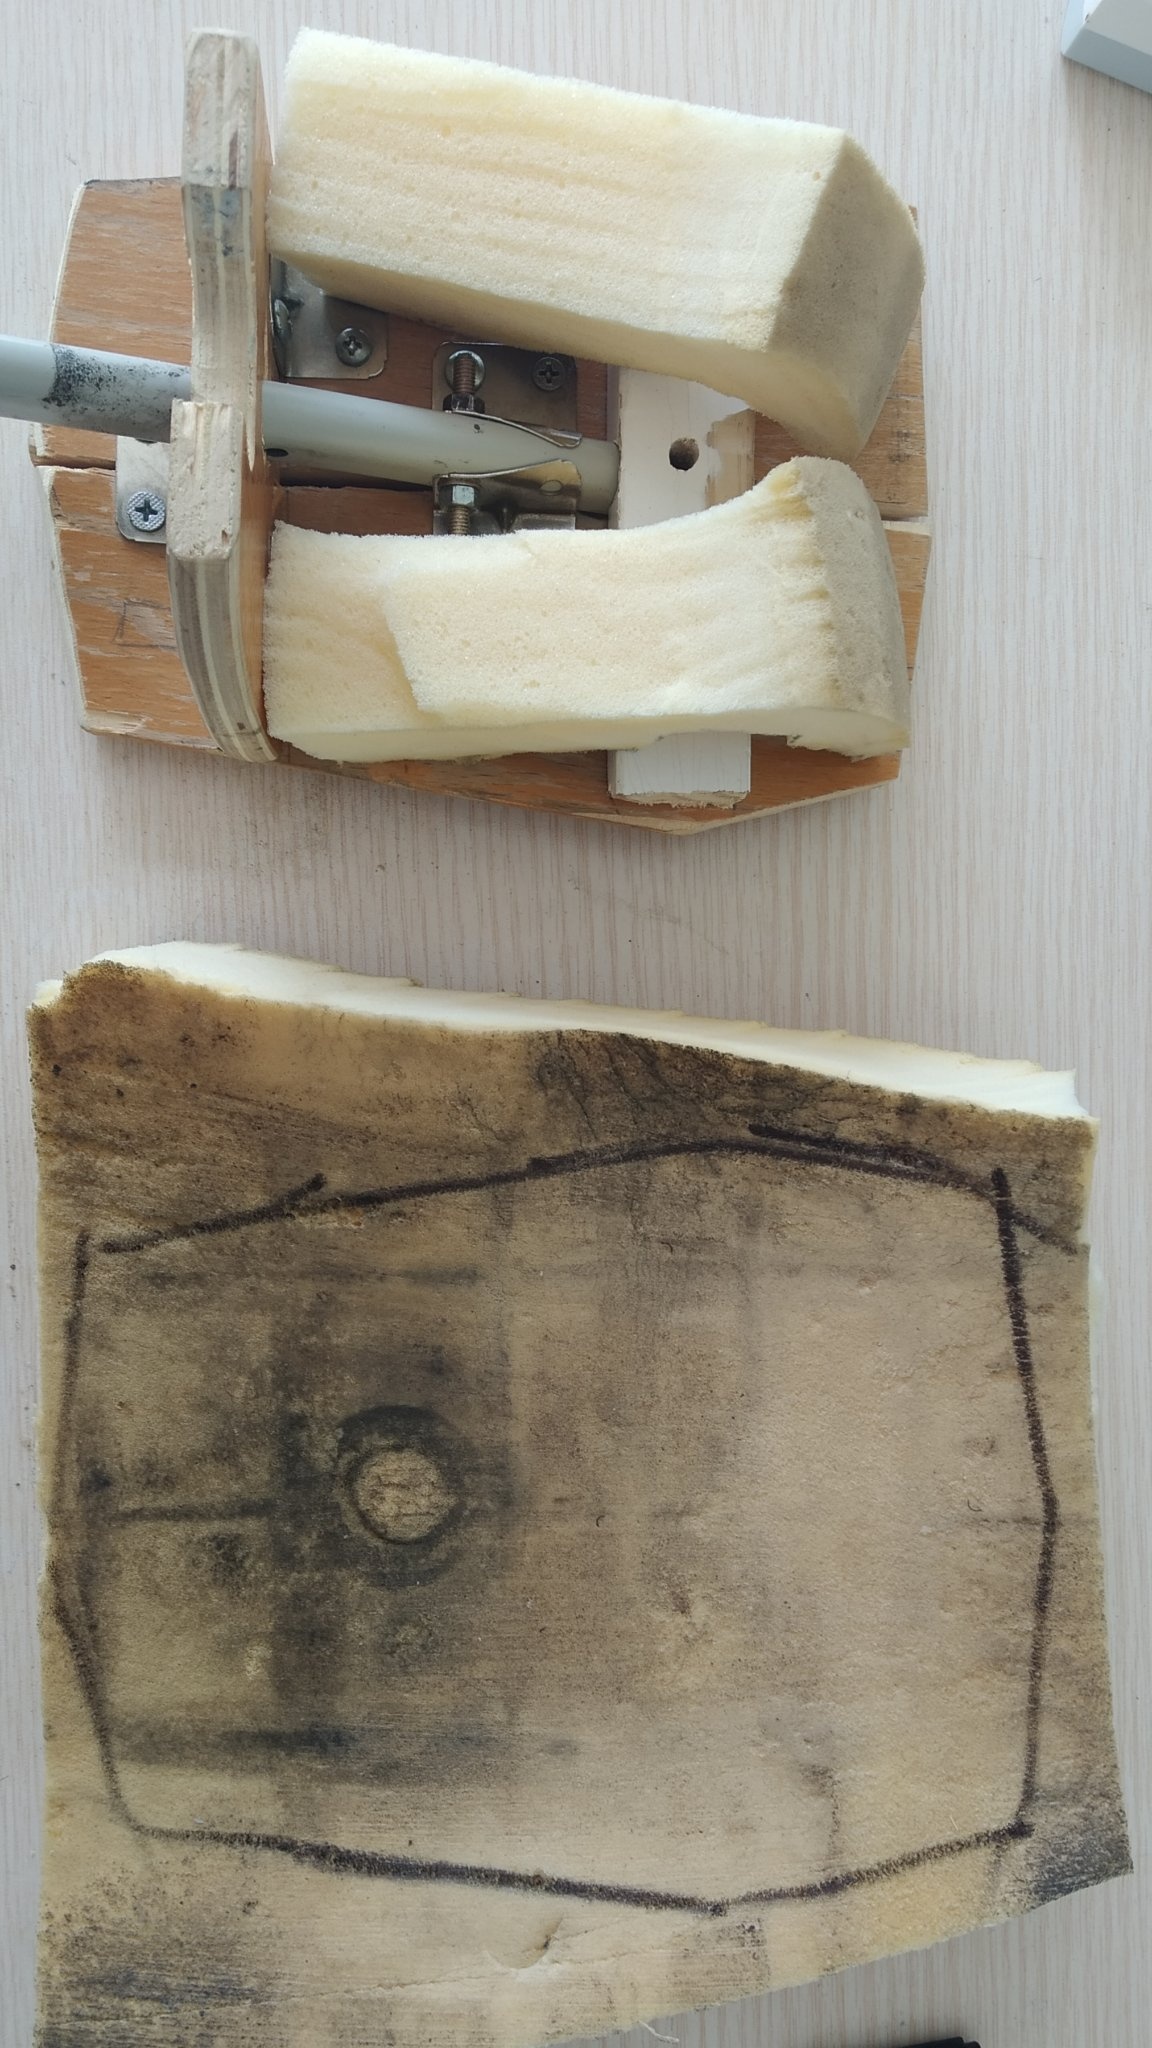
A wooden core clogged inside the rod. Basically, in order to make it more convenient to form a mount to the clamp. The denser the joint, the less mobile the whole structure will be. When the frame is ready, try it on the bike again. Now you need to ride a little with a small passenger to make sure that the design is reliable and comfortable. At this stage, I decided to slightly change the shape of the seat and sawed off the corners. After that, you can carefully process all the edges and stretch the screws (I took apart the whole structure and reassembled re-lubricating all the joints with PVA glue)
Step 3:
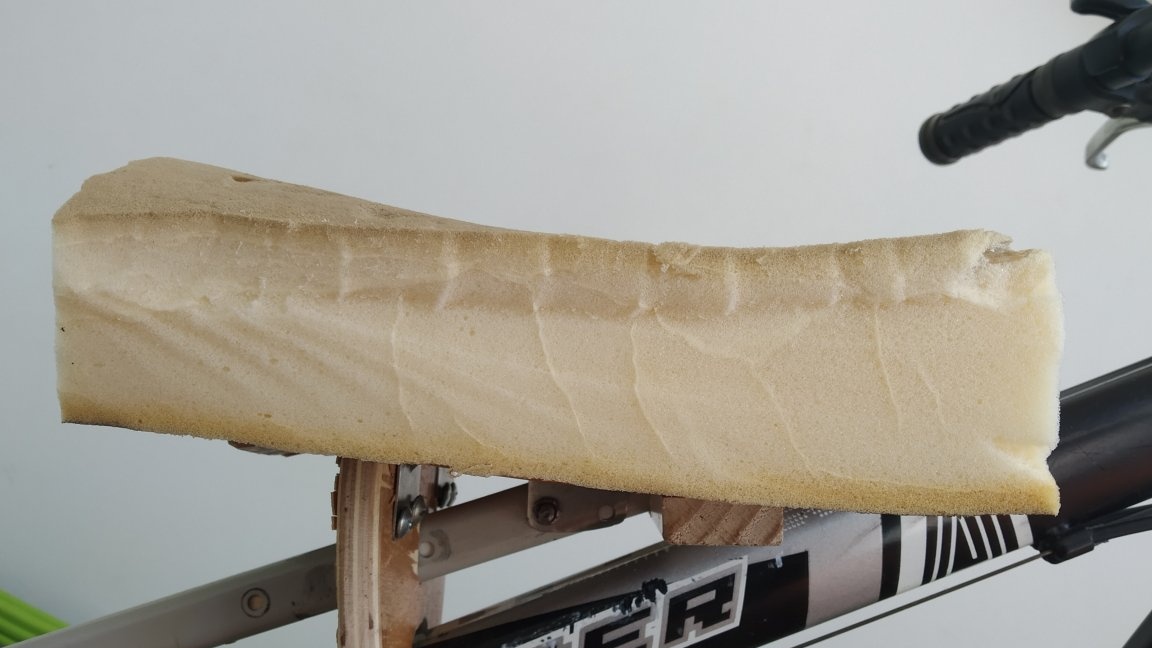
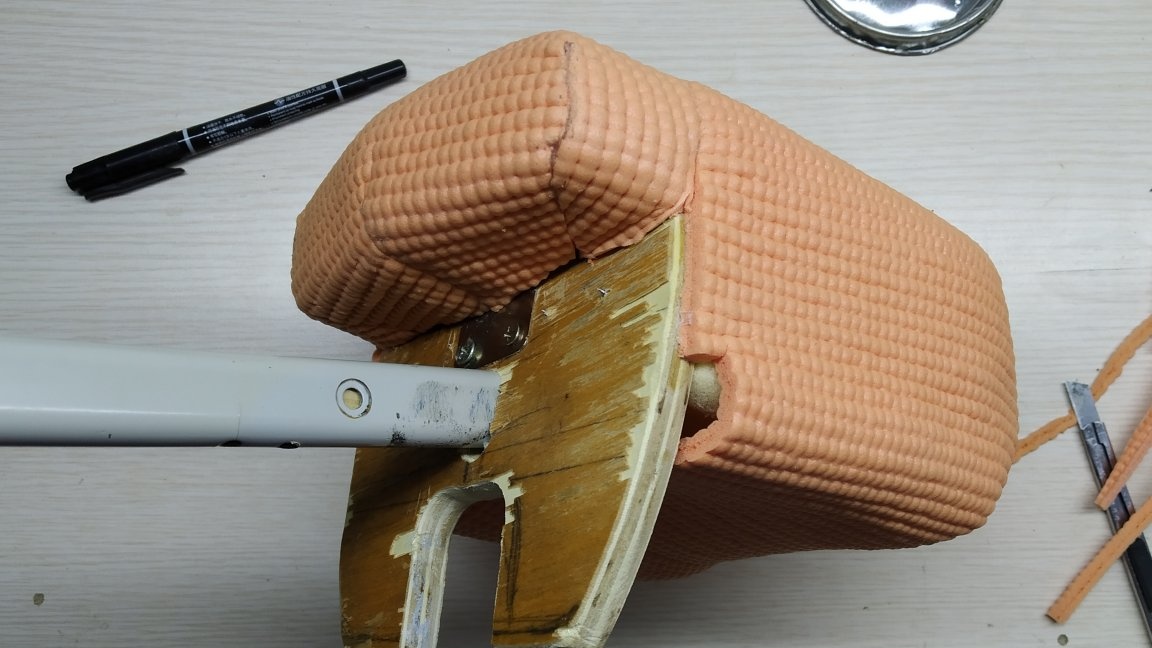
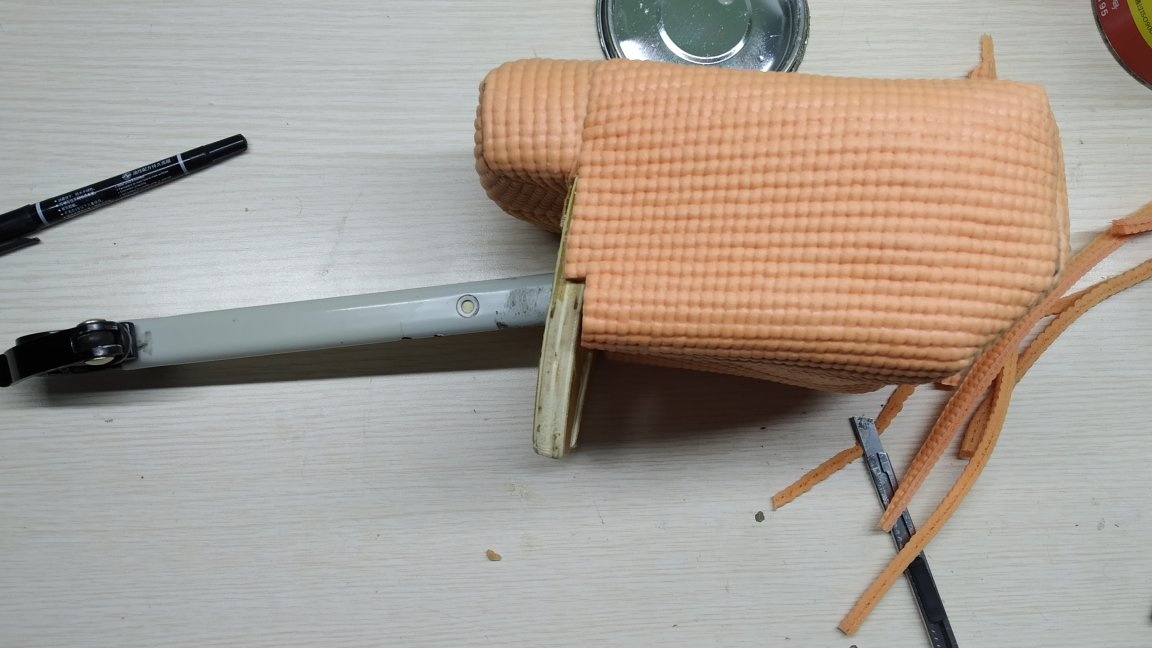
Now you can do convenience. It is best to use foam from a motorcycle or car seat. We cut out the desired piece, with a margin of 2-3 cm around the entire perimeter and glue it to the plywood frame. And when the glue is dry, you can give the seat the desired shape. I did it with a repair kit for car cameras. Also, pieces of foam were glued on the underside of the seat in order to hide a wooden block and metal corners. For beauty is shorter.

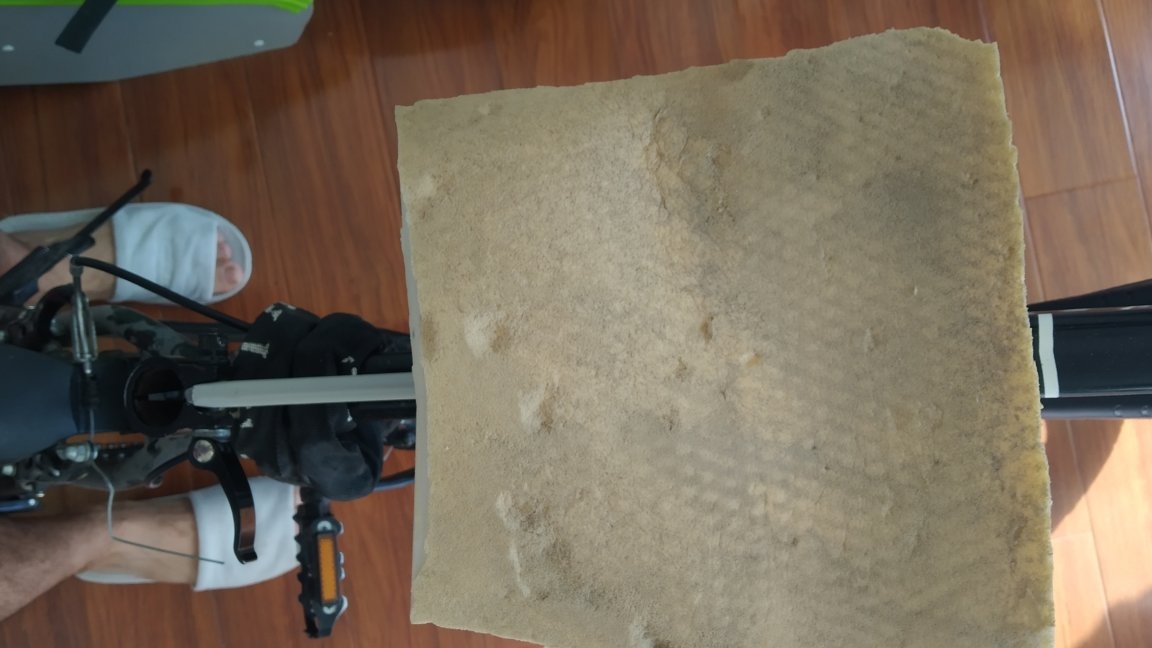
When the shape of the foam is formed and all the jambs on the frame are removed, we fit the structure with a gymnastic rug. You can fix it from below with a furniture stapler. And if there is no such tool on the farm, then we use glue. It’s best to take a solid piece of mat and fit the saddle seamlessly. I had to do with three small scraps.
Step 4:
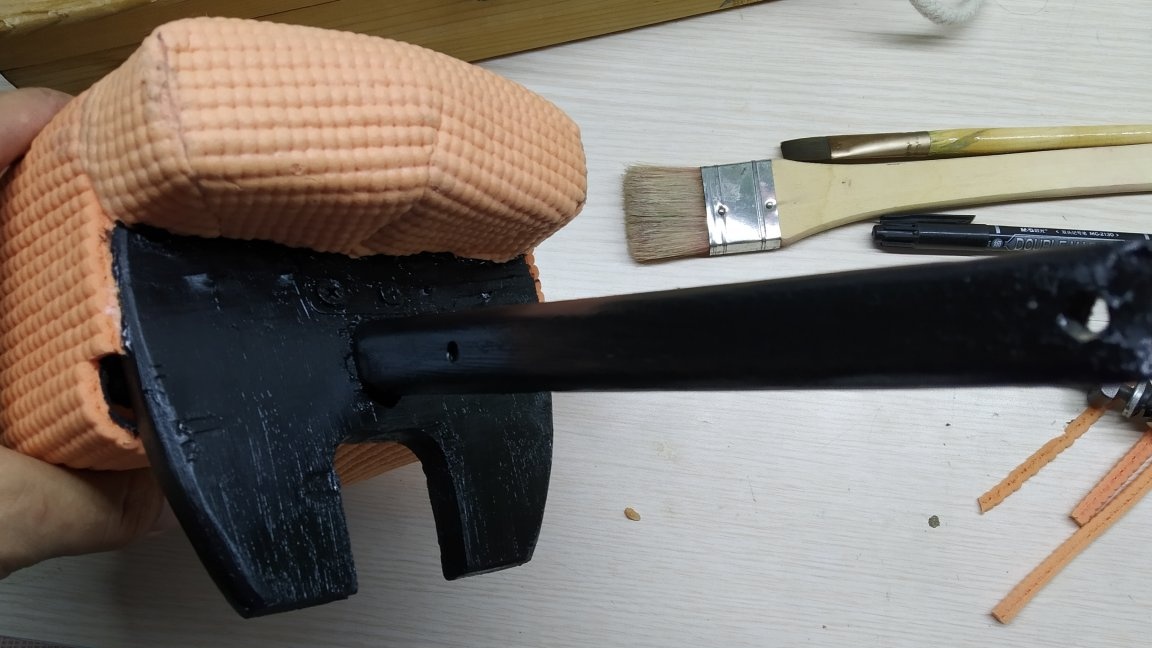
Next, I painted the traction and the visible part of the frame in the color of the bicycle frame. He painted with a brush and used acrylic paint. The plans were to sew a leatherette cover in the color of the frame. But since this seat was considered as a temporary solution (we took the bike for a couple of weeks to ride), I refused to cover.
Conclusion:
After two weeks of riding with a child, I can say that no critical shortcomings have been identified. The power structure performed well. But just in case, I would advise fixing the rod to a separate clamp, so that the rod and frame form a force triangle. Just in case. After all, it’s better to overdo it than to overdo it.
In terms of aesthetics, there are flaws. Firstly, the entire structure in profile does not look solid. It would be worth pasting it completely with foam rubber and copy the trapezoid shape or any other finished shape. Secondly, the outer layer must necessarily be from a single piece and preferably in the color of the frame (and not like mine) And ideally, the seat should be covered with suitable material on top.
I hope someone will find my experience useful.
Thanks for attention.