
Claiming that Arduino is supposedly a "fake DIY", critics forget that this is open source hardware. Therefore, there are so many clones of these boards, and not only ready-made, but also home-made. And it was openness that enabled Arduino to supplant the now almost forgotten, and once very famous AVR Butterfly board. There was really "fake DIY." The board was not only not allowed to repeat - it was impossible with all desire. It had a custom display, which you can’t get separately, and you won’t make it on the knee.
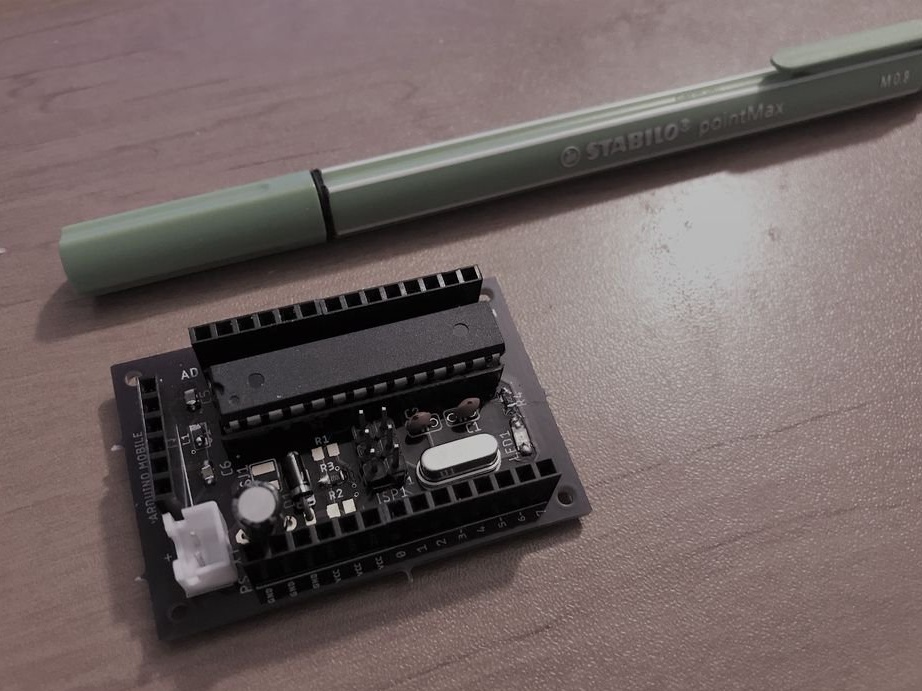
But Butterfly was a very low power device. There was no linear stabilizer, and the economical display driver was located directly in the microcontroller. The board was powered by a battery installed directly on it, which lasted for a very long time. But Butterfly is also made on AVR, and Arduino too. Is it possible to do do it yourself low power Arduino compatible board? The author of Instructables under the nickname mdeudon claims that it is possible. His homemade has the same pinout as the Arduino Uno, and sketches go without reconnecting the I / O circuits. And the LED on the thirteenth "leg" is also provided. But at the same time, there is no linear stabilizer, a constantly on LED to indicate power and built-in FTDI (when you need to fill in the sketch, you can connect an external one). In sleep mode, the current consumption does not exceed several microamps. The device diagram is shown below:
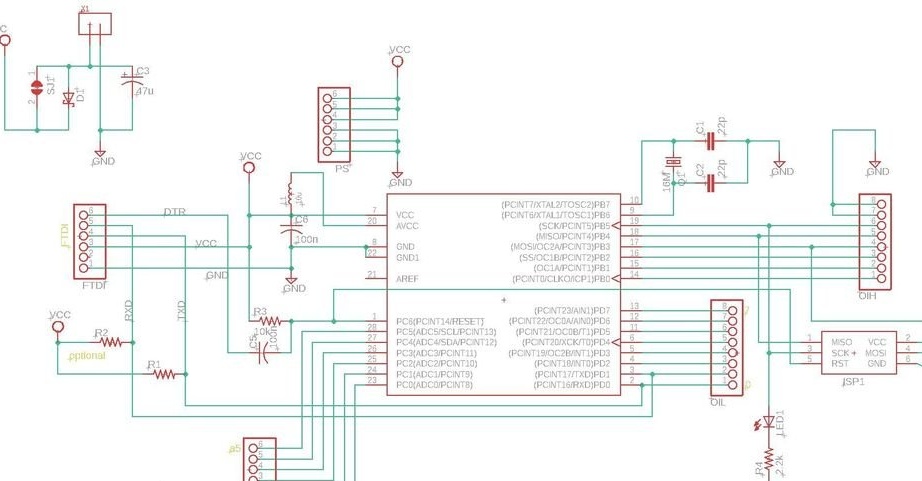
Due to the lack of a linear stabilizer, the microcontroller determines the voltage range of the board: from 1.8 to 5.5 V. One can of a lead, lithium-ion or lithium-polymer battery, or two cans of nickel-metal hydride. When external devices are connected, incl. FTDI module for sketching, this range is narrowed to the appropriate device, the compatibility of logical levels should also be taken into account.
The microcontroller must be with the Arduino bootloader installed. If there is no programmer, it will be replaced by another Arduino or its clone, for which you need to use the advice provided here. Thus, as long as you have at least one Arduino with a working bootloader, you can use it to restore the functionality of any other, as well as "revive" the newly assembled home-made board.
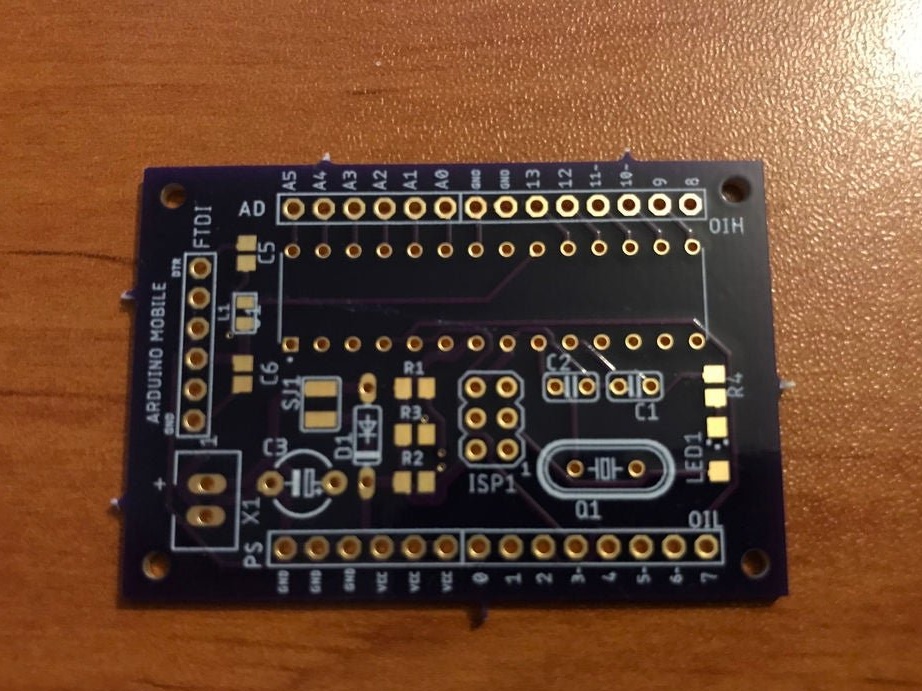
The printed circuit board itself can be made by LUT, ordered somewhere or replaced with a perfboard-type breadboard. The master chooses the board manufacturer at OSH Park, any other manufacturer will do. The necessary files for this in the Eagle format are here: scheme and pay. And the result looks like this:
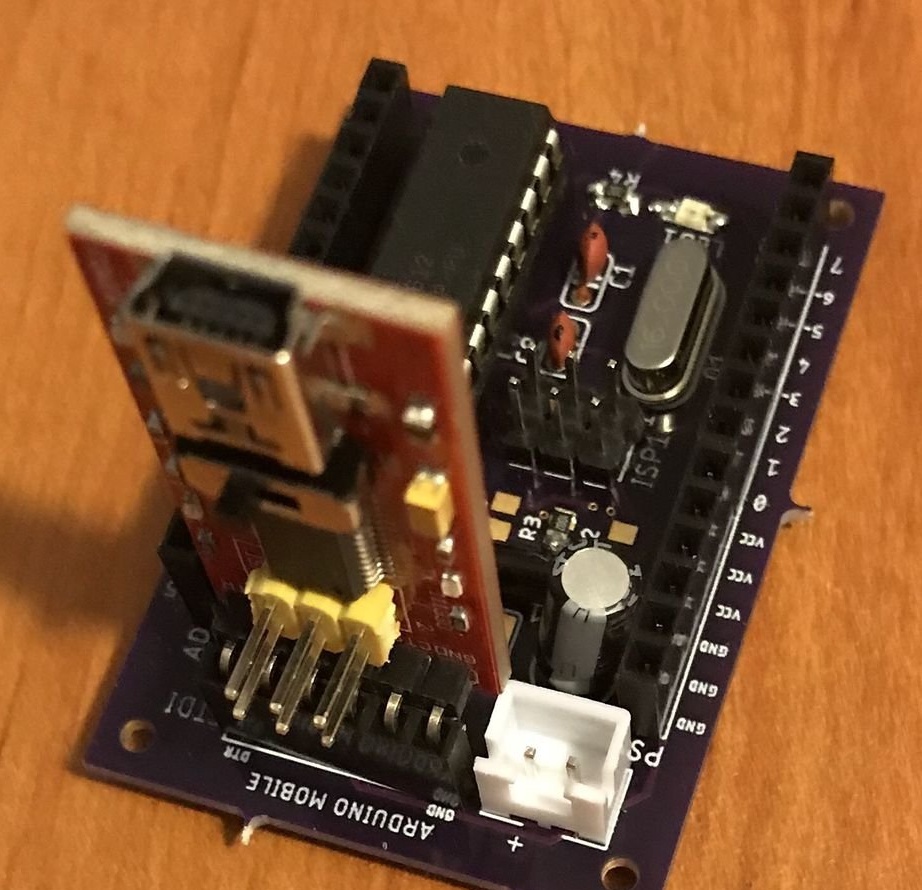
Having assembled the board and installing a microcontroller on it with the Arduino bootloader already previously flashed into it, the wizard connects the FTDI module and tries to fill in the sketch for blinking with the LED on the 13th leg. Of course, everything works, and the master is experimenting with well-known ways to reduce the power consumption of the microcontroller by putting it into sleep mode, turning off unused peripherals, etc.
Also on the site there is a translation of an article about a device to remind you to stop airing, where using the same tricks (removing a linear stabilizer, etc.), you managed to make the Digispark board low-power.