

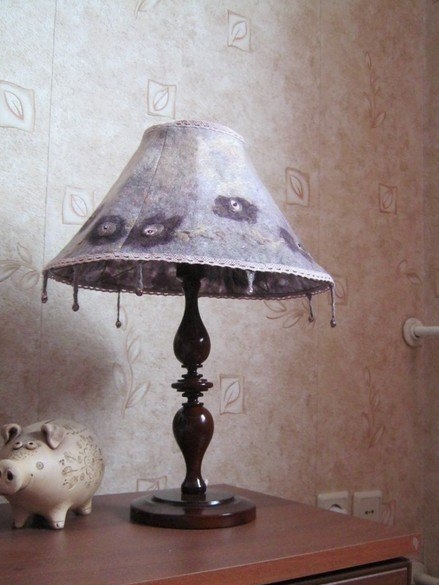
There is only the number of types and types of fixtures, well-deserved love, of which, large rag lamp shades are most used. Hanging or floor lamps. There is something cozy and homely in such lamps. A kind of retro. Involuntarily in the imagination there is a picture from an old book, where at one table mother knits, daughter reads, and a pioneer in a tie prepares lessons. And over this whole idyll there is a large, low fringed lampshade. Shadows in the corners.
Given the hefty cost of factory store fixtures and for the most part very low aesthetic properties, it often makes sense to do this kind of thing yourself. Having shown a bit of meticulousness and artistic taste, we get a beautiful individual thing to your liking.
General part, strategy
Of course, such a frame can be made of many materials - from wood, metal, plastic. Beautiful - to weave a whole lampshade or its frame from a rod. It is quite simple and quite convenient to do this kind of thing from a thin wire. Connections - soldering with low-temperature solders, electric soldering iron. For example, here, the frame of a small lampshade is made of brass wire ø2 mm. Solder - POS60 with rosin or other fluxes for copper alloys. It is much cheaper to use galvanized steel wire. A whole cove of such wire costs as a piece of brass, sufficient for only one product. The thickness of the steel wire is the same - 2 mm. And not thick and quite durable. POS-60 is perfectly soldered to galvanized steel with “soldering acid” (zinc chloride) or other acidic fluxes. The place of soldering should be thoroughly washed with warm water and soda. It is convenient to use a brush with a short bristle, for example, an old toothbrush or a small paint brush with a shortened bristle. After - rinse.
It is very difficult to correctly assemble a complex volumetric product by weight. Need technological equipment - form. For semicircular or lampshades of any other smooth shape, a complex and laborious form to manufacture, for example, carved from wood, is required. This is far from always justified. Having simplified somewhat, straightening the curves, we come to the shape of the lampshade, similar to a truncated cone. This form is quite good, and most importantly, the required snap-in template for its manufacture is much easier. It is not difficult to do it for long, materials will need very little.For manufacturing, you can use common hand tools, although the availability of equipment allows you to make the work more accurate and faster.
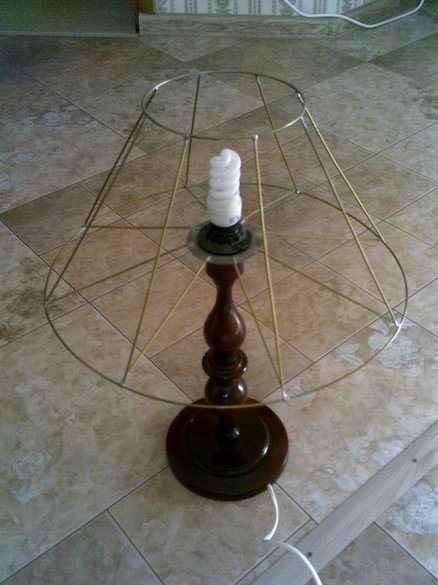
The proposed lampshade, with the most minor differences, can be used in two or three versions of lamps - as a lamp hanging on a cord, as a lampshade for a floor lamp and a sconce lamp. Sizes and proportions to choose the taste of the master.
A few words about the lamp with fittings. Incandescent lamps are now used only in special cases, for the rest and mainly fluorescent and LED lamps are used. They do not emit too much heat during operation - the lamp power can only be selected based on the required amount of light. Among other things, the assortment of lamps with E14 and E27 sockets is large, any type can be used, although it is more logical to equip E27 with a larger lampshade, and E14 for a wall sconce or table lamp. There are both types of cartridges with external thread on the body. E14 met only white plastic, E27 - black, similar to old-mode carbolite. One cartridge has one flat nut. Kit. For a hanging lampshade, it is quite enough for it, for the lower location of the lamp in a floor lamp or sconce, you have to purchase two sets and make a nut from one for the other. The lampshade mounting pad is clamped between two nuts screwed onto the cartridge, otherwise the lampshade is unstable - its center of gravity is high in this application. Alternatively, the cartridge is half recessed in the thickening of the leg, the mounting area of the lampshade is clamped between the edge of the thickening and one nut.
What was required for the manufacture
A set of carpentry tools, a set of tools for electrical installation, a powerful soldering iron. Galvanized steel wire 2 mm, lighting cord, fittings.
Tactics
The first step is to decide on the size. Aspect ratio, it is reasonable to choose equal to or close to the golden ratio.
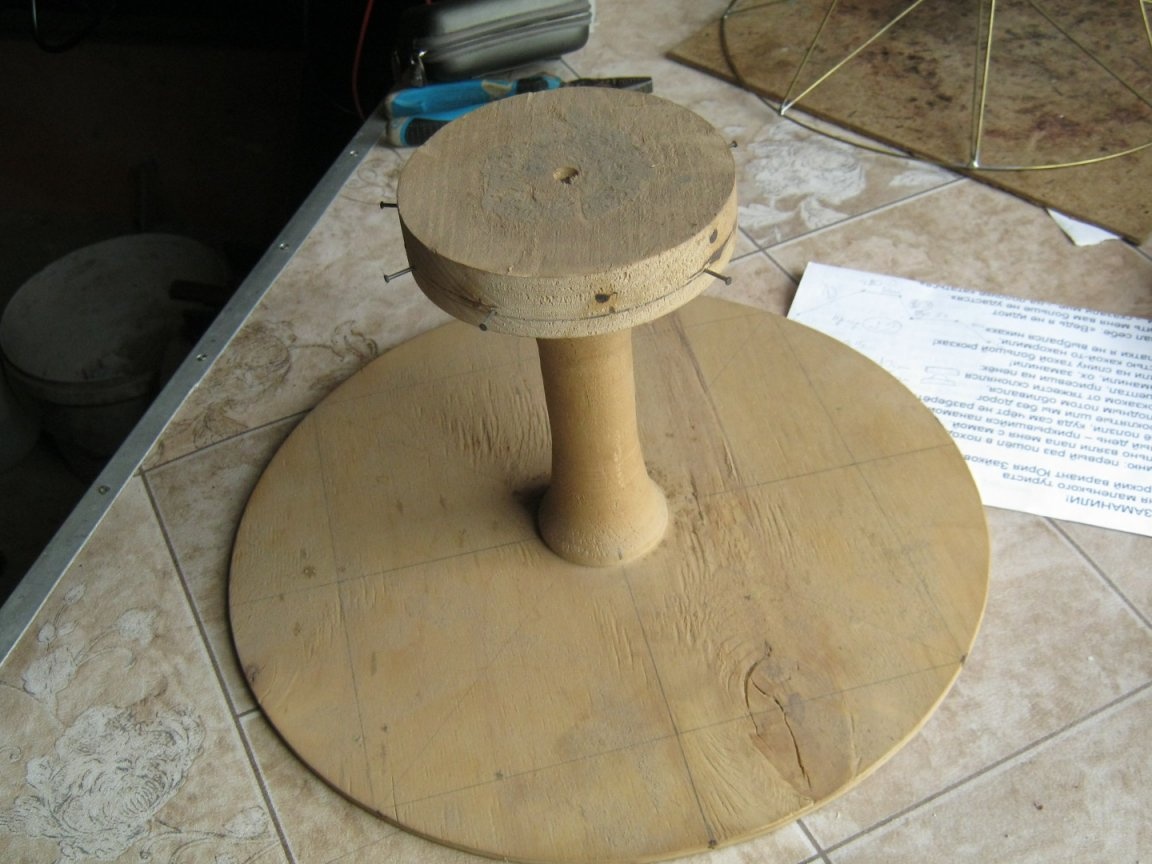
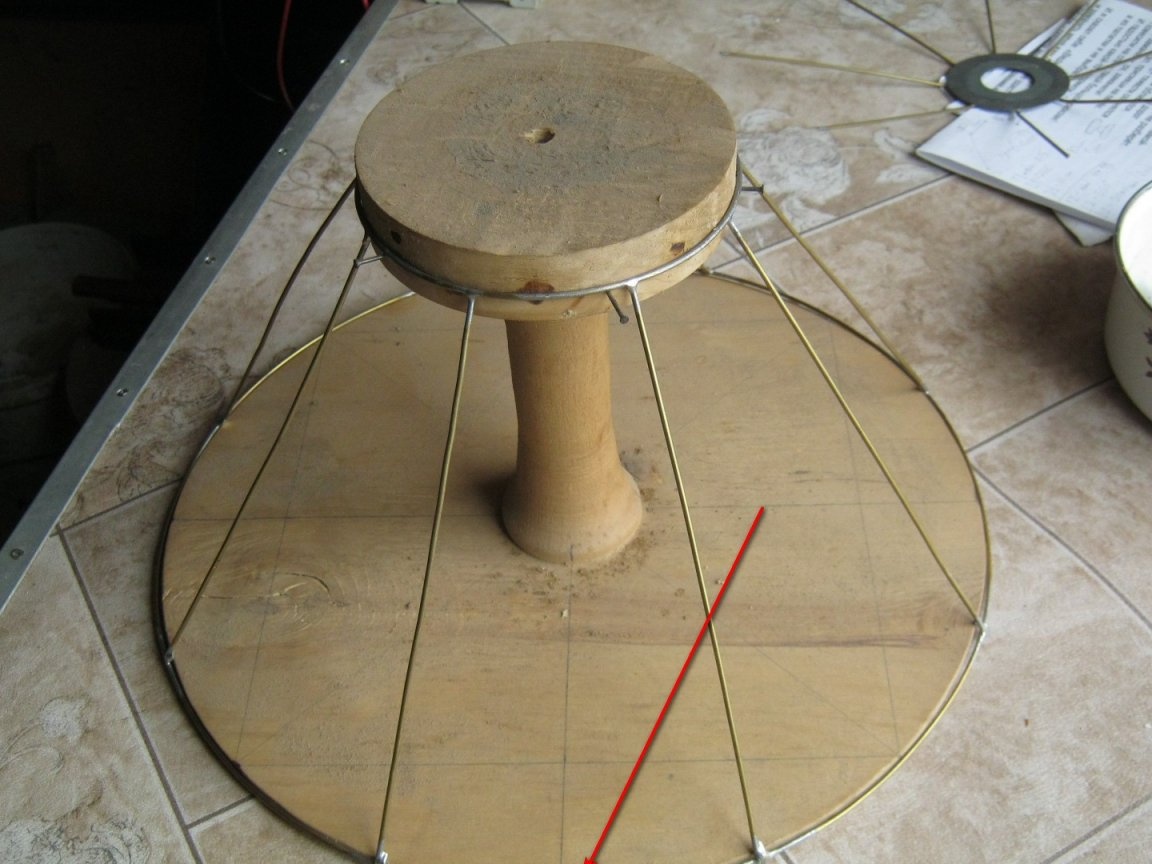
Making a wooden mold is a crucial moment. It is best to make parts on a lathe - all of them are bodies of revolution, in addition, the problem with perpendicularity is automatically solved. Ready-made wooden cylinder-legs can be inexpensively purchased at the household garden store. As blanks use the wooden handle of a shovel; for small lampshades, you can try on the dowels. It is more convenient and more accurate to cut the leg with the right length on a pendulum saw, but it is also possible in the miter box with a fine-tooth saw. The upper and lower circles are also quite acceptable to cut by hand - the bottom of the plywood, can be made from the thinnest, 6 mm thick, the top - from a thin board or plywood thicker, about 10 ... 15 mm. Manual, "pioneer" jigsaw on wood or electric. Small flaws in the form will not be too noticeable in the finished frame - they are leveled by the stiffness of the wire.
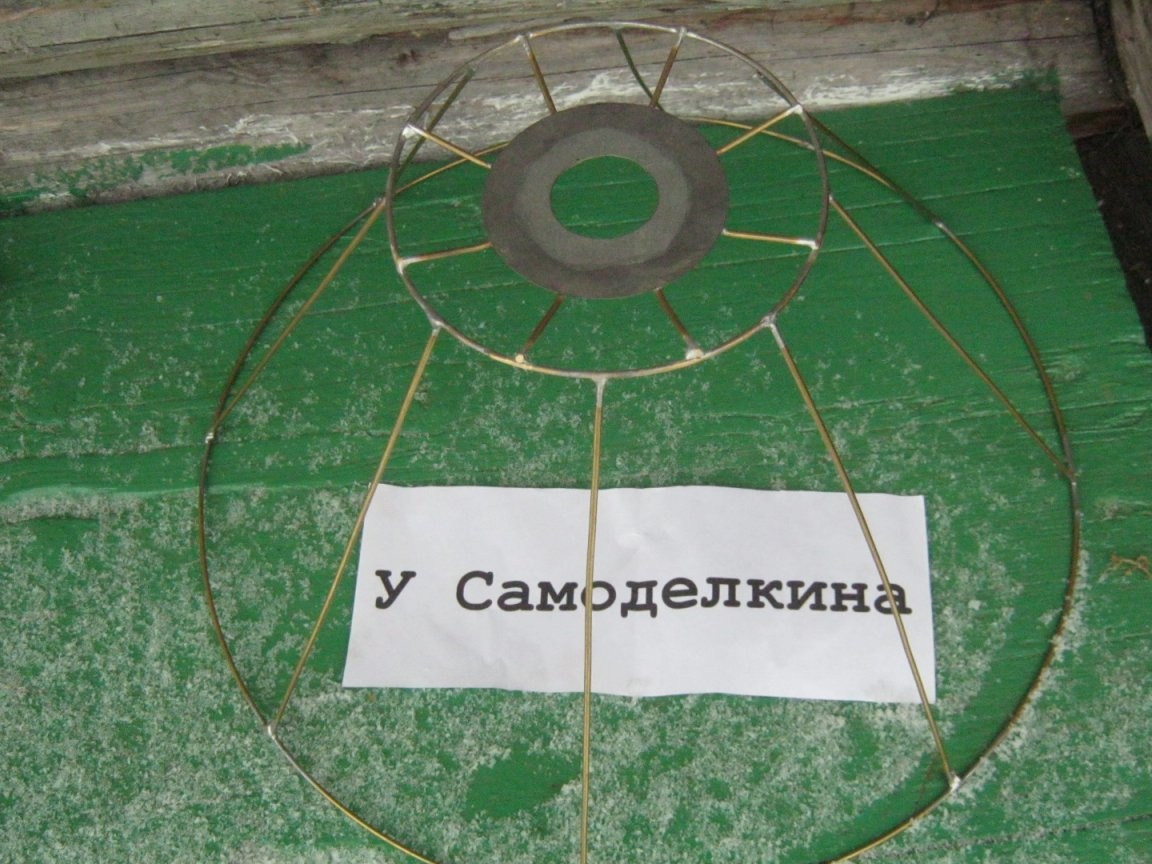
The manufacture of wire rings has several points. The lower ring lies on the table, its shape is set by the lower disk. The upper wooden disk has isogypsum, drawn with a pencil, small cloves are hammered into it, and a smaller ring lies on them.
The number of straight racks forming is taken by eye. Their density is selected based on the ribbing of the finished lampshade. More racks - less angularity, the shape is closer to the cone. Usually, the adequacy of the "finning" is clearly visible visually. Four opposite - top, bottom, right, left. It’s not enough to divide each segment with another rack - oh! Good. In a larger lampshade, for the same smoothness, more wires will have to be installed. Well - the end, however, justifies the means.
The length of the wire-forming is measured directly in place on the template.
Soldering, as already mentioned, a powerful soldering iron, watt sort of 60 ... 150, with any convenient and familiar fluxes used in wiring, but at least with vulgar rosin. Places of soldering, it is clear - previously cleaned with a fine sandpaper, tin. If the flux is acid, rinse after soldering with warm water and soda, rinse, dry. Do not put off washing for a long time.
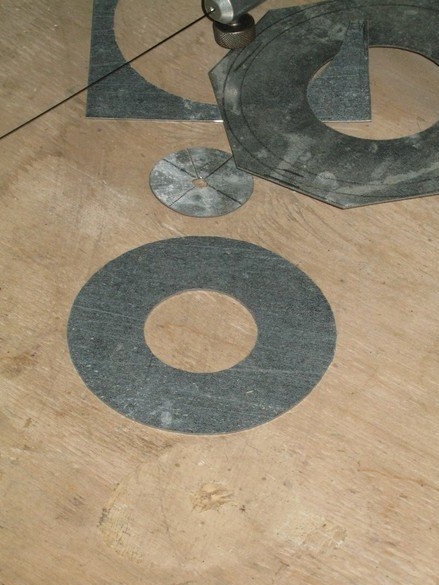
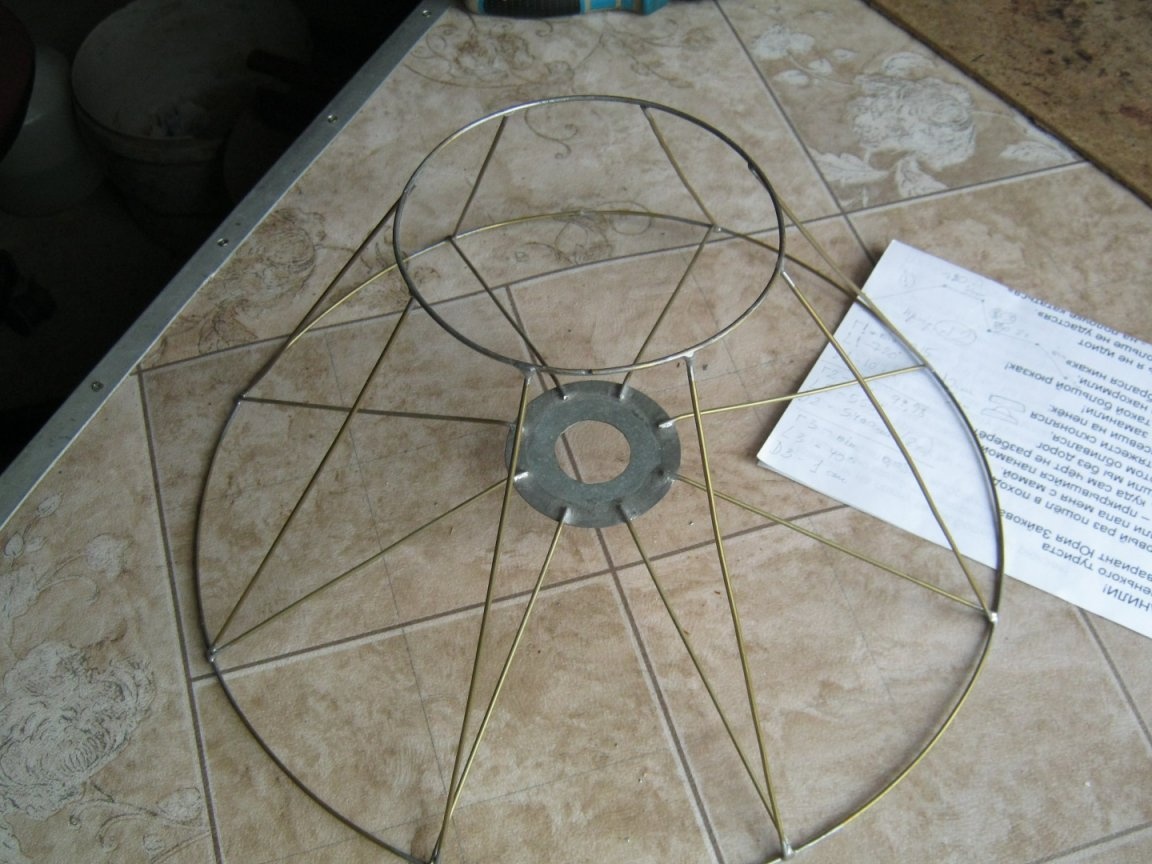
The platform for the lamp holder. With this assembly, the lampshade holds onto the lamp.It is more convenient and easiest to cut this platform from non-thick (standard roofing iron - 0.45 ... 0.5 mm) galvanized steel with a jewelry jigsaw. This is an excellent tool, it turns out beautifully, accurately and not painfully. An economical option is to charge a nail file from a jewelry jigsaw to a penny pioneer. On wood. It just fits. Sometimes it’s even more convenient - the frame size is larger, you can process a larger part. The only, but major inconvenience - the frame of the jigsaw on wood is much heavier, inertia, more difficult to control - the thinnest files often break. When cutting, the dovetail pioneer stand is also used. Marking - draw the center, draw with a compass. It is possible drawing with stylus, you can scratch metalwork.
To the edge of the site, with a slight overlap, the rods are soldered for fastening to the main part of the frame. The number of rods is also determined by eye, but remember that through them you will have to poke your hand or fingers to install the lamp. Do not part.
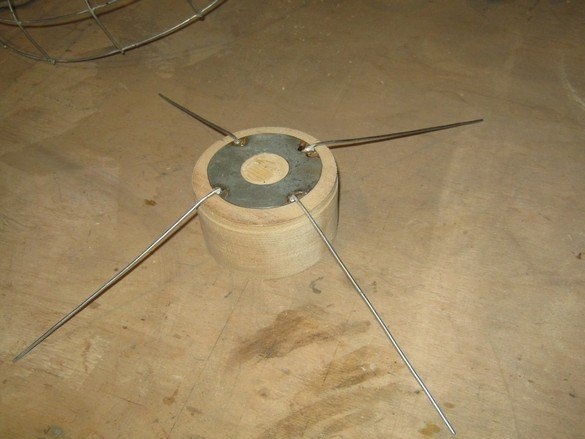
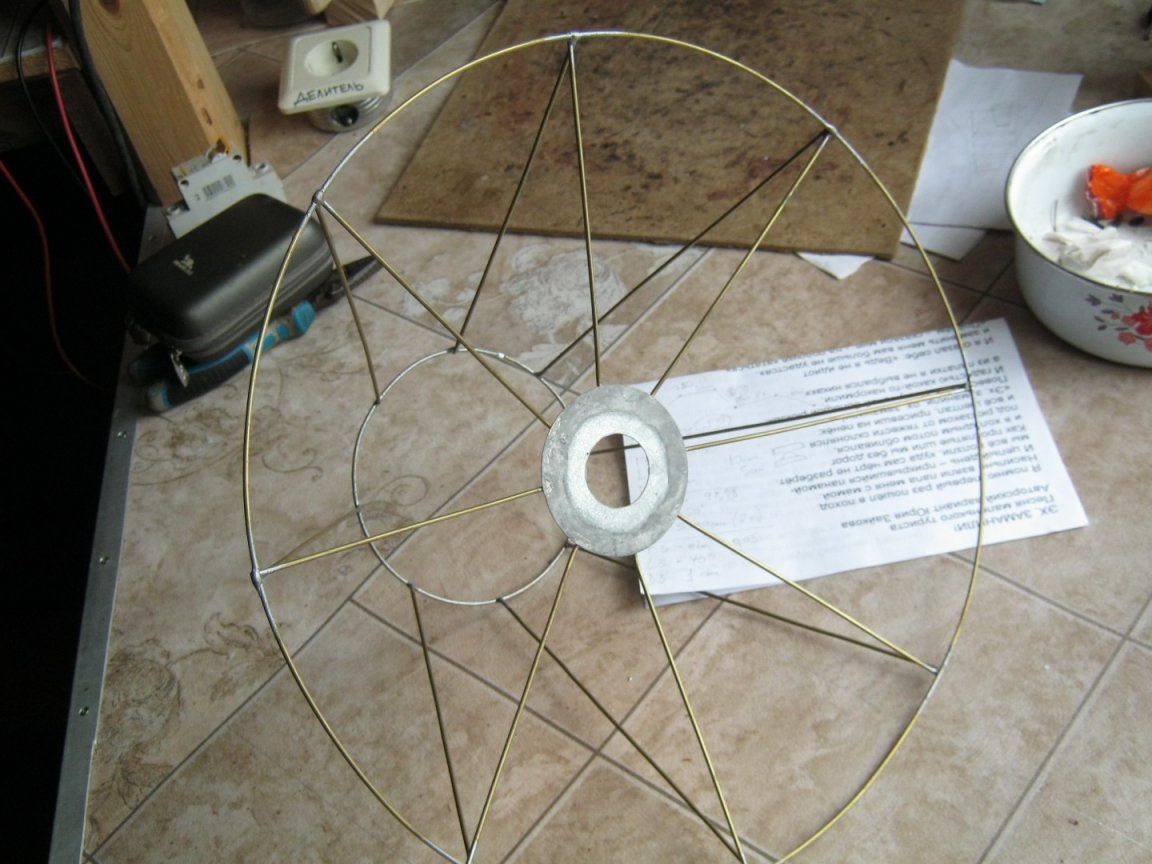
Generally speaking, you can try to make the entire area without sawing it with a jigsaw - solder it from wire parts, for example like this. The number of “braces” is seen to be somewhat increased, at least to five. A wide, flat nut on the chuck will hold the structure by fan-diverging rods. You may have to invite a child to screw in the light bulb.
Actually, it remains only to assemble two parts - try on a platform with rods, fixtures, specify the length in place, cut off the excess. Solder, remove residual flux. Done.

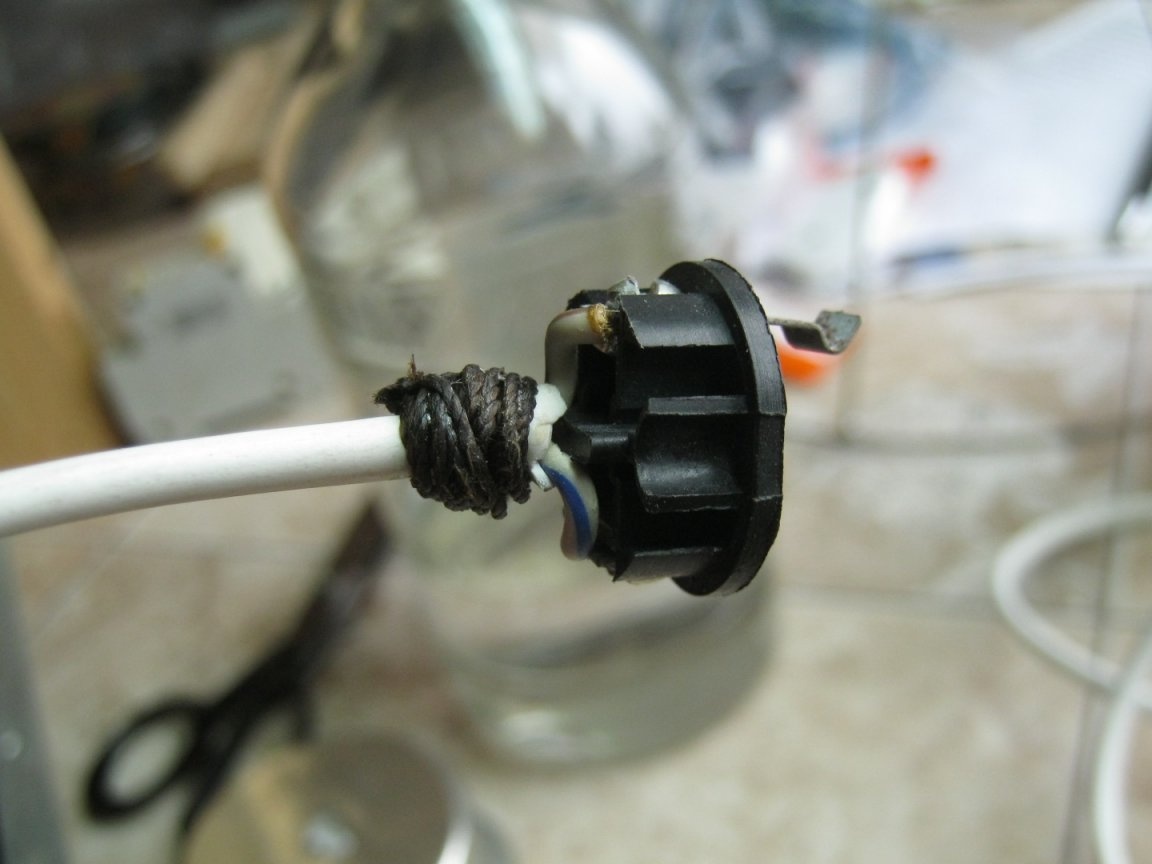
Yes, when hanging the lampshade, care should be taken to remove the mechanical load from the places of electrical connections, for example, on the external insulation of the wire, make a bandage of thick threads inside the lamp holder, soak with glue. Possibly fit a wide metal or textolite washer.
Babay Mazay, November, 2019