
From the article below you will learn how to make a small biogas plant working on waste.
Master antoniraj from the English-language site instructables searched for a method for the efficient use of food waste and biodegradable organic materials and came across information on the production of biogas from organic waste.

Biogas obtained in this way consists of methane and a small amount of carbon dioxide. It is an alternative fuel. In addition, the waste can be effectively removed without any odor and accumulation of flies, and the digested suspension from the biogas block can be used as an organic fertilizer in the garden.
Biogas plant components
The main components of a biogas plant are a tank as a digester, an inlet for supplying kitchen waste, a tank for a gas tank, an outlet for a split suspension, and a gas supply system for removing and utilizing the resulting gas.
Necessary materials:
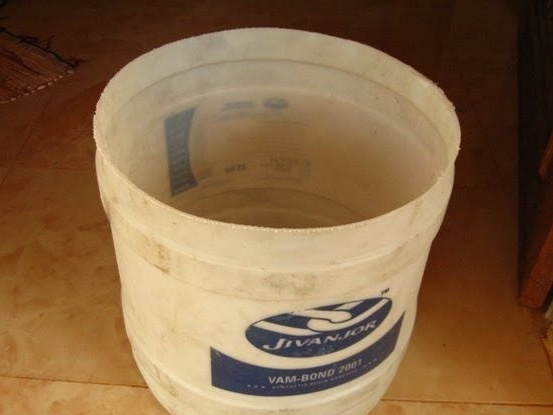
1. An empty PVC canister with a capacity of 50 liters: for use as a tank for a digester;
2. An empty PVC can with a capacity of 40 liters: used as a reservoir for holding gas (Make sure that the smaller can is placed in the larger one and moves freely);
3. PVC pipe with a diameter of 64 mm: about 40 cm long. (For waste supply);
4. PVC pipe with a diameter of 32 mm.: About 50 cm long. (Fixed inside the gas tank for gas as a guide);
5. PVC pipe with a diameter of 25 mm.: About 75 cm long. (Fixed inside the tank for the digester as a guide pipe);
6. PVC pipe with a diameter of 32 mm.: About 25 cm long. (Fixed to the tank of the digester, which serves as an outlet for the spent mixture);
7. Any waterproof adhesive;
8. Gas exhaust system: for details, see Step 4
Tools required:
Many tools will not be required. All the necessary tools - a hacksaw and a sharp knife for cutting holes in containers. (Note: It is better to use a hole saw or crowns)
Optional accessories:
Single burner gas hob or Bunsen burner used in school laboratories (Note: A gearbox is also likely to be needed).
Step 1:
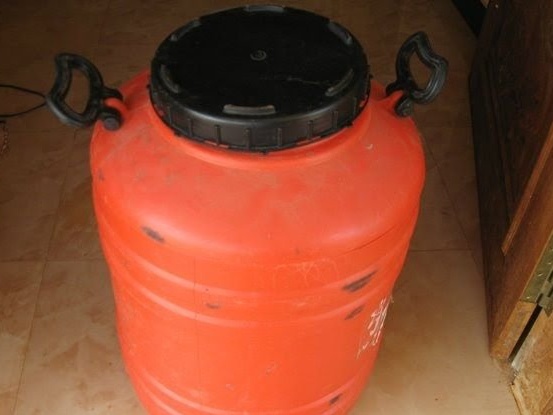
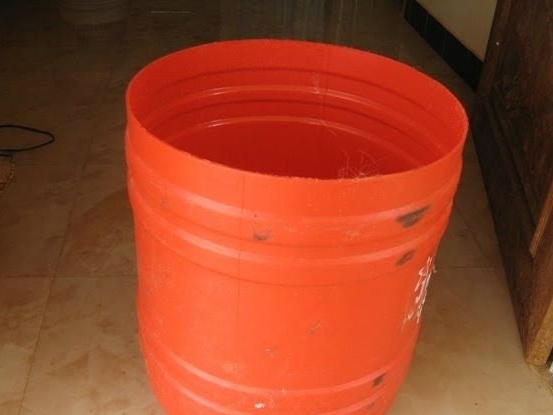
In a plastic canister with a capacity of 50 liters, which will be used as a unit for the digester, the master removed the upper part, cutting it with a hacksaw.
Step 2:
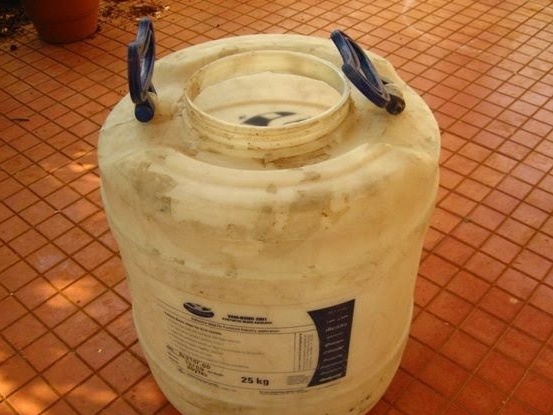
A smaller white canister, which will act as a gas holder, fits inside the red one. Here again, the upper part of the canister is cut off, also with a hacksaw blade.
Step 3: Pipes
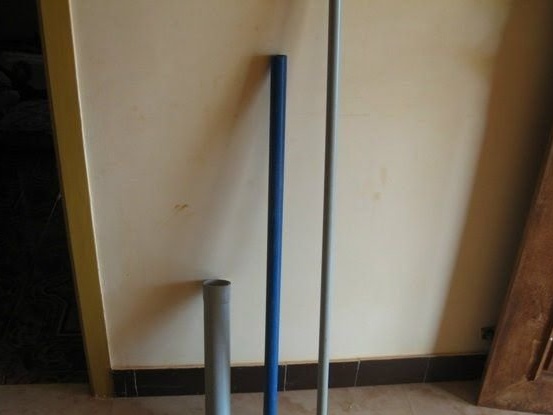
The PVC pipes shown in the photo with a diameter of 64 mm, 32 mm and 25 mm will be used for the supply of kitchen waste. The guide tube for the gas holder and the guide tube are fixed in the digestion chamber. A small piece of pipe with a diameter of 32 mm will be used as an outlet for the spent mixture.
Step 4: Materials Needed for a Gas Delivery System
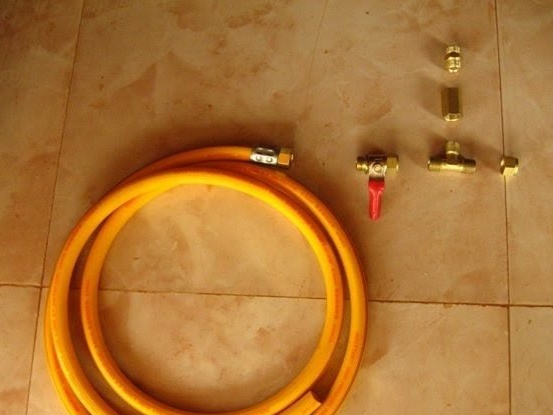
1. Ball valve: (for adjusting gas flow);
2. Tee: (for connecting the gas holding canister and ball valve);
3. End cap to block one end on the tee;
4. Coupling or adapter: (for connecting a tee to a gas manifold);
5. Nipple: (added to the coupling in the gas manifold);
6. Gas hose (flexible eyeliner): two meters;
7. Teflon tape (fumlent): one roll (used as a thread seal at the joints);
Step 5:
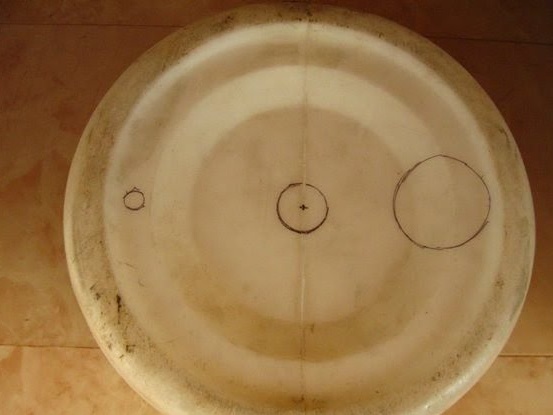

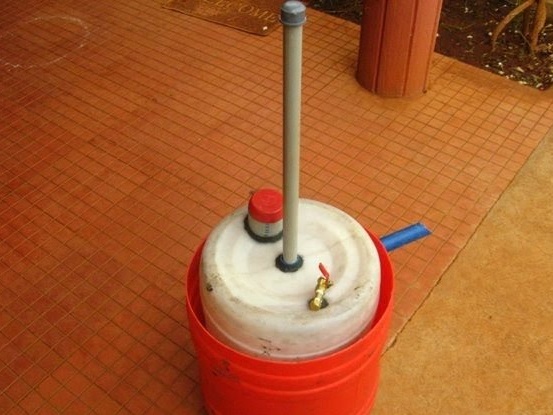
The photo shows where the master marked the places for cutouts that should be made at the bottom of the gas collection tank. Smaller hole on the left for the gas supply system, central hole for attaching 32 mm of the guide pipe and 64 mm hole for attaching the waste pipe on the right side. The master made these holes with a sharp knife and a hacksaw blade. (approx. Actually, there are crowns and hole saws))
The following image inside the gas holder shows 32 mm. guide tube (center) and 64 mm. a feed pipe secured with a waterproof adhesive (sealant or cold welding may be suitable).
Step 6:
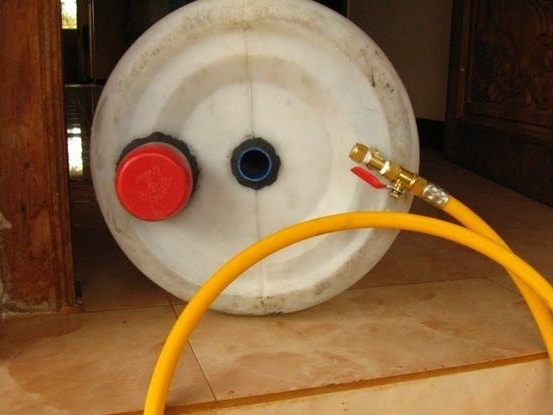
Top view of the gas system. On the left is the supply pipe, the central guide pipe and the gas supply system: the supply pipe is closed with an old suitable size cap (red). This will facilitate the opening of the supply pipe while the system is being powered.
Step 7:
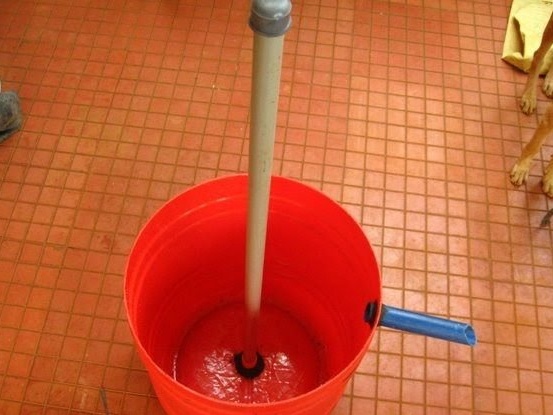
The fermentation tank is equipped with a central guide tube and an exhaust pipe for the spent mixture.
Step 8:

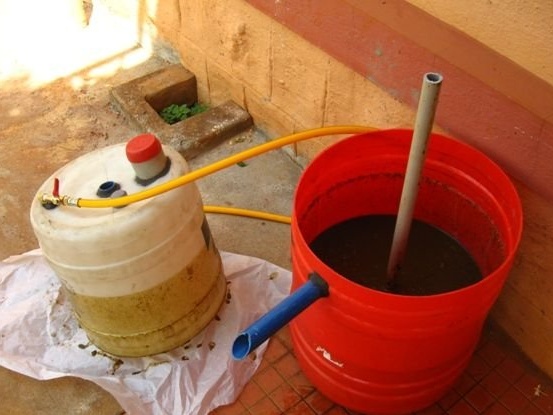
Completed block. The master removed the gas pipe so that the joints did not experience unnecessary stresses when sealing joints.
You should wait one or two days before using the system so that all connections become leakproof.
At the beginning, cow manure mixed with water will be fed into the system, which will begin the process of gas formation. Subsequently, food waste, degradable organic materials and kitchen waste will be diluted with water and used to fuel the system. The upper canister rises along the guide tubes depending on the amount of gas produced. You will need to add some weight on top of the canister to increase gas pressure. When the system is powered, excess digested slurry will fall out through an exhaust pipe that can be collected, diluted, and used as organic manure.
Initially, the produced gas will consist of oxygen, methane, carbon dioxide and some other gases and will not burn. These gases can be released into the atmosphere. To do this, open / close the ball valve at least three / four times.
The subsequent gas will consist of about 70-80 percent of methane and residual carbon dioxide, which can be used in a gas stove or in a Bunsen burner.
This homemadethis is working modelbut for constant use you need more volumes.A tank for cooking gas with a capacity of one thousand liters will be enough for a small house for daily cooking. Large commercial models provide a waterproof seal between the fermentation tank and the gas tank.
Step 9:
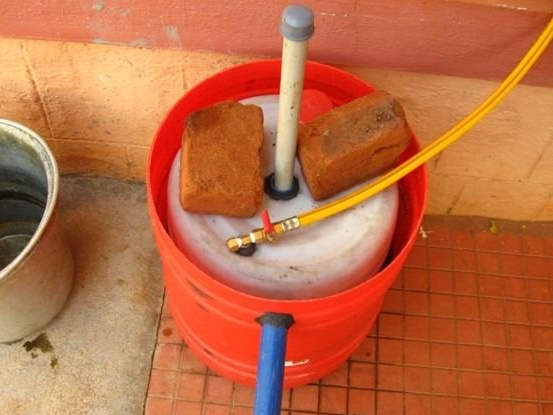
The ball boiler is filled with cow manure diluted with water. Then he was left for two to three days. A slurry of cow dung began the process of gas formation.
Gas formation has begun and the gas storage tank rises. The master placed two bricks on top of the plastic canister to get more gas pressure.
Perhaps this homemade product is useful for use in suburban areas.
If you liked the author’s homemade, then try to repeat and make.
Thank you for attention.
See you soon!