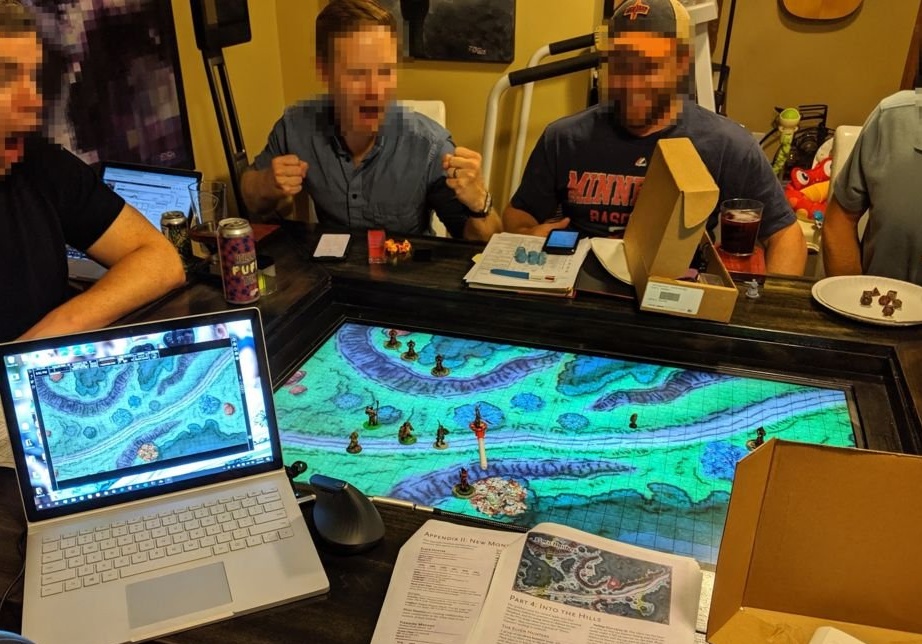
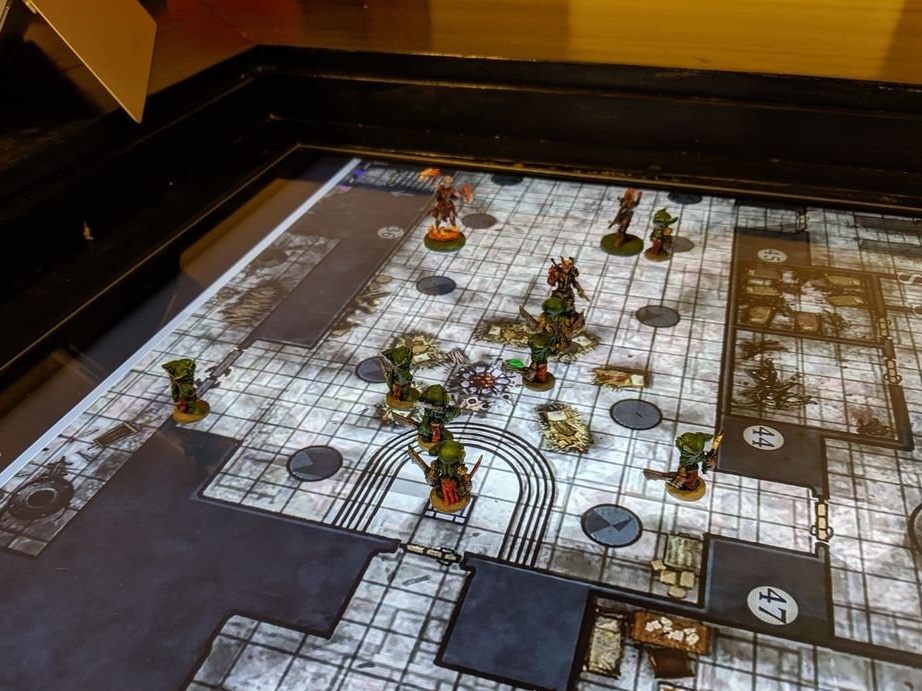
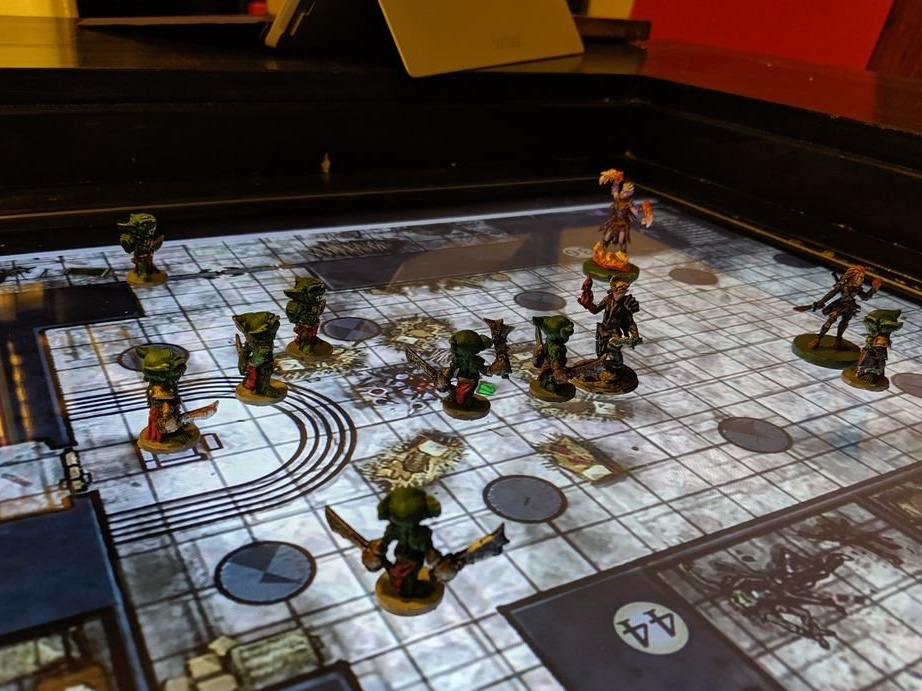
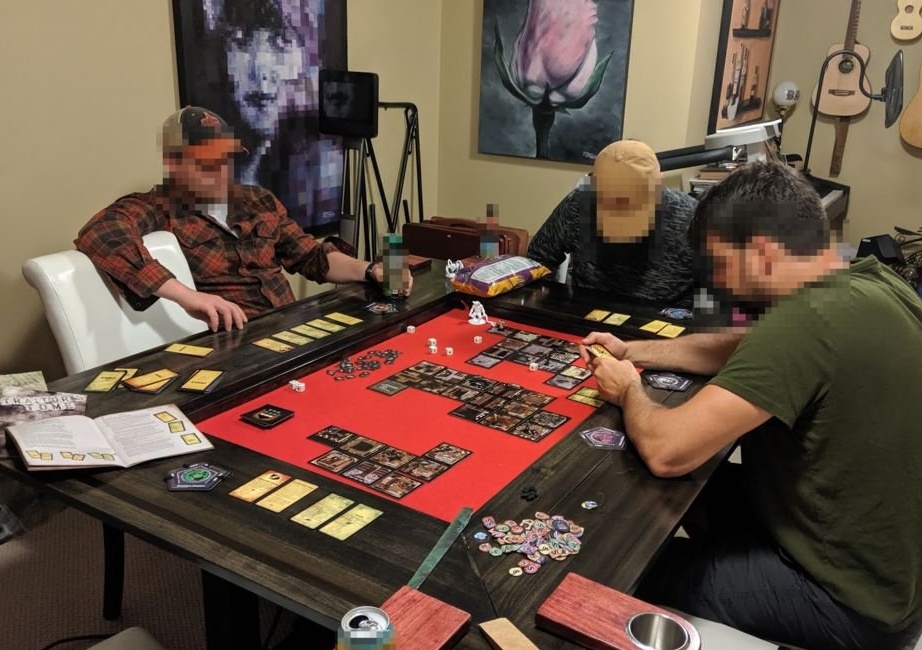
The author of this homemade likes to play with friends the board game Dungeons and Dragons. With the development of technology, this game has become more and more virtual. First, the game was displayed on the TV screen, and then each player on the laptop. The sense of company was lost, more and more each player went into a virtual game.
Then the master decided to make a table so that Dungeons and Dragons, other games could be played on it, and at another time it should be used as a regular table.
Tools and materials:
-Board;
-Plywood;
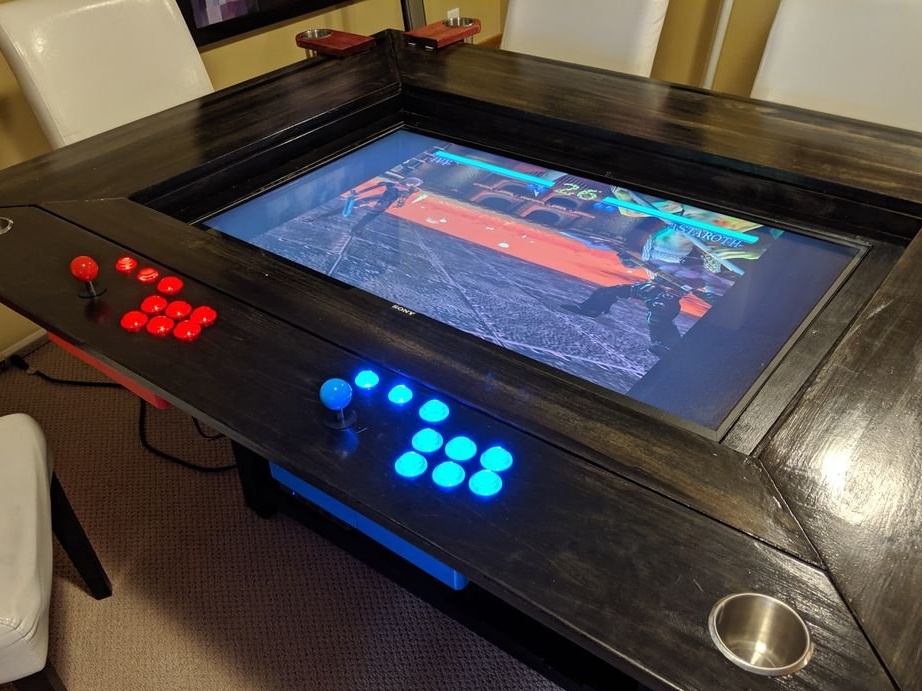
-TV 43 "4K HDR;
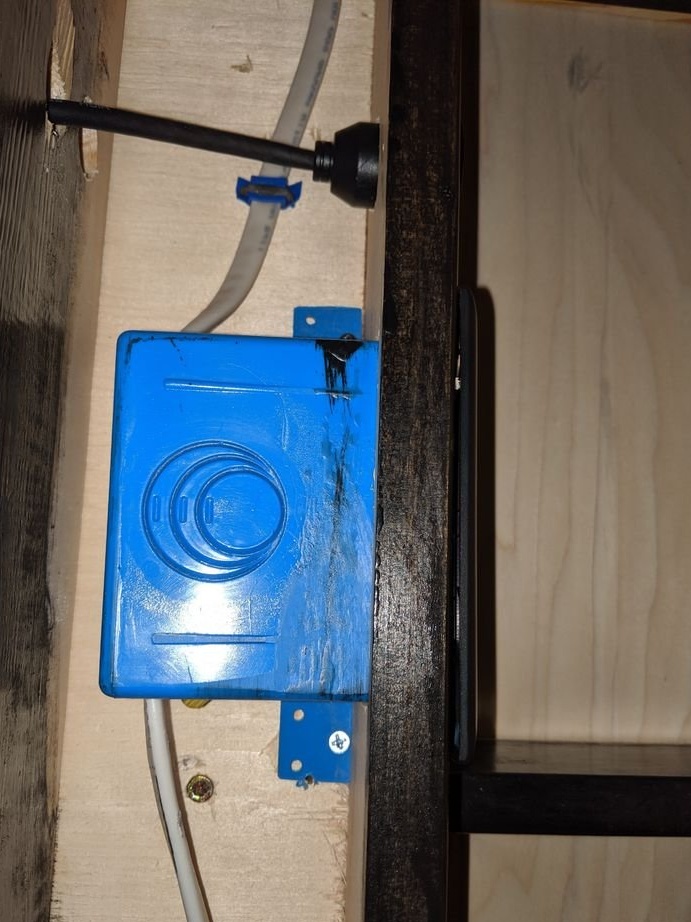
-Various connecting wires;
-Acrylic;
-USB charger;
-Fasteners;
-Game computer;
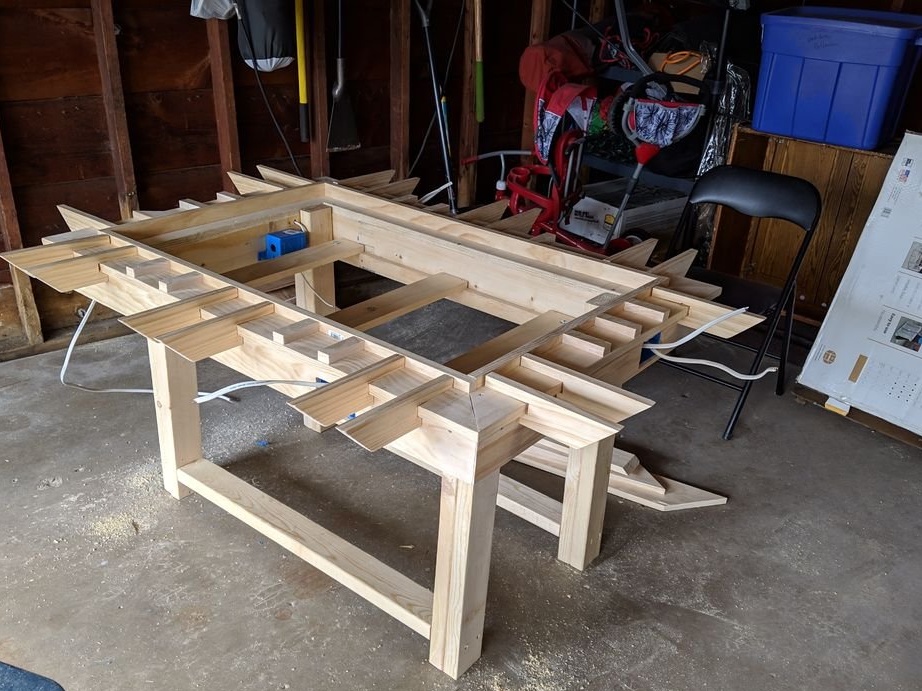
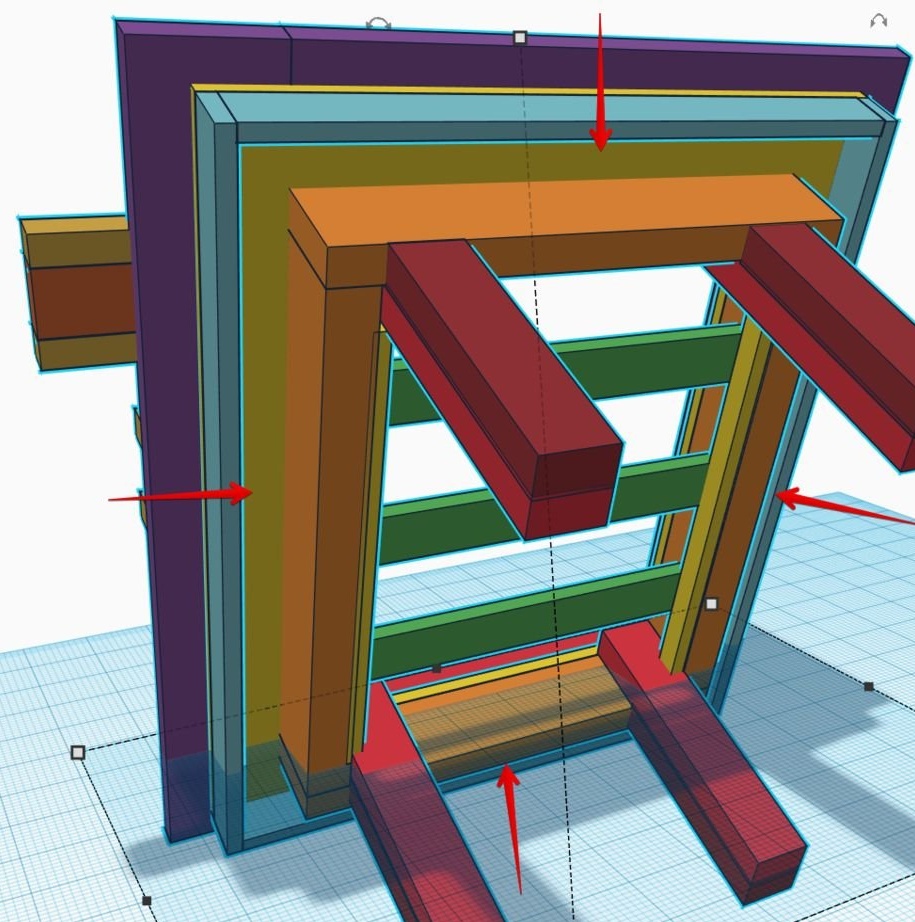
Step One: The Table
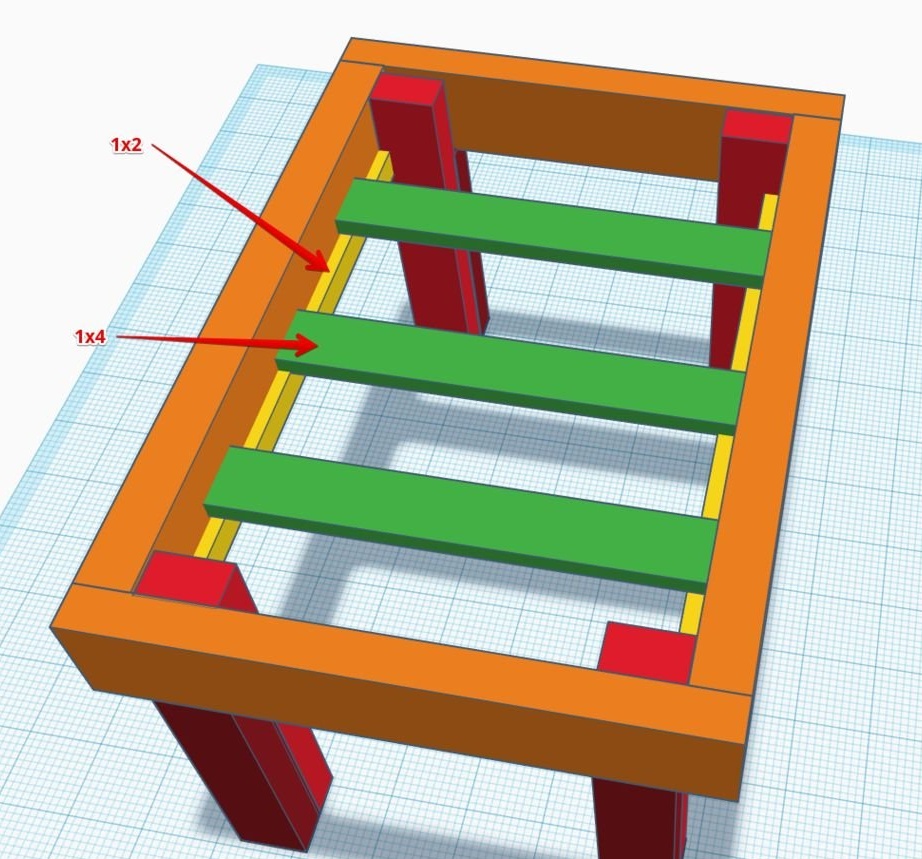
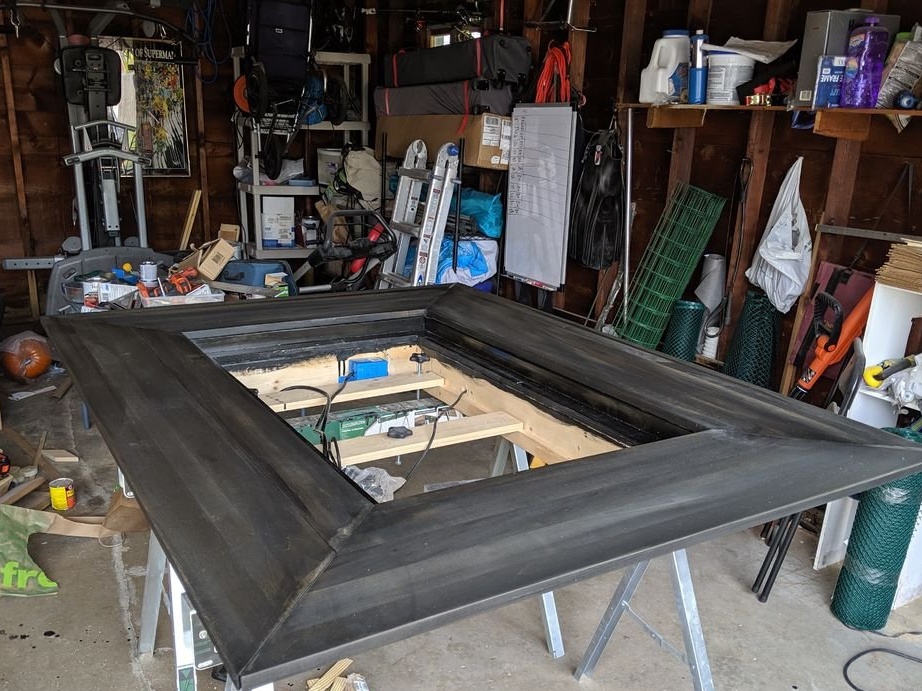
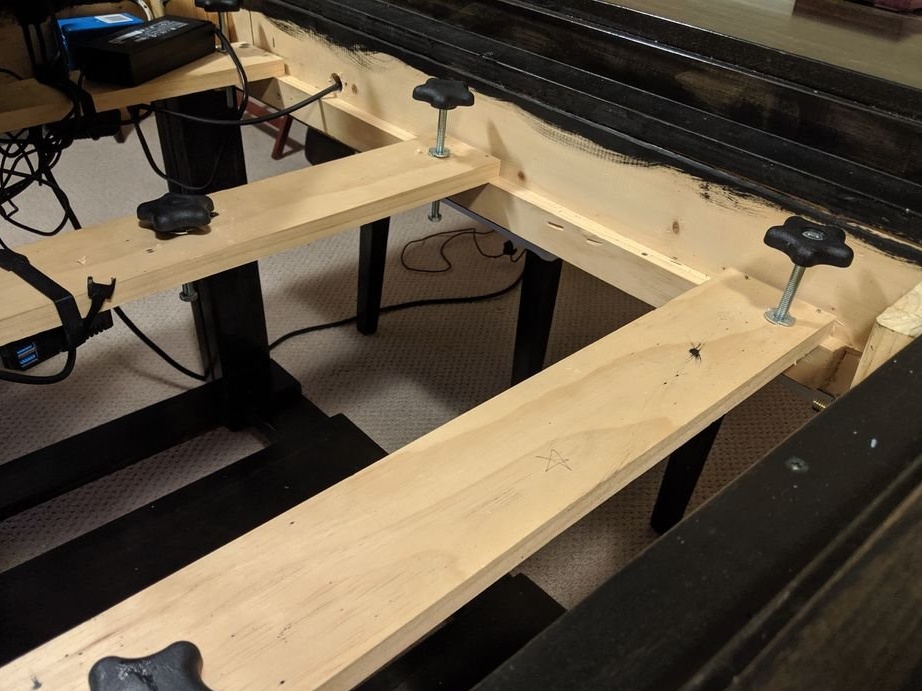
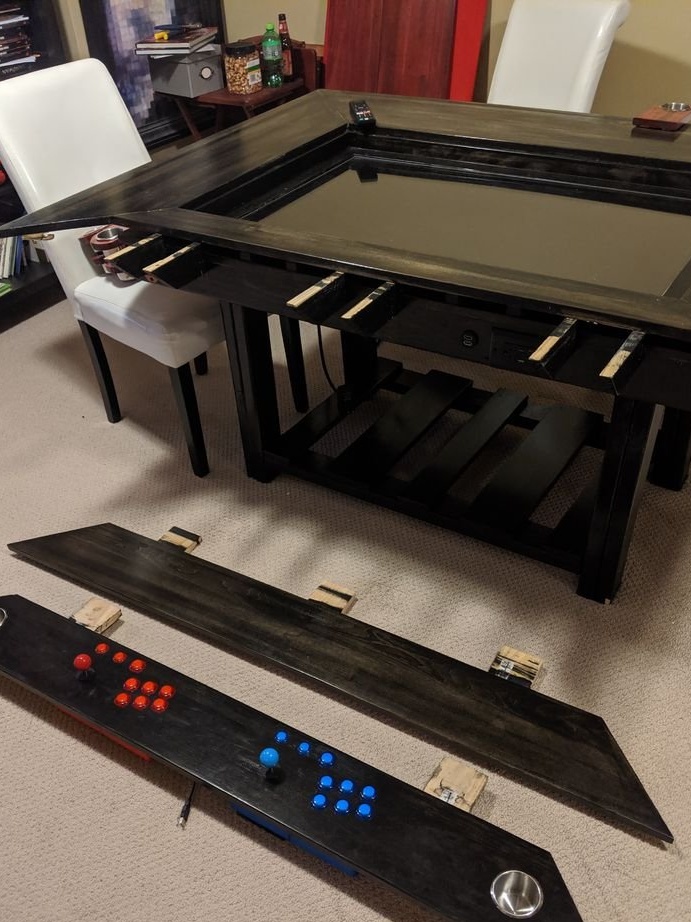
The master collects the frame from the board and fixes the legs. The frame should be larger than the TV panel in size.
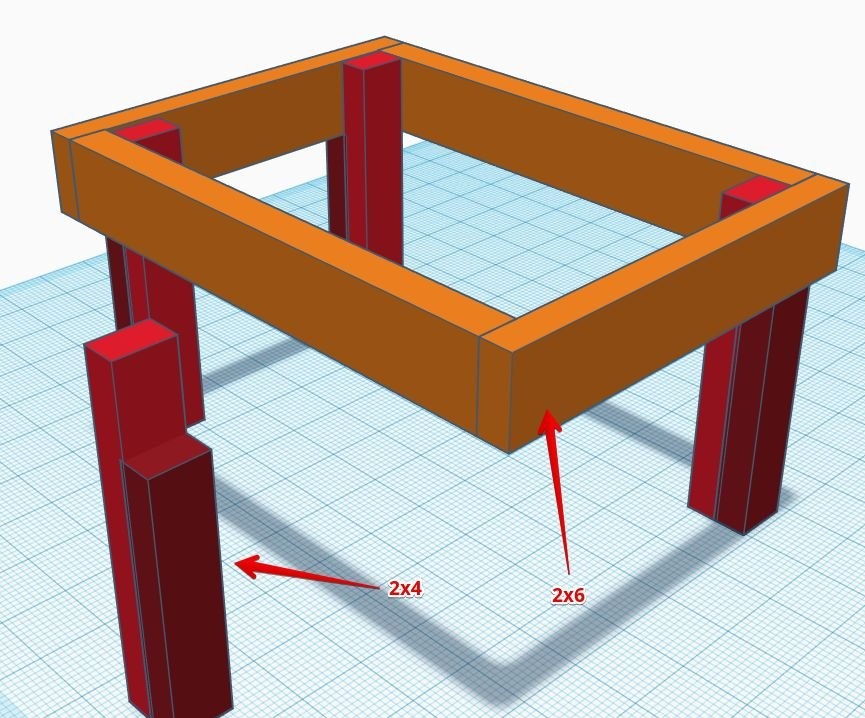
Inside the frame, the transverse rails are fixed, a TV panel will be mounted on them.
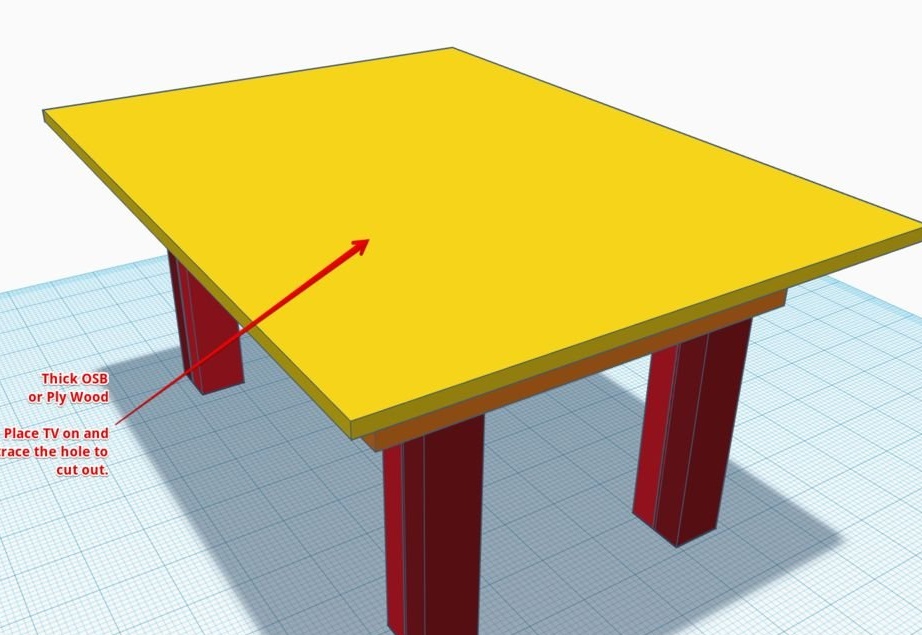
A plywood sheet fastens on top of the table. The inside cuts out. The size of the cut out part corresponds to the size of the TV.
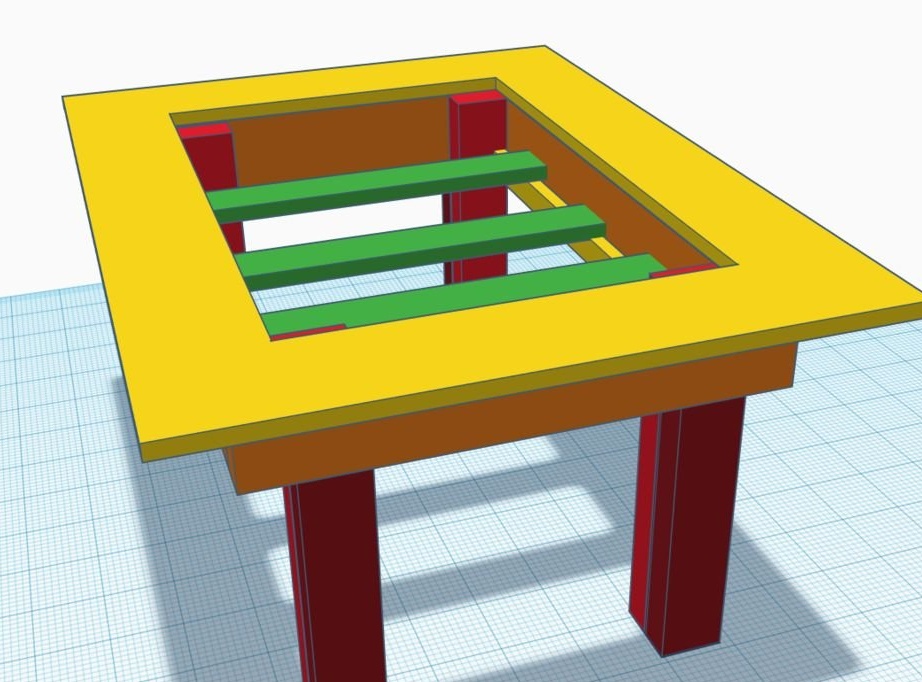
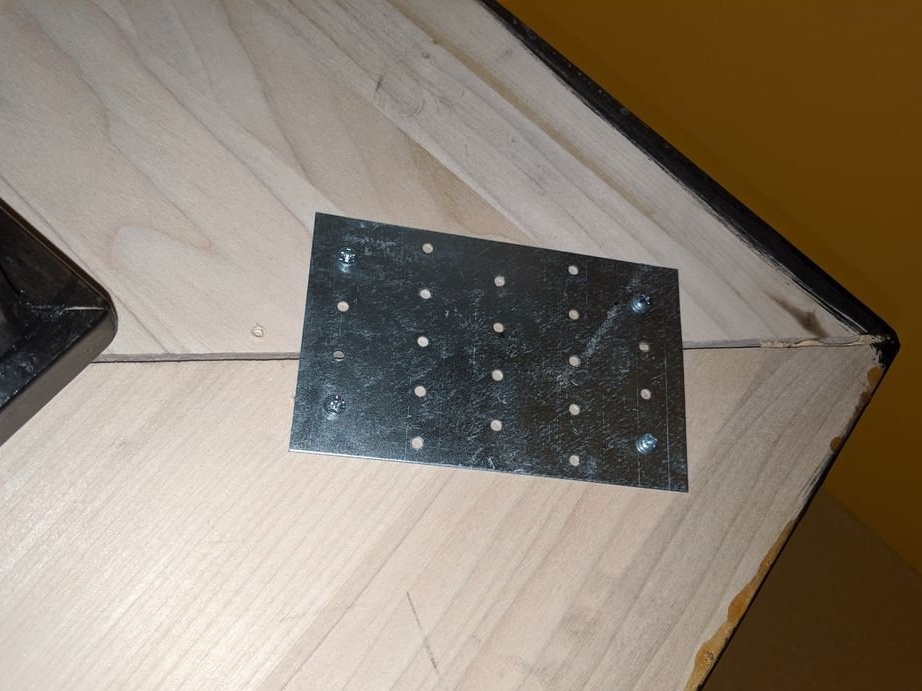
Below, around the perimeter of the plywood sheet, a wooden frame is attached. Inside the frame will be installed electronic part.
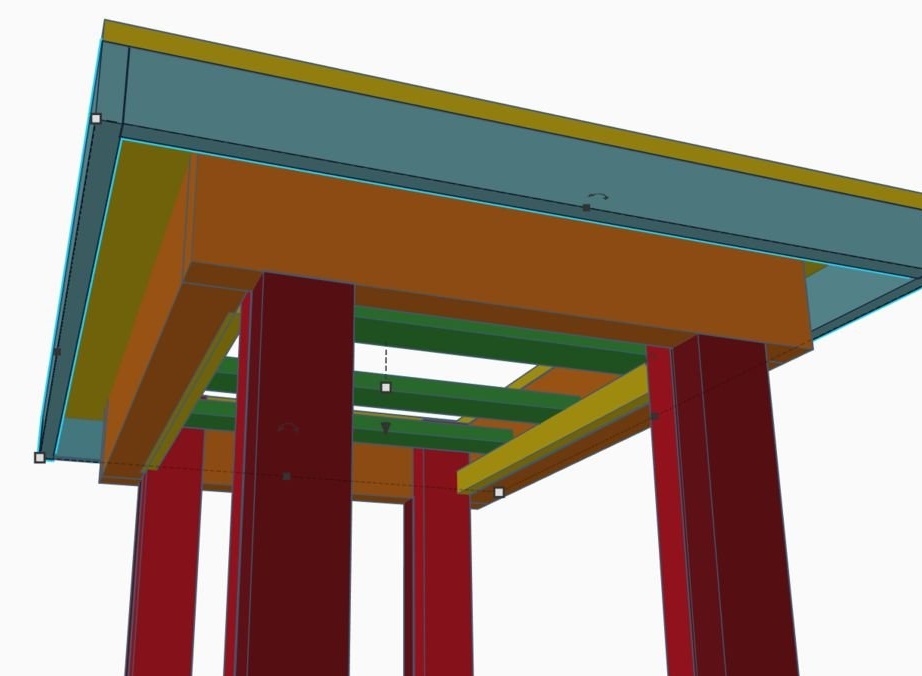
Around the cutout secures the frame.
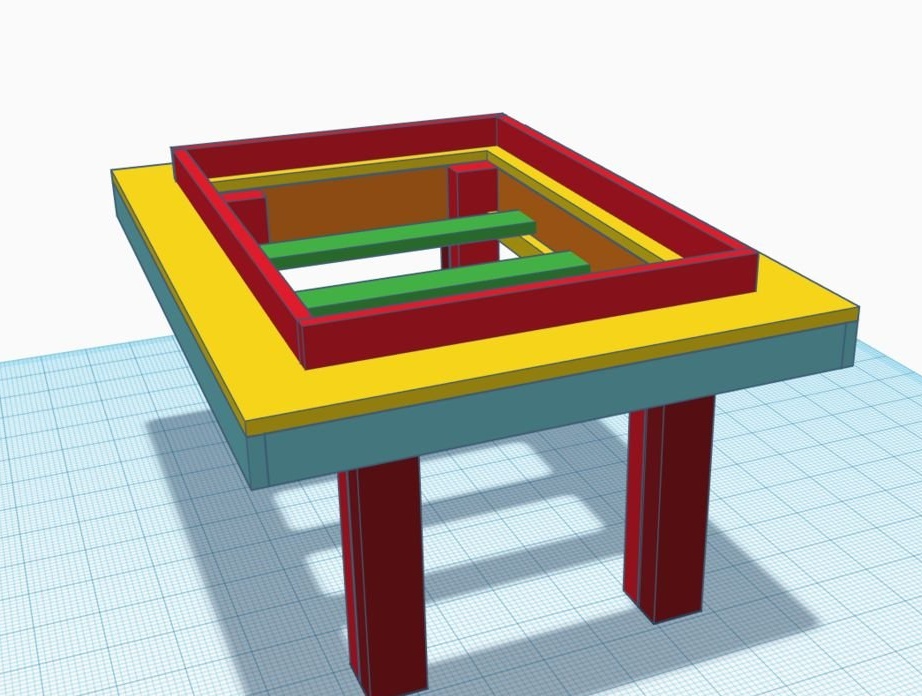
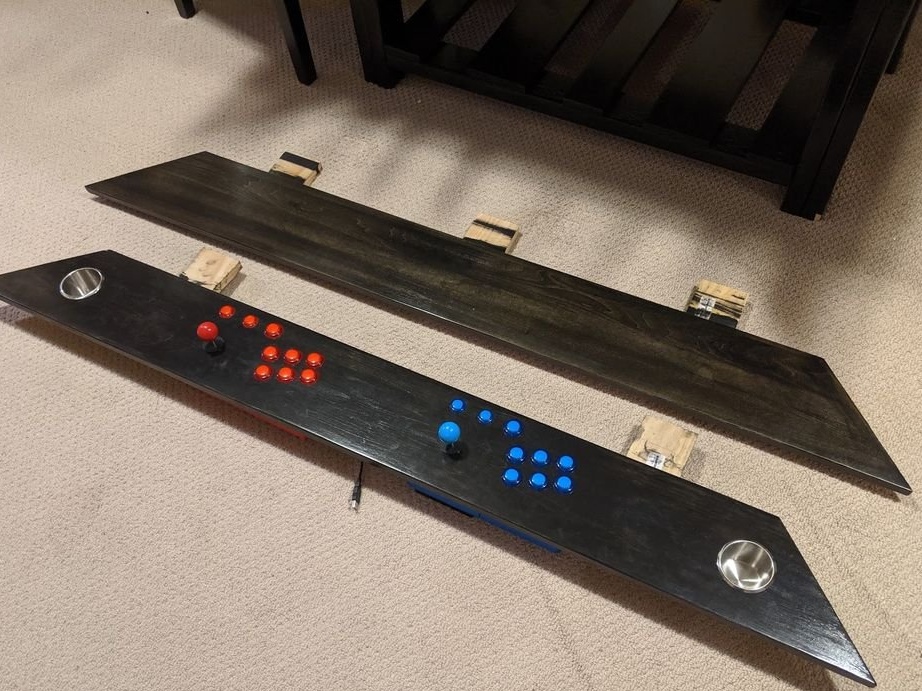
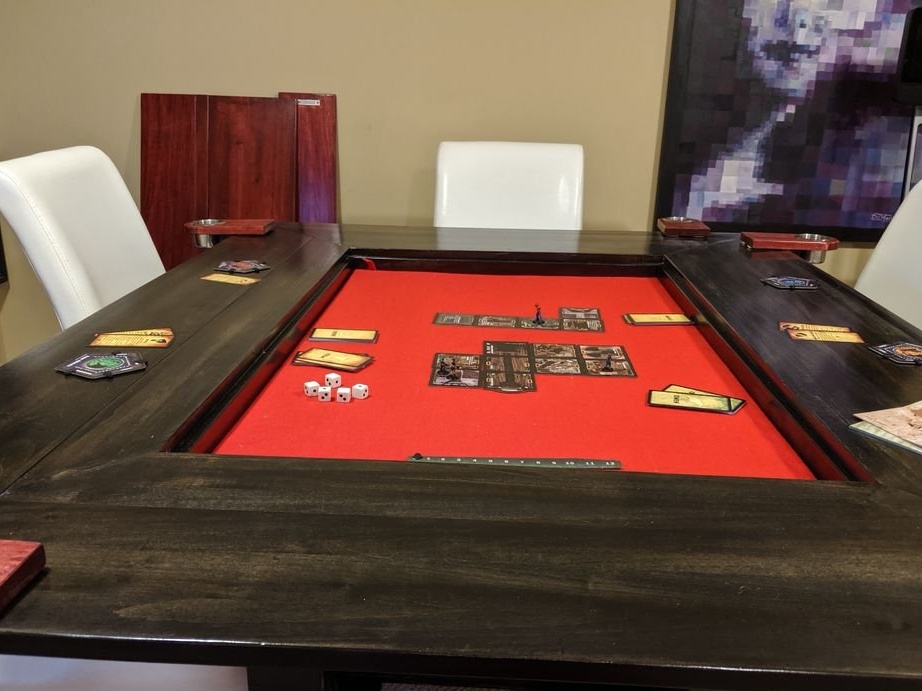
Boxes for storing cubes, figures, chips, etc. will be installed around the outer perimeter, and everything is closed by a board on top.
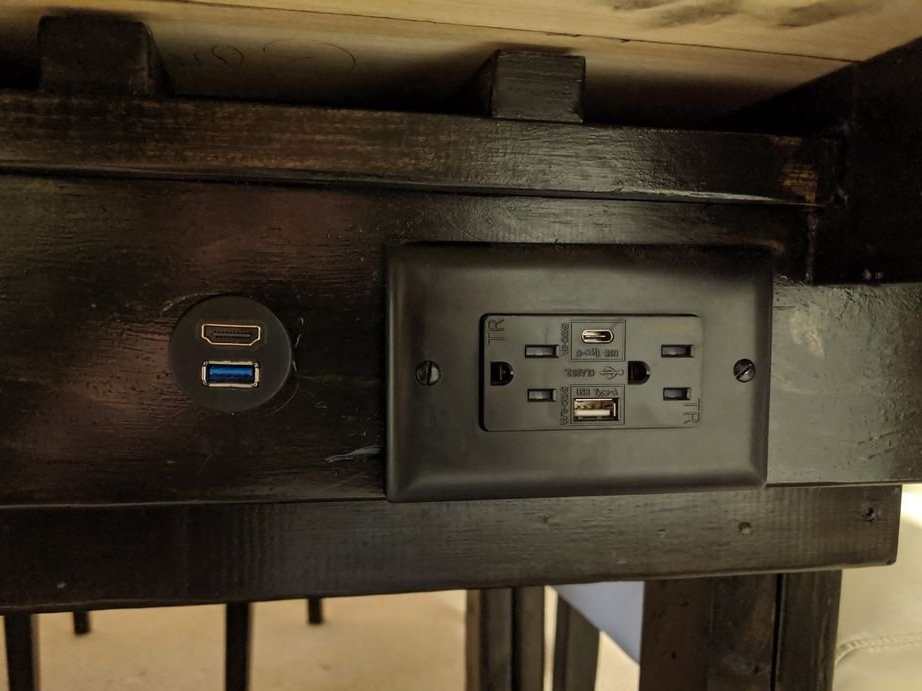
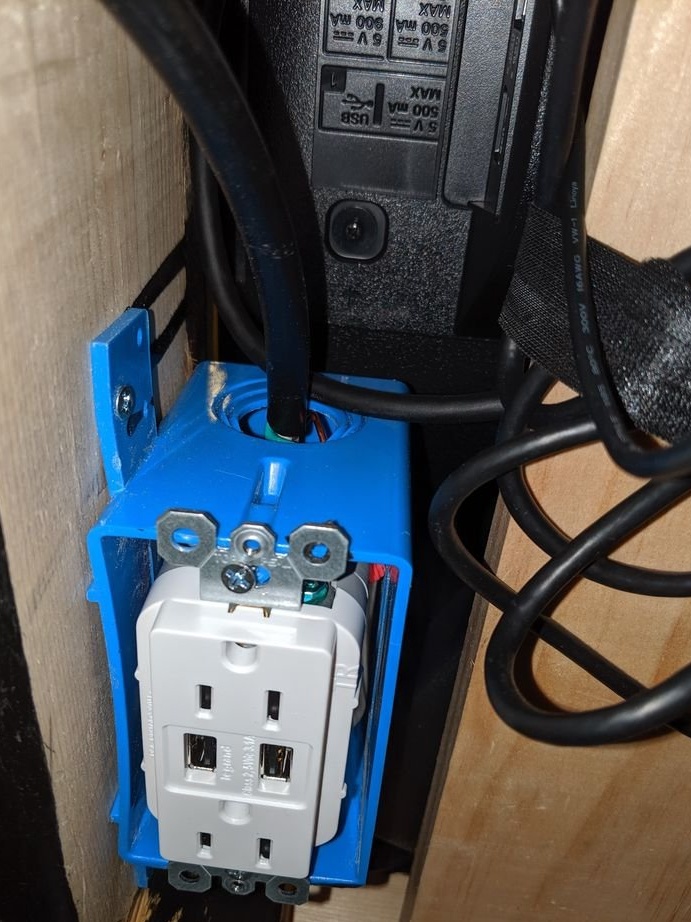
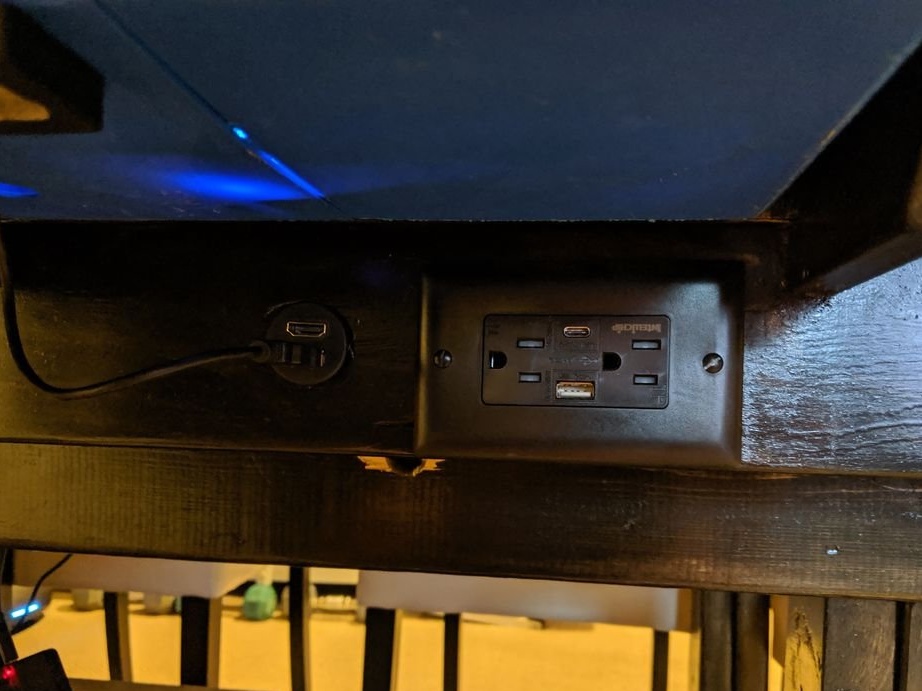
Step Two: Outlets
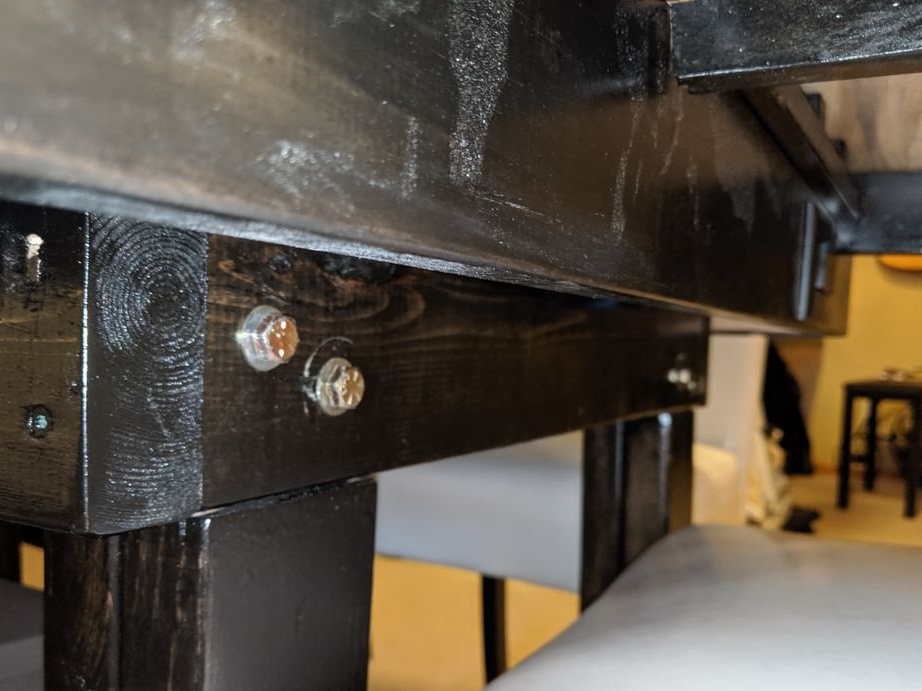
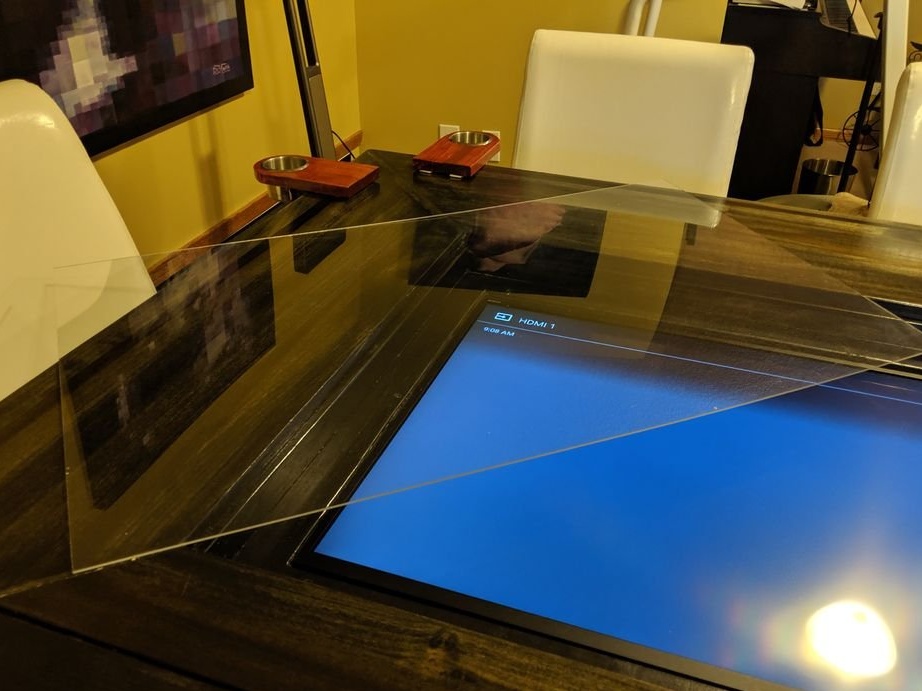
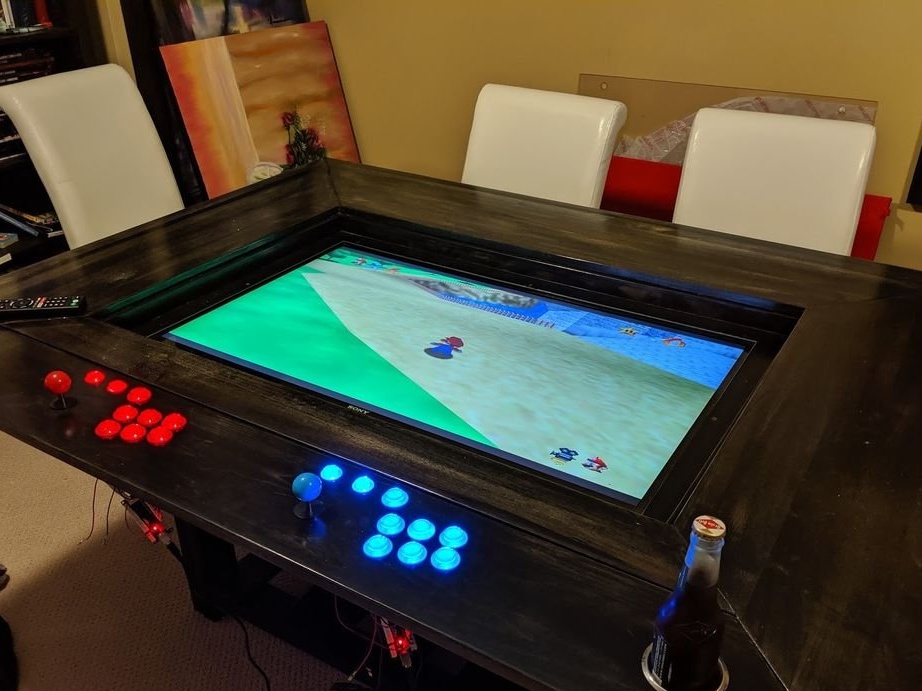
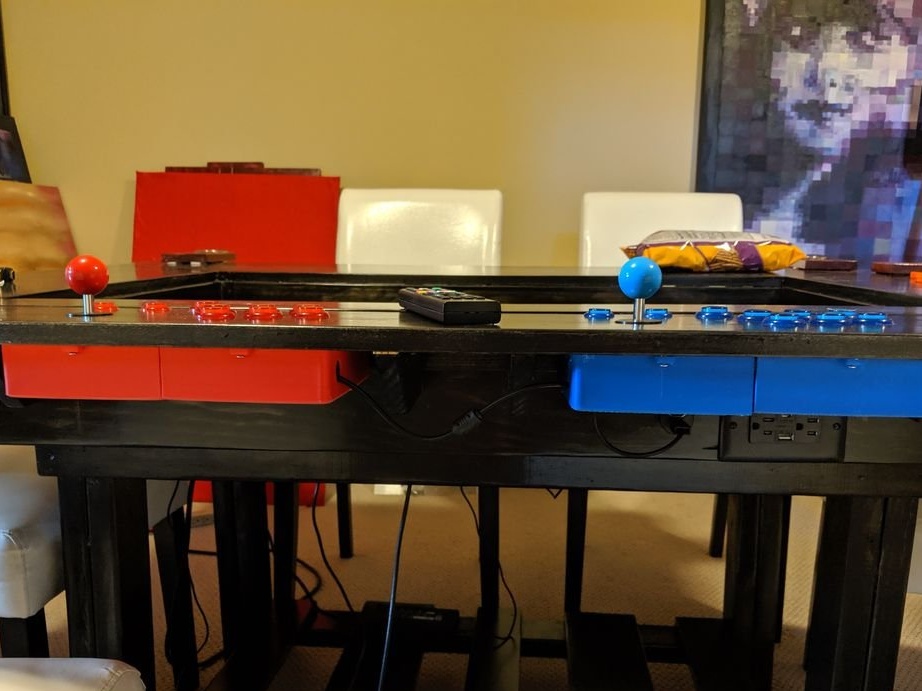
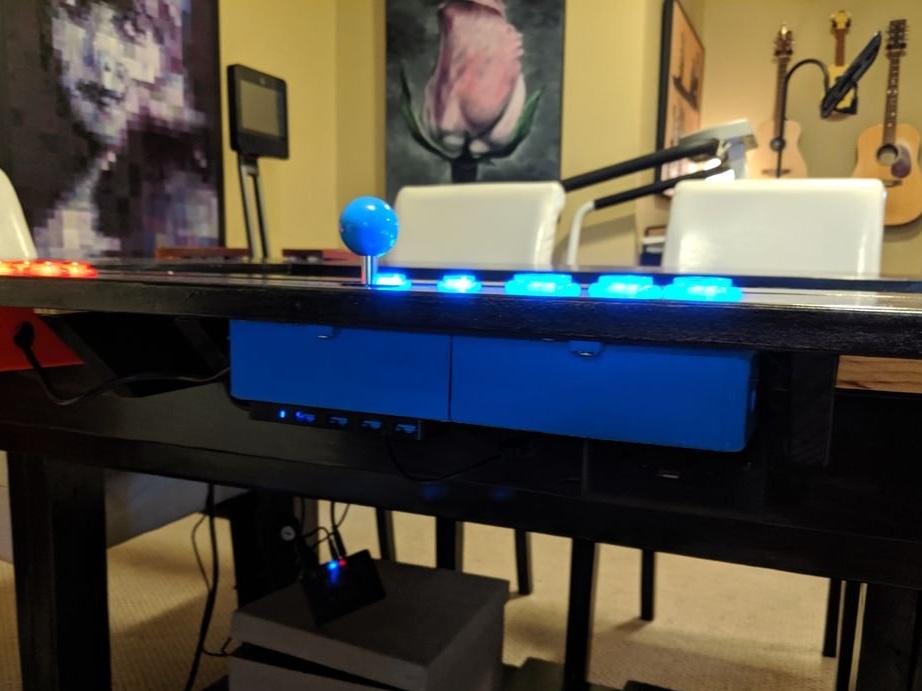
Under the tabletop, it installs power outlets and HDMI and USB.
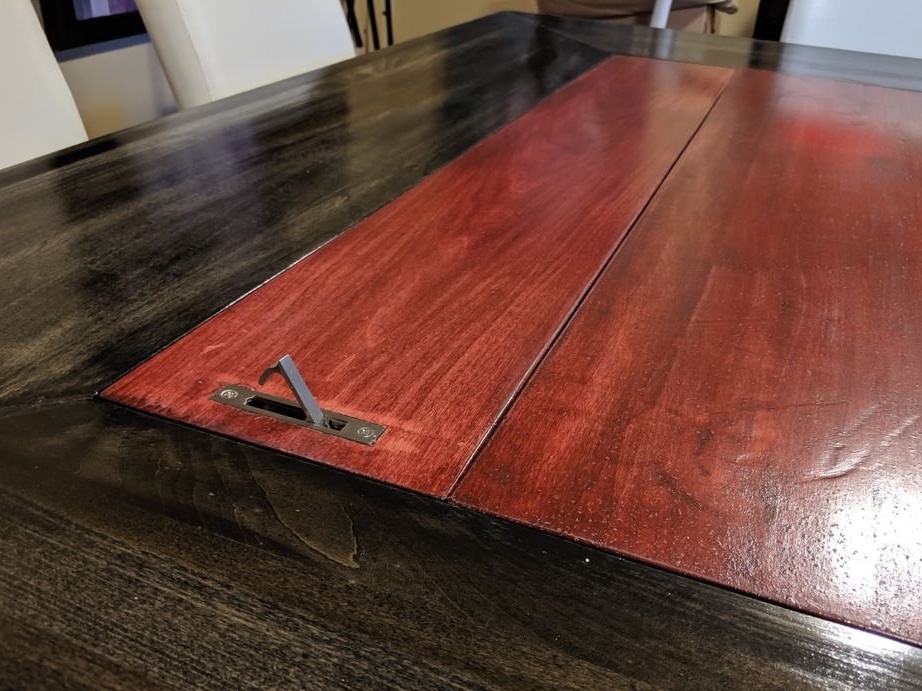
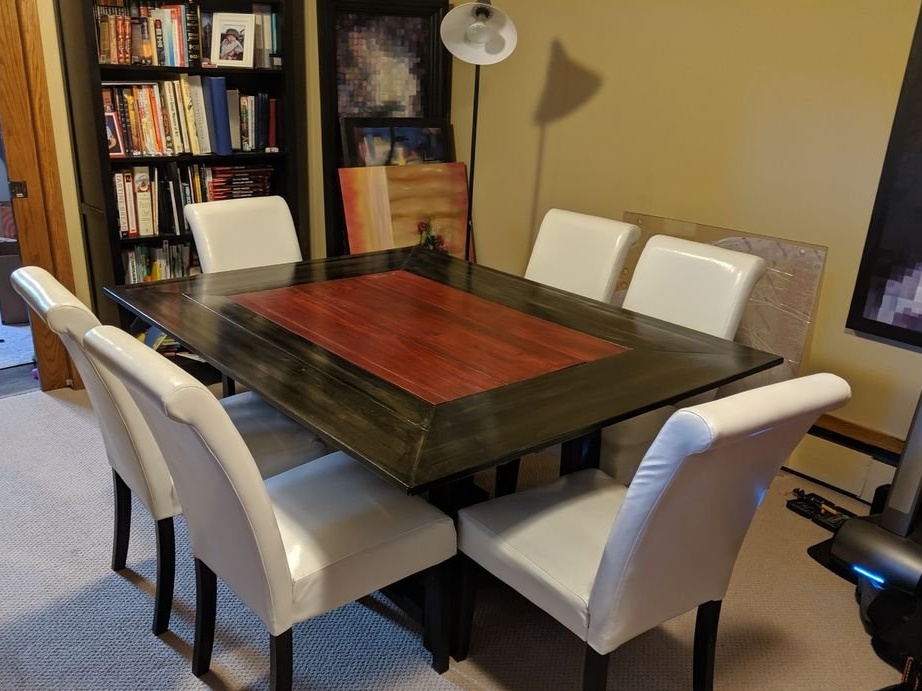
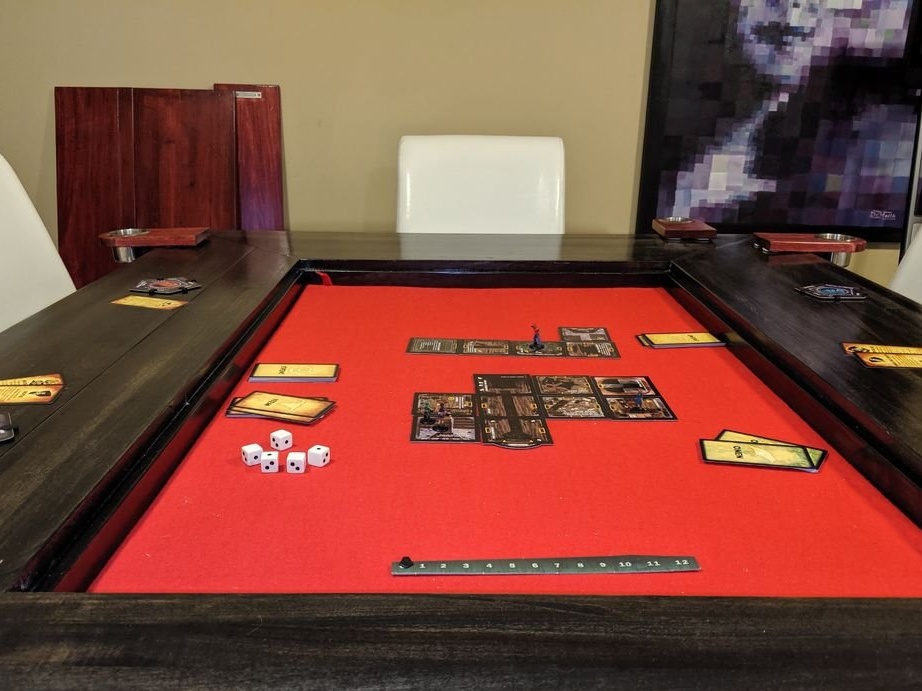
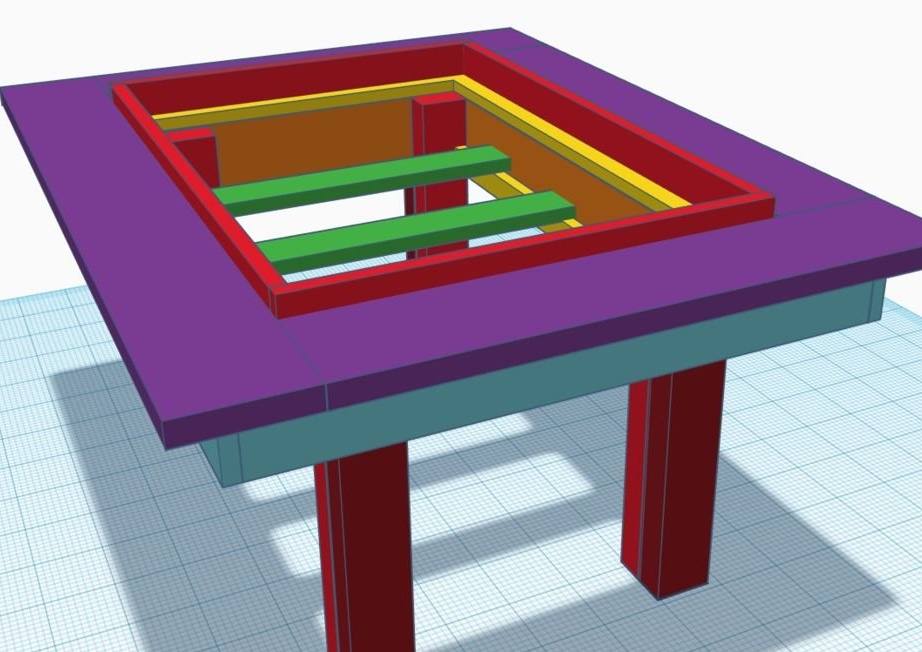
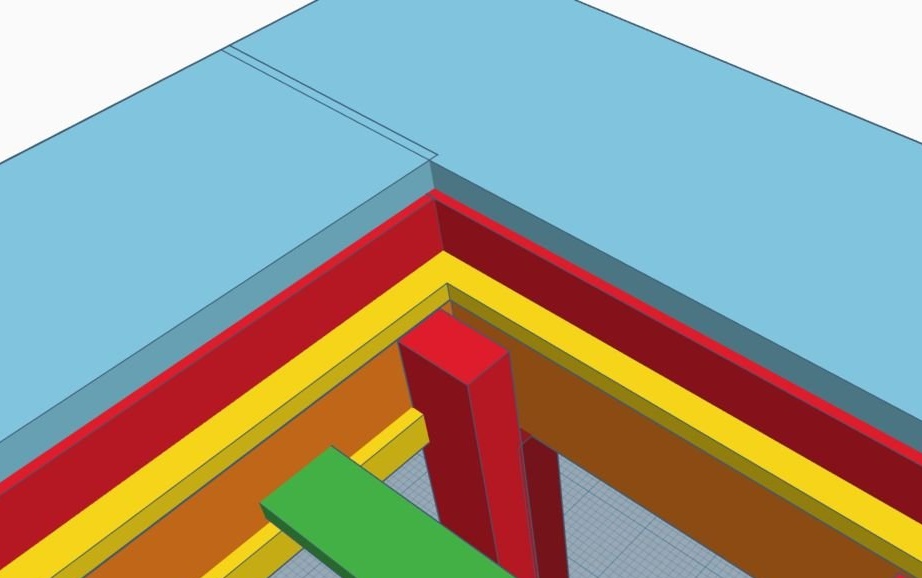
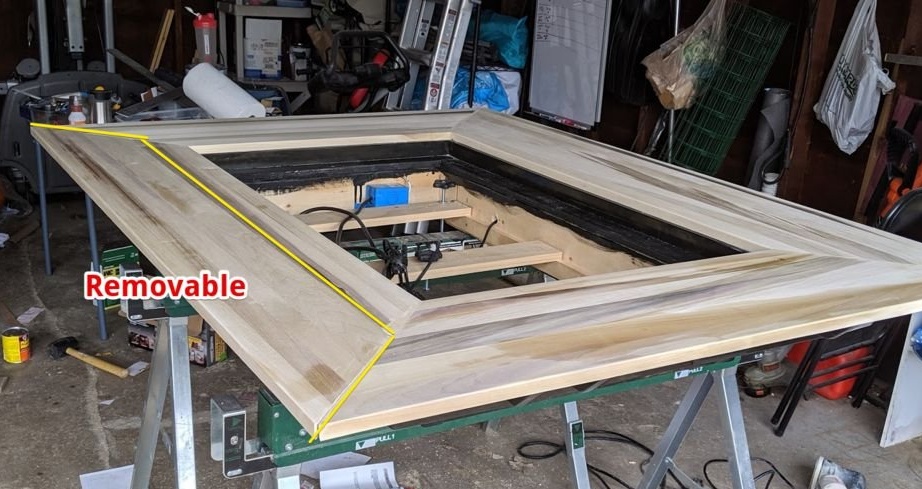
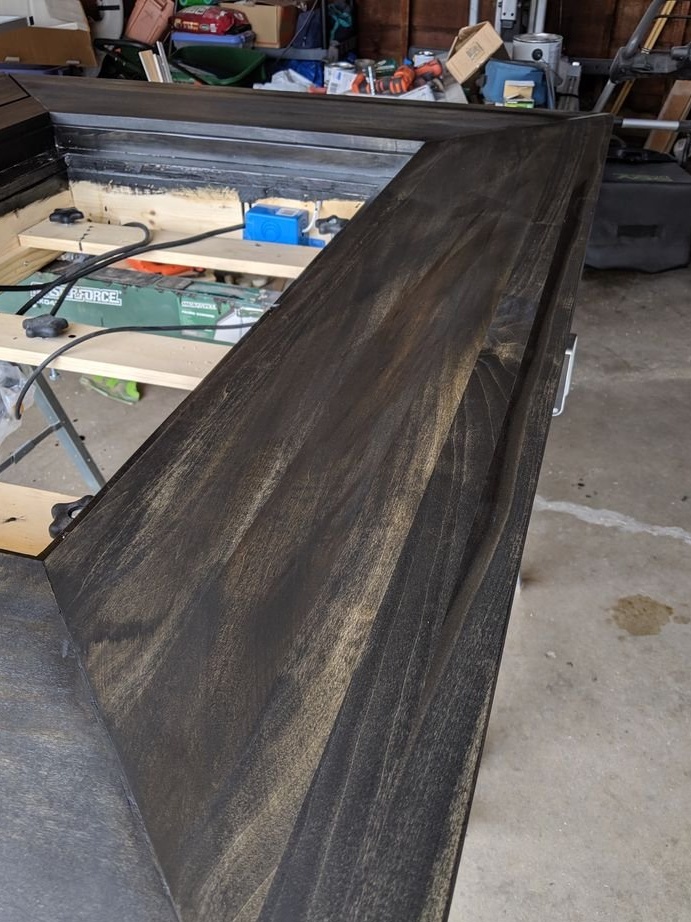
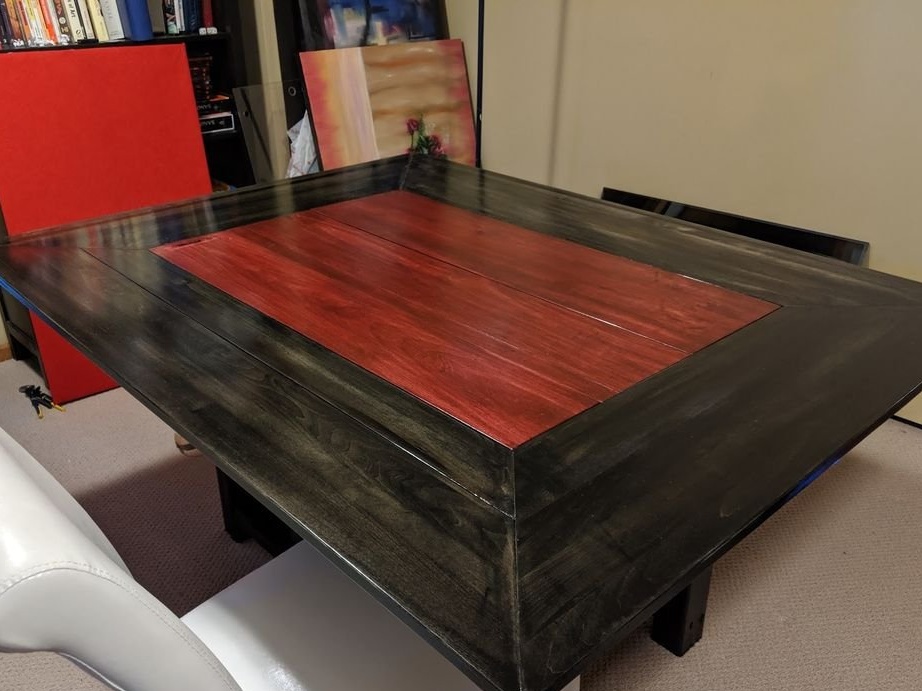
Step Three: Outer Frame and Countertop
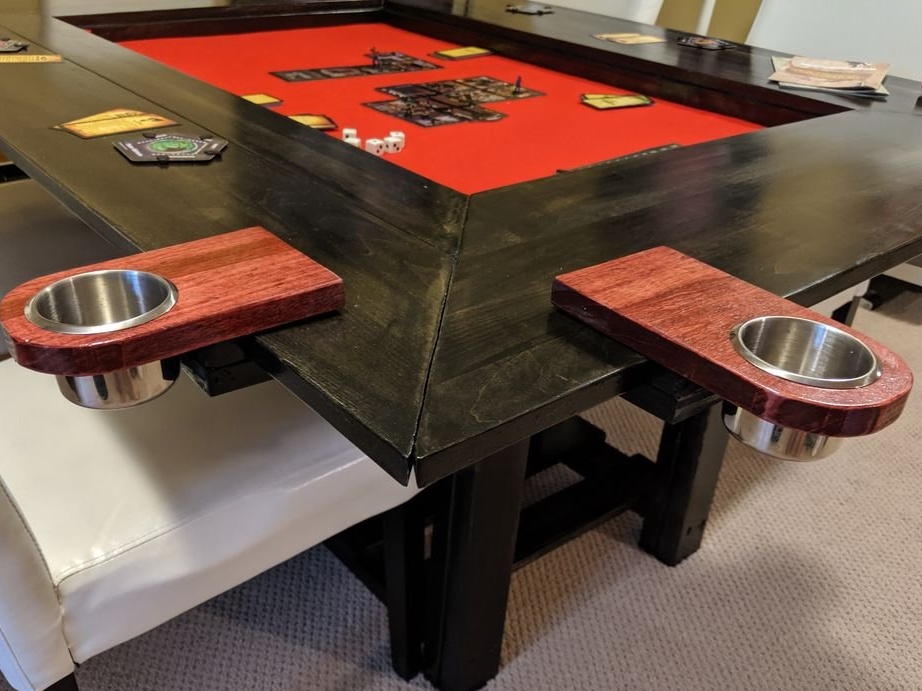
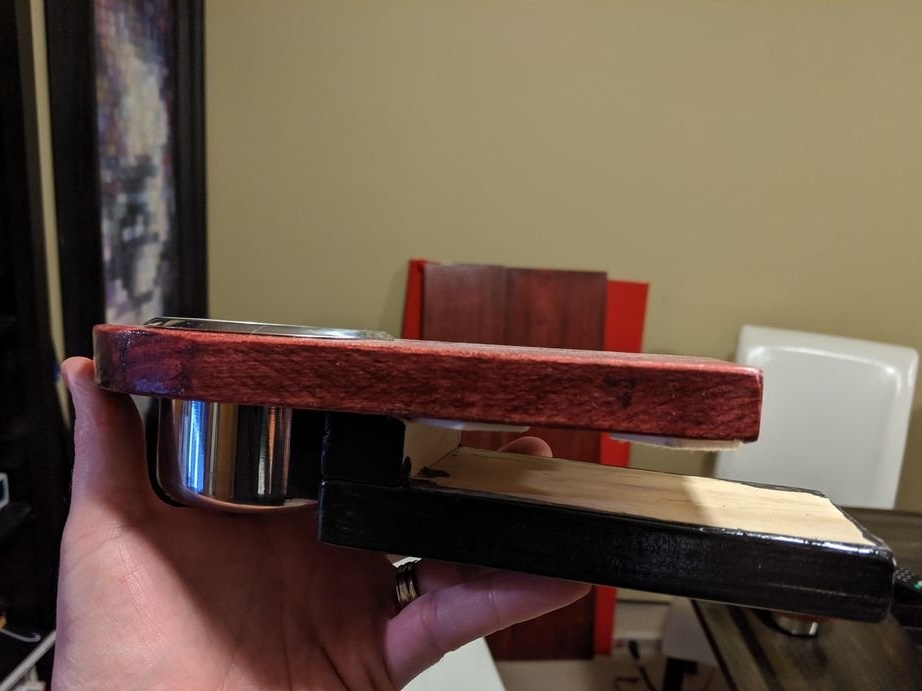
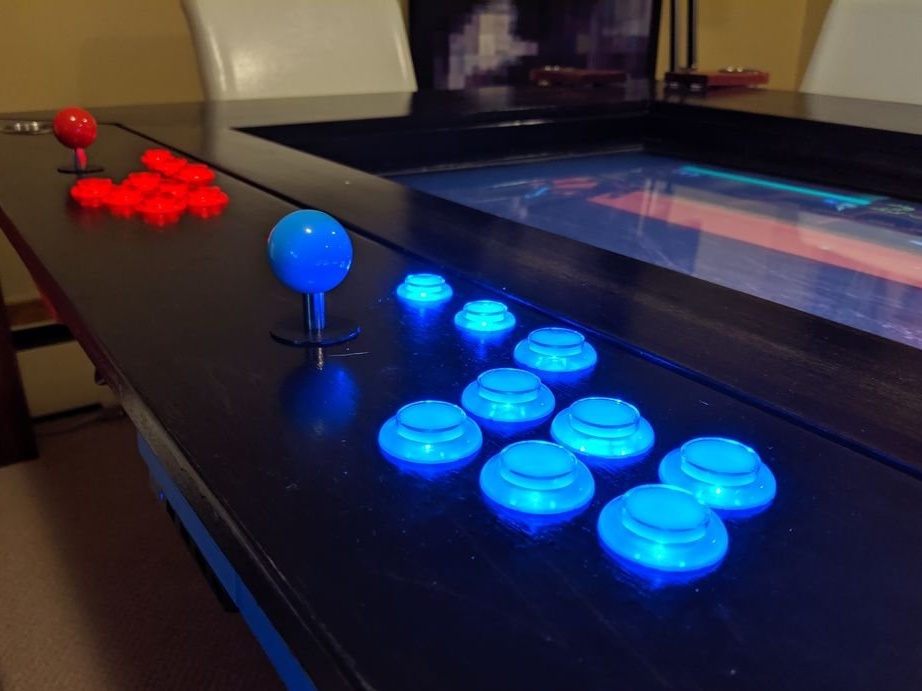
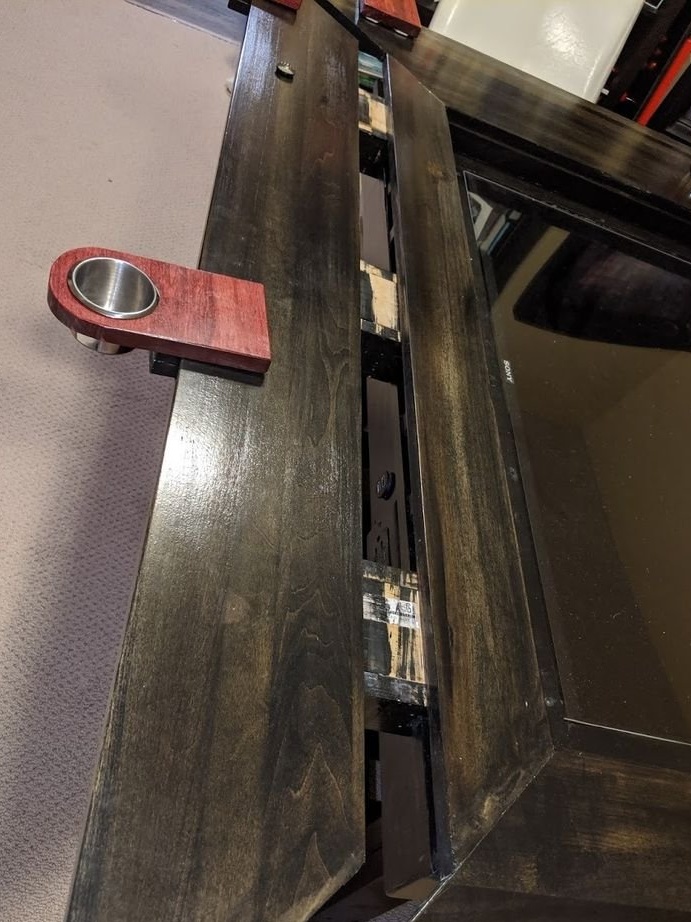
Three sides of the outer frame are attached to the table. The fourth side has two options. When you need a regular table, the inner part is closed with a countertop, and a board identical to other boards of the frame is installed on the fourth side. If you need to play, the countertop is removed, and the usual panel is replaced by a panel with a built-in joystick.
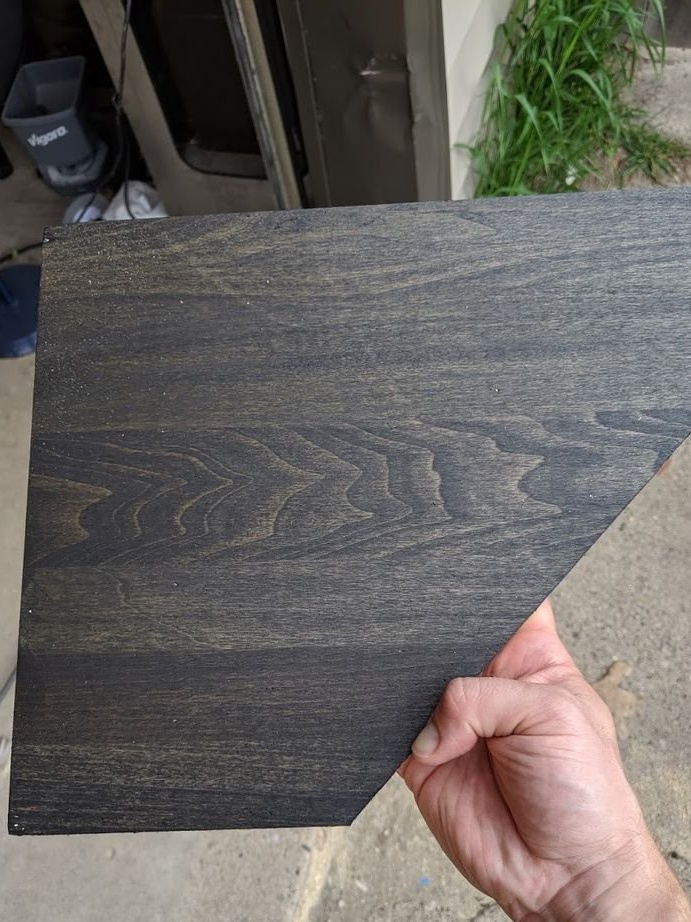
Step Four: Painting
The outer frame is painted black, the countertop is red. After painting, the paint is rubbed with rags to give a worn look.

Step Five: Installing a TV Panel
During installation, the TV panel is aligned using the adjusting bolts with plastic tips.
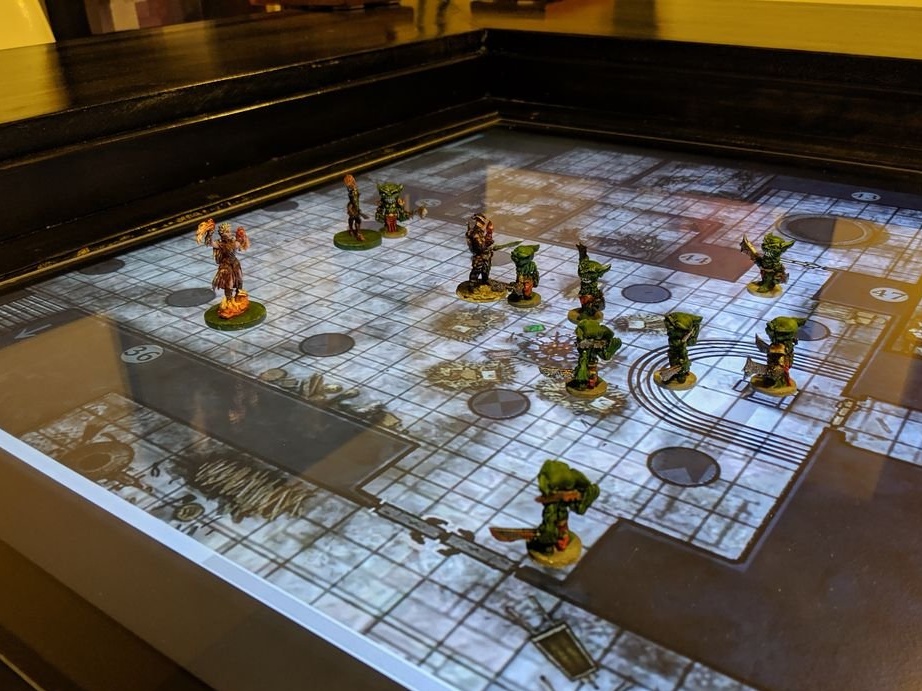
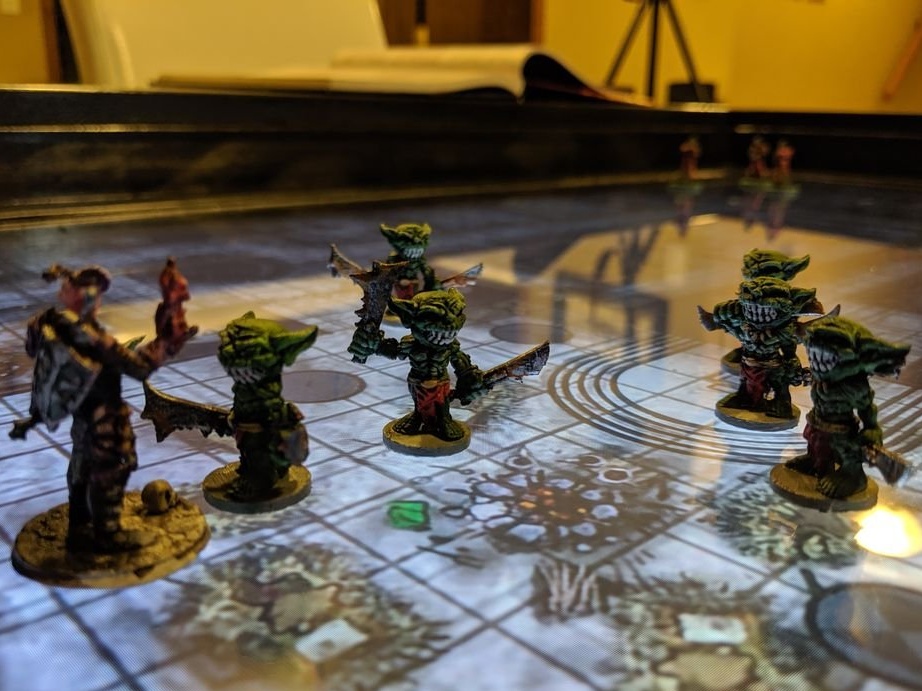
On top of the TV, the master fixes a protective screen made of acrylic.When choosing a TV, you need to pay attention to the viewing angle, not all TVs clearly shows from any angle.

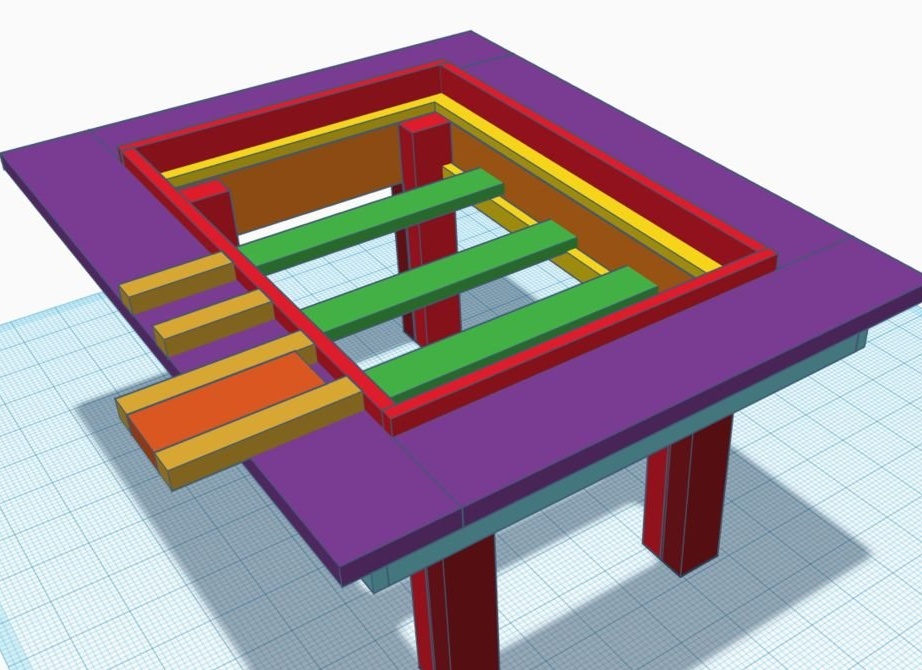
Step Six: the playing surface
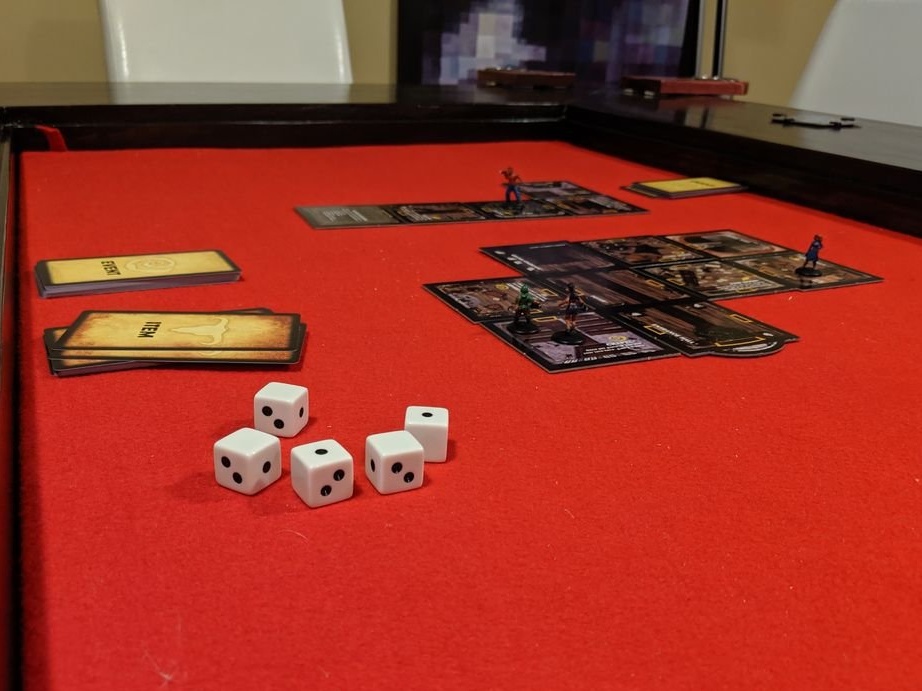
To turn the table into a traditional game room, the master cut MDF to the size of the inside, and pasted it with red felt.
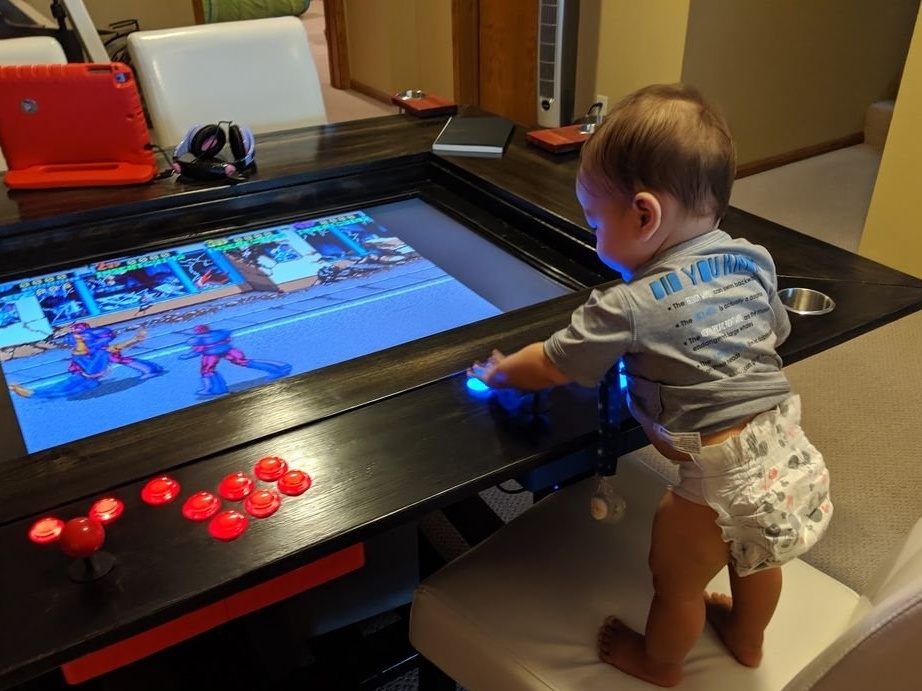
Seventh step: PC
Under the table is a single-board computer running RetroArch. It connects to one of the TV's HDMI ports. Joysticks are connected to the computer via USB.
To close the joysticks, the master printed on the 3D printer of the case.

Step Eight: Final
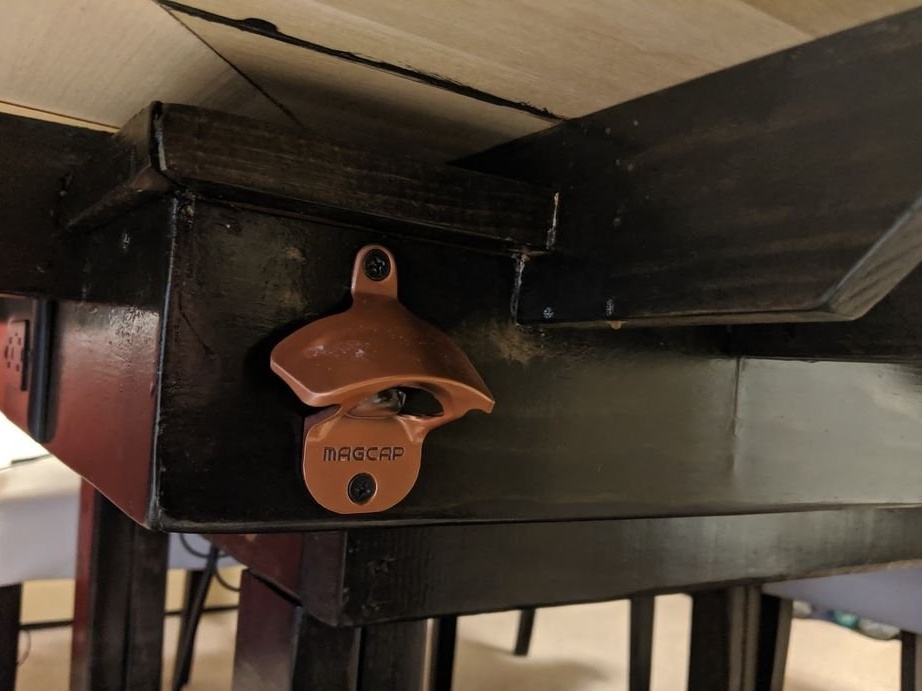
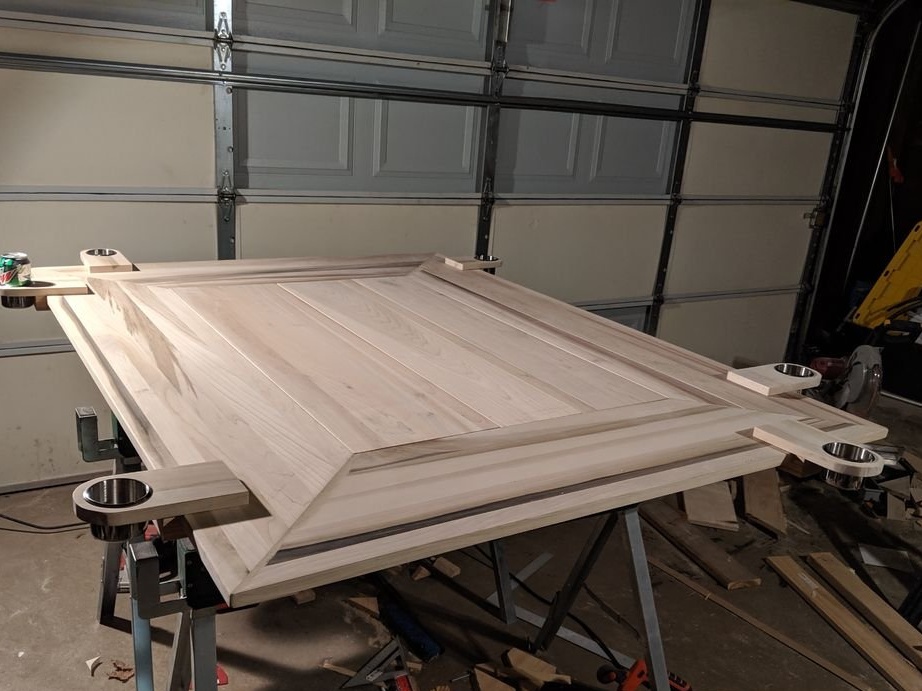
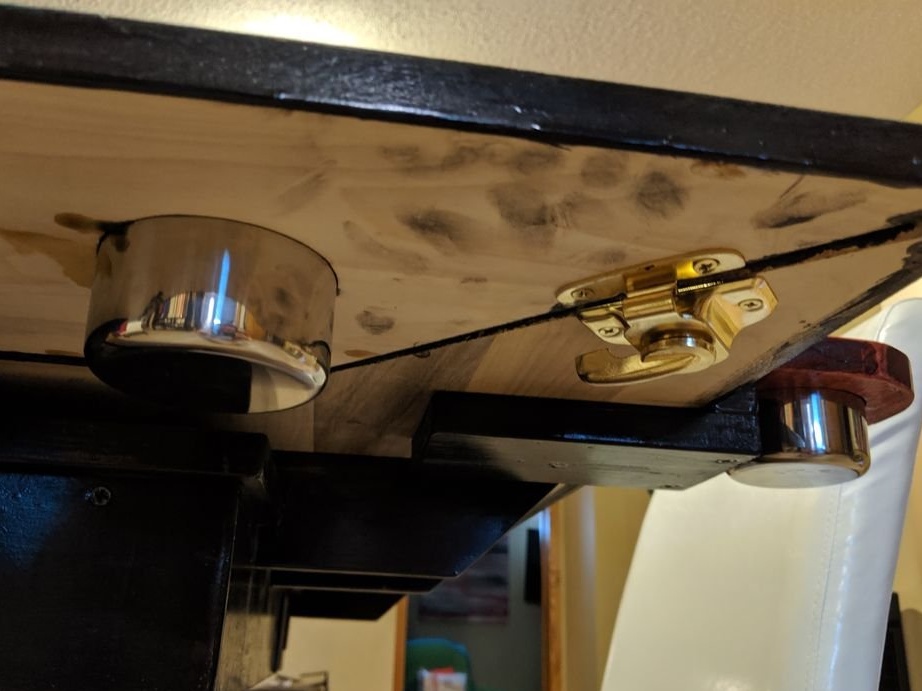
According to the author of this work, the last thing he did out of woodworking was a birdhouse at school. Despite this, he is very pleased with the work done. In addition, the master added bottle holders and secured bottle openers for corks.