
Hello dear readers!
From the article below you will learn how to do it yourself make an air purifier with a filter for the workshop.
The following description and instructions are taken from the Matthias Wandel YouTube channel.
Necessary tools and materials used by the master:
- an electric motor from an exhaust fan with a control unit;
- mallet;
- grinder;
- emery with grinding wheel;
- square;
- wooden beam;
- plywood sheet with a thickness of 10 mm and a size of 75x75 mm;
- pantorouter;
- PVA carpentry glue;
- sandpaper;
- cutting knife;
- clamps;
- self-tapping screws;
- screwdriver;
- screwdriver;
- drill stand;
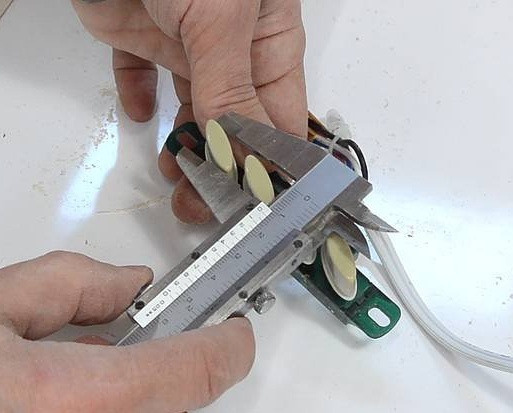
- caliper;
- Forstner drill 12 mm;
- rasp;
- a capacitor with a capacity of 3 microfarads;
- compass;
- stationary jigsaw;
- bicycle camera;
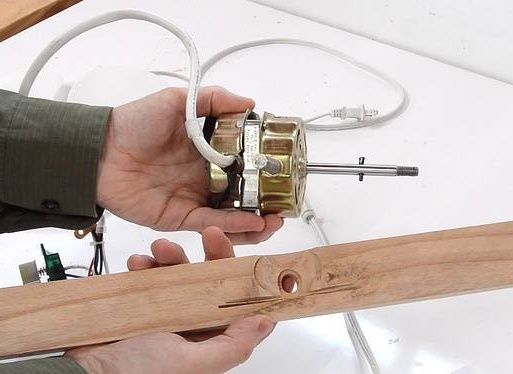
Several years ago, the master experimented with creating a mount for a fan exhaust motor, mounted the engine on the same rack that is welded onto the body. He cut a thread in a strut that protrudes from the engine housing, and then used a nut to secure it to a wooden bracket.
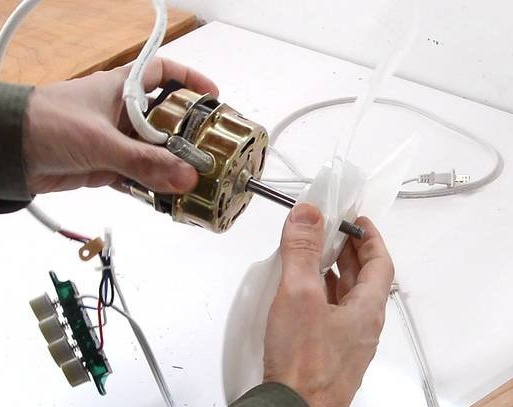
On the exhaust fan, the blade is at a considerable distance from the engine. But the master did not want to make the box too deep, so he decided to move the blades closer. The fan rotor is attached only to the shaft with a press fit, therefore, by removing the rotor and hitting one end of the shaft, the master was able to move it a little back.
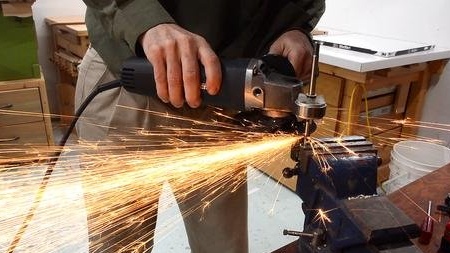
Then he cut off an unnecessary piece of shaft from the other end with an angle grinder.
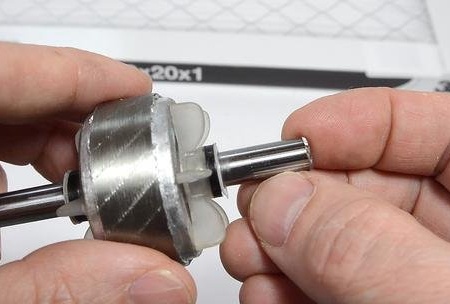
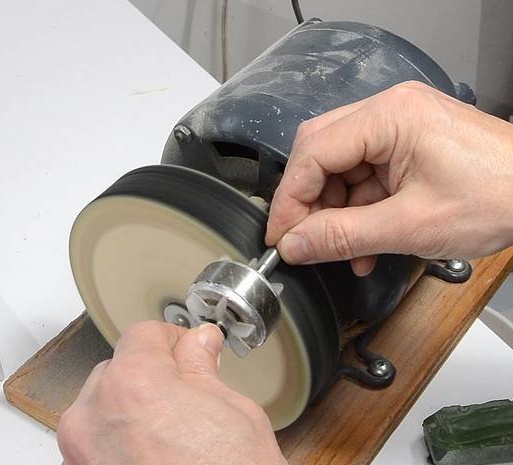
The master found that several lines were drawn on the shaft where the rotor was located, probably to provide better grip. He polished them on a grinding wheel.
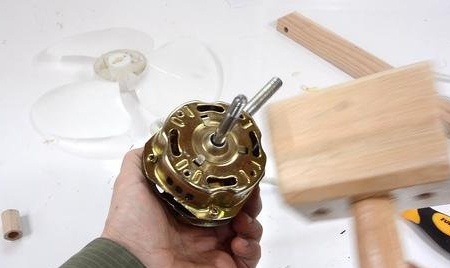
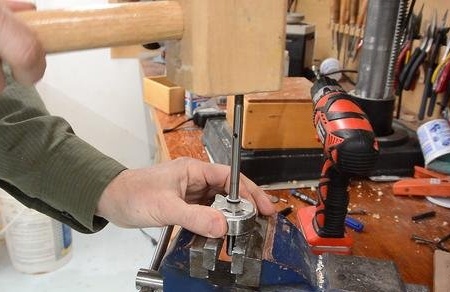
When reassembling this engine, even when using fresh oil, it is often difficult to crank it. Self-aligning bearings are not so easy to align. But tapping the engine with a hammer in several places is often enough to move the bearings to the desired position.
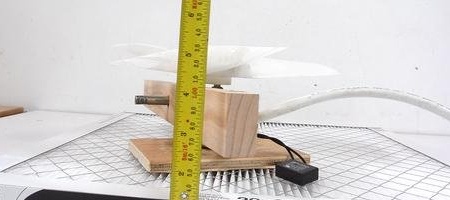
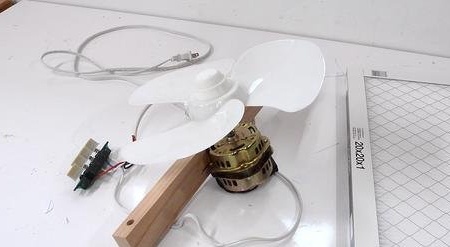
By installing the fan motor and the blade on the filter (with a distance spacer), the master determined that the total required thickness is only 15 cm.
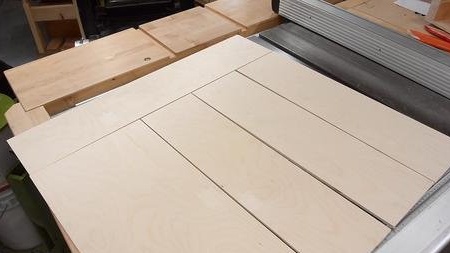
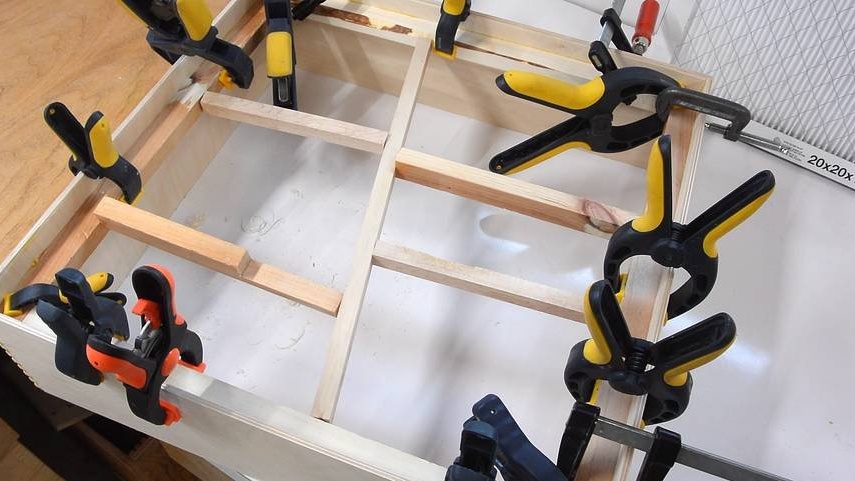
The master cut parts from a sheet of Baltic birch plywood measuring 75x75 cm, cutting off one strip from the end before cutting out the remaining three stripes of the same size.
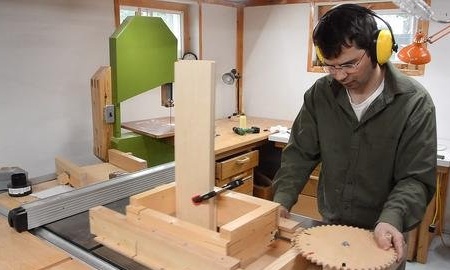
Then the master cut out 6 mm spikes at the edges of the parts using a pantorouter.
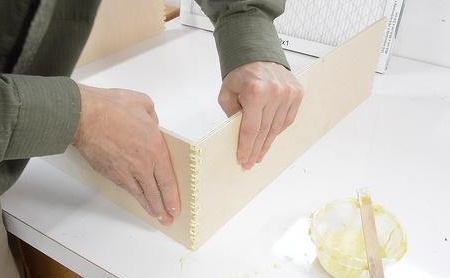
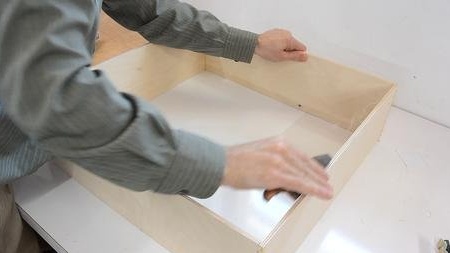
And glued the box.
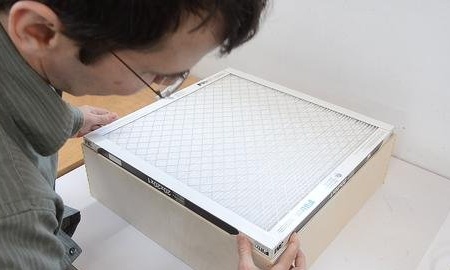
The master glued the box too tightly. In fact, the filter turned out to be 1-2 mm larger than the opening of the box.
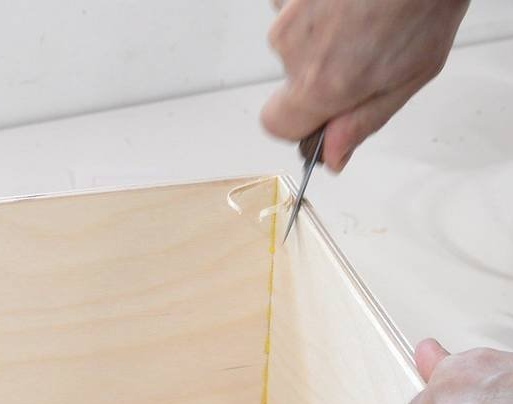
Therefore, the master polished the edges of the box with sandpaper and rounded them in the corners with a cutting knife.
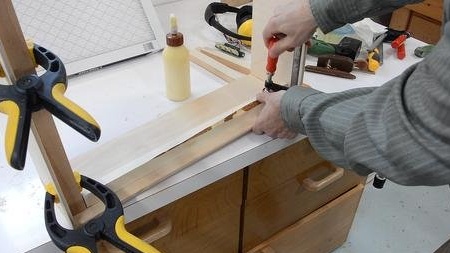
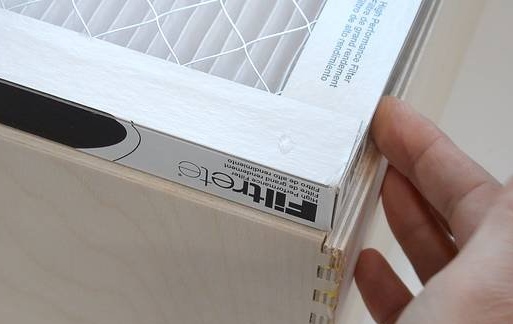
Then you need to glue a wooden strip at the edges to fix the depth of the filter.
The sides of the box tilt slightly inward, so insert the filter inward did not work. So until the glue has dried, the master set up the spacers so that after drying the glue retains some of this shape.
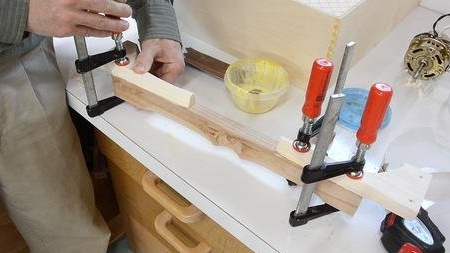
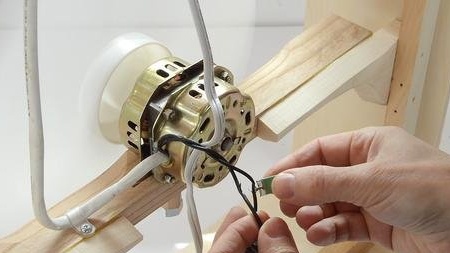
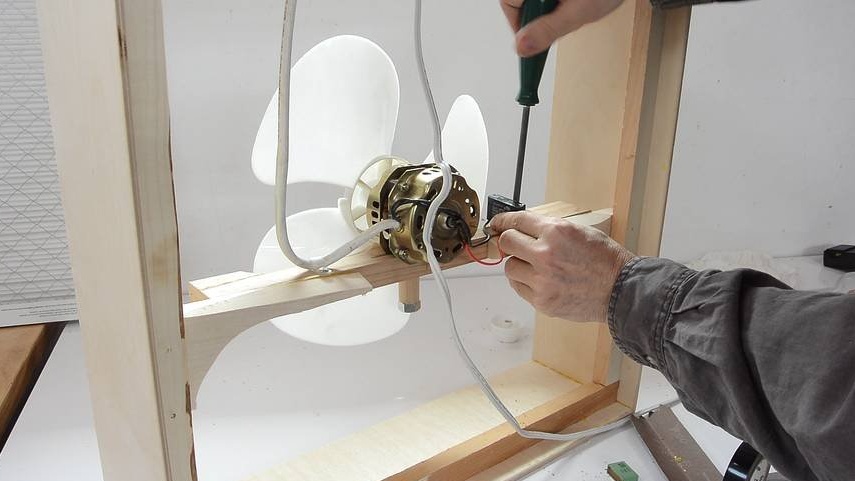
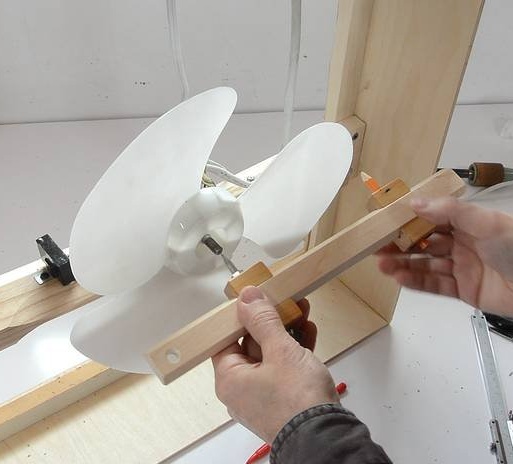
The bar for mounting the motor was too short, so the master increased the bar with the help of additional bars at the ends.

After the glue has dried, the master measured the place to place the engine, and then marked the places where the screws would be screwed.

Then holes were drilled.

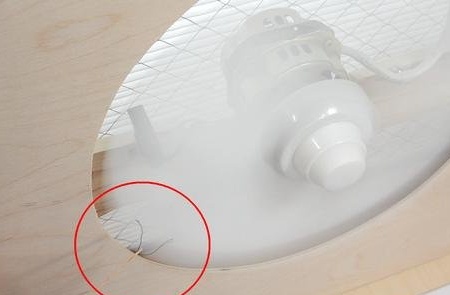
The fan buttons can fit in a groove about 12 mm wide. The first thought of the master was to make this groove on the pantorotor.
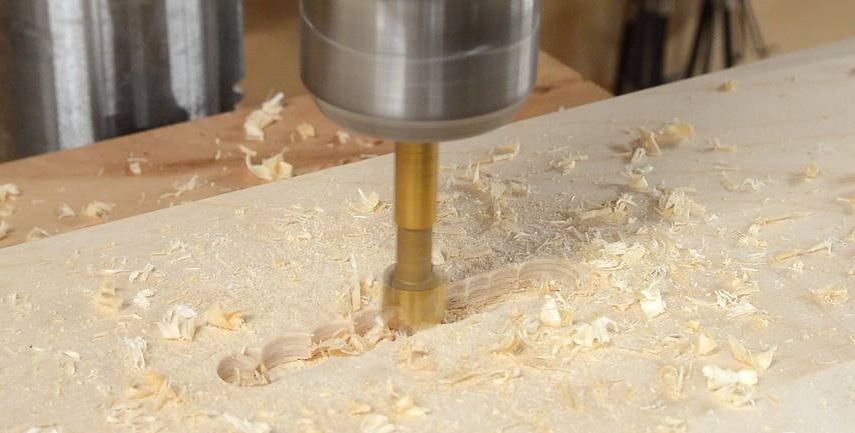
But instead, he drilled a hole with a Forstner drill.
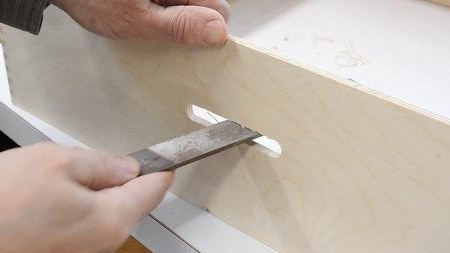
Then the master removed the scuffs from the sides of the slit with a rasp.
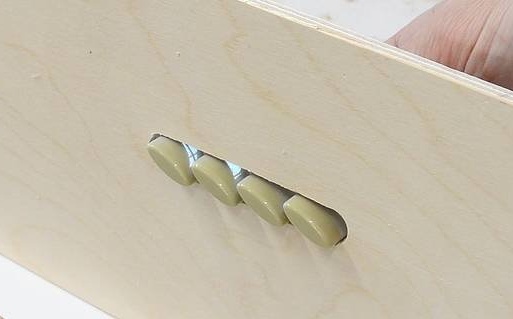
Buttons sat well, but did not want them to bulge strongly on the side.
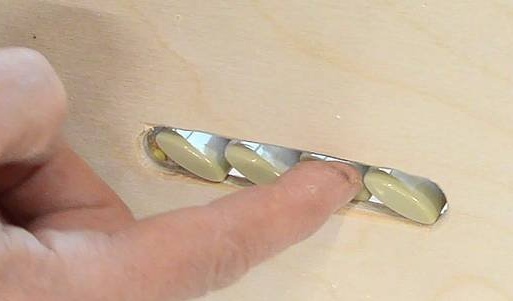
Therefore, the master glued the wooden blocks inside to raise the button block a little higher so that they were flush with the plywood box on the outside.
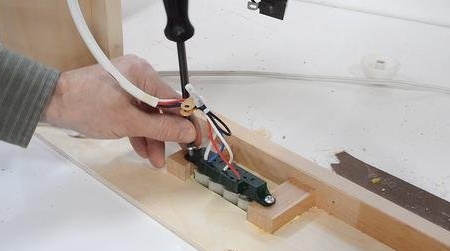
The master suspected that connecting a 0.47 uF capacitor in parallel with the working capacitor of the engine would make the engine run faster.
Fortunately, he had another starting capacitor, working in conjunction with the engine. It was a 3 microfarad capacitor, while the motor came with a 2 microfarad capacitor. With a capacitor of 3 microfarads, it was much better than with the one with which the engine was equipped.
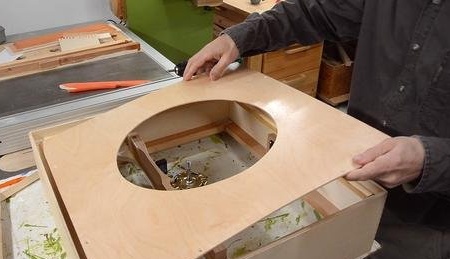
The master needed a front panel around the fan blades to make sure that all the air passed through the filter, and not just passed through it in front.
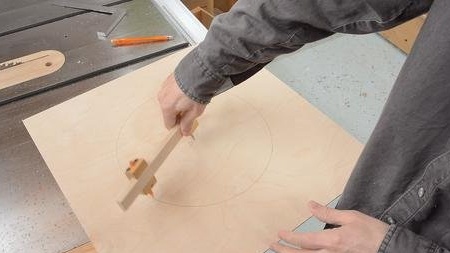
The master opened the compass a little wider than the radius of the fan and drew a circle on the plywood.
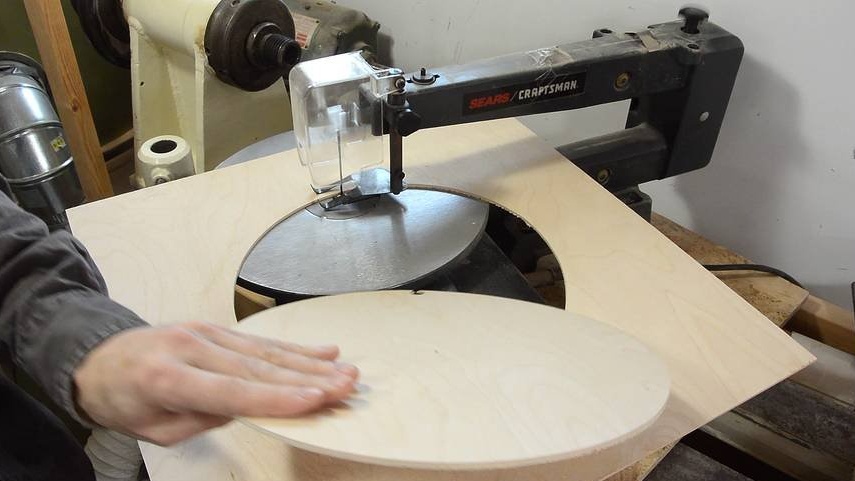
Then he cut out this circle with a stationary jigsaw.
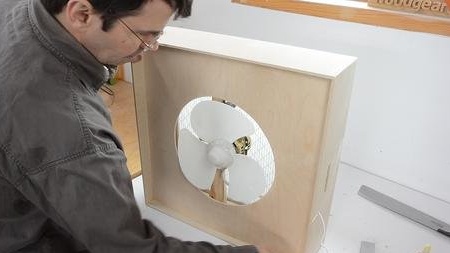
Installing the front panel in the fan tray.
The best place to install a panel, or partition, is above the fan blades (slightly behind them), because centrifugal force ejects some of the air from the fan to the side.
But checking the air flow with a piece of wire attached to the stick, the master found that the fan draws air from the side, especially if there is any resistance behind it from the filter. Thus, if you install a partition just below the fan, then the air drawn in from the side will also come from the filter.
With the partition where the master installed it, near the edges of the fan, there was still some air.
You can also make the air cleaner by simply attaching the filter to the back of the fan box, and since the fan boxes do not have internal baffles to stop the return air flow. Thus, this means that if the filter provides any resistance to air flow, then most of the air drawn in from the front of the fan box is actually air drawn in from the front. Therefore, the creation of such a fan is a more elegant solution.
As soon as it was established how far back the front panel should be recessed, the master immediately installed wooden blocks on the edges on which the front panel rests. Then, screws were screwed into them.
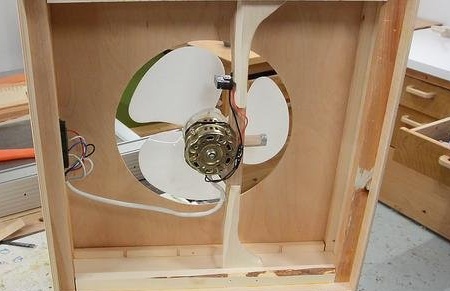
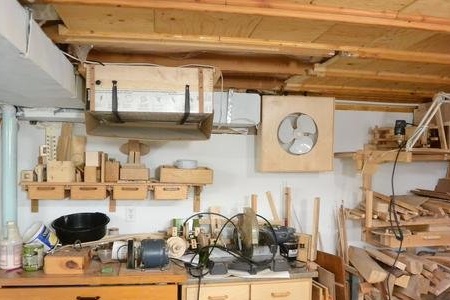
The inside of the box has nothing but an engine.

The master made two wooden blocks with hooks at the ends. They are connected by scraps of a bicycle chamber. One block is screwed to the ceiling, the other to the top of the fan duct. This provides a slight vibration isolation. This is not necessary, but it is not difficult to add to the design.
And now the air purifier is installed on the ventilation duct. To his left is an old air purifier. The wizard added a switch next to his desk to turn on both fans at the same time. By turning on both devices, they can remove half the dust from the air in the workshop every three minutes.
If you like homemade author, then try to repeat and make.
Thank you for attention.
See you soon!