

Hi friends. In a past boron machine project, I smelted aluminum from a friend of mine. He made a small gas furnace from refractory bricks and uses it for forging. So I decided to make myself a furnace for melting non-ferrous metals. And we will start with the manufacture of a gas injection burner. On the Internet there are many different drawings for its manufacture. I had to study this whole thing and choose, in my opinion, the optimal design.
Let's talk a little about how it works. There is a certain tube of clever form. On the one hand, gas flows through the nozzle. But just gas without air does not burn as we need. The burner sucks in air itself due to ejection. This is the process of mixing any two media, in our case, air and gas, in which one medium, that is, gas, being under pressure, affects the air and carries it into the mixer tube. In the place of air intake, a vacuum is created and the air itself goes where it is needed. Mixing takes place in the burner body, and the combustible mixture leaves it under pressure and creates the required temperature. Everything is simple.
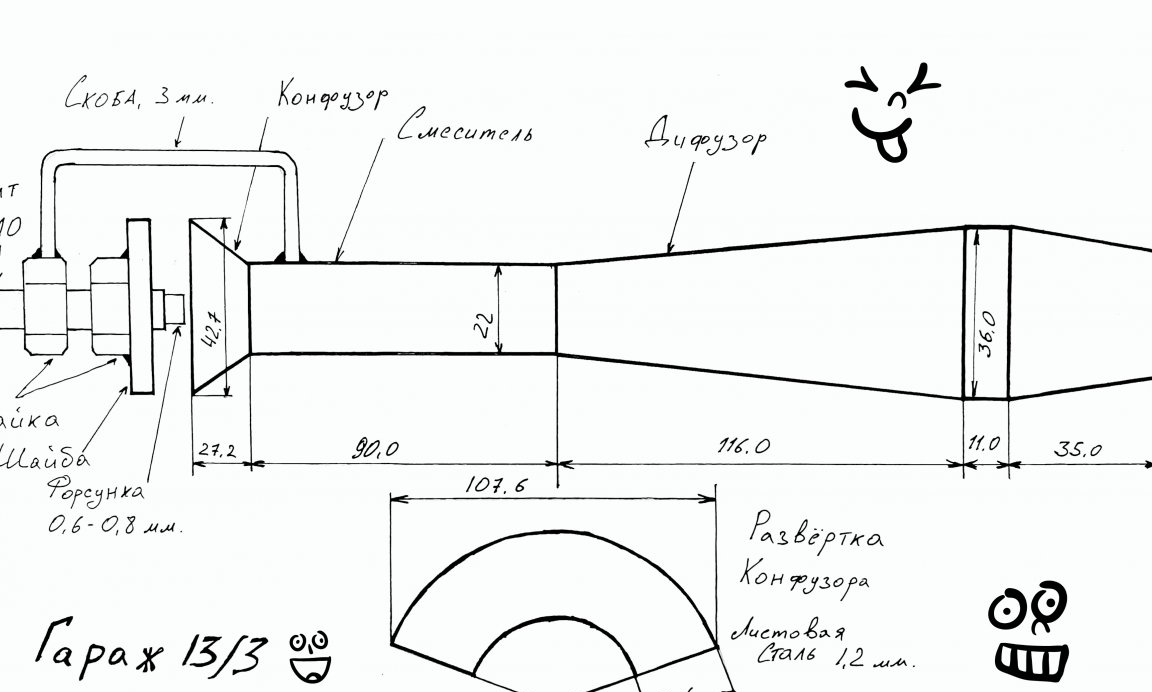
In this burner, the dimensions are selected for the use of water pipes.
Stage 1: Diffuser.
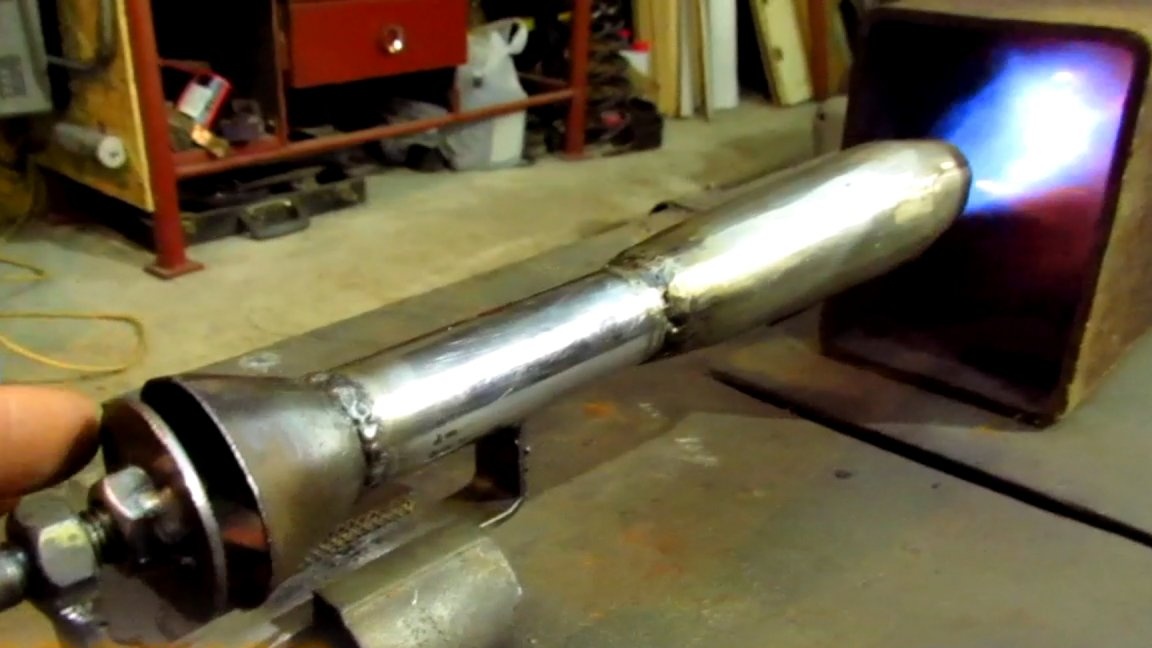
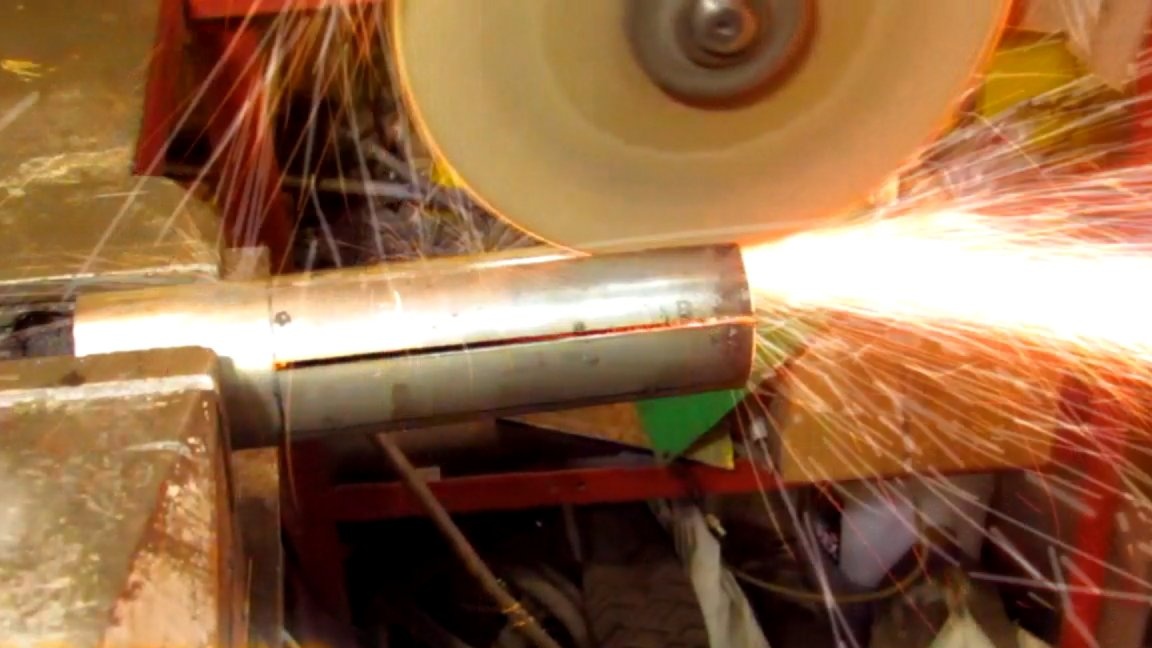
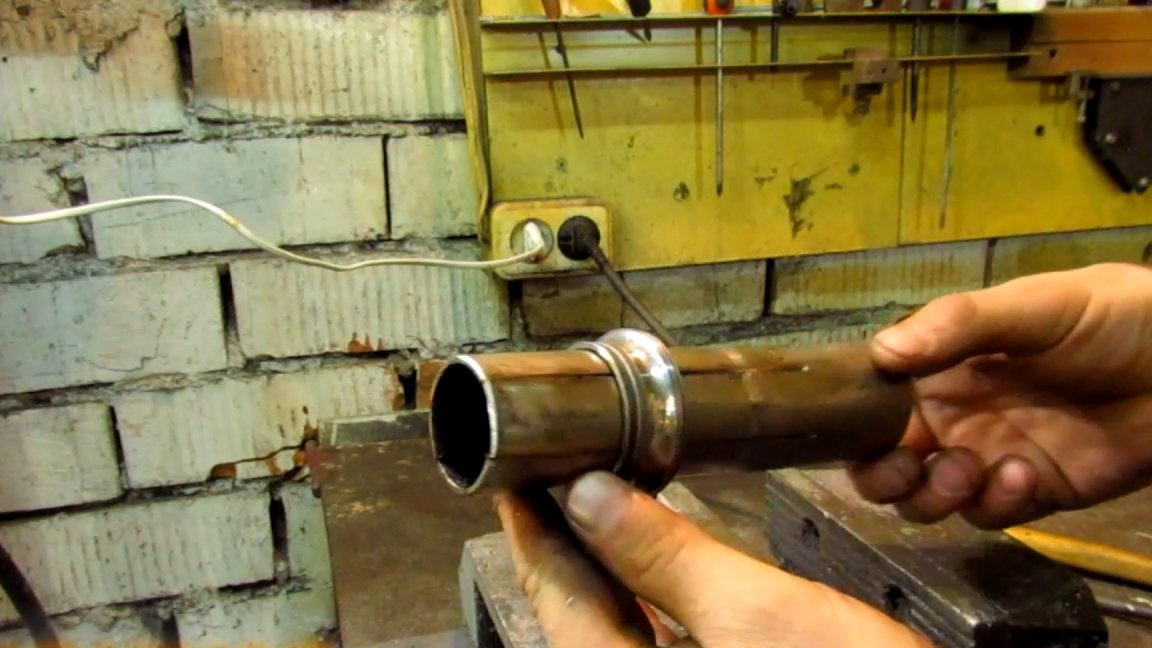
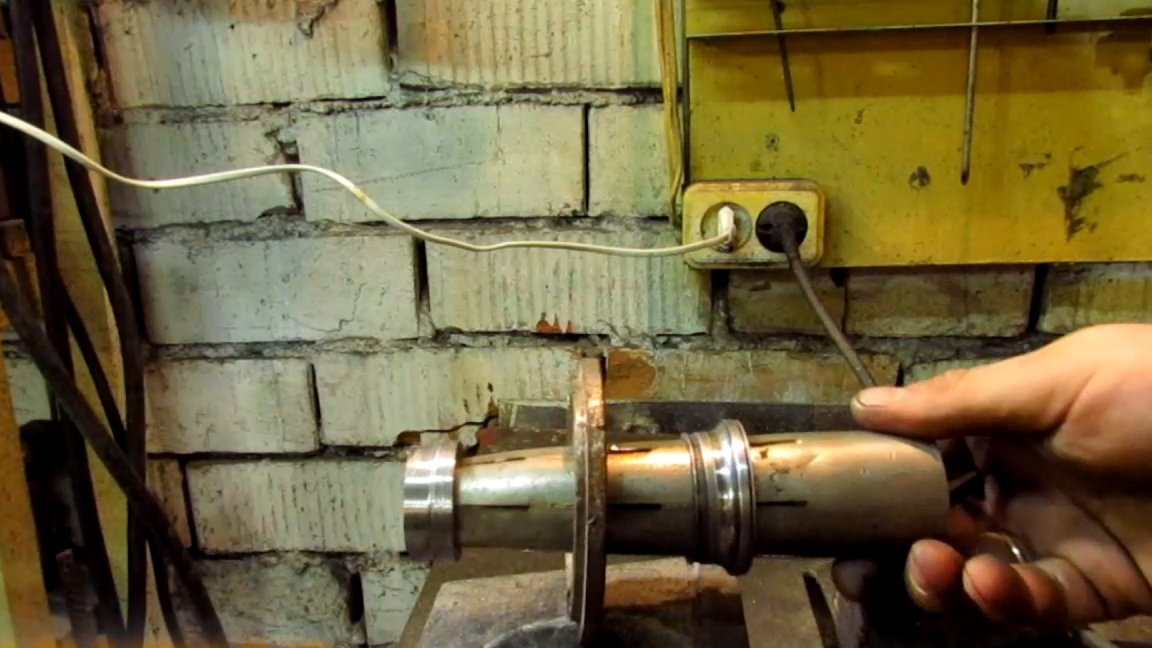
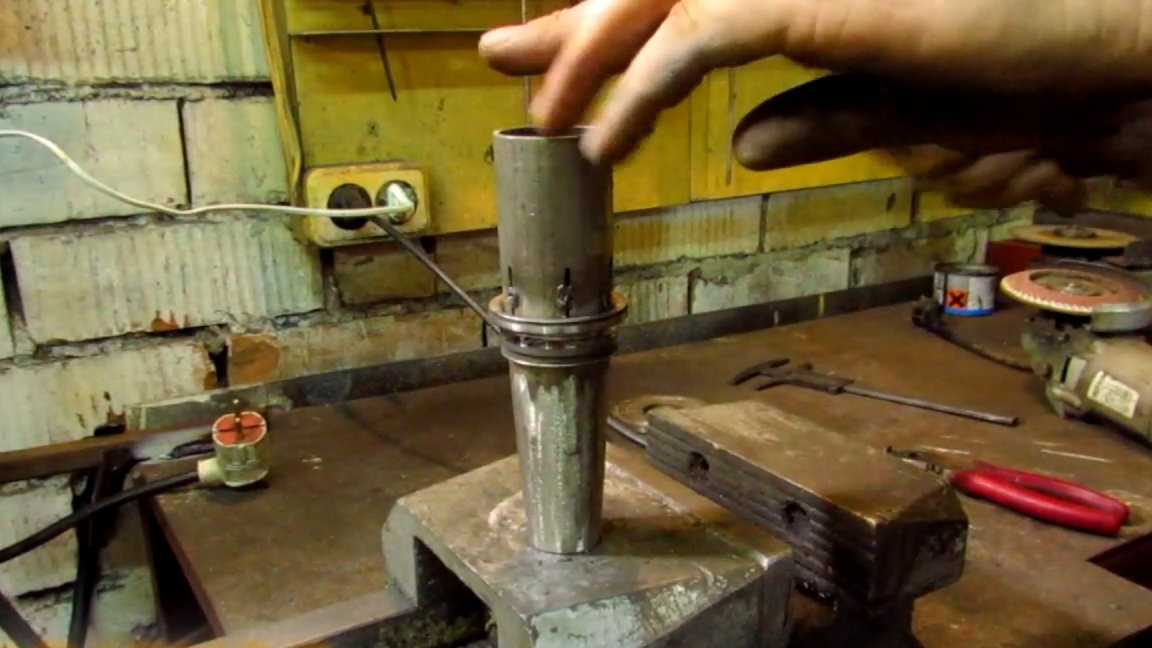
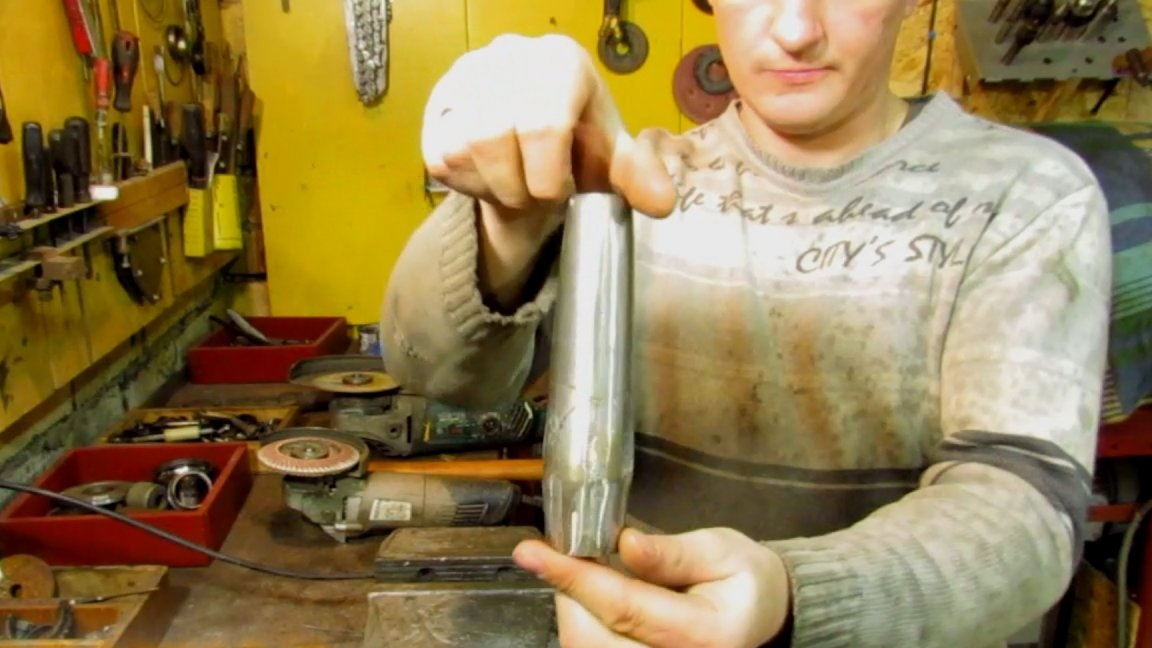
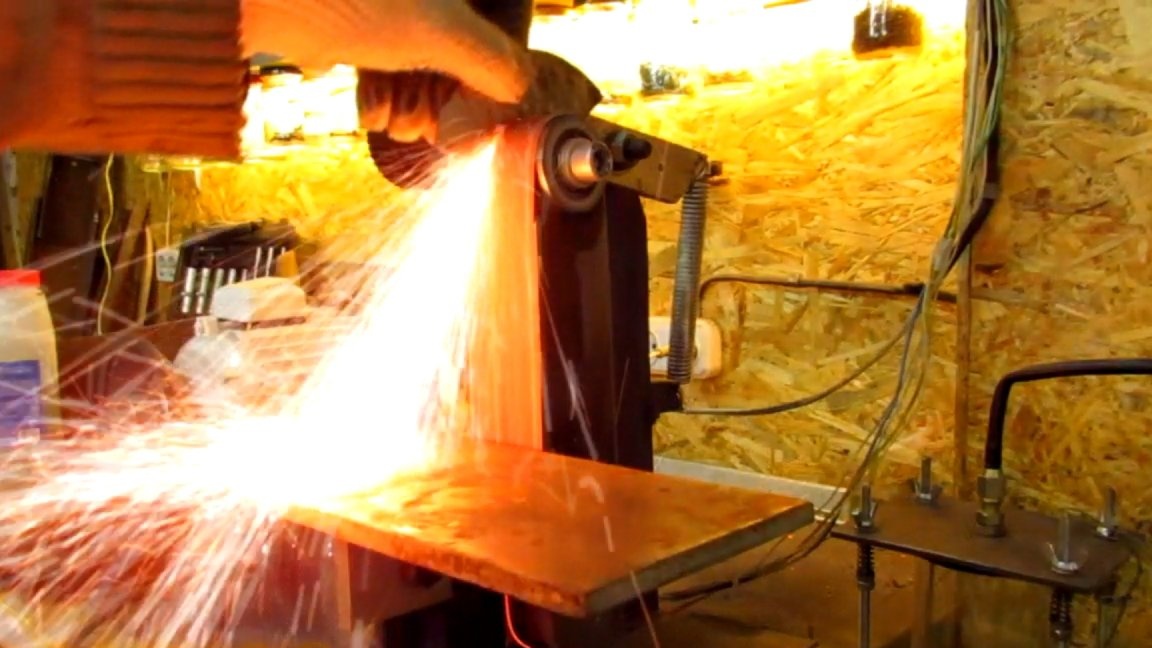
Let's start with the manufacture of the diffuser. I had in my possession a piece of pipe of suitable diameter from a stainless steel from a silencer. To give the necessary shape, you need to make cuts with a grinder along the tube to the specified length. Then I picked up the cage from the bearing and stuffed it on the tube. After removal, I once again cut through the grinder. Did this until the desired diameter was formed. On the other hand, the same thing needs to be done. It remains to brew cuts and treat with a petal circle until a smooth surface is formed. If there are pores and lack of fusion, brew and clean. It is also necessary to remove the burrs inside the part with a round or semicircular file. Everything, the diffuser is ready.
Stage 2: Mixer and confuser.
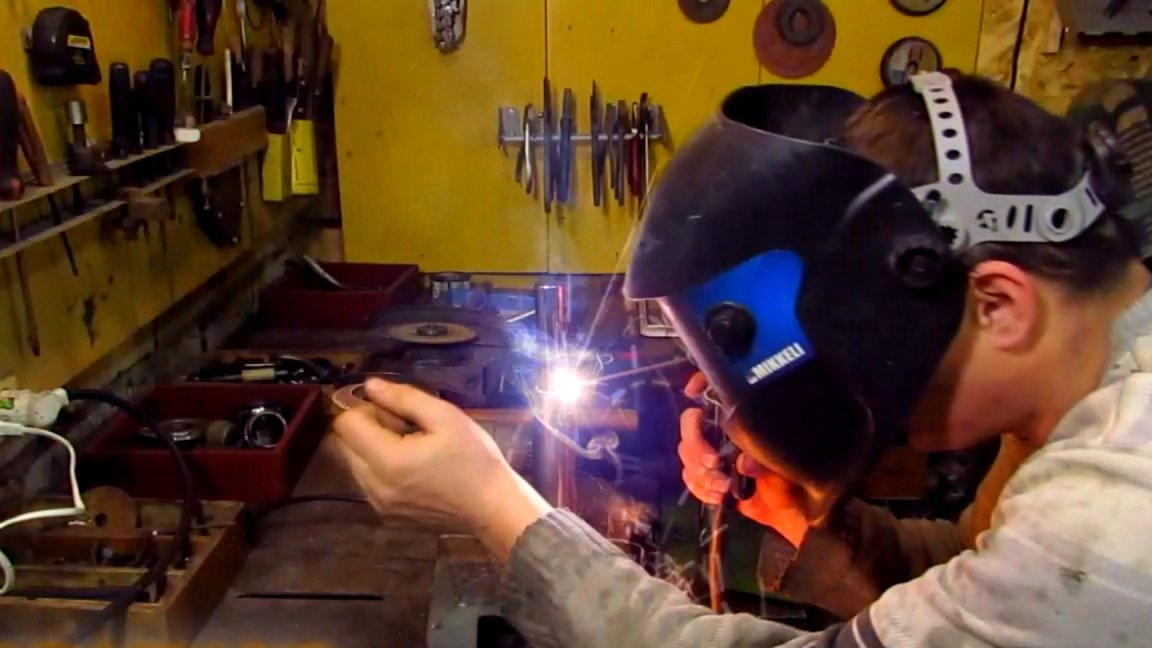
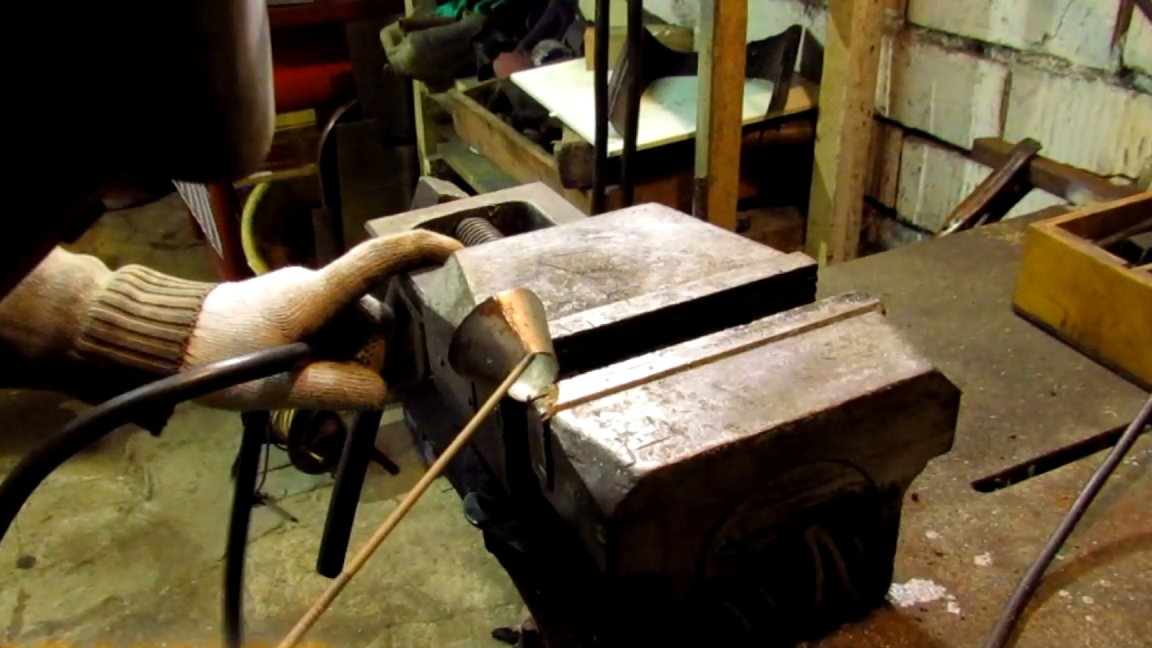
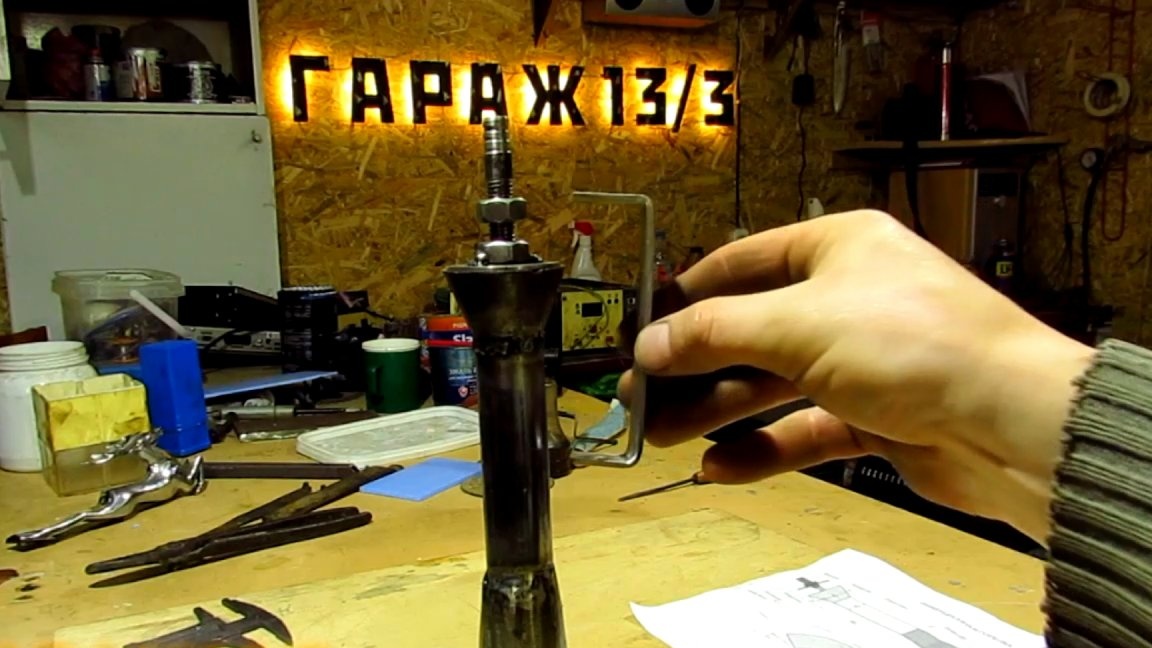
The next part is the mixer. This is a simple 90 mm long tube. Diameter 22 mm. I had a chrome pipe in stock of furniture. You can use the water twenty. It is welded to the diffuser. Everything is simple here. Now you need to weld the confuser to this tube. This is the name of the cone through which air enters, and through the gap between the cone and the washer, the incoming air will be adjusted. The drawing has a scan. All necessary sizes are indicated there. I cut from a sheet 1.2 mm thick. He bent it, boiled the seam and welded it to the mixer. Here you need to make a plane from the end. An adjusting washer will adjoin it.
Stage 3: Gas and Air Supply Unit.
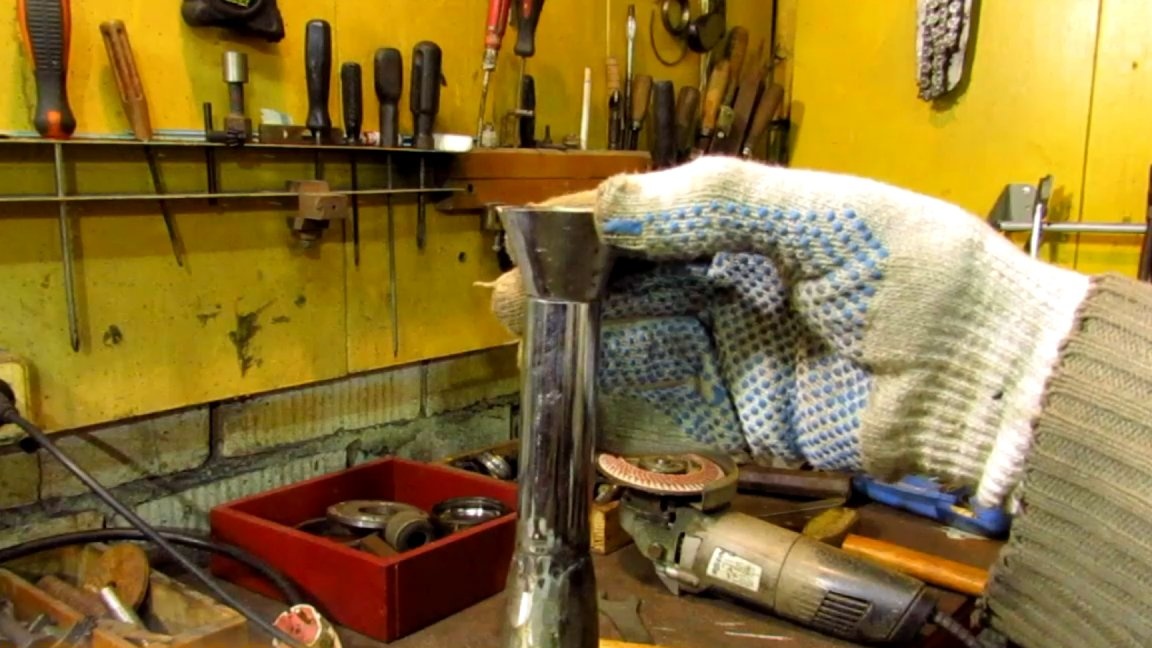
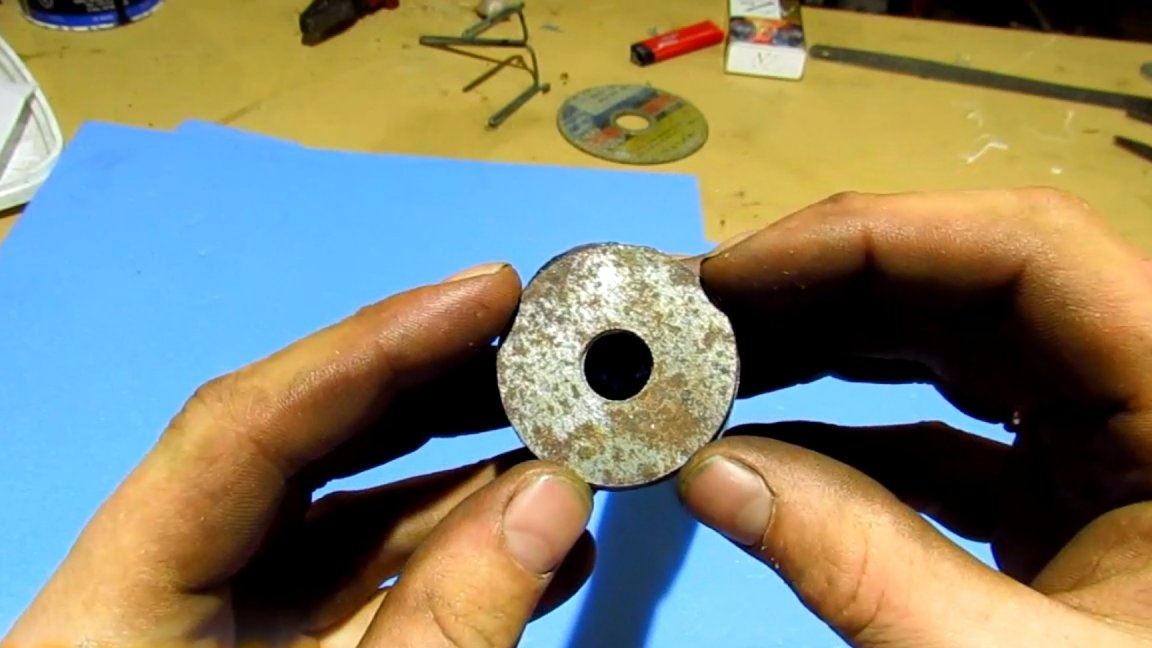
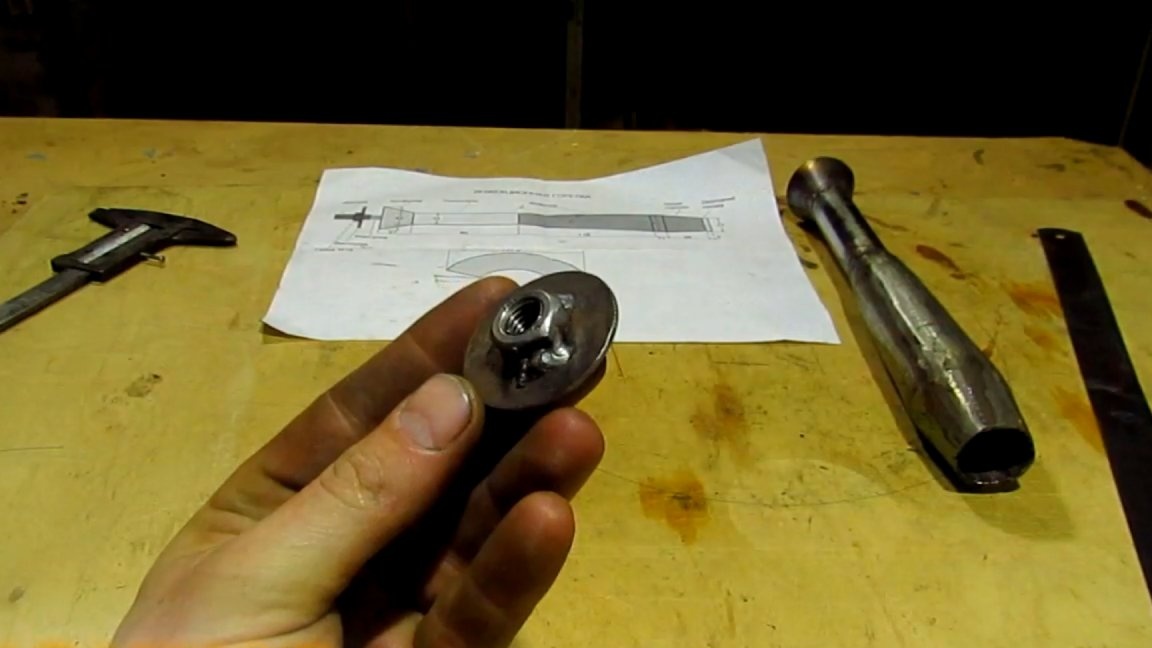
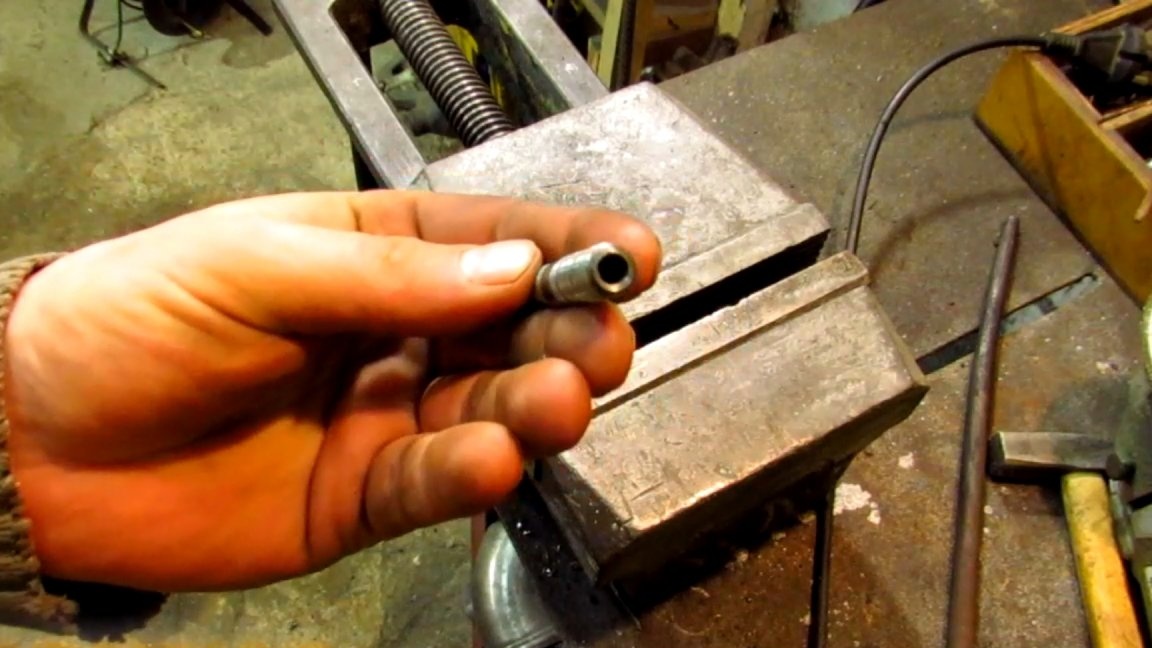
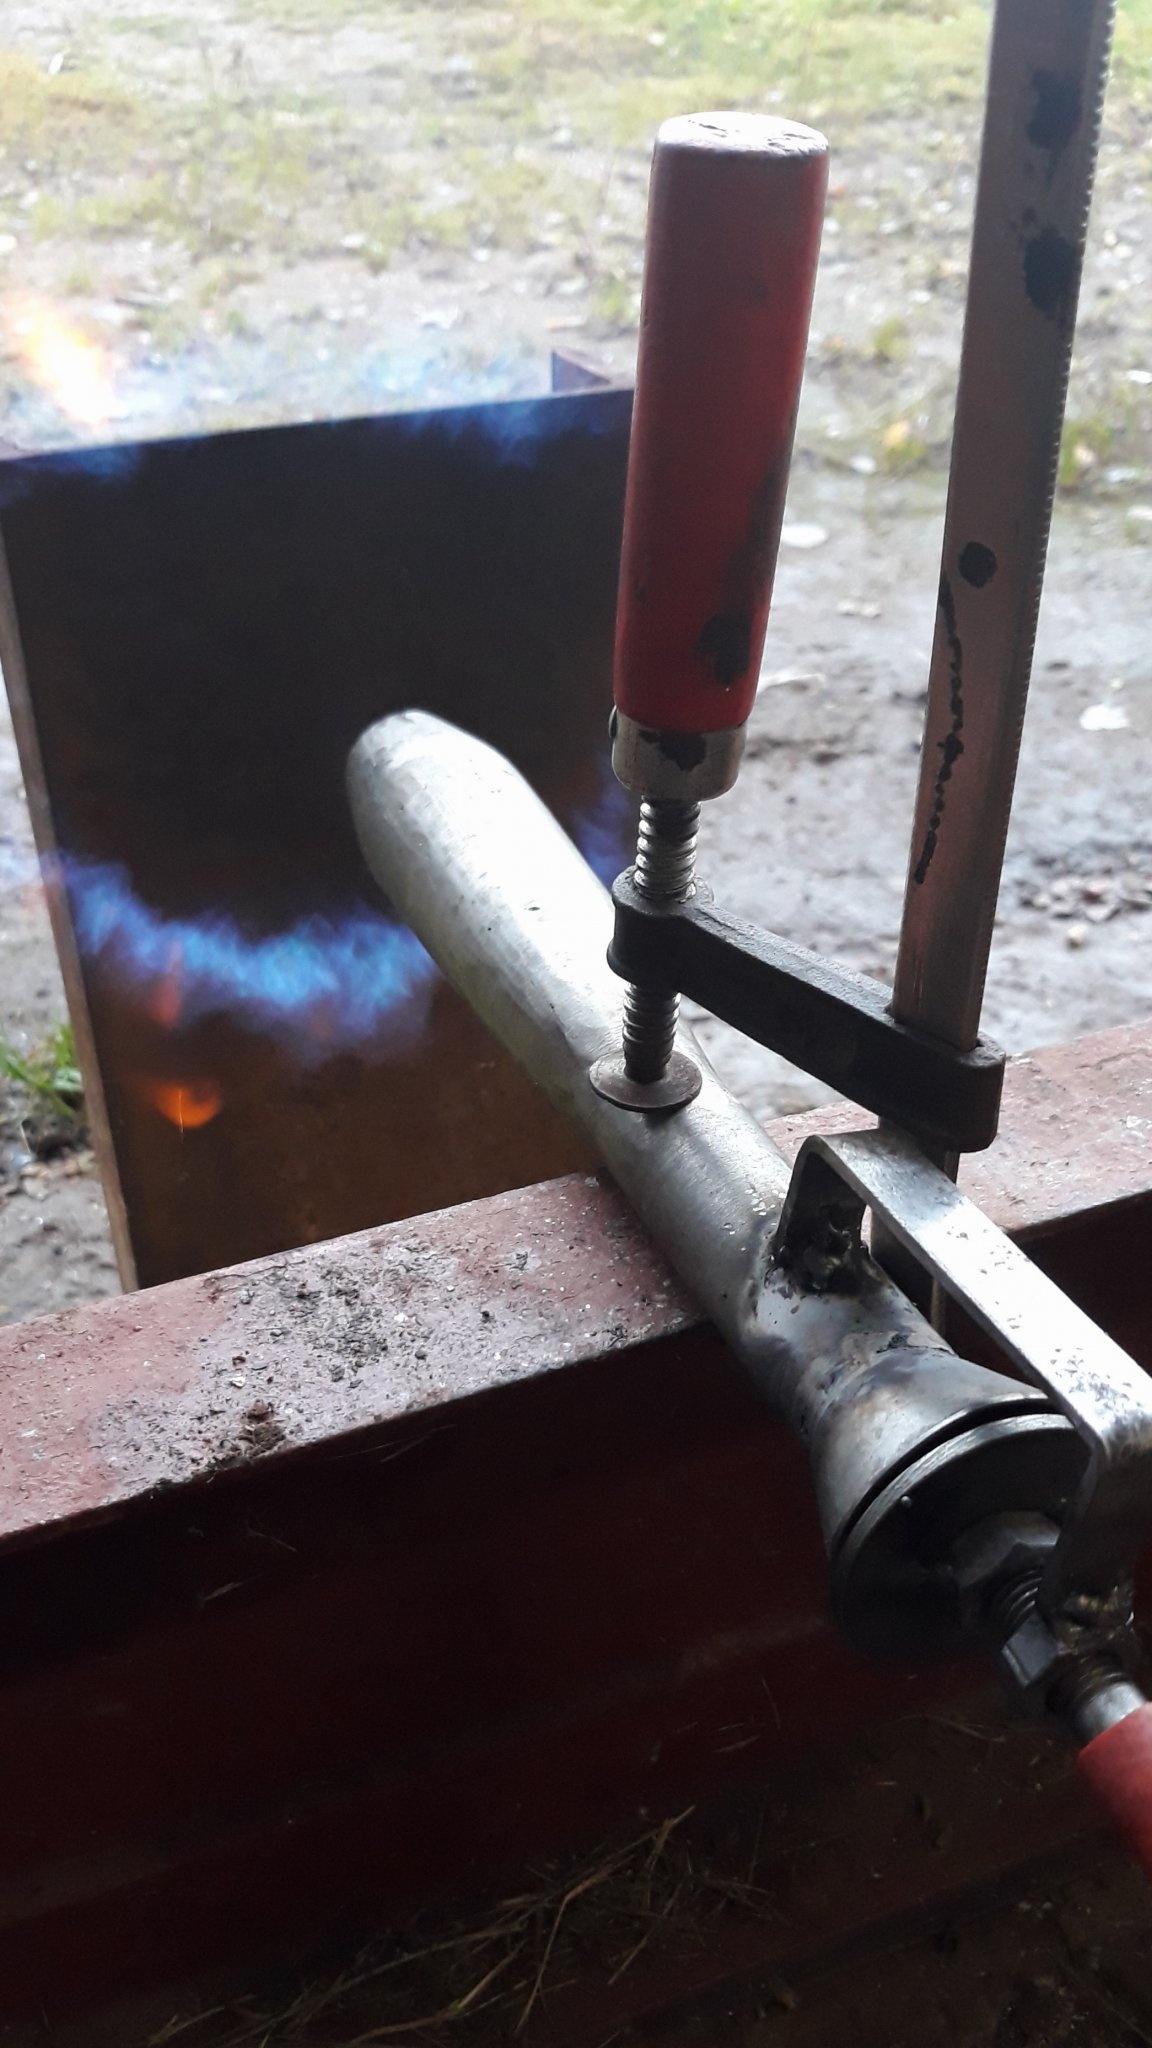
Now the mechanism for adjusting air and gas supply. We need a M10 bolt with a long thread. A bolt hat is not needed. From the end, we drill a through hole with a diameter of 5 mm., And cut the M6 thread. As a gas jet, I used a wire feed tip from a semiautomatic device. They cost a penny, and there are with a diameter of 0.6 and 0.8 mm. There is one caveat. The tip is long and needs to be cut so that about 3-4 mm remain after the thread. On the remaining part, you can cut the thread and get another nozzle. Now you need a washer with a diameter of about 43 mm. You can look at hardware stores or cut from sheet metal.
I have machined on a lathe. A hole with a diameter of 12 mm must be drilled in the center of the washer. We weld the M10 nut to the washer. Now assemble the structure. Screw the nut onto the bolt. A mount will be welded to it. Then we wind the adjusting washer and screw the gas jet. We bend the bracket from the metal, which will fasten this assembly to the body. I cut 3 mm from metal. Now, by rotating the washer, set the nozzle flush with it. The first nut we screwed in must be located in the center of the thread. In this position, we apply all this to the confuser, then we attach the bracket and you can grab it to the nut and body. It doesn’t matter in which place to weld to the body, but the shorter the harder. If everything is smooth, then finally weld. Well, everything seems ready.
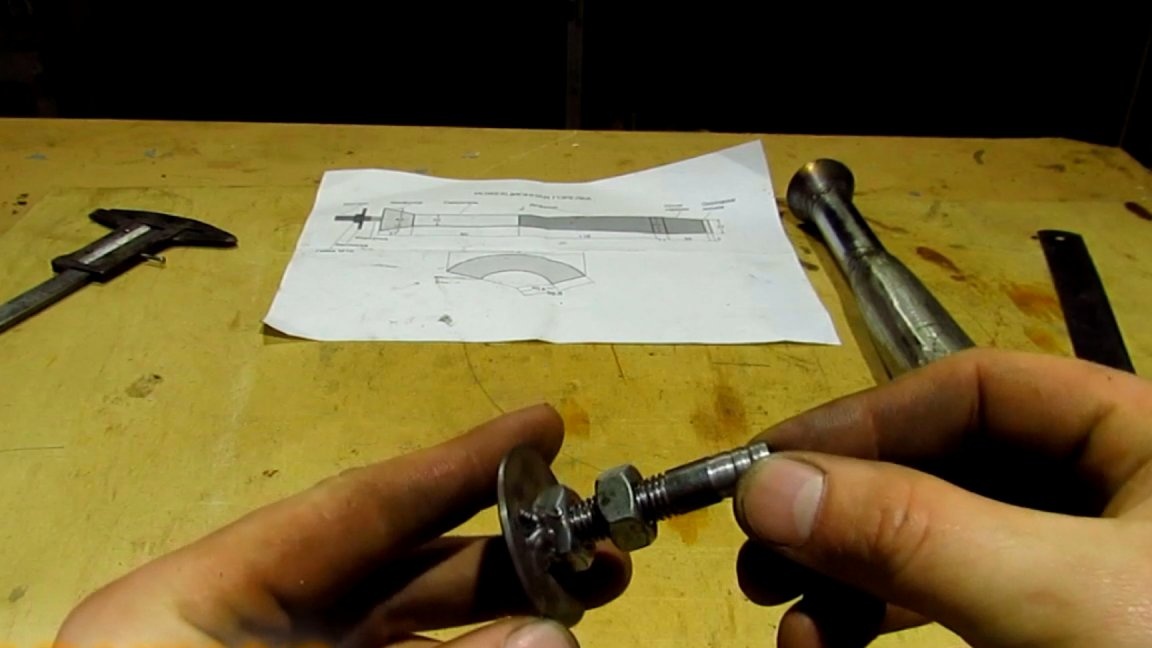
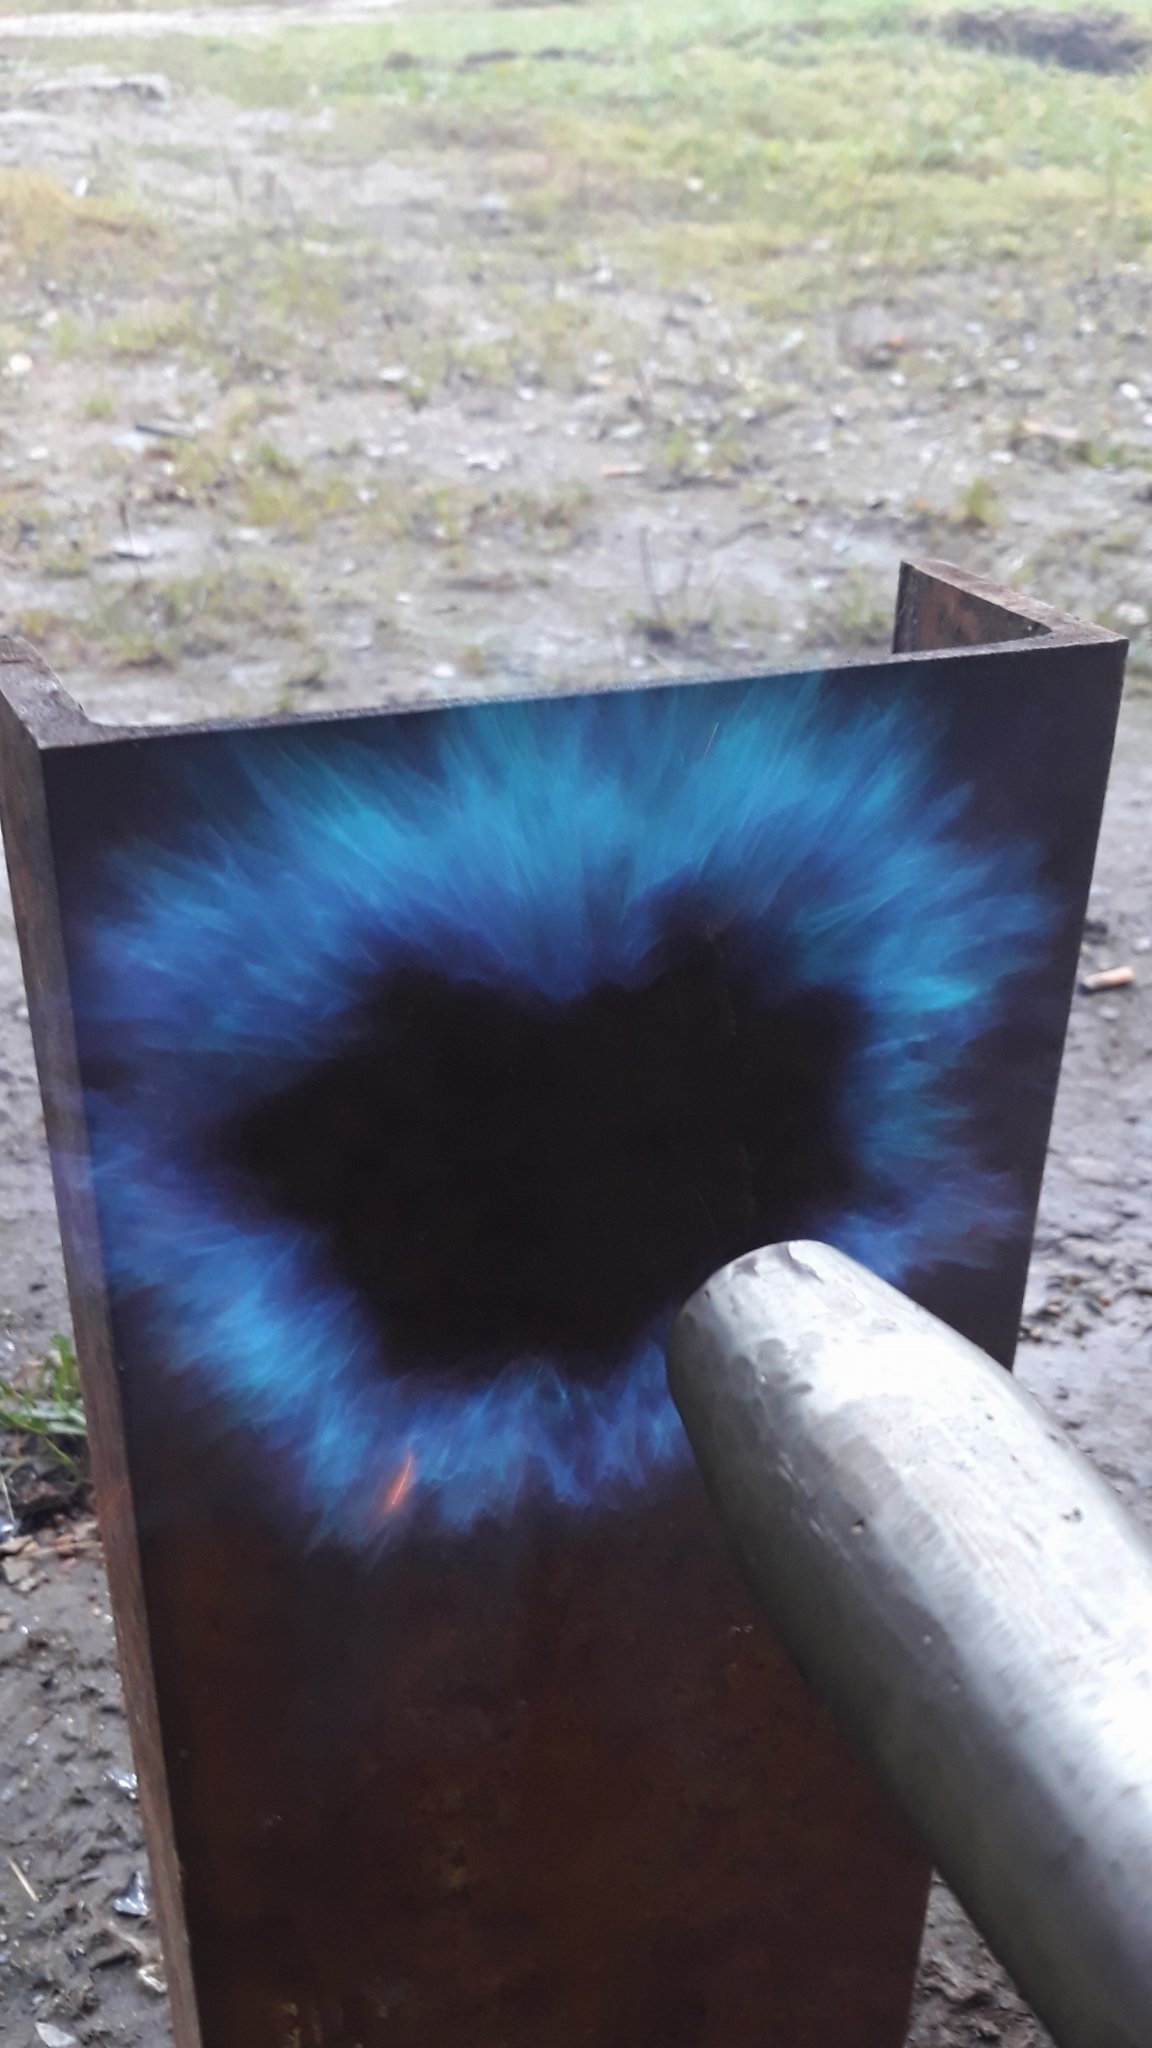
What we have. When screwing and unscrewing the bolt, we adjust the degree of ejection, so to speak. The best result is when a couple mm nozzle. enters the confuser. Here you need to twist and see. The washer controls the amount of air supplied and, accordingly, the quality of the mixture. In fact, the gas jet needs to be set once and can not be touched. And so as not to spin, you can screw the nut.
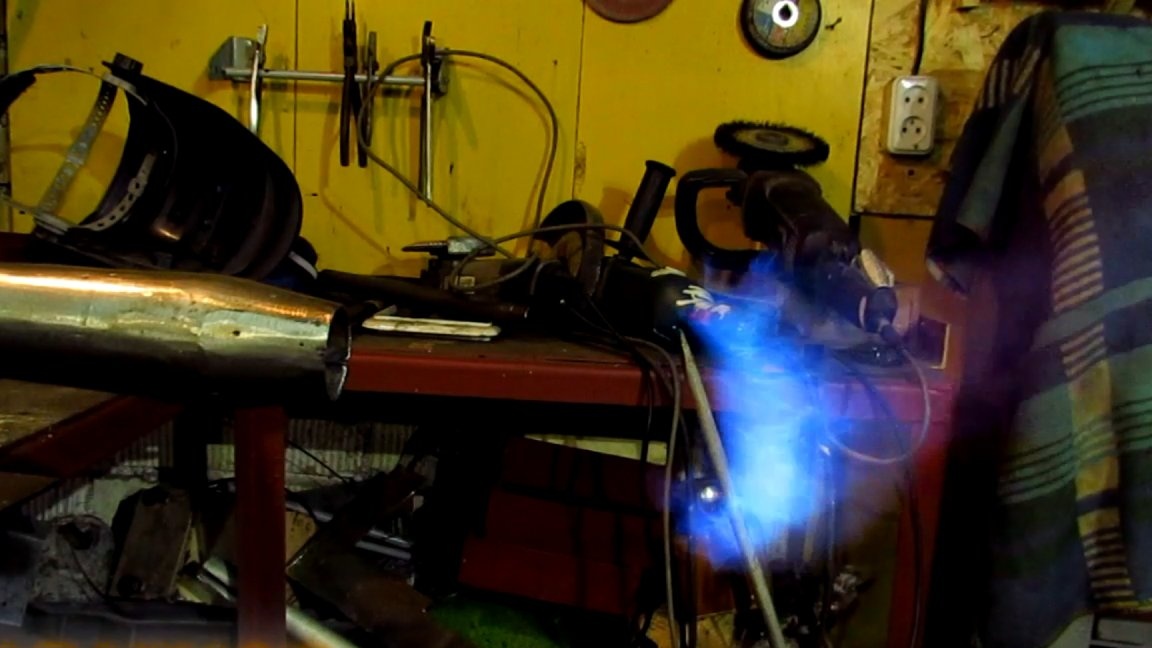
Stage 4: Test.
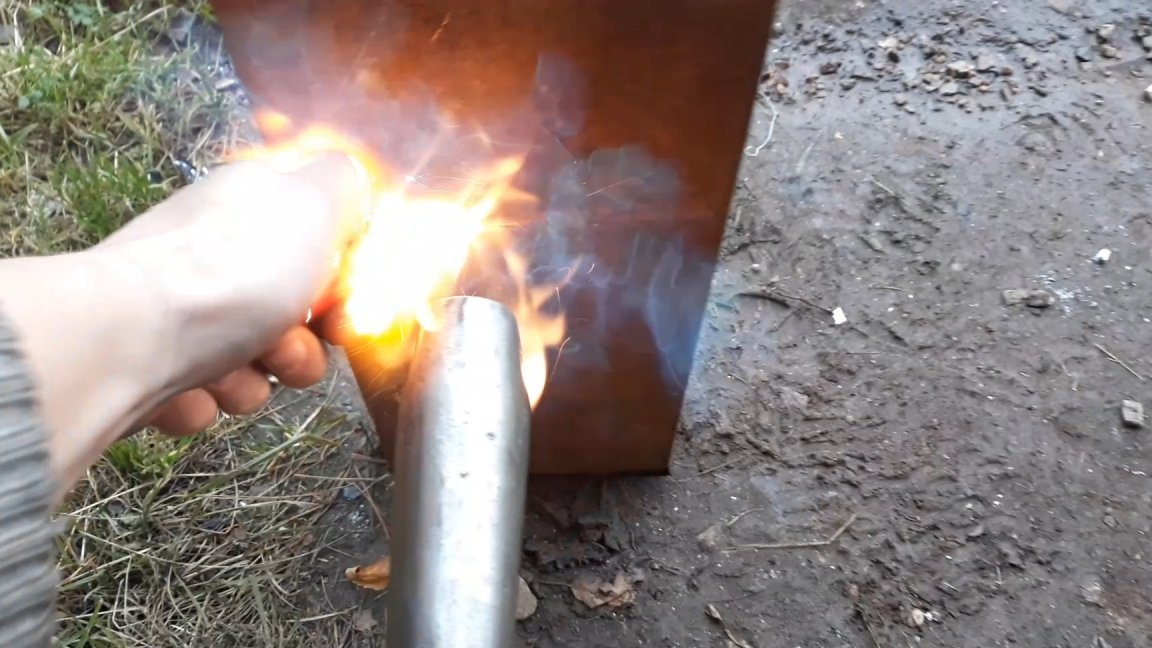
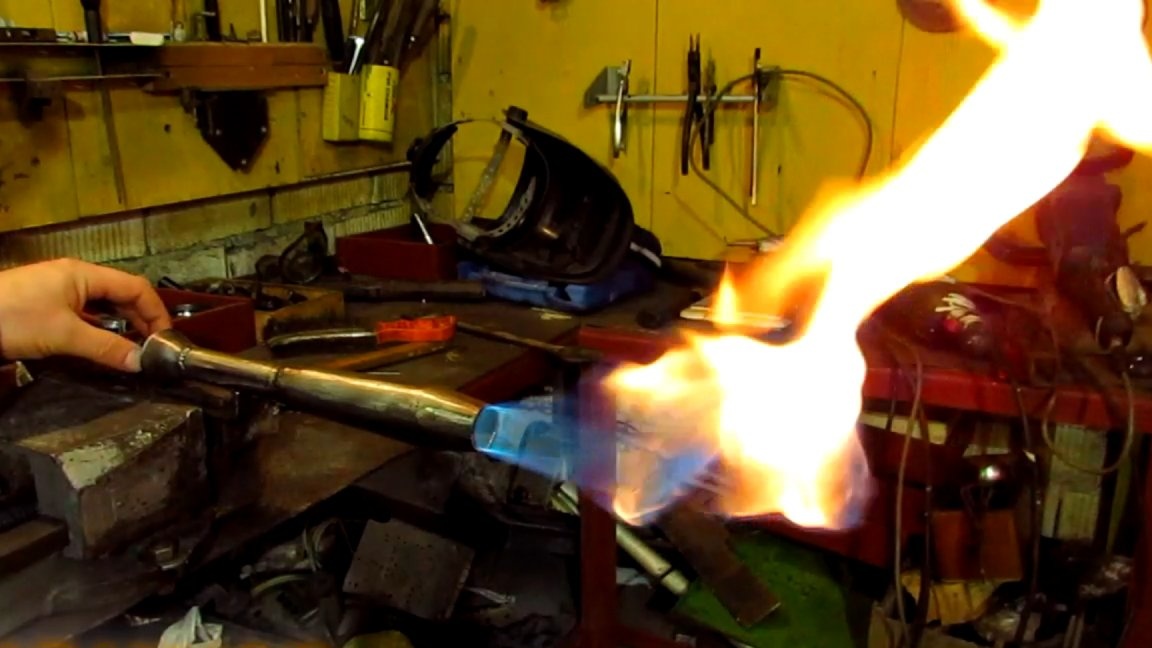
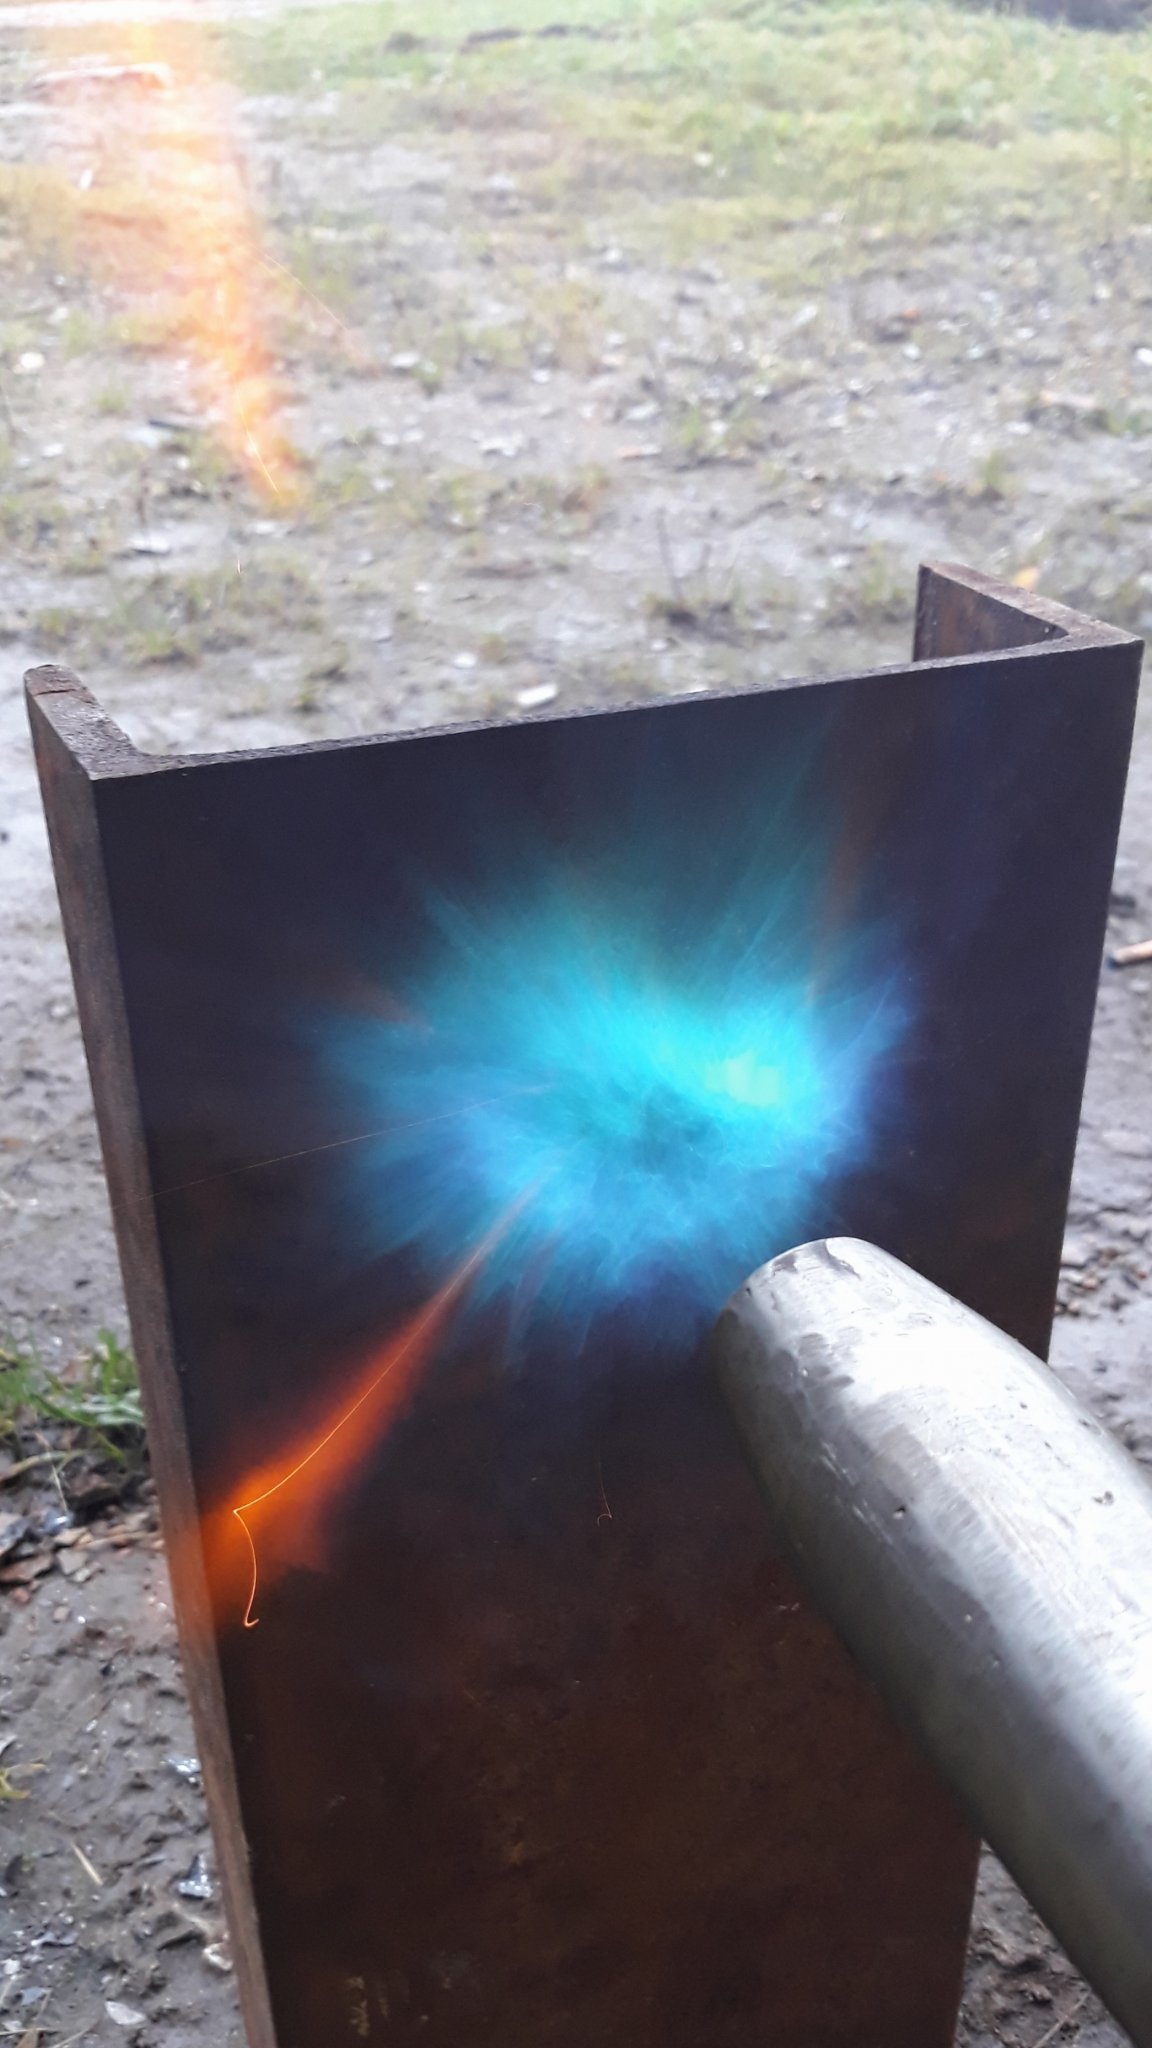
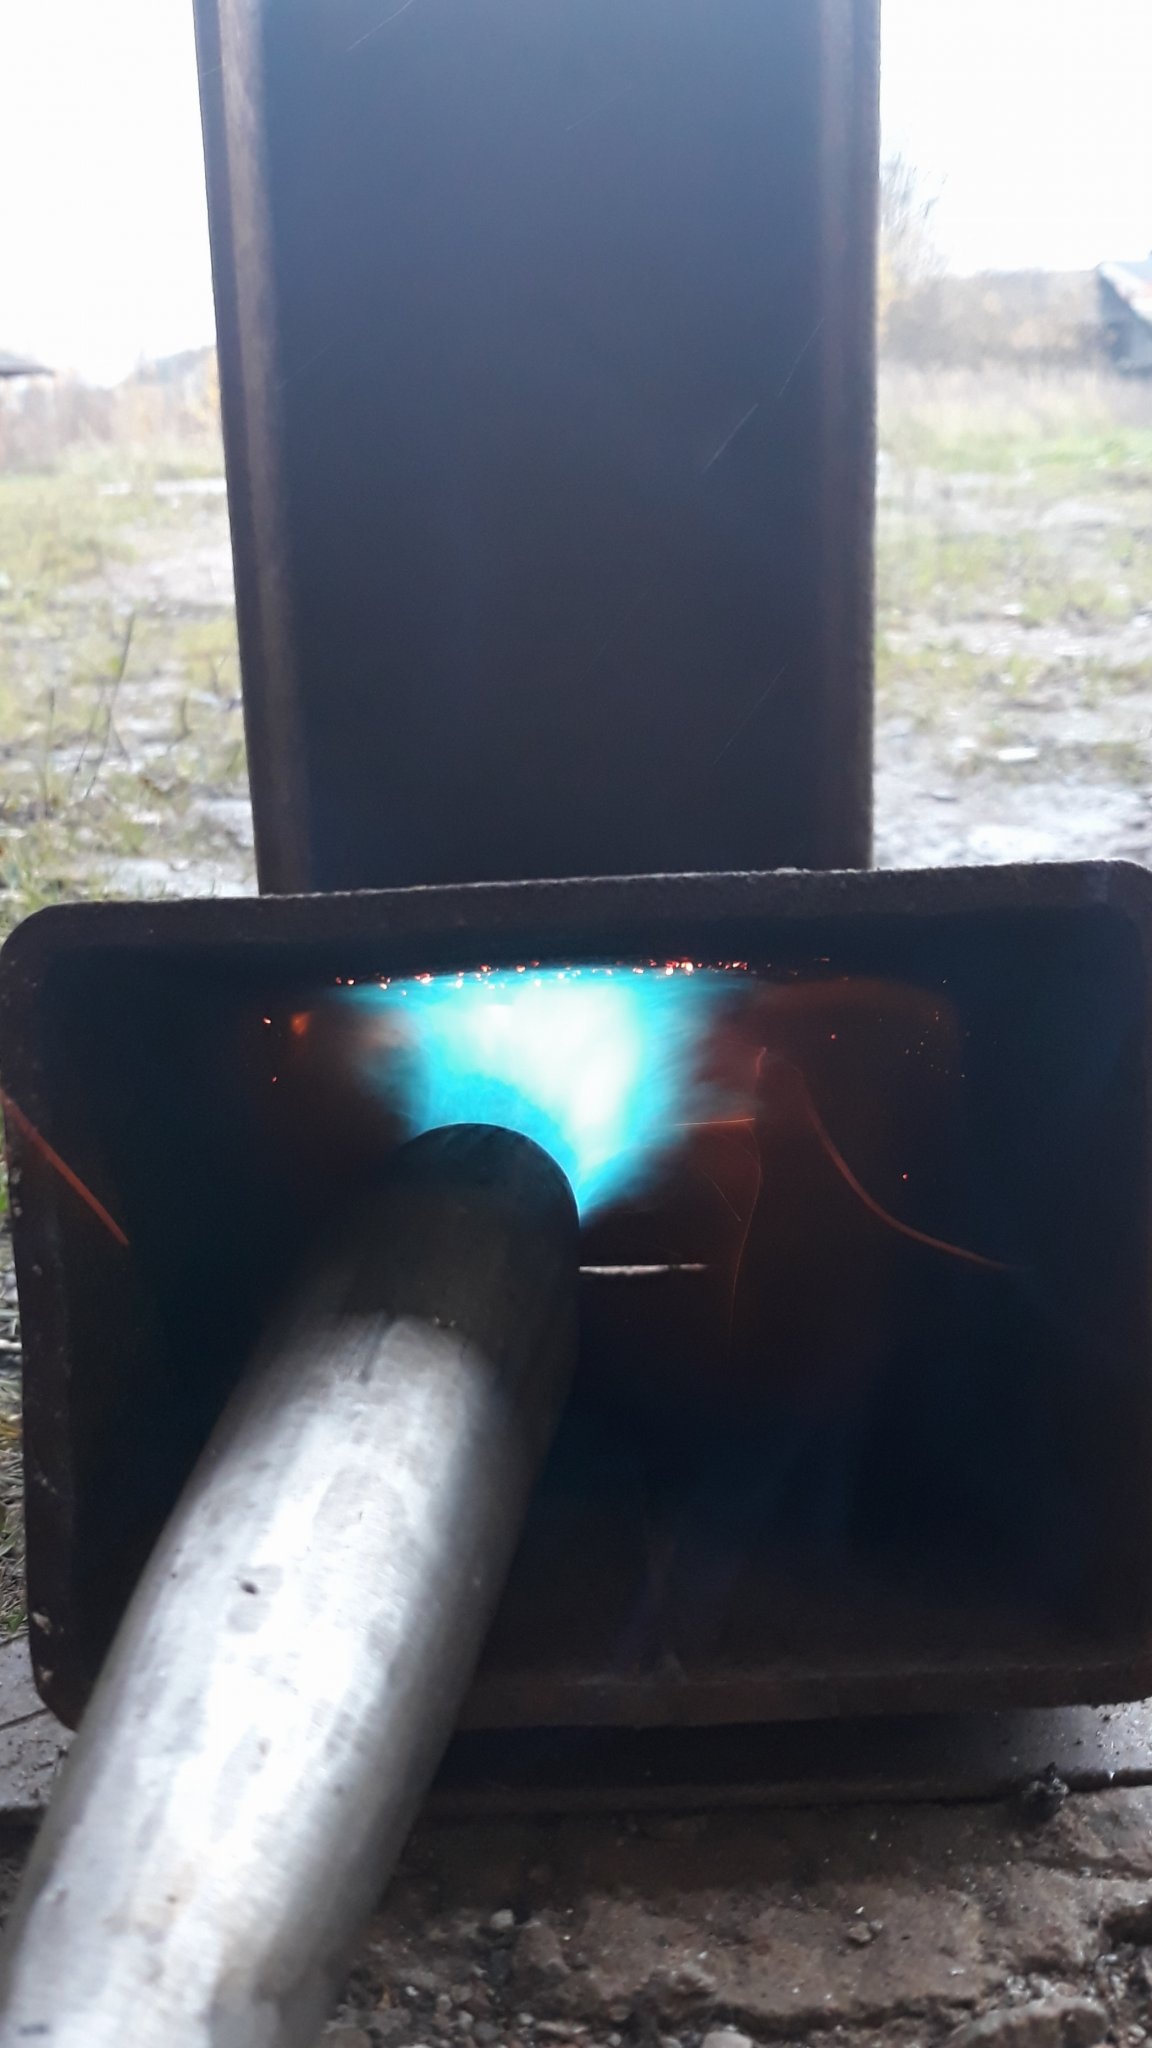
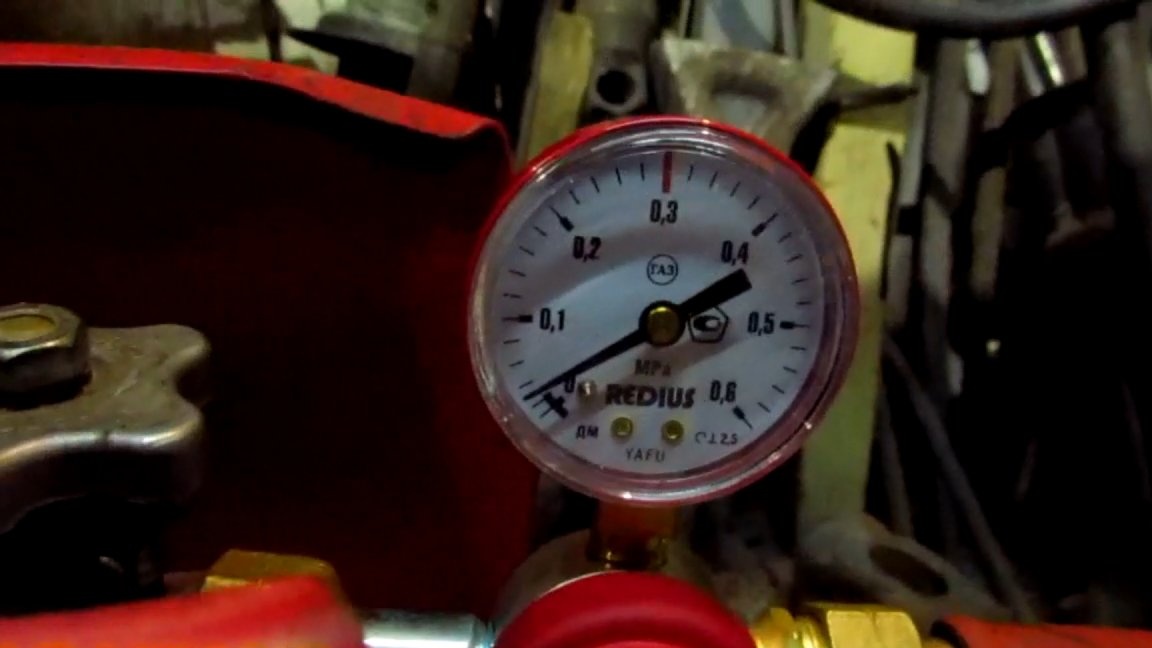
Let's start the tests. We put the hose on the bolt, on the gearbox we set 0.2 kg per cm squared. You can play with pressure too. But too much gas consumption leads to a quick freezing of the cylinder, especially by 5 liters. Then it is better to set the nozzle to 0.6 mm. Before ignition, the washer is completely closed or with a small gap. We set fire to the gas and slowly increase the air supply, watching how the flame turns blue and slowly moves away from the nozzle of the burner. With a further increase in air, the flame completely breaks away from the burner and it goes out. This is a feature of her work. To prevent this from happening, you need to install a barrier on the path of the flame or use it in an enclosed space. Then the exiting fire will set fire to the gas, and it itself maintains combustion. In my case, the burner will be installed in a furnace for smelting non-ferrous metals. But about her next time. An idea for a note. Old cast iron batteries.
We put the burner in the lower part, opposite to the top there is a pipe to the street. The rest is drowned out. Settings for minimum flow and can be heated garage. It works well in an enclosed space and, in theory, at optimal settings will give a temperature of about 1200 degrees. This is enough for the eyes to melt aluminum, brass, bronze, lead, hardening and annealing blades for knives. You can forge blanks from files. Mass applications.
Necessary tools and fixtures:
1. Bulgarian
2.Cutting and cleaning circle (petal possible)
3. The file is semicircular or round.
4. Protective equipment (glasses, mask, mittens)
5. Drill or drilling machine.
6. Drill 5mm, 12mm.
7. Tap M6, lerka M6
8. Welding (better semi-automatic)
9. Pipe scraps, bolts, nuts, washers.
10. Sheet metal 1.2 mm, 3 mm.
11. Tip for feeding wire from welding 0.6 and 0.8 mm.
12. Hammer, pliers, brush for metal.
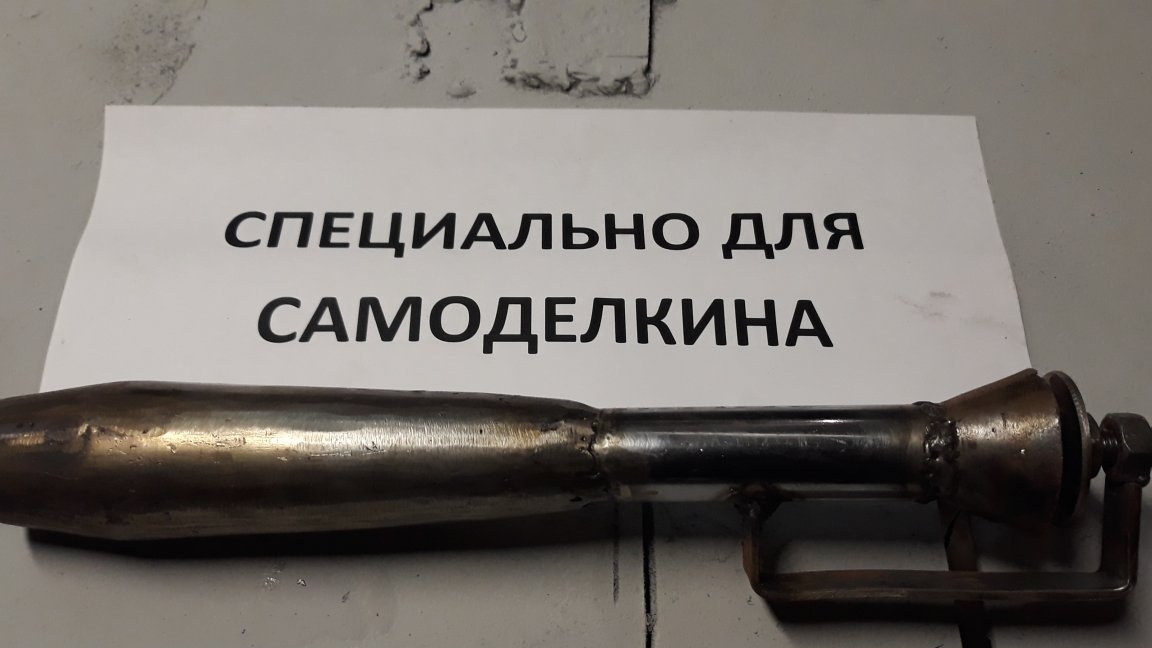
Actually such a burner turned out. The test was successful. The case does not heat up during operation, you can hold it by hand. When working in an oven, heating will be anyway. At the end of operation, the burner will need to be removed. The next part will be about the oven. More details about the manufacture of the burner can be seen in the video. Thanks for attention. Until next projects!