From this article, we learn how the Master made a hot air soldering station under control. Arduino. In this project, the PID algorithm is used to calculate the required power and is controlled by the Triac driver.
According to the master, this soldering station is efficient and reliable, and easy to assemble.
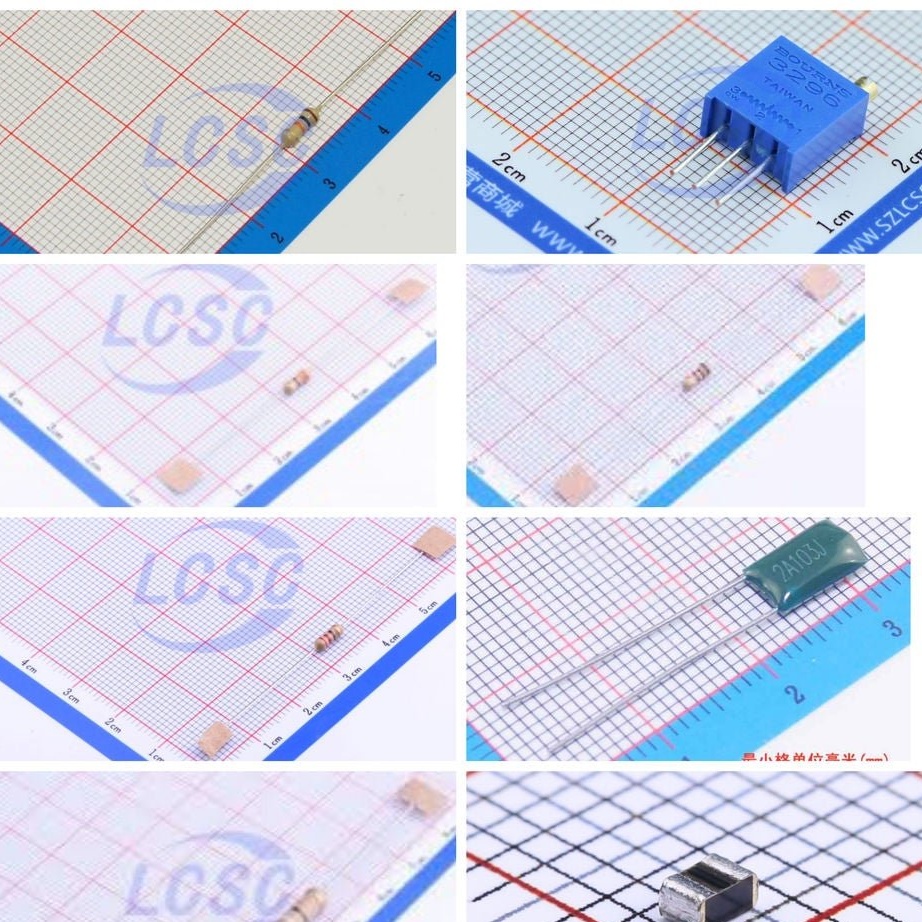
Tools and materials:
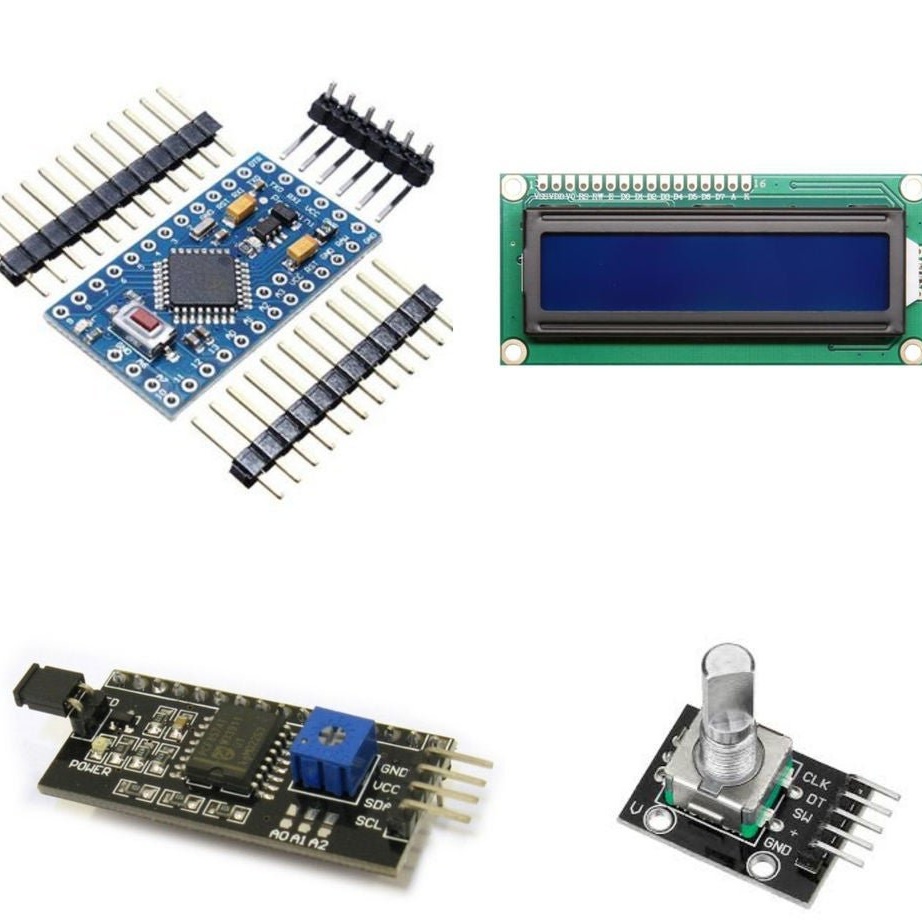
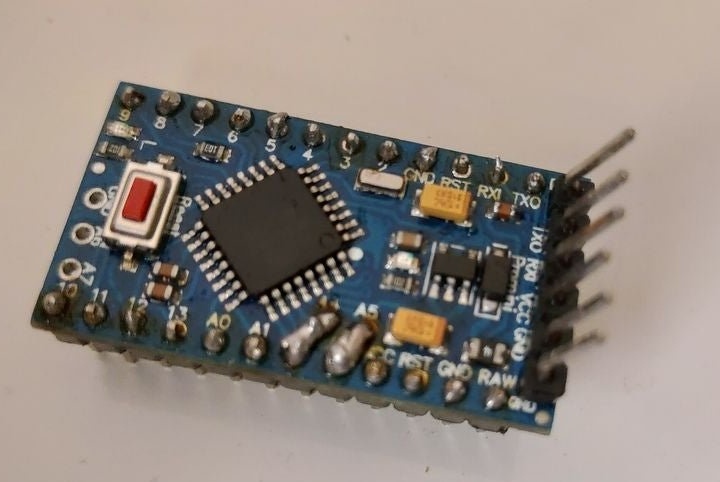
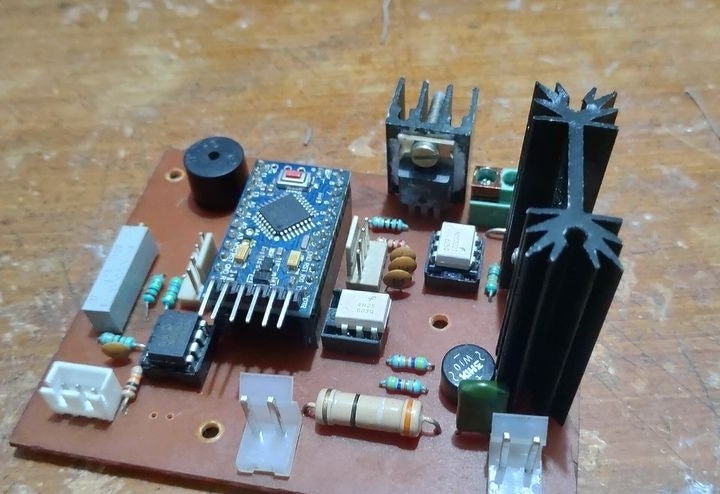
- Arduino Pro Mini;
-1602 LCD module + I2C;
- Rotary encoder with button;
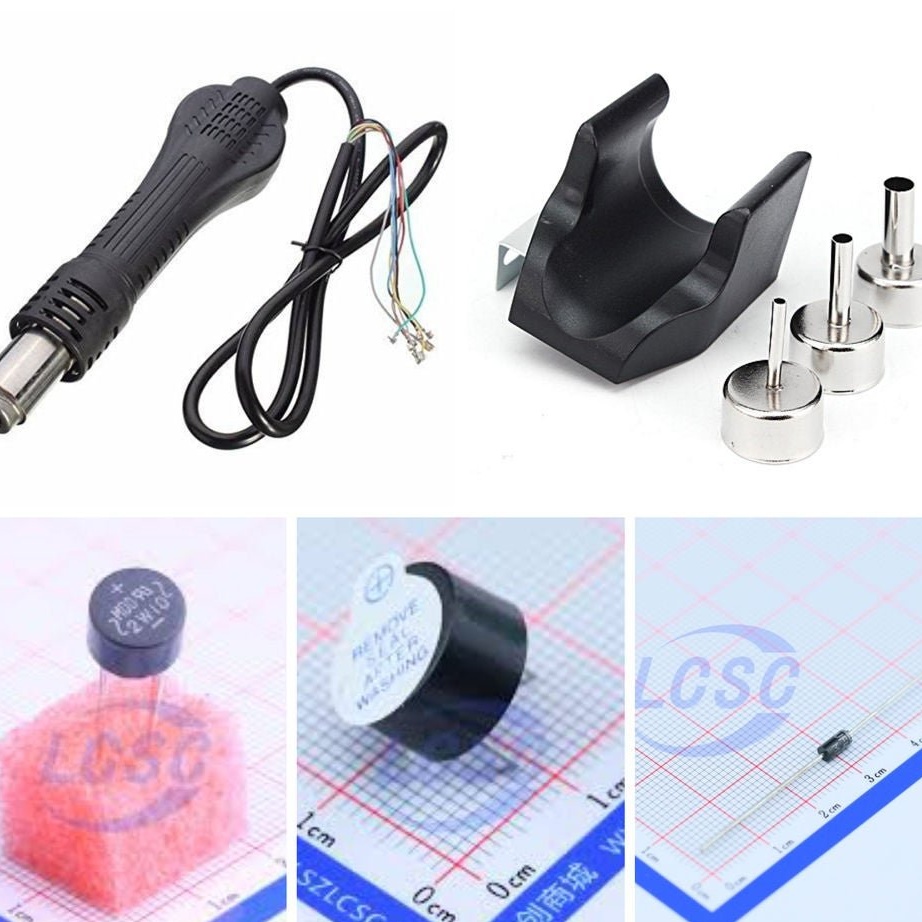
-Hair dryer for soldering station;
-Stand for hairdryer;
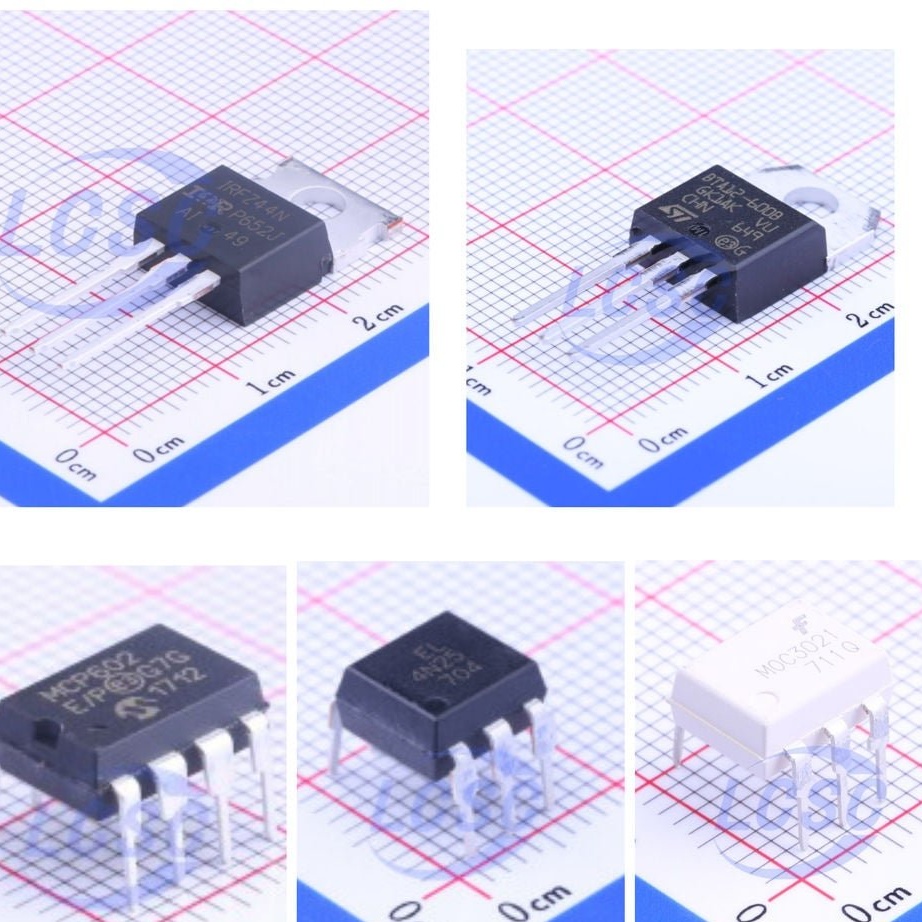
-Simistor BTA12-600B;
Transistor IRFZ44;
Amplifier MCP602;
Optocoupler MOC3021;
Optocoupler 4N25;
-Diode bridge 2W10M;
Diode UF4007;
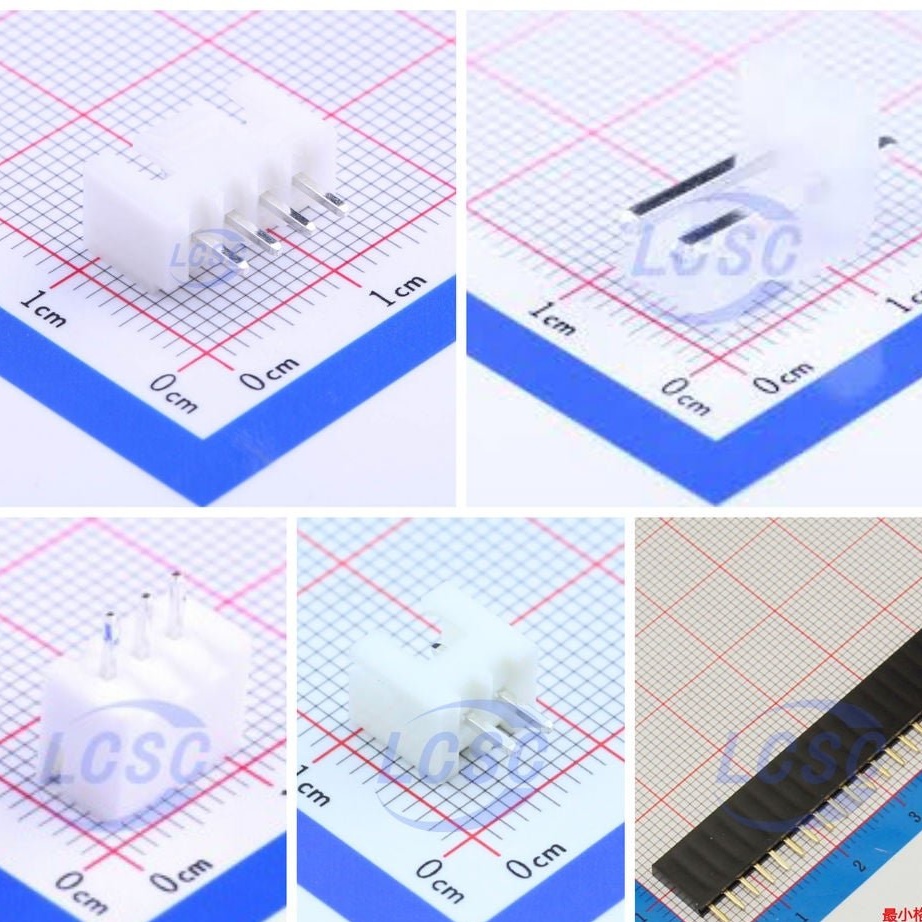
-4-pin connector;
-3-pin connector;
-2-pin connector;
-2-pin large connector;
Capacitor 0.1 uF;
- Capacitor 10 nF;
- Trimmer resistor 200K;
- Resistor 100K;
-Resistor 47K;
- Resistor 10K;
- Resistor 1K;
-Resistor 470E;
- Resistor 330E;
- Resistor 220E;
-Resistor 39E;
-Buzzer;
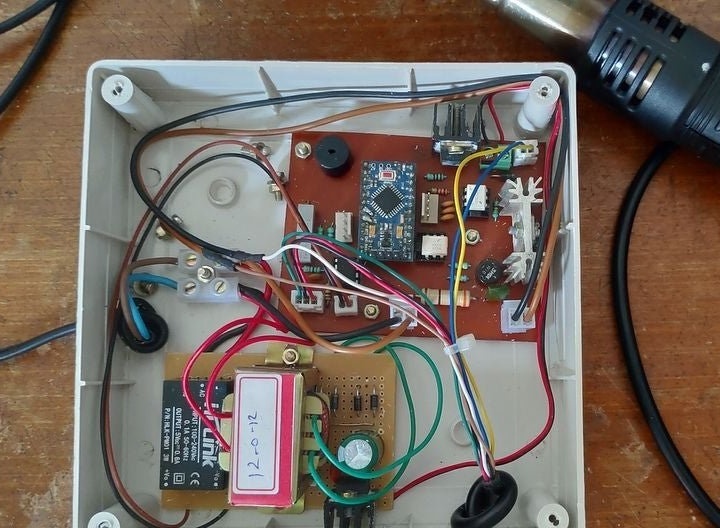
Step One: Installation
To share the Arduino Pro Mini and the circuit board, you need to make the following changes to the Arduino board. Since the I2C pins of the Arduino A4 and A5 are not PCB friendly, the A4-A2 and A5-A3 pins should be shorted, as in the photo.
Further installation is as follows:
For I2C LCD Module
I2C module - Arduino Pro Mini
GND - GND - GND
VCC - VCC - 5V
SDA - A2 - A4
SCL - A3 - A5.
For encoder module:
Encoder - Arduino
GND - GND
+ - NC (not connected, arduino built-in I / O is used in the code)
SW - D5
DT - D3
CLK - D4.
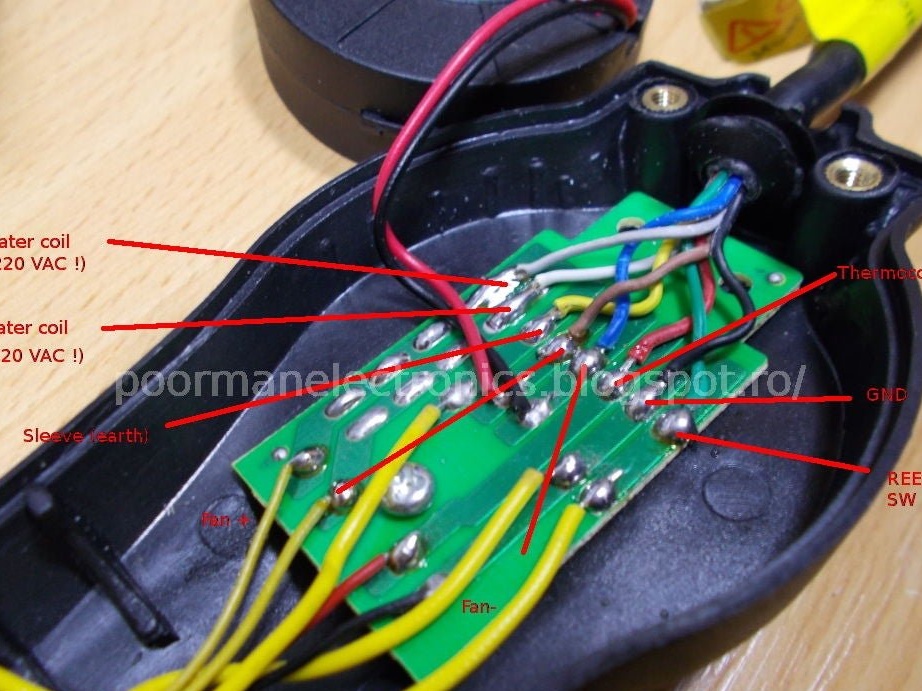
Hair dryer (7 wires)
3-pin connector - (green, black, red)
Red wire - Thermocouple +
Green wire - Reed switch
Black wire - Common ground.
2-pin connector - (blue, yellow)
Blue wire - Fan +0
Yellow wire - Fan - (or GND)
2 Large pin connector - (white, brown)
White wire - Heater
Brown wire - Heater (no polarity)
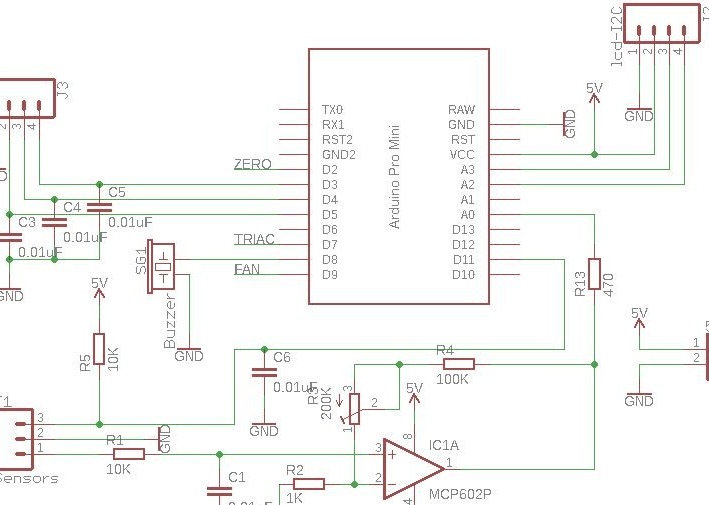
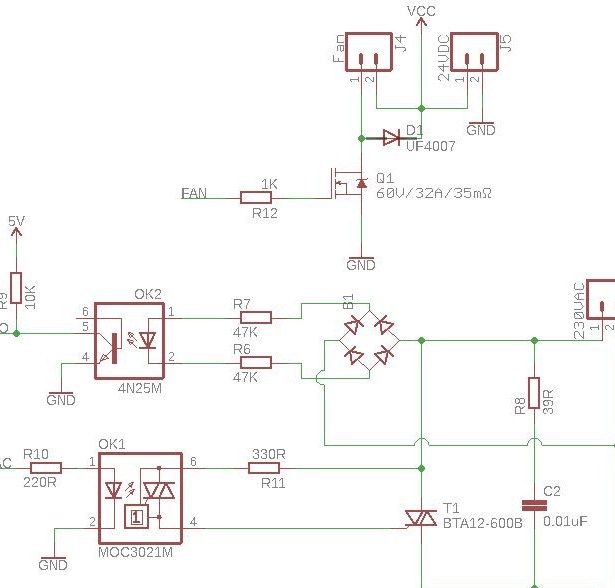
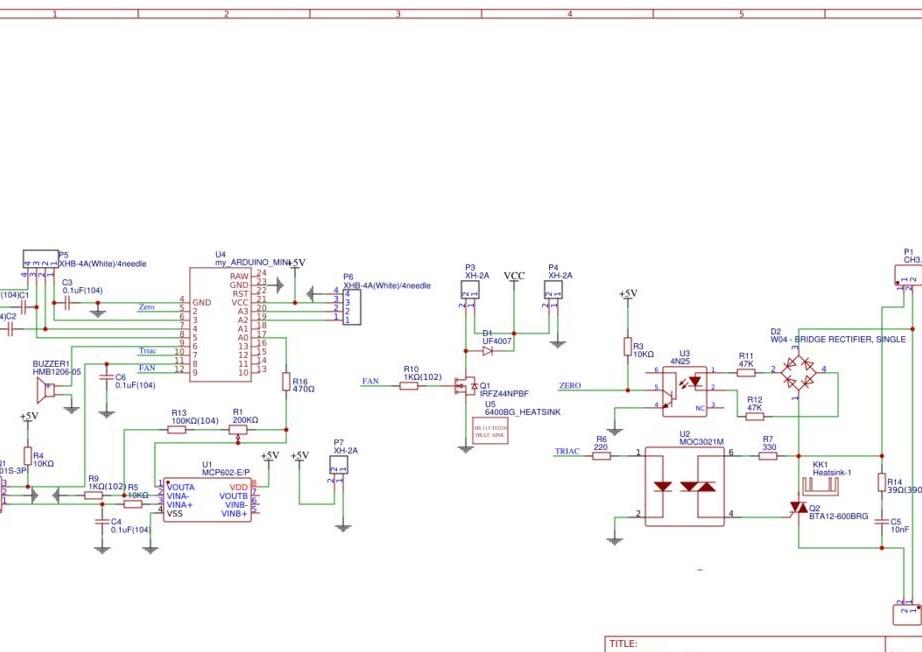
Step Two: Schematic
The circuit consists of 3 parts.
Part of the interface:
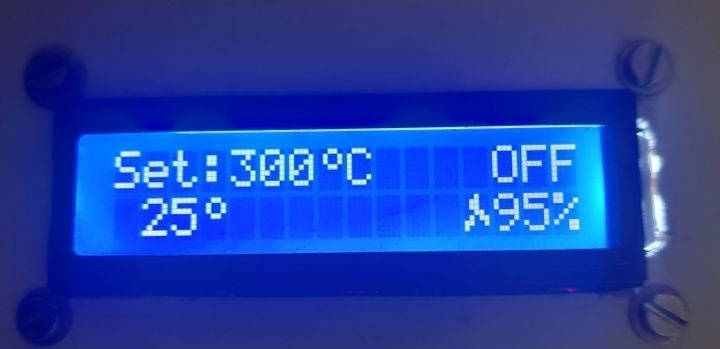
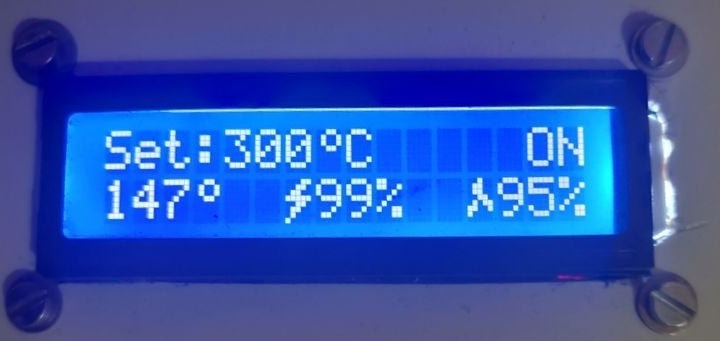
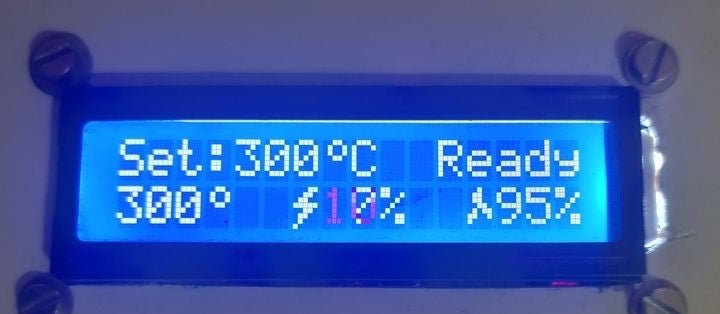
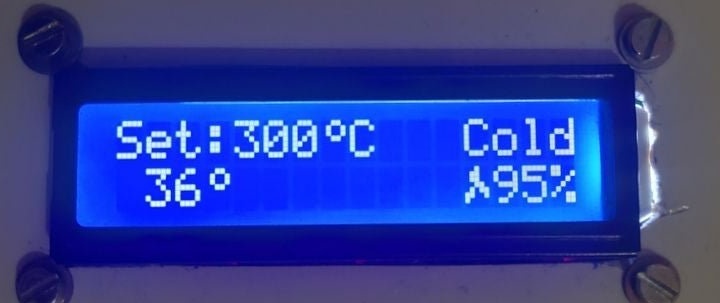
Consists of a 1602 LCD with I2C module and a rotary encoder with button. The display shows the set temperature, current temperature, fan speed and applied power, as well as the current state of the handle. The encoder is used for various inputs and navigation through parameters and controls.
Sensor Part:
Consists of a K-type thermocouple for measuring temperature and reed switches for determining the position of the handle. The thermocouple voltage is amplified by the operational amplifier to the voltage level measured with the Arduino. The gain of the operational amplifier is controlled by a 200K trimmer.
Controller part:
There are two controllers in this circuit.One of them is a simple PWM fan speed controller with a MOSFET. The other is an isolated controller for the heater. It consists of TRIAC powered by opto-coupled DIAC. The 4N25 optocoupler helps maintain synchronization with the AC signal.
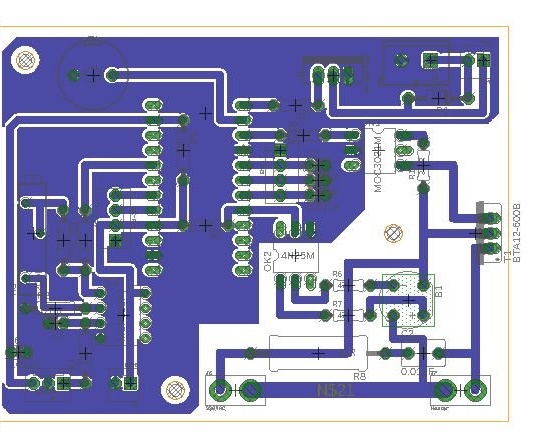
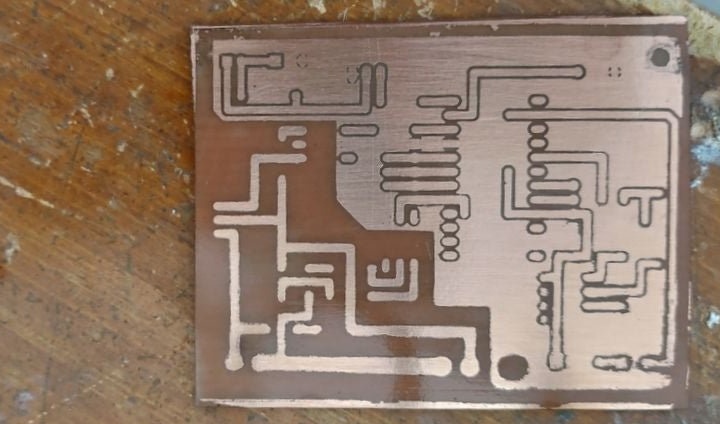
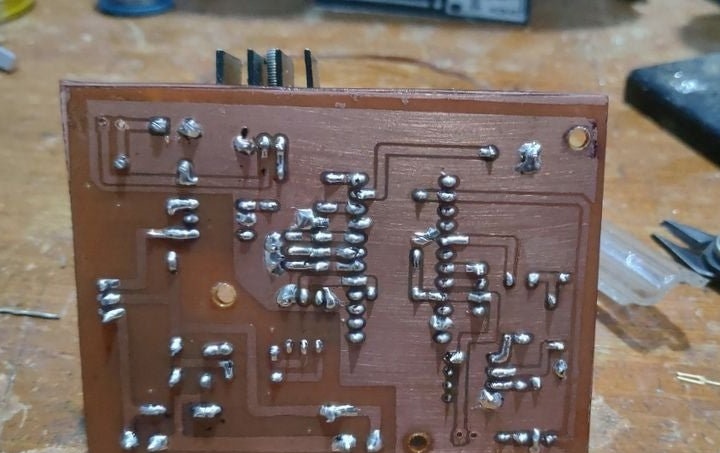
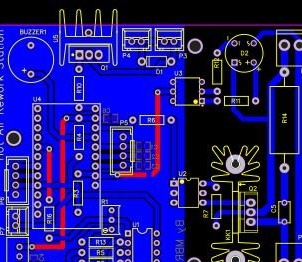
Step Three: PCB
The master recommends ordering a printed circuit board on the corresponding site, but if desired, it can be done independently.
Arduino-Rework Station.sch
Arduino-Rework Station.brd
The specification board can be viewed here.
Step Three: Code
The program is the most important part of the project. The program uses a PID algorithm to control power to maintain a given temperature.
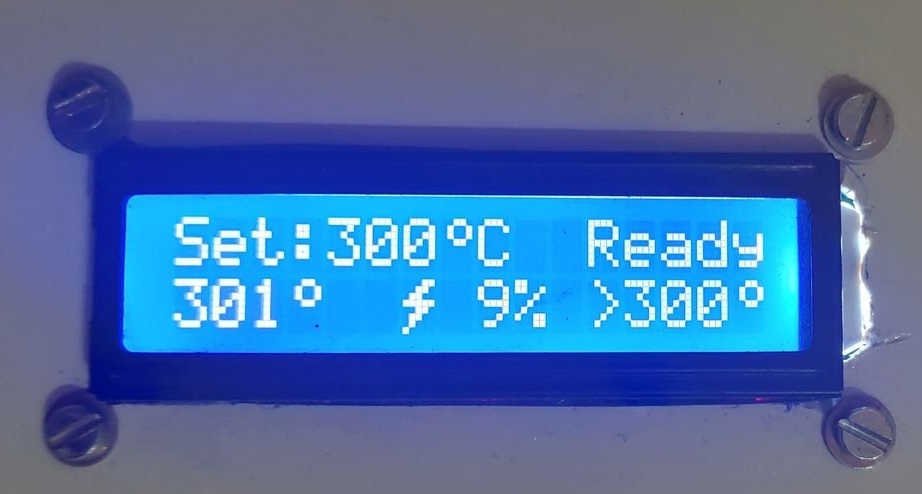
By rotating the encoder, the temperature and fan speed can be adjusted. A short press on the encoder toggles between fan speed and temperature setting.
The hair dryer begins to heat up as soon as it is removed from the holder. The display shows "Ready." When the set temperature is reached, the set temperature sounds a short buzzer sound. When the hair dryer is installed in the holder, the heating stops, but the fan continues to blow until it reaches a safe temperature. After the temperature drops below 50 C, it will emit a short beep and display “COLD”.
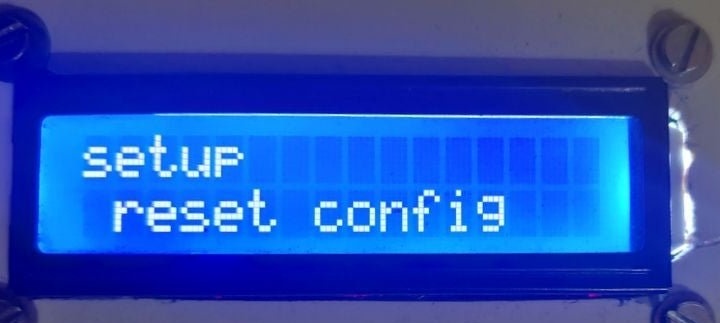
When the hairdryer is turned off, the controller enters the setting mode if the encoder is held down.
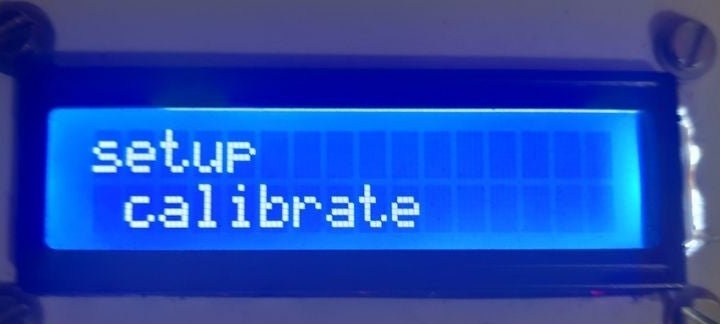
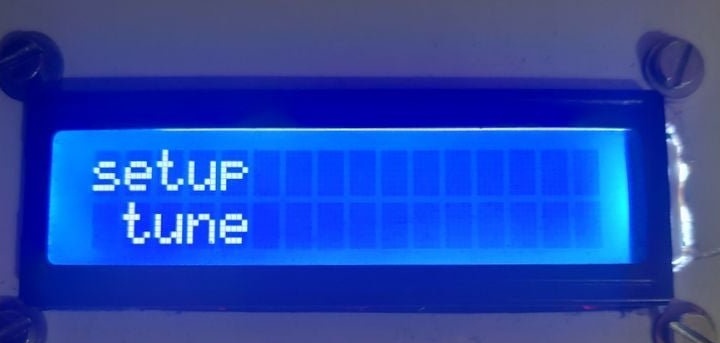
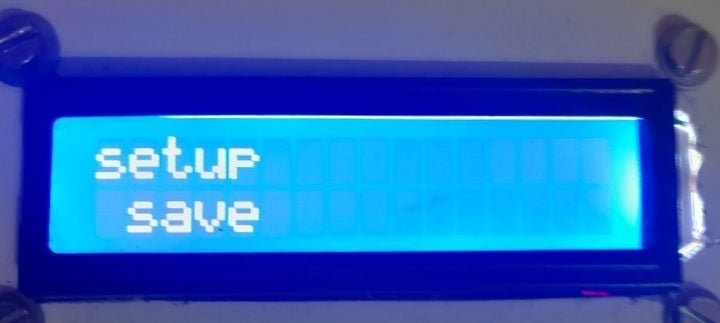
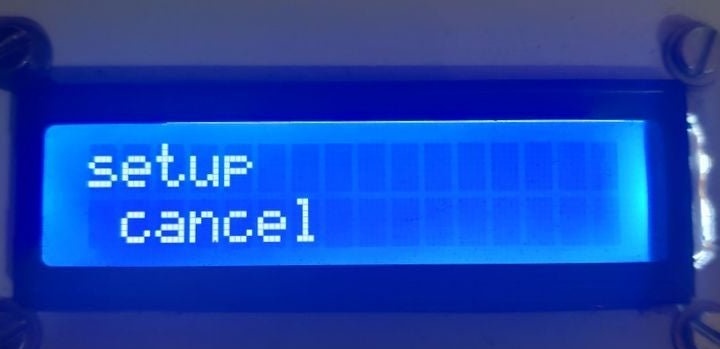
The setup mode has calibration, setup, save, cancel and reset settings.
Note. If the easyEDA printed circuit board is used, then change the reed switch contact number to contact number 8 and the buzzer contact to 6.
You need to install the Commoncontrols-master, time-master and code libraries.
hot_air_gun_station_V1.0.ino
CommonControls-master.rar
Time-master.zip
You can download all the files in one zip file here.
Step Four: Calibration
Temperature readings must be calibrated. To do this, follow these steps.
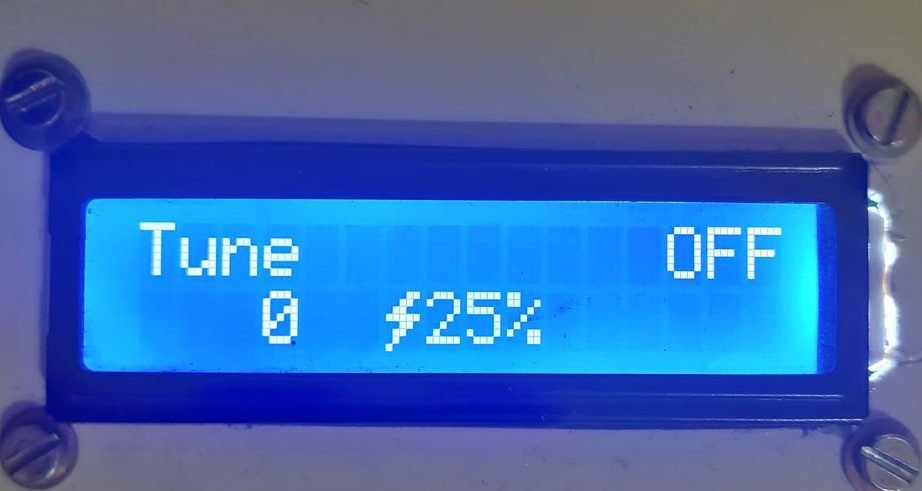
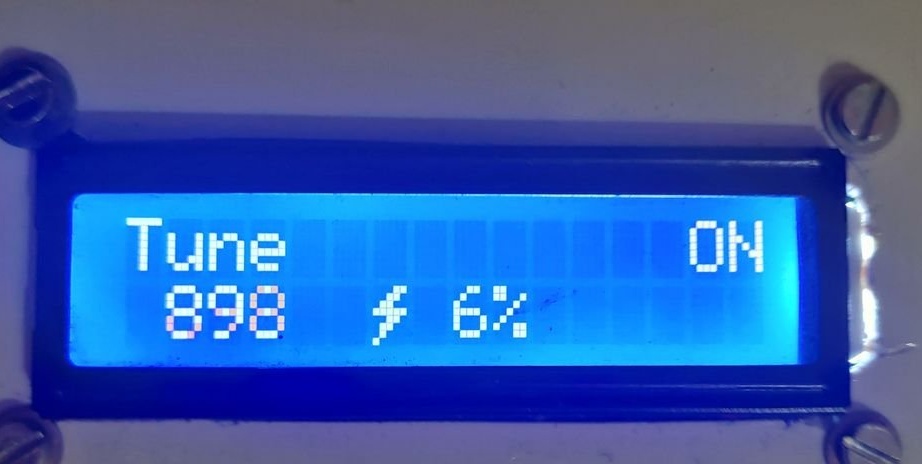
First go to setup mode and select the option.In option. In setting mode, the temperature will be displayed on the screen (0-1023). Turn the knob to manually select the power to the hairdryer. Heat the hair dryer to 400 degrees. When the temperature reaches the set value, the buzzer will beep. Then set the internal temperature by dimer to about 900. Long press on the encoder - return to the menu.
Then go to setup mode and select “Calibrate”. Select the calibration point: 200, 300 or 400 degrees, click on the encoder. The hair dryer temperature will reach the desired temperature and the buzzer will sound an alarm. Turn the encoder knob to enter the actual temperature. Then select a different control point and repeat this process for all calibration points.
After that, press and go to the main screen, and then go back to setup mode and select save.
Step Five: Nutrition
The master used a Hi-link power supply unit of 230 V AC - 5V 3W DC as a power source. For 24 V DC, I used a 12-0-12 500 mA transformer, connecting the end of 12 V AC to a bridge rectifier. Then the rectified output is fed to the filter capacitor, and then to the LM7824 voltage regulator.