Video demonstration under Metallica - Fuel
Video demo for Evanescence - Even in death (2016 version)
Good day to all readers and amateurs to "make it yourself." We all look forward to the New Year. And of course I want to decorate my house. To make everything beautiful and fabulous. And what a New Year without good music. Everyone’s tastes, of course, are different, but everyone will want to turn on something fun and dance. Or maybe it will be a slow dance or remember the past year with sad motives. In any case, color music will help to create an atmosphere and decorate the house. Creating color music based Arduino and WS2812, and this instruction will be devoted. This idea was prompted by AlexGyver. On his site there are many similar ideas and inventions. Look how time will be. So, let's begin.
Add to the shopping list for the New Year:
- Arduino Nano (you can use almost any compatible board)
- Addressable LEDs WS2812 (WS2812B), in the number of LEDs from 2 - 400 pcs.
- Variable resistor 10 - 100 kOhm
- Button
- Power supply 5 V, 3 A (current is selected according to your number of diodes)
- power supply socket
- 3.5 mm stereo jack jack
- Connecting wire (3.5 mm stereo jack - 3.5 mm stereo jack)
- Ceramic capacitor 10nF (marking 103)
- wires
- Soldering iron and all associated with it.
Step 1 Preparation of LED strips.
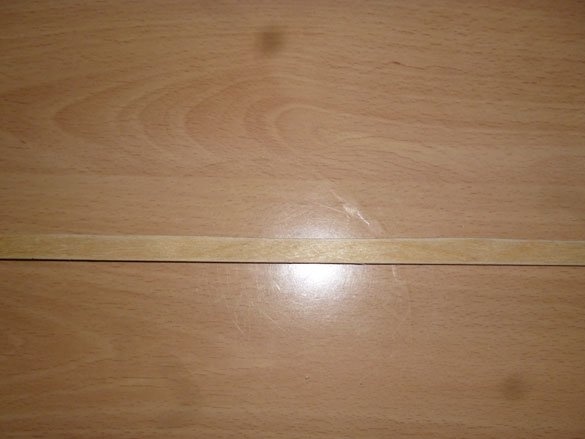
In this step, there is great scope for your imagination. You can fix the tape on the cabinet, picture, ledge, TV, stand, etc., etc. I could not decide on the choice of place. I did, and I recommend you, make a portable tape, or rather two. In length - it all depends on your desire. Also, the tape is with different densities. I took with a density of 30 diodes per meter. They also have 60 and 120 diodes per meter. I made two strips of 18 LEDs. This is approximately 60 cm. First we need a foundation. Strips of plywood, fiberboard or plastic will suit the basis. I took 3 mm thick plywood and cut two strips 1 cm wide and 62 cm long (with a margin to secure the wires from the tape at the end):
We glue the LED tape over the plywood strip, if you did not stick the tape evenly and had to peel the tape, it will not hold well. In this case, I recommend using stationery double-sided tape. It is 1 cm thick, just the width of our tape:
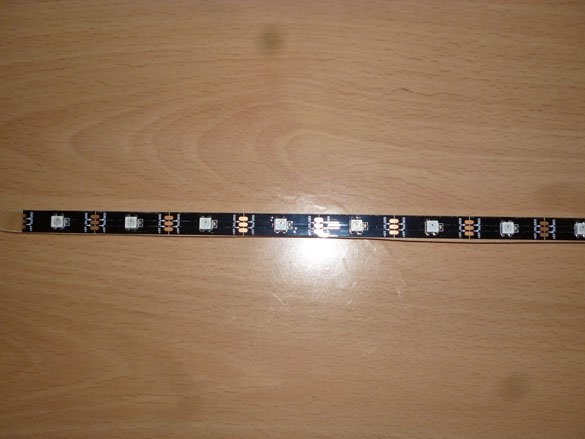
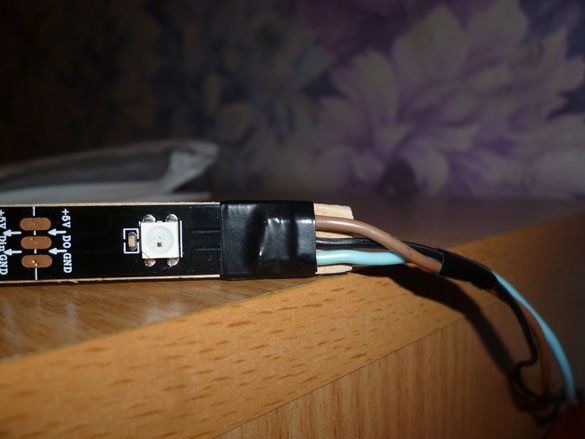
For those, the cat did not work with address tapes in brief. WS2812 is three LEDs (red, blue, green) and an 8-bit PWM driver for them in one housing. Three wires are used to connect the tape. + 5V contact to which plus is supplied from the power supply, GND - minus the power supply.The control takes place by supplying a 24-bit signal for each LED (8 bits per color). The signal from Arduino is fed to the Din contact of the first LED, which, in turn, writes the first 24 bits to its temporary memory and according to them, sets the glow color, cuts off these first 24 bits from the signal and sends the signal through the Do contact further to the next LEDs. Therefore, the tape has a direction. It is indicated on the tape by an arrow, or from Din to Do contact.
The more LEDs, the more current flows. WS2812 is very voracious and one diode consumes (at a maximum brightness of all three colors) 0.06 A. Therefore, the + 5V and GND power wires must be selected for the maximum current flowing through them. I used a copper flexible wire with a cross section of 0.5 mm (with a margin and to further increase the length of the tape). The wire for the signal contact is not so demanding on the cross section, the current flowing through it is small, so we take a thin flexible wire. Solder the wires to the tape and isolate the contacts:
Color music works as follows: divides the number of LEDs in half, the music volume is indicated by the diode lighting from the middle to the ends of the entire tape. Therefore, if you want two bands working like on my video, both tapes are connected in parallel (wire from the Din contacts of both tapes to one Arduino pin, D12). And then we indicate the number of LEDs in the sketch equal to the sum of the diodes of both tapes. If you want the tape to work from the middle, connect two strips in series and also indicate the total number of LEDs.
Step 2 Power Supply
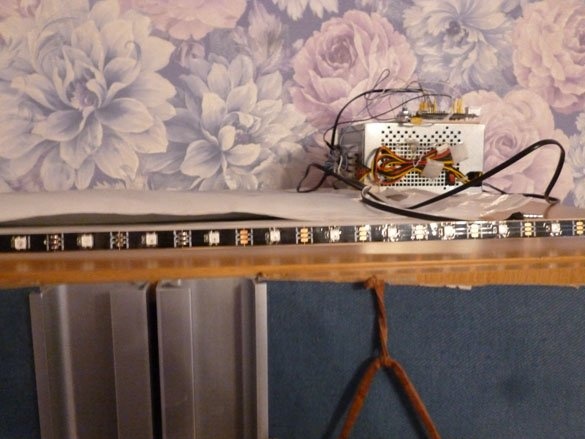
As I said, the WS2812 tape is gluttonous, you need to approach the choice of a power supply thoroughly. We need a 5 volt stabilized one, we select the current strength depending on the number of LEDs, it is better to take with a margin. I recommend, for example, such a 3 A:

Specifications are written on the power supply housing:

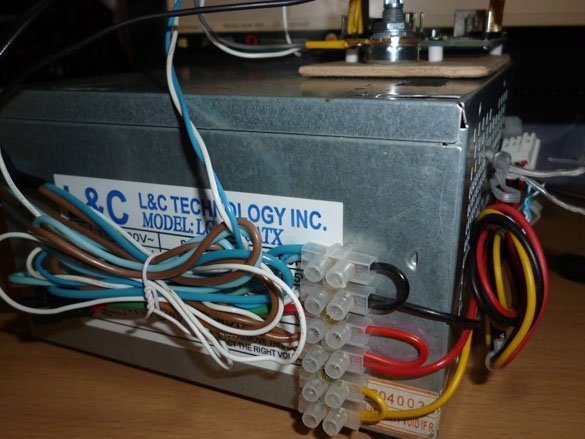
I plan to further expand my color music, so I don’t give up on taking a computer power supply with the connected contacts:
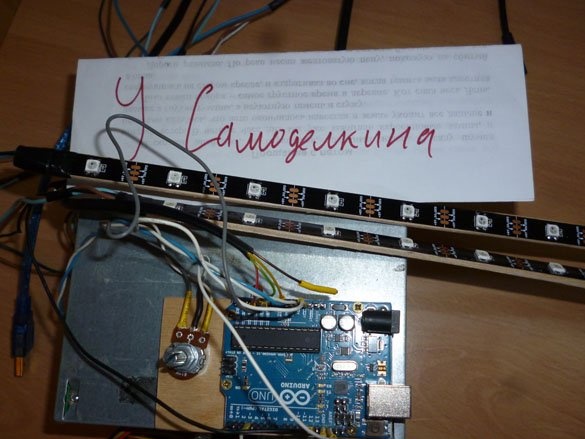
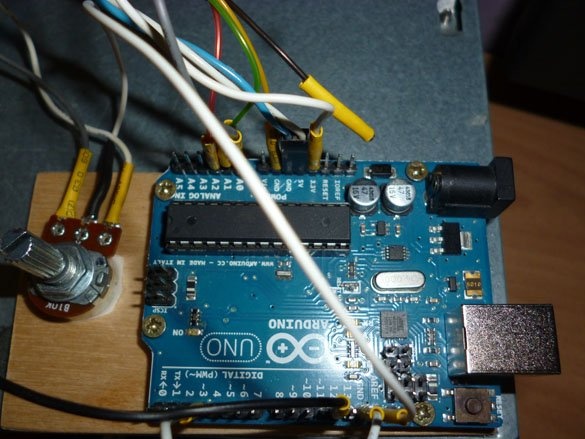
Step 3 Arduino and wiring diagram.
Almost any Arduino compatible board is suitable for implementing this project. I had Arduino Uno at my fingertips. Now we need to collect everything according to the scheme. I will take the scheme from my ideological mastermind AlexGyver –ra:
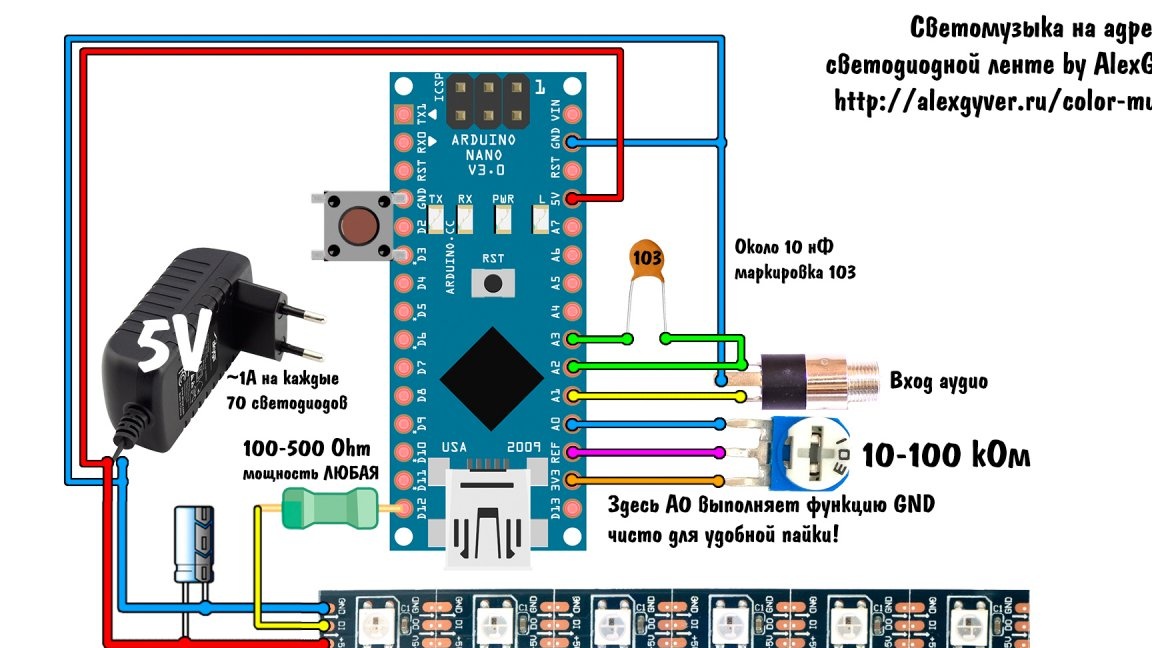
A potentiometer is needed to set the reference voltage to measure the level of the audio signal. Contact A0 is used as GND (for Arduino Nano it is more convenient to connect). You can do without a potentiometer by turning on the use of the internal reference voltage in the sketch.
Contacts A1, A2 are used to connect the audio signal, do not forget to connect the Arduino GND contacts and the audio signal wires.
Button, used to switch modes, connects to pin D3 Arduino.
The connection of the socket and contact A3 through the capacitor is necessary for some modes to work. You can learn more about operating modes on the page AlexGyver:
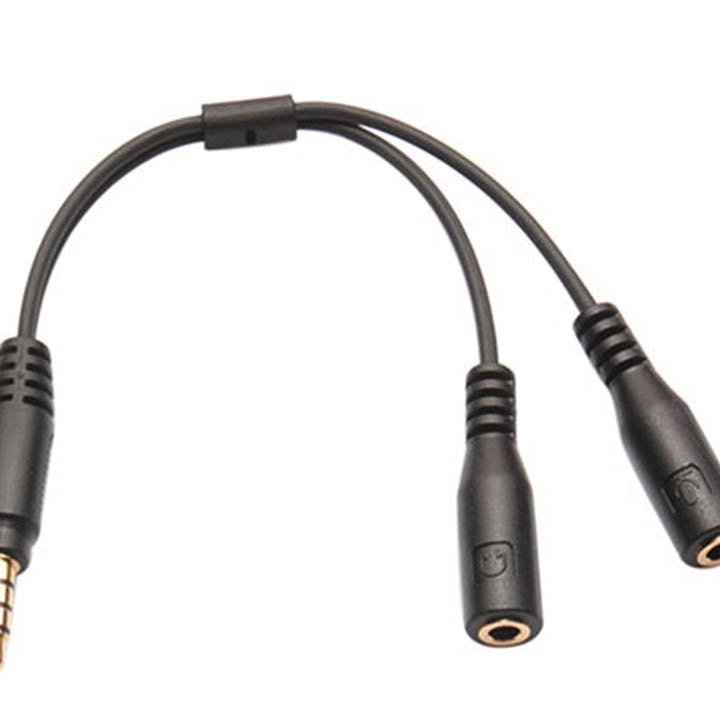
So that we can listen to music, and our color music work, we need to separate the audio signal. You can do this using a tee:
You can also connect speakers to the audio output on the motherboard, and color music to the headphone output. The main thing is that you can’t connect the color music to the output after the amplifier, there is too much signal level for the Arduino.
I built everything based on Arduino Uno and placed it on the power supply:
Step 4 Editing, customizing and filling the sketch.
To get started, you need to download the latest version of the Arduino IDE development environment. Best with official site.
Choose what is more convenient for you: download the ZIP archive and unzip it to the right place or download the installation file and install the program. No difference.
For the sketch to work, we need the libraries: Adafruit_NeoPixel-master, EEPROMex, FastLED-master, FHT, GyverButton, IRLremote-master and IRremote. The easiest way is to download them all together and the necessary versions from the site AlexGyver.
Download the whole archive. After unpacking the archive, we rewrite the entire contents of the “libraries” folder to the folder of the same name located in the folder with Arduino iDE installed.
Launch the Arduino IDE. Open the sketch from the previously downloaded archive. The sketch we need is in the “firmware” folder. Open "colorMusic_v2.10". For it to work correctly, you need to tweak it a bit, or rather set the correct settings.
Sketch provides for the possibility of using an infrared remote control.If you wish, you can find all the necessary instructions on the website of AlexGyver. In my opinion, the remote control is not required. Therefore, it will configure to work without a remote control. We are looking for a line:
#define REMOTE_TYPE 0There should be a "0".
Arduino settings will be stored in non-volatile EEPROM memory. To avoid further errors, reset all settings. Find the line:
#define RESET_SETTINGS 0First we put “1”, flash the sketch, then put “0” and flash it again.
In line:
#define NUM_LEDS 36Indicate your number of LEDs.
After starting the color music, proceed as follows: first you need to configure the lower limit of the sound level. To do this, pause the music, hold and hold the button until the diode on the Arduino board lights up.
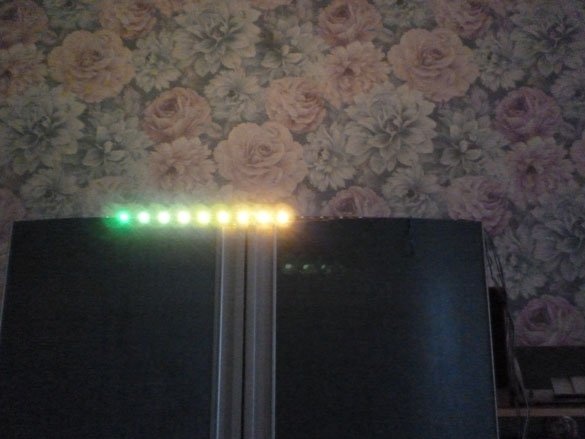
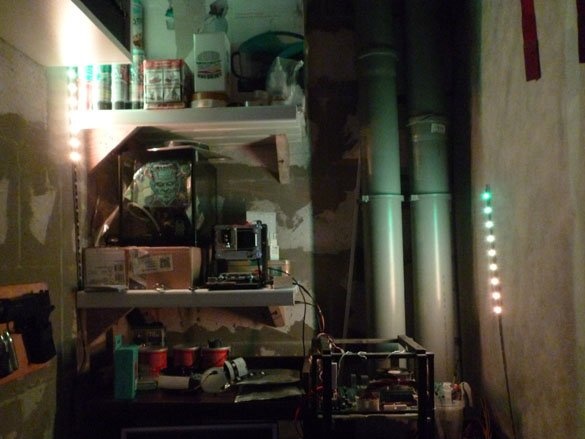
Options for installing color music mass. I installed the power supply and Arduino on the cabinet. The power supply is far away so that it is not visible, and the tape is directed up:
You can also install tapes on the sides of the computer table:
Then we turn on the music and see if all the tape lights up when the music is working. If the tape works only at the very beginning, or vice versa, always turn the potentiometer on. Empirically, we make the whole tape work. All the luck in homemade and great ideas.