

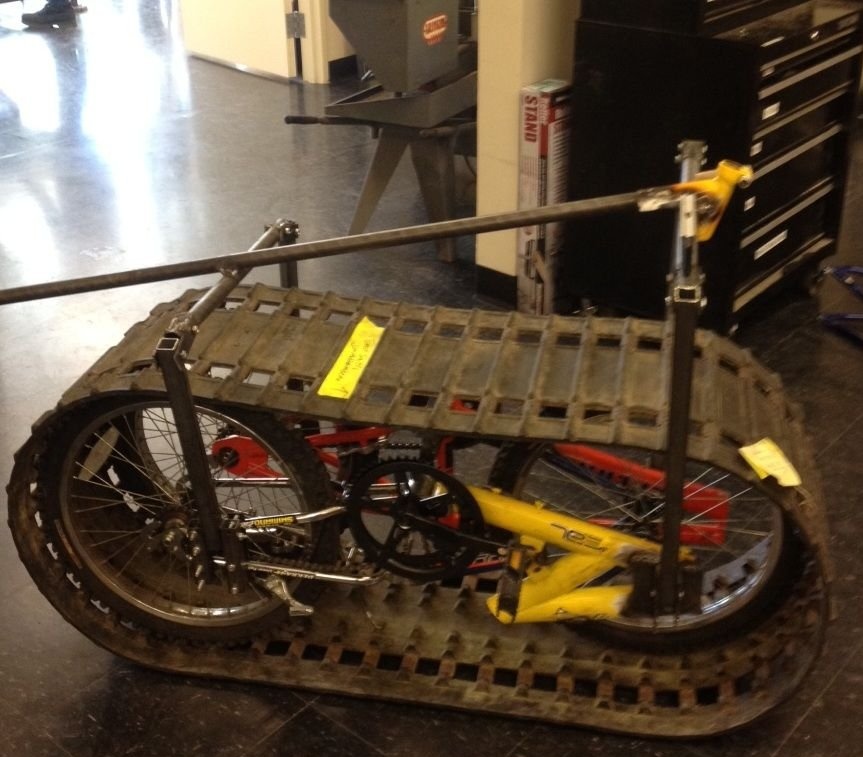
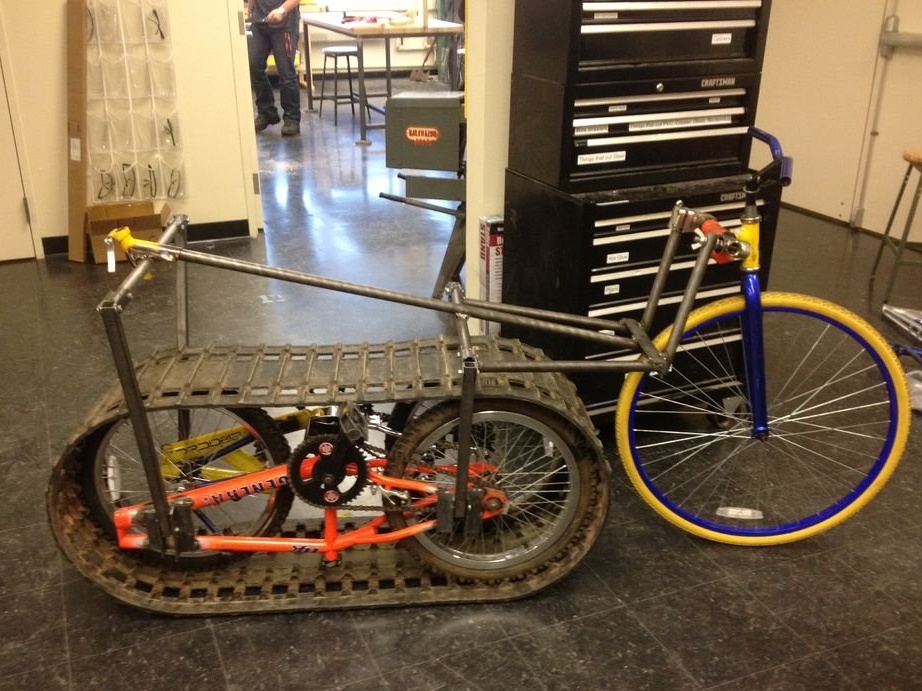
Inspired by the “American Chopper” show on Discovery and seeing my neighbors drive their snowmobiles, I decided to create a crazy combination of such a motorcycle and a snowmobile with a pedal drive. I designed and made this bike in three weeks using the details of three broken of bicycles, steel pipes and angle profile, as well as a crawler track from the 1990 old Polaris snowmobile.
This is a fun way to dispose of old parts. motorcycles, creating from them a completely new car. The resulting 2-meter handsome is something! Combining bicycle, motorcycle and snowmobile parts in one car is another adventure!
The main tools involved in the project are a MIG welding machine and a conventional hacksaw, as well as a standard set of wrenches and screwdrivers. This is an excellent master class for lovers of homemade bikes or snowmobiles, who have a couple of unnecessary “old women” lying around, used materials and a bit of free time.
Step 1: think through the insides
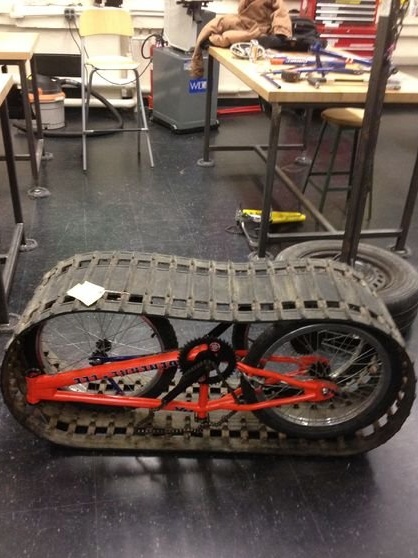
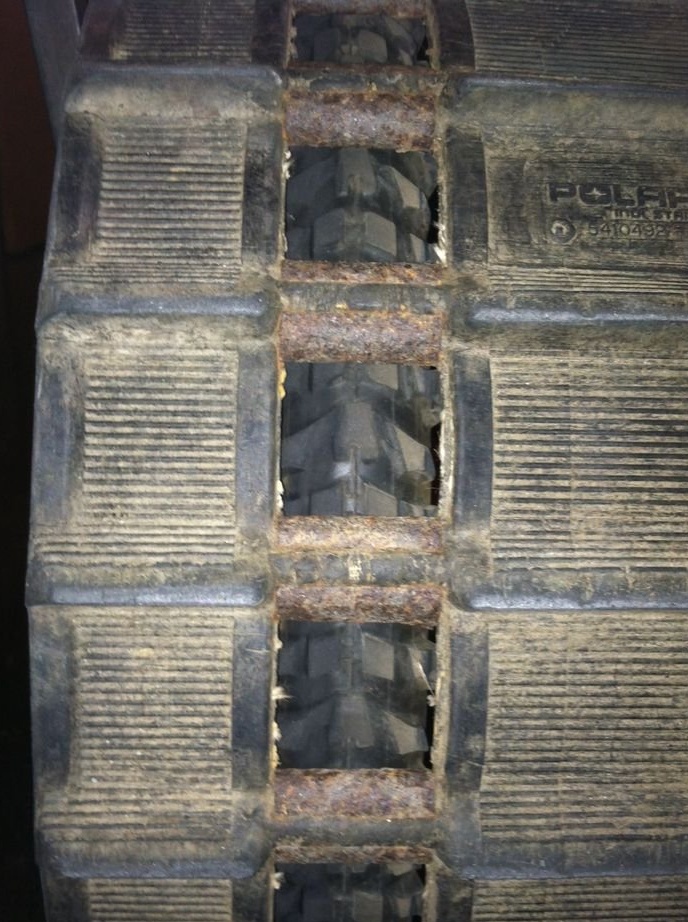
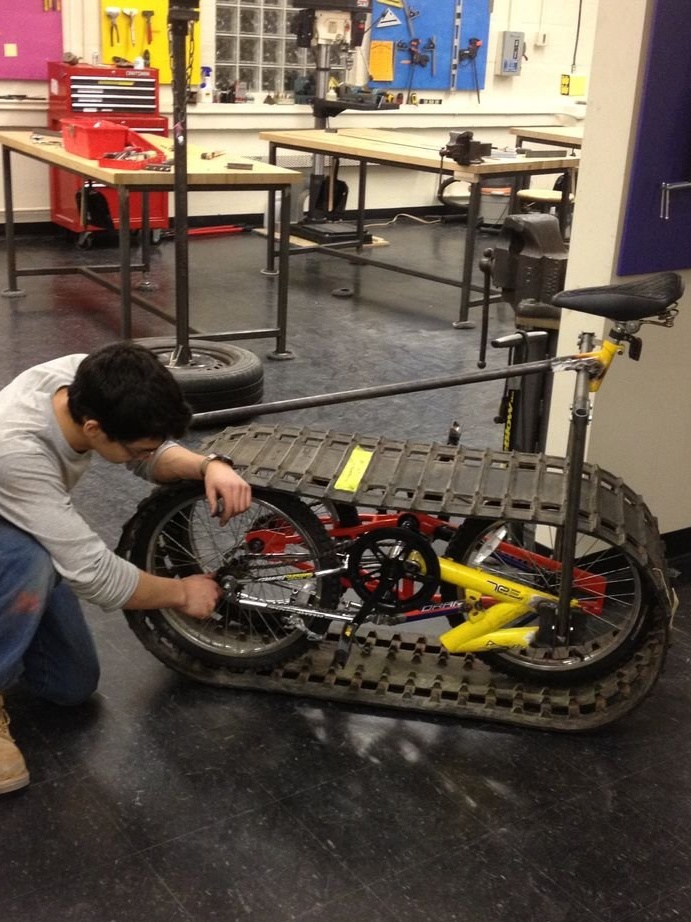
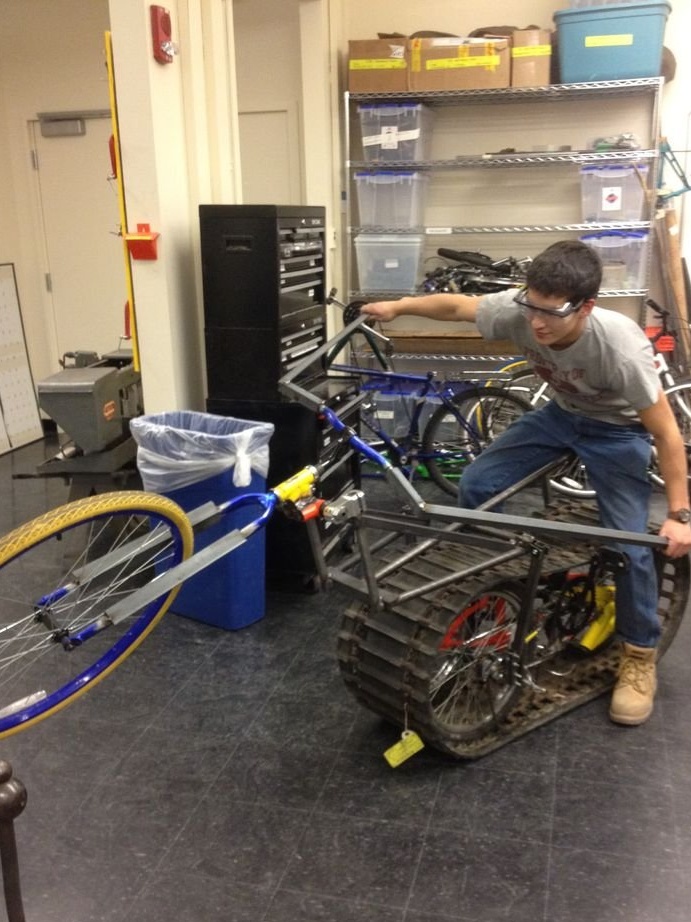
After the necessary tools, spare parts and as many bicycles as possible are assembled in one place, begin to think about your way of arranging the caterpillar track and the bicycle frame. Children's mountain bikes with a rim of 20 inches fit perfectly into the snowmobile track, and embossed tires sit tight in the gap where the chain gear should be. I found that the limited space inside the track is better for a 3-wheel configuration than a 4-wheel one.
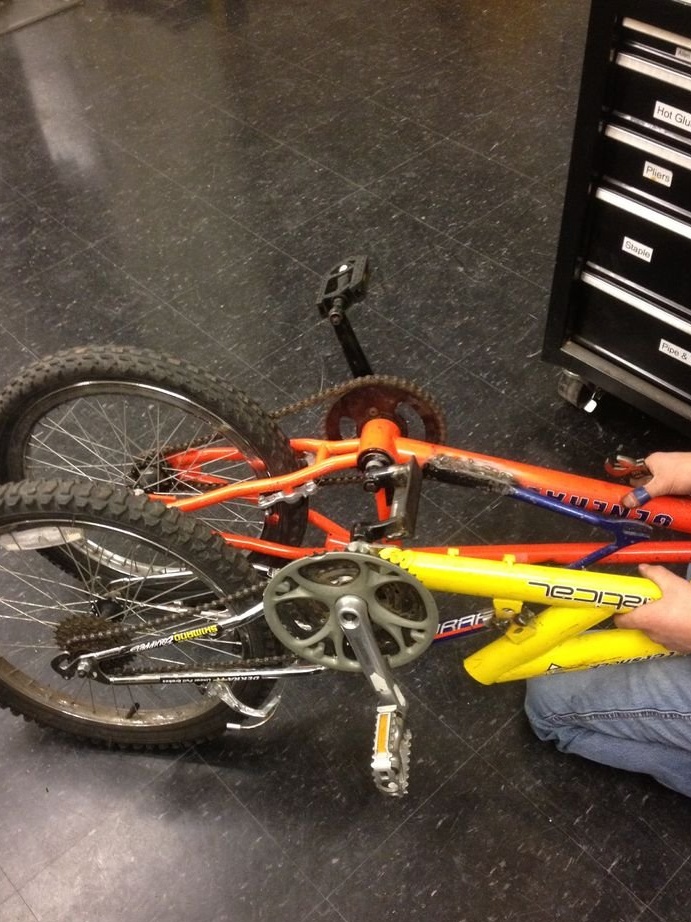
Start by dismantling the two bikes to assemble the inside of the future snowmobile. Disassemble the large ones to the frame with the pedals. trim the frames so that they fit well inside the track and do not interfere with rotation. Frames will be parallel to each other inside the caterpillar track.
It is necessary to connect the two frames together by welding the lower and upper feathers of the additional frame to the inside of the two-wheeled frame. The third wheel should also fit snugly between the track. When welding frames, you need to clean the paint from the metal surface. * Make sure that the assembled construction of the frames and wheels fits snugly on the tracked track, so that when the wheels are inflated, the tires adhere well to the track without any additional tools.
Step 2: make the drive
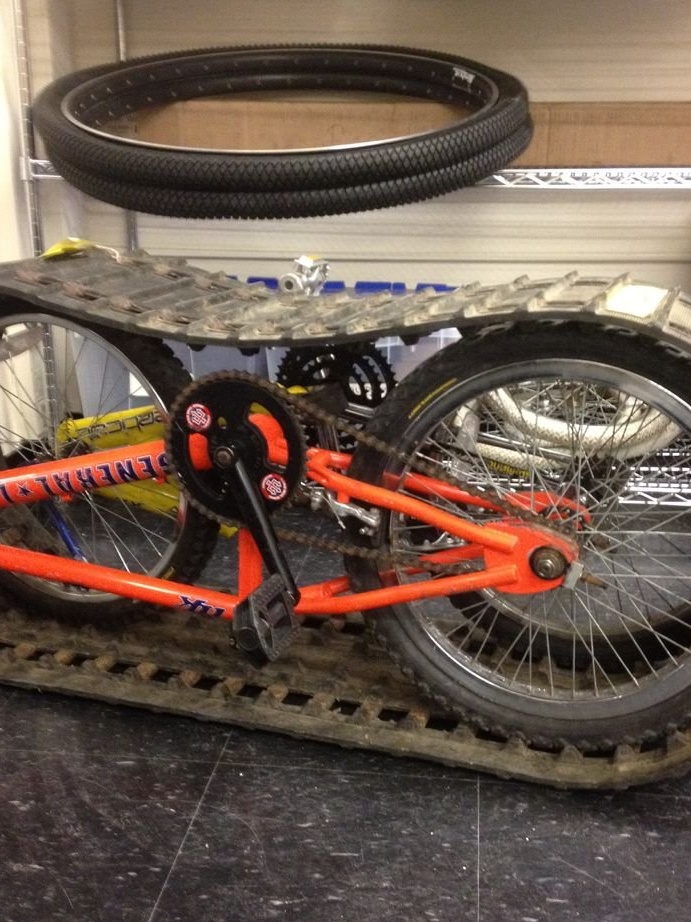
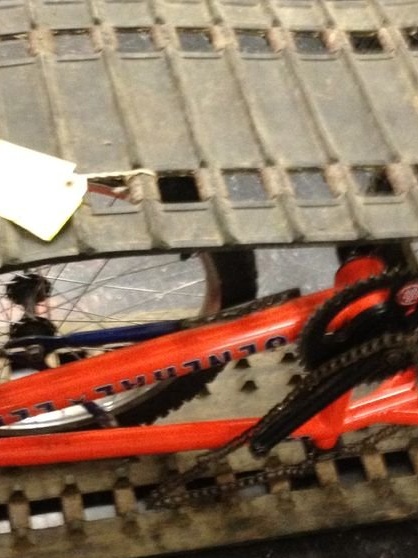
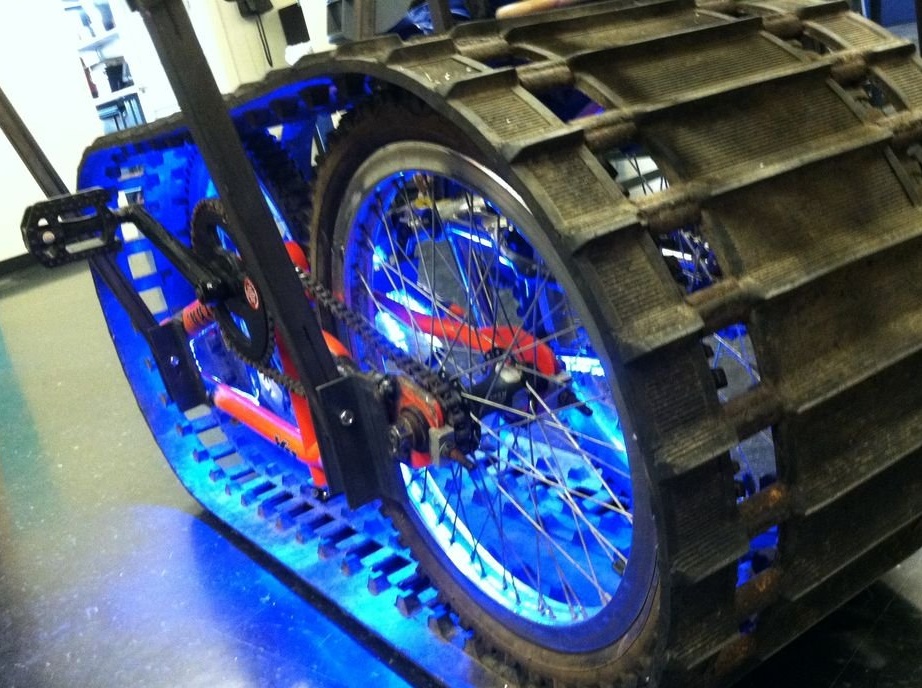
Initially, I wanted the pedals to be ahead of the track.But for the convenience and simplicity of the design, I decided to use the traditional pedal design, placing it inside the caterpillar track. Of course, the pedals will have to be twisted on both sides of the wide crawler track, which can create inconvenience. But in reality it turns out better than it seems: in an upright position, the pedals go beyond the upper edge of the track, so it’s quite convenient to turn the pedals. Since we have two frames, both pairs of pedals should be perfectly aligned with each other, since when turning the pedals one single axis will rotate. Also, the distance from the system to the axis of the drive wheels must be the same so that both wheels rotate the track together.
My two frames did not fit perfectly together, so I had to embed new dropouts into one of the frames in order to correctly connect them together. If you, like me, use two unequal frames, you will have to tinker with the connection. This is most conveniently done by dropouts.
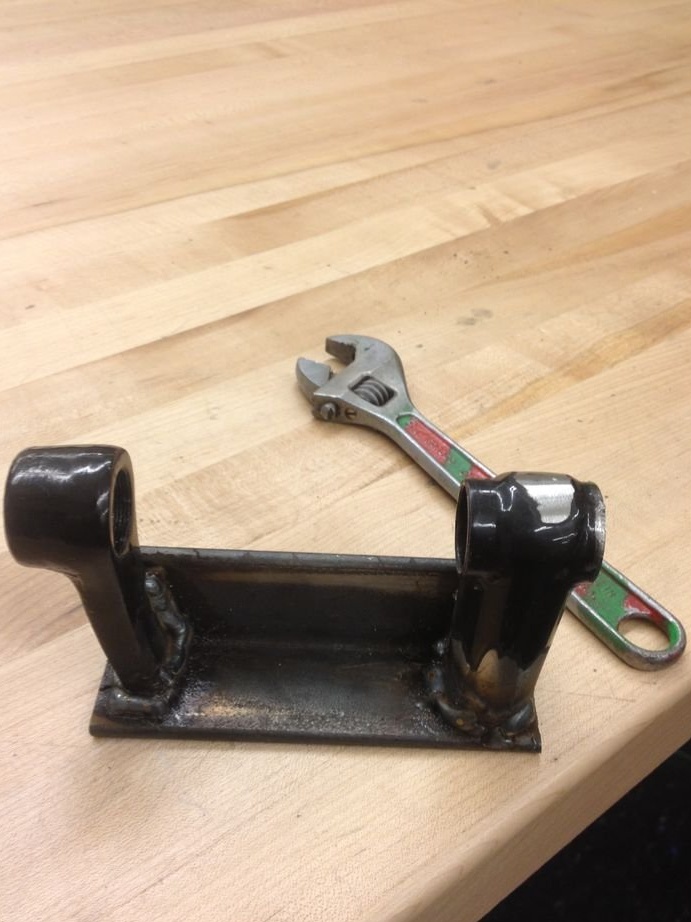
When everything is fitted, you need to remove the two internal pedals and cut off the levers, leaving a small fragment for welding. You can connect two cut off internal levers by welding a piece of a metal corner. This connection synchronizes the two frames when pedaling. The connection must be reliable, so tightly weld the corner to both levers. The gear ratio in both frames must be the same so that both drive wheels rotate synchronously.
Now we have something like a tank monocycle :)
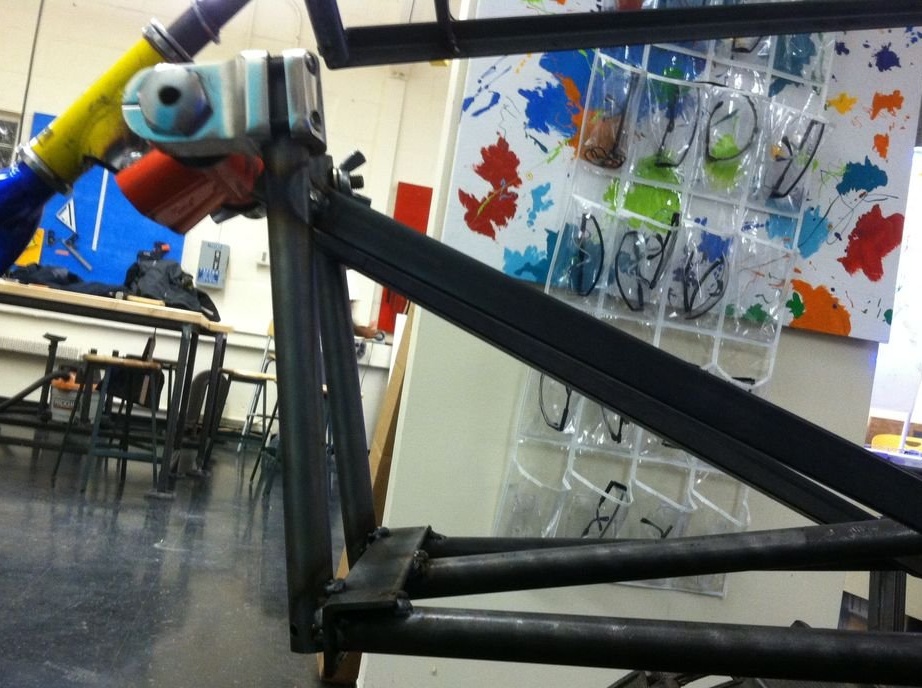
Step 3: make the frame
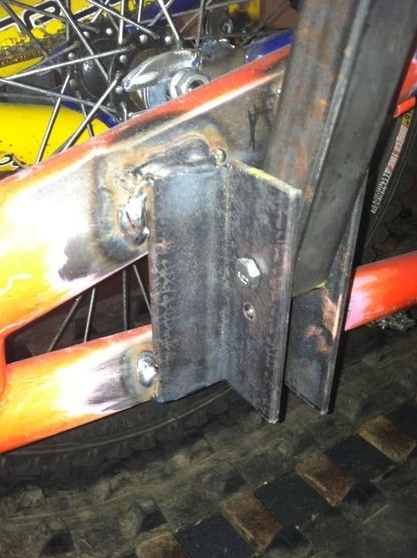
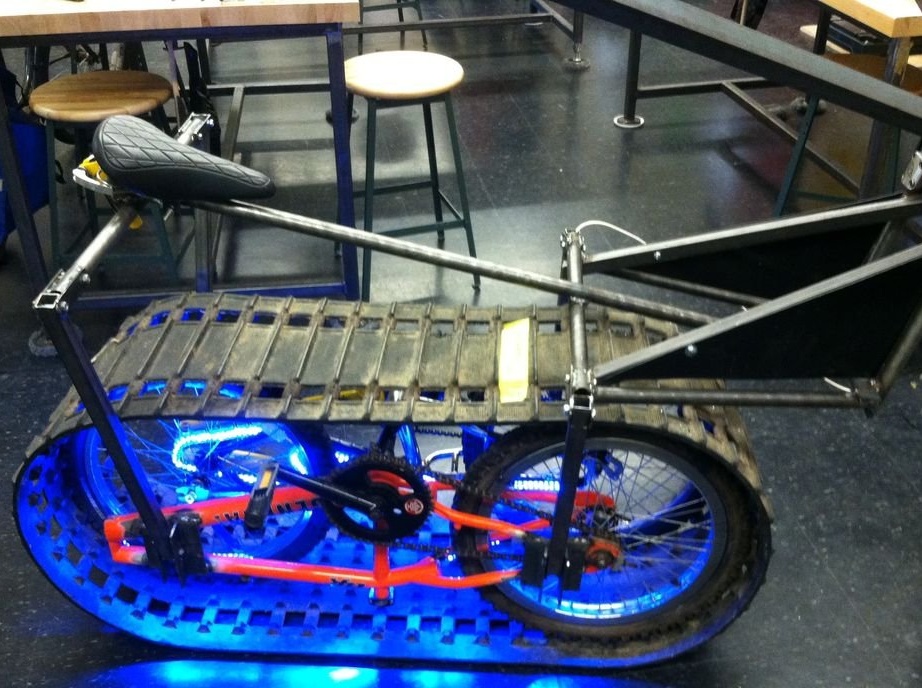
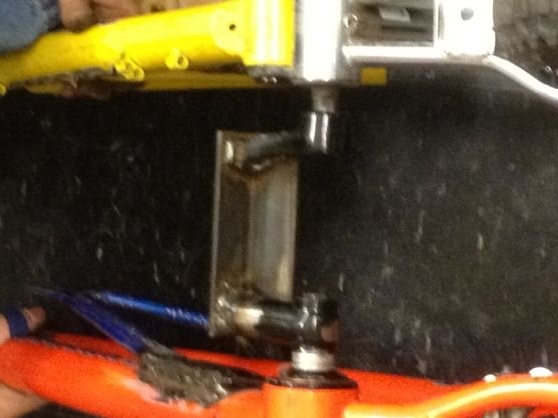
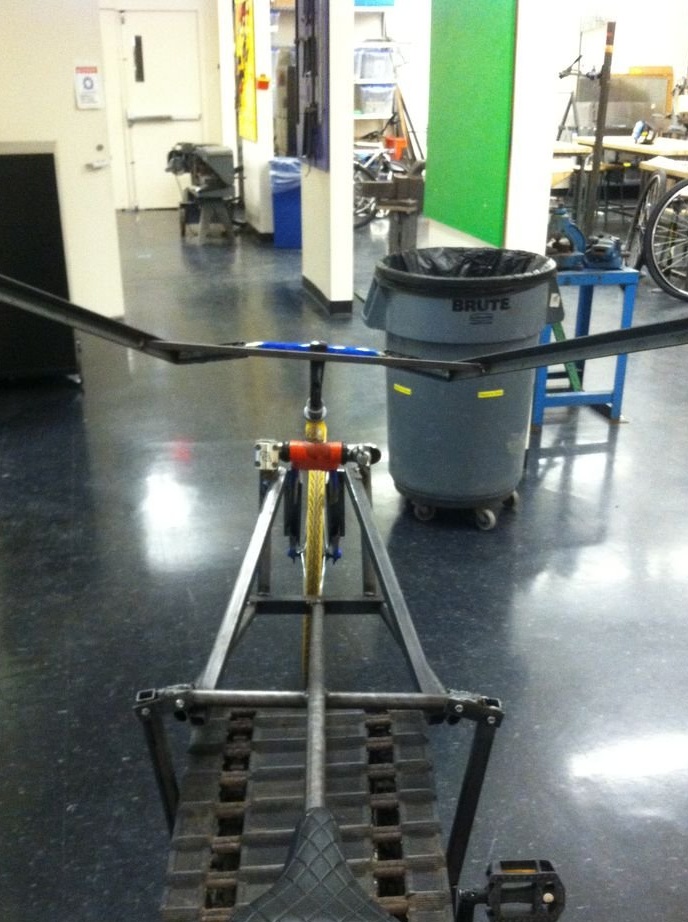
Now you need to construct the last, outer frame to attach the seat and steering wheel. I just welded the segments from the steel angle profile to the frames in the places where the pipes were attached. Steel pipes will exit from them to the seat mounting axis. Then you need to attach the pipe sections in front and behind, as shown in the photo. Cross pipes are needed to secure the seat and steering rails. They are connected by a long transverse pipe. This design allows you to drill holes in the profile and pipes, to find the optimal position for parts of the frame. Can be bolted, adjust the position of the pipes. When everything is debugged, it is enough just to weld the bolts so that the frame becomes solid.
I left several mounts un welded, so that the upper frame could be untwisted and removed as a separate modular unit, in case you had to remove the track for repair.
The fastenings of the vertical tubes to the bicycle frames must be strong enough so as not to break under the weight of the rider. Neither should they touch the chain or other moving components inside the track. It is most convenient to fix the seatpost of the frame at the intersection of the horizontal beam and the long transverse pipe.
Step 4: Steering gear
Probably the most difficult moment in the construction of a snowmobile bike is to find a method of convenient steering, since it will have to be driven by a large mass, moving a caterpillar track of a large area.
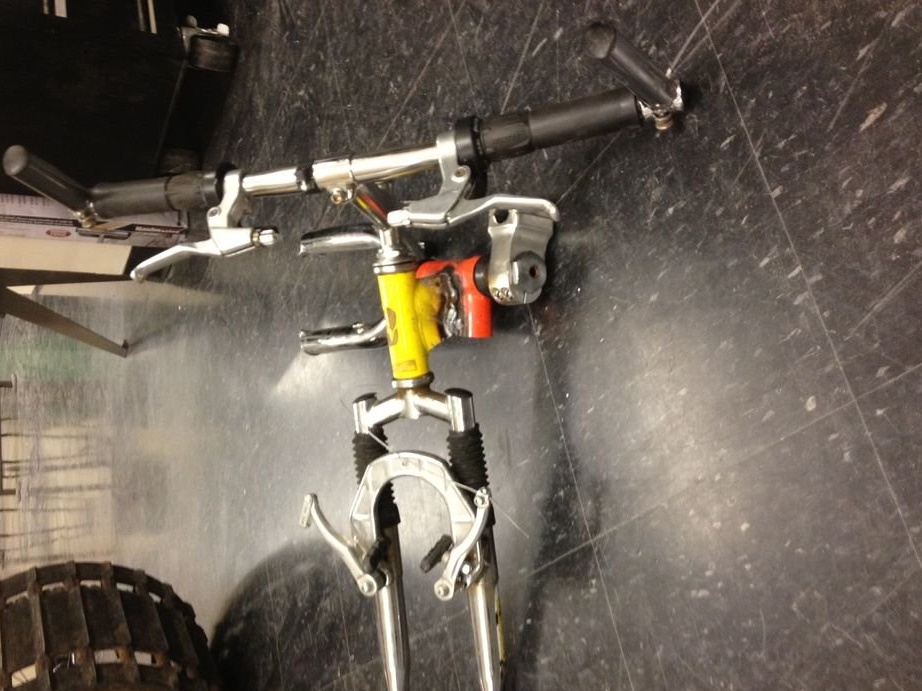
The movement of the bike is complicated by the presence of a heavy truck with strong friction on the ground, as well as a combination of the truck with a conventional front wheel. And if you increase the weight and increase the friction of the wheel on the ground, this will make the bike even more difficult to manage. The bike is very heavy, so do not expect from it pokatushek with a breeze. I decided to use the front frames from the disassembled bicycles to make the steering gear as lightweight as possible.
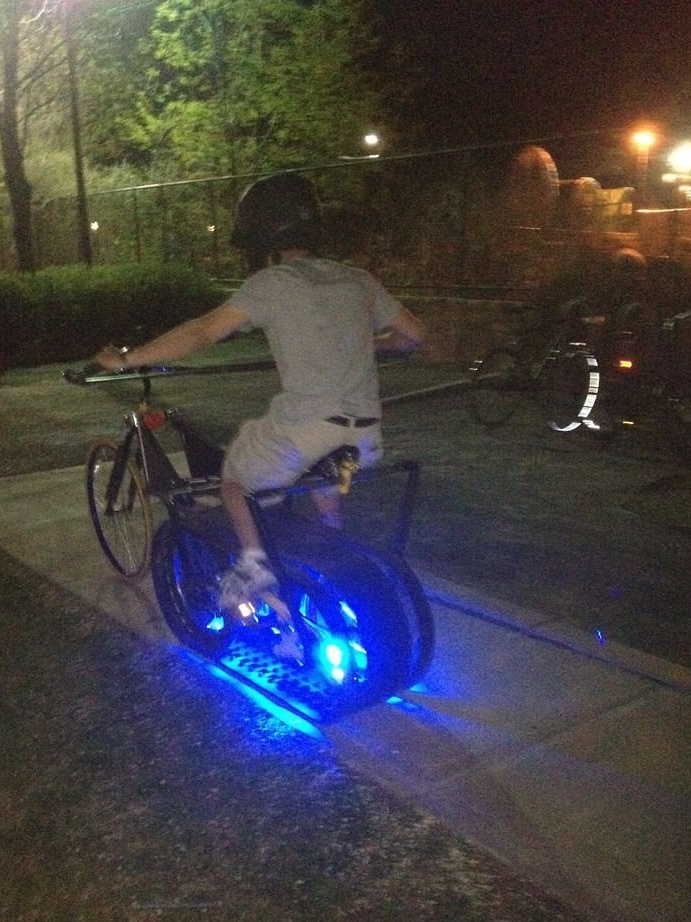
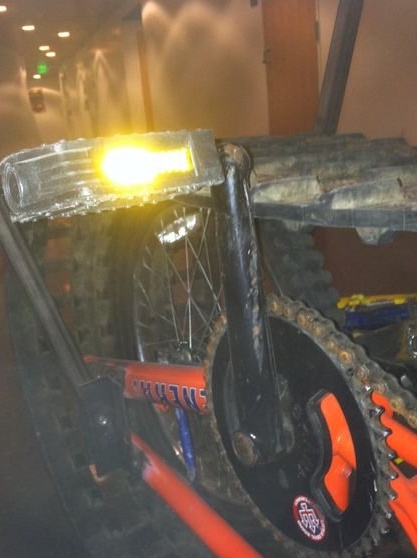
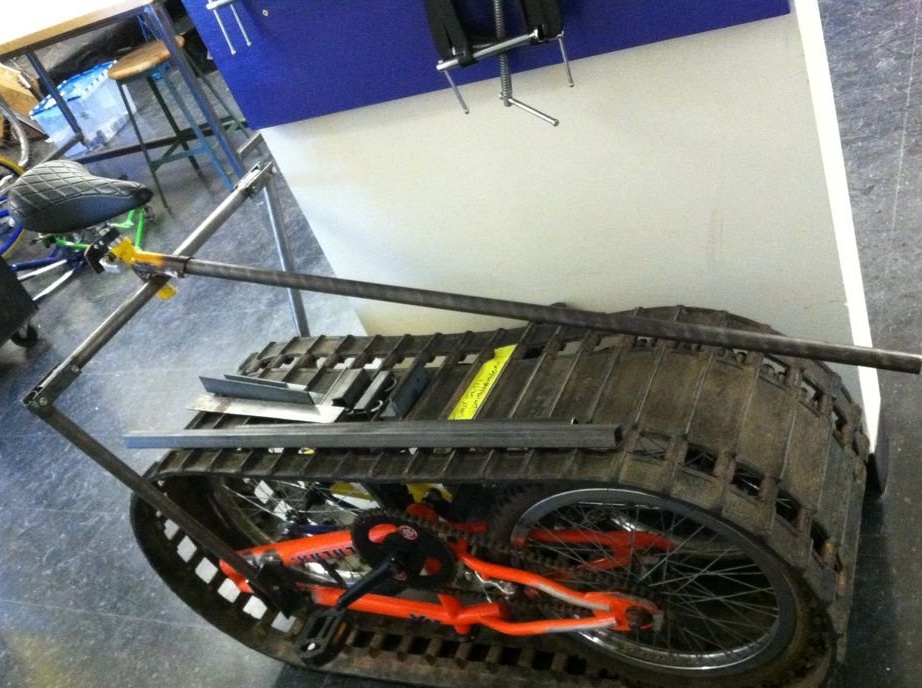
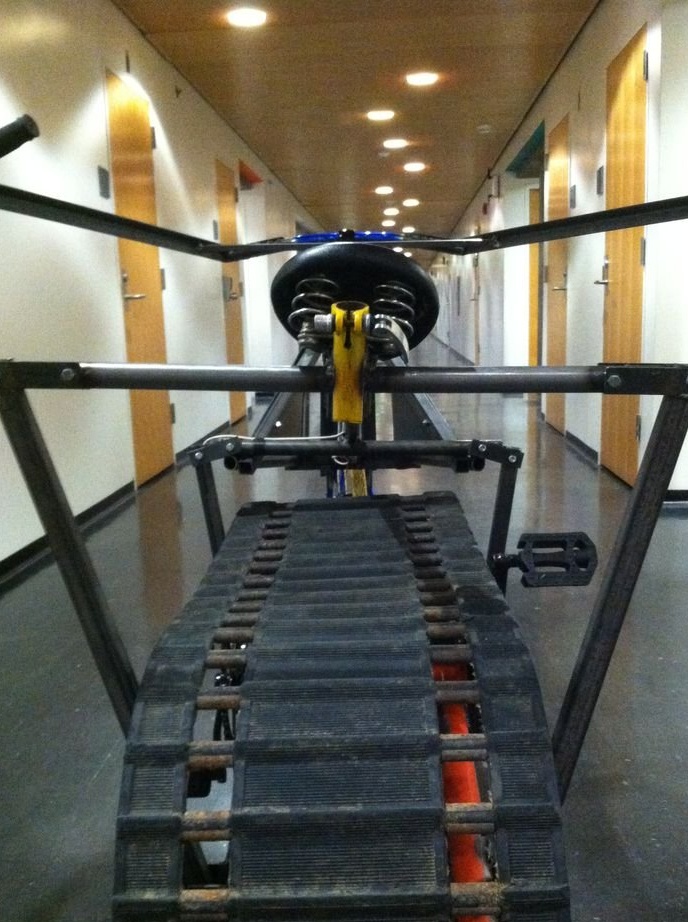
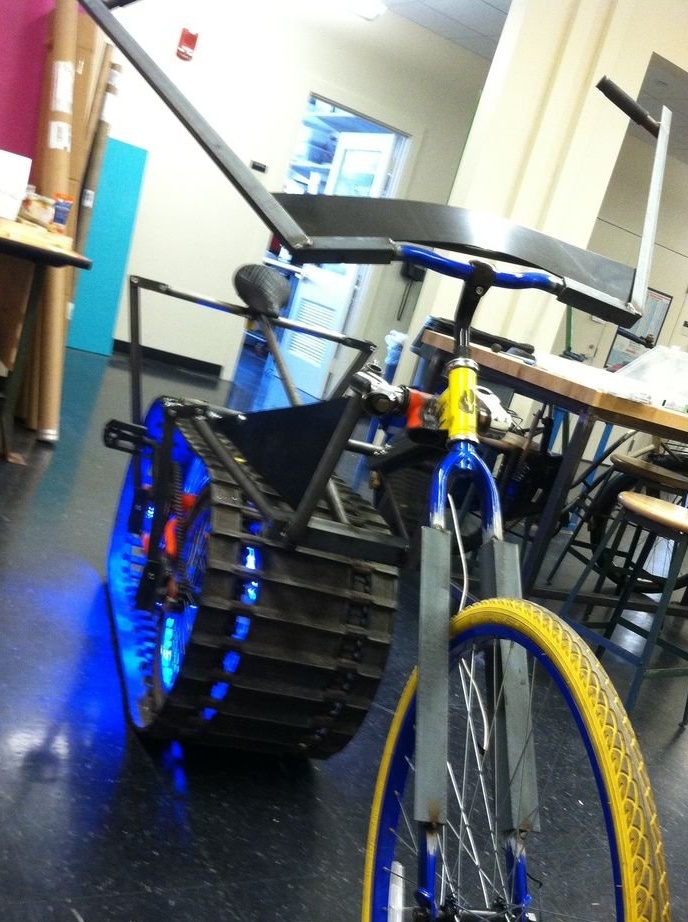
I arranged the two head tubes so that the steering wheel could rotate in the traditional way to change the direction of movement, as well as on the horizontal axis, so that the front wheel could be freely raised and lowered. This control allows you to redirect the weight from the track to the front wheel for better control of the bike. I extended the frame by adding a steering wheel mount from two steel corners (see photo).This moved the front wheel away from the track and the bike became more than 2 meters in length.
Adding long corner profiles, the steering wheel in the style of Ghost Rider allows you to better control the bike while sitting on the back of the seat and provides enough leverage to lift the bike (front wheel) while sitting on it. Such an unconventional method of mass transfer during control requires getting used to, especially at bends, but you can adapt to this.
Step 5: Final touches


In the end, it’s useful to go through the entire structure and strengthen the weak points so that no welded joints break. In the front frame, this danger is most likely due to the additional load from the steering wheel and raising the bike. I also did not hold the brake cable to the steering wheel and just brake with my feet. I think adding a foot brake would be very helpful.
Well, in the end - what kind of bike without diode illumination? The backlight adds to this beauty tank and makes it suitable for driving at any time of the day or night, in any weather!