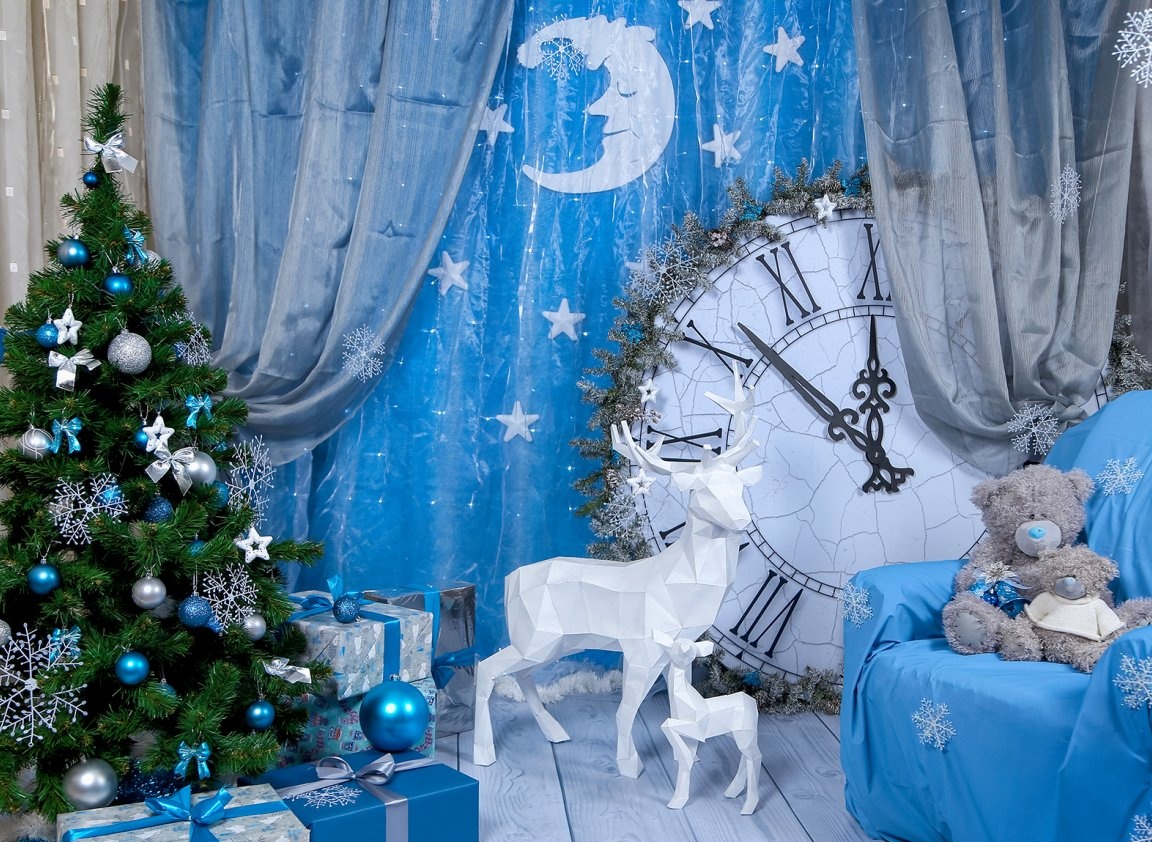
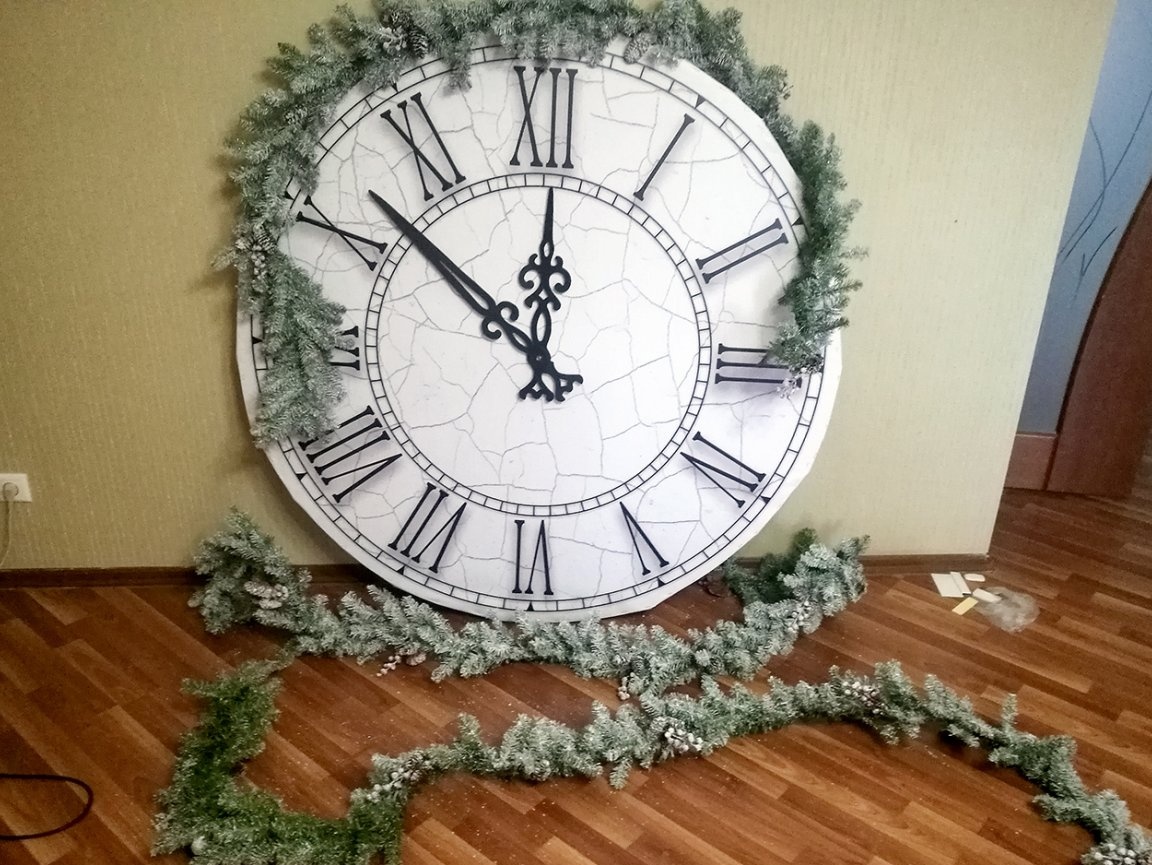
I’m a photographer for the entourage of the New Year’s location this year, I needed a large watch (1.5 meters)
Was needed easy to move - but massive in appearance, and at the same time quite robust construction.
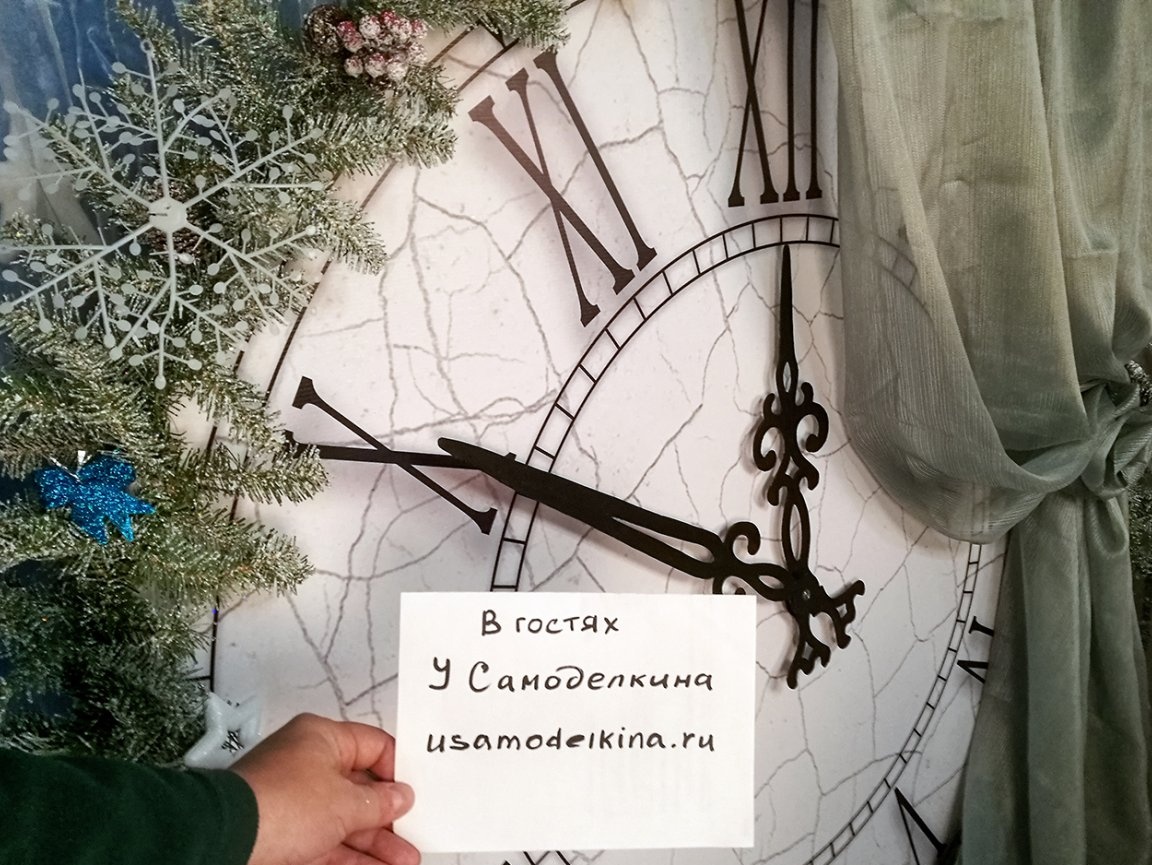
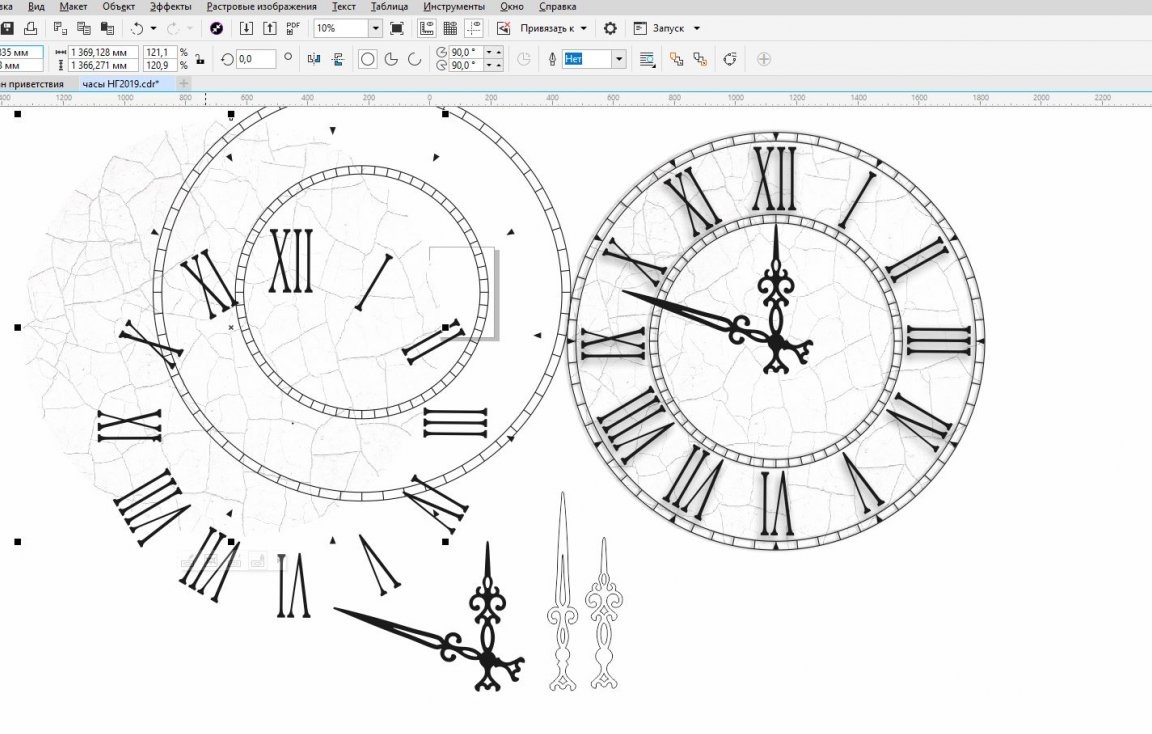
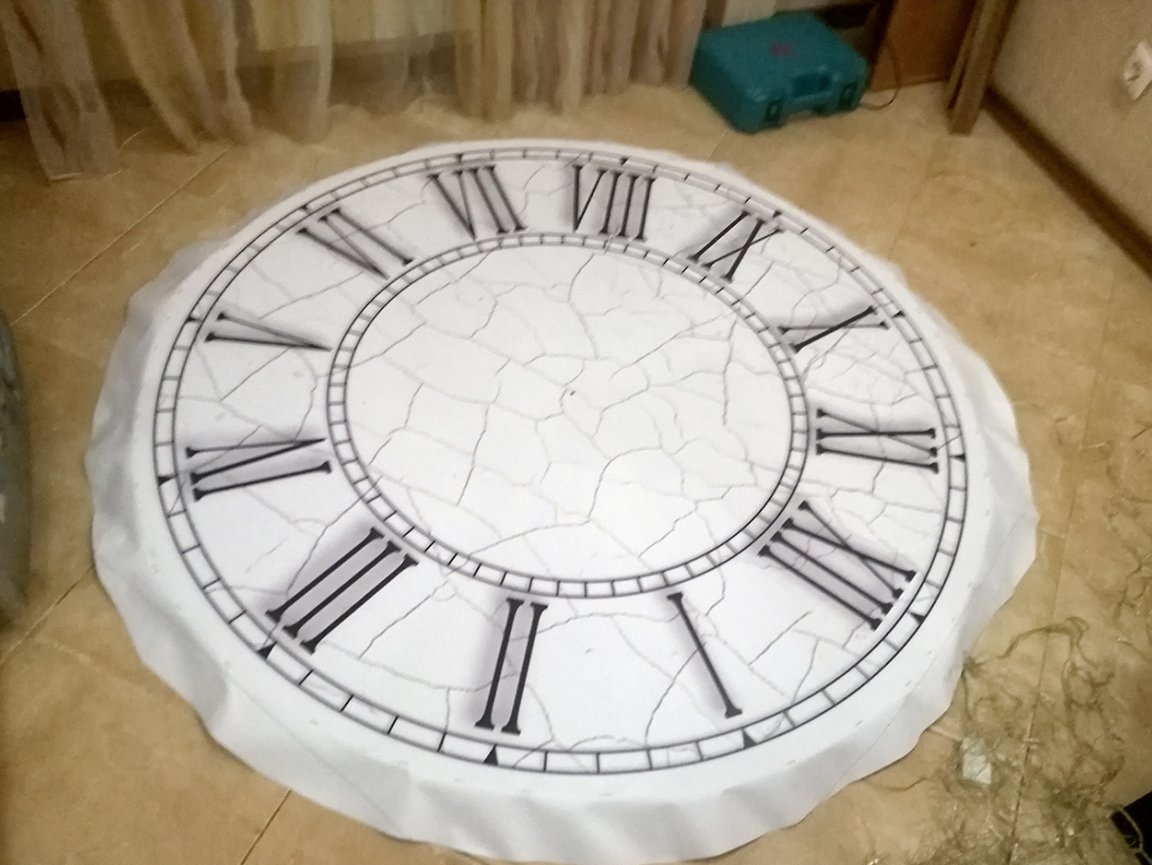
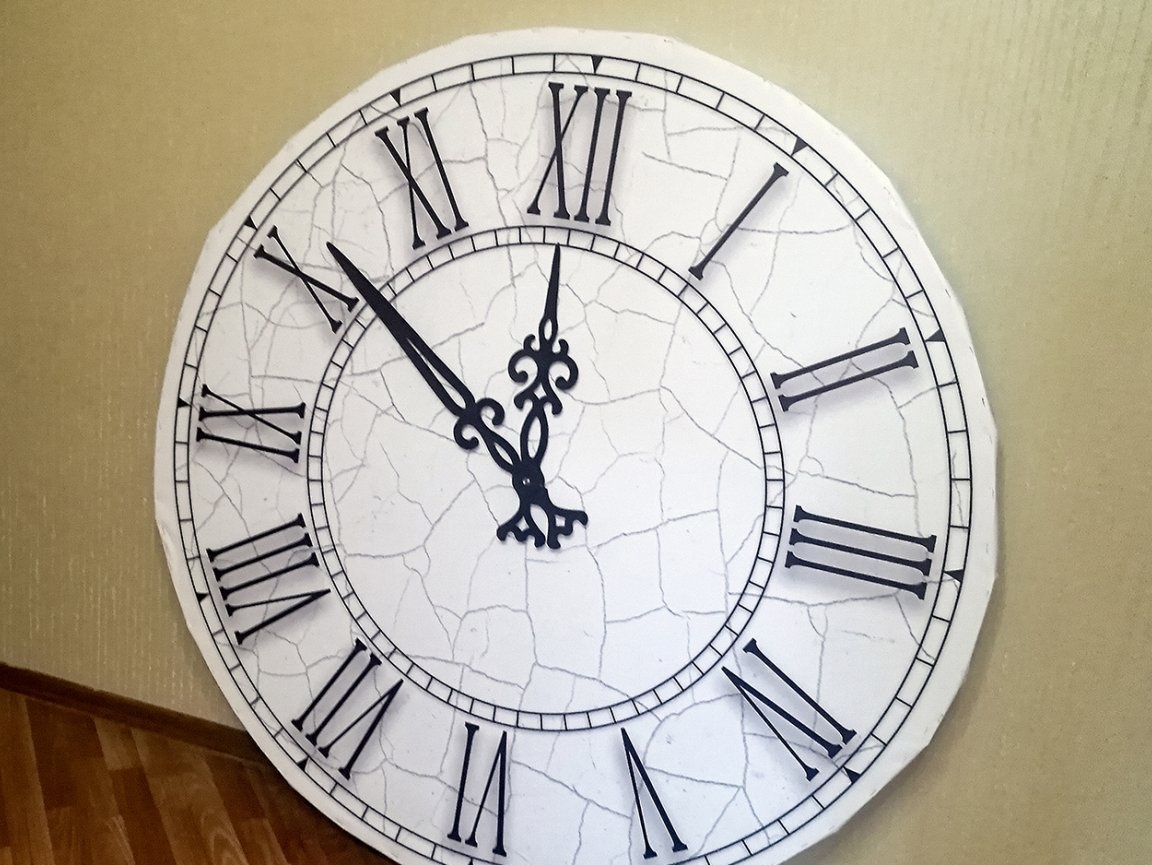
I immediately decided on the front part, its basis was an advertising banner, onto the surface of which was transferred and printed my design of the dial.
I prepared the layout of the image of the dial in the vector editor CorelDRAW. In it, I drew the most suitable dial in style.
Background under Roman numerals it was decided to do in the form of cracks in the stone, and adding “kraken” I “aged” it, making it more stylish.
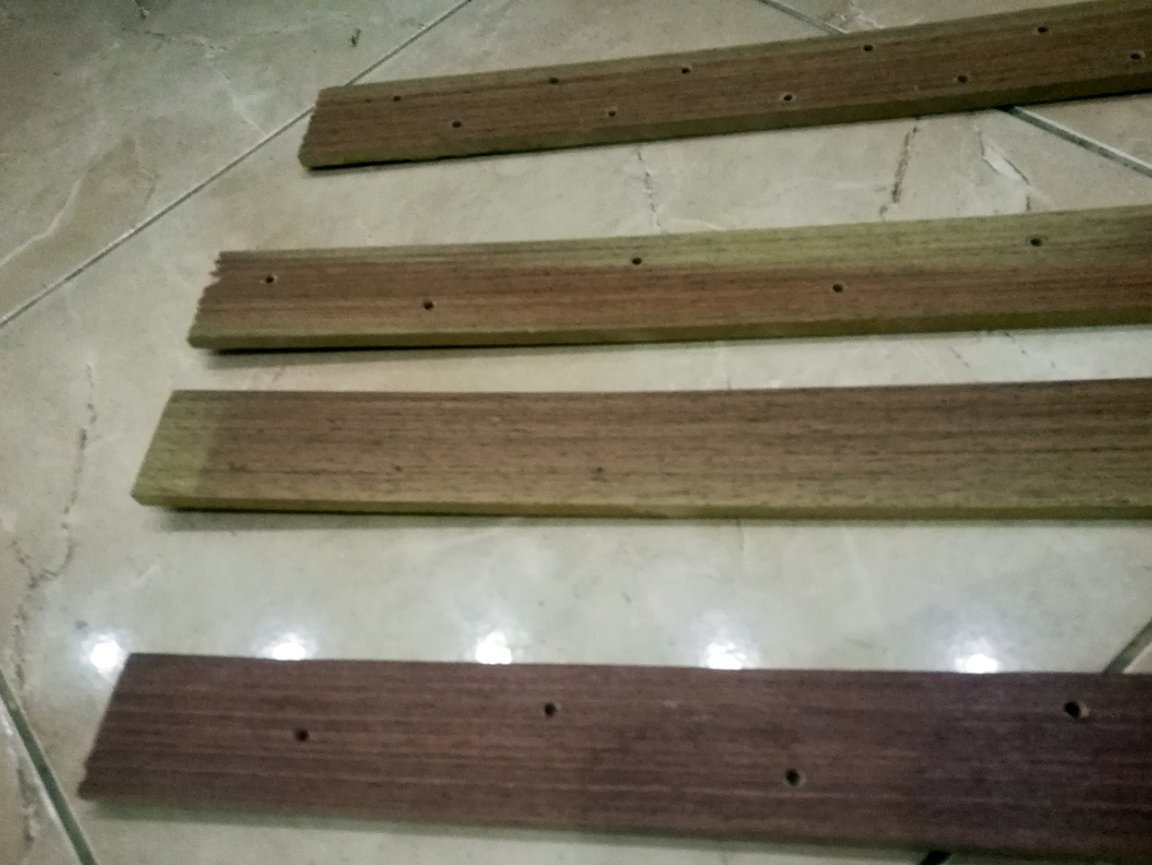
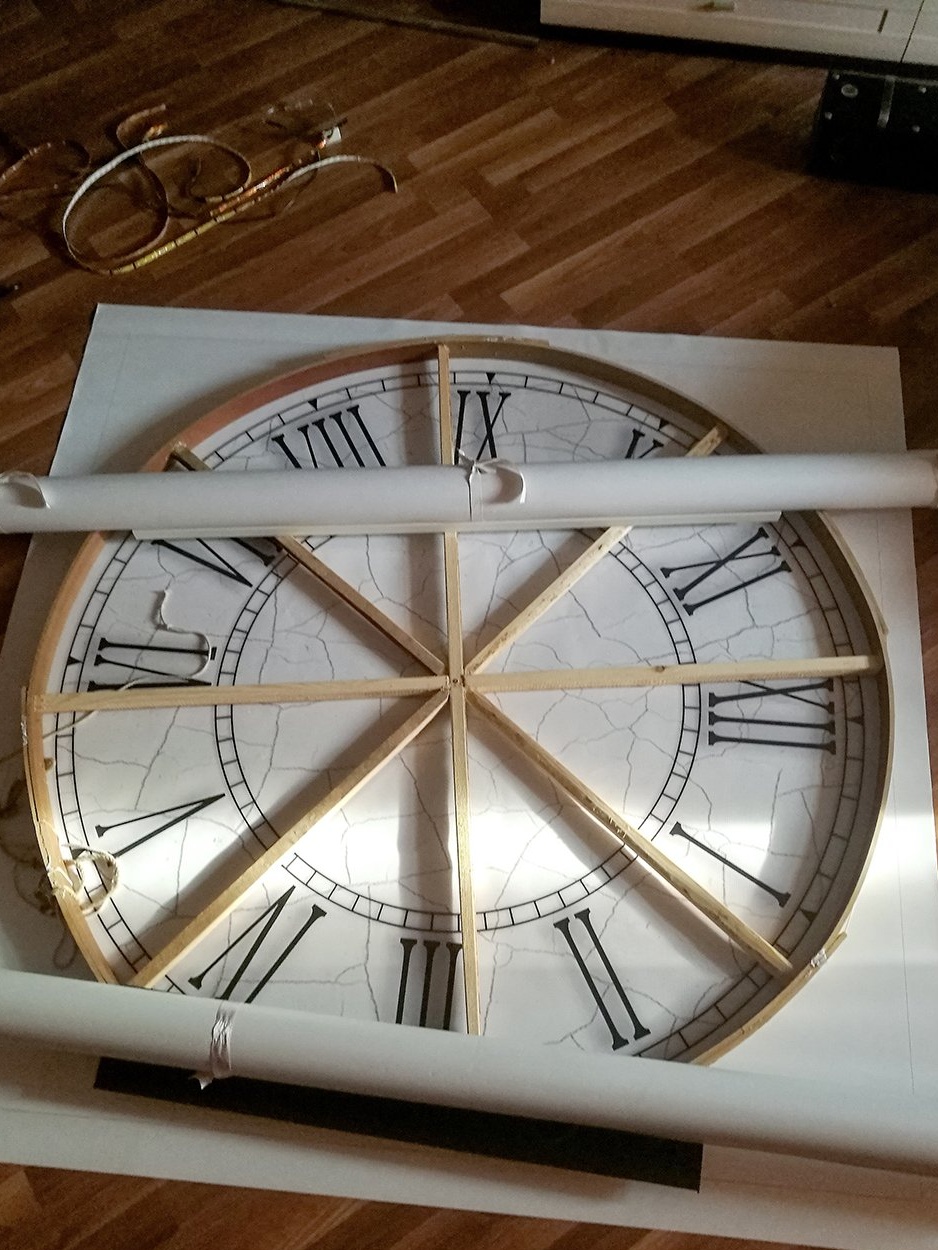
With the frame, it turned out to be much more complicated. After going through the possible options, I opted for stripes MDF, 8 mm thick and 70 mm wideremaining with me after the door work.
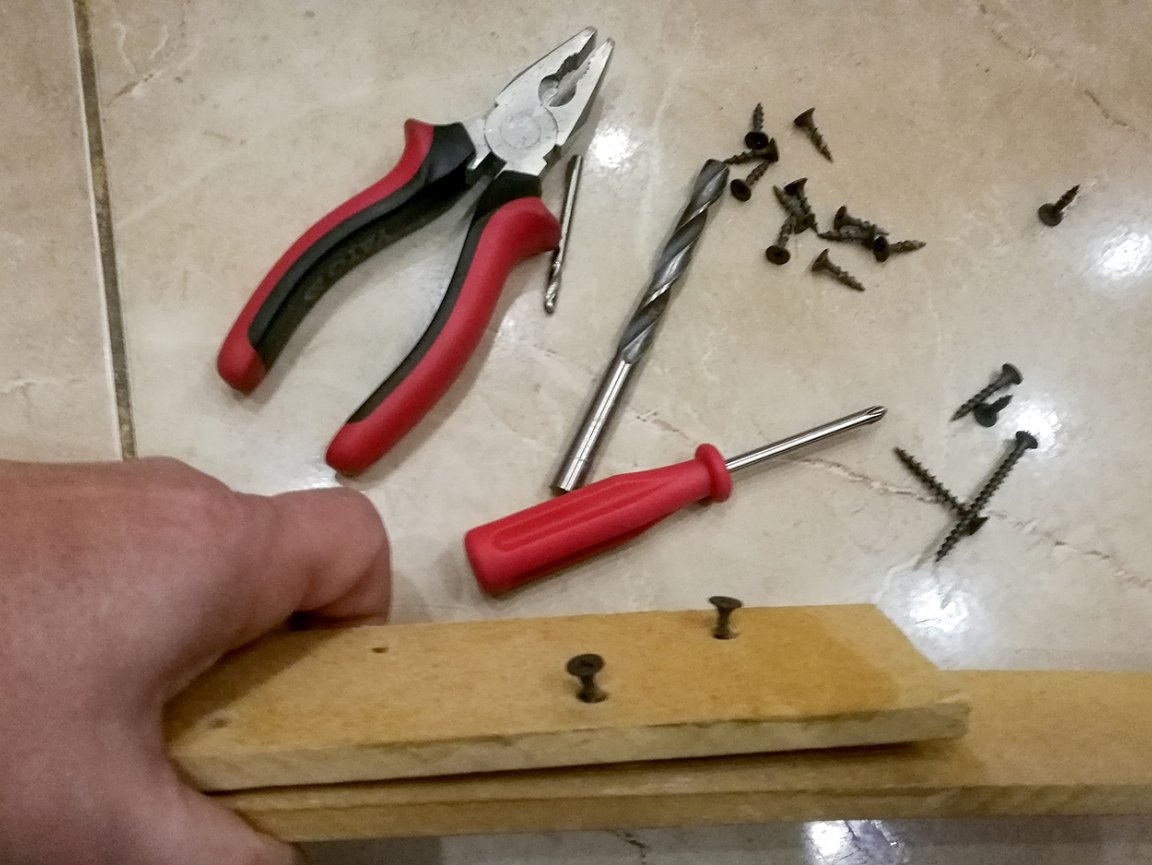
I had 4 strips, 2000 mm long. According to my calculations, with a bending radius of R = 775 mm, the strips should have been easy to bend, without much risk of breaking. According to my plan, I had to create circle, diameter D = 1550 mm. Dock the ends of the strips - smearing glue on the wood, and fasten with screws on the outer diameter, pieces of the same MDF (in these segments were previously drilled holes staggered at a distance of 60-70 mm)
This is in theory ..
In practice, the following occurred: self-tapping screw - added voltage (compromising in my hands :)) at the bend. Having made the frame, I left the glue to dry, but when I arrived in the studio in the morning, instead of a circle, I found a drop shape - one of the joints, unable to withstand the stress after fastening with screws, burst. I had to go the other way. The decision was made do not connect the joints with segments, but overlapfastening the free ends of the strips with screws. In parallel, large inserts were being prepared: a long segment was pulled together with a rope in the manner of a hunting bow. The created ring and improvised bow were sprayed with water from a flower spray and left to dry for two days.
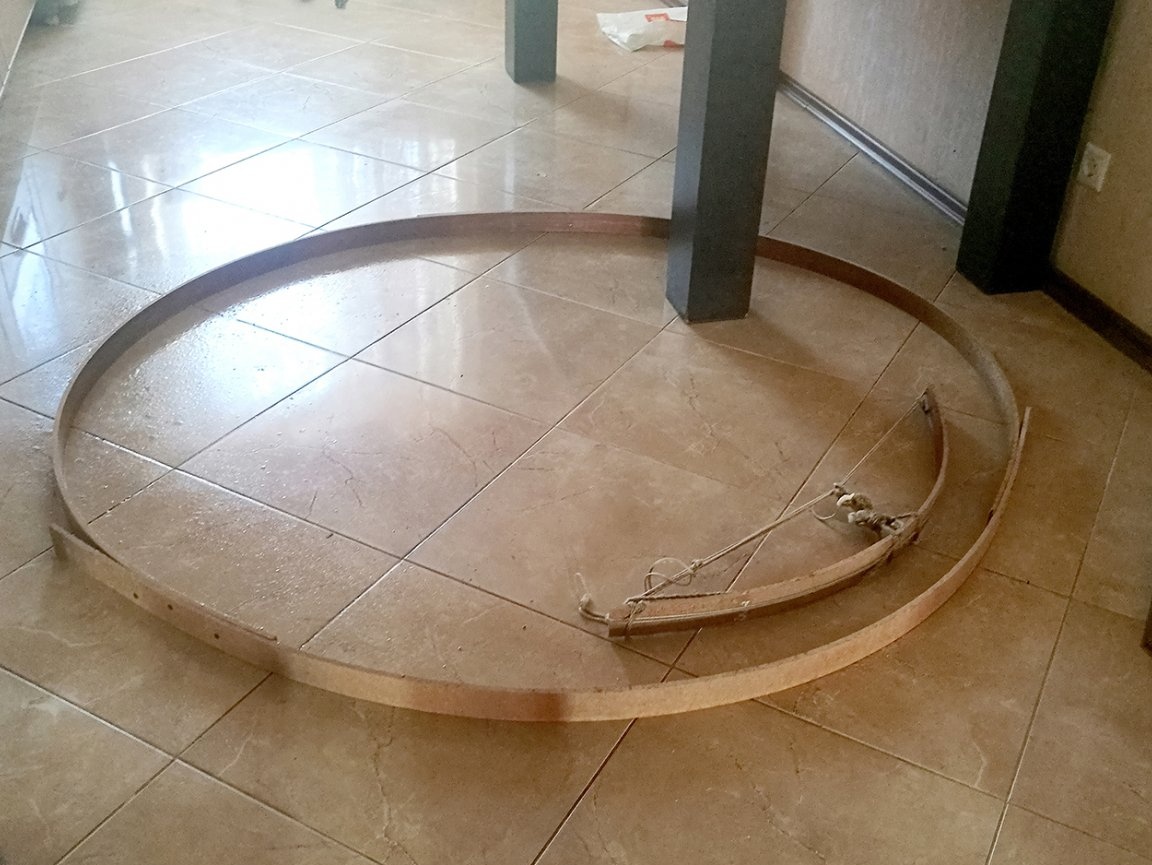
Two days later there was an untied rope on the bow, while MDF retained a curved shape. Next, a curved insert was attached to the joints of a large hoop.
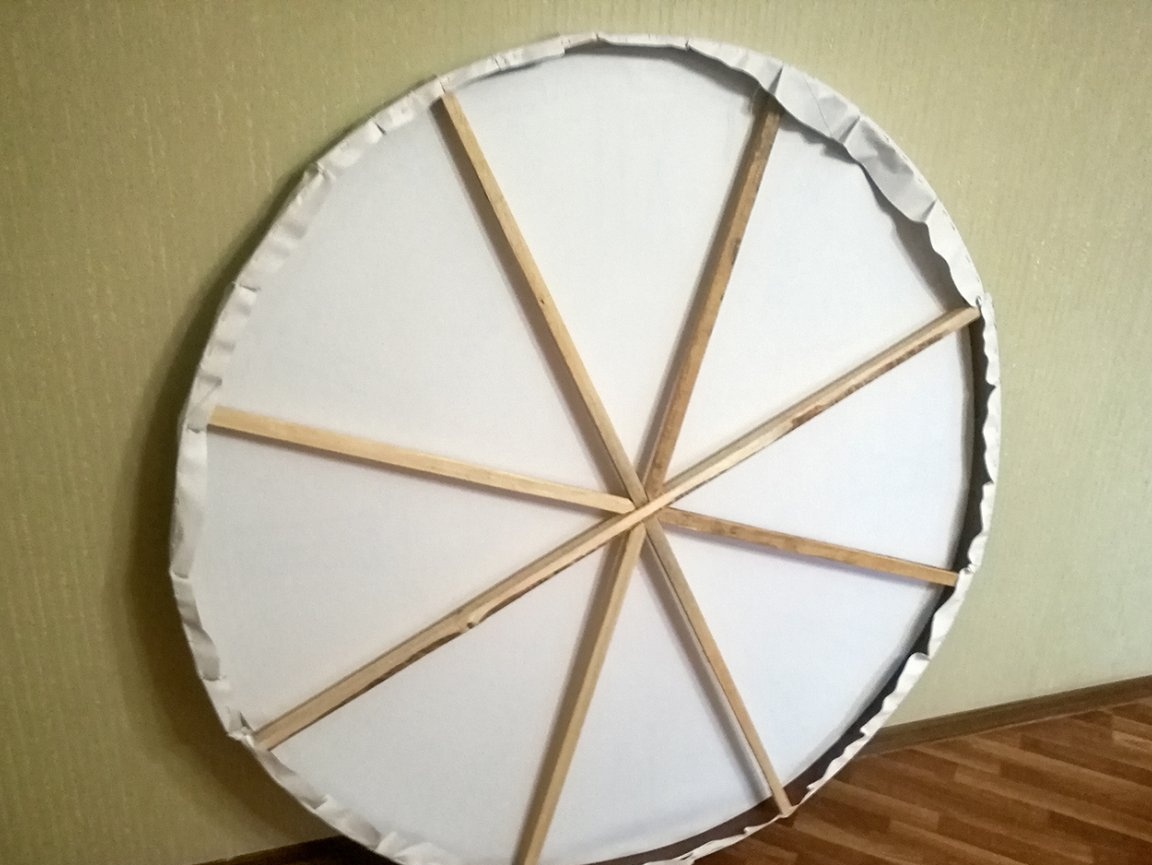
So that the frame does not become an oval, when installing it vertically, cruciform spokes-spokes were installed inside it.
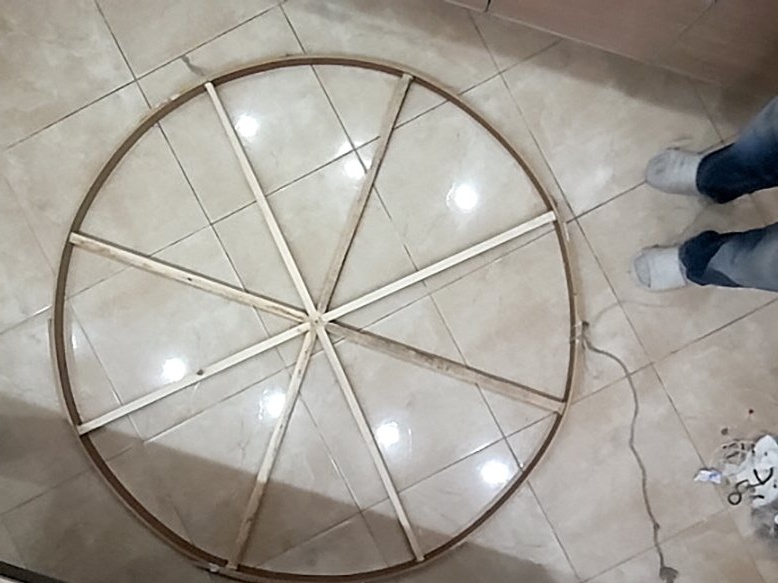
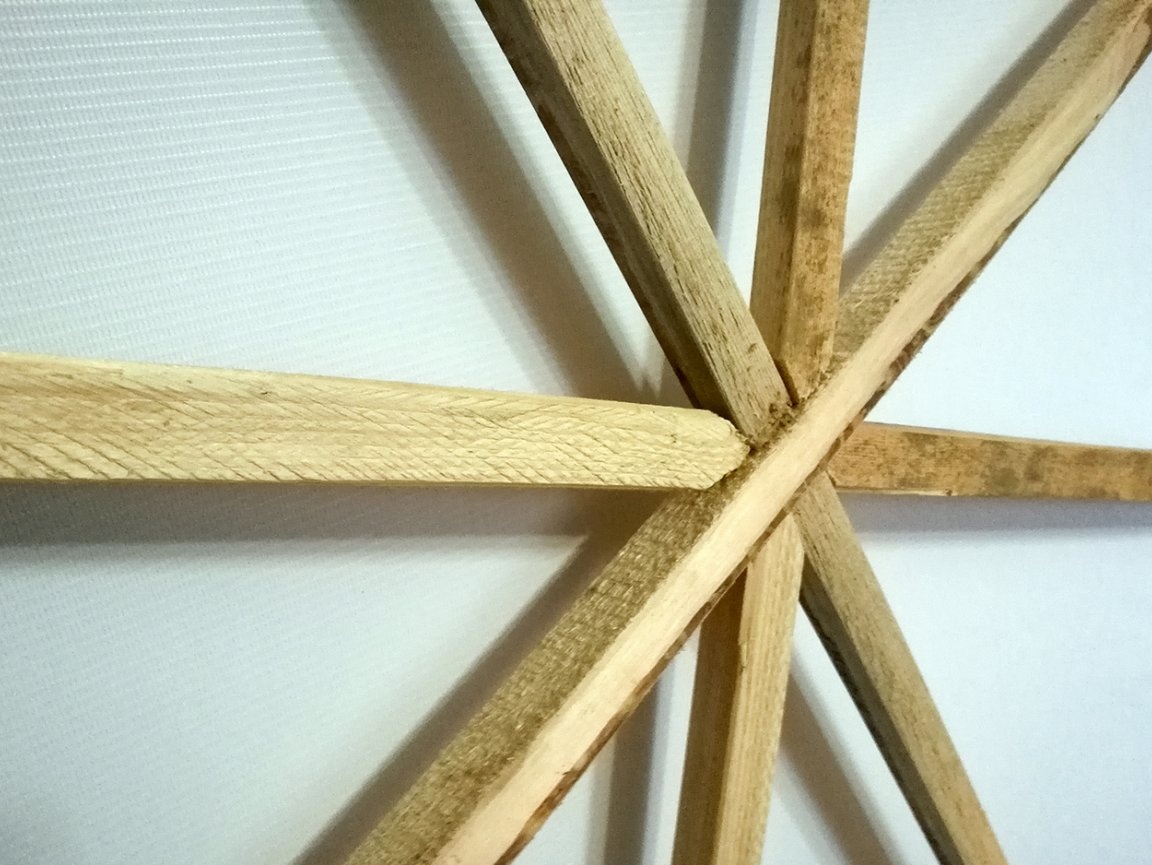
For their manufacture I was approached dry bars 25 x 25 mm.
Two the main knitting needles were connected by central grooves to each other and formed a cross. Rest 4 inserted into the spacer, from the inside corners of the cruciform middle to the inside of the hoop, then the ends of the spokes - attracted by screws on the outside of the hoop. All compounds were accompanied by smearing glue on wood.
The finished frame had the shape of a circle, with a diameter of D = 1550 mm. and kept his shape perfectly.
Having picked up a banner with a printed pattern of the dial, I laid it on a made frame, placed it strictly in the center, and cut off the excess banner.
Picking up a stapler, he began to fasten the free edge of the banner with brackets to the back of the end of the hoop. In order to evenly pull the banner “drum”, fastening is done using the "star" method, when the banner is each time pulled from the opposite side, offset from each subsequent fastening with a stapler (for example, the crankcase cover, or cylinder head cover car).
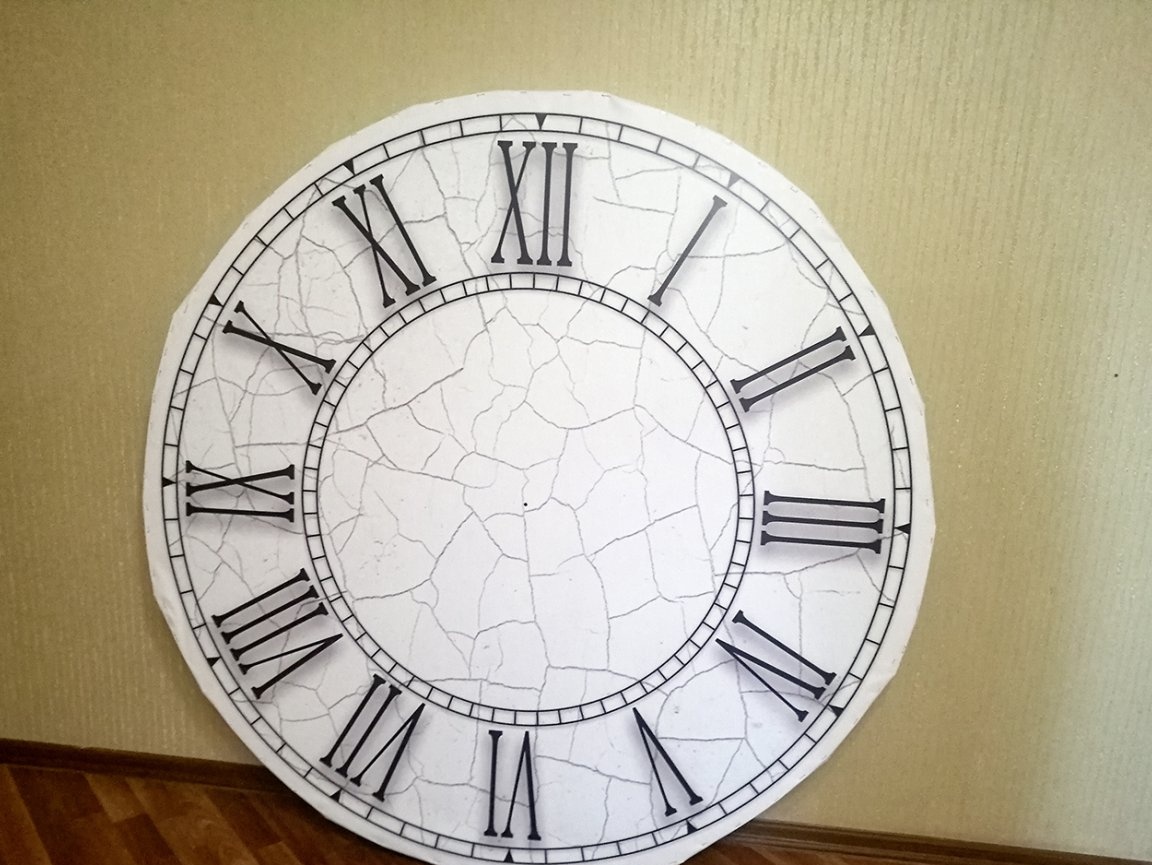
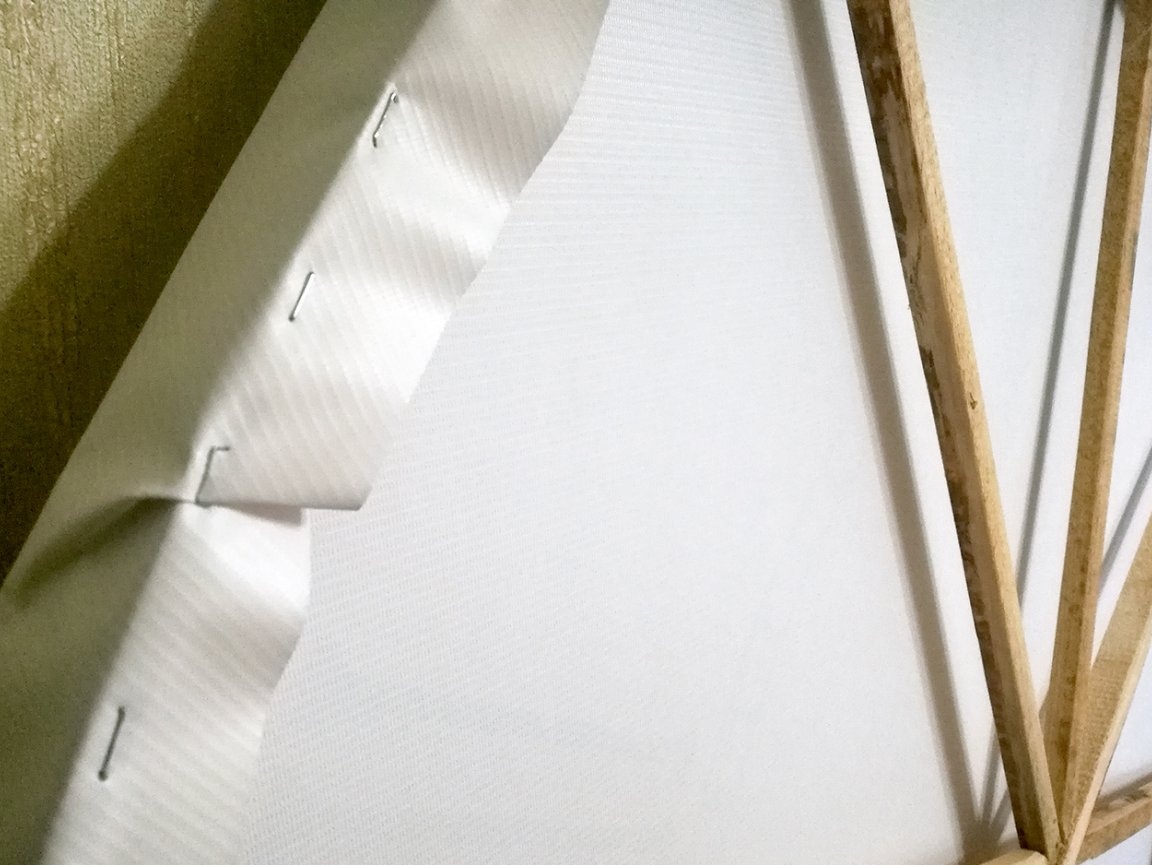
The remains of the banner, after pulling up, are bent and also pressed by the stapler.
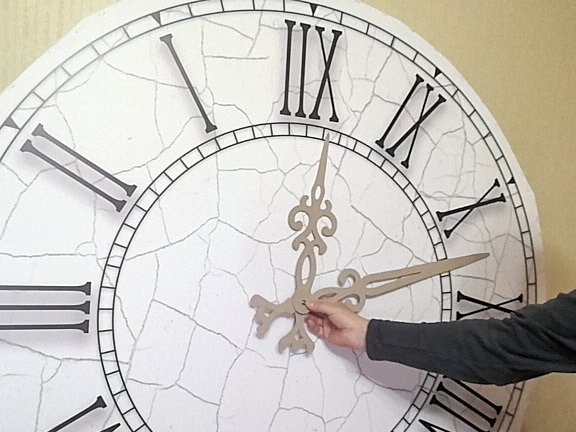
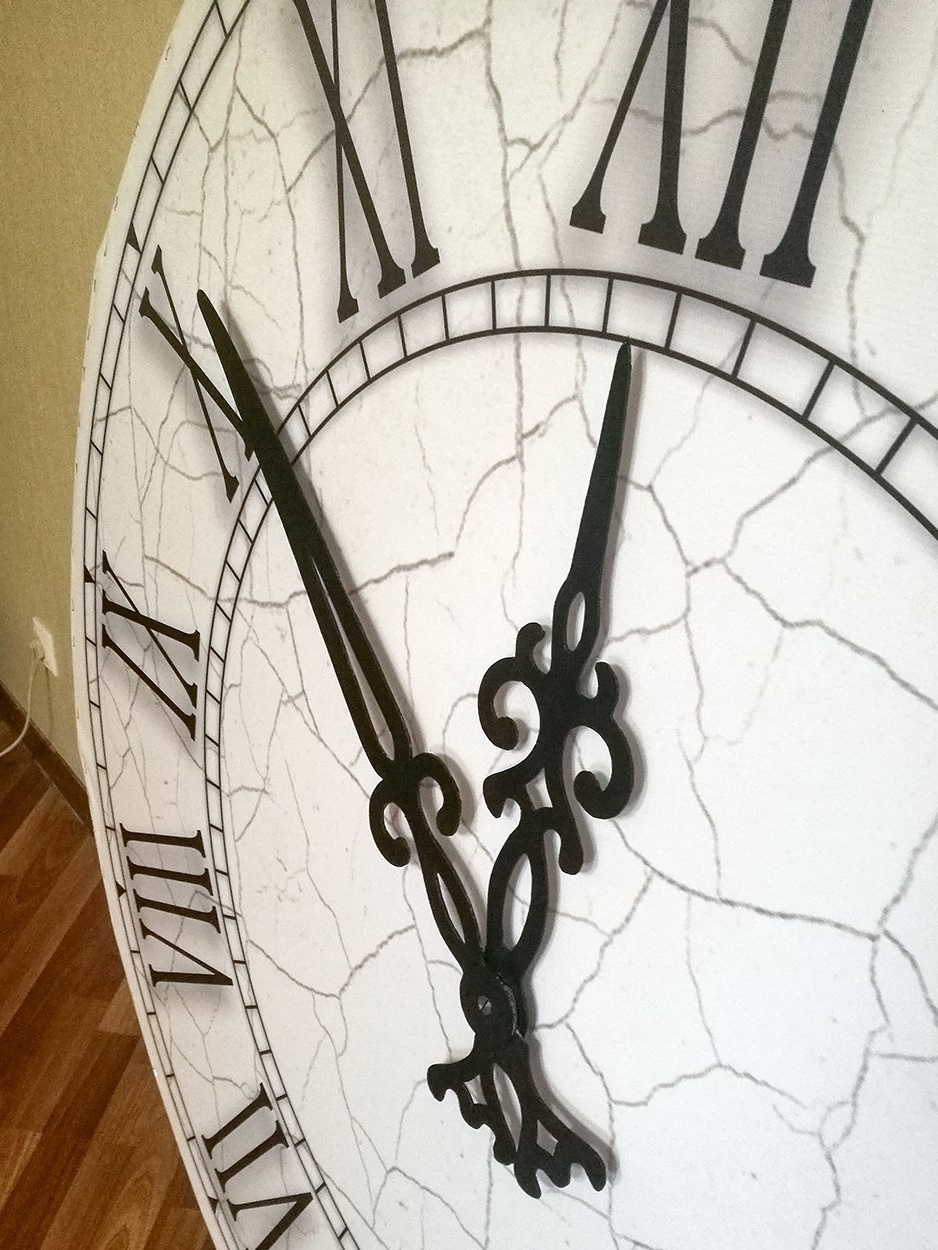
The dial is ready, but not the most important thing - the shooter.
The layout of the hands is done along with the design of the dial, all in the same vector editor CorelDRAW.
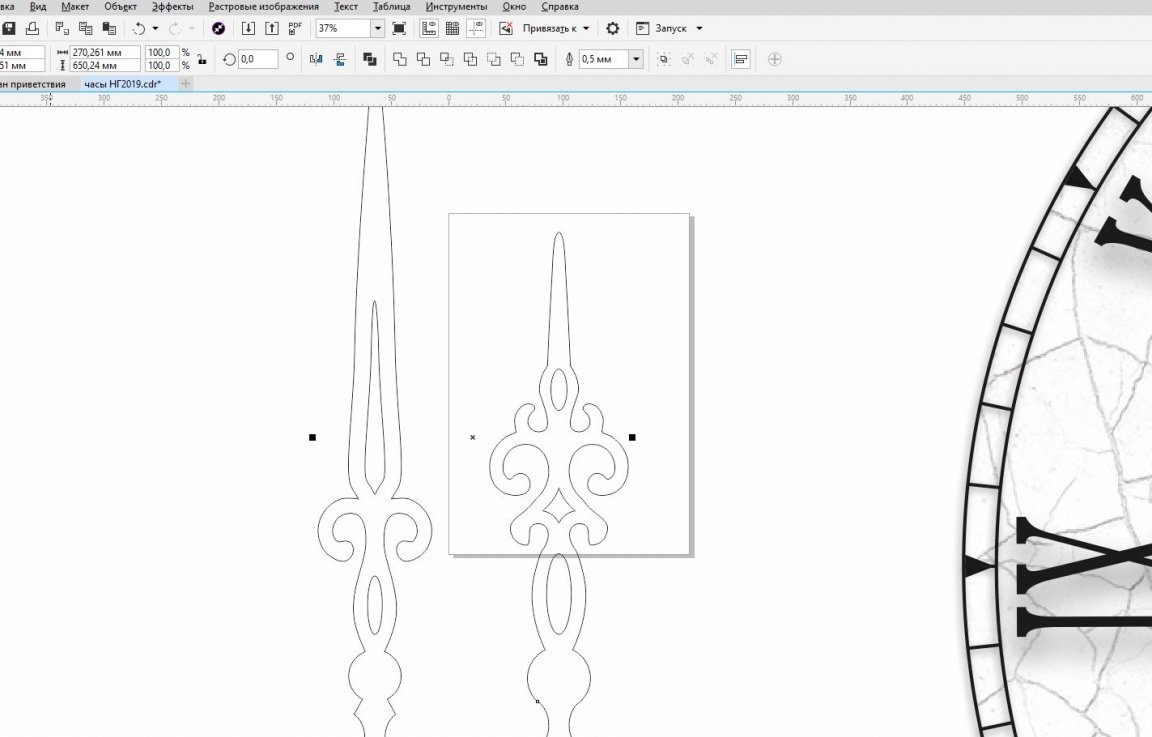
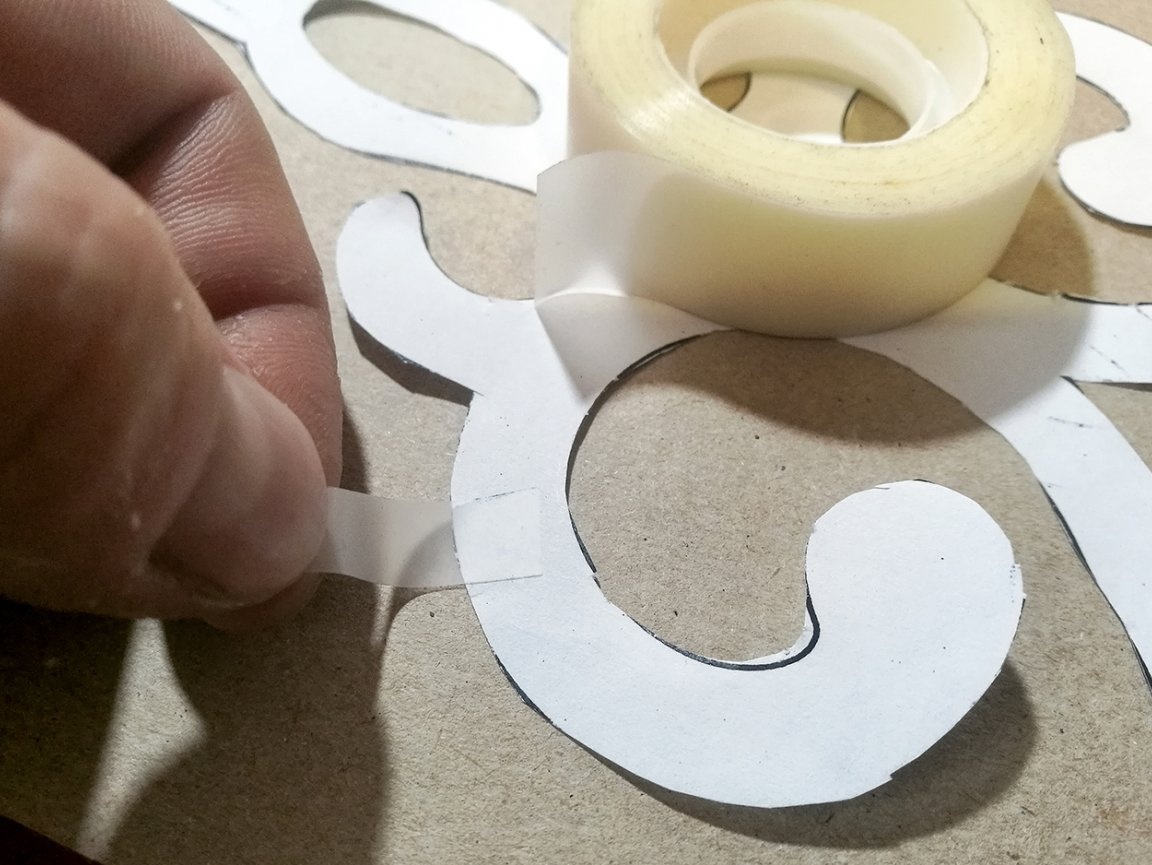
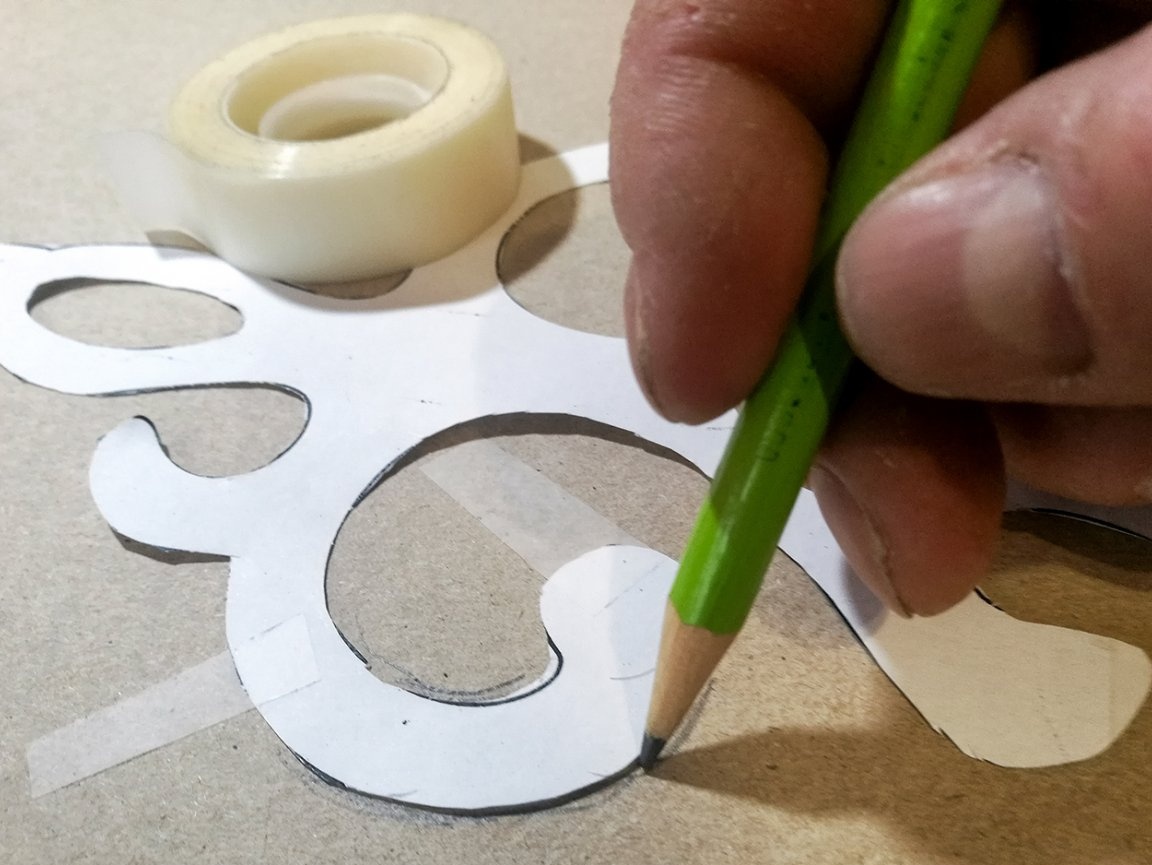
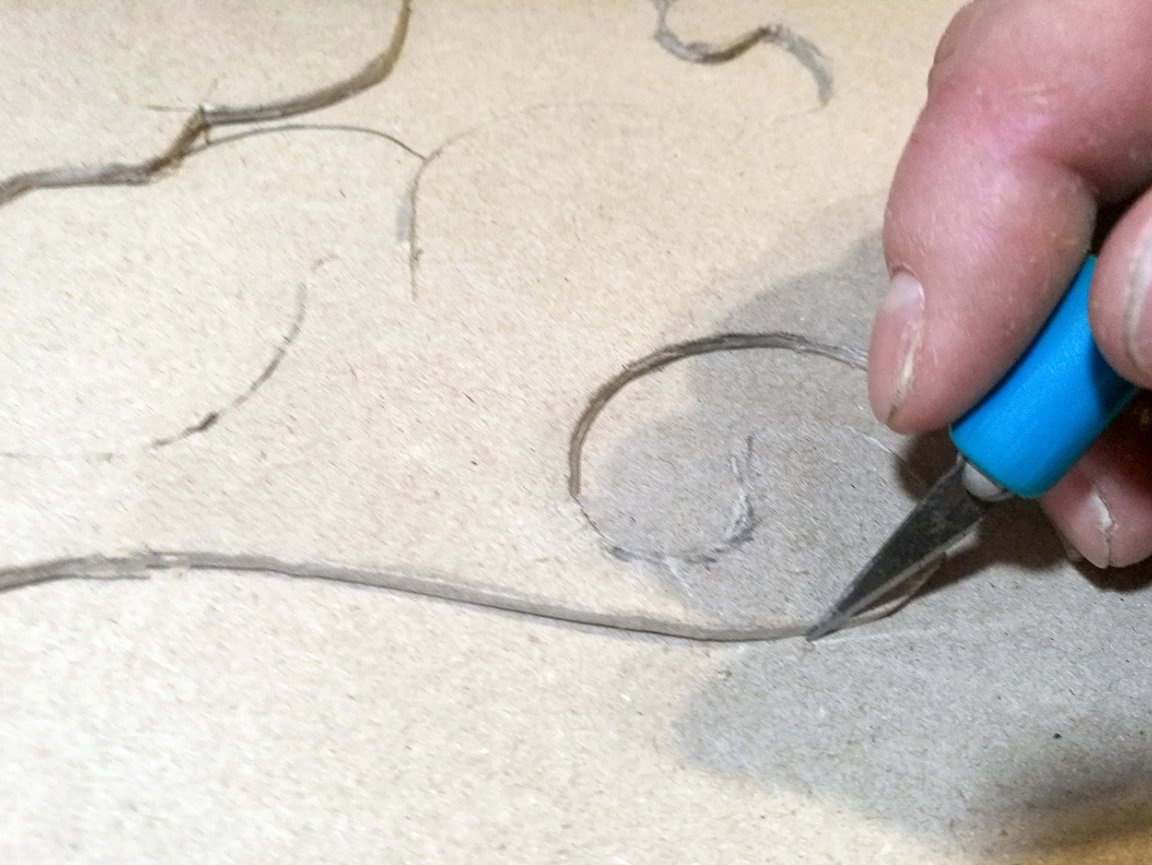
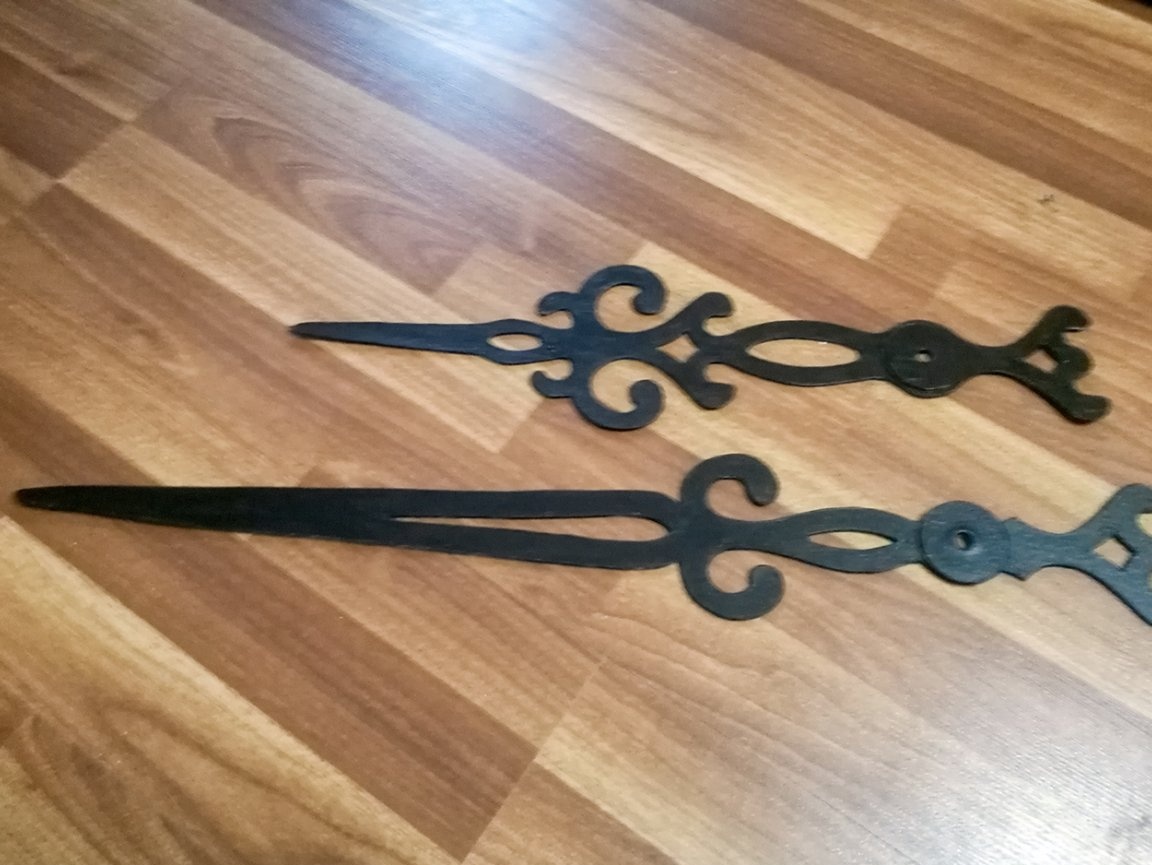
Then prints on a conventional laser printer, on several sheets. The sheets are glued together with tape and are cut along the printed path scissors, get arrow patterns.
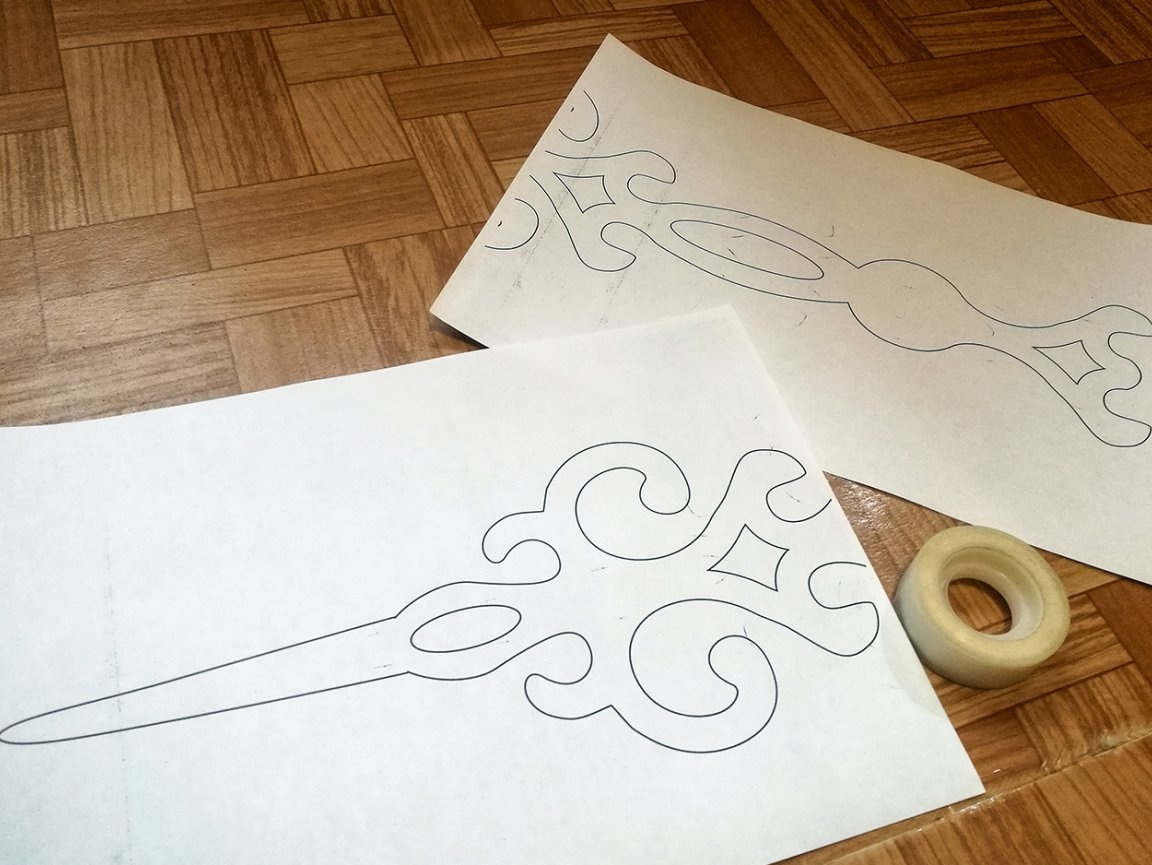
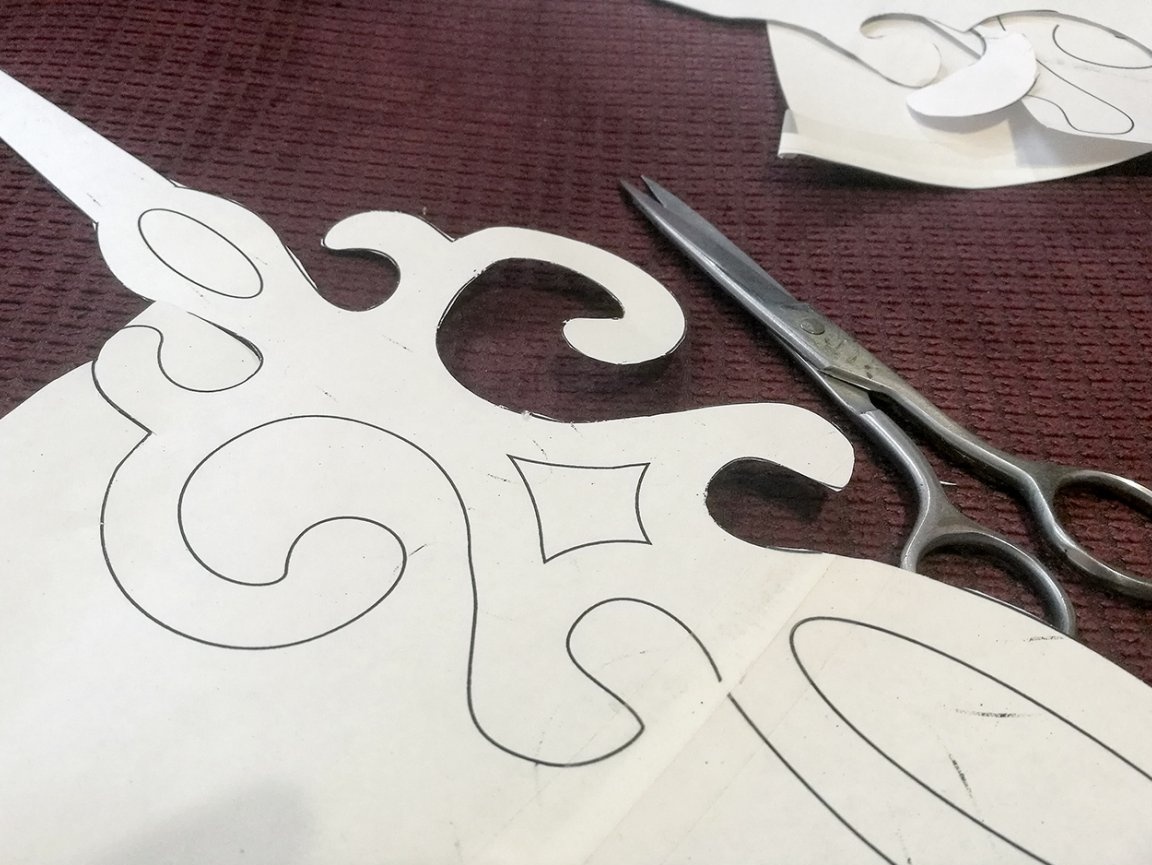
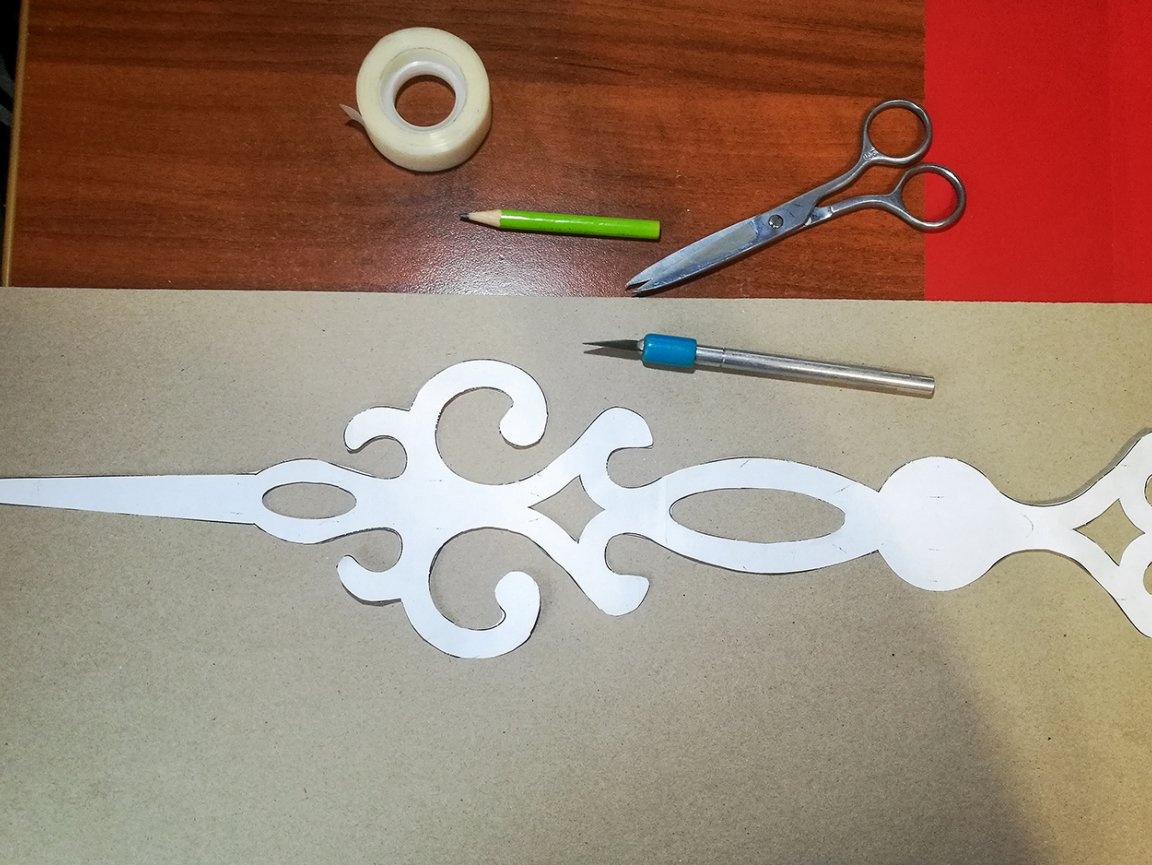
In the "office supplies" I bought thick cardboard, 1.4 mm thick. Attaching paper arrow patterns and securing with tape to cardboard, circled them with a pencil.
With a scalpel for creative work, I cut out the hour and minute hands from cardboard, as well as cardboard washers, for laying between the arrows, and processed all the edges with fine sandpaper.
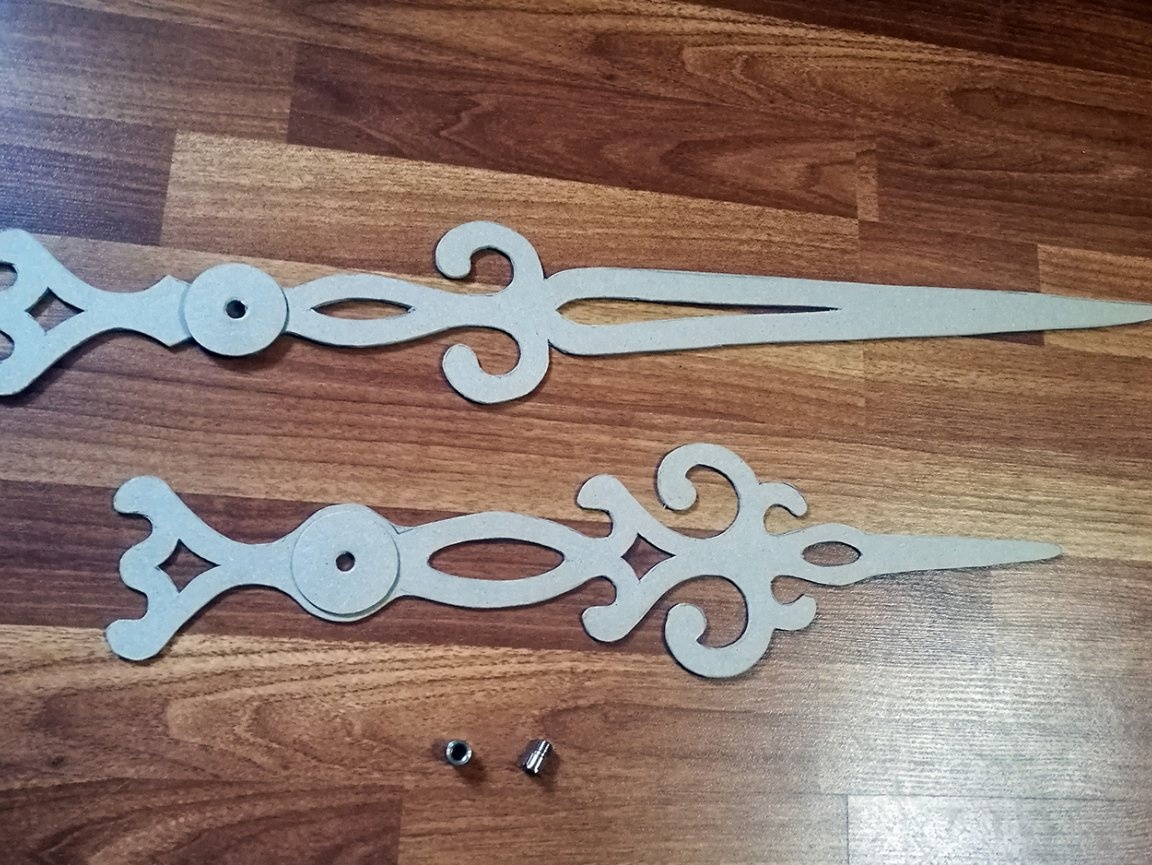
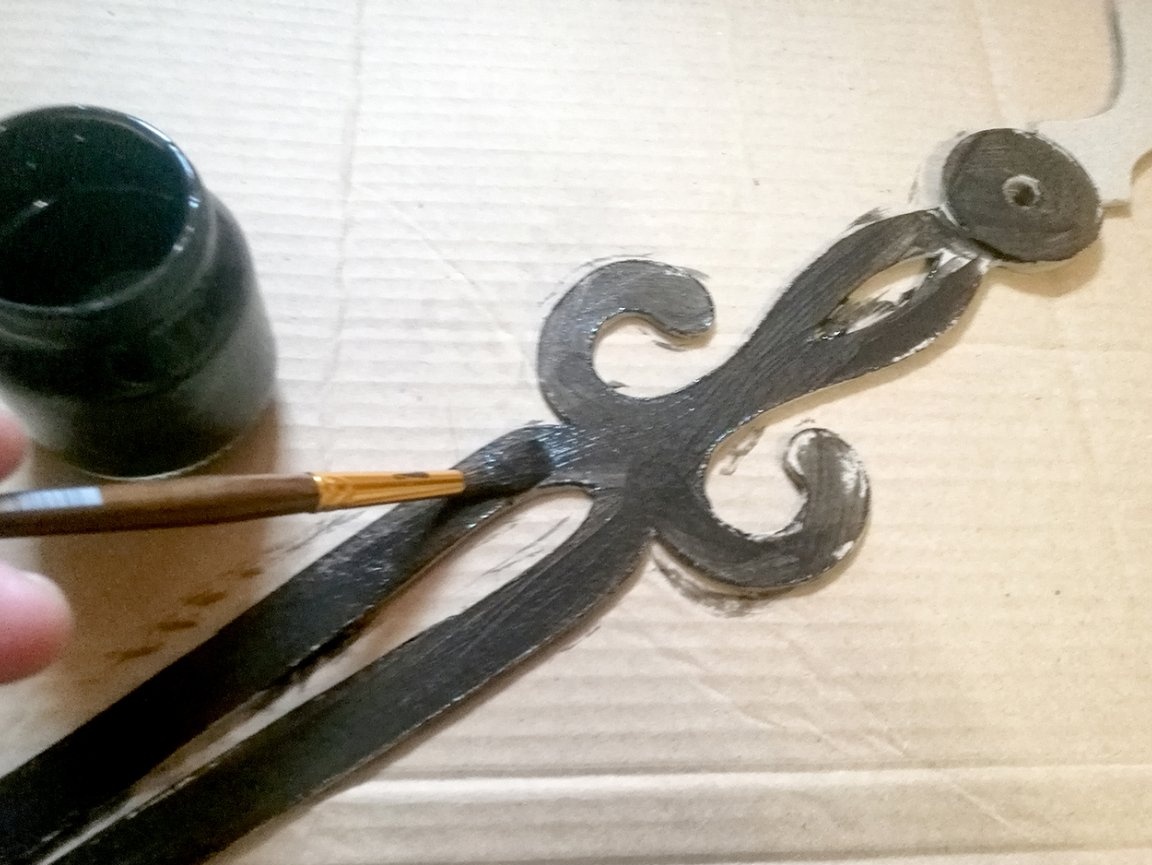
To paint the arrows, acrylic, interior paint was chosen, and a black color to it.
So that when painting the arrow "did not lead", coloring took place alternately on both sides and the necessary time to dry the paint layers.
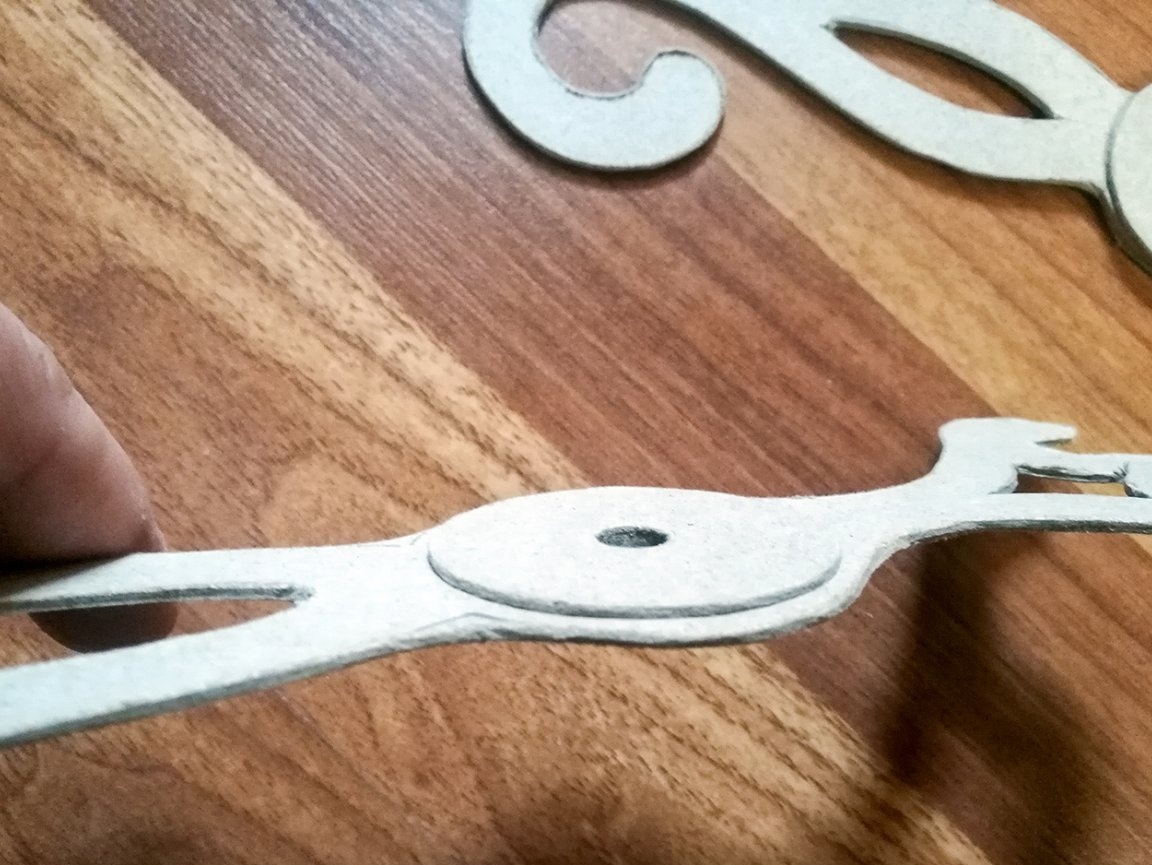
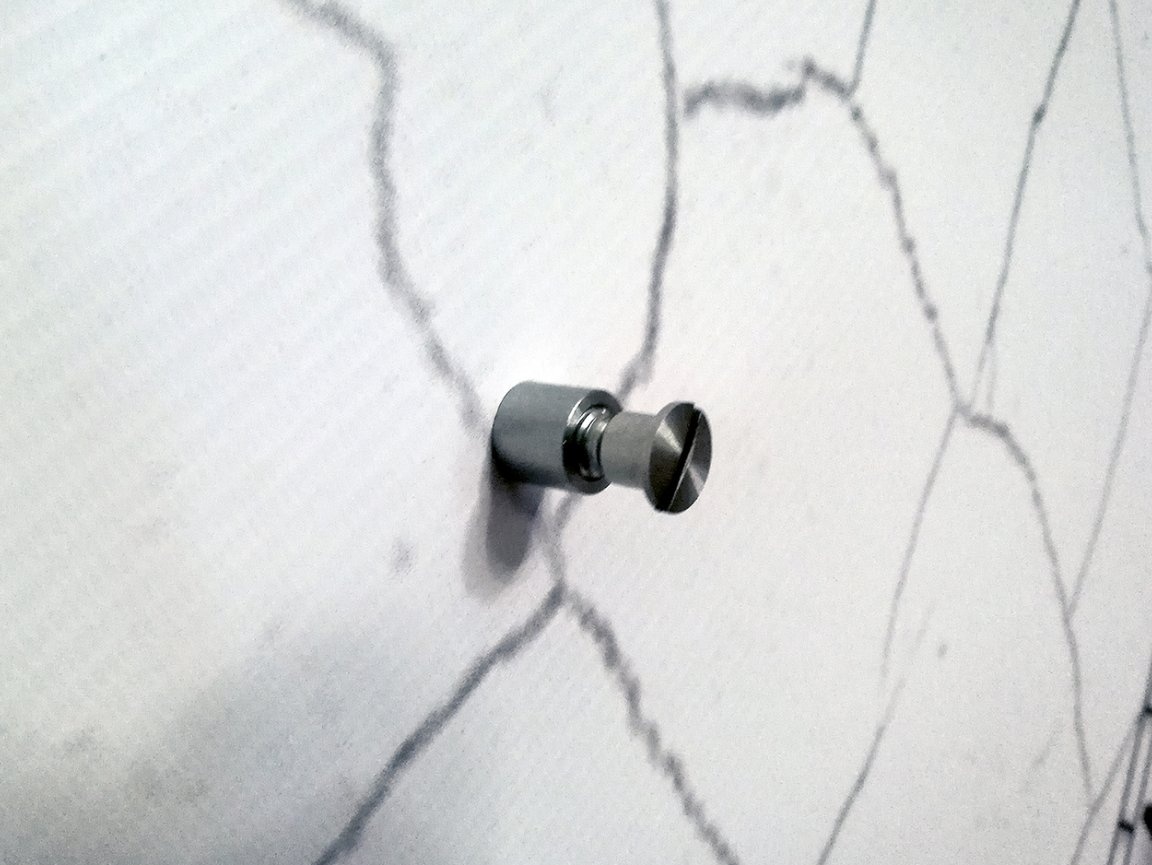
To attach the finished hands to the center of the dial was purchased accessories - glass fastening through a hole drilled in the glass.
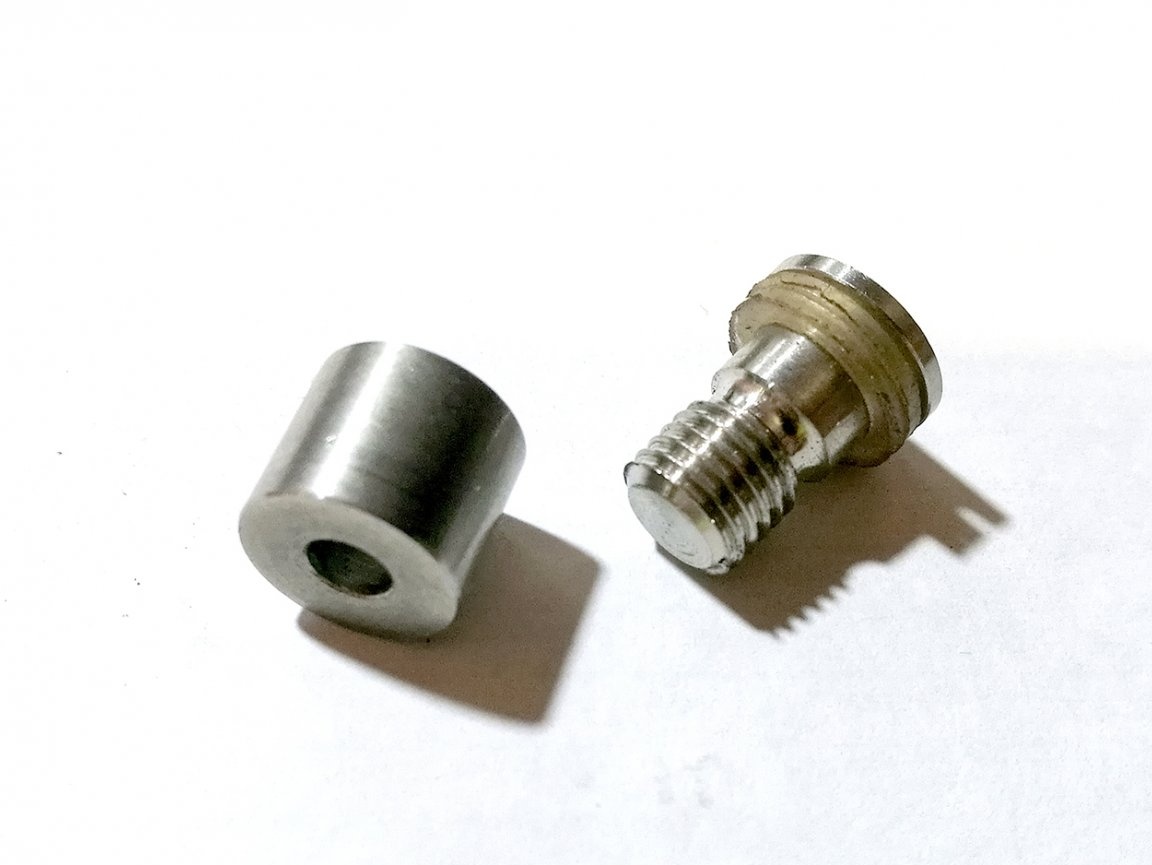
The fastening consists of two parts: a sleeve on one side of which there is a left threaded connection, on the other end there is a hole with a side for fastening to the surface with a self-tapping screw or bolt, the second part is a bolt with a mating threaded connection and a flat hat.
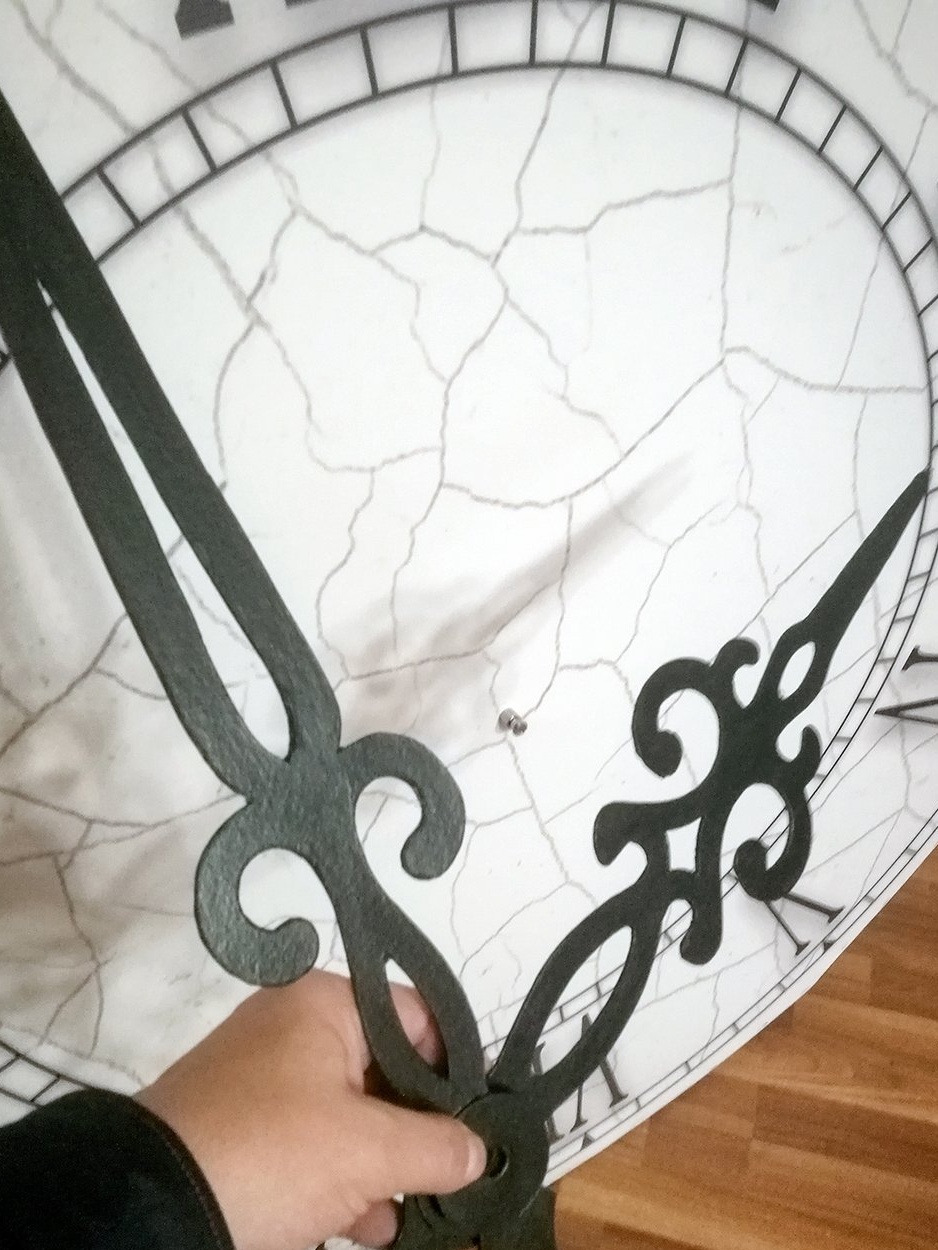
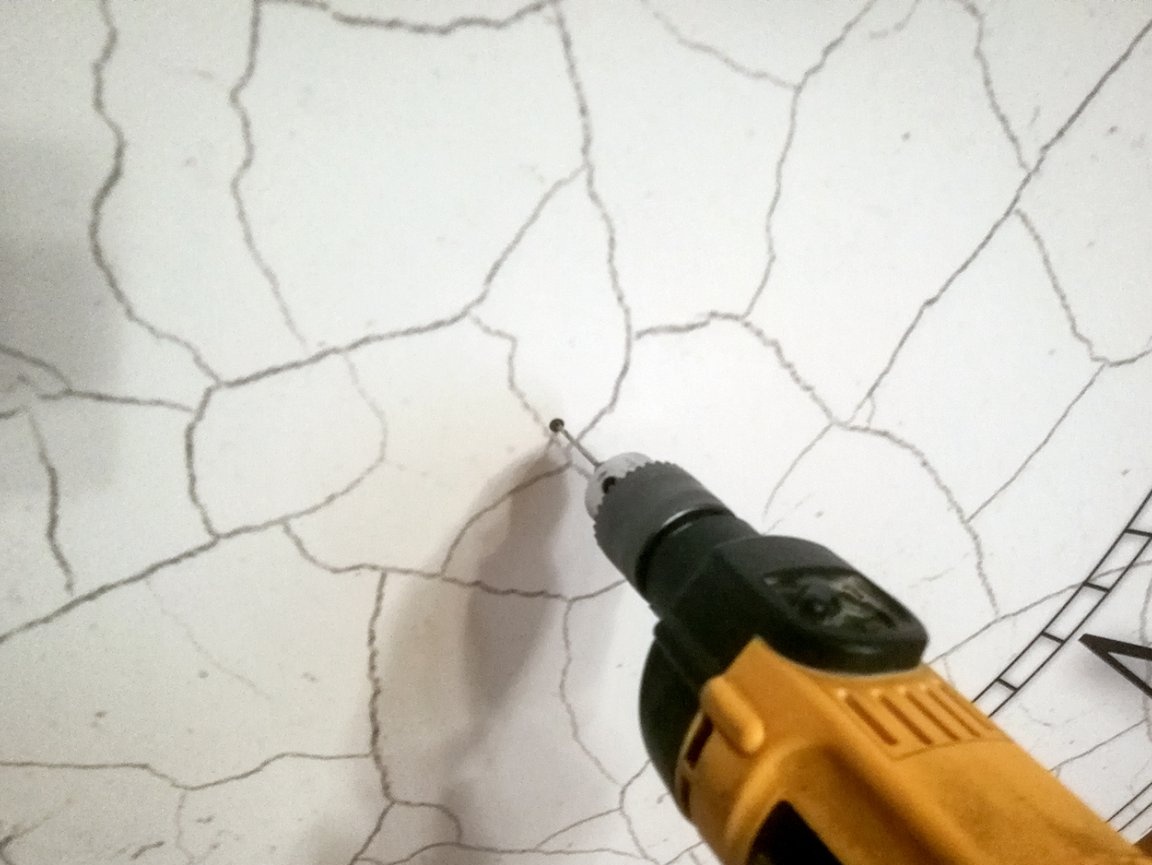
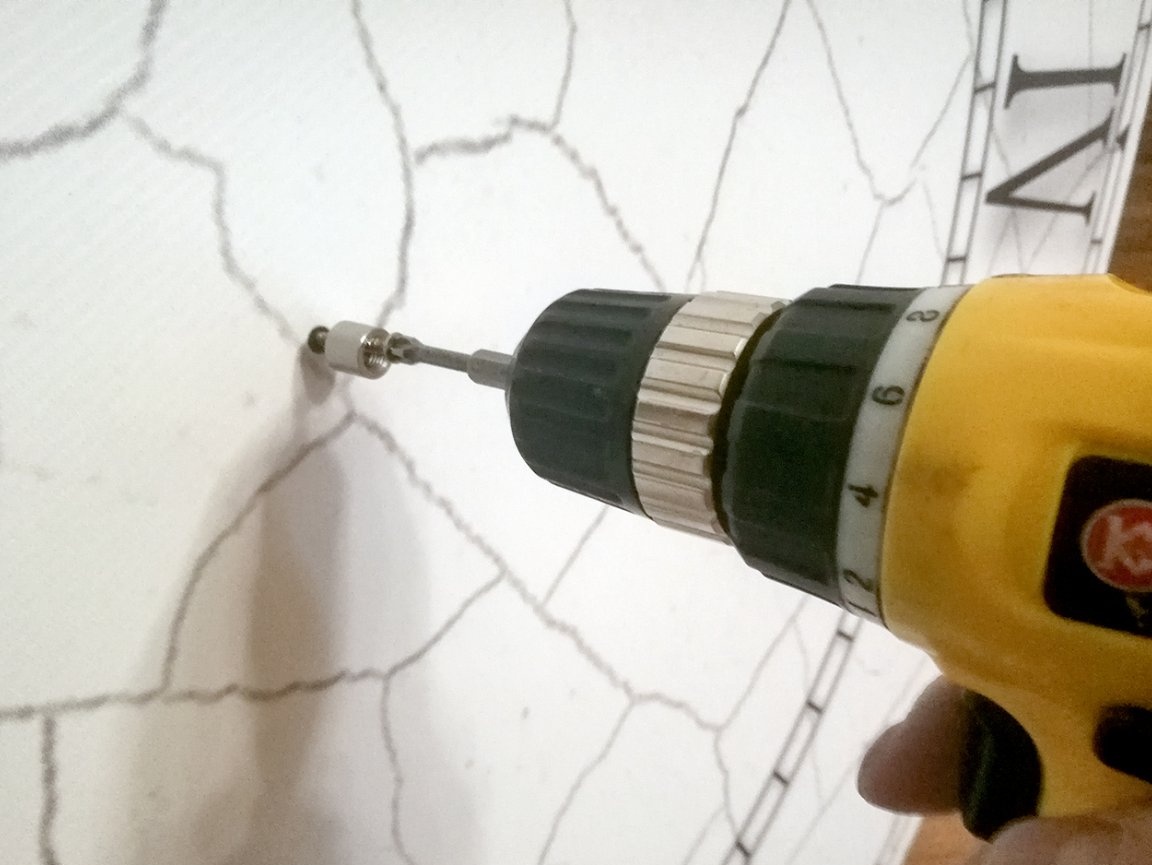
Drilled a hole, through a banner, into a wooden cross of knitting needles, in the center of the dial and screwed the threaded fittings sleeve.
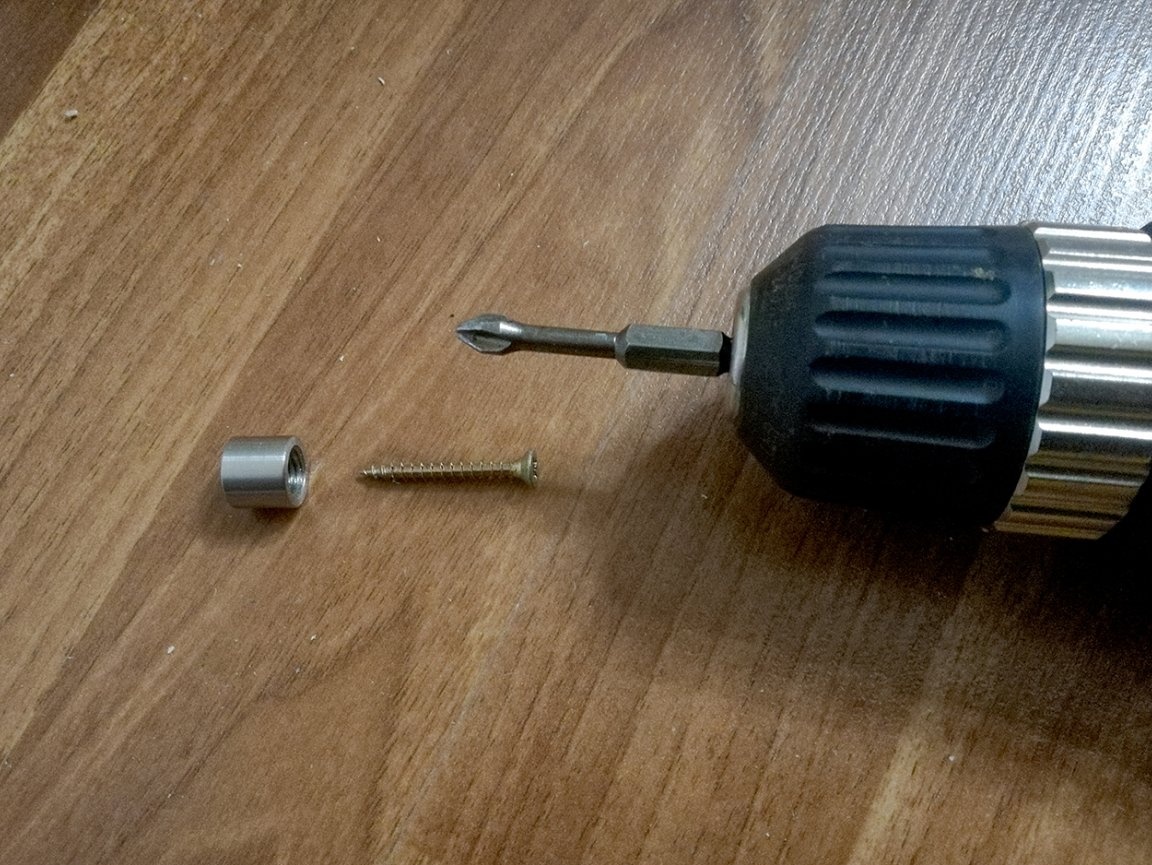
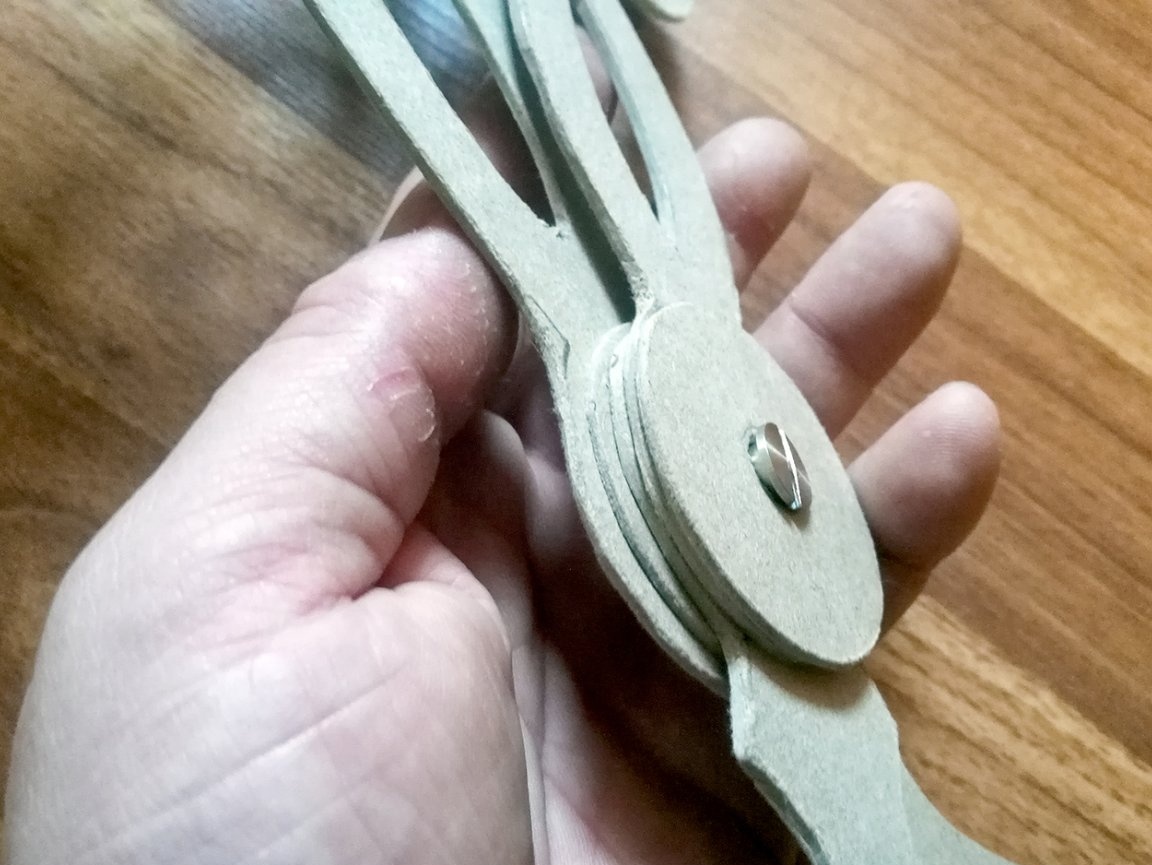
Ready arrows mounted on a hardware bolt through a cardboard washer, and screwed to the hub mounted in the center of the dial.

The bulk of fake watches - ready. Now you need to visually brighten up the uneven edges of the banner on the hoop frame.
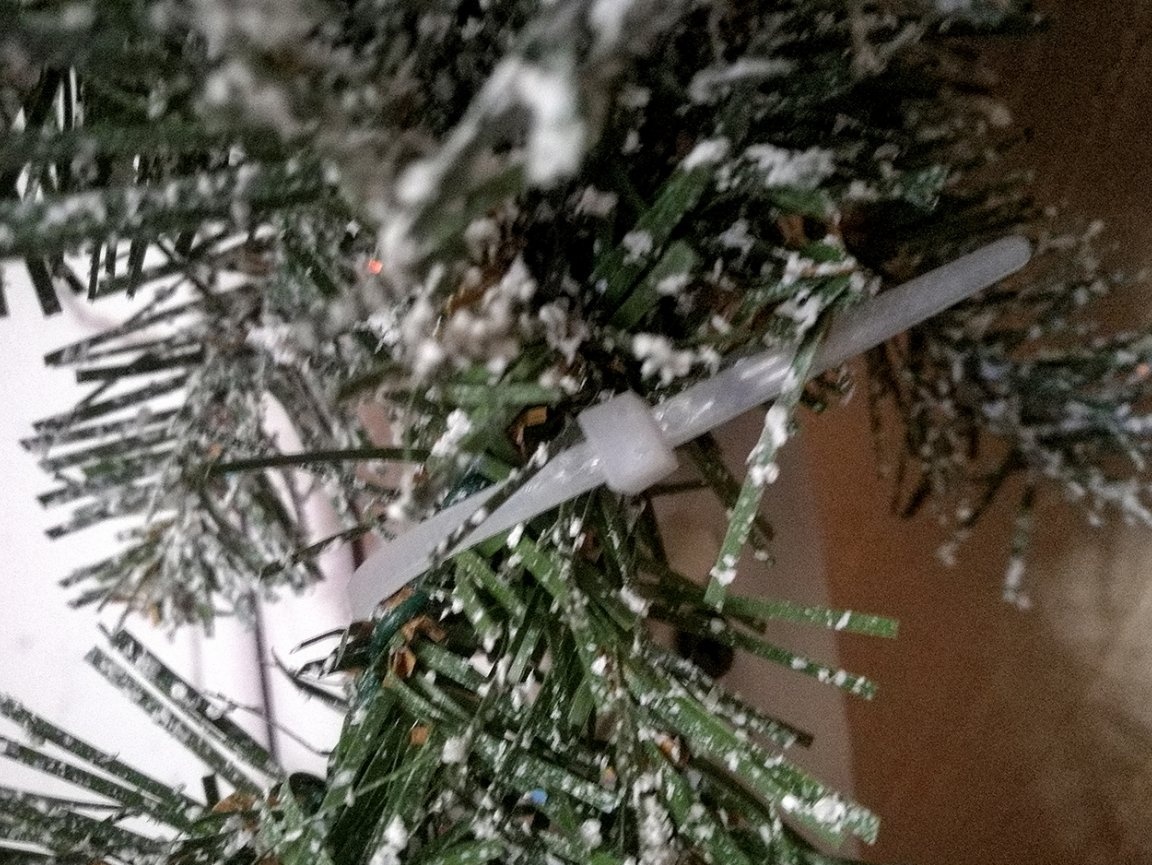
Since last years I had decorative flexible "creepers" of spruce branches, with beautiful cones, sprinkled with artificial snow. It was them who were decided place around the circumference of the watch.
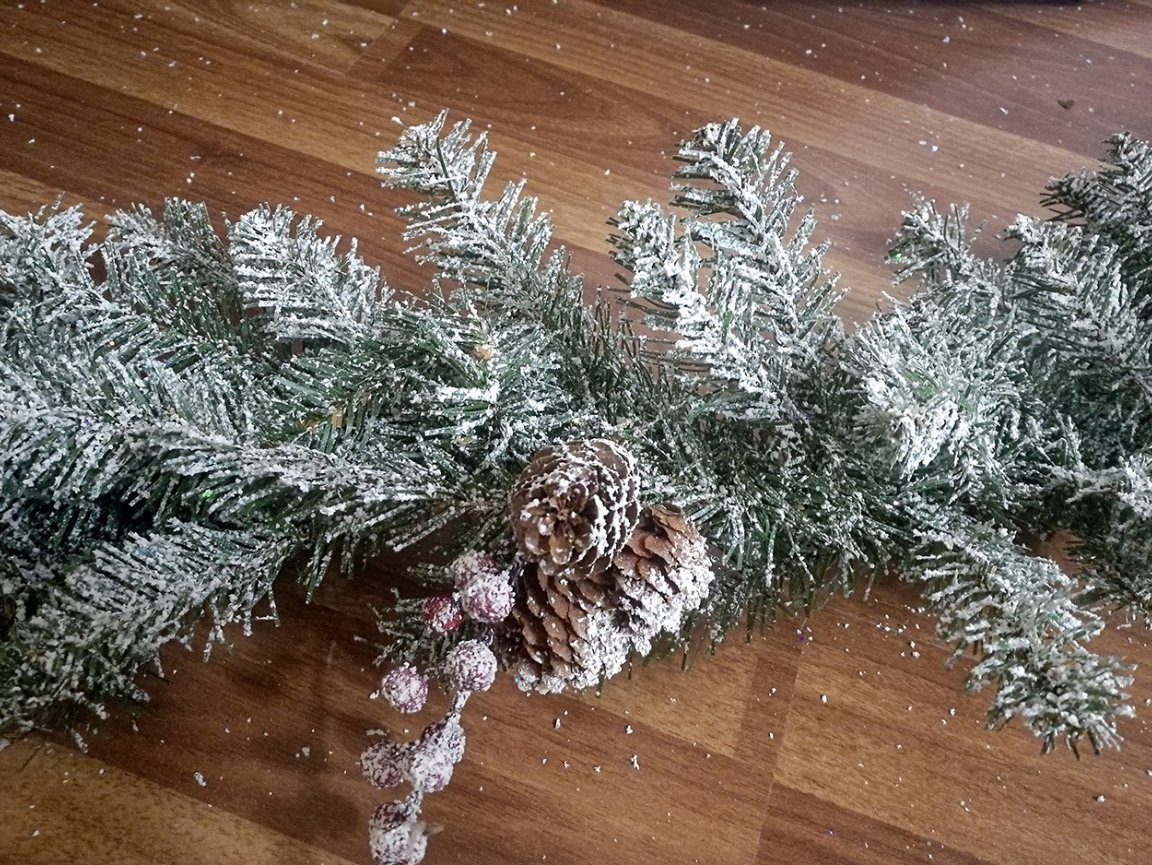
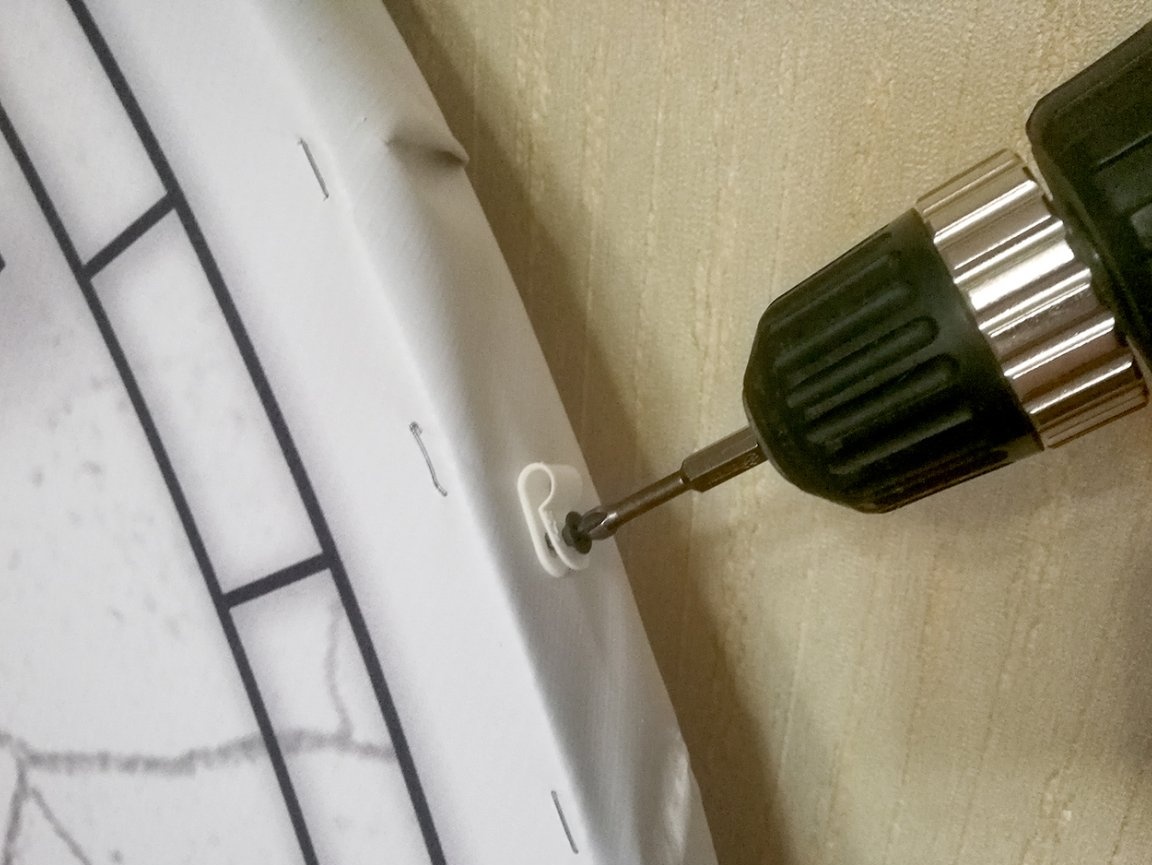
In the hardware store, plastic ones were bought, loop-shaped cable holders, and plastic clamps 3 x 150 mm.
Around the perimeteron the outside of the hoop, at a distance of 5 minutes of the dial (30 degrees)by screws cable holders were fixed.
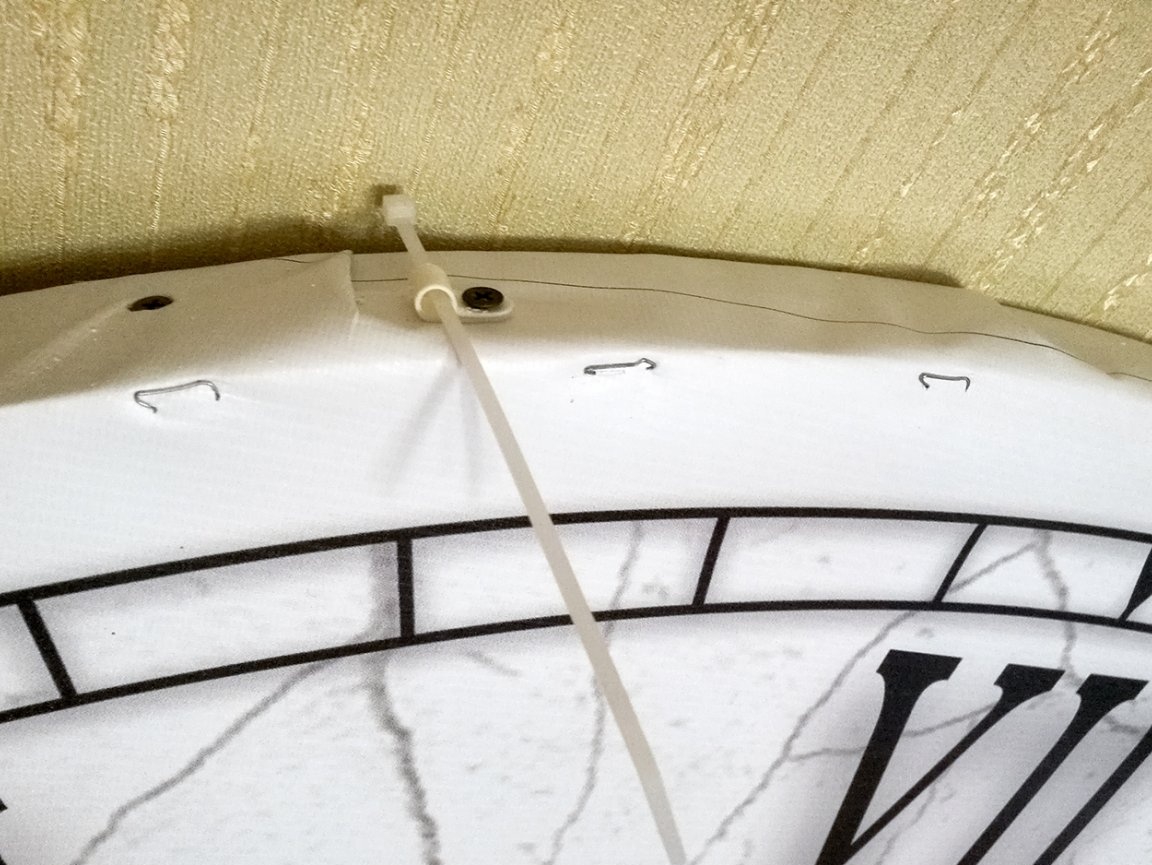
Encircling the perimeter of the dial with a spruce "liana", we attract it with plastic clampsby passing them through the ear of the cable holder.
The finished clock was fully consistent with the idea and fit perfectly into my location.

Used materials and fasteners
MDF strip 2000 x 70 x 8 = 4 pcs.
Bars with a section of 1500 x 25 x 25 = 4 pcs.
Self-tapping screws 4 x 15 = 20 pcs.
Self-tapping screws 4 x 25 = 60 pcs.
Glass fittings = 1pc.
Looped cable holders = 15 pcs
Clamps - plastic ties 3 x 150 = 20 pcs.
Joiner's glue - Moment Joiner Express = 1 tube
Acrylic paint for interior use = It took about 100 grams.
Color - black = 1 jar
Stationery cardboard 60 x 40 x 1.4 = 2 sheets
Sandpaper with fine grain
A stapler with staples, a screwdriver, a scalpel and other tools were available.