
To reset the Ikea Trodfrey LED remote control lamp to the factory settings, you need to supply power to it and remove it six times in a row, and the pulse duration should be less than the duration of the pauses. At the same time, requirements for minimum and maximum duration are imposed on both. Using a simple switch can be difficult to follow. But Arduino and a solid-state relay allowed the author of Instructables to askmurphy to simplify this procedure significantly. And the master has to carry it out quite often, because he is experimenting with reconfiguring these lamps, sometimes bringing them into a state that requires a reset.
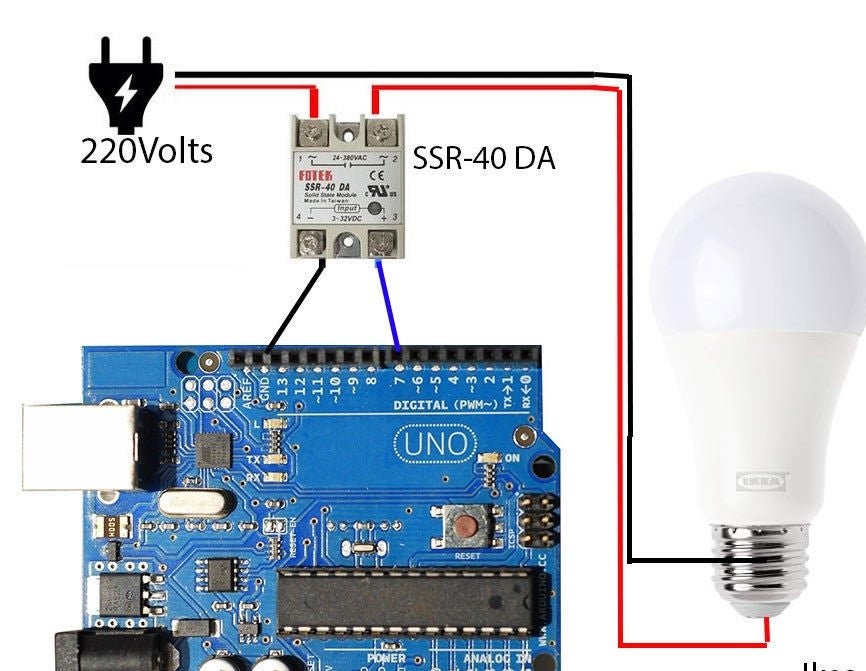
Fotek's SSR-40DA solid-state relay is controlled by a DC voltage of 3 to 32 V, supplied in the polarity indicated on the housing. In this case, this voltage is removed from pin 7 of the Arduino Uno board, but the sketch can be adapted to other Arduino-compatible boards, and any digital output can be assigned programmatically. The relay can switch loads powered by alternating voltage from 24 to 380 V (effective value). The load current can reach 40 A, if the relay is original, and 16 or 25 A for fake ones. LED lamp consumes significantly less - tens of mA. Like an electromagnetic relay, a solid-state relay provides galvanic isolation between the input and output, but it does not require an intermediate key stage (current consumption in the control circuit is 7.5 mA) or a diode that protects the transistor of this stage from self-induction voltage.
Quite often, files with sketches on Instructables are with the unknown extension, after downloading they have to be renamed to ino yourself. This is due to certain problems when attaching files to texts on this site. Here, the wizard circumvented the problem in a very original way: instead of a file, I attached a screenshot that fit all the rather short source code:
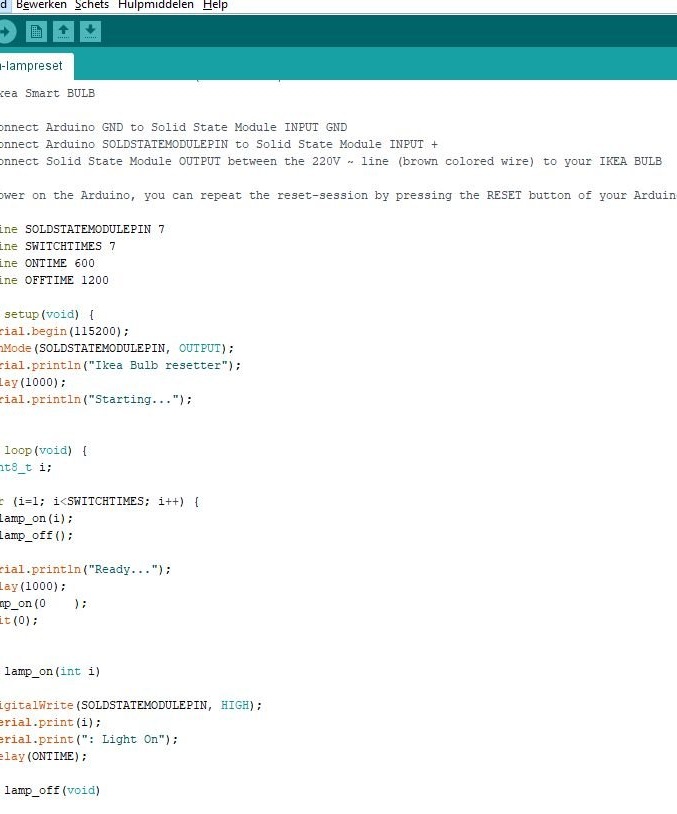
The text from the screenshot can be recognized using OCR, or even typed manually - the volume is small, it won’t take much time.And you can compile and upload the firmware and assemble the device. Which, of course, is better to put in the case along with the PSU for Arduino, leading out only the cord and the lamp holder.
By adjusting the duration of pulses and pauses in the program, as well as their number, you can reset to the factory settings similar lamps from other manufacturers.