

Lamps - gizmos that set the tone in the interior more than others - the subject is luminous, it attracts attention in the first place. Here, we will talk about things more decorative than practical. Lamps working, lighting, must also satisfy a number of important parameters, we will not talk about them now.
The described type of luminaire is very simple and can be done using a set of simple tools. The luminaire can be either a desktop size or larger - in the floor version. An impromptu lampshade box is also very simple in shape. Here a wide variety of materials and techniques, their combinations can be applied. All we are rich in is to apply any skills we possess. Work with metals? You are welcome! - cutting, cutting, chasing, pickling, soldering, working with wire. With paper and cardboard? Be kind! - a lot of fashionable "postcard", "ladies'" techniques, twisted ribbons. Modeling? To your health! - polymer clay, ordinary ceramics (there are some more suitable techniques inside), salt dough. Rags? Undoubtedly! - patchwork, weaving, wallowknitting. Work with glass? Do not even hesitate! - mosaic, various stained glass techniques, gluing with UV glue, fusing, painting with glass paints.
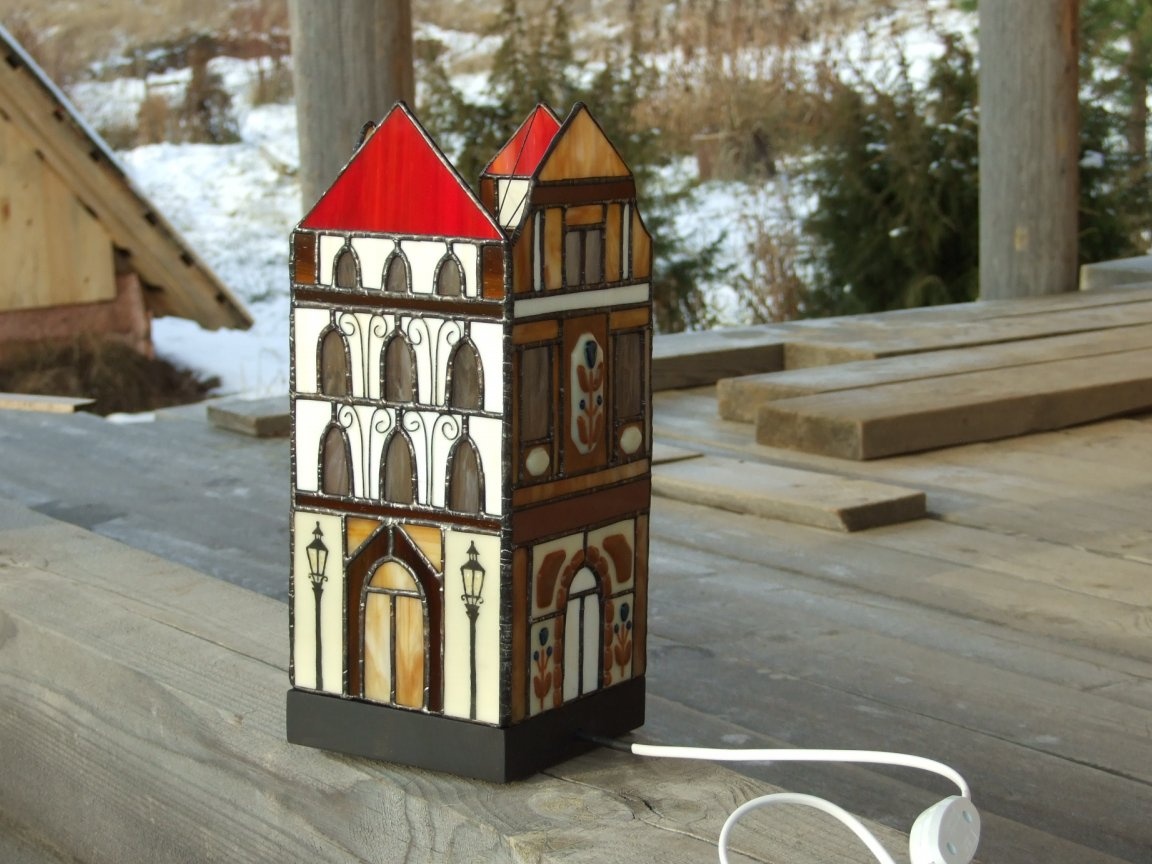
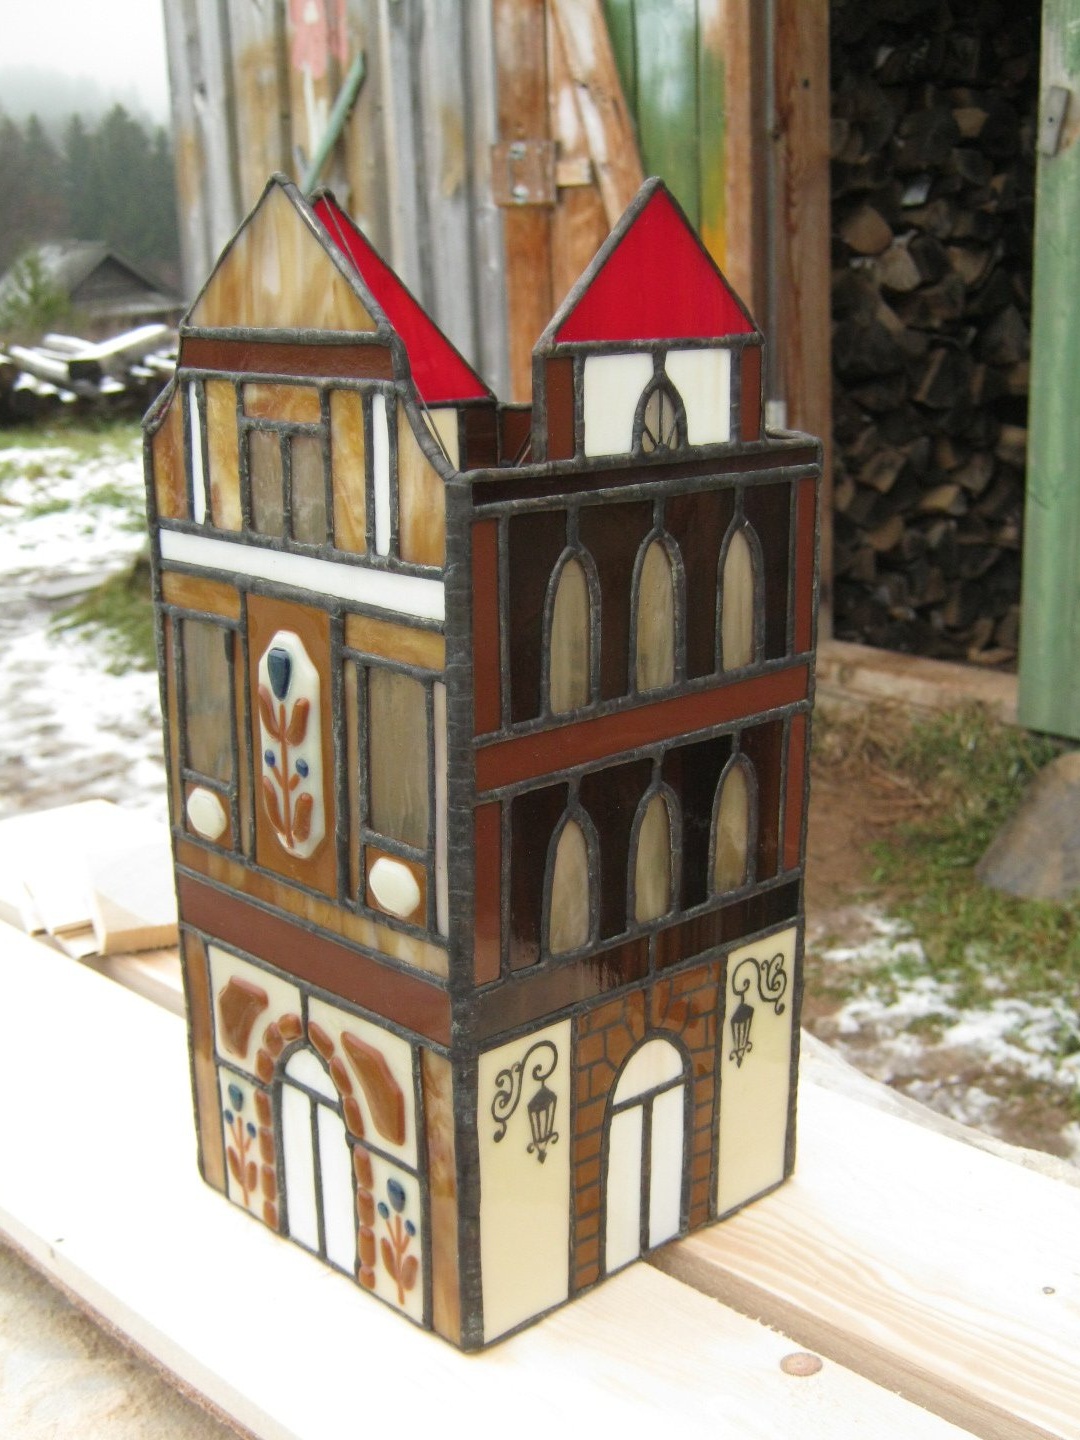
Such a simple lamp with a beautiful lampshade can work not only as a lamp, but also like a kind of demonstration, an impromptu showcase for a piece in the form of a lampshade. Simplicity of form does not distract from the main thing.
Lamp design
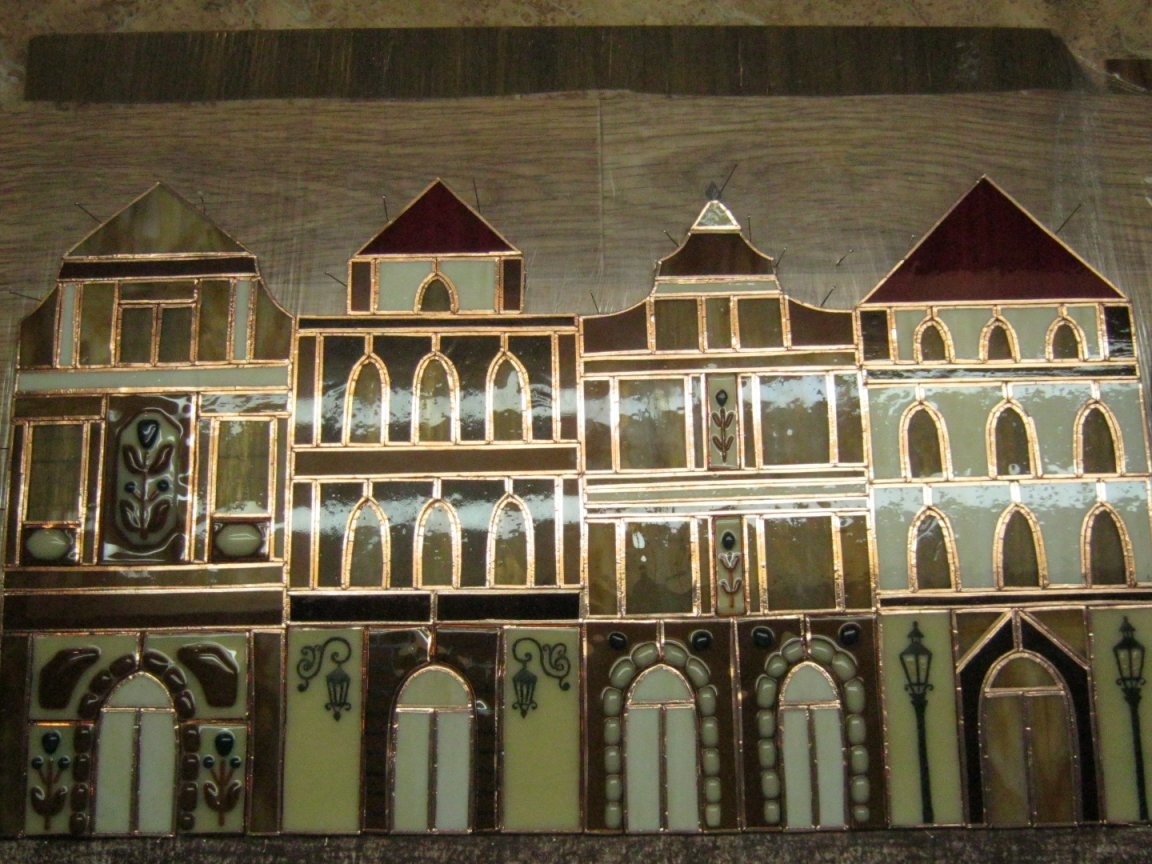
Shade
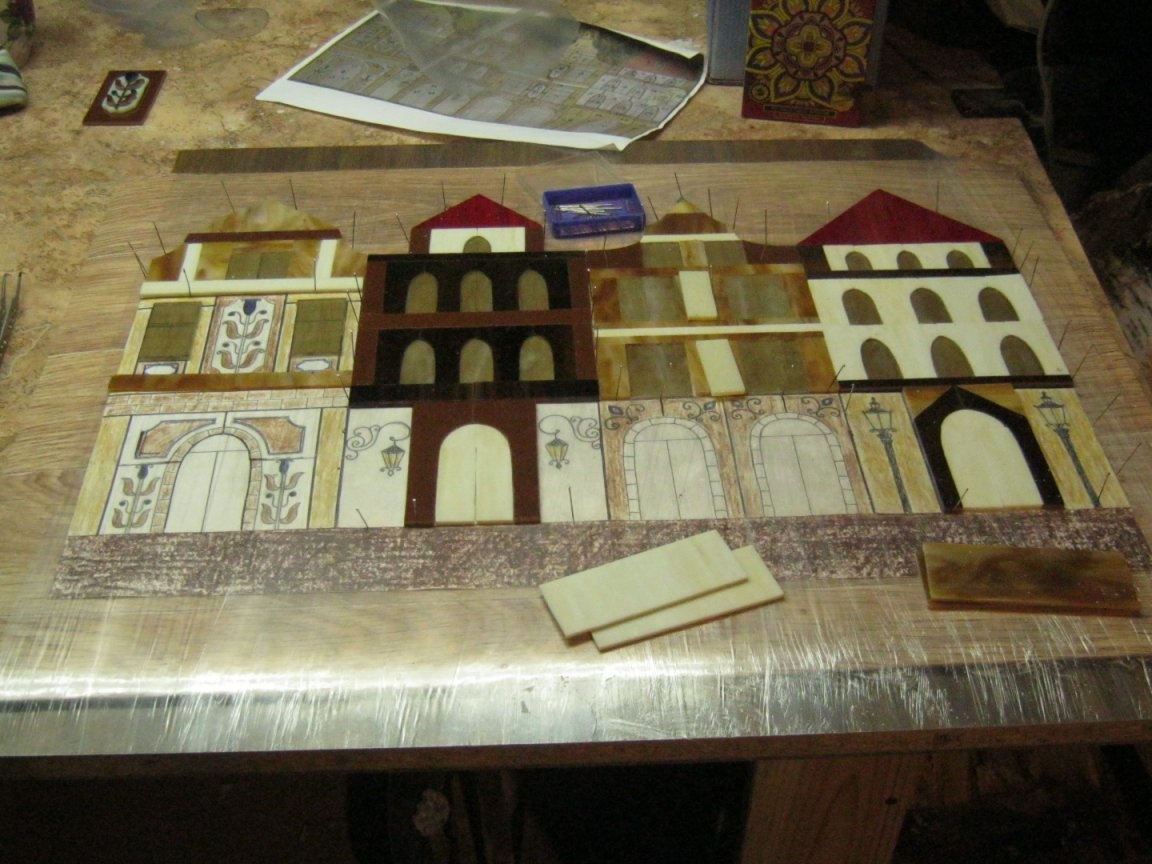
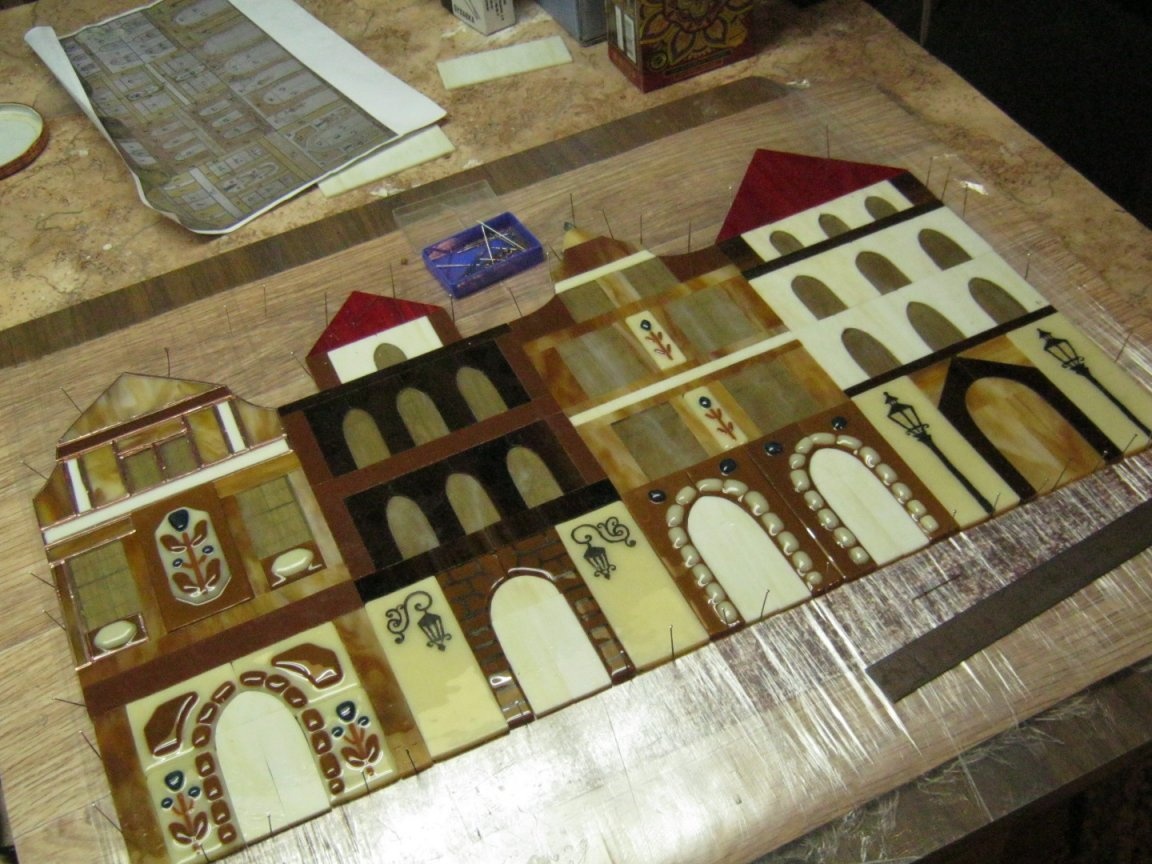
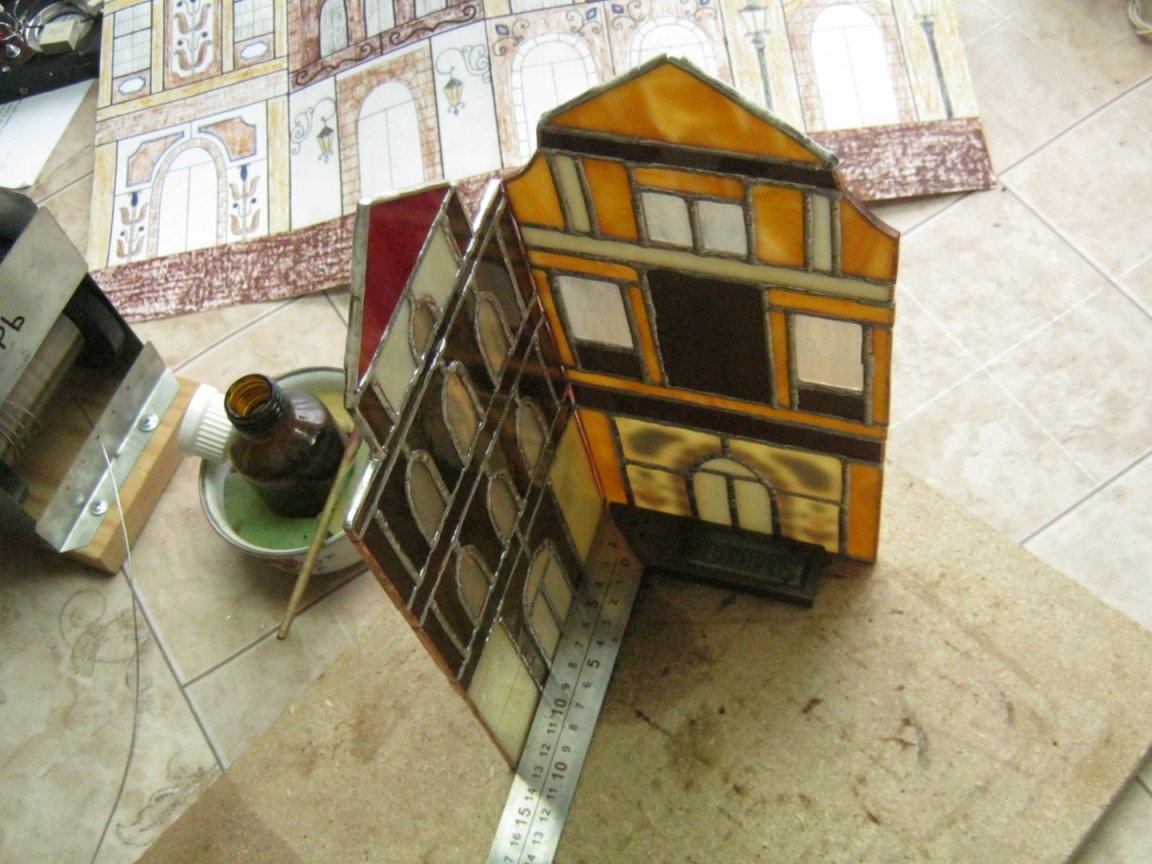
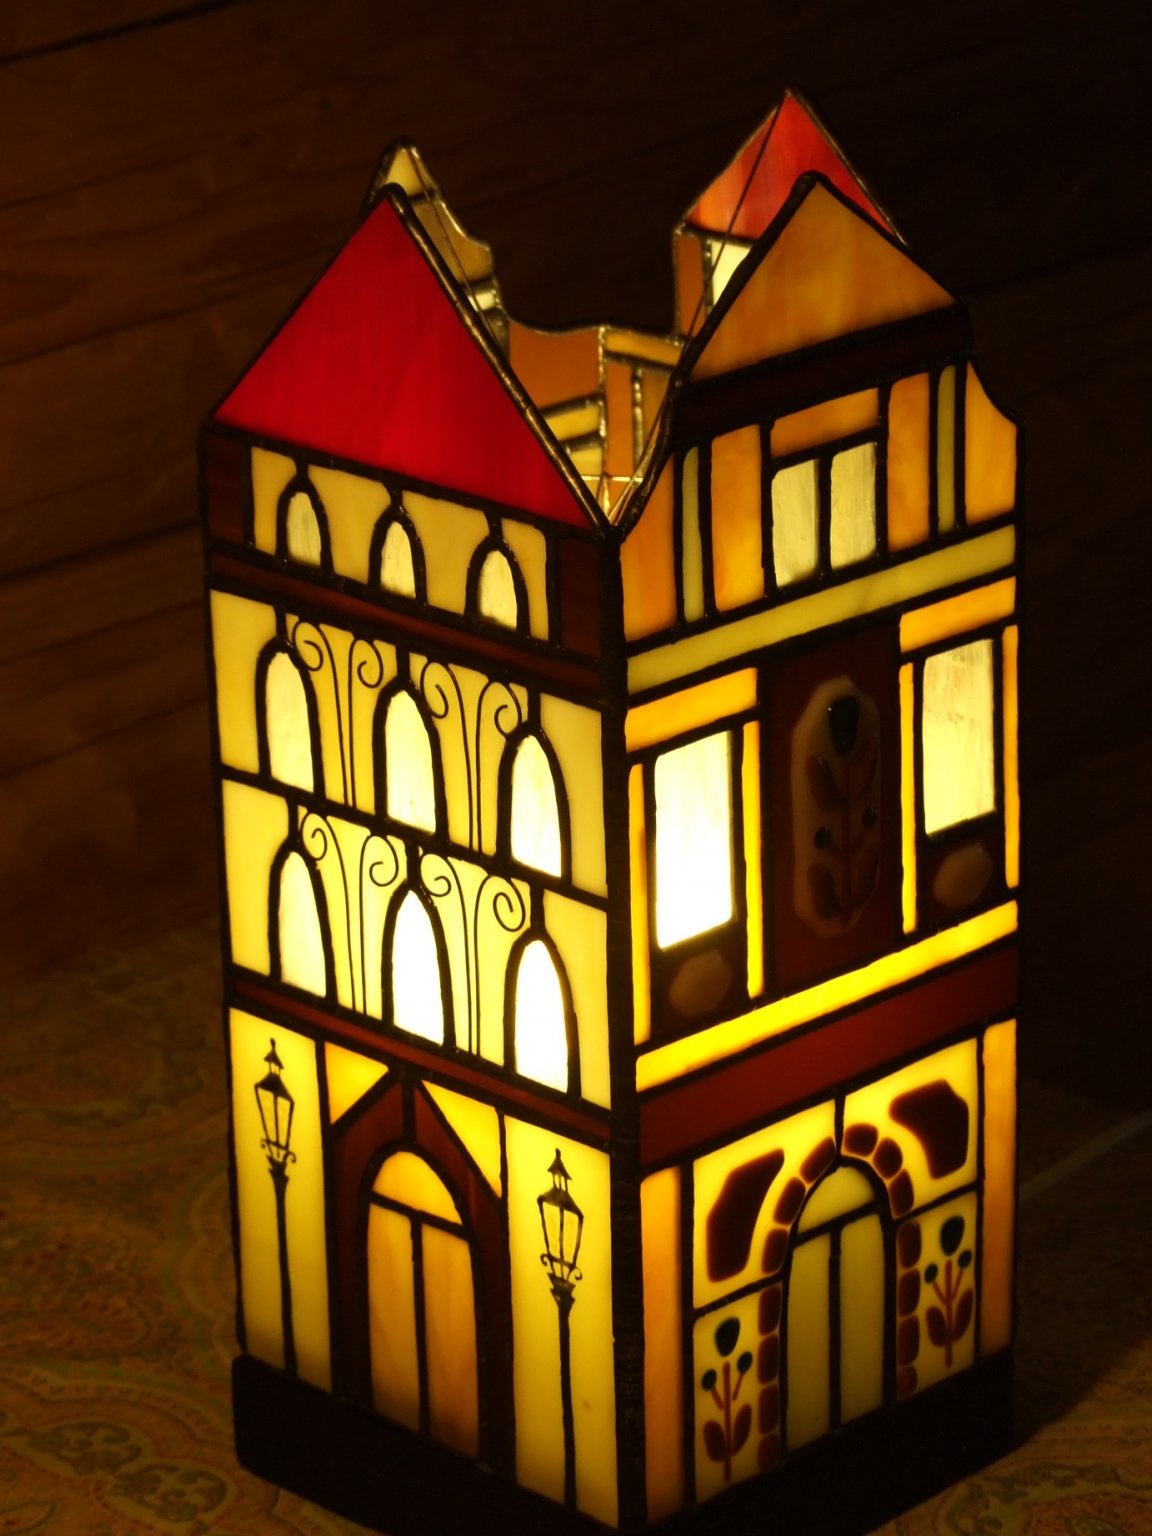
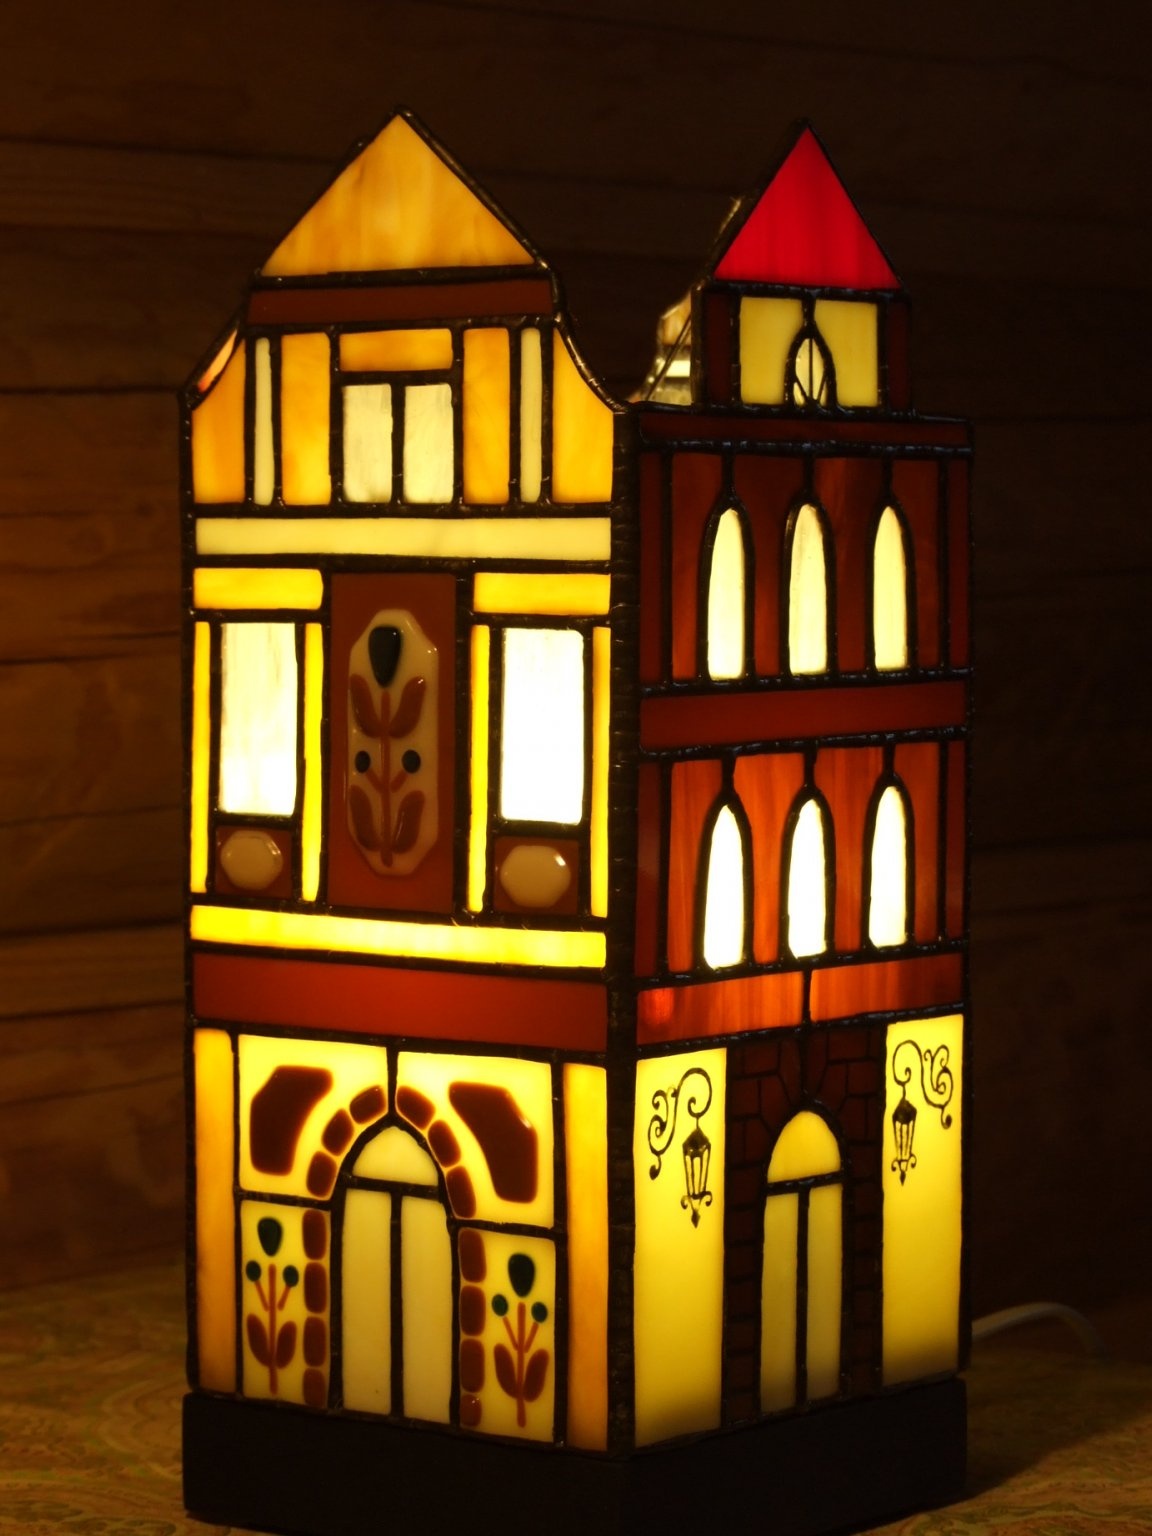
Often, this is the most complex and time-consuming detail. It should be made first of all, while the dimensions can be observed conditionally, with an accuracy of several centimeters. The lower edges of the lampshade will be the basis for the manufacture of electrified soles. The lampshade does not have to be square in section, only rectangular. It wouldn’t be too bad for him to make the bulb bulb twice the size.
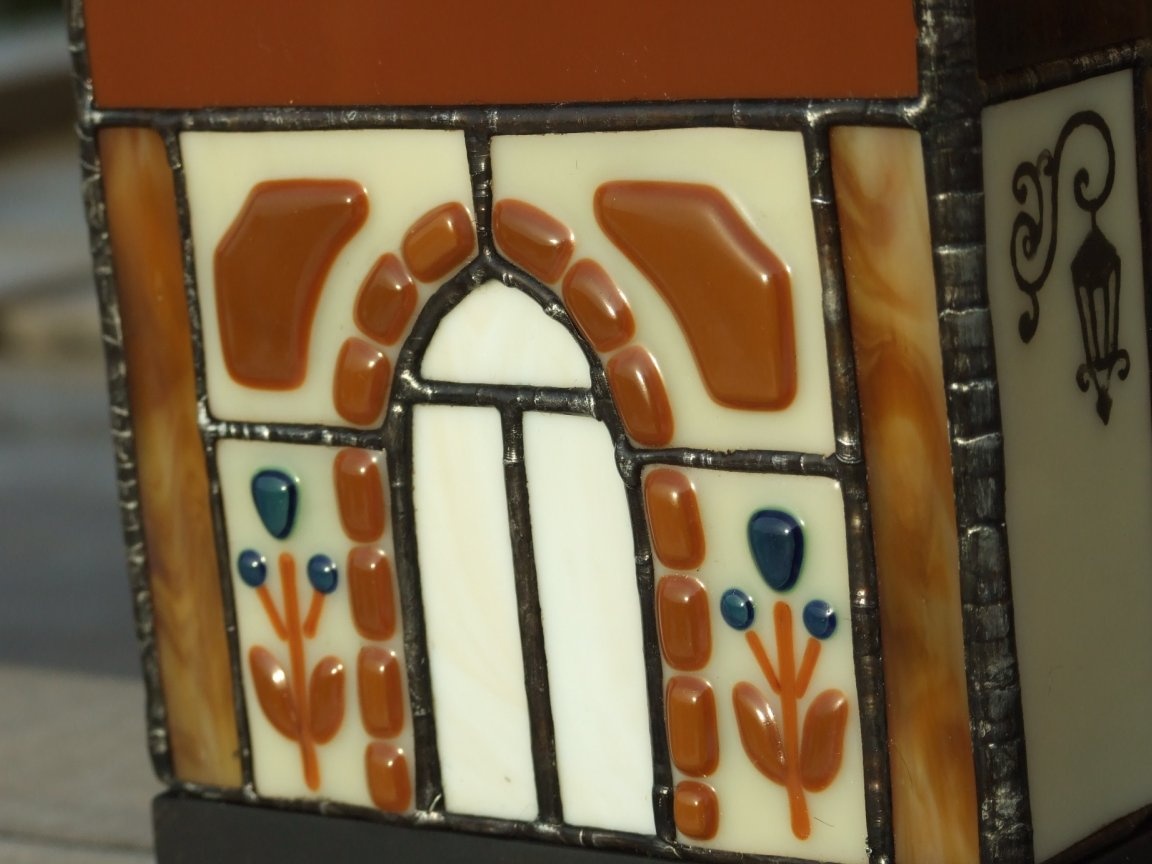
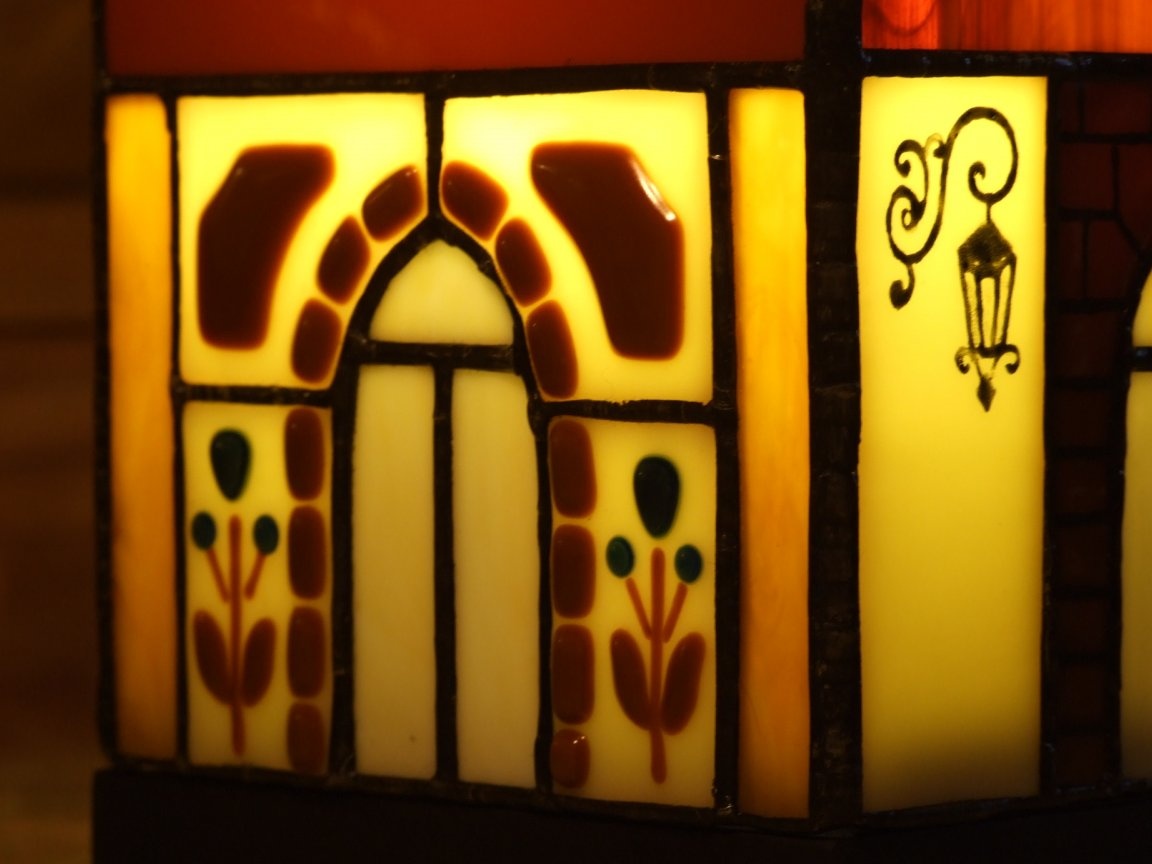
Here, the lampshade is made of colored art glass, in a combined stained glass technique - fusing (fusion in an oven), Tiffany (soldering). And a wooden base. Glass - pewter - wooden, eh? The perfect combination!
Highlights.
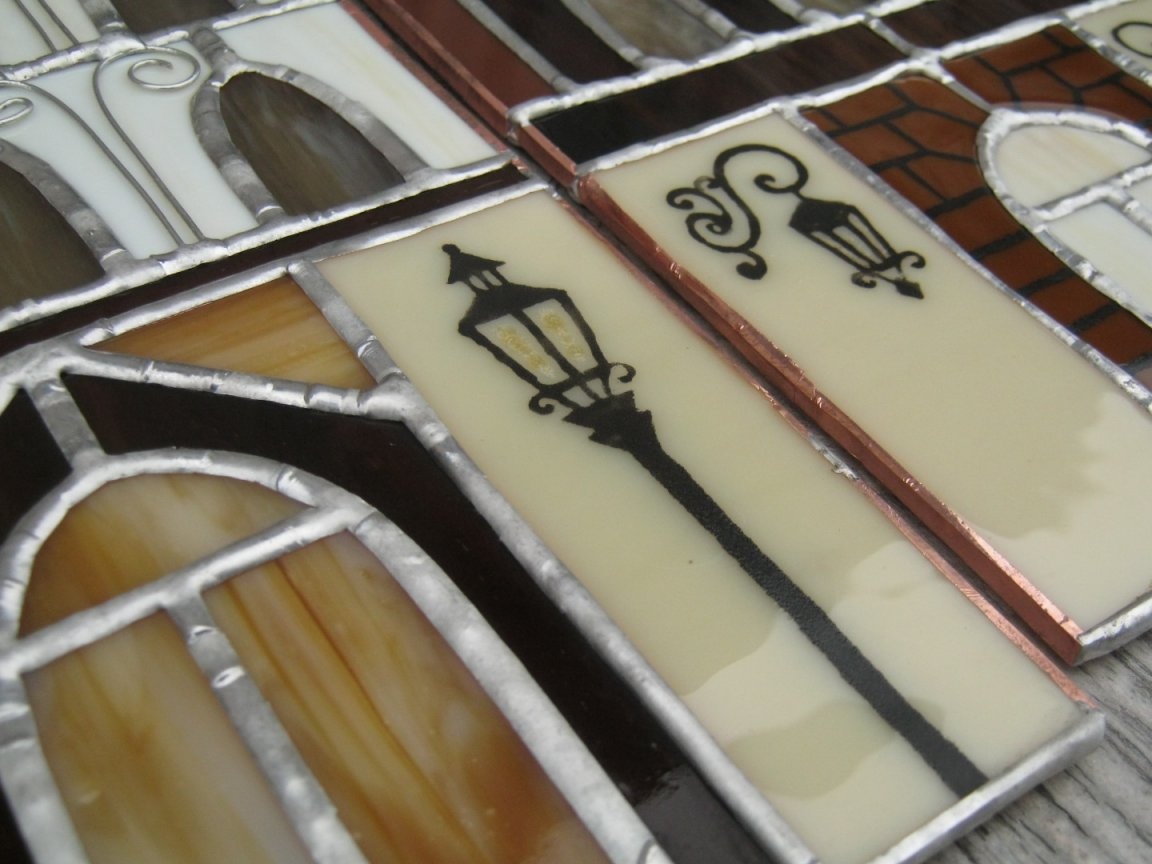
they are washed off from flux residues, if necessary, chemically stained, protected from oxidation.
Wooden sole
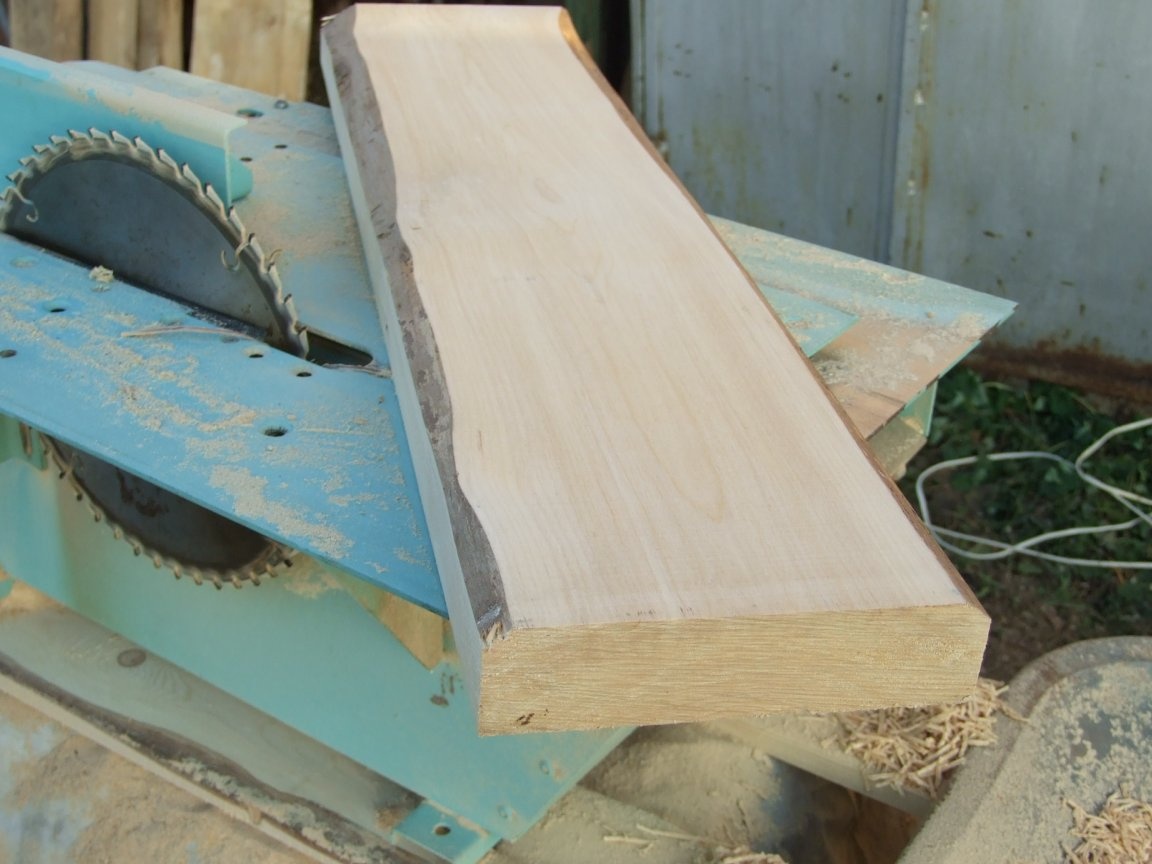
For this kind of work, there is some stock of dry birch boards, thick, a little thicker than 50 mm. He pulled out a little thing, turned it this way and that, marked small places without large knots, sawed it off with a chainsaw. Unedged board, with tapering uneven edges. I sawed off these edges on a circular saw, having previously drawn with a pencil under a long ruler. Harvesting, reconfiguring the universal machine, planed.
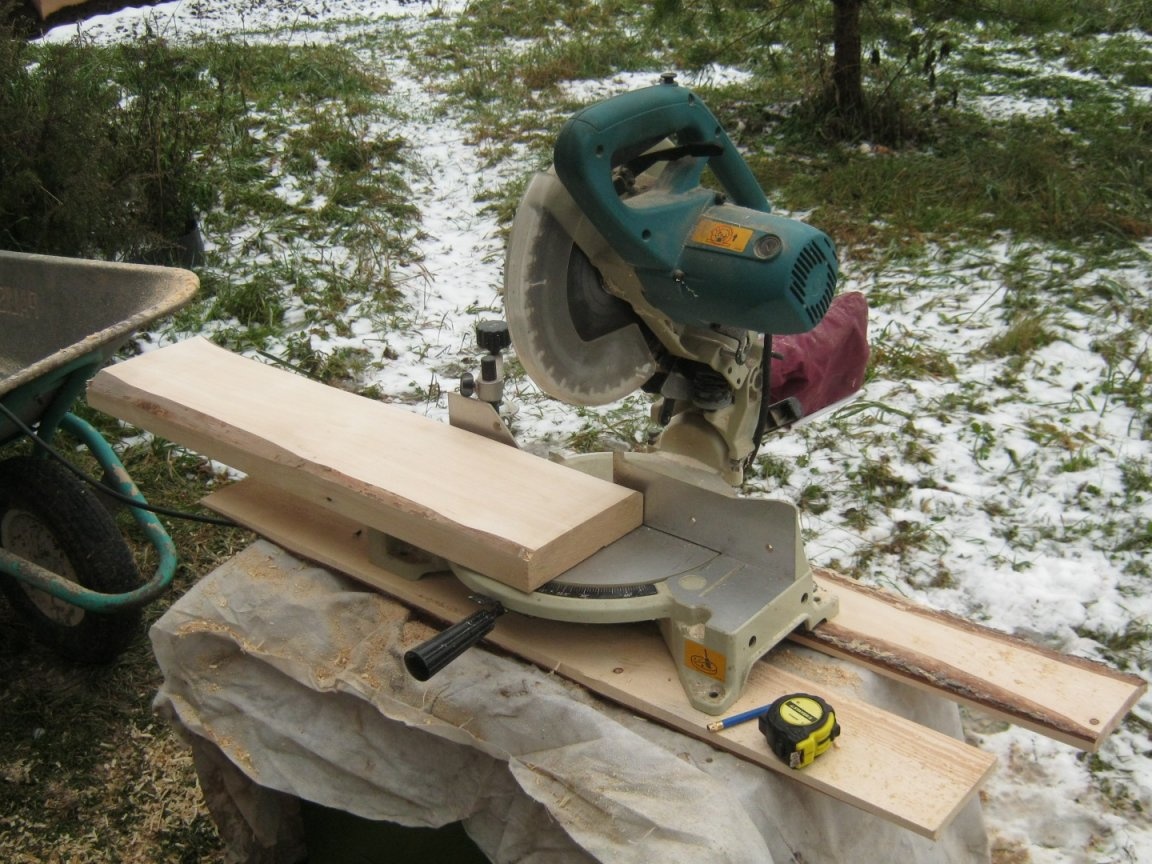
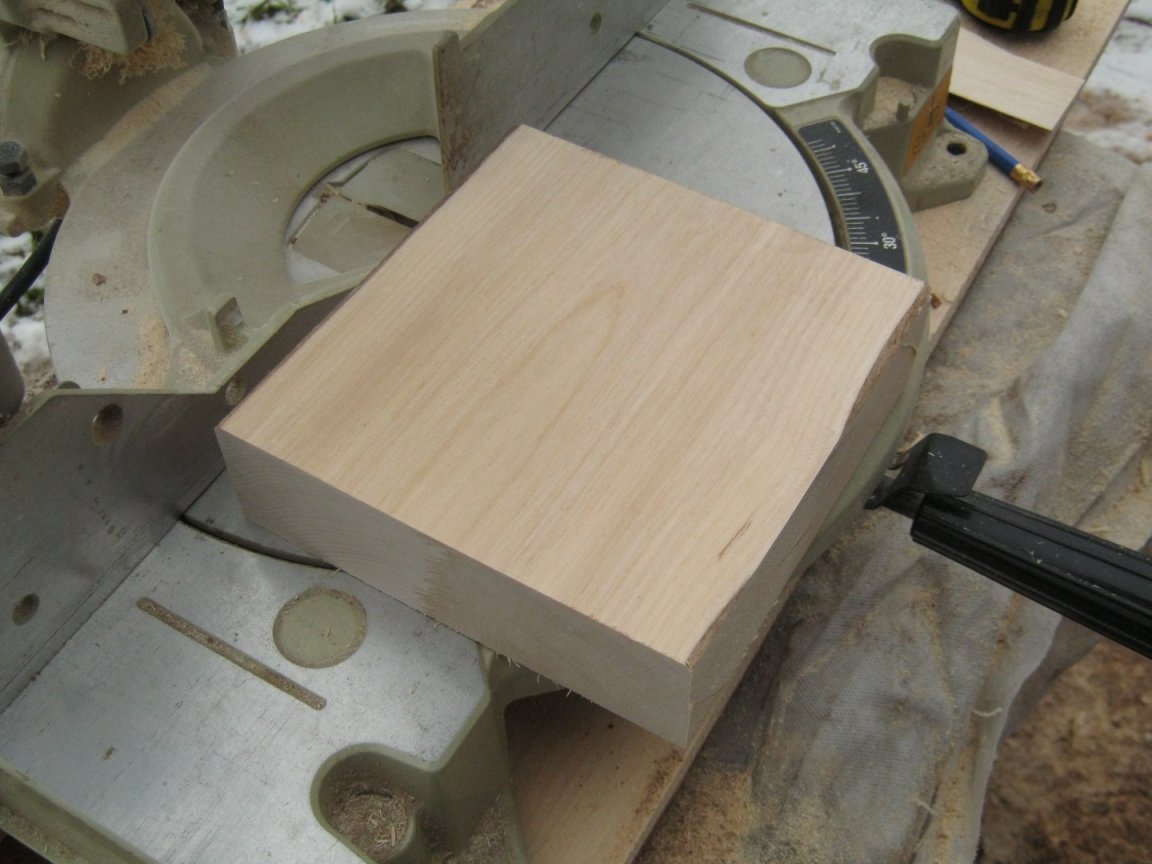
Applying a pendulum saw, he sawed out a block of billet, after several fitting-iterations, adjusted its dimensions to the outer contour of the bottom of the lampshade.
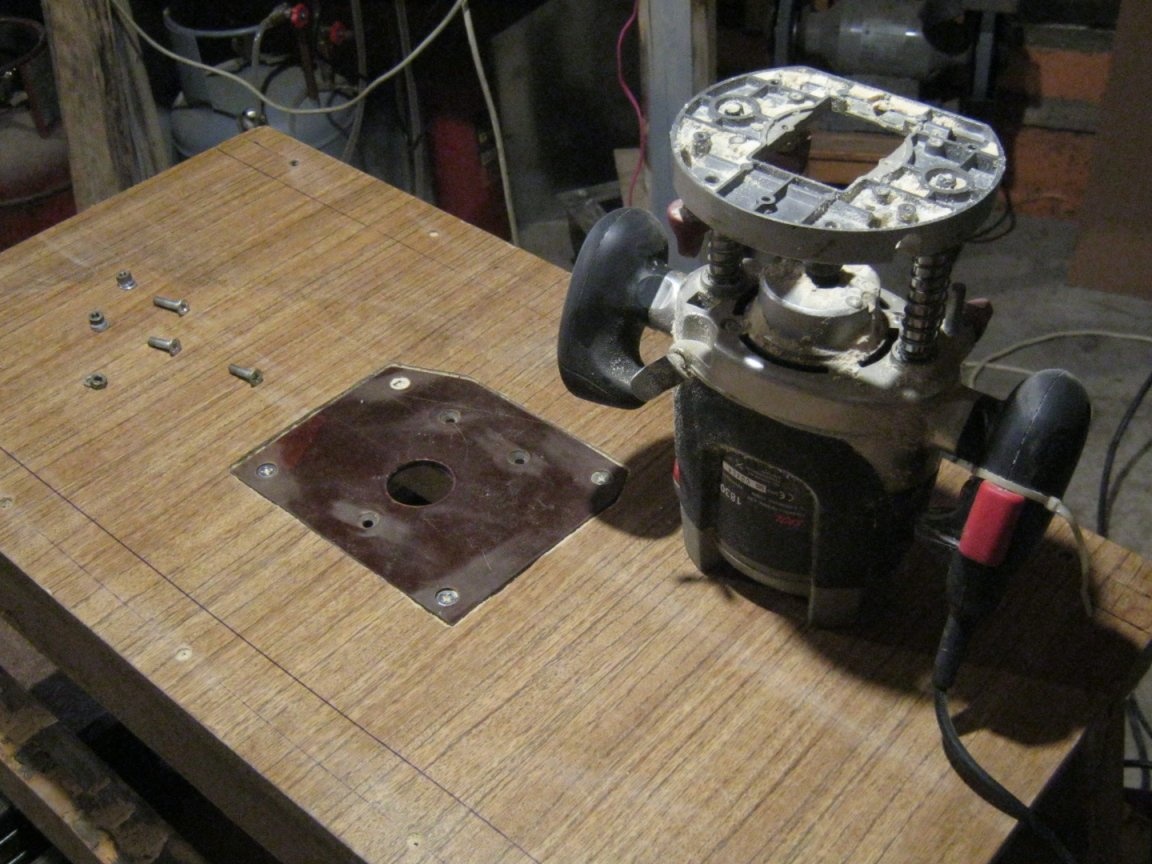
To cut the “quarter” along the contour of the block, I used a manual milling machine installed in a home-made milling table.

Straight grooving cutter. Milled immediately to the entire depth - about 15 mm, but little by little, 2 ... 3 mm. This made it possible to easily reconfigure the process - milled four sides, tried it on the lampshade, if it does not fit in, loosened one of the clamps and slightly moved the guide.
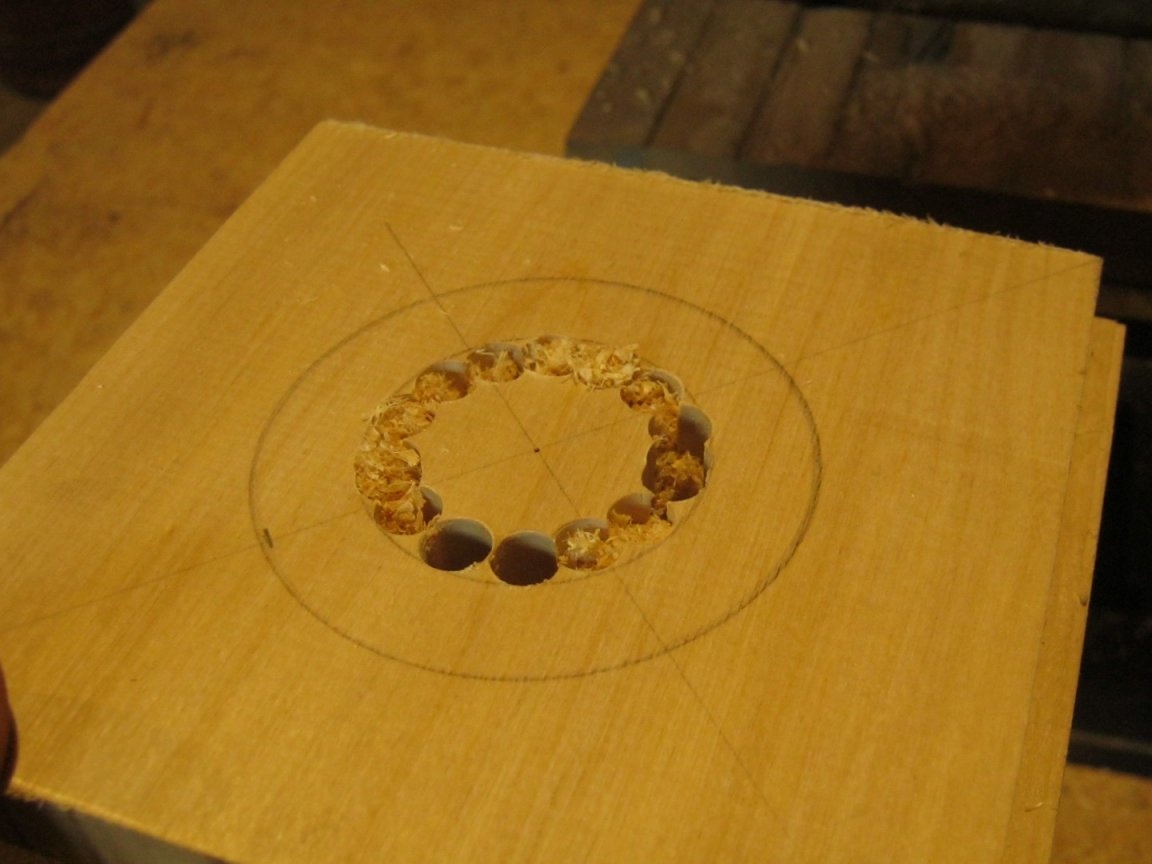
The cavity for the hidden parts of the cartridge was drilled on the machine. With a twist drill for wood with a spike in the center, ø9 mm, ~ 3000 rpm The wood is dense, it turns out smoothly and accurately.
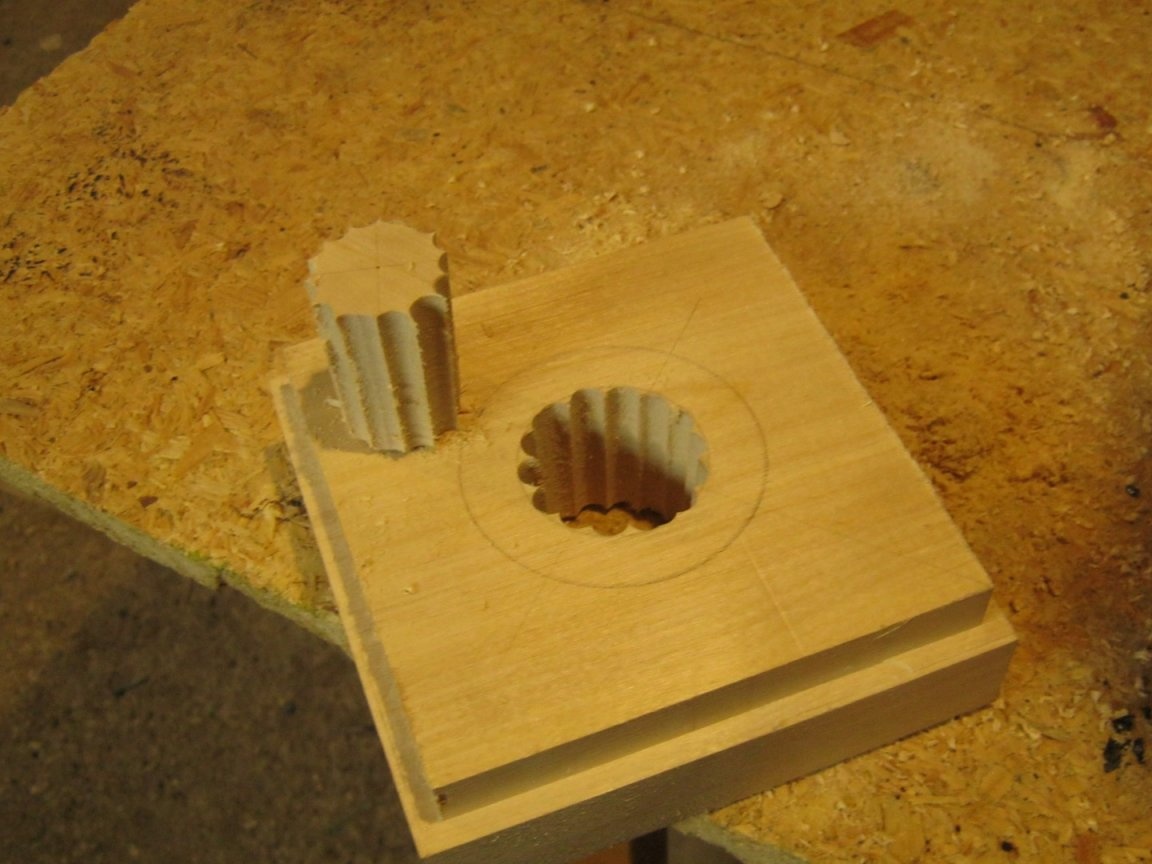

I drilled the inner step (see sketch) so as not to blindly milling or making a template. All the same, only a depth gauge for drilling has been applied. The screw on the limb of the machine I was twisted from vibration and was lost, made a ring of adhesive tape on the drill - do not swim behind the buoys.
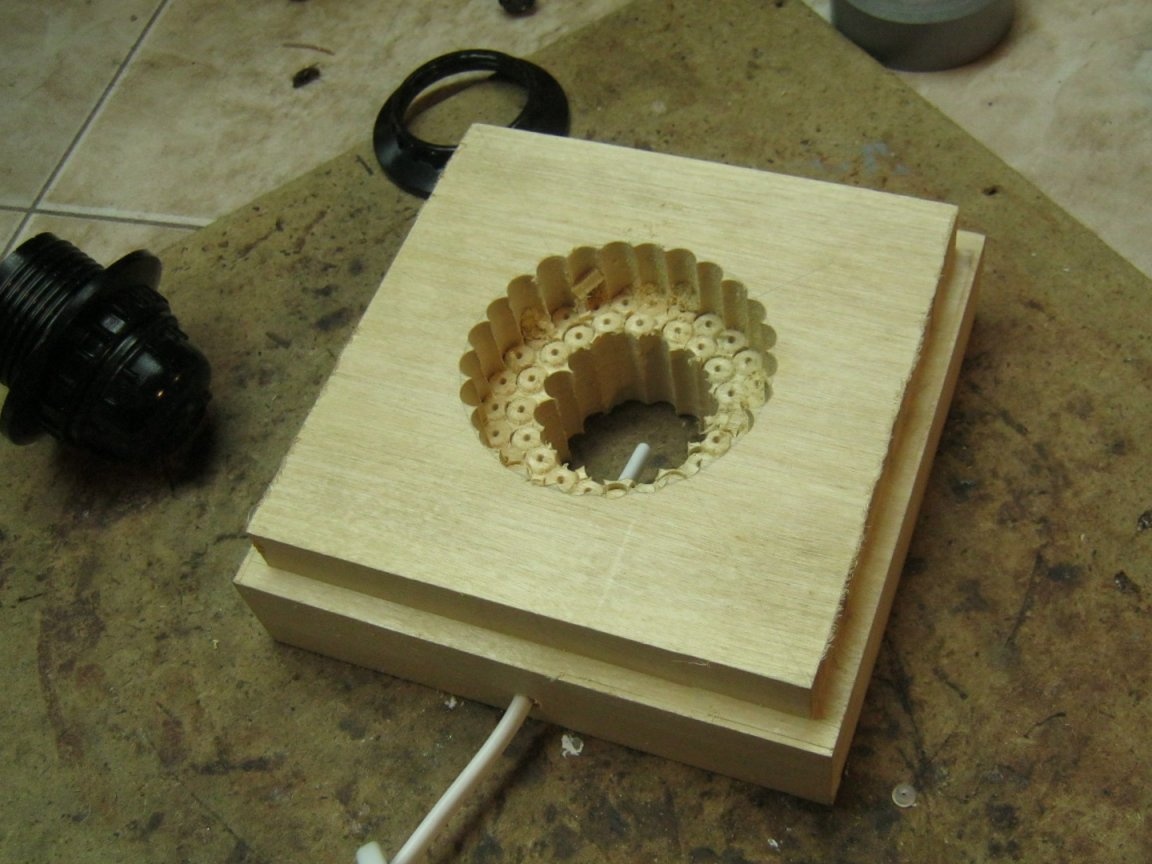
I drilled a hole-channel for the power cord. The same and drill 6 mm.
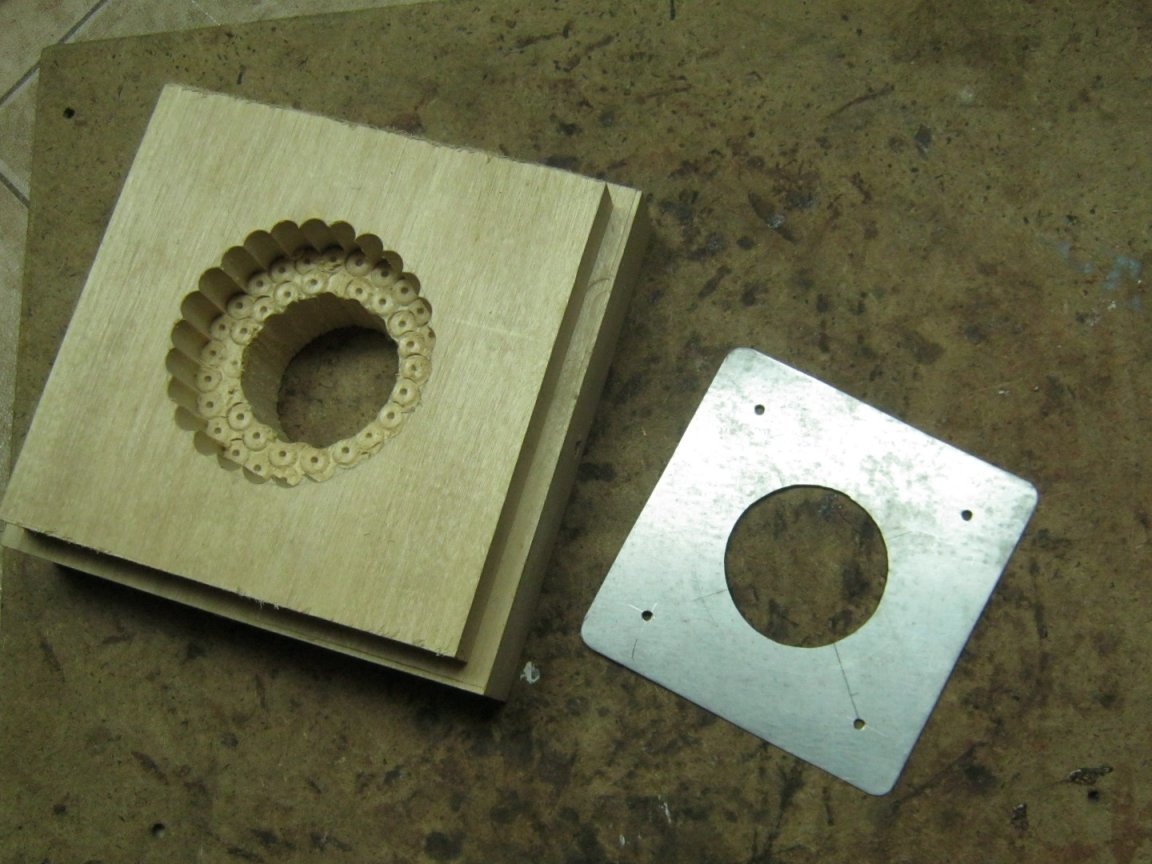
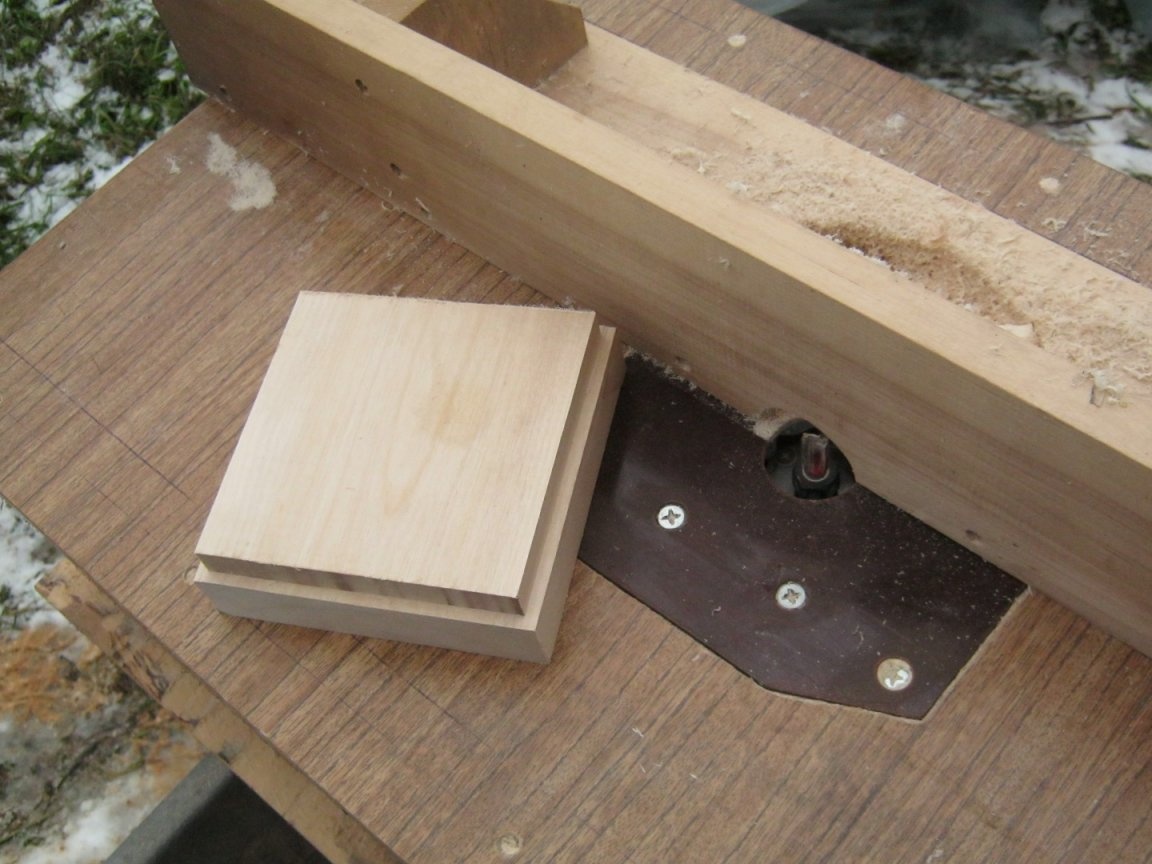
A metal plate, item 3 (see sketch) was cut out with a jewelry jigsaw from a galvanized steel roofing 0.5 mm thick. I marked out the blank with a pencil and cut out with scissors for metal. At the intersection of the diagonals he poked with a core - the center, so that the leg of the compass would not slip. He drew, drilled an inlet inside, and sawed a circle with a jigsaw. Jeweler. The scope of the frame was just enough. He rounded the edges too. I marked the fillets with a ruler-template, but you can also outline a small coin. Monotonously marked, screwed and drilled holes for fasteners, under suitable screws. The edges of the finished piece of iron dulled with an average skin and wiped the part with a cloth moistened with transparent nitro-varnish for metal.
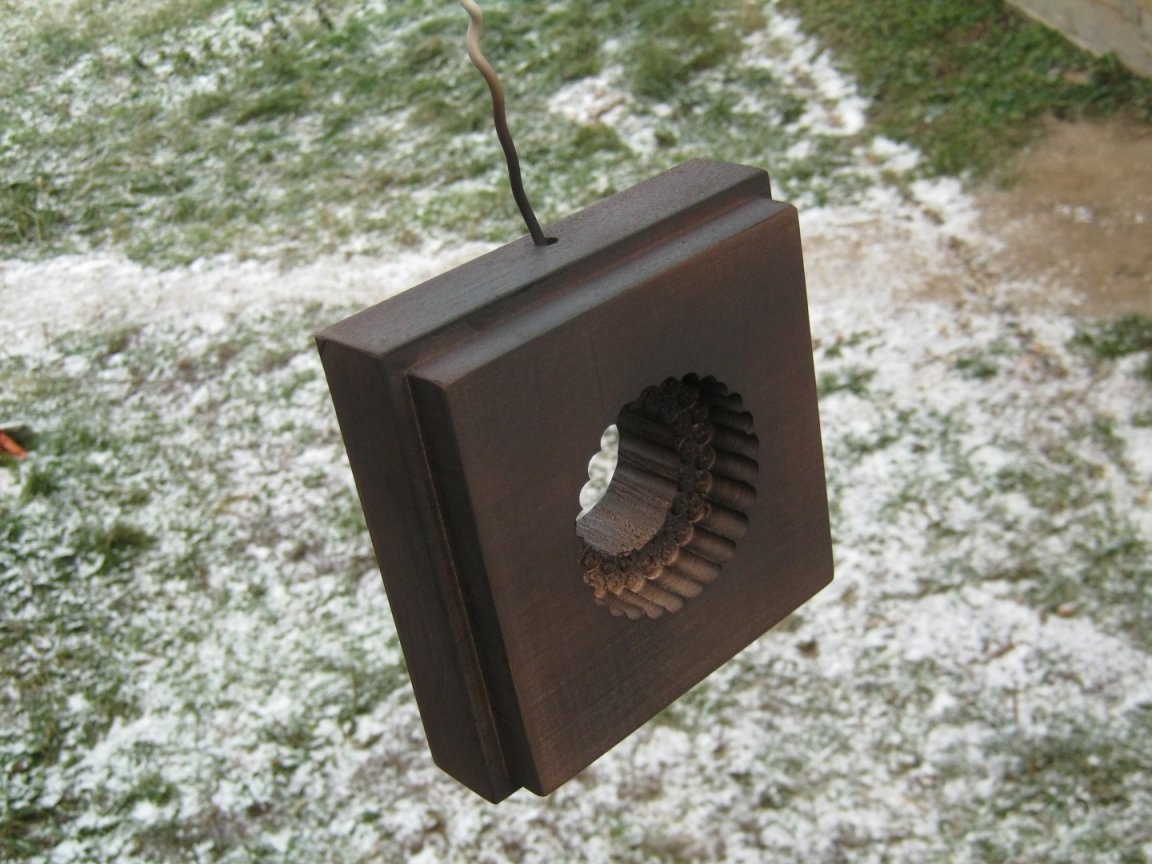
I sanded a wooden blank with several numbers of sanding paper with an increase in number (the farther, the smaller the grain) and painted with a dark brown stain. Painted by pneumatic spraying - a small spray-airbrush for modellers, with homemade compressor. After drying, applied four layers of matte varnish, carefully drying each. From the same spray gun.
Sole assembly, electricity
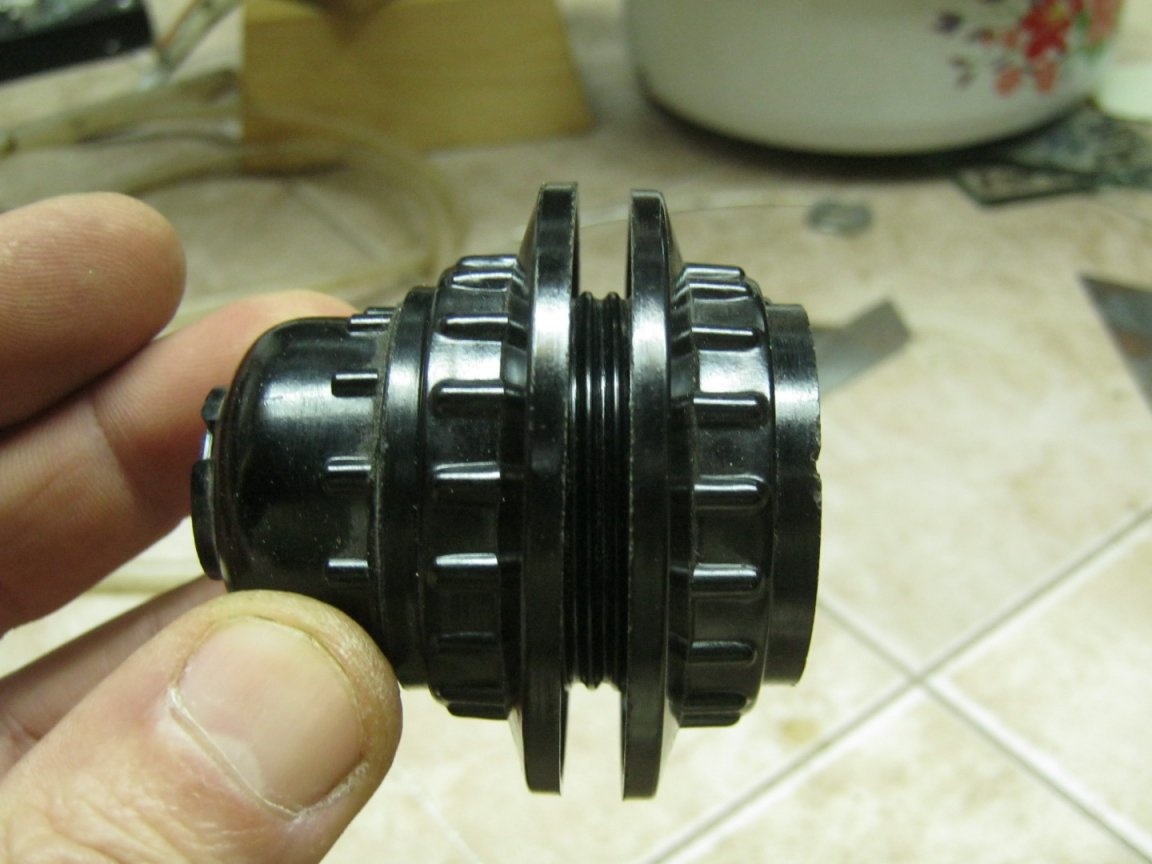
He cut the end of the network wire, connected it to the screw terminals of the lamp holder. He twisted the ends of the wires into rings on the shank of the drill ø3mm, soldered it, removed the remaining flux. Aligned the loops with pliers, clamped under the washers of the contact screws of the cartridge.
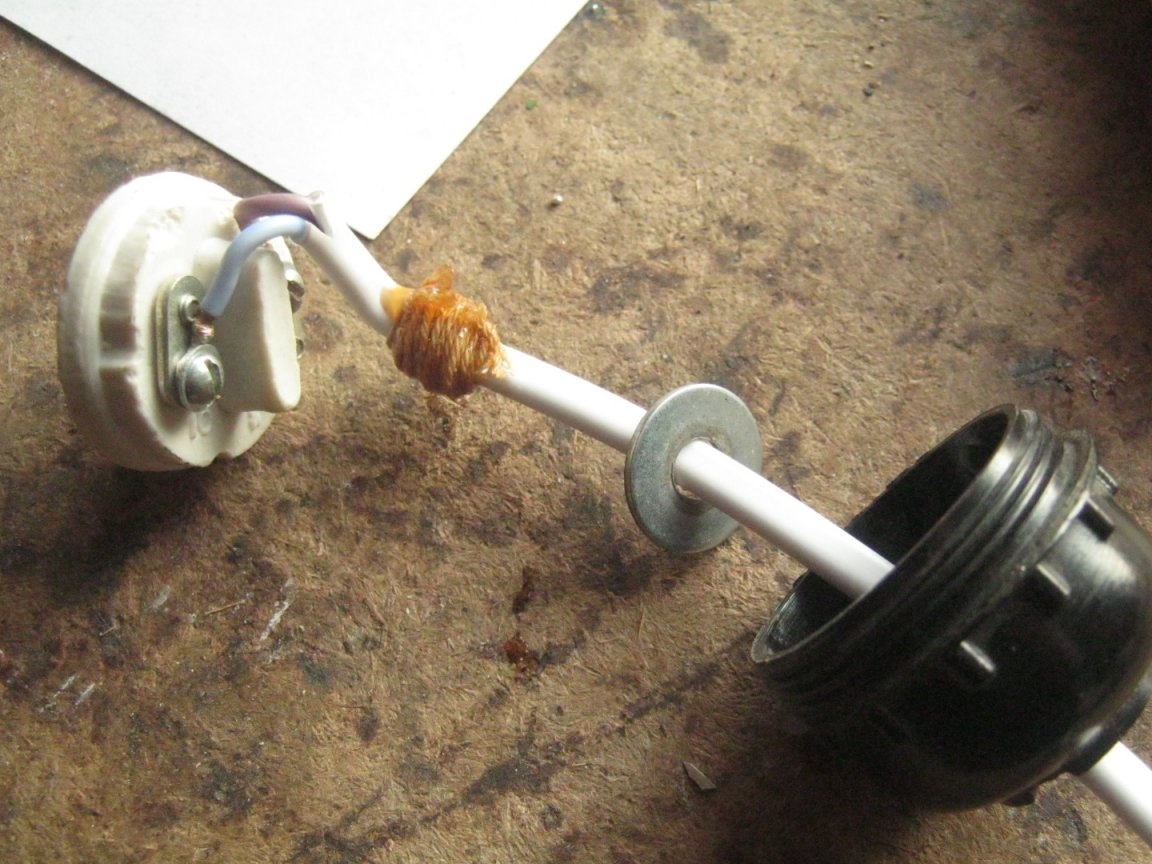
For mechanical fastening of the cord in the cartridge, made a bandage of thick threads, impregnated with glue BF-4. The "outlet" hole for the cord in the cartridge is quite large, and I had to put a wide "body" washer M6.
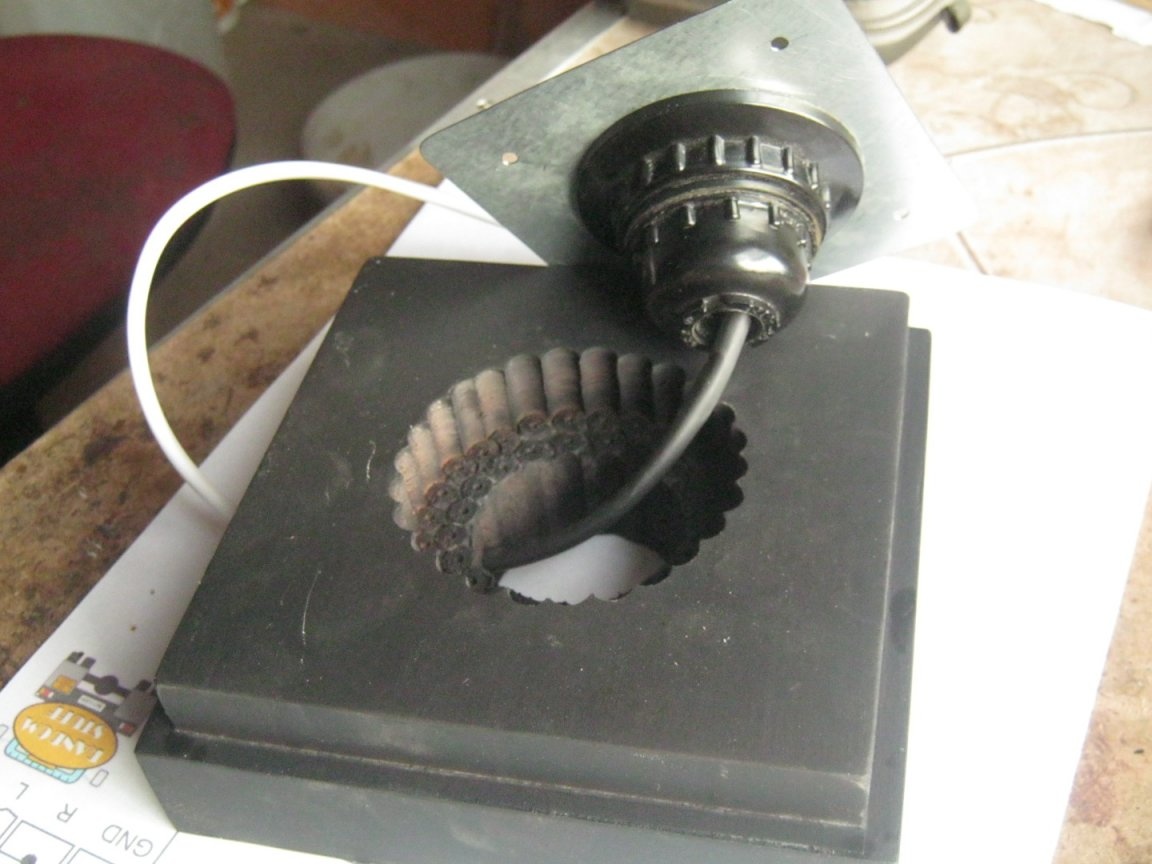
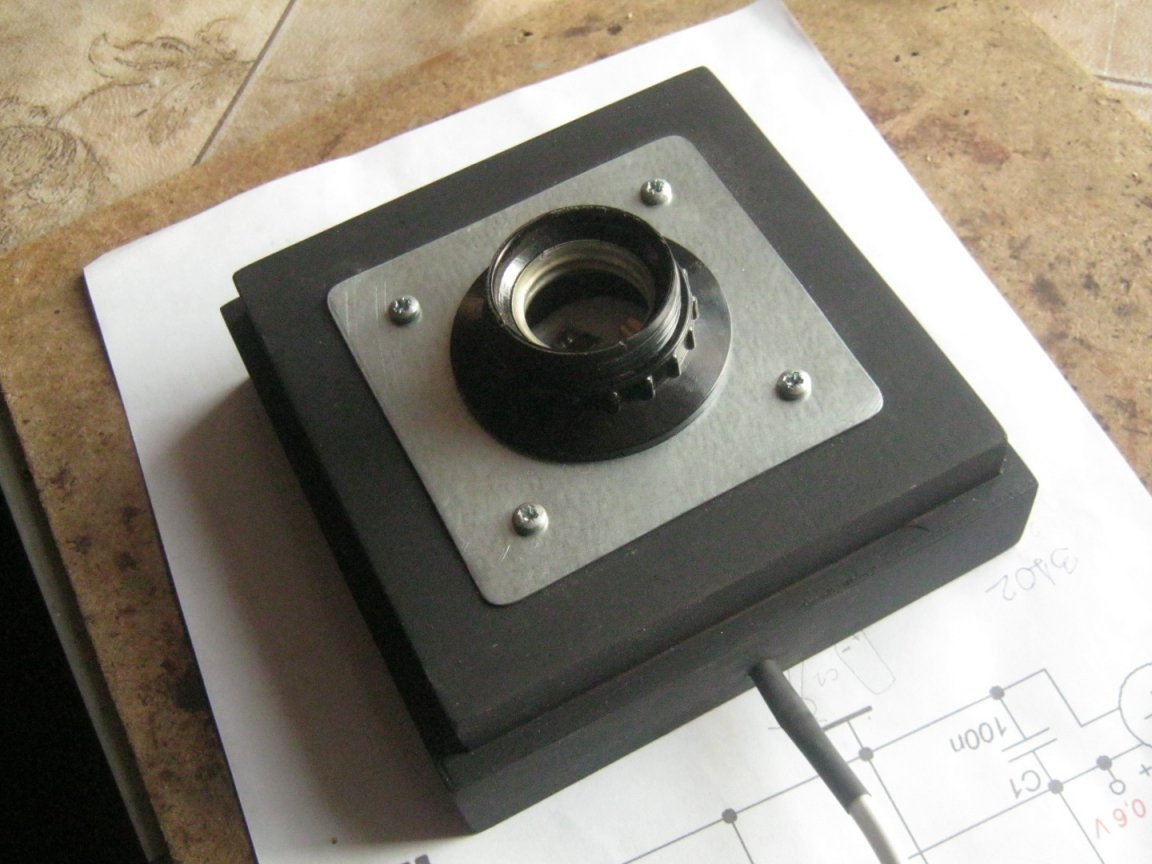
Screwed the cartridge to the metal pad. I put a piece of thermotube of suitable diameter on the cord, passed it into a special hole in the wooden base. The assembly was installed on a wooden base. I picked up short screws with flat hats, marked the centers of the mounting holes with an awl, drilled holes (pick up a drill) for screws (hard wood). Screwed the pad with a cartridge.

I installed a key switch on the wire close (about 30 cm) from the lamp so as not to bend to turn it on. Its casing is cramped; for accurate and reliable installation, you also have to tinker. I tinned the ends of the wires and, after cooling, cleaned the rosin residues.The standard means of the switch unreliably fix the wire for insulation, here for this, instead of a bandage of threads with glue, plastic disposable straps are used.

After connecting the power plug, we check the installation. Order, everything works.
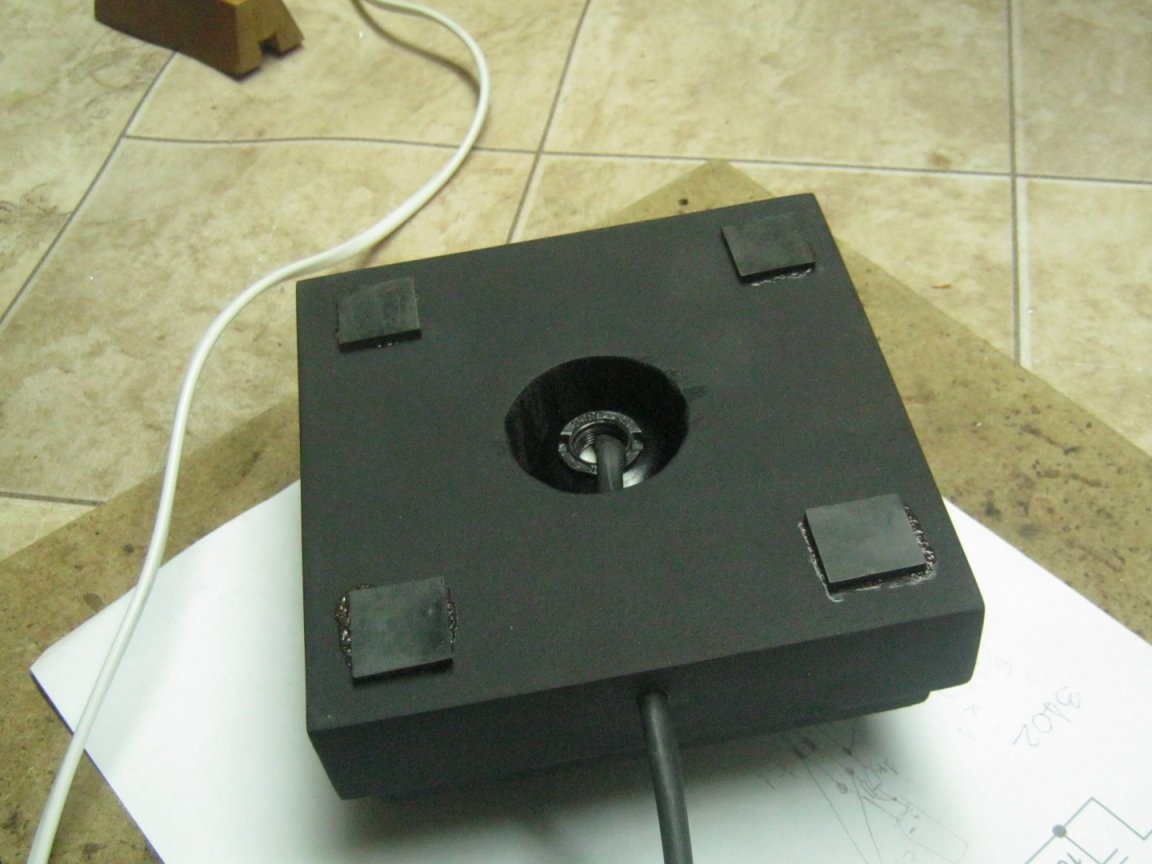
At the bottom of a wooden sole, Moment glue legs glued from squares of thick thick rubber. You can use pieces of a leather belt.
What did we get
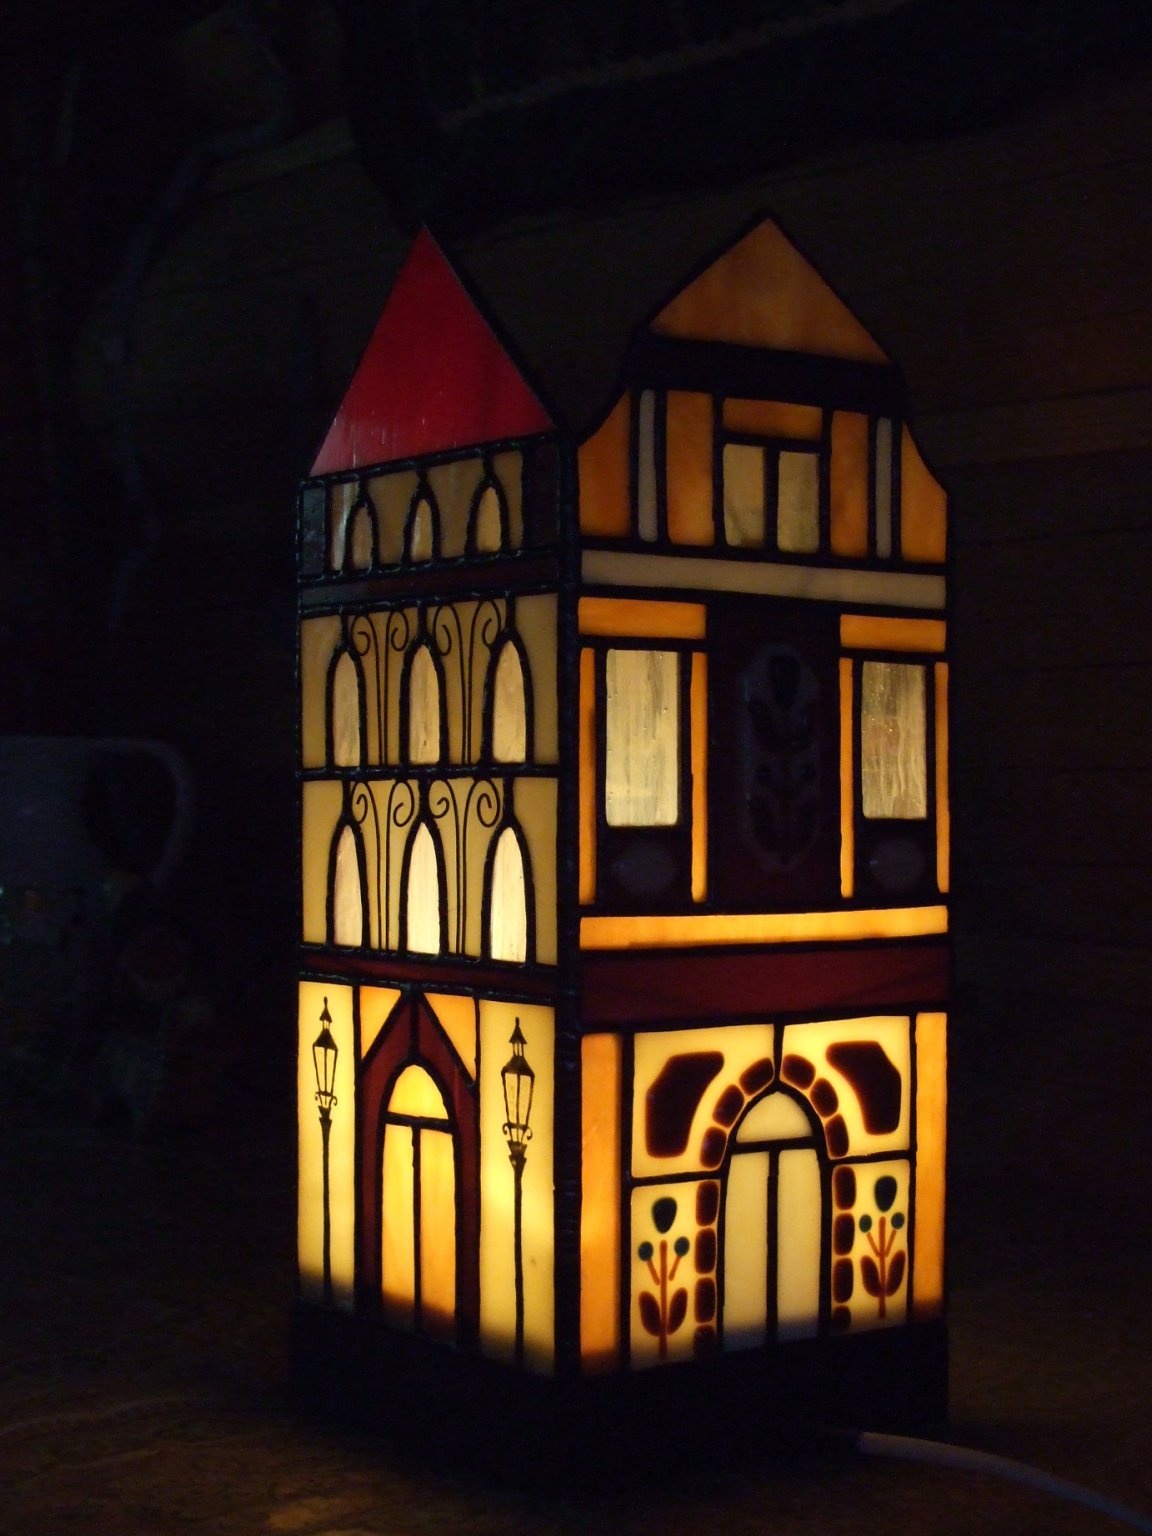
As for luminosity, I must say that in this kind of interior things it is very desirable to use a dimmer - dimmer. This can be a special installation device for incandescent lamps or a module with a remote control, for low-voltage LED lamps or tapes. Adjusting the brightness greatly changes the appearance of the lamp, and, well, and so and so, but in different ways. Here, for a change, you can have several lamps of different power in the kit.
Additive
The number of woodwork can be significantly reduced if the “quarter” is a step on a wooden base, where the lampshade is placed, made of laths. Saw off the pieces with a hacksaw with a small tooth and nail with small cloves. It is better to splash glue under the slat, the same joiner's PVA.
Babay Mazay, November, 2019