
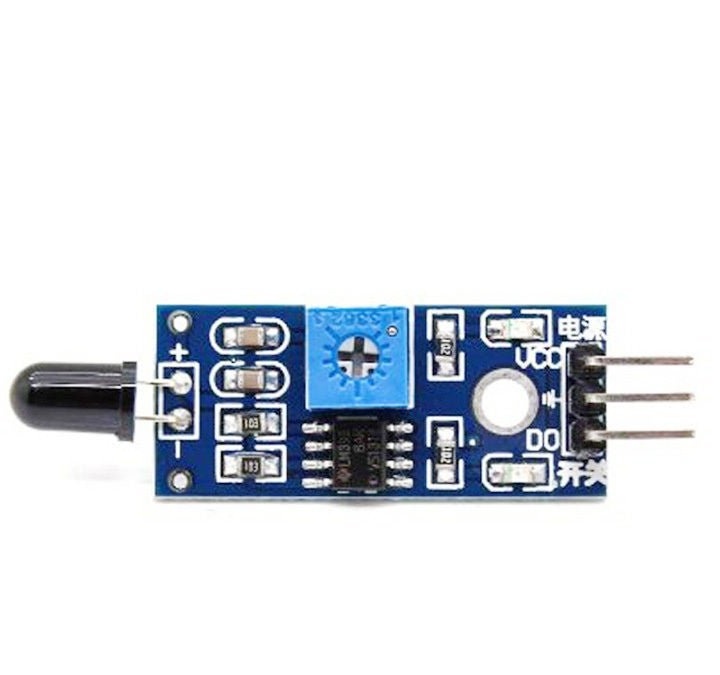
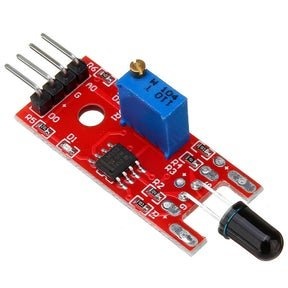
The sensor, proposed by Instructables under the nickname AdnanA61, allows you to detect short-wave infrared radiation from sources such as remote controls, fire, incandescent lamps, and the sun. It does not respond to another form of infrared radiation - long-wave, the sources of which are all objects heated to ordinary temperatures. Homemade produces two types of signals: analog and discrete, the second of them is formed by a comparator, the threshold of which is made adjustable. Both signals can be applied both to Arduino, and to other devices with or without a microcontroller. The following is another board design, the circuit is not different:
The sensor is made on one of the two comparators of the LM393 microcircuit; the second one can be used to solve another problem if desired. If you do not use it, it is better to connect both of its inputs with a common wire, and leave the output unconnected.
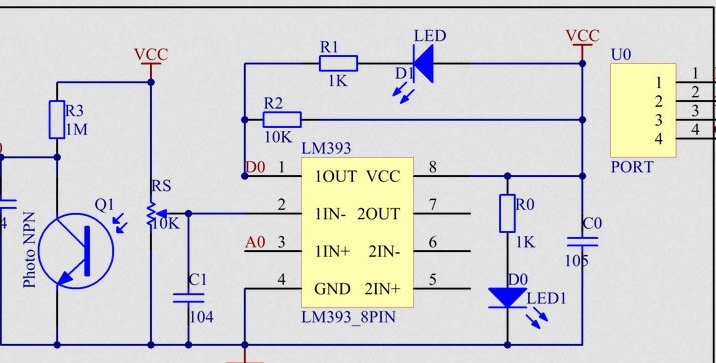
The scheme is designed so that reading it is not very convenient. The three points designated as A0 must be connected together. Two points designated as D0 - too. So it becomes clear what is connected to and how it works. No riddles. If you assemble the sensor from the designer, the pinout of the comb on the board included in the kit will be as follows:
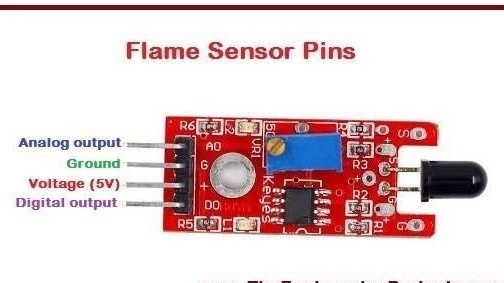
Of course, on a makeshift board, printed or breadboard, this pinout can be made to be convenient for you. You can check the board in action and adjust the comparator threshold immediately after assembly, simply by supplying power, thanks to the LED on board. The second LED lights up continuously when the power is on. Then you can connect the sensor to the Arduino and test the analog output with this sketch:
// copy this code in the ide of arduino from this line

// note: - this code is for analog value

int sensor = A0; // initializing the analog pin

int buzzer = 3; // initializing buzzer pin

int value;

void setup () {

Serial.begin (9600);

pinMode (sensor, INPUT); // assing the pin mode type of the pin as input or output

pinMode (buzzer, OUTPUT);

}

void loop () {

value = analogRead (sensor); // reading the valus from the sensor

value = map (value, 0.1023,0,255); // mapping the value from 0 to 1023 b / w 0 to 255

digitalWrite (buzzer, value); // switching the buzzer on or off by the mapped value

}
And digital - with another sketch:
// copy this code in the ide of arduino from this line

// note: - this code is for digital value

int sensor_digital = 2; // initializing the digital pin

int buzzer = 3;

int value;

void setup () {

Serial.begin (9600);

pinMode (sensor_digital, INPUT);

pinMode (buzzer, OUTPUT);

}

void loop () {

value = digitalRead (sensor_digital); // reading the digital dat from the sensor

digitalWrite (buzzer, value); // switching buzzer on or off

}
When everything works, you can write programs that implement algorithms of greater complexity. For example, for a robot “afraid” to approach a flame or a powerful incandescent lamp so as not to deteriorate. And he’s doing the right thing, since holding the sensor board to sources of strong heating at a distance of less than 100 mm can damage it.