
From the article below you will learn how to do it yourself to make a fence for a flower pot, to protect against babies. The following description and instructions are taken from the Matthias Wandel YouTube channel.

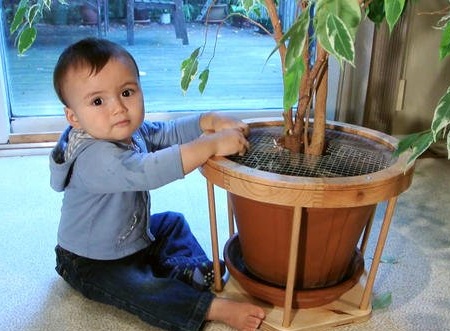
This project began with a simple problem: the master’s nephew discovered that it turns out to throw dirt from a flower pot is very fun.
I had to urgently solve this problem.
Thoughts were about how best to place the screen on top of the flower pot. It’s not so easy to come up with a clay pot.
Necessary materials:
- oak panel;
- pre-prepared wooden pins;
- oak timber;
- metal grid;
- PVA carpentry glue;
- polyurethane varnish;
Tools required:
- band-saw;
- desktop circular saw;
- caliper;
- building compass (for drawing a circle);
- clamps;
- stationary belt grinding machine;
- drilling machine;
- a pencil;
- roulette;
- milling machine;
- scissors for metal;
- screwdriver;
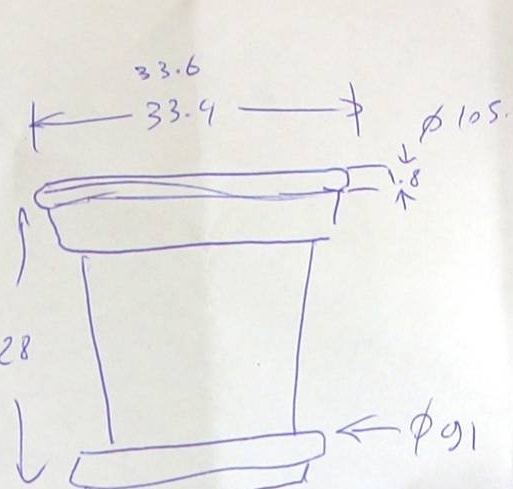
The wizard began by measuring the flower pot.
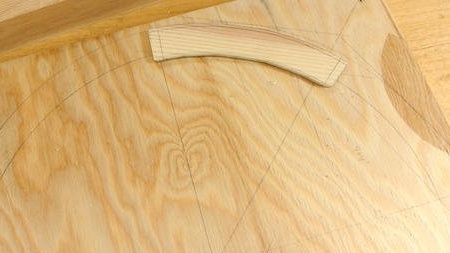
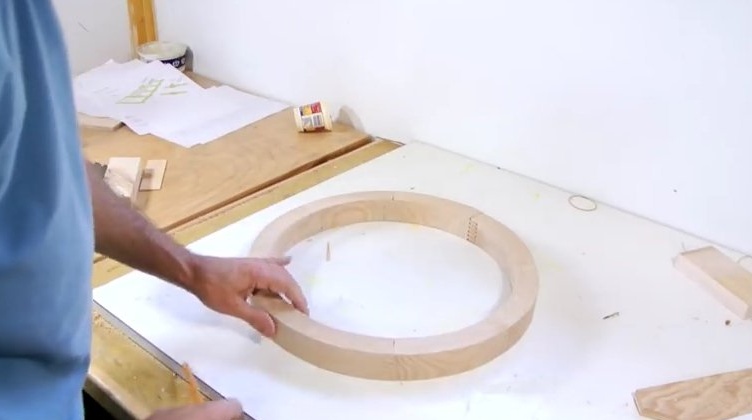
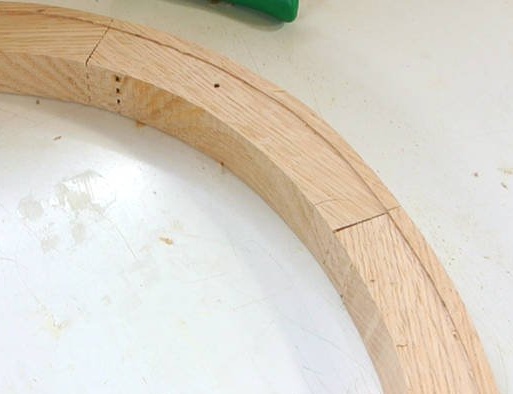
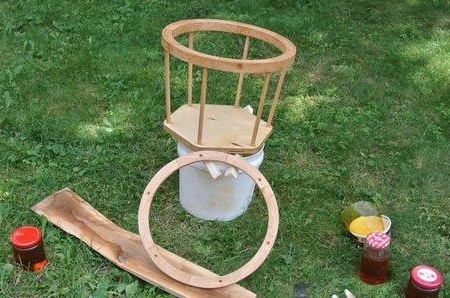
He wanted to make a hoop around the pot so that he would hold the screen. The master decided that he could make it out of eight segments. To begin with, the master carved a piece of wood to outline how to cut segments.
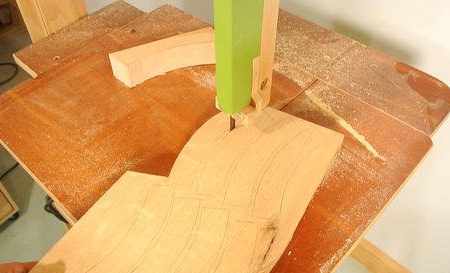
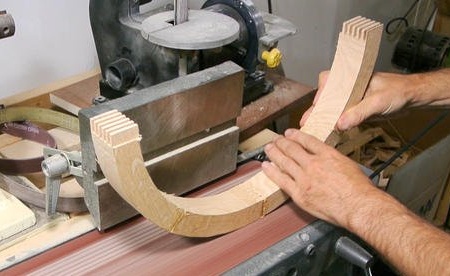
The master laid out nine segments on a piece of oak 5 cm thick, and then cut them out on a band saw.
Why nine segments? This, of course, in case the master screwed up with one of them.
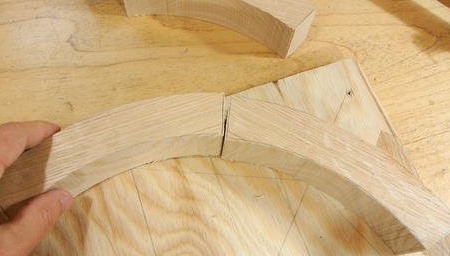
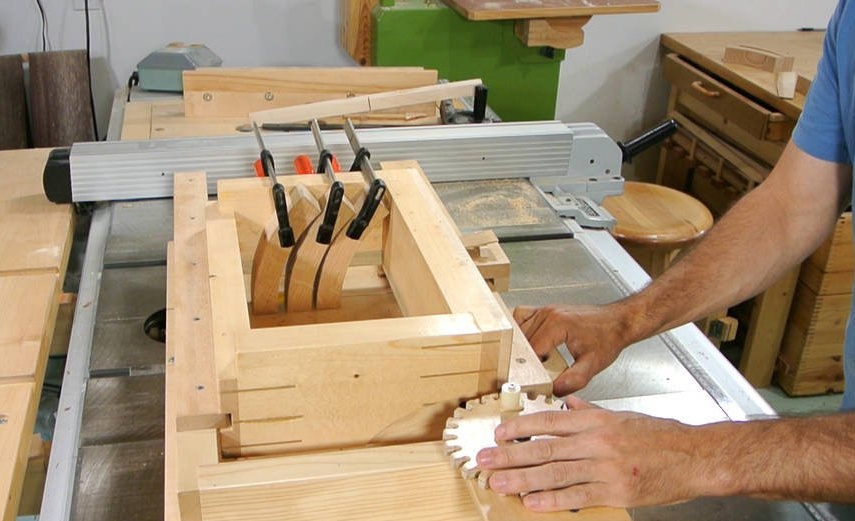
Checking segments. So far, so good. Now you need to cut the stud connection on the segments.
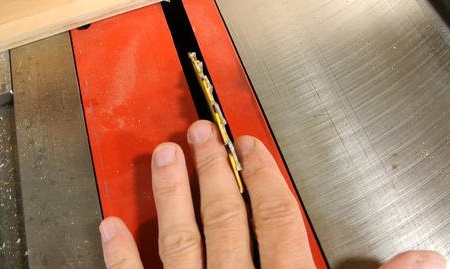
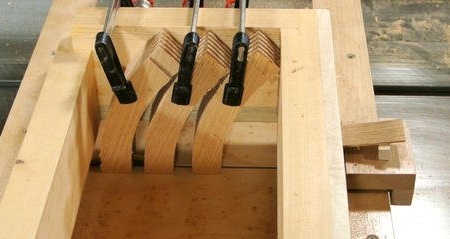
The master installed two 184 mm disk blades. into a table saw to get a wider cut width.
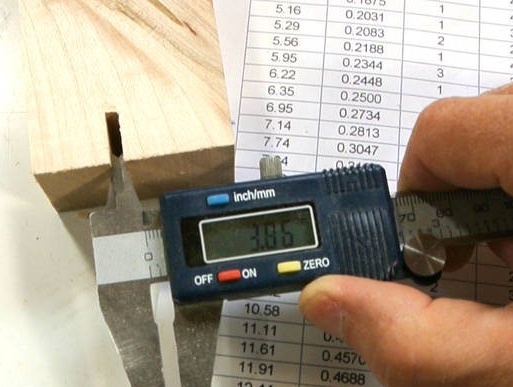
He made a test cut and measured the width.
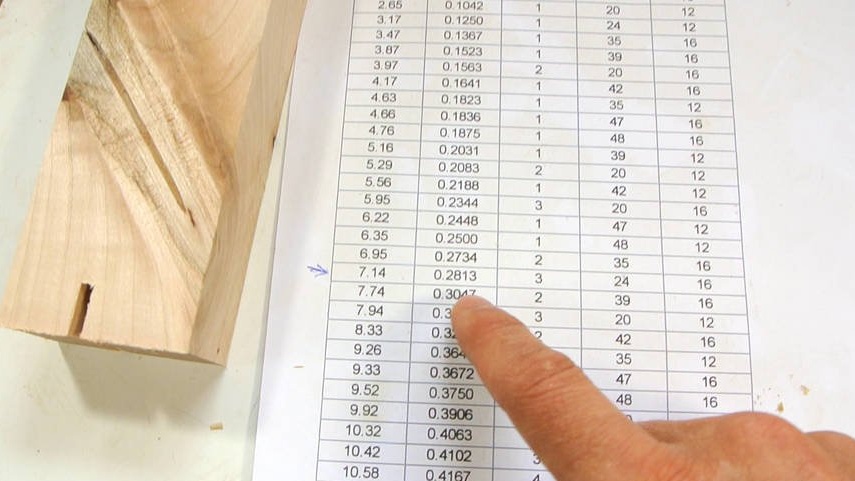
For the manufacture of proportional spikes and grooves, the master needs to make changes. The table shows the next lowest step in its spacing table. The intermediate table contains all the possible gear combinations that he made for his homemade boxed swivel assembly.
He chose three turns from 24 gears against 16 gears for each advance. This will make the spikes a little freer than we would like, but it was the most suitable combination, and he did not want to make another set of gears.
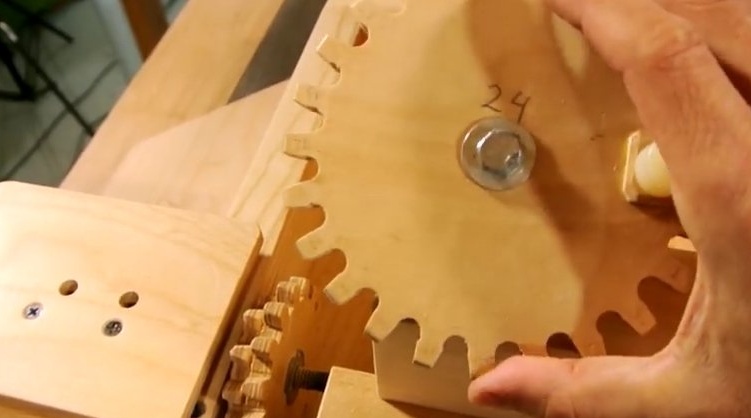
Installing the sixteen gear on the clamp device.
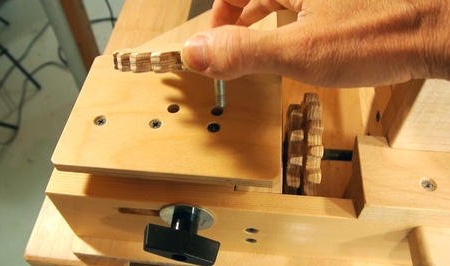
Three segments are pressed against the edge of the jig. Three crank turns between cuts. After six cuts, the carriage returns to its original position by turning the handle clockwise.
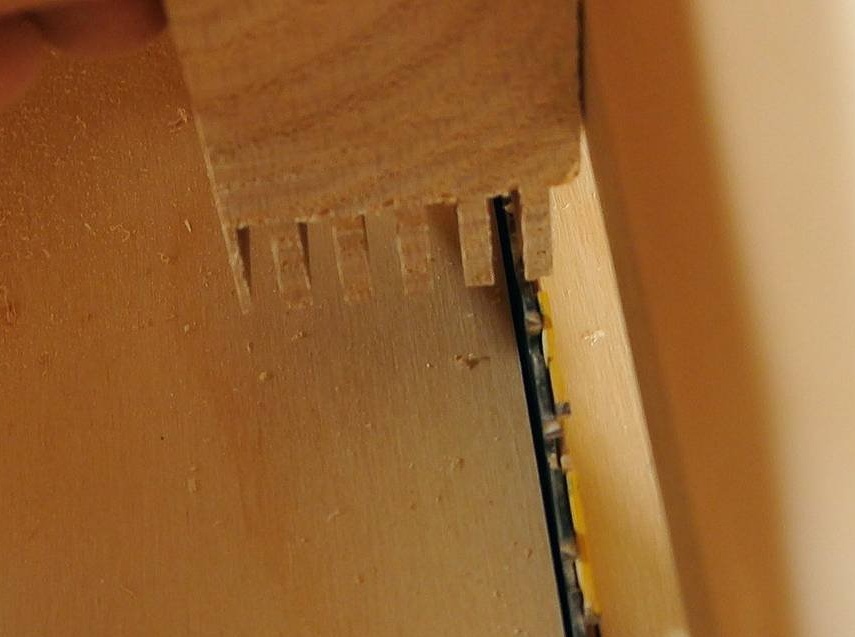
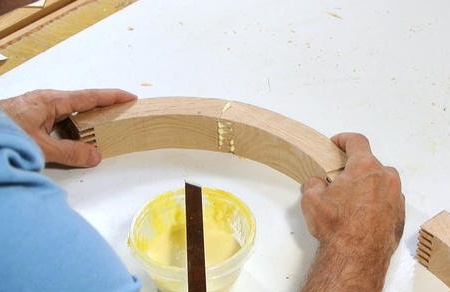
First, the master cut out all the necessary spikes at the ends of the segments from one edge. Thus, he will be able to check the quality of the connection to prepare them for further connection.
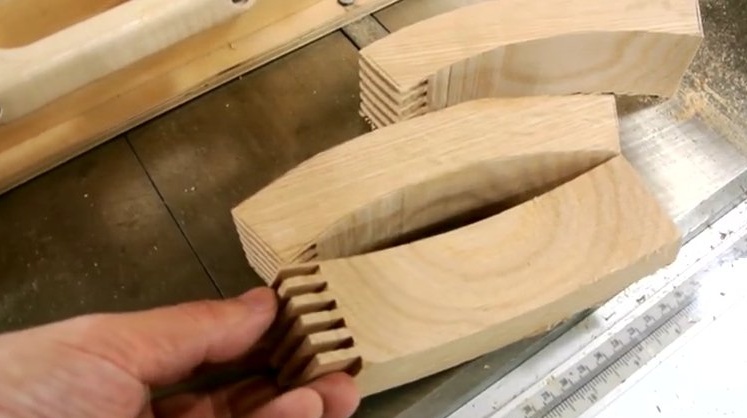
Cutting other segments. It became obvious that the spike connection would be slightly weakened due to the bundle of segments around the circumference, so he switched to a thinner bunch of saw blades.
Check segments at the top of the layout.
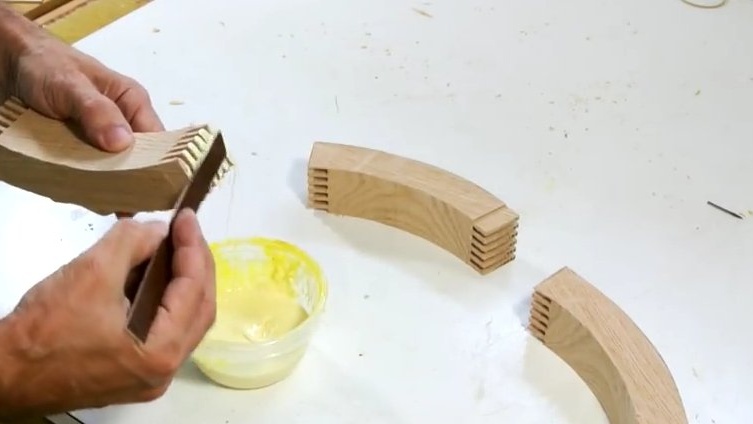

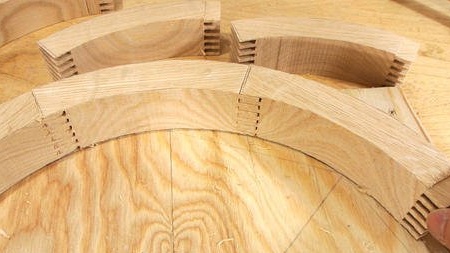
The connections turned out, of course, not as perfect as we would like. Therefore, the master compensated for this shortcoming with a large amount of glue, in order to fill the voids. A relatively thick layer does not necessarily lead to a weakening of the compound, rather the opposite.
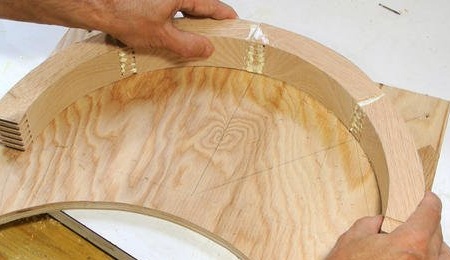
With so much glue in the joints, the segments dried for a long time, so there was enough time to make sure that the gluing of the segments coincided with the preliminary drawing.
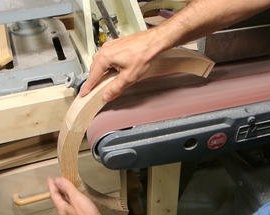
Grinding plays an important role in making joints perfect.
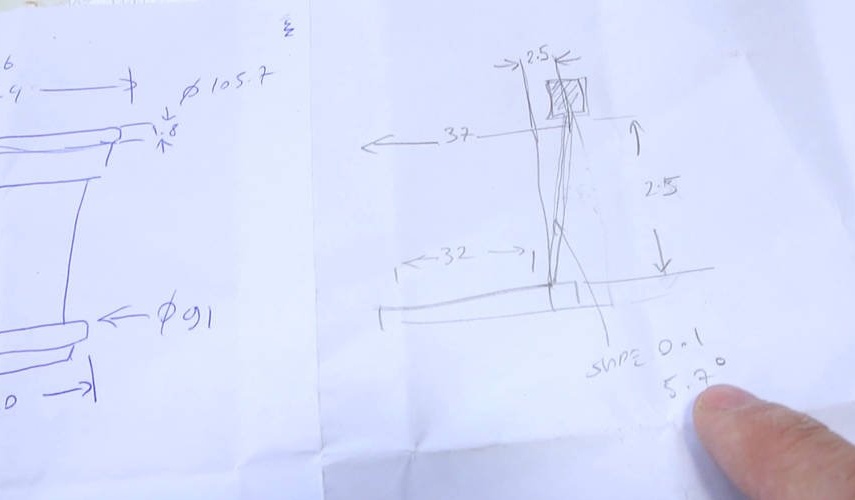
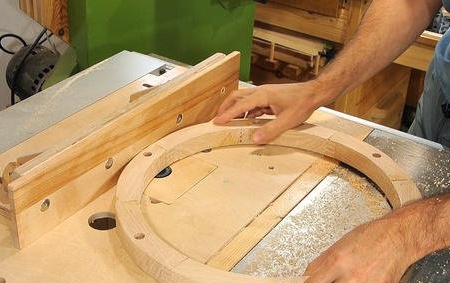
The next step is attaching the hoop to the base with pins. Here, the master determines the size of the base, and what angle he will need for the support pins. The angle of inclination relative to the vertical for the pins should be 1 to 10. The reverse tangent is 5.7 degrees. This is exactly the angle that will be needed in this design.
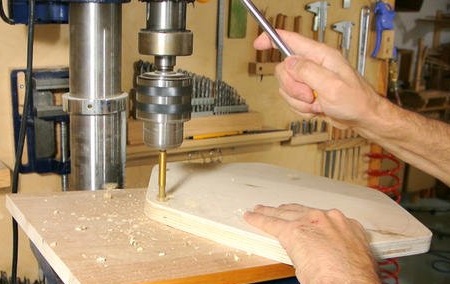
Drilling holes in the base.
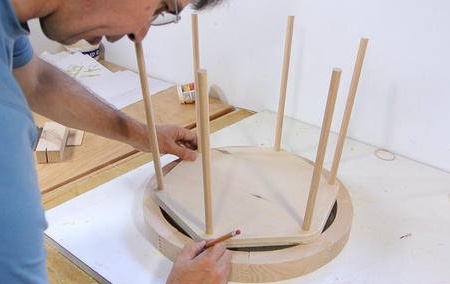
Further, at the base, the master uses a hexagon to determine the location of the six holes. With the eight segments that make up the ring and the articulated six pins, you need to be careful. After all, the master does not want to drill holes in the joints of the segments.
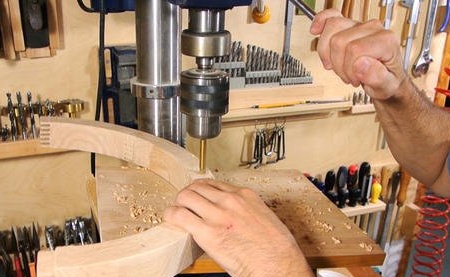
Drilling holes in ring parts, also at an angle of 5.7 degrees.
Before completely gluing the ring, the master decided to make the final fit, so to speak in fact. Just to make sure the flower pot really fits inside. It will be very unpleasant if this does not happen!
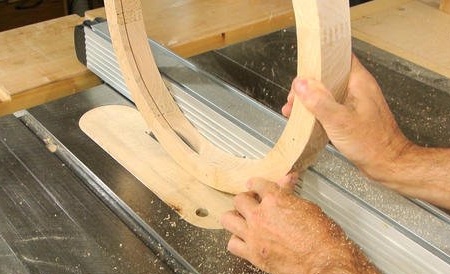
After fitting, the master glued the ring together, and then cut it off by about 1 cm to make a separate ring to fix the screen on it.
The master chose a wide and shallow groove in the upper upper part of the main ring on the milling machine. A screen of metal mesh will be placed here.
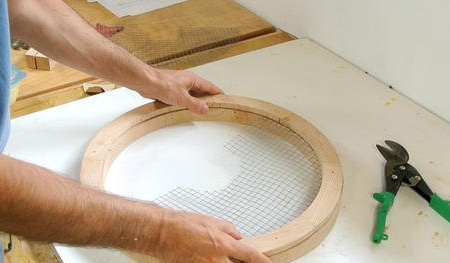
The wire mesh should be made of two halves so that it can fit around the tree. Check fit.
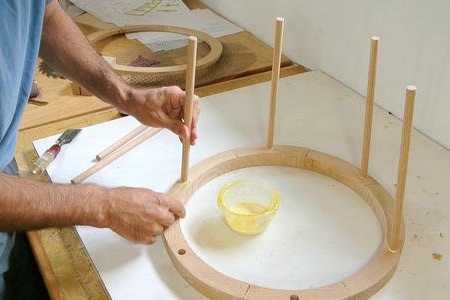
Confident that everything will work out, the master glues six pins from a tree that is suitable for the fortress.
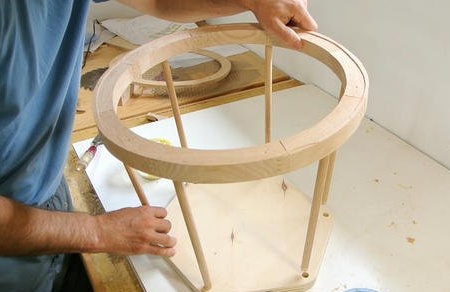
Further gluing of the upper part together with the base.
In the final, the master varnished the finished product with polyurethane varnish. Recently, the master rarely uses oil-based polyurethane, but he thought that water would spill from time to time on this design, and oil-based varnishes repel water much better. It is preferable to dry polyurethane varnish outside, outside of the room. Outside, it dries faster, and there is no smell in the house.
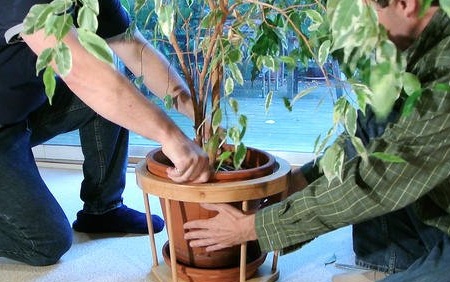
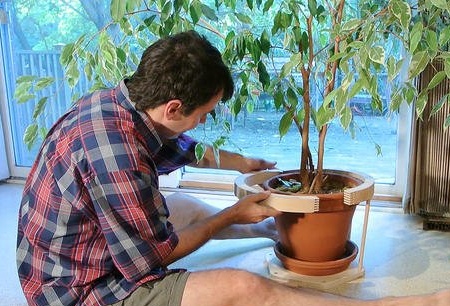
Since the flower is large and heavy, it takes two people to install the flower pot, one to lower the pot into the basket and the other to hold the pot under the rim and lower it on the saucer.
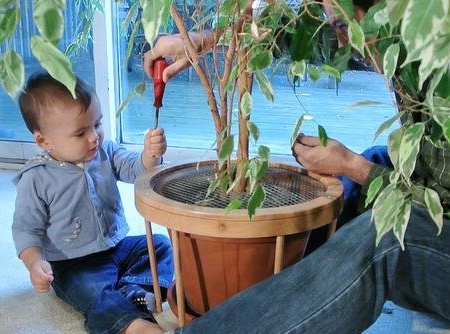
Installing this thing with a screwdriver was interesting for the child.
But because of the screen that does not allow him to get to the flower land, the flower pot has lost its attractiveness for him.
If you like homemade author, then try to repeat and make. Thank you for attention. See you soon!