
From the article below you will learn how to do it yourself turn an ordinary cot into a cot - an electric rocking chair. The following description and instructions are taken from the Matthias Wandel YouTube channel.
The initial intention of the master was to build some kind of children's rocking chair, which would use a large cam to perform more complex swinging movements to calm the child.
Necessary materials and tools:
- a two-speed gearbox from an impact drill;
- an electric motor from a fan 3500 rpm, 25 W;
- belt sander;
- scraps of plywood 10 mm;
- wooden block;
- screwdriver;
- electrical grease;
- transformer;
- board size 50x150 mm;
- clamps;
- a pencil;
- caliper;
- roulette;
- a belt from an eight-track tape recorder;
- band-saw;
- stationary belt sander;
- drilling machine;
- Forstner drill with a diameter similar to the diameter of the wheels of the cradle;
- self-tapping screws;
- screwdriver;
- fan blade;
- a sleeve with a diameter equal to the diameter of the shaft of the drill gear;
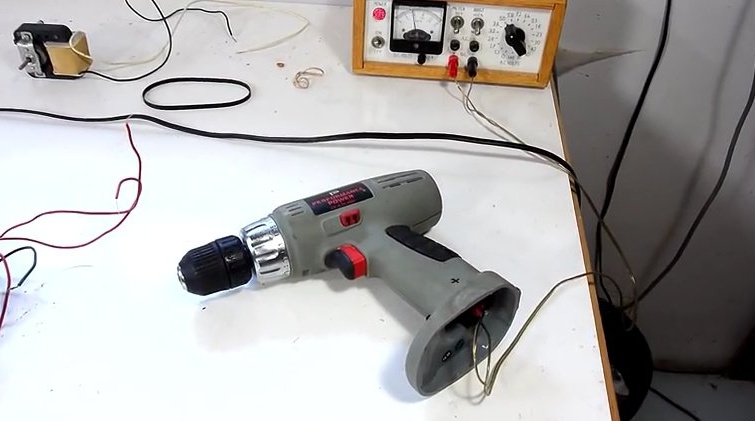
The first problem was how to charge this thing with energy. An engine with a gearbox is most likely ideal. Perhaps a cordless drill, in which there has been no battery for a long time, is suitable, but it is loud and wears out quickly. Then the master turned his attention to using an engine with an AC gearbox, but this engine is intended only for temporary use. Operating at 60 volts instead of 120 prevents overheating, but an additional transformer will be needed to get this voltage.
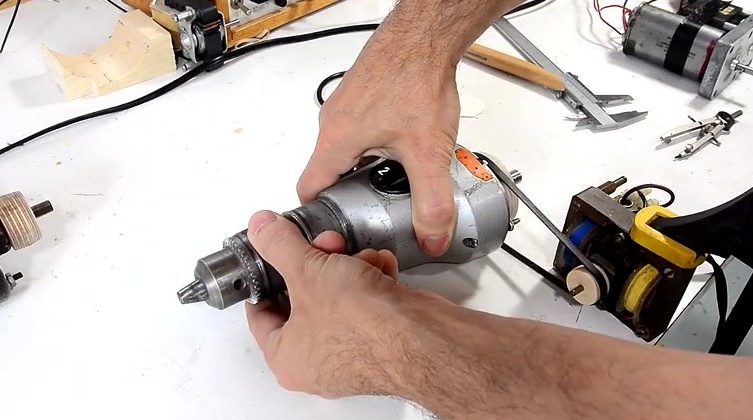
But starting to think about drills, the master remembered that he could not fix the gearbox from a large impact drill. But you can put a pulley on the motor shaft and set it in motion with a belt. And the gearbox has two speeds, which can come in handy.
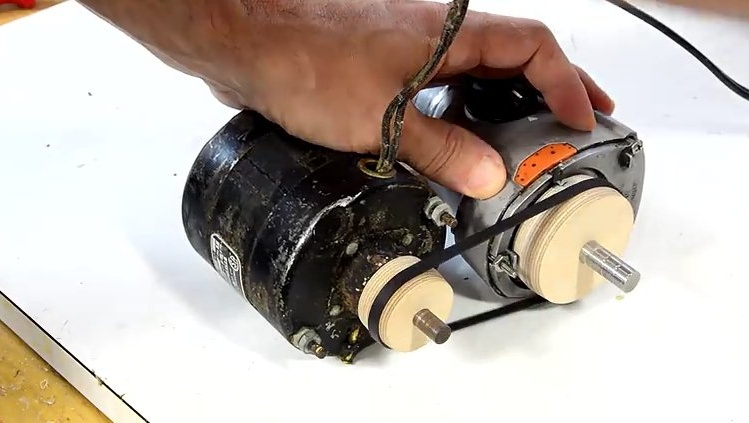
At first he wanted to use a pulley with a circular cross section for the belt, but he did not have enough belt length. But there was a flat belt from the old "eight-track tape recorder."

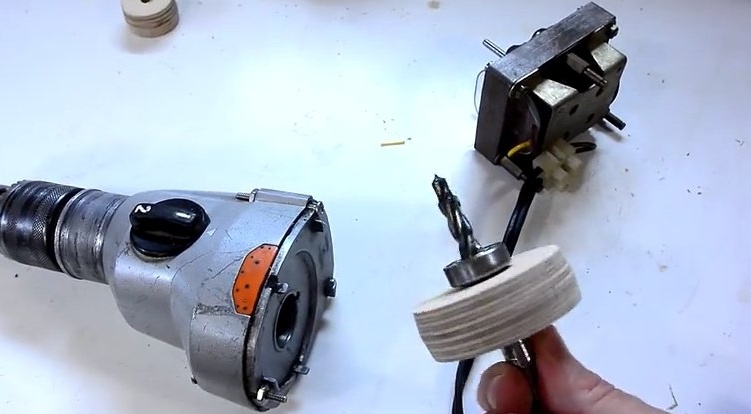
Flat belts require castor-shaped pulleys for tracking. Therefore, the master made pulleys from pieces of birch plywood 18 mm thick. First I cut a circle on a band saw, and then turned it on a band grinder (grinder).The master tilted the table a few degrees and polished it on both sides to give the pulley a slightly “oval look” (the middle of the pulley is slightly larger). The master used a screwdriver as a central pin to make sure that the pulley is completely round from the outside with a centralized hole and does not warp to one side.
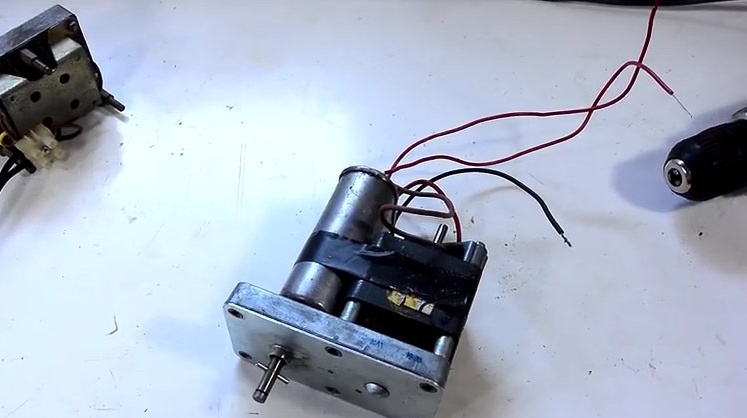
Initially, the master wanted to use this small asynchronous motor with a spindle speed of 1750 rpm. But it consumes about 50W, so it will be quite hot.
Then the master tried another electric motor, also with a rotation speed of 1750 rpm, which was installed on an old vinyl player. It consumes only 8 watts and works very quietly, but there was no certainty that it was powerful enough.

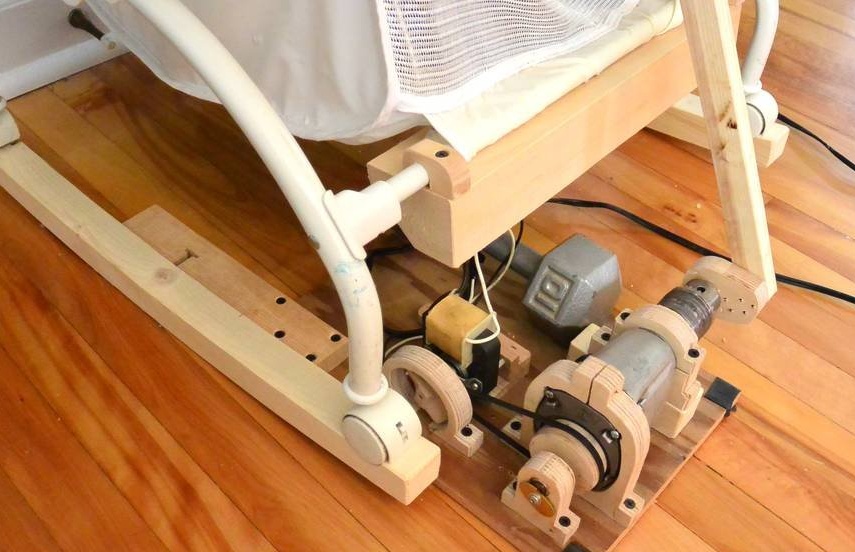
The master made wooden brackets for attaching the gearbox from the drill. The master fixed it straight so that the drill chuck was slightly above the base. This will leave more space for installing the cam wheel in the drill chuck.
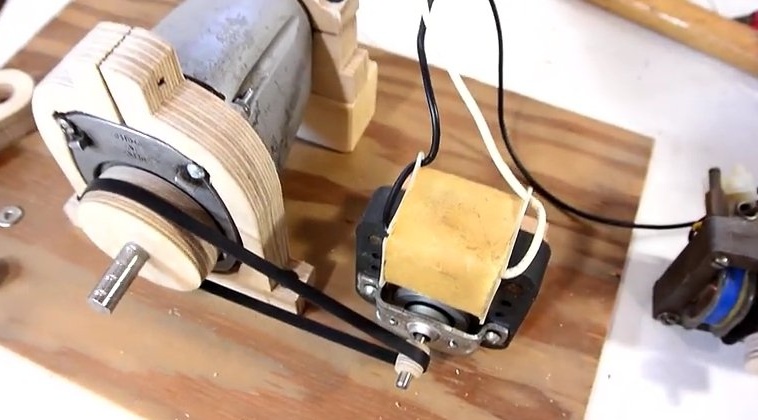
In further experiments, the master was already sure that the motor from the turntable was not powerful enough. So he turned his attention to this shaded pole fan, which consumes 25W. But this engine is an engine with a rotation speed of 3500 rpm, so a much smaller pulley was needed to get the same speed. The master again used a belt sander. To give the pulley a regular shape, he secured it to the drill of a screwdriver and directed the movement in the opposite direction relative to the moving belt of the grinding machine.
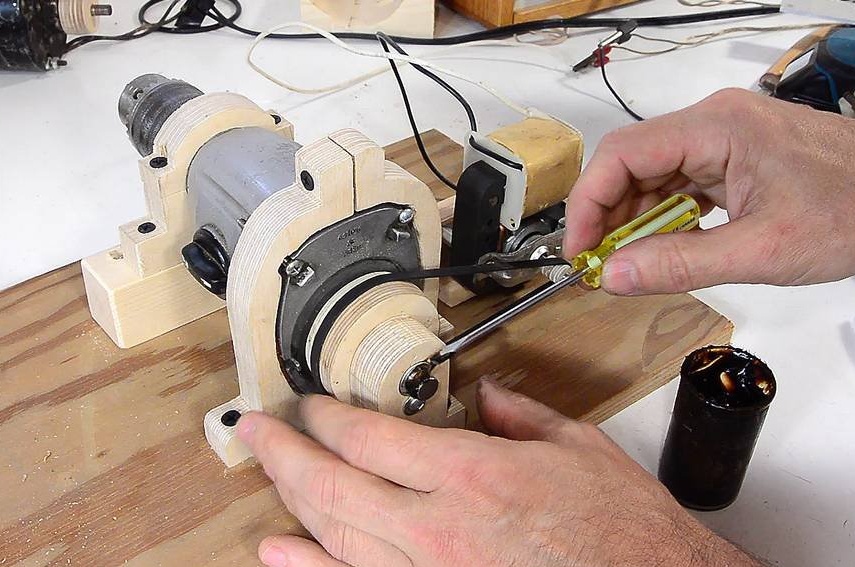
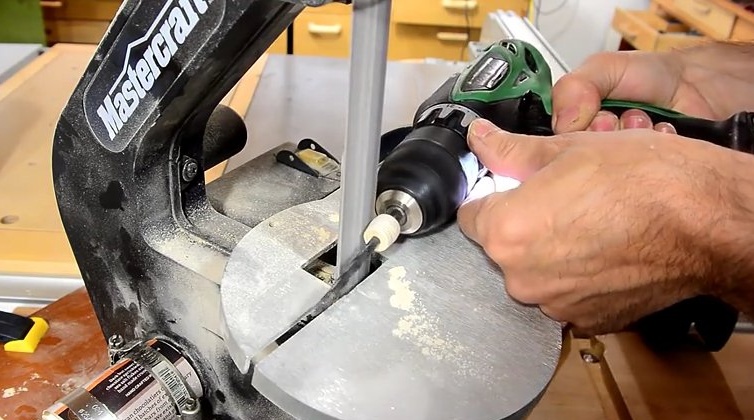
He also picked up a sleeve of the same diameter as the motor shaft from the electric drill. Then he made a wooden block to hold it in place. This gives the shaft much more support. The photo shows how the master applies grease to ensure smoother operation.
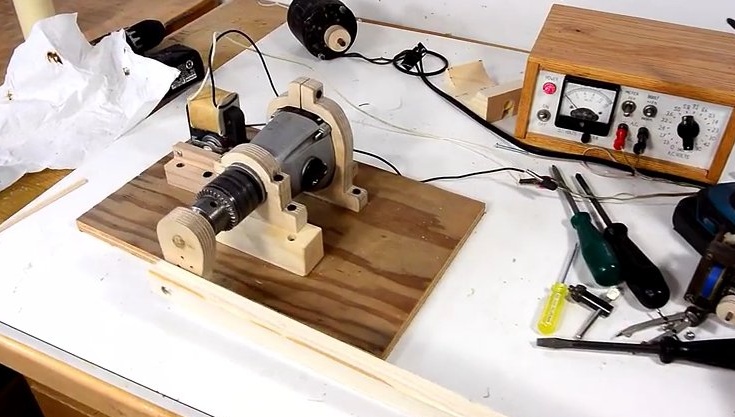
The master was still in thought about the use of closed boxing, but I would like to try the assembled device in action. Therefore, he made a small handle, which is mounted in the drill chuck, as well as a long lever for attachment to a crib for subsequent rocking.
The cot is mounted on wheels, and it can be made to ride back and forth, but a cot on skis and rocking chairs would be much better.
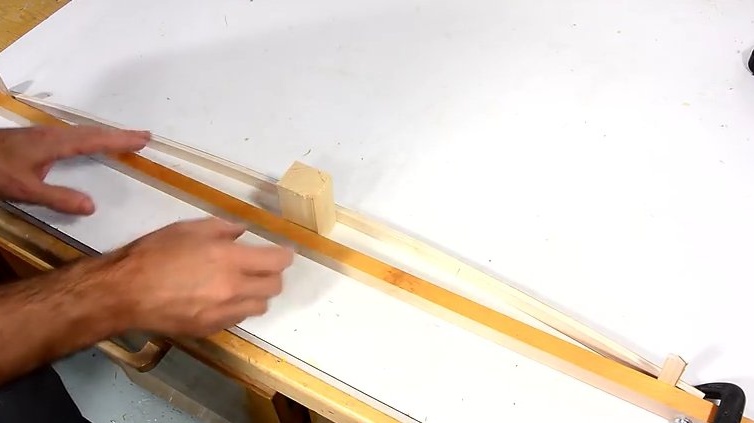
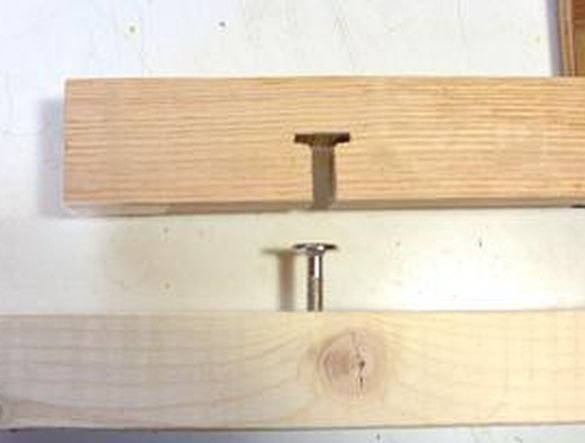
To get a round curve, the master pressed a strip of wood to a larger wooden beam so that it was bent at an angle. The master clamped the wooden strip in such a way that the moment of bending fell on the ends of the strip, fixing this position with a wooden block in the middle. With a bending moment at the ends along the entire length of the wooden strip there is a constant bending moment, which allows you to create an arc much closer to the circle. Subsequently, this curve was used as a pattern.
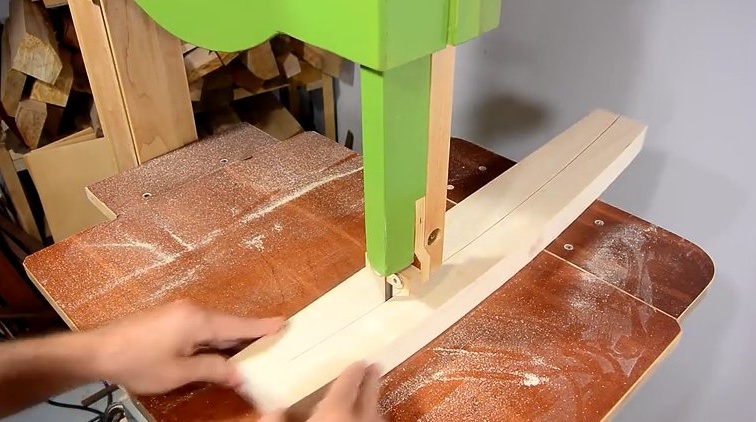
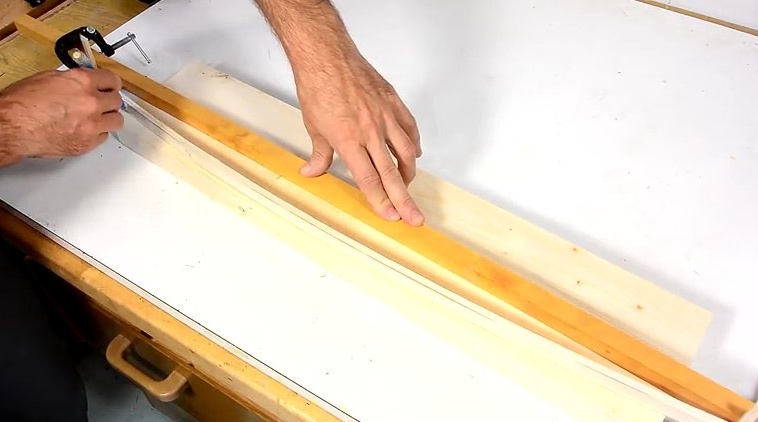
Marked bends on a wooden board, the master cut out on a band saw.
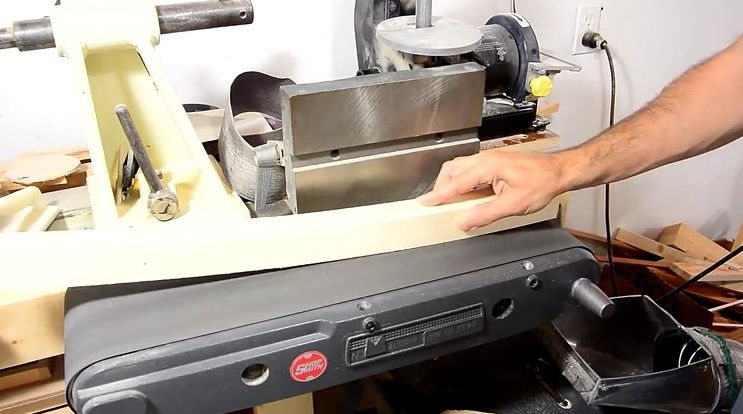
The following is grinding the surfaces to obtain a smoother curve. This required some refinement. Even a very small, even area on a rocking chair can cause a very noticeable unevenness in the swinging motion.
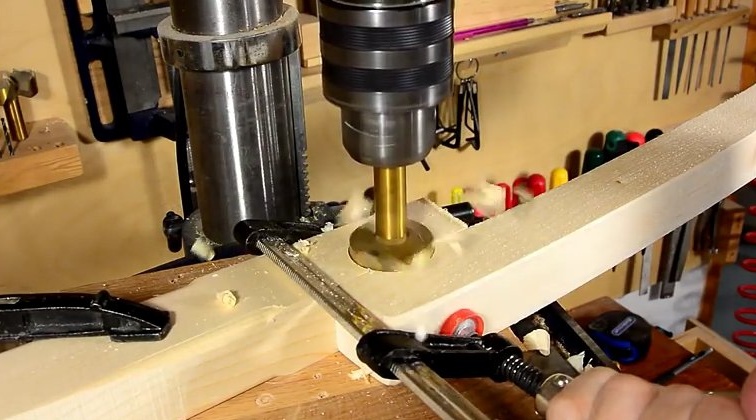
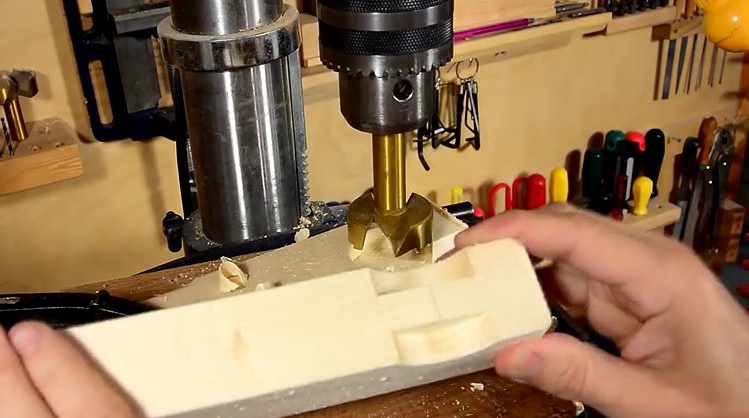
The craftsman carved several semicircular grooves at the ends of the legs - rocking chairs, so that the cradle wheels fit into them simply by drilling a semicircular hole with a Forstner drill. This operation had to be performed using clamps, since without the clamp the master could not hold the leg firmly enough. With high-quality pressure, this operation was carried out immediately on two “rocking chairs”.
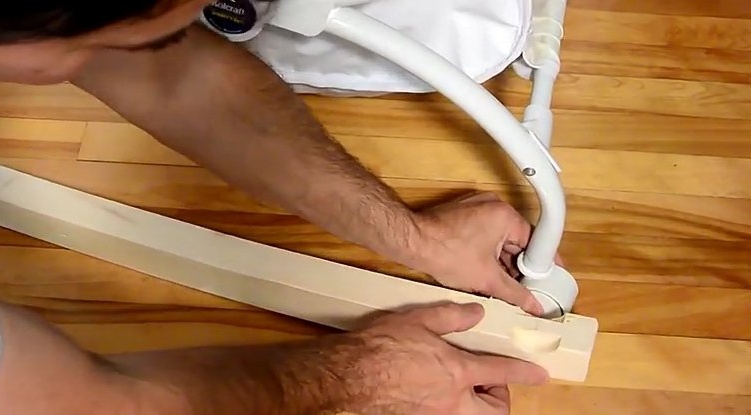
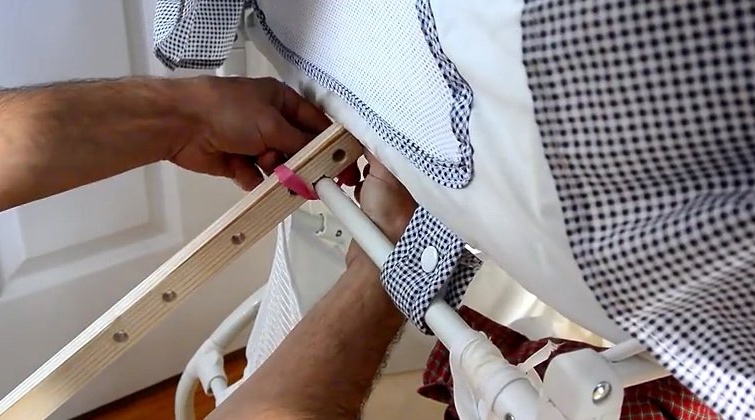
Installation of the cradle on the rocking chair and the mounting of the drive lever to the frame.

Verification Surprisingly, it helped reassure the baby.
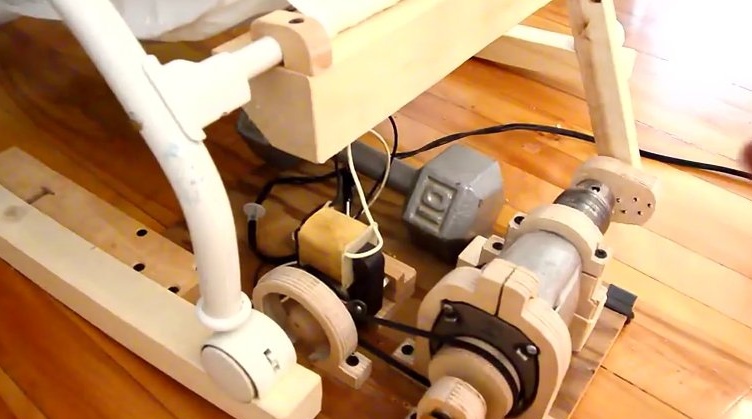
The master had to use a rocking chair quite often, so he slightly improved the design. Without a stream of air, the fan motor was very hot and its smell was felt.Therefore, the master added a fan blade to the motor shaft, with a protective casing around it. Support was also added to the end of the motor shaft.
In addition, the device slipped a bit, so the master added an extension cord that connects to the hinged screw in one of the rocking chairs. The extension cord itself is fixed to the floor using self-tapping screws.
The bracket connecting to the cradle was also shortened, and then the master rearranged the device parts so that the machine was partially located under the cradle. The cradle's movement was also a little unbalanced, so a wooden block was added as a counterweight, which can be seen in this photo. This reduces the force required to hold the drive arm upright.
The master uses his device with a relatively small crank and gearbox in low gear, but if you switch it to a large crank and high gear, it will be a wild ride! The wizard is afraid to use this mode.
If you like homemade author, then try to repeat and make. Thank you for attention. See you soon!