There are many devices on the market with which you can track the condition of an animal locked in an apartment or house. The disadvantage of these devices is their stationarity. Of course, if, for example, the dog is in the same room, then this is not a problem, but if he moves around the house, and possibly around the site, then to monitor his condition you need to set up cameras throughout the house / apartment / site.
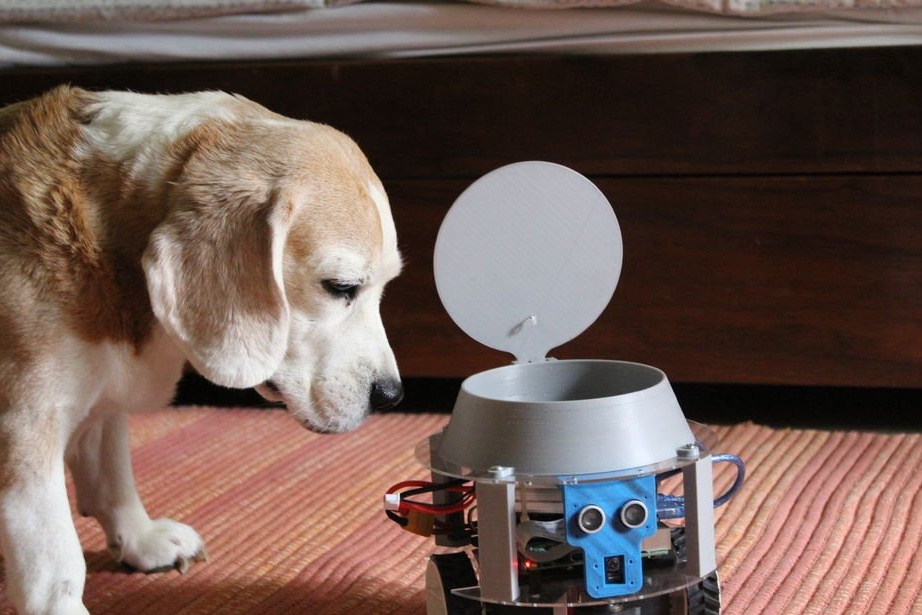
In order not to be hung with cameras, the Master made a mobile device remotely controlled by a smartphone.
Tools and materials:
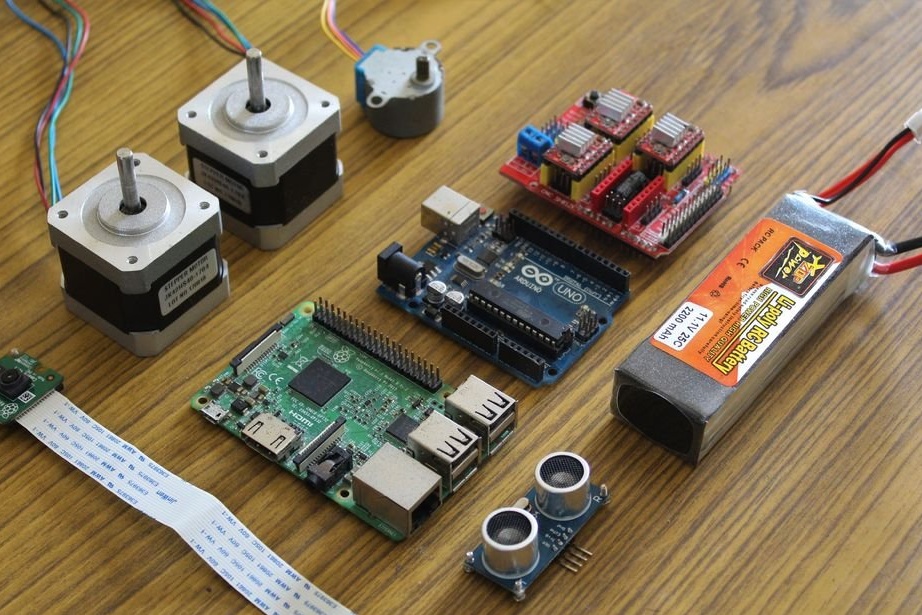
-Arduino Uno;
-Raspberry Pi;
-CNC Shield;
- A4988 stepper motor driver - 4 pcs;
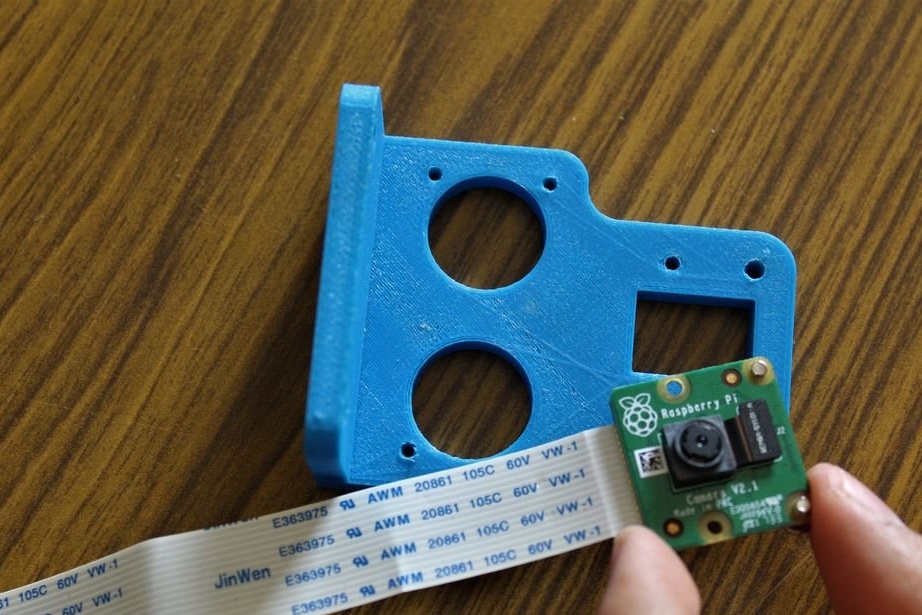
-Pi camera;
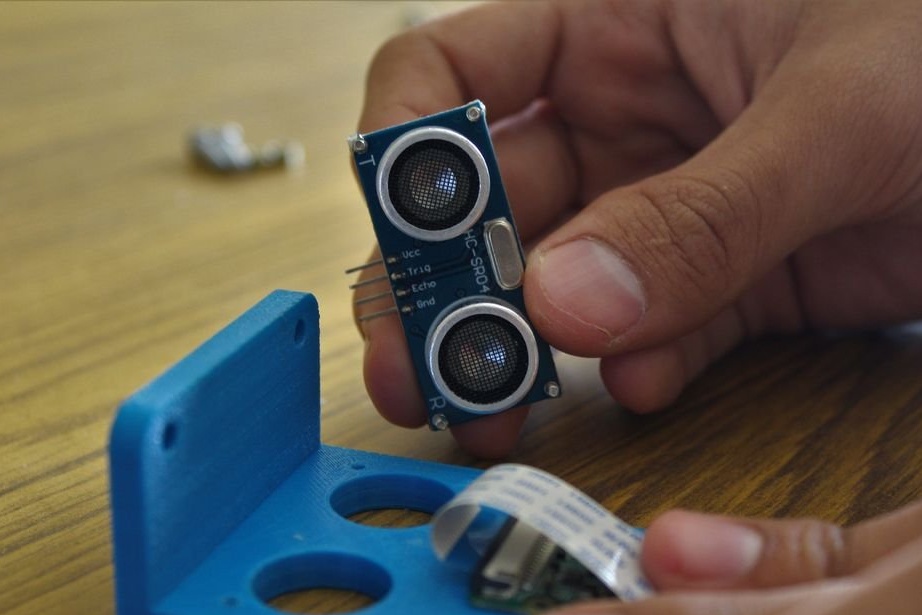
-Ultrasonic distance sensor;
-AKB 11.1V;
-Step engine NEMA 17 - 2 pcs;
- Voltage stabilizer UBEC 5V;
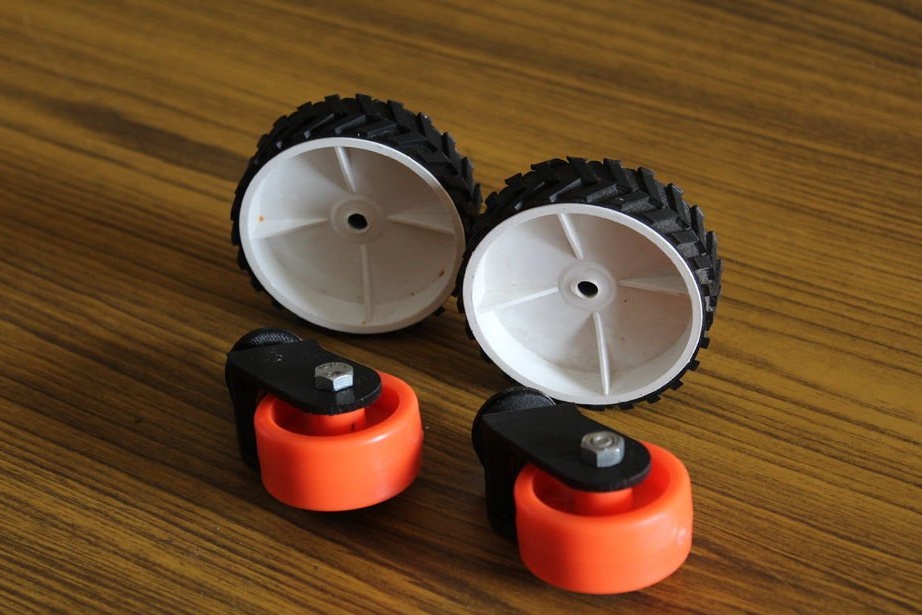
-Wheels with a diameter of 7 cm - 2 pcs;
- Rollers -2 pcs;
-Fasteners;
-Computer with software;
-3D printer;
-Acrylic;
-Laser cutter;
Step One: Project
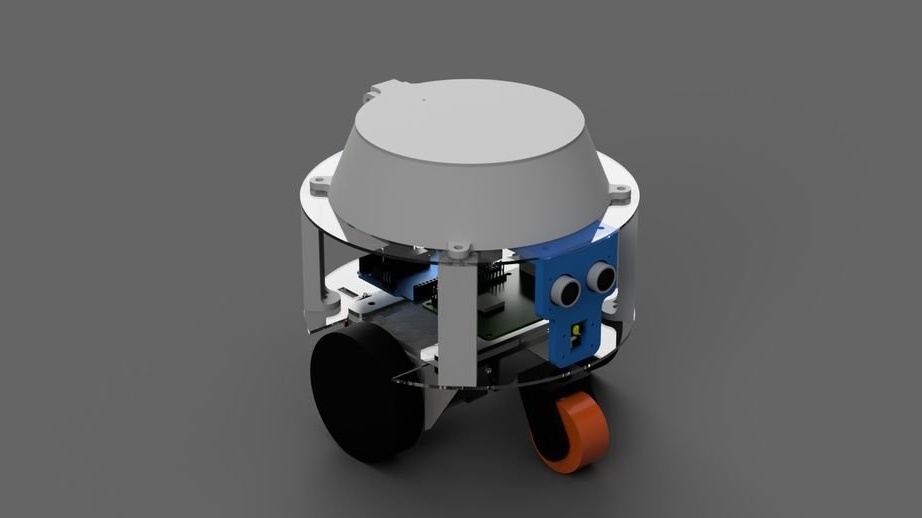
At first, the device was designed in the Fusion 360 program. The robot has the following features:
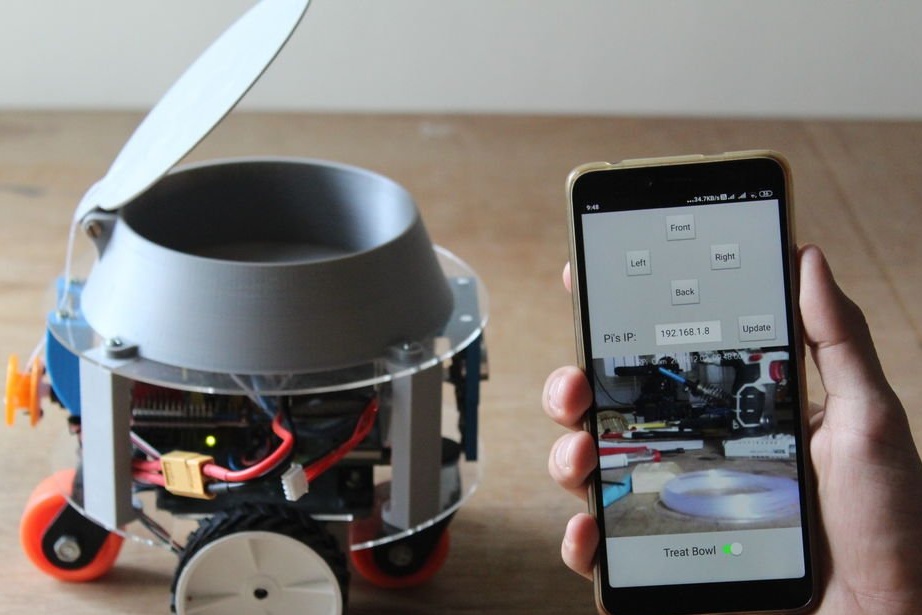
-It can be controlled through the application on the Internet. This allows the user to connect to the robot from anywhere in the world.
-A built-in camera that streams video to a smartphone helps the user to maneuver around the house and interact with the pet.
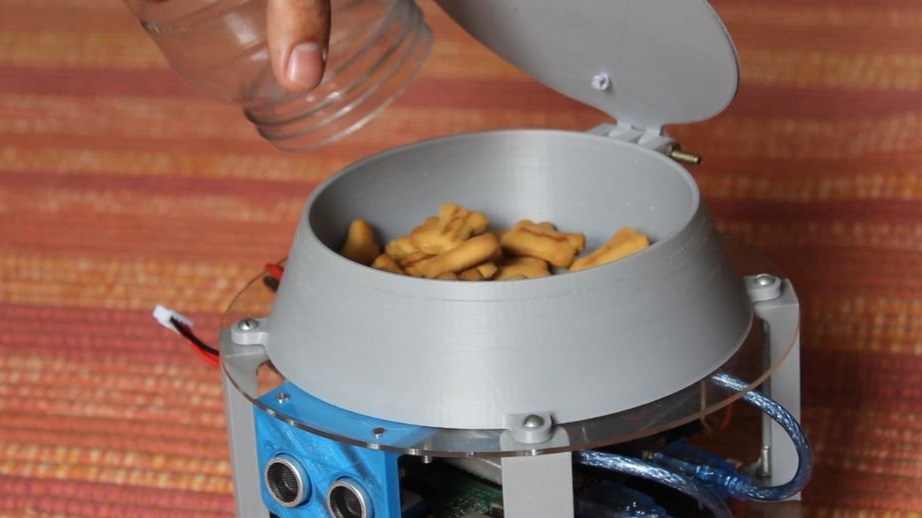
-Additional bowl for treats, with which you can give your pet a treat.
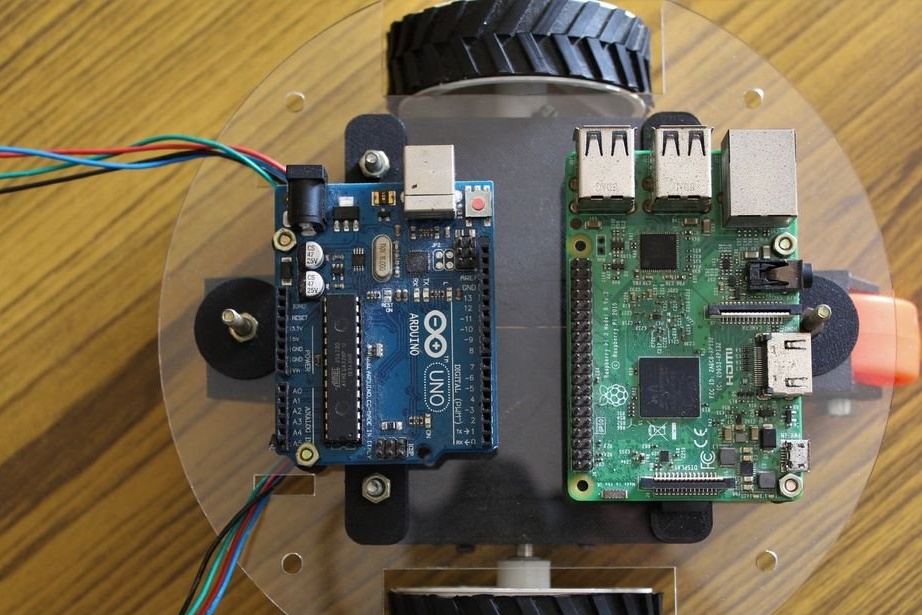
The Raspberry Pi is here used to connect to the Internet because it has a built-in Wi-Fi module.
Arduino is used to command stepper motors.

Step Two: 3D Printing, Laser Cutting
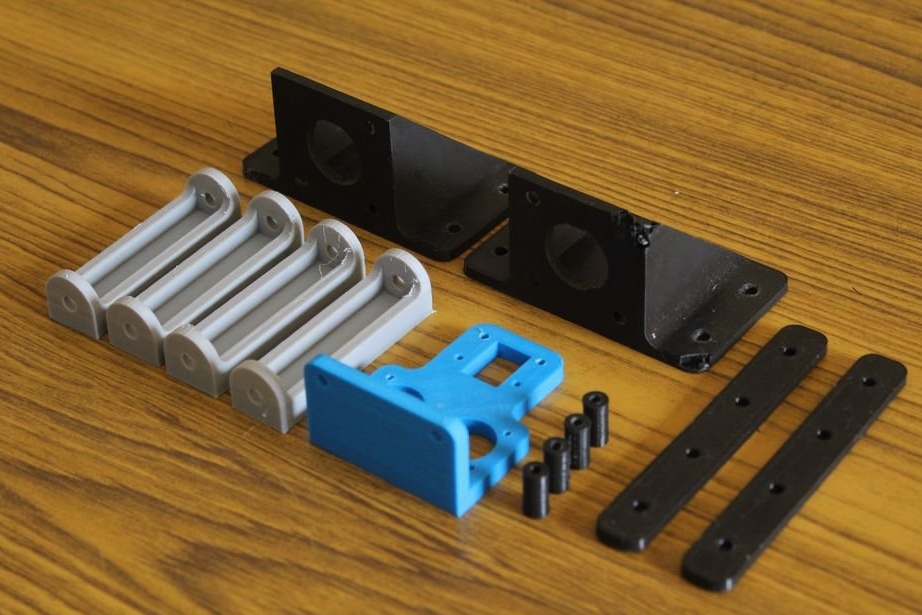
Some parts that are used in this project, the master ordered in the workshop. They were first modeled in the Fusion 360, and then made using a 3D printer and a laser cutter.
3D printing parts:
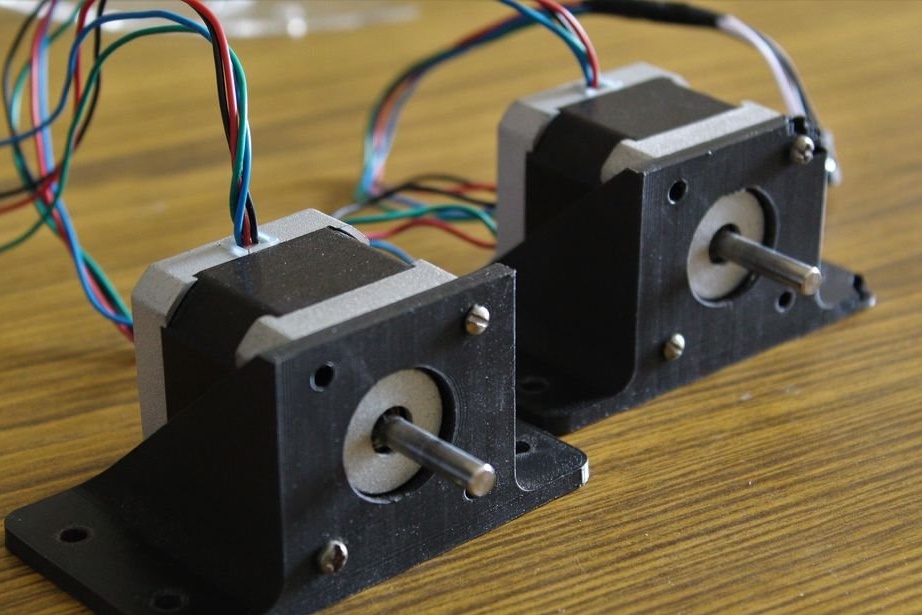
Stepper Holder x 2 pcs.
Vision System Mount x 1 pc.
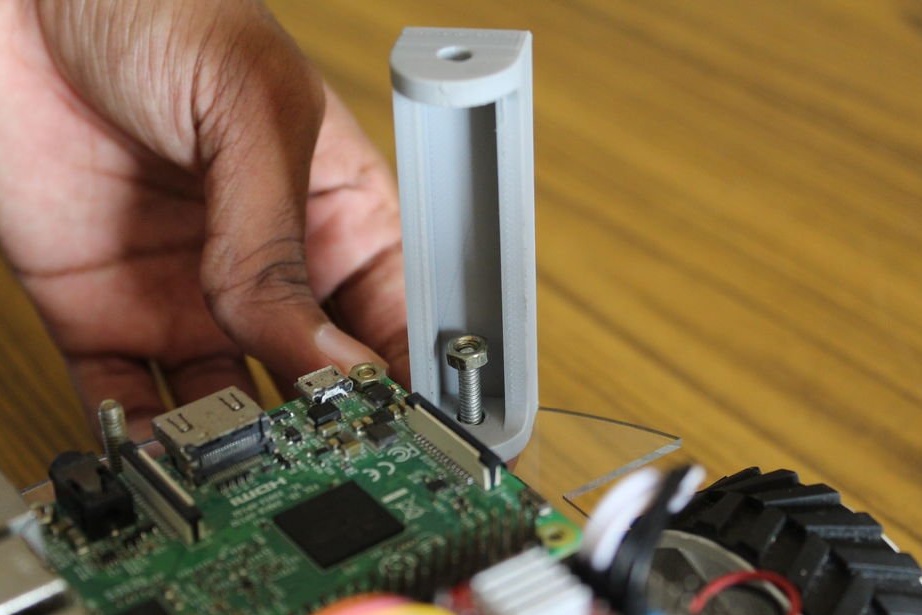
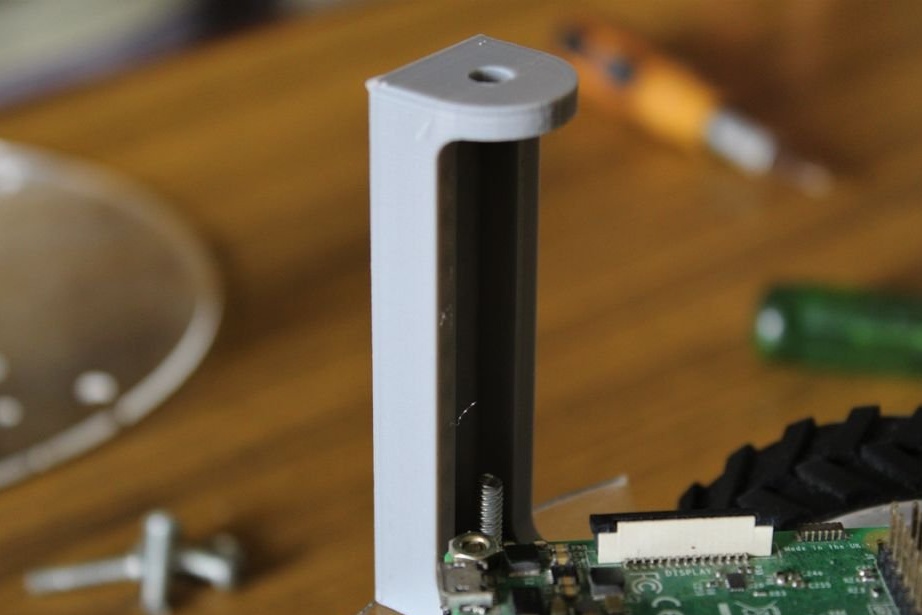
Electronics Standoff x 4 Pcs.
Vertical Spacer x 4 Pcs.
Chassis Reinforcement x 2 Pcs.
Treat Bowl Lid x 1 Pcs.
Treat Bowl x 1 pc.
Rear Stepper Mount x 1 pc.
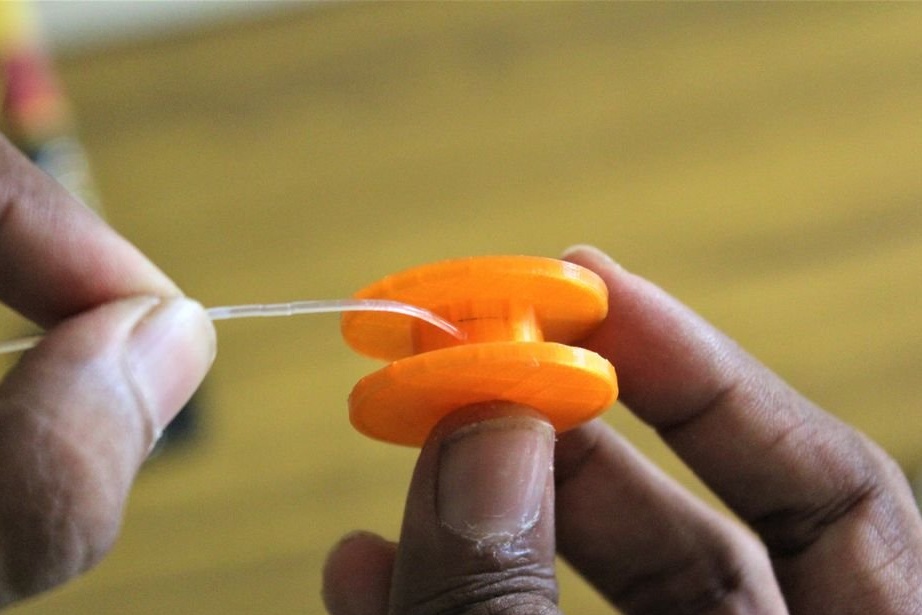
Winding Disc x 1 pc.
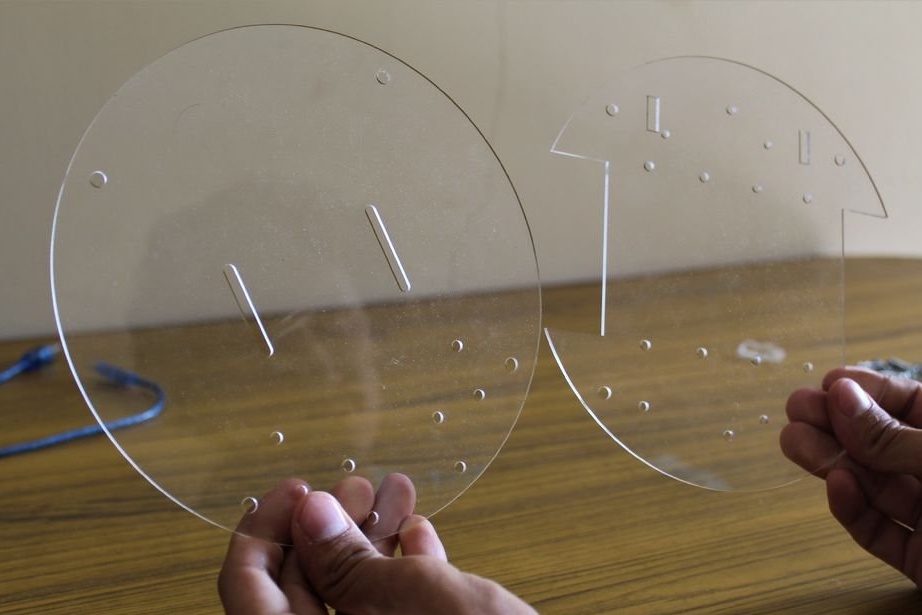
Laser Cutting Parts
Bottom Panel x 1 pc.
Top Panel x 1 pc.
An archived folder containing all STL files and files for laser cutting is located below.
3dprints.rar
lasercutting.pdf
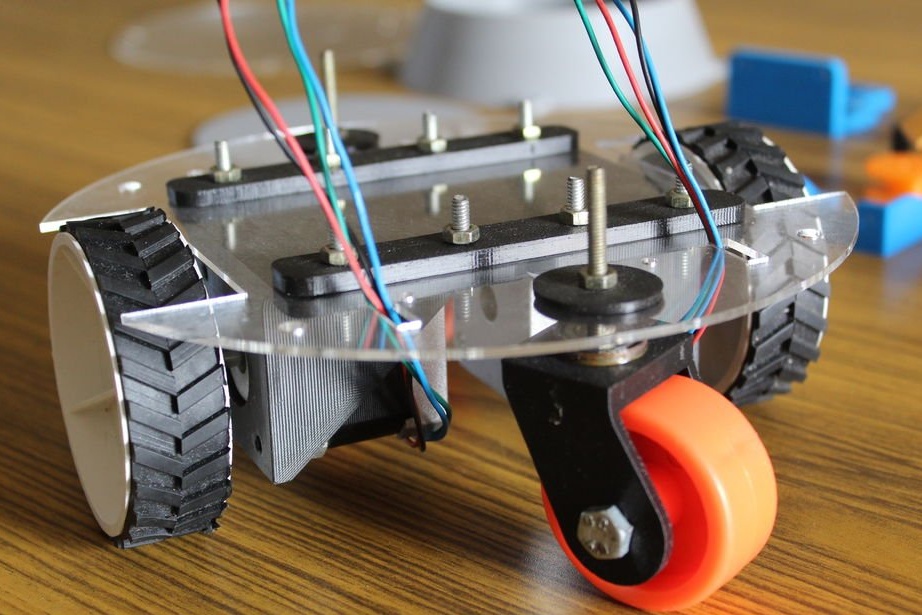
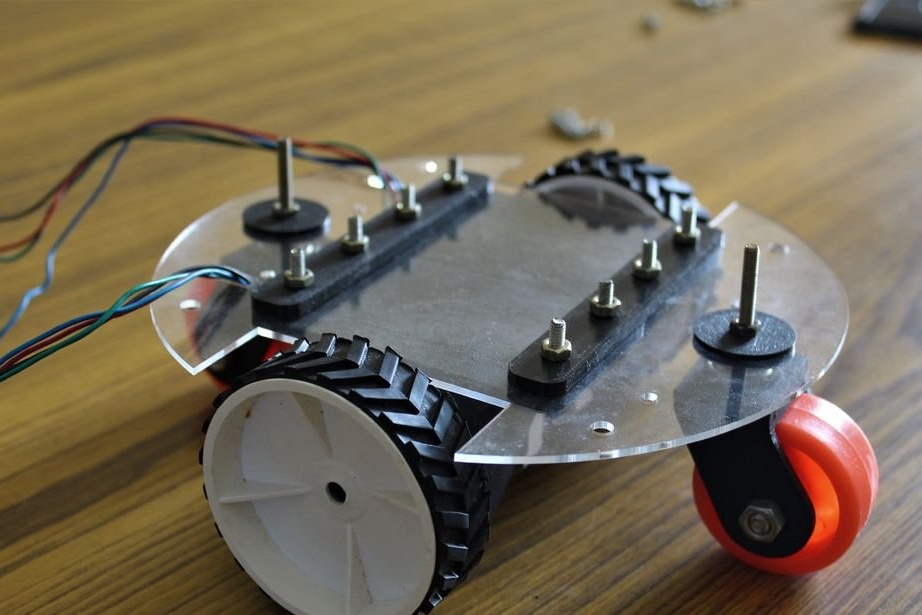
Step Three: Build the Platform
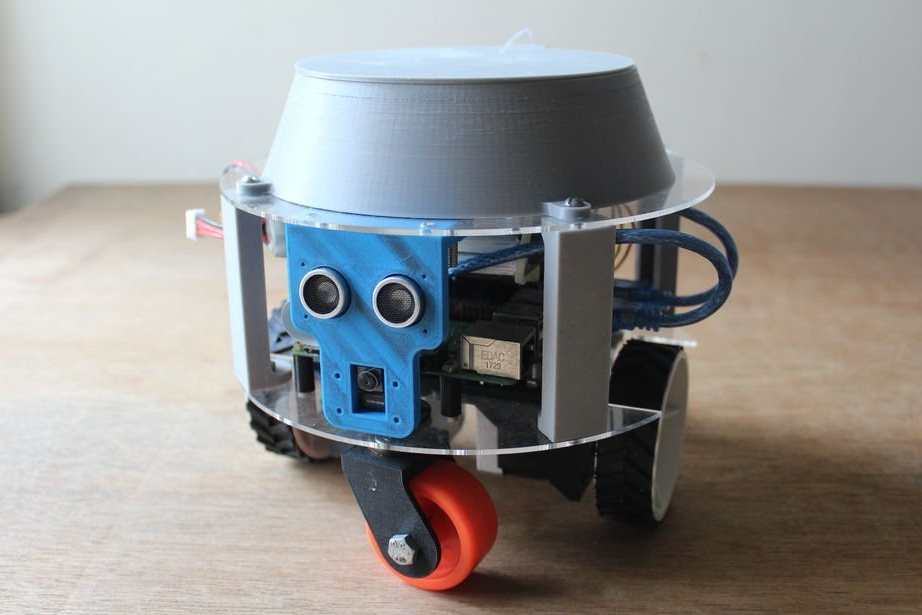
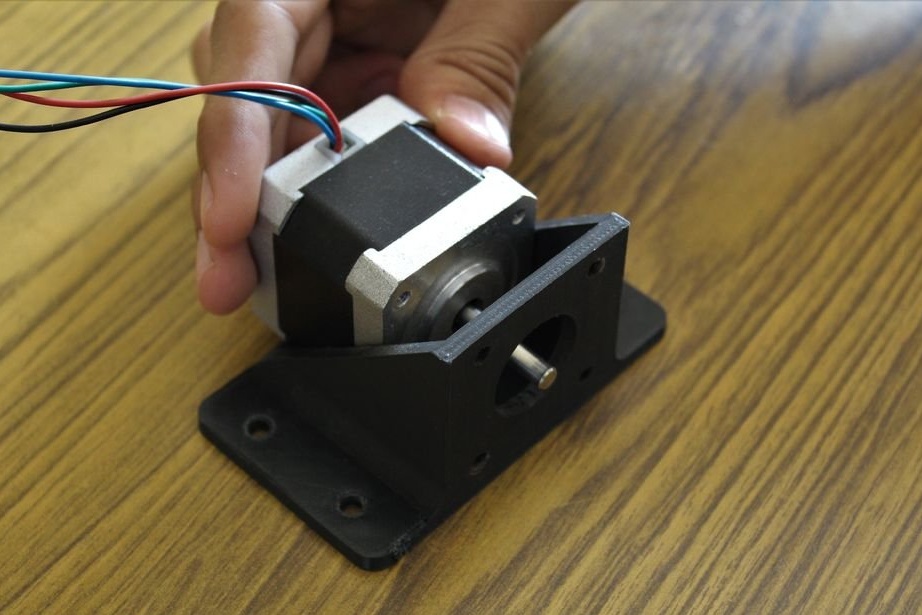
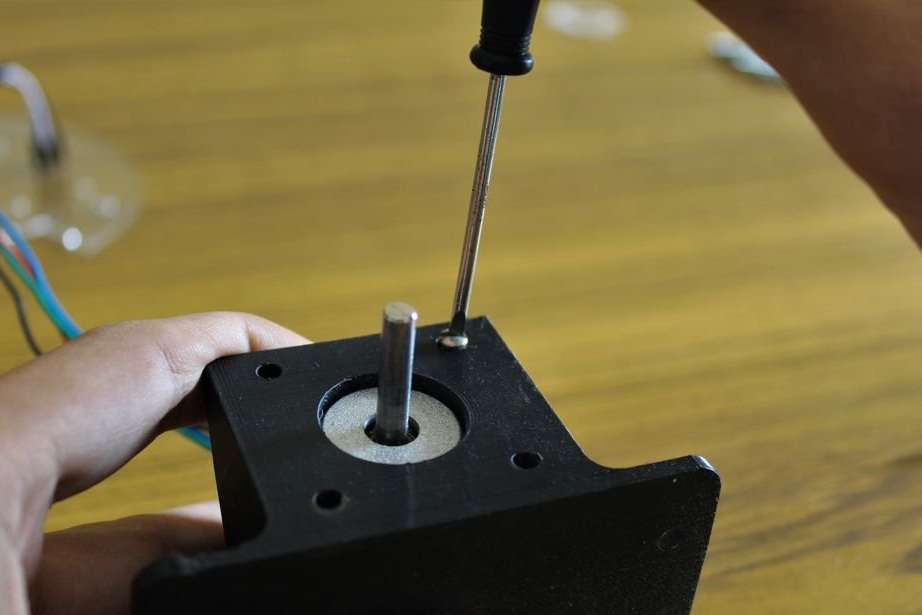
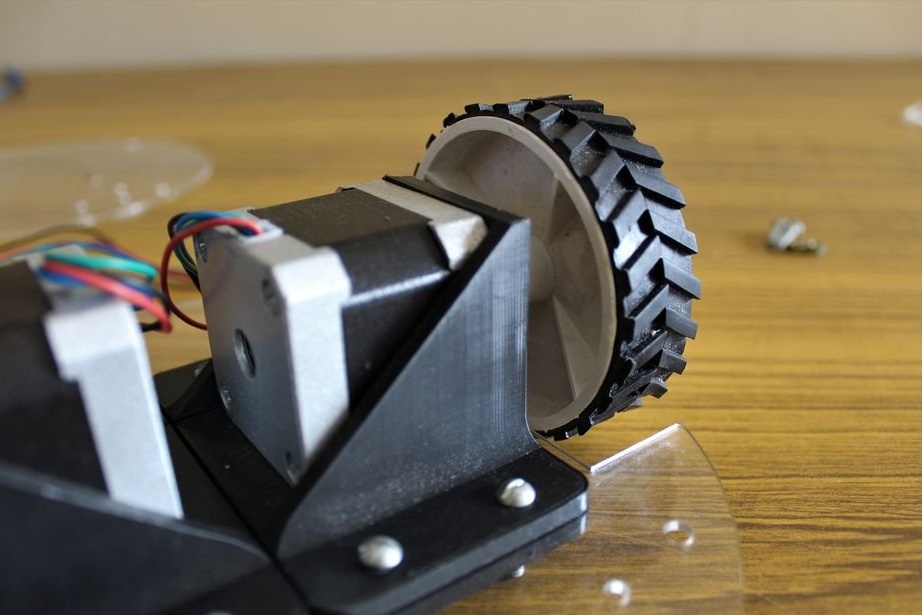
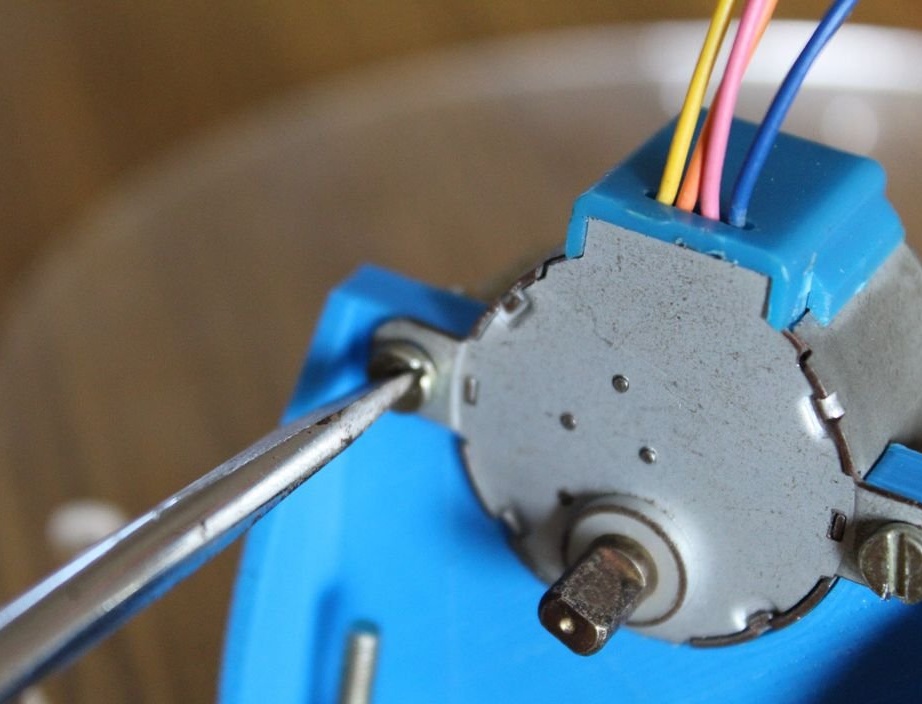
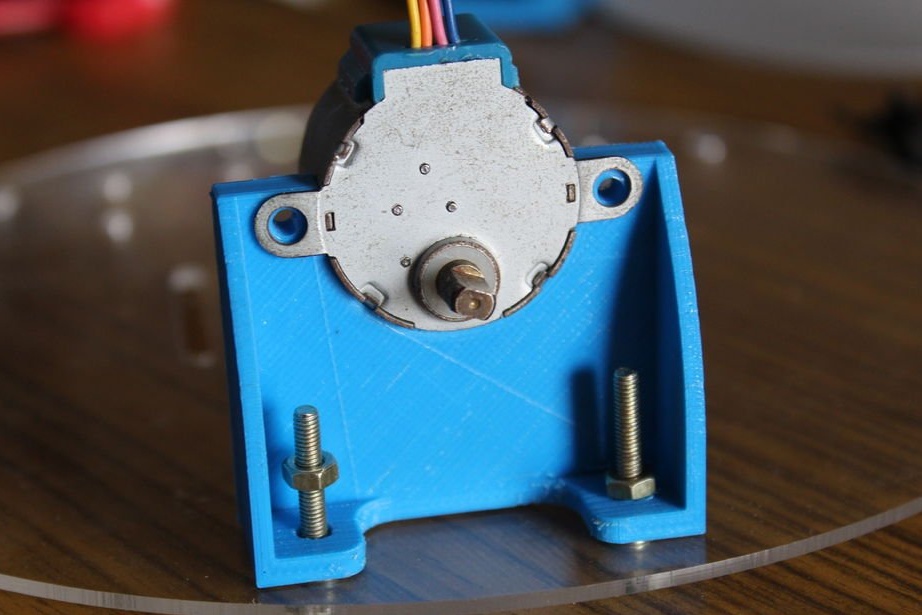
As soon as all the details are printed and cut out, the master begins assembling. The designed stepper motor holder is designed for the NEMA 17 model. Pass the motor shaft through the hole and secure the motor in place with the fixing screws. After that, both engines must be firmly fixed to the holders.
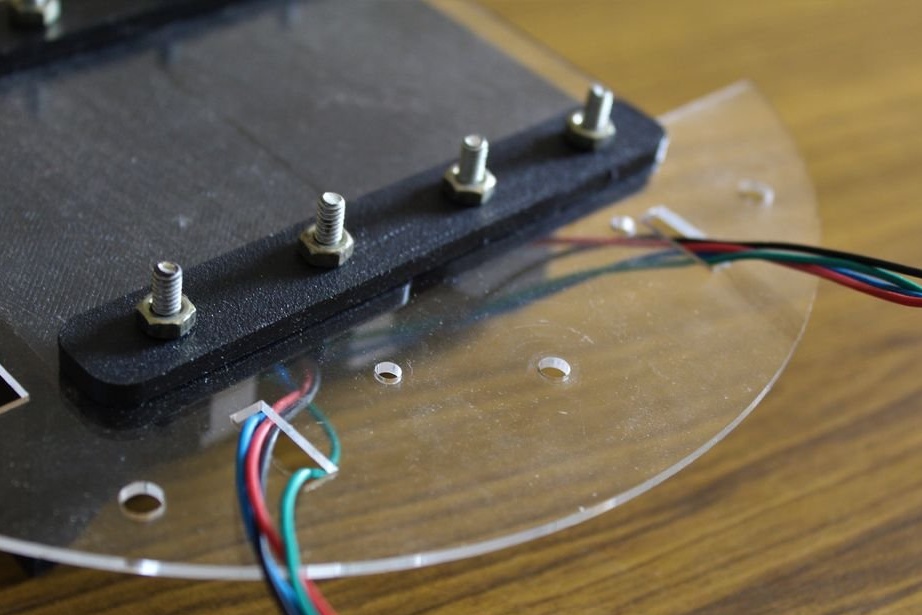
M4 bolts are used to attach the holders to the bottom laser-cut panel.Before fixing them with nuts, it is necessary to strengthen the reinforcing strips.
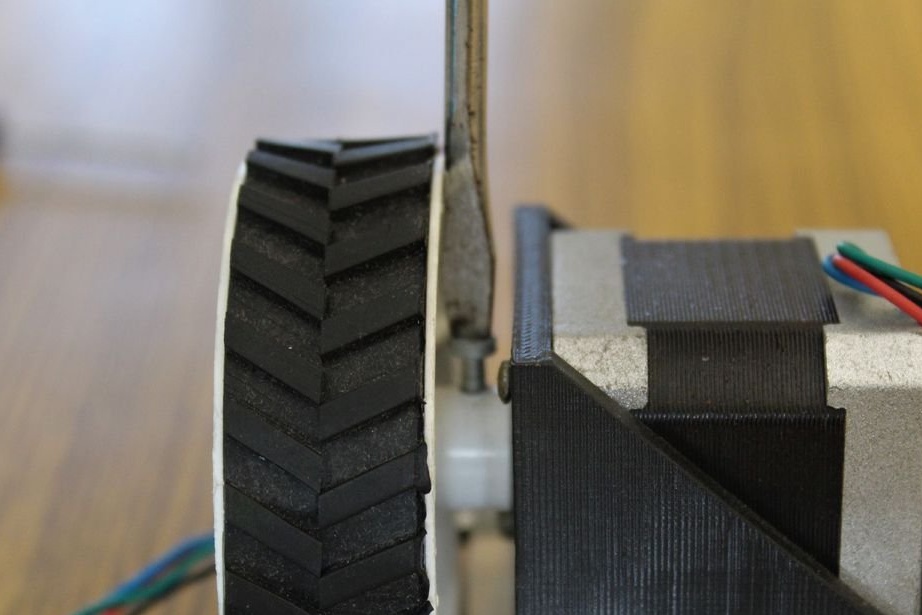
The acrylic panel has two sections cut under the wheels. The wheels that are used have a diameter of 7 cm and came with set screws that were attached to 5 mm stepper shafts. Make sure that the wheels are firmly fixed and do not rotate on the shaft.
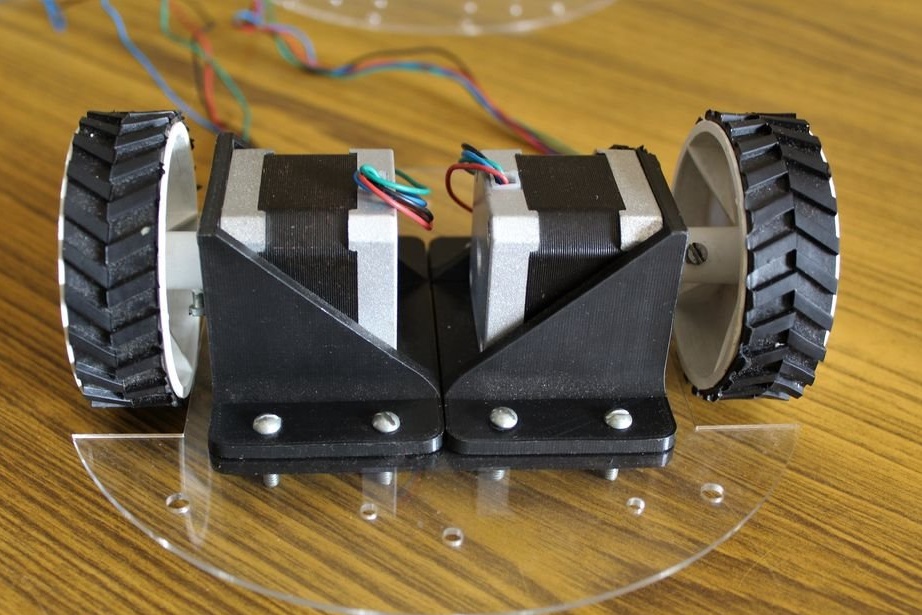
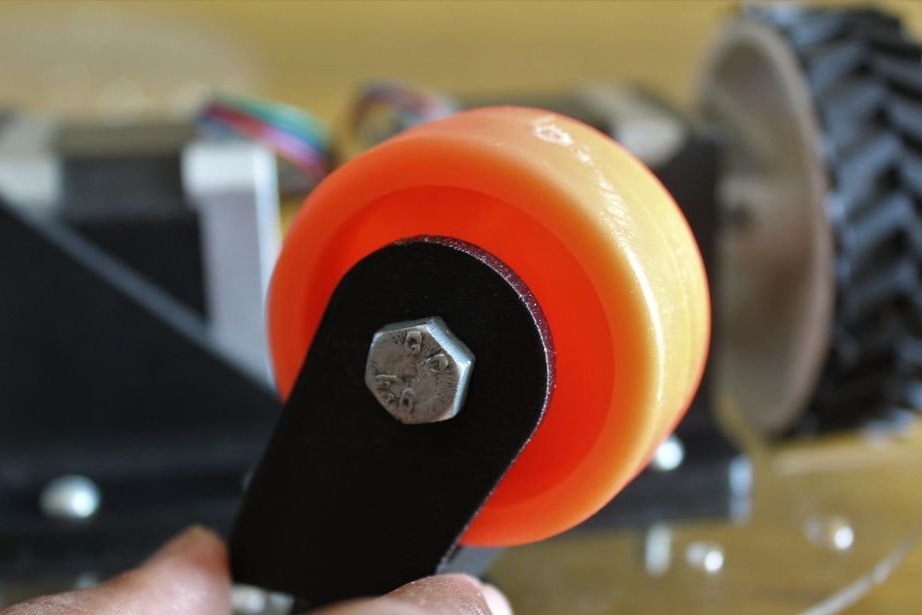
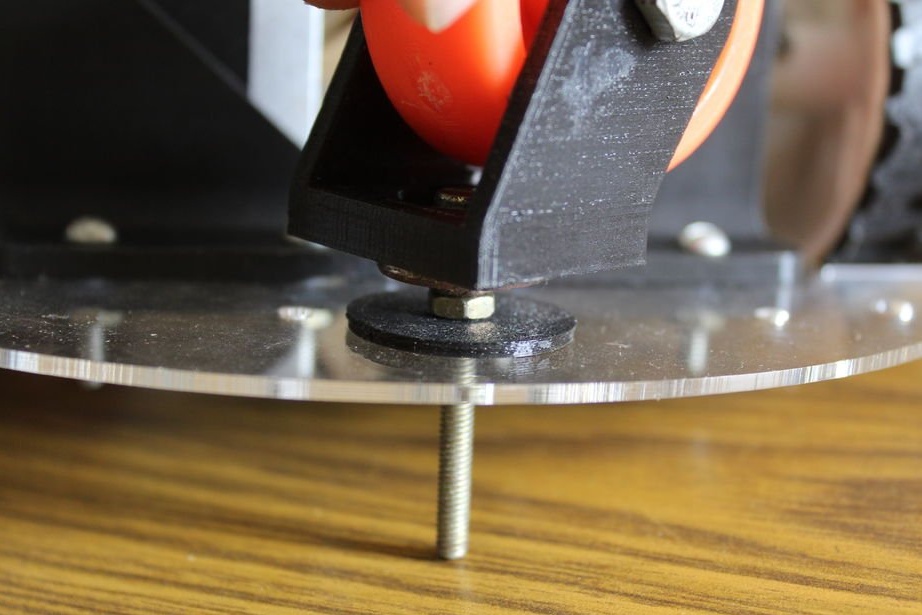
To make the chassis move smoothly, the rollers are installed in front and behind the device. This not only prevents the robot from tipping over, but also allows you to freely rotate the chassis in any direction. The rollers come in different sizes, in particular, these were delivered with one rotary screw, which was fixed to the base. To adjust the height, the master used spacers.
Step Four: electronics
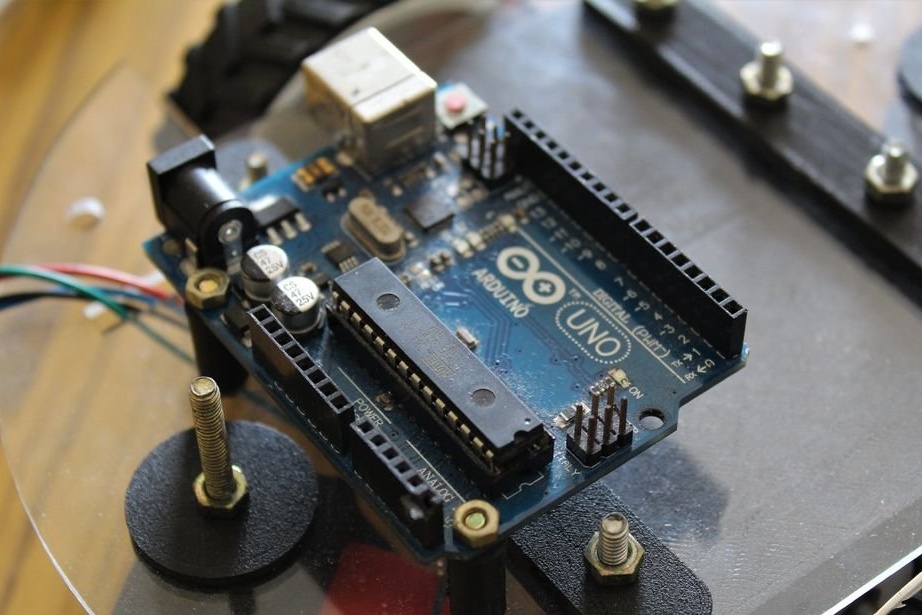
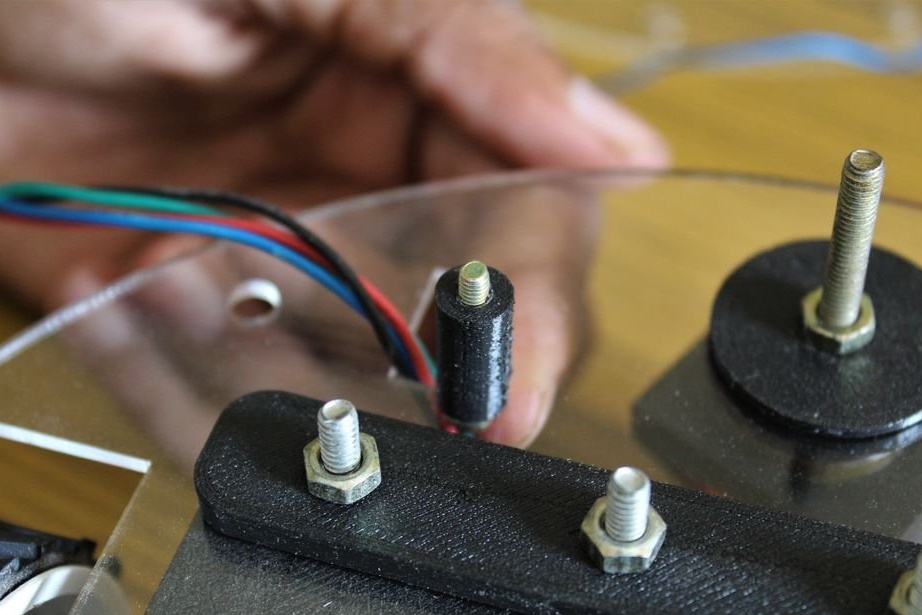
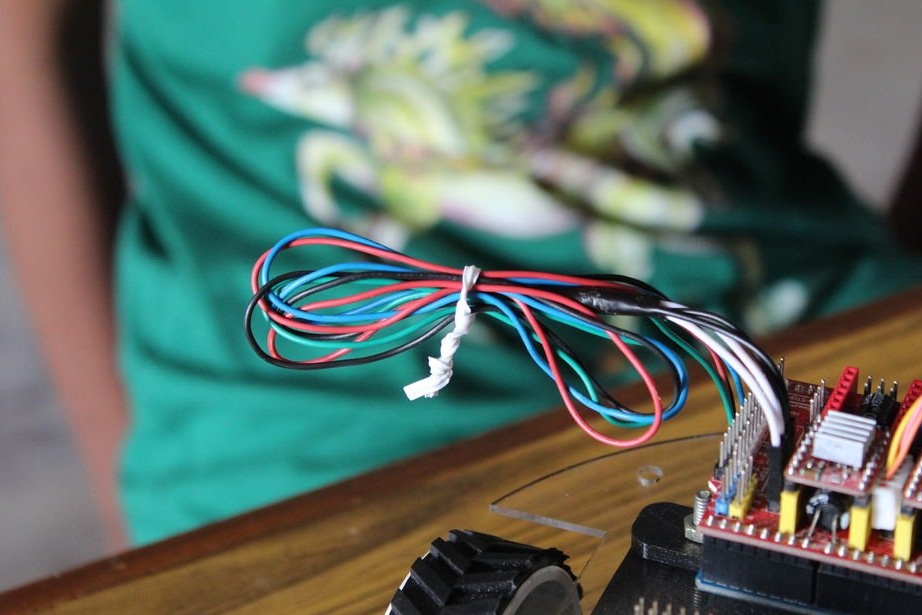
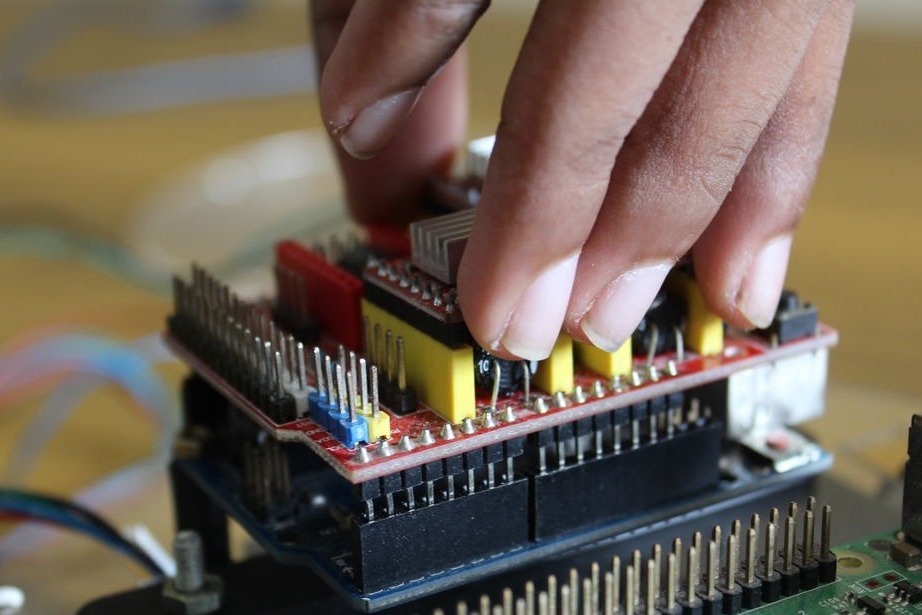
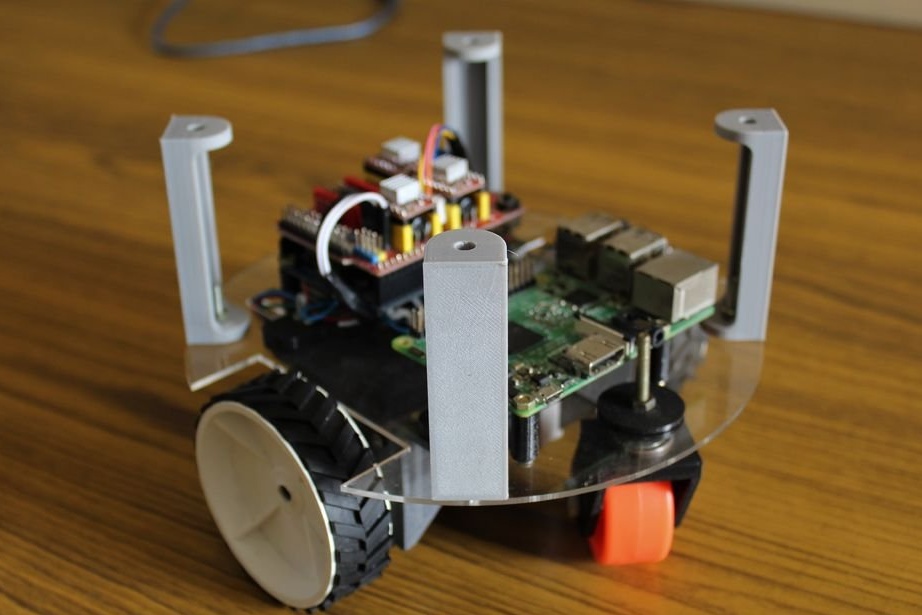
Now you can proceed with the installation of the electronic part. The holes in the acrylic panel are aligned with the mounting holes of the Arduino and Raspberry Pi. Using 3D-printed racks, the electronics are mounted just above the acrylic panels so that all excess wiring is neatly hidden underneath. Arduino and Raspberry Pi are fixed with M3 nuts and bolts. After fixing the Arduino, the stepper motor driver is installed and the wires are connected in the following configuration:
Left engine to X axis port of driver
Right engine to port axis Y driver
After the stepper motors are connected, it connects the Arduino to the Raspberry Pi using the Arduino USB cable, while the front of the robot is the side on which the Raspberry Pi is installed.
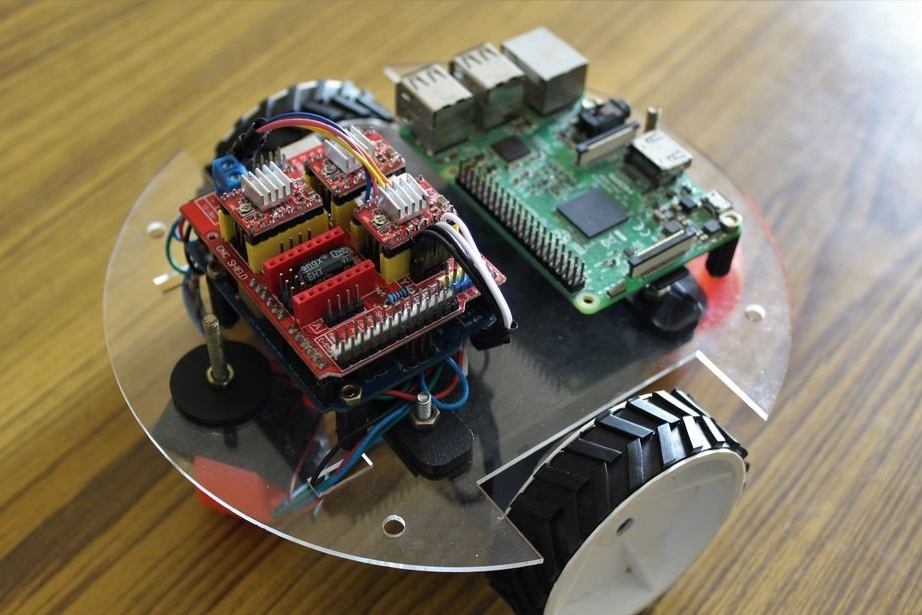
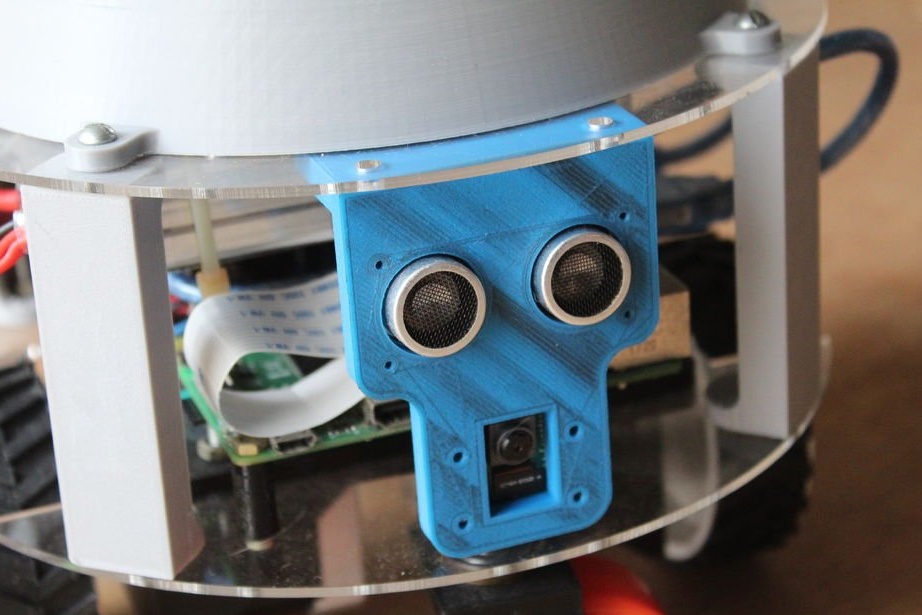
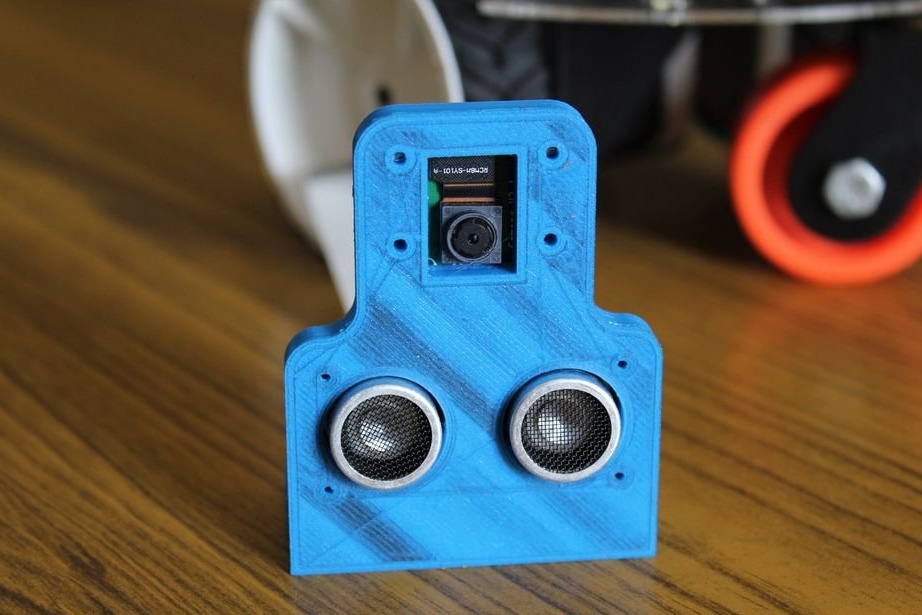
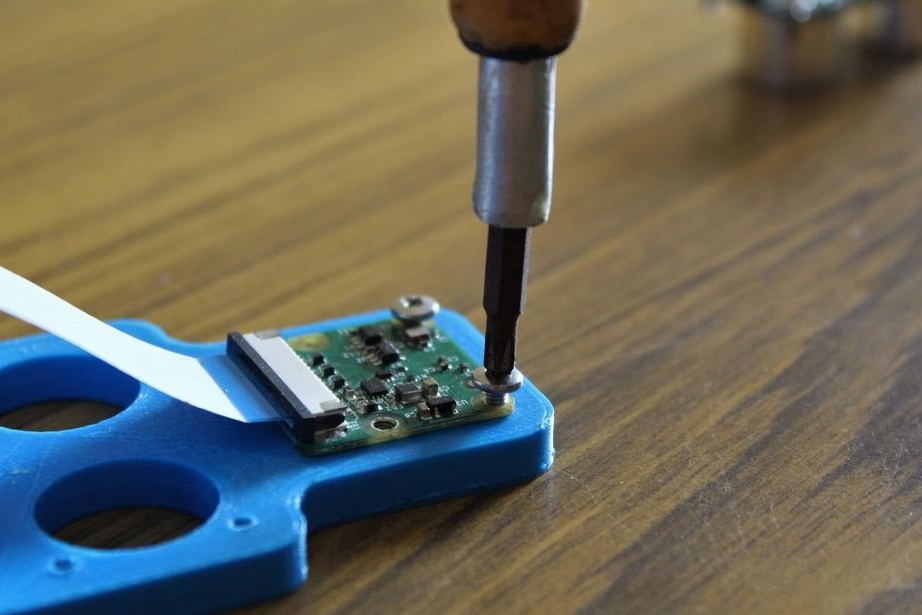
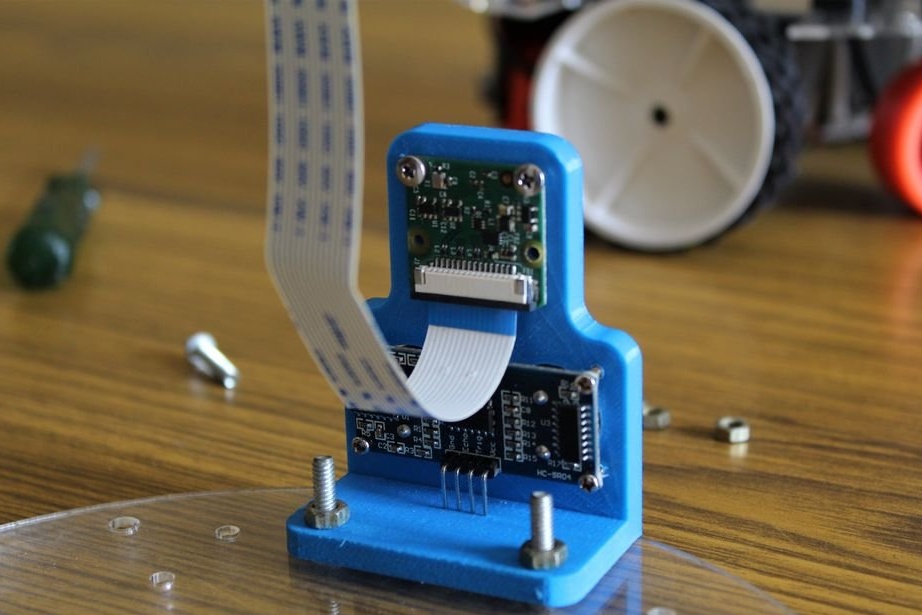
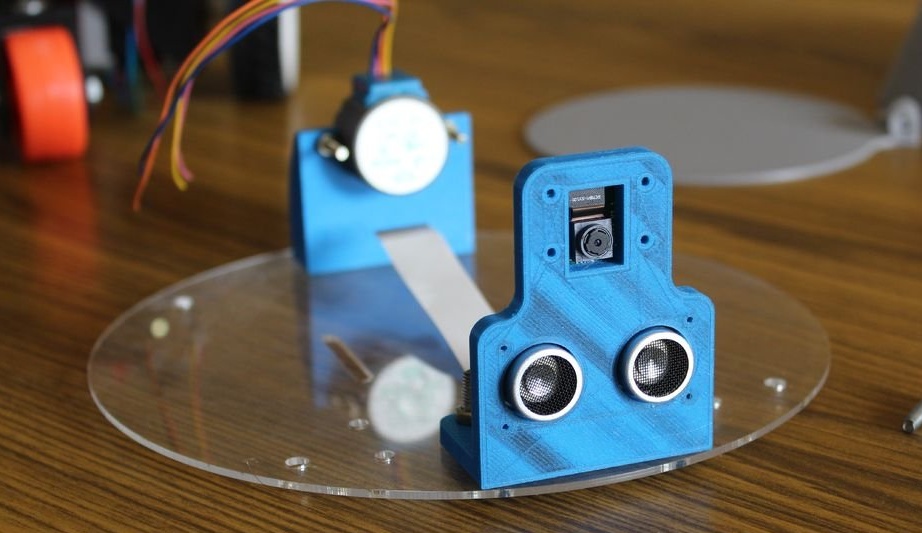
The main source of information for the observing robot is vision. The wizard decided to use a Raspberry Pi compatible Picamera to stream video to the user over the Internet. An ultrasonic distance sensor is also installed to avoid obstacles when the robot is operating autonomously. Both sensors are attached to the holder with screws.
Picamera plugs into the Raspberry Pi port. The ultrasonic sensor is connected as follows:
VCC Ultrasonic Sensor - 5V CNC Shield
GND - GND
TRIG to X + end locking pin
ECHO - Y + end stop pin pin CNC screen
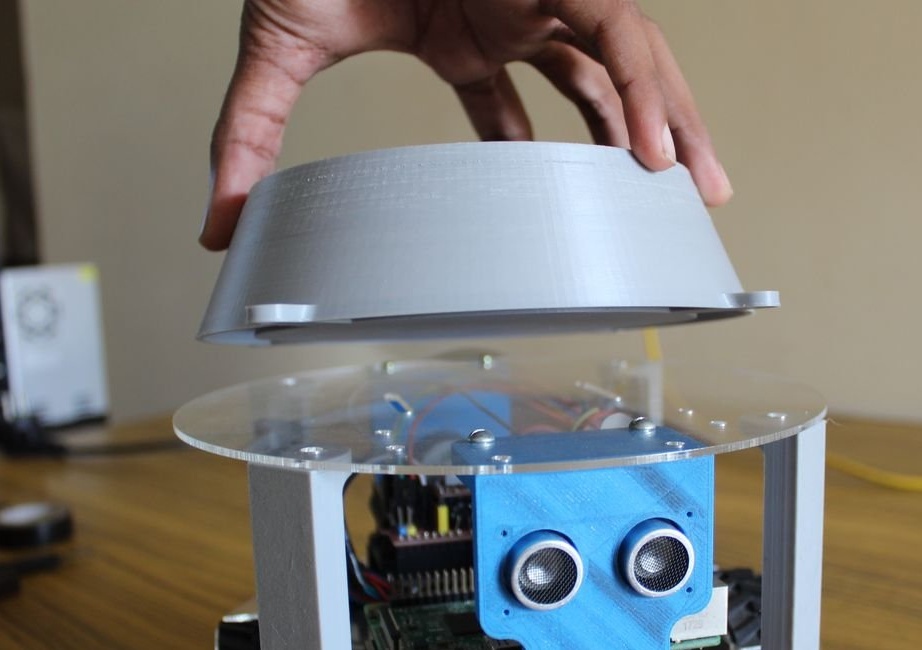
Step Five: Install the Top
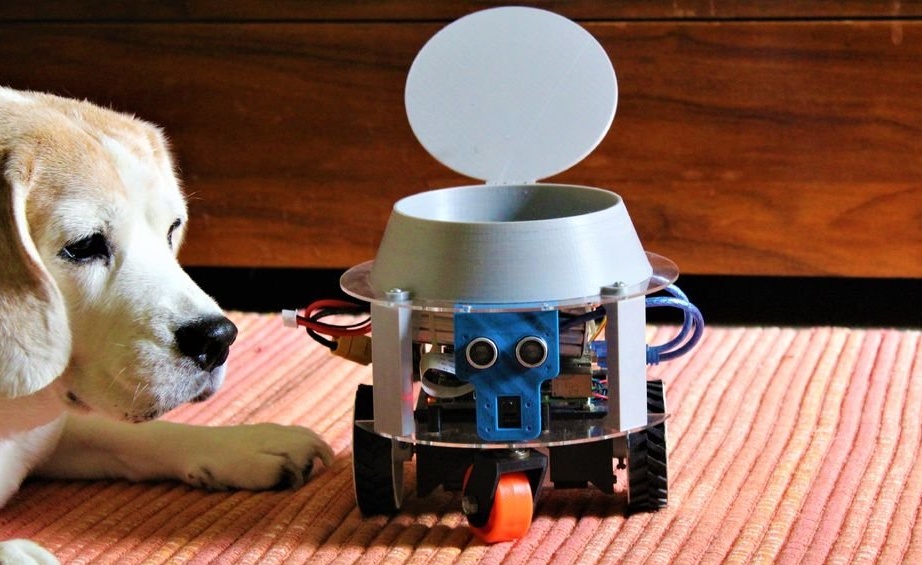
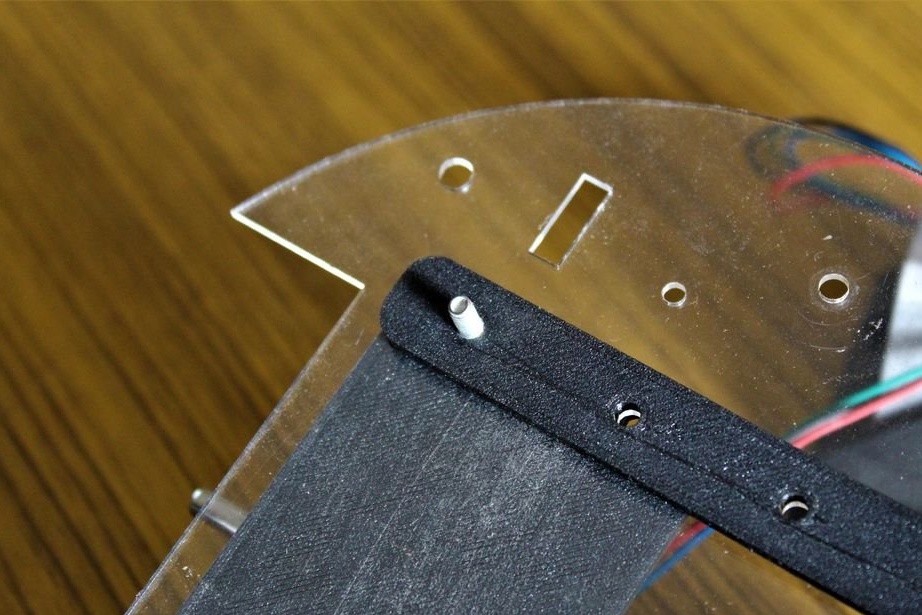
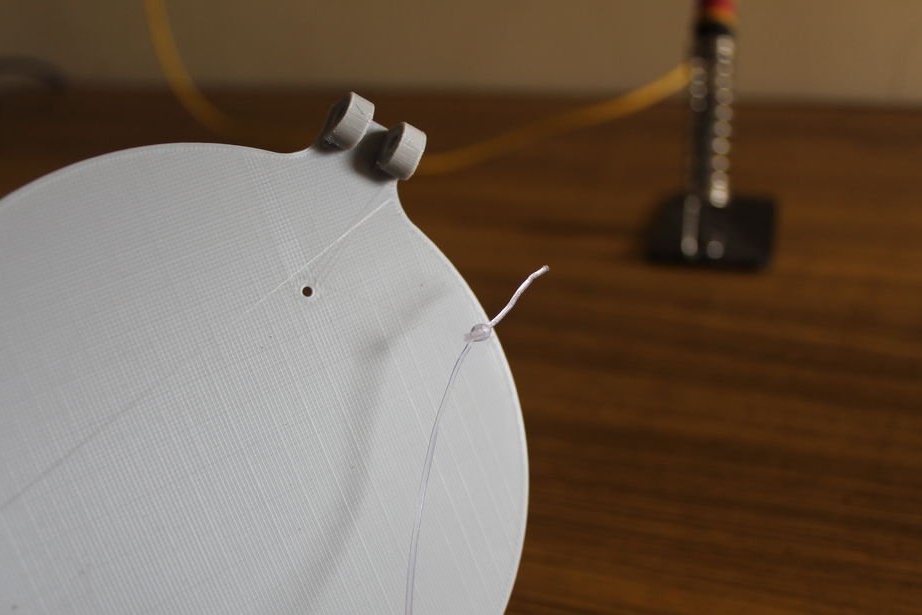
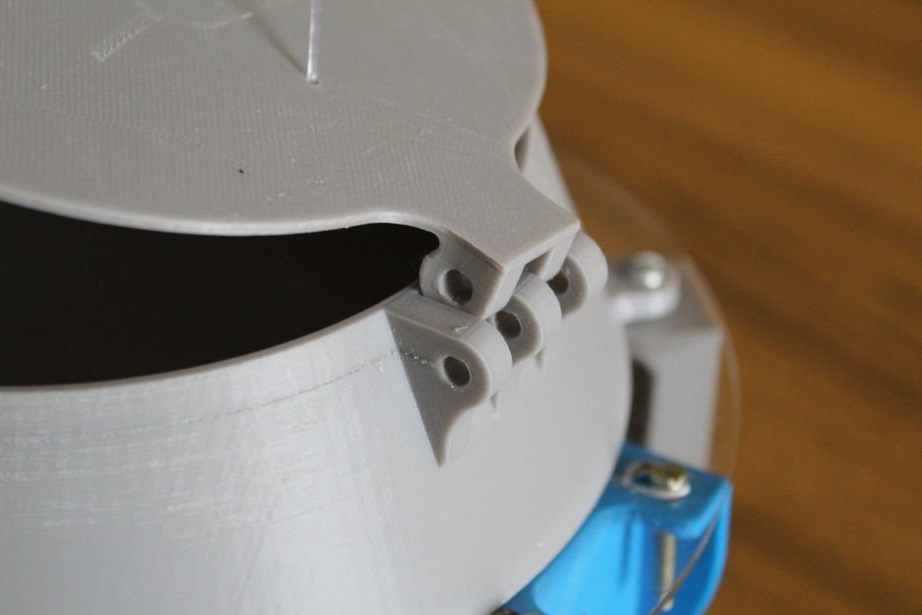
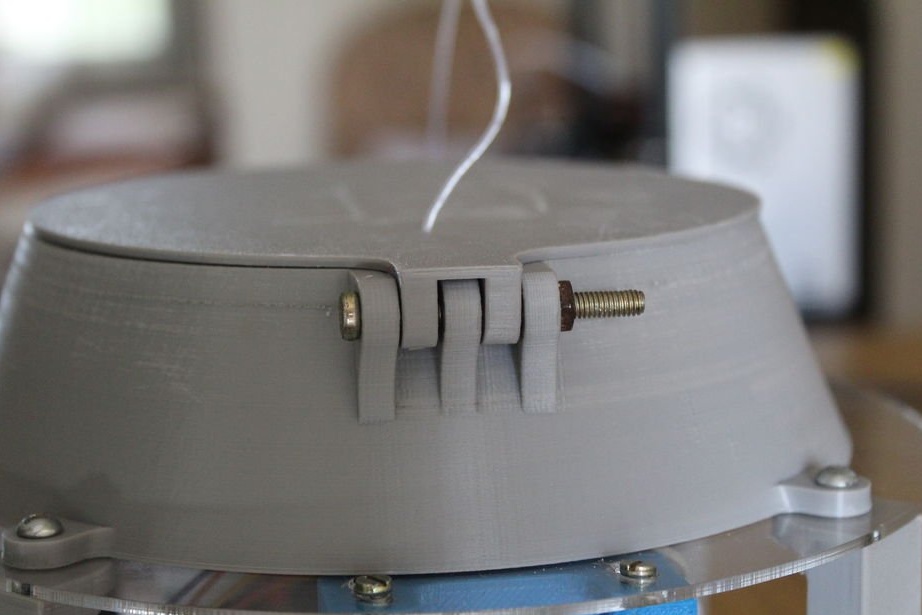
Attaches the camcorder to the front of the top panel. A stepper motor is attached to the rear. He will open the lid of the container with a treat.
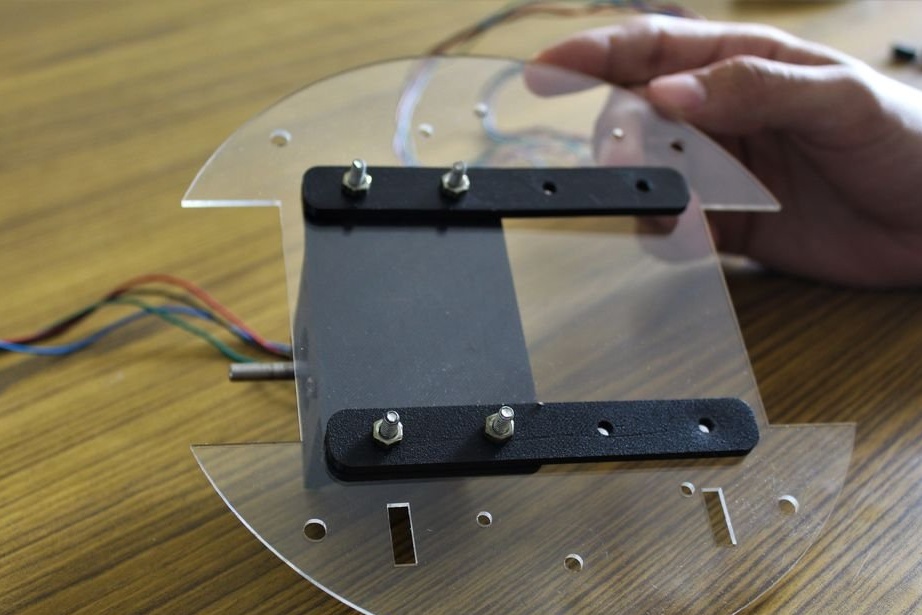
Fastens four racks to the bottom panel. On racks fastens the top acrylic panel. Attaches a cup to the panel.
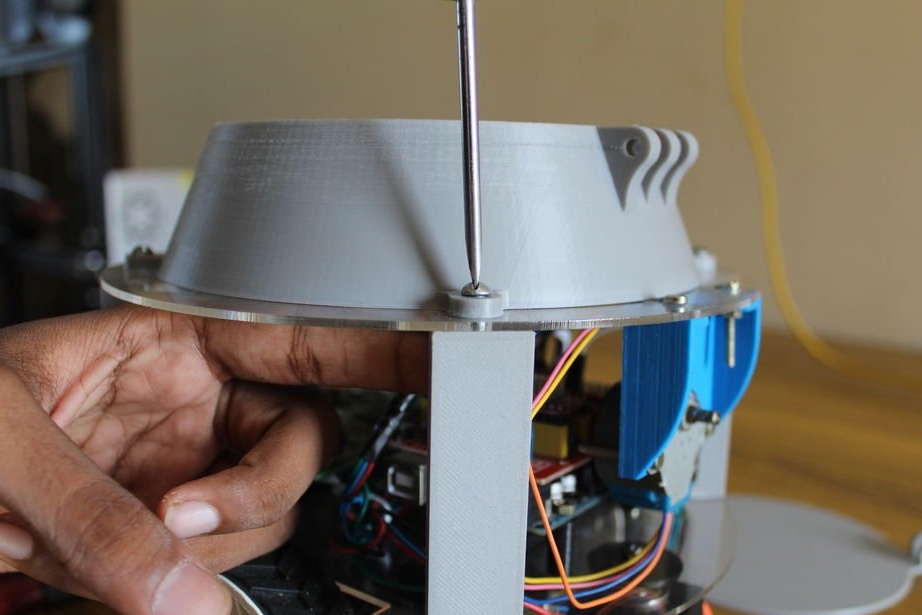
Installs the cover. The lid opens simply. A coil is mounted on the shaft of the upper stepper motor. A fishing line is wound around the reel. The second end of the fishing line is attached to the lid. When the engine starts to rotate, the fishing line is wound on the drum and the lid opens.

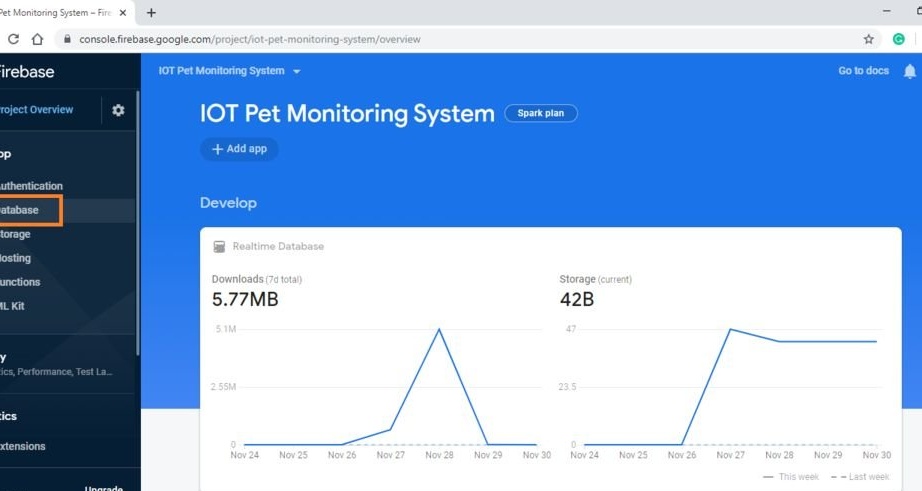
Step Six: The Cloud
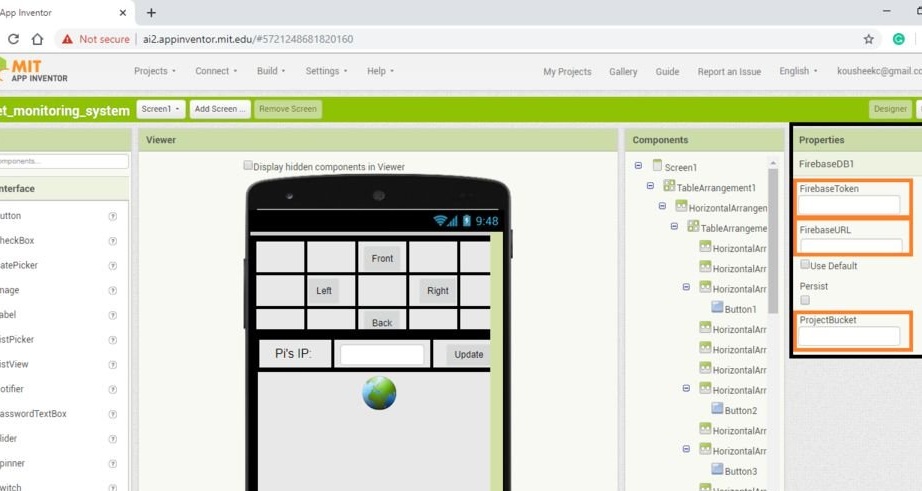
Next, you need to create databases for the system so that you can communicate with the robot from your mobile application from anywhere in the world. Click on the following link (Google firebase) that will lead you to the Firebase site (logging in with your Google account). Click the Get Started button to go to the Firebase console. Then you need to create a new project by clicking “Add Project” and fill in the requirements lines (name, data, etc.). Finish by clicking the “Create Project” button.
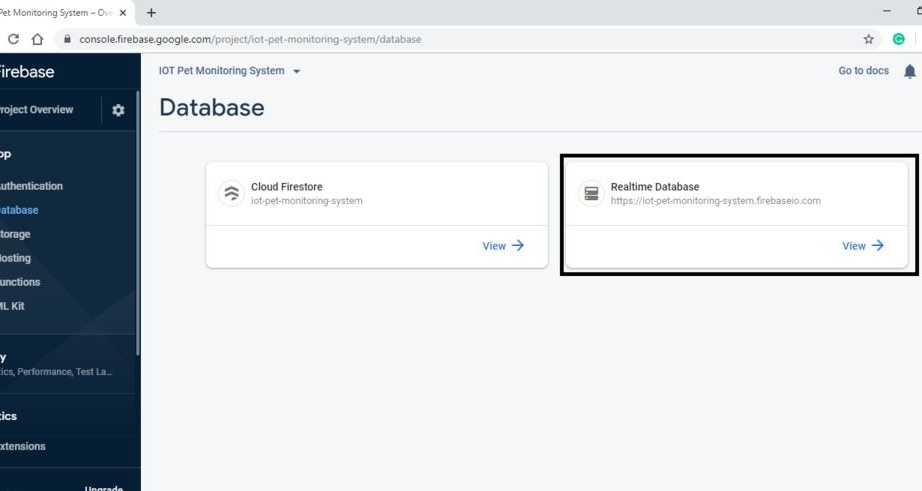
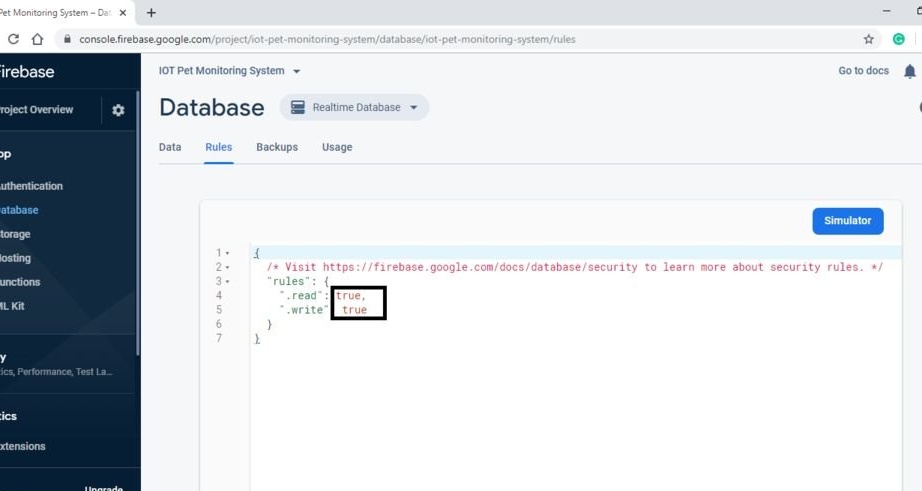
Select "database" in the menu on the left. Next, click the "Create Database" button, select the "test mode" option. Set the “realtime database” instead of the “cloud firestore” by clicking the drop-down menu at the top. Select the “rules” tab and change “false” to “true”. Then you need to click on the “data” tab and copy the database URL.
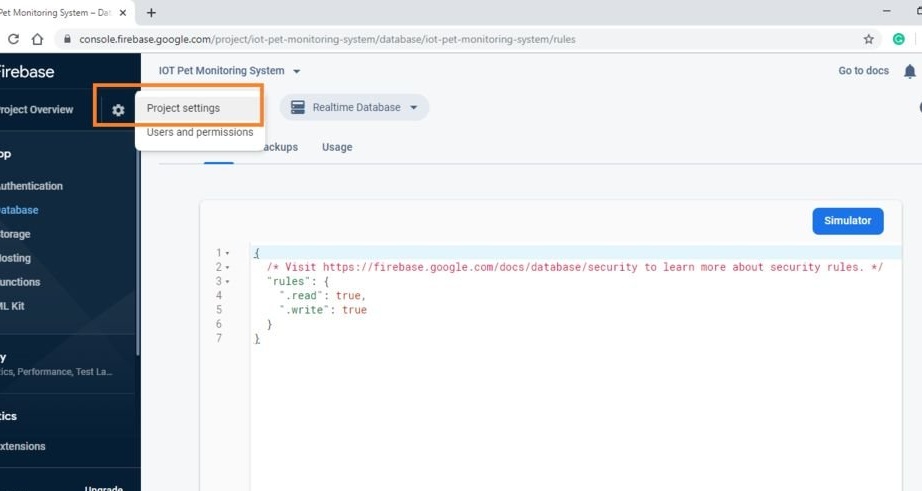
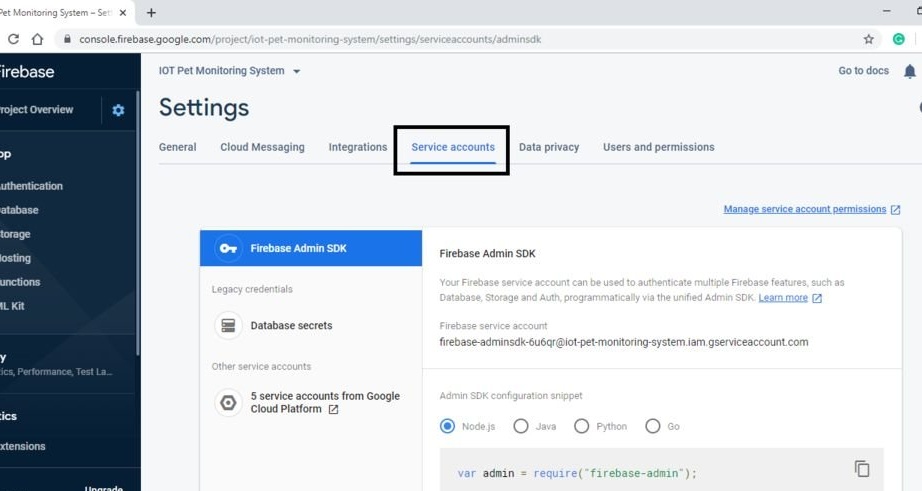
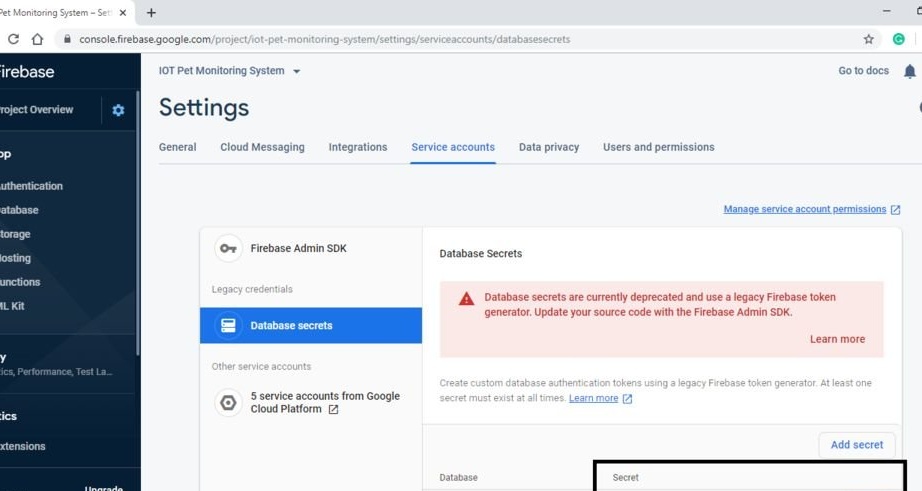
The last thing to do is click on the gear icon next to the project overview, then in “project settings”, select the “service accounts” tab, finally click on “Database Secrets” and write down the secure code for your database. By completing this step, you have successfully created your cloud database, which can be accessed from your smartphone and with the Raspberry Pi.

Seventh step: smartphone application
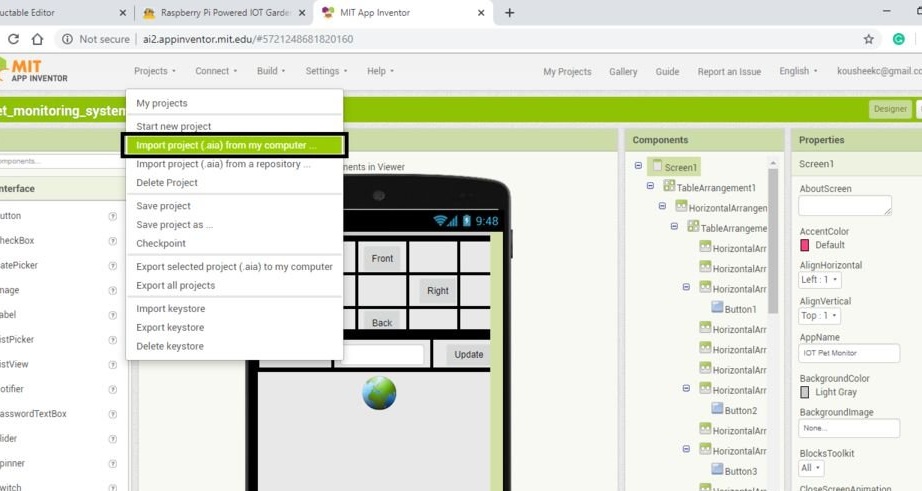
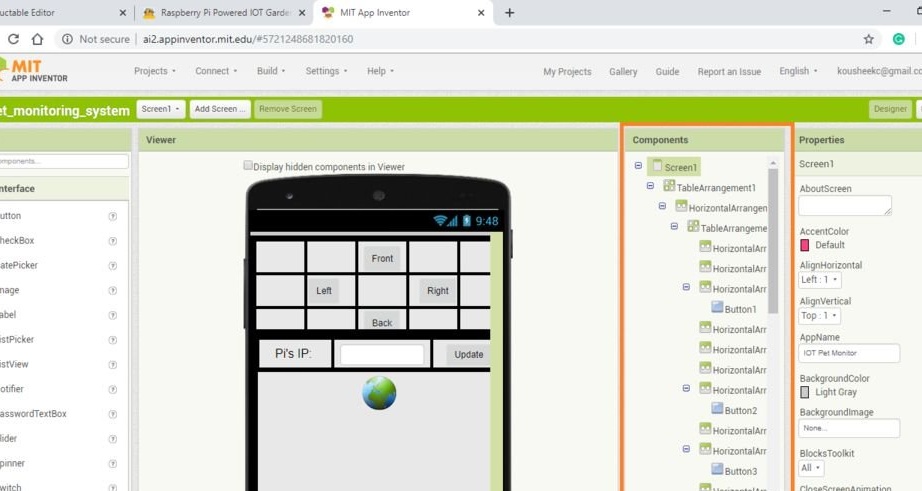
The next part is a smartphone app. The wizard decided to use the MIT App Inventor to create his own application. To use the created application, first open the following link (MIT App Inventor)which will lead to their web page. Then click “create apps” at the top of the screen, and log in to your Google account.
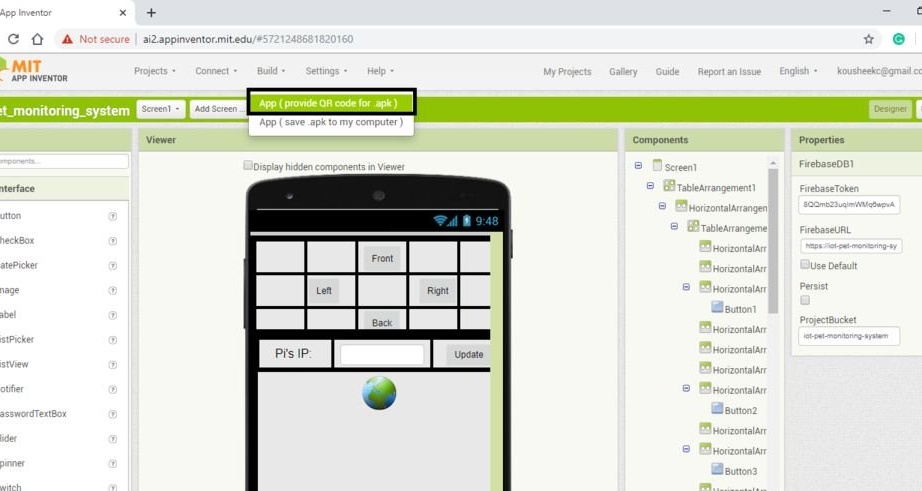
Next, you need to download the file, which is listed below.Open the “projects” tab and click “Import project (.aia) from my computer”, then select the file you just downloaded and click “OK”. In the component window, scroll down until you see “FirebaseDB1”, click on it and change “FirebaseToken”, “FirebaseURL” to the values that were copied above. After completing these steps, you can download and install the application. You can download the application directly to your phone by clicking on the “Build” tab and clicking on “App (provide QR code for .apk)”, then scanning the QR code from your smartphone or clicking on “App (save .apk to my computer)”
IOT_pet_monitoring_system.rar
Step Eight: Raspberry Pi Programming
The Raspberry Pi is used for two main reasons.
It transfers the live video stream from the robot to the web server. This stream can be viewed by the user using a mobile application.
He reads the updated commands in the Firebase database and instructs the Arduino to complete the necessary tasks.
There is already a detailed guide that you can find to configure your Raspberry Pi for live streaming. here. Instructions come down to three simple commands. Turn on the Raspberry Pi, open a terminal and enter the following commands.
git clone https://github.com/silvanmelchior/RPi_Cam_Web_Interface.git
cd RPi_Cam_Web_Interface
./install.sh
After the installation is complete, restart Pi and you can access the stream by searching the http: // IP address of your Pi in any web browser.
After setting up the live broadcast, you will need to download and install certain libraries in order to be able to use the cloud database. Open the terminal on your Pi and enter the following commands:
sudo pip install requests == 1.1.0
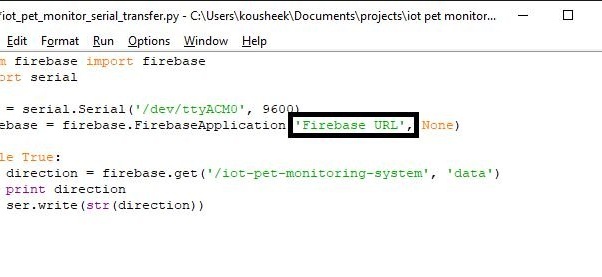
sudo pip install python-firebaseDownload the python file below and save it to your Raspberry Pi. In the fourth line of code, change the COM port to the port that the Arduino is connected to. Then change the URL on line 8 to the Firebase URL you wrote about earlier. Finally, run the program through the terminal. This program receives commands from a cloud database and transfers them to Arduino through a serial connection.
iot_pet_monitor_serial_transfer.py
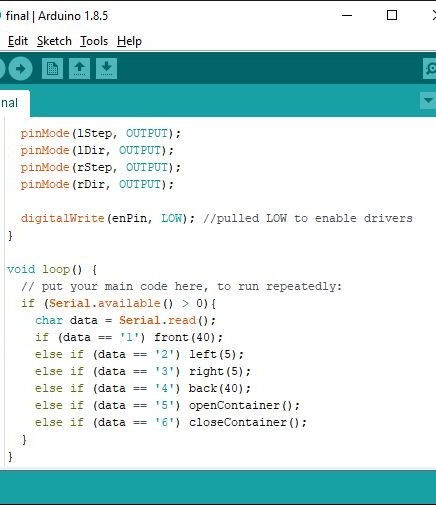
Step Nine: Arduino Programming
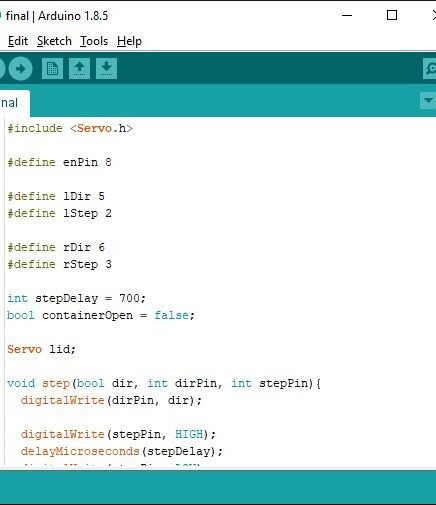
Arduino receives a signal from Pi and gives the command to the actuators to perform the necessary tasks. Download the Arduino code attached below and upload it to Arduino. After programming the Arduino, connect it to one of the Pi's USB ports using a dedicated USB cable.
final.rar
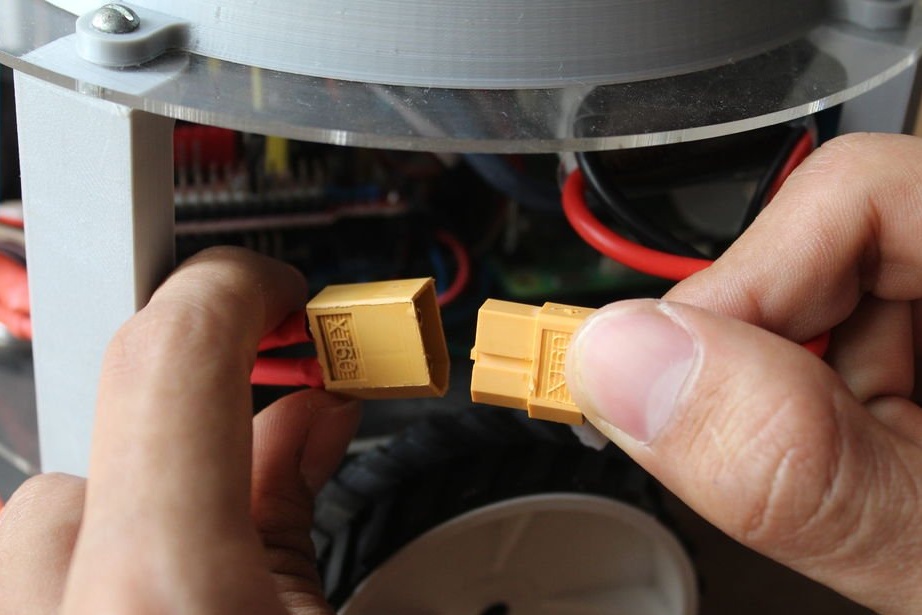
Step Ten: Nutrition
The device will run on a lithium polymer battery. Battery power goes directly to the CNC screen to power the motors, and, on another bus, to the 5-volt UBEC, to power the Raspberry Pi via GPIO pins. 5V from UBEC is connected to the 5V pin of the Raspberry Pi, and GND from UBEC is connected to the GND pin on the Pi.
Step Eleven: Connect
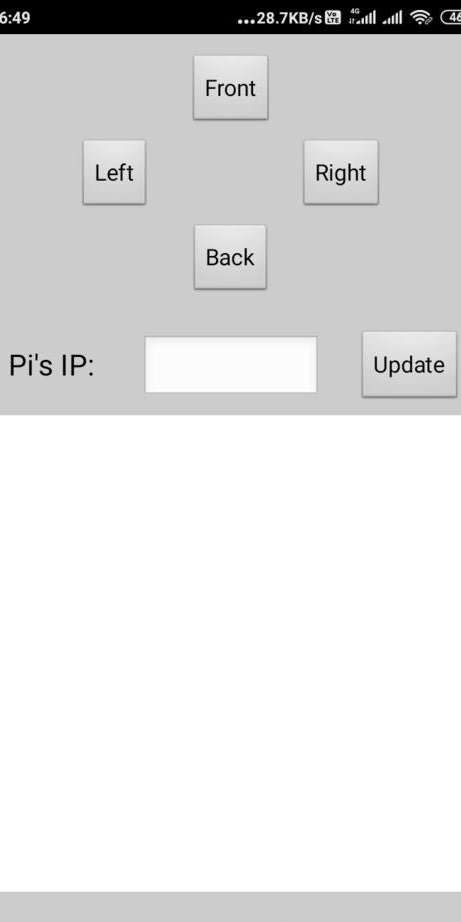
The application interface allows you to control the observing robot, as well as broadcast live broadcasts from the built-in camera. To connect to the robot, you need to make sure that you have a stable Internet connection, and then simply enter the IP address of the Raspberry Pi in the text box and click the update button. After that, a live broadcast will appear on the screen, and it will be possible to control various functions of the robot.

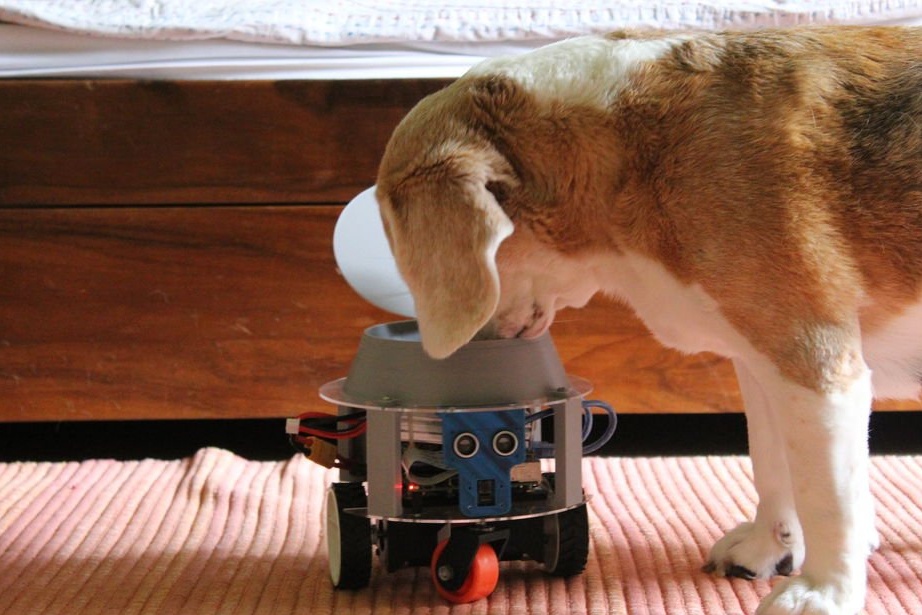
Now that the pet watching robot is fully assembled, you can fill the bowl with a treat for the dogs.
According to the master, as soon as the dog overcame the initial fear of this moving object, she chased the bot around the house. The on-board camera provides a good wide-angle view of the surroundings.