» Construction »Construction of a garage with a living area on the second floor

Construction of a garage with a living area on the second floor


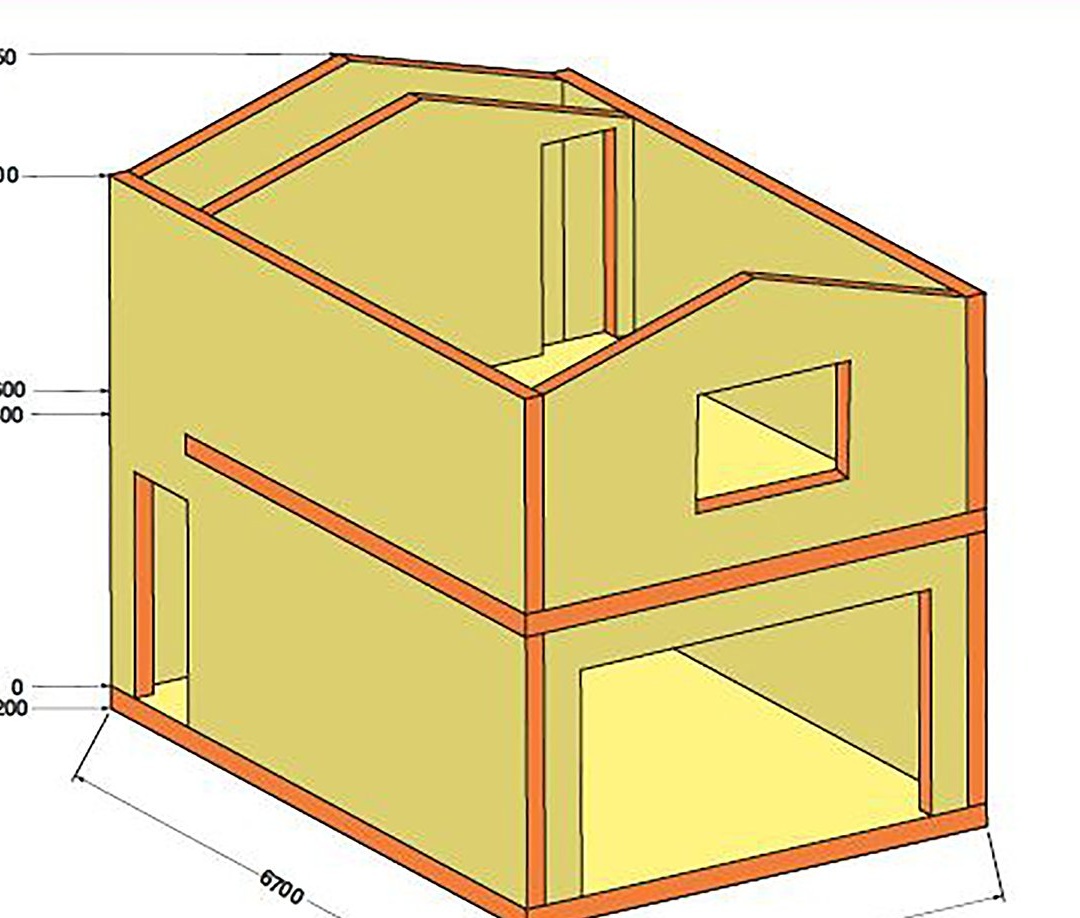
Winter passed, the foundation had to stand. It's time to start building. As I decided, the bottom the garage I will make from slotted sand-cement blocks, and the living room upstairs from foam concrete. I decided to put the staircase inside. The general plan of the garage is presented.

Read about the foundation production in the first part.


Why foam concrete blocks are good, that they have poor thermal conductivity (thermal conductivity coefficient 0.13-0.14 Kcal / m² * deg.), When compared with aerated concrete. This is approximately 4 bricks. They do not absorb water, as their pores are closed and light in weight. In terms of the size of the standard block (foam concrete blocks are usually larger), it weighs about 12 kg. But they have very poor adhesion to plaster. But this problem is solved - a small amount of the cheapest liquid soap is added to the plaster solution.

First, it is necessary to concrete the blind area to a width of 500 mm from the perimeter of the foundation with a thickness of 100 mm with a reinforcing mesh. Concrete was poured into a pre-prepared trench with a sand cushion covered with geotextiles and a laid reinforcing mesh. Concrete was interfered by hand in a large trough. Then, paving slabs measuring 500x500x45 mm with a slight slope outward will lie on the blind area.

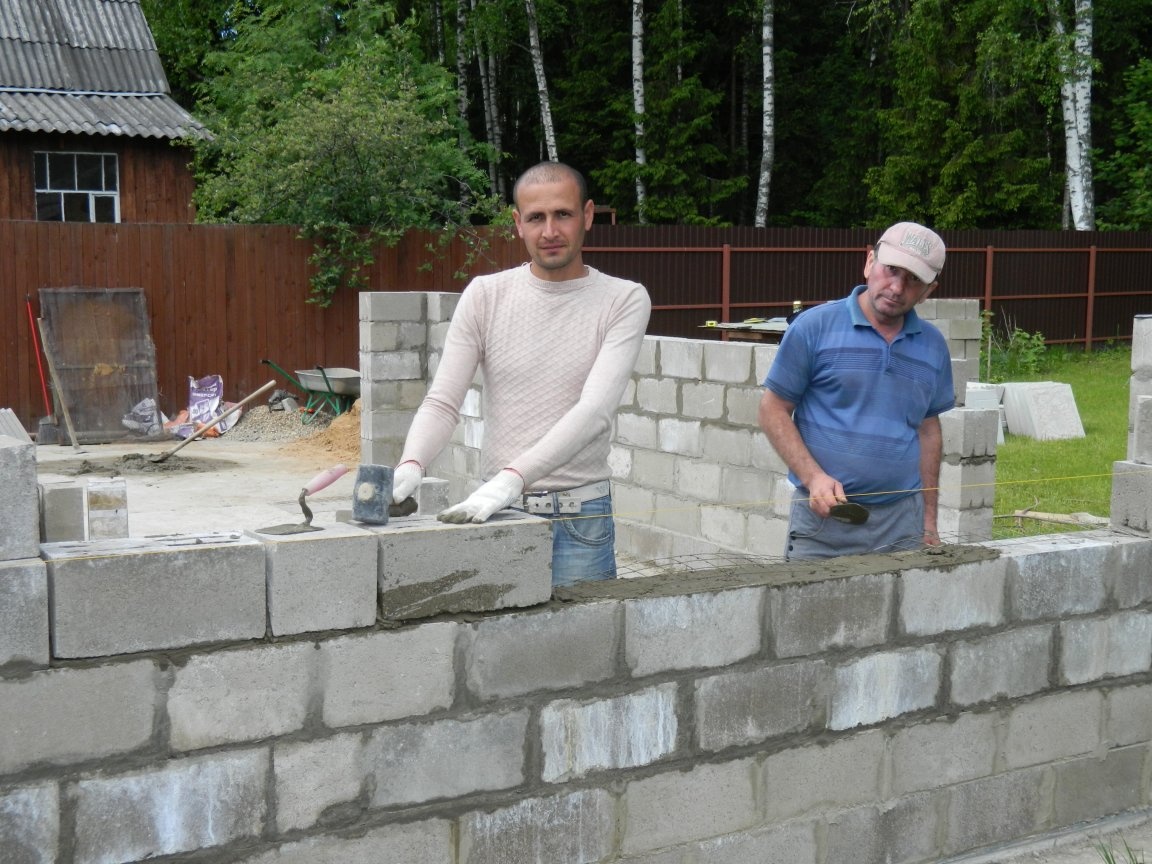
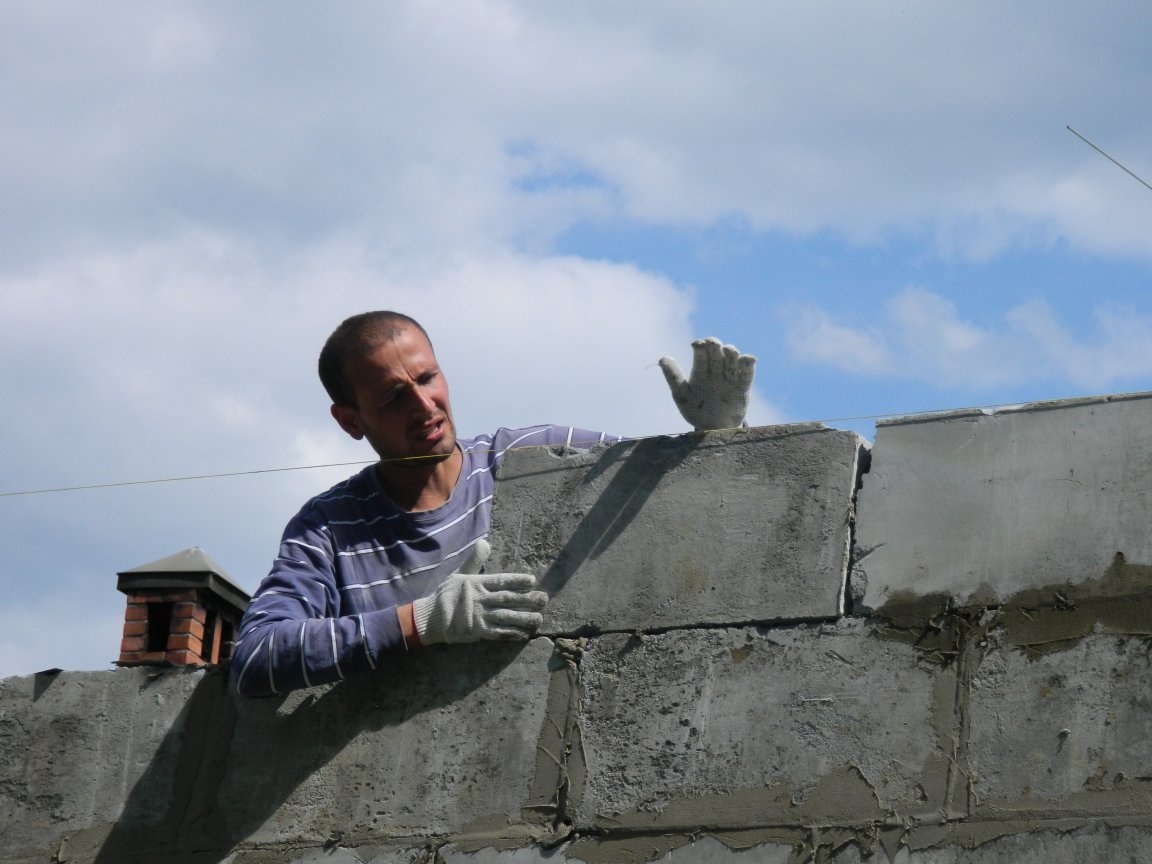
The four-slit sand cement block has dimensions of 188x190x390 mm and a weight of 21 kg. The blocks were laid on a ready-mixed mortar of cement grade M500.


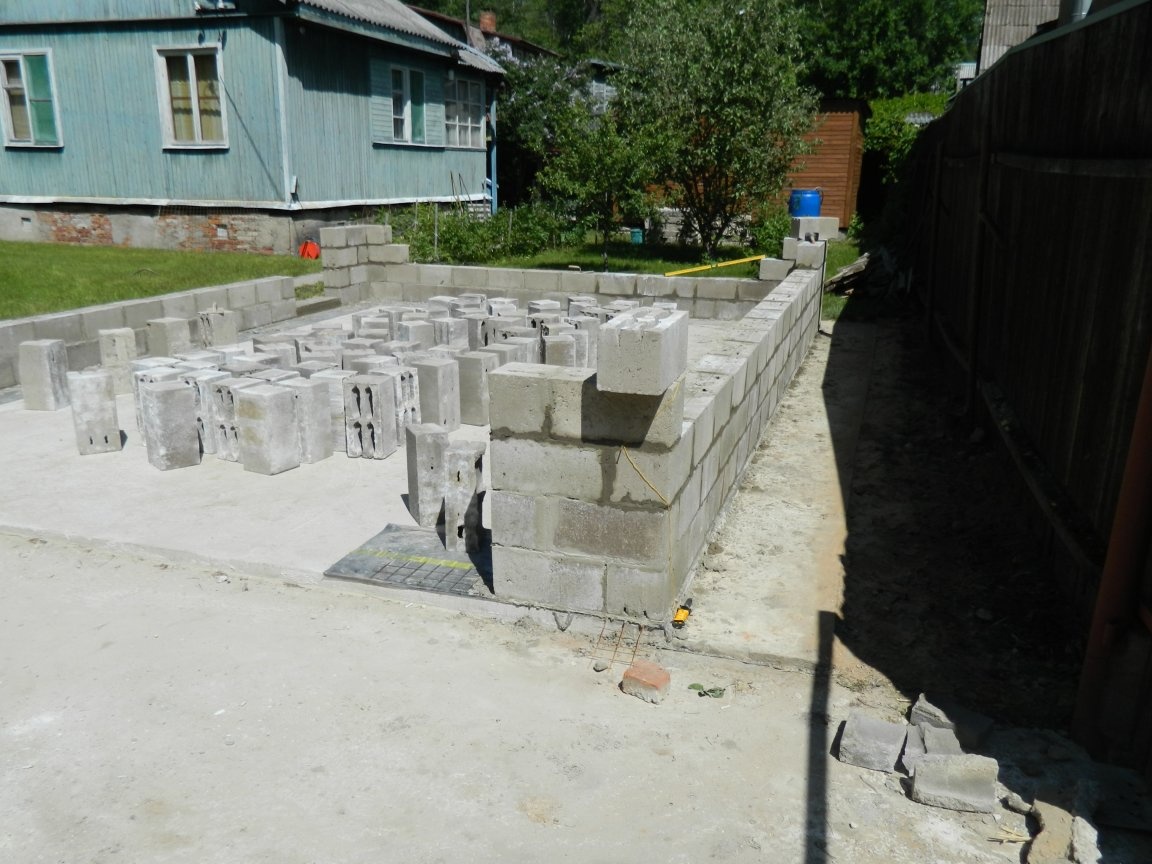
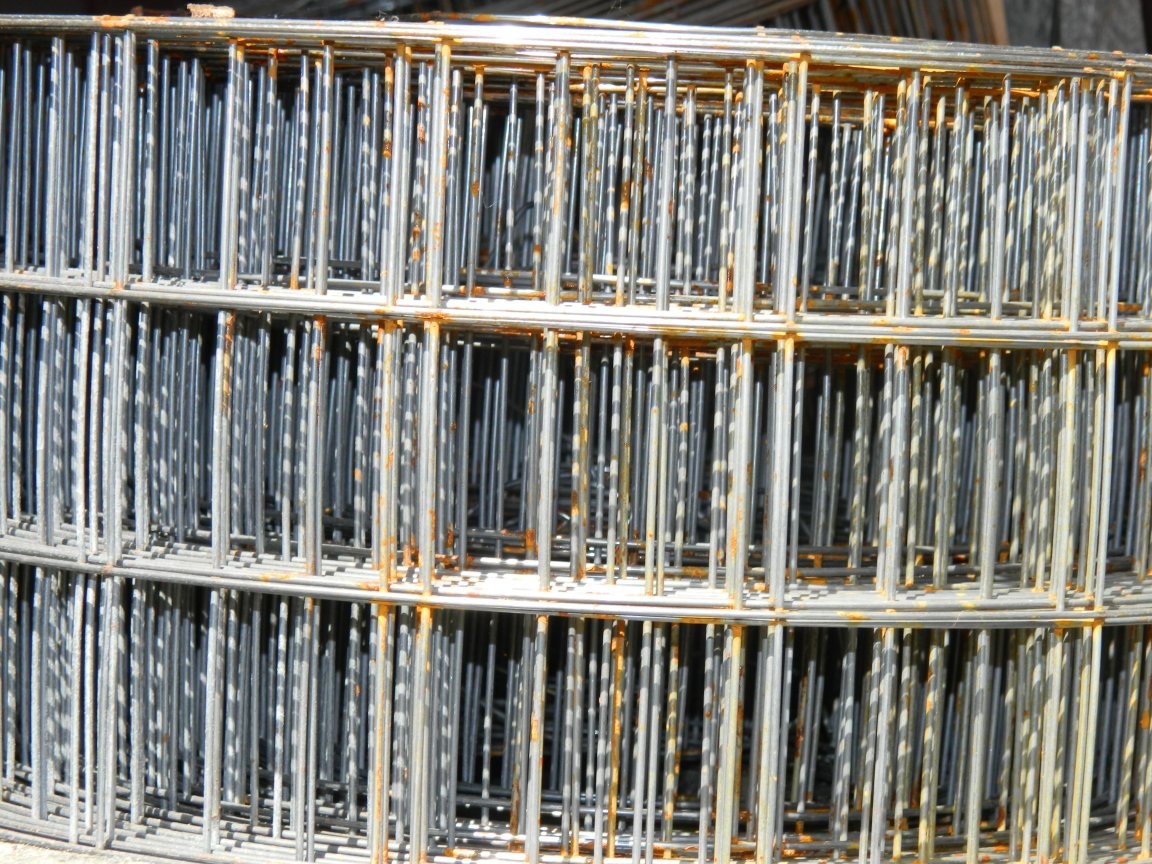
Under the first row of blocks, a hydroisol and a reinforcing 4 mm mesh were laid in two layers, then a rolled 1.5 mm mesh was laid through every two rows of blocks.


The formwork was made and concrete was filled with sills for the front door with a height of 100 mm.
It is worth telling in detail about the preparation of formwork for the AWP belt.

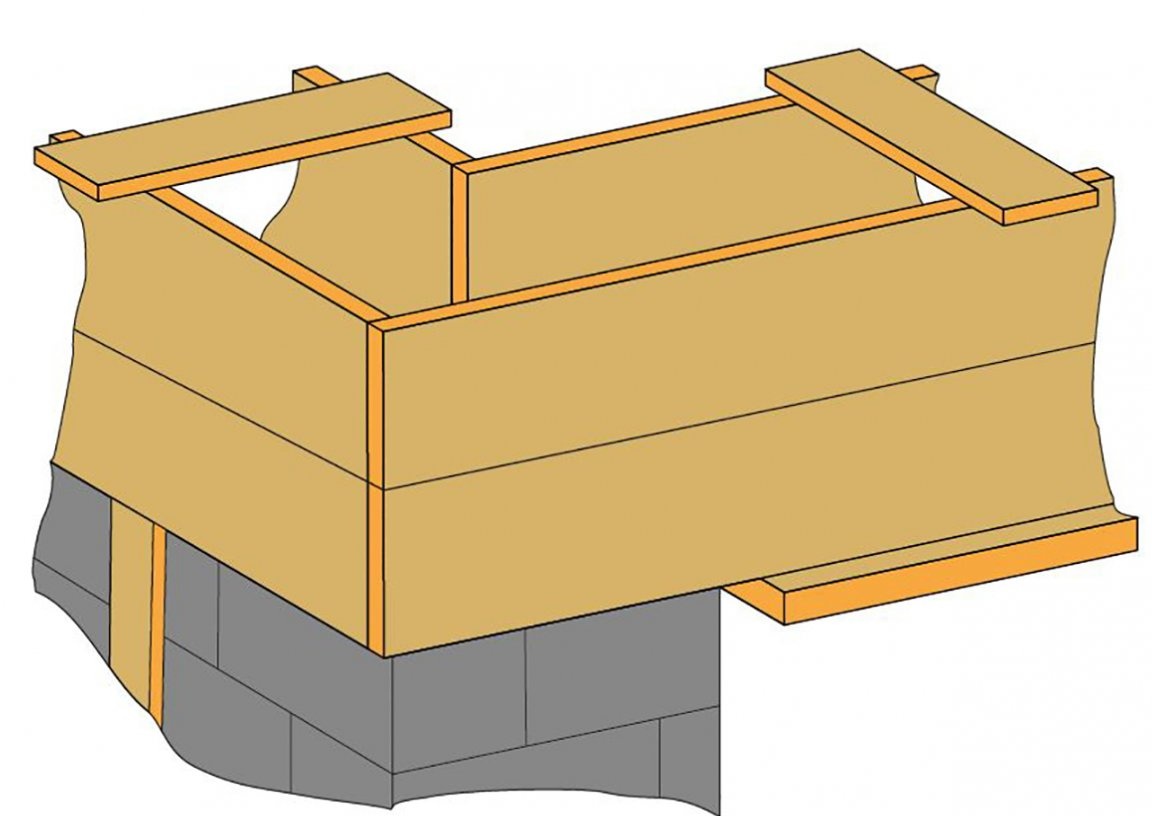
The side formwork panels were made of two boards with a section of 40x100 mm. From the sides they are sewn by scraps of boards with a cross section of 25x120 mm through about 1500 mm. In the corners they were sewn with screws in a single box. Where there should have been openings for the gate and front door, two boards with a section of 40x120 mm were used, which are attached to the side shields from below. In the openings, columns are installed as props. After the reinforcing assemblies were placed inside the formwork and connected together in the corners by knitting wire, trimmed boards were packed along the upper edge of the formwork to prevent it from diverging when pouring. To eliminate the divergence of the side shields from below, they are interconnected by steel wire.On the walls, where there were no openings, the formwork is propped up by boards at the level of the bottom of the fill.


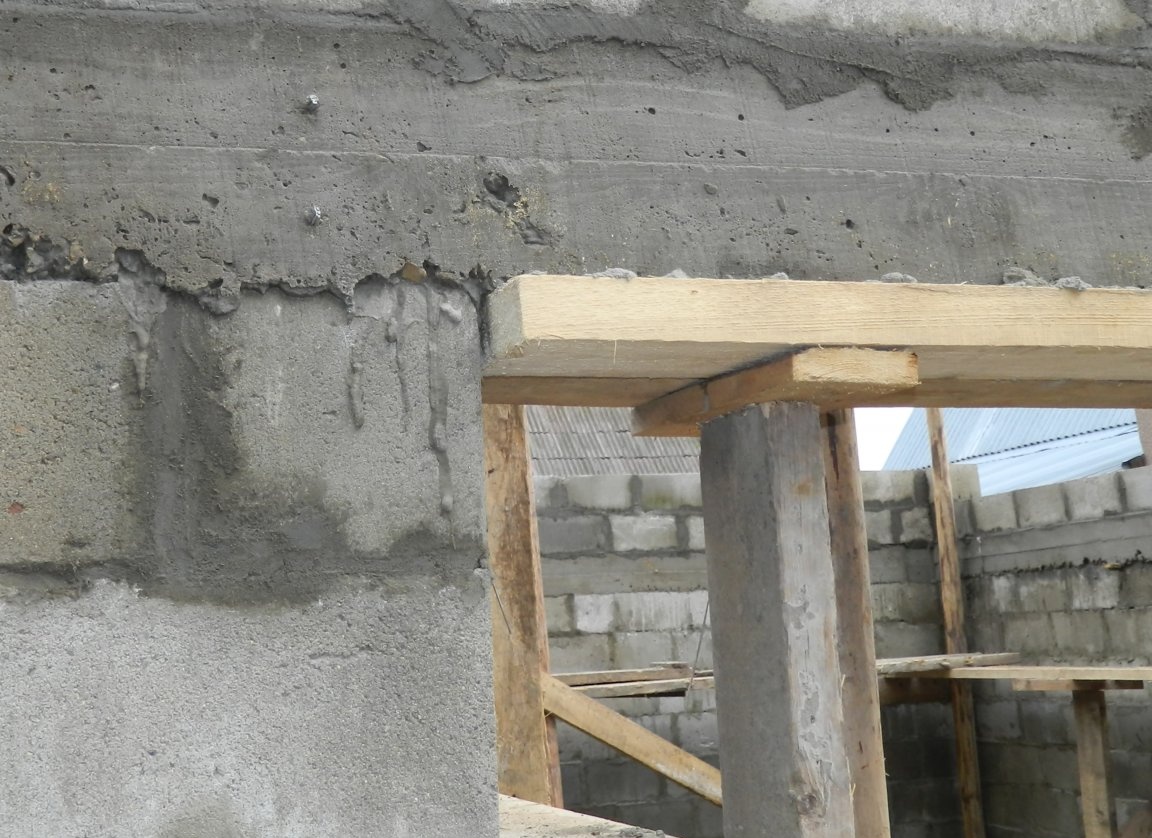
At a masonry height of 2000 mm around the garage perimeter, a continuous arm with a 12-mm reinforcement was connected, connected in the form of a box of 4 bars, and hexagonal 6 bars above the entrance gate,

section of 200x200 mm. At the same time, the arm belt formed the top of the gate and door openings.
After the concrete has hardened, the masonry height is brought up to 2400 mm by sand-cement blocks.

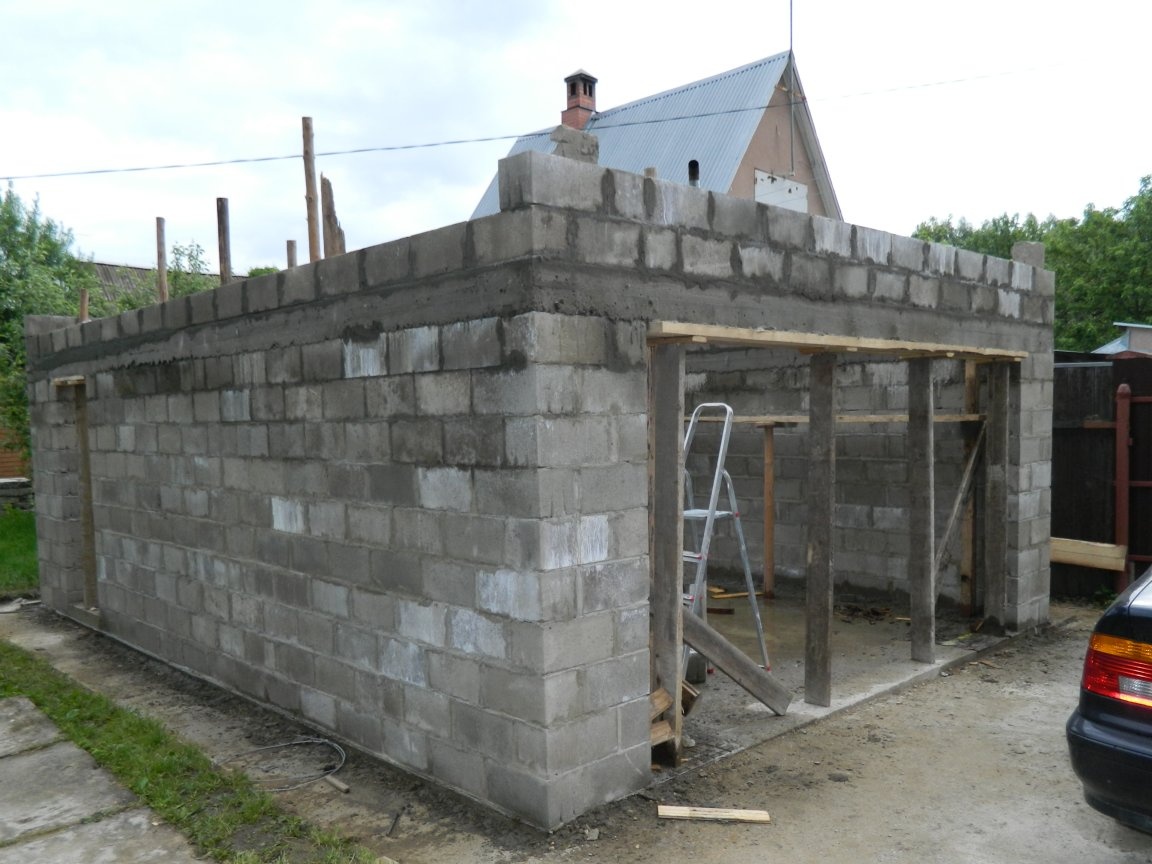
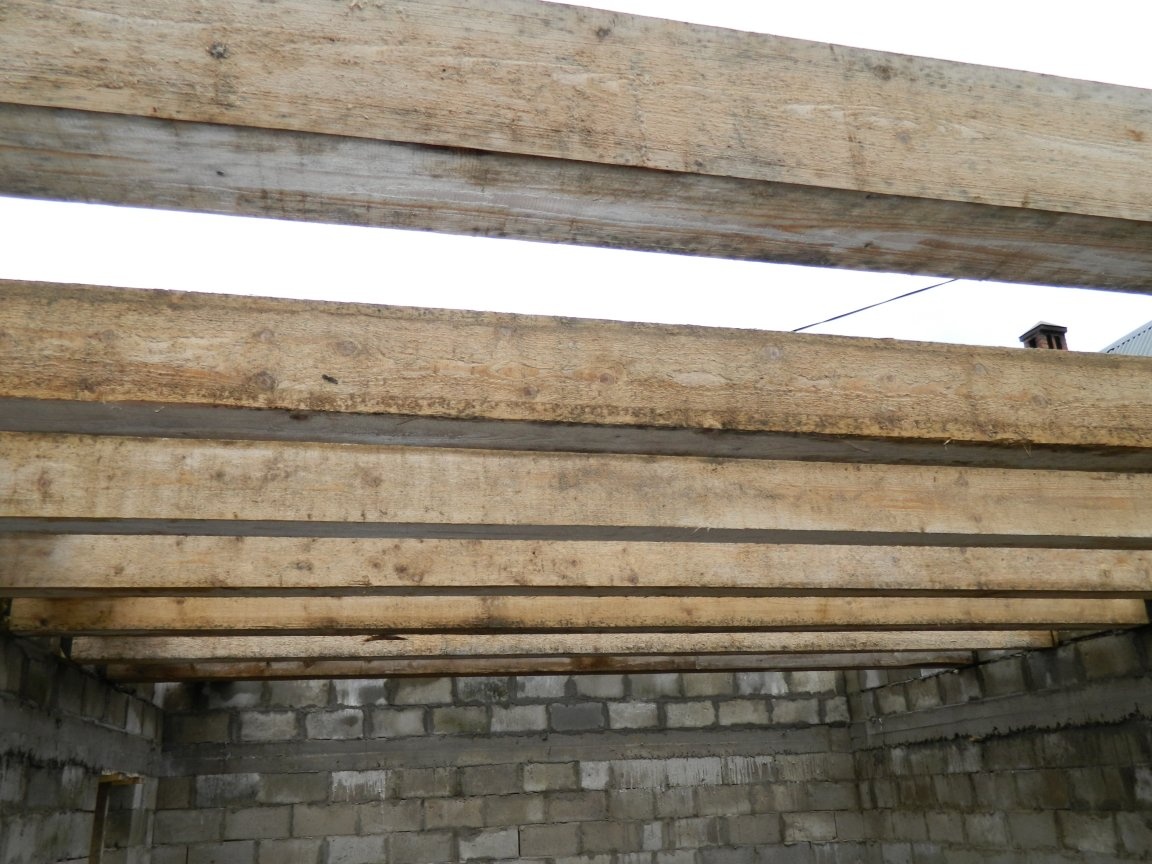
and from the gate to the front door, floor beams are laid through 500 mm. Since the span is quite large, we used a beam of 150x200x5000 mm lying on the wide side. The extreme beam on which the partition for the second floor will be built has a section of 200x200 mm.

The gaps between the beams are also filled with the same blocks. Where the beams are in contact with the blocks, a hydroisol is laid. A ceiling of 400 mm, formed above the opening for the gate, is enough to install a sectional lifting gate in the future.


Foam concrete blocks measuring 200x300x600 mm were fixed with special glue for aerated concrete.


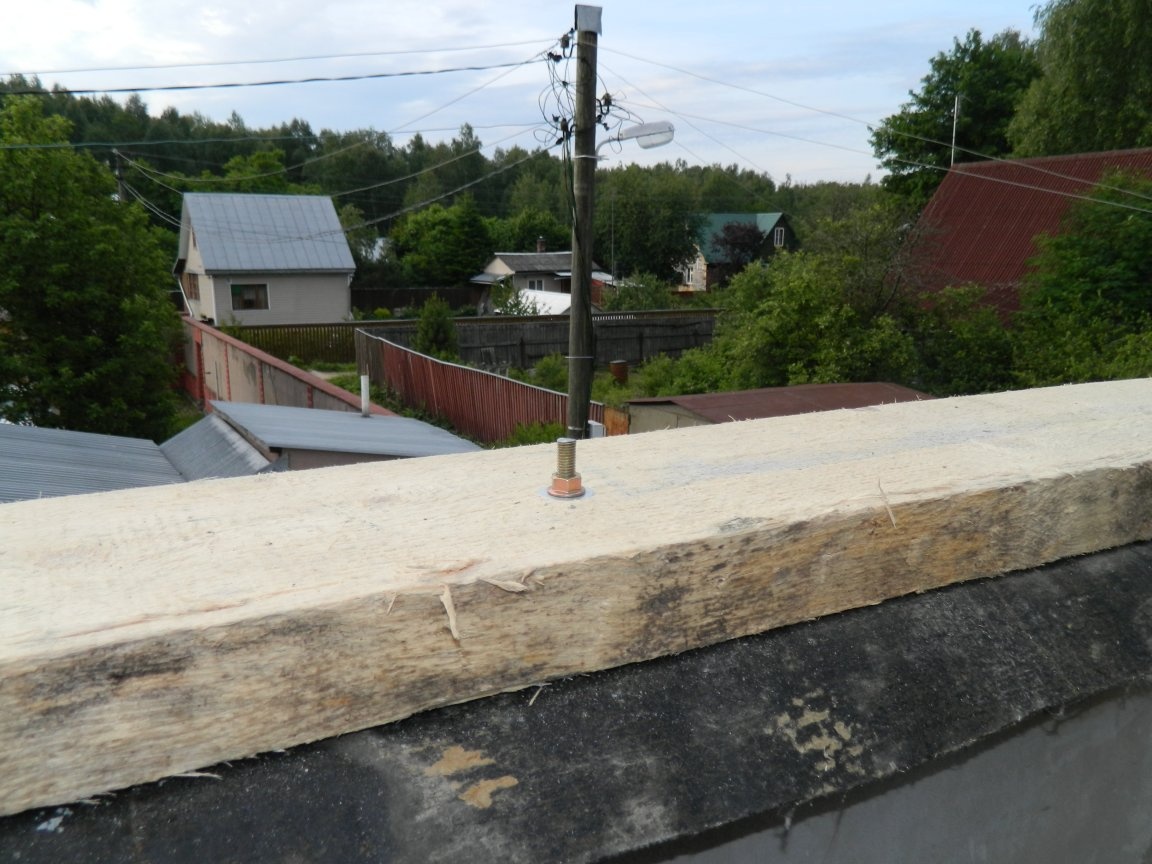
At a distance of 900 mm from the top of the beams, an opening with a width and height of 900 mm was left on the facade for the window. At a masonry height of 4400 mm, a Mauerlat from boards with a cross section of 50x200 mm was fixed using anchor bolts ø12x300 mm at the upper ends of the side walls. with preliminary insulation with hydroisol between it and foam concrete.

For the brood of pediments from a beam with a section of 100x100x6000 mm, the side rafters are installed, which are installed inside the masonry.

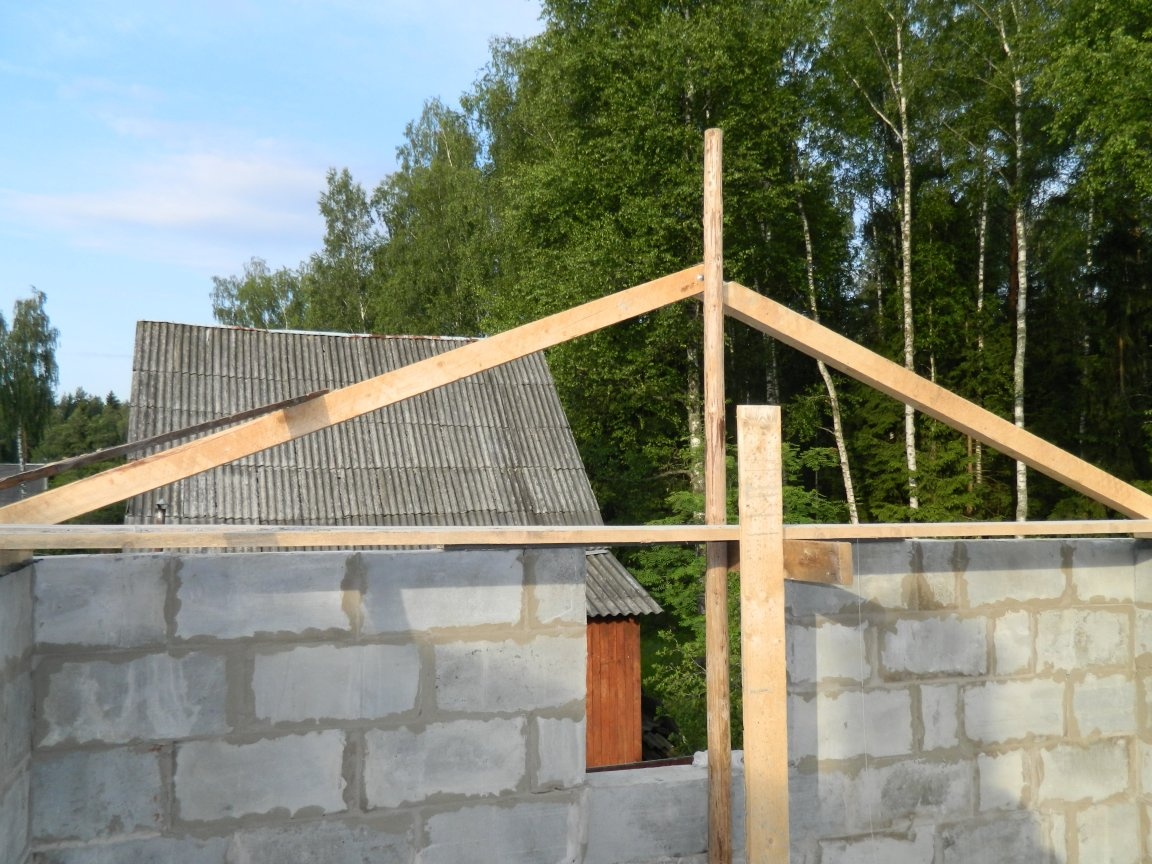
At the top of the opening where the window should be, two 63-mm angles with a length of 2000 mm are installed, which are welded together by a strip along the width of the block. Pediments brought to a height of 5450 mm along the upper end of the rafters.


A lace is stretched between the extreme rafters along the ridge of the future roof, and the remaining rafters are installed from the 100x100x6000 mm timber. Where the living area will be located, between the rafters a distance of 500 mm. Where there will be a staircase and a platform for entering the second floor - 600 mm.

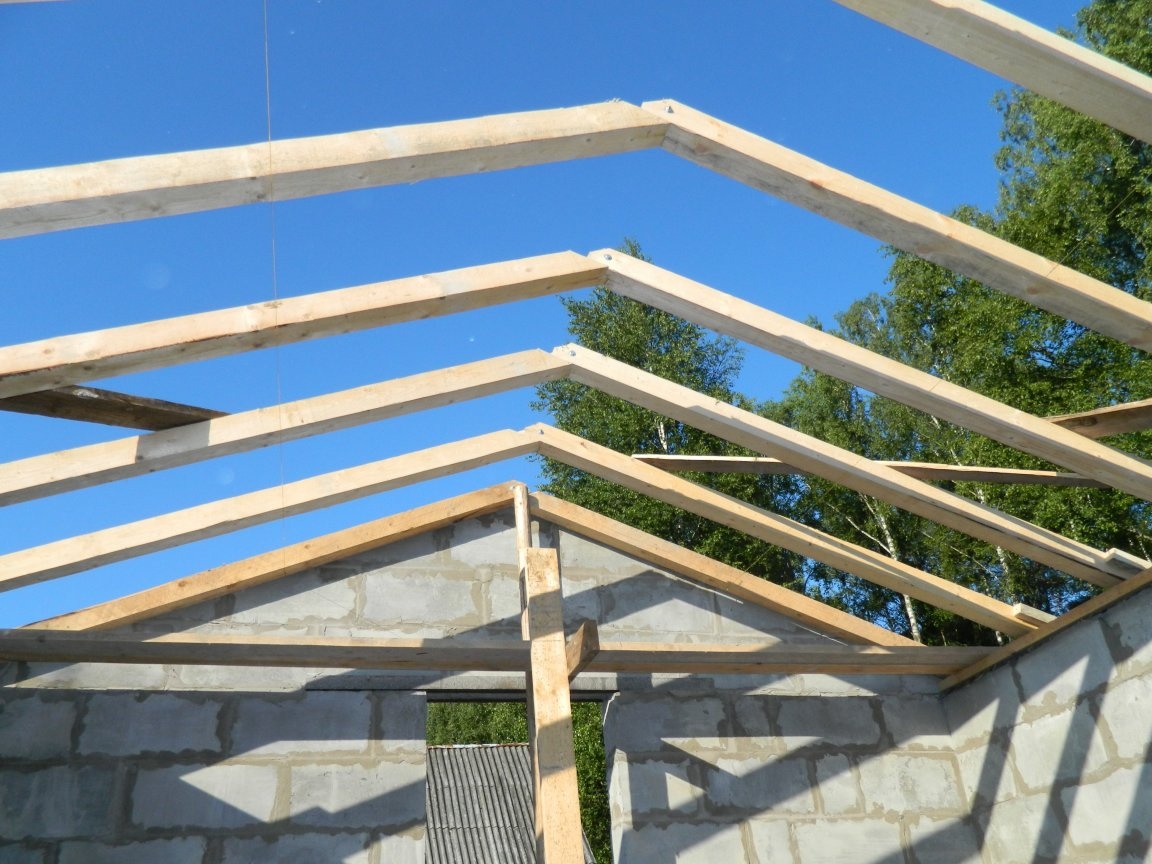
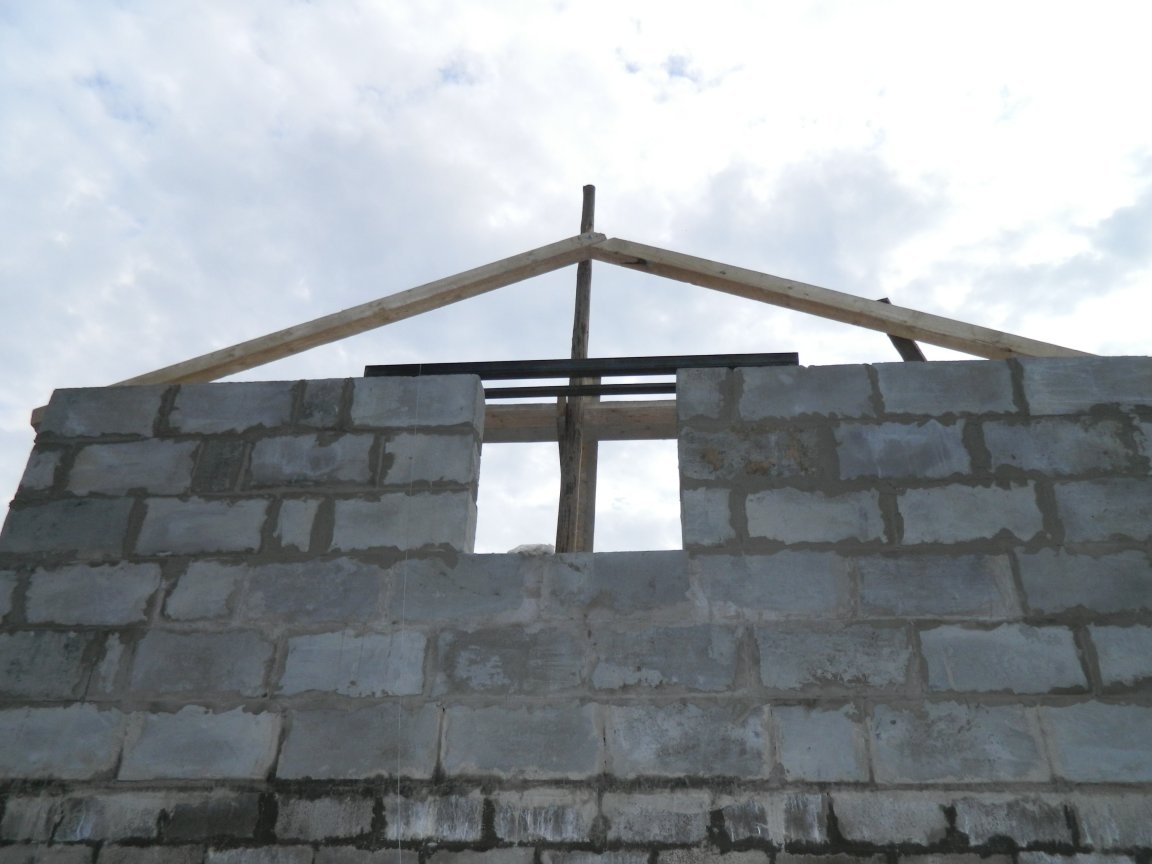
At a height of 2480 mm, rafters were installed cross-members from a bar of the same section. They were fastened with steel corners.

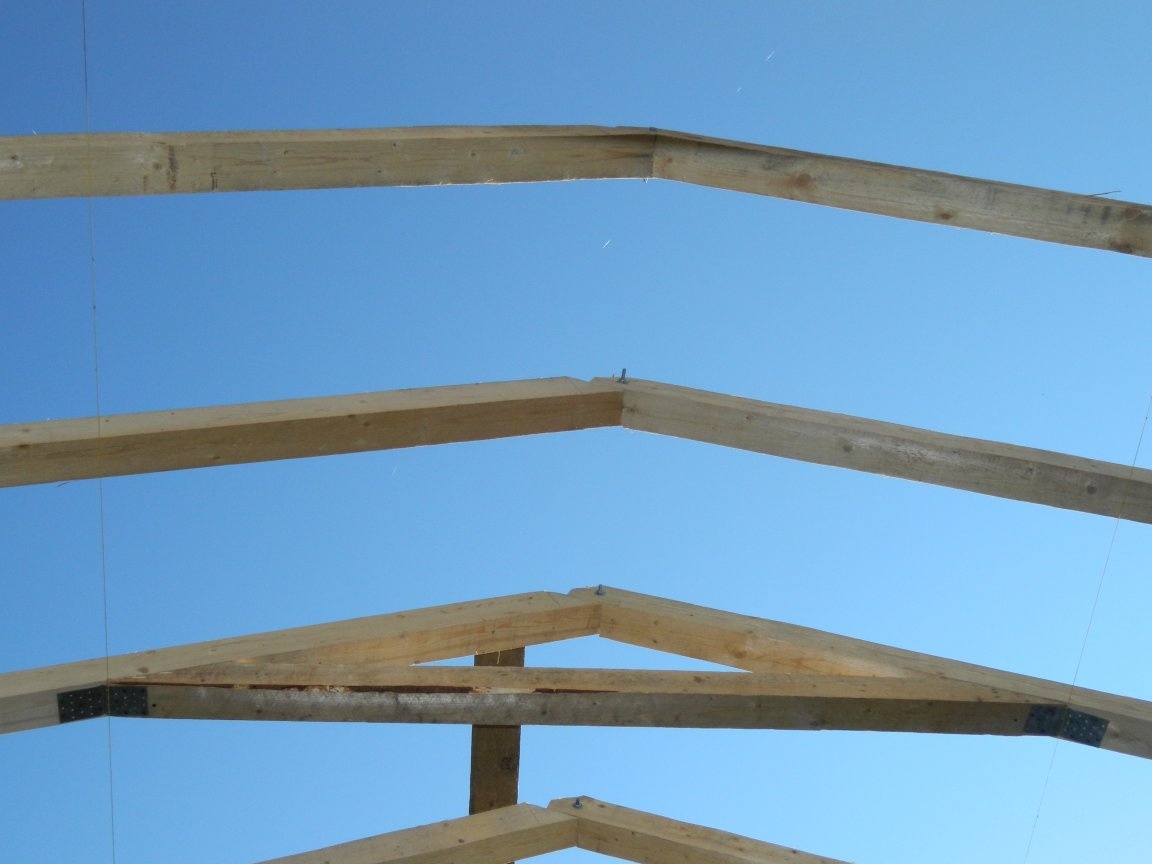
The crate must be made continuous, since the roof will have to be insulated. For it, an edged board of 25x120x6000 mm was used. She was sewn to the rafters with a release of 300 mm around the perimeter of the roof.

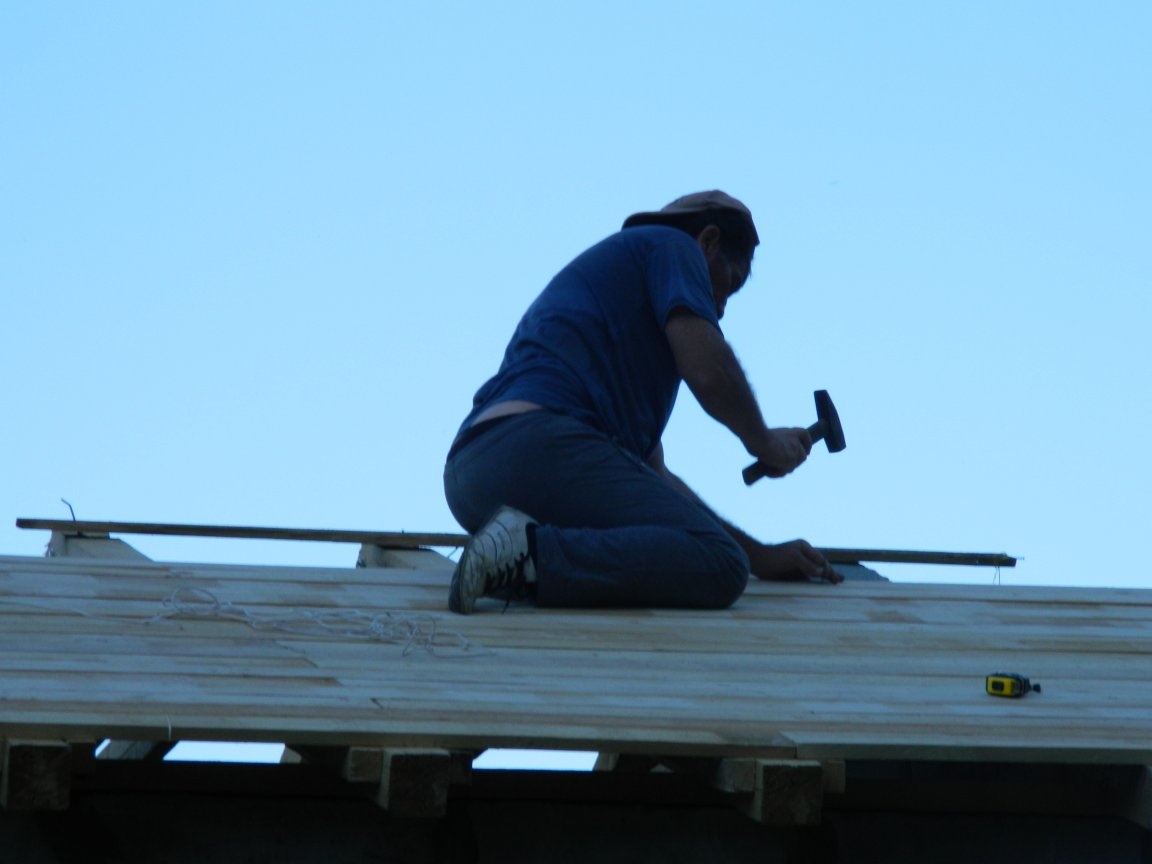
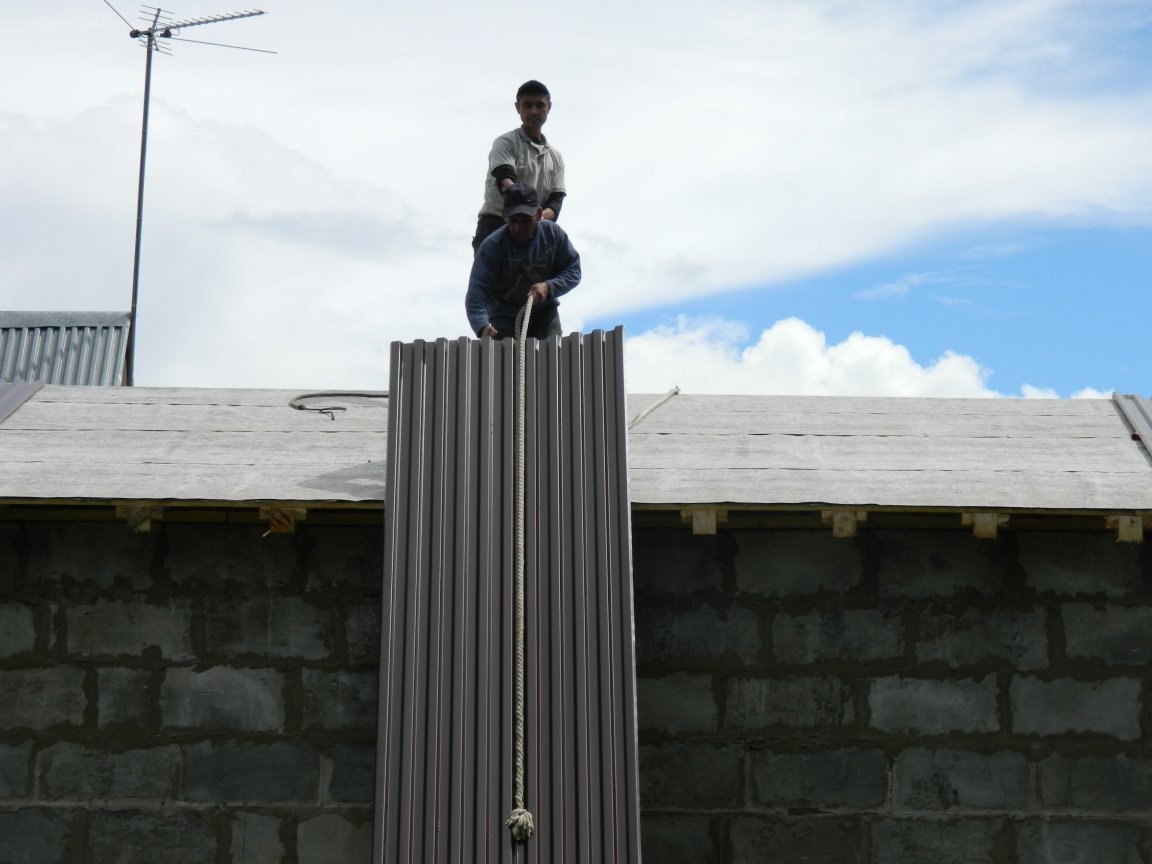
Ruberoid is shot to the crate by a stapler. Two layers were laid: along and across the roof slopes.

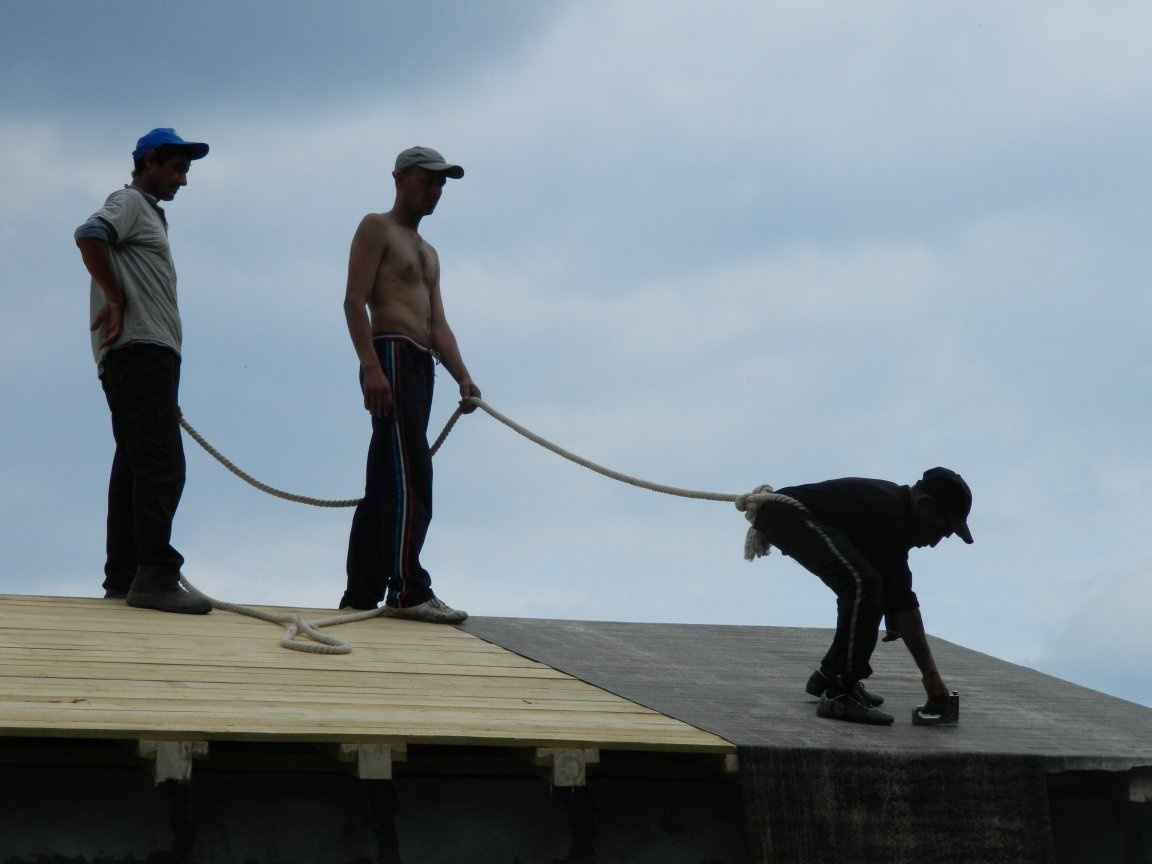
Further on the roof was laid professional sheet # 21 (equal wave) color 8017 (brown) 3000 mm long with a working width of 1050 mm. It took 16 sheets (8 for each slope of the roof). For fastening the sheets, special roofing screws ø4.8x35 mm were required. The skate is fixed on roofing screws ø4.8x70 mm.

In black we have a built garage.

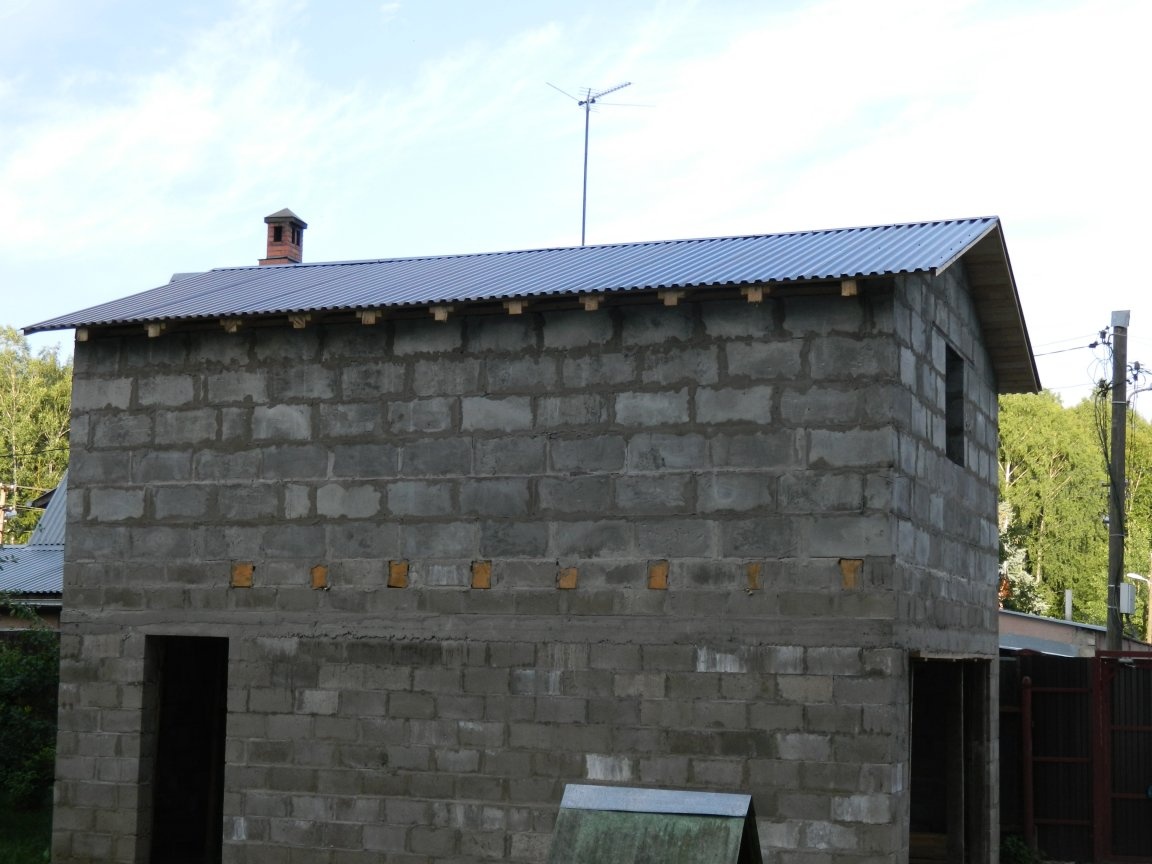
It remains a little: to plaster the walls inside and out, lay out the tiles on the garage floor, finish the blind area, put the gate and door, order and put up the window, make the stairs to the second floor and, most importantly, go into the second floor.

I spent about 270,000 rubles in money. The most basic price fell on the blocks, their delivery and on hired labor.

My advice: draw everything (block to block) on paper, estimate your strength, that is, what you can, do it yourself (do not hire workers). Hire only for heavy work - knead concrete, lay blocks, etc.
9.8
8.5
8.8

Add a comment

    • smilesmilesxaxaokdontknowyahoonea
      bossscratchfoolyesyes-yesaggressivesecret
      sorrydancedance2dance3pardonhelpdrinks
      stopfriendsgoodgoodgoodwhistleswoontongue
      smokeclappingcraydeclarederisivedon-t_mentiondownload
      heatirefullaugh1mdameetingmoskingnegative
      not_ipopcornpunishreadscarescaressearch
      tauntthank_youthisto_clueumnikacuteagree
      badbeeeblack_eyeblum3blushboastboredom
      censoredpleasantrysecret2threatenvictoryyusun_bespectacled
      shokrespektlolprevedwelcomekrutoyya_za
      ya_dobryihelperne_huliganne_othodifludbanclose
11 comments
the foundation, as you advised, is made of 12 fittings and poured 100 mm


When did I advise pouring the Foundation on 100 mm ???? !!!!
Let's understand the concepts:
1. There is a concept "base plate". Here it is quite enough of such a thickness with twelve-armature (below !!!) so that, lying on the ground, it can withstand the weight of a loaded truck !!!
But...
As a foundation, it can never and never under any circumstances act !!!! You can use it only on a strip foundation along the perimeter, deepened to a depth below the level of soil freezing in a given area !!! ... If your neighbor poured only such a slab, without foundation, then .....
(I already advised what to do with his head ....)))))). Because, it is OBVIOUSLY that it cannot sustain the weight of the building !!! The walls will crack, in the first winter, as soon as the soil under it swells from freezing. (It is precisely to prevent this phenomenon that a recessed “tape” is poured around the perimeter !!!) .. As I understand it, this is exactly what he did (did not fill the “tape”), and this is exactly what happened to him. Now he needs not to block the roof, but to demolish the garage! Because, with each freezing-freezing cycle, there will be new cracks and subsidence, the roofs will move apart and the roof will crack. As an option, it is possible (possibly !!!) to help fill piles under the foundation around the perimeter, buried below the freezing level. But not a fact that will help completely !!!
2. And there is a concept "Foundation type" floating plate ". And these are completely different concepts. As I understand it, this is your case! It is filled with a continuous plate and does not go deep !!! For this type of foundation, the thickness of the slab is desirable, 30 cm and above! Because this plate should “float” when freezing soil under it, while maintaining the weight of the building on it !! ! The fact that you have the minimum permissible thickness for your light (relatively) structure! (This is completely “not for ages.” Moreover, with the voiced error during reinforcement))))). When I advised the fittings thinner, I did not know that you would lift it. And below, I repeat, even a dozen would give the same effect!
Let's hope that the soils in your area do not differ in high humidity, and winters do not differ in sharp temperature drops from plus to minus! Enough then!
Sorry, but do not advise your neighbor to add ruberoid, but add brains!)))). Let him try to shed water through the roofing material!)))). Leaking ????))))
No, it’s not leaking! And through the metal sheet?))))
I mean, if there is a leak in the roof, then you need to look for holes, and, MOST IMPORTANT, the reason for their appearance !!!
The function of roofing material is not to protect against rain and melt water! The roof protects against this !!! Ruberoid is needed for the sole purpose - to protect the tree from condensation, which must take place under the metal roof !!!
And if rain water gets under the roof, then this is a violation of the installation technology (for example, poor quality sealing washers under the screws, the dependence of the overlap on the angle of the roof and so on is not maintained),
. So, the garage (it costs 4 years) has cracked (the foundation, as you advised, is made of 12 fittings and is poured 100 mm).

This is the reason that the floor is "playing.")))))
I don’t know what you meant by “breathing”, but if it means that it vibrates, “plays” and so on, then I’m sure that’s not the point !!! Perhaps technology is broken simply. (For example, having laid a tree that was not dried, he loosely fixed the beams to the walls (did not hammer the pins). Perhaps when laying the subfloor, he neglected the difference in the level of the beams (the boards simply “pulled”, deciding that “half a centimeter is rubbish ". Maybe he hit the rough board with one nail and not two. In all these cases, the floor will lose its rigidity after the wood dries! (And the cross section of the beams will not save if it is large. Anyway, there will be creaks and vibrations). the rigidity of the foundation may be insufficient, and, as a consequence, uneven shrinkage n - the overlays will also begin to “play”!
But such a section through such a distance behind the eyes is enough for a hard overlap.
Fittings should be AS BELOW !!!! Raising it in the middle of the stove, you thereby reduced its benefit by half, if not more !!!
Concrete is not compressible, but does not work well for breaking! So that he doesn’t burst where the forces try to stretch him, and reinforcement is needed !!! Only in this is its function !!! It is for this reason that the fittings are ALWAYS placed on the side opposite to the applied load!
If the load is on top (machine weight), then it is the lower part of the plate that will stretch when bending (read, burst).
In short, it’s good that you put a thick reinforcement - with such an error, it will work no better than a dozen laid down. But that’s enough.
Author
The fittings lie approximately in the center of the plate. Our soils are very poor - peaty. Sometimes, even under the weight of the car, the old parking lot sank. Although there were plates of 100x500x1000 mm on a sand cushion of approximately 150 mm. Therefore, I decided to make it, although more expensive, but to stand "for centuries".
Author
The neighbor and the rafters collected from the same boards 50x200! And the roof is covered with roofing material in one layer and profiled sheet. So, the garage (it costs 4 years) has cracked (the foundation, as you advised, is made of 12 fittings and is poured 100 mm). Yes, and he went over the roof, because there were leaks (added another layer of roofing material).
Author
Between the rafters, and so is the insulation. The neighbor who made a similar garage just put 4 m on the span !!! a board 50x200 mm through 50 cm. So his floor "breathes"!
Author
Yes, I made a reservation. The beam lies on the "edge" (if you can call the sides of the beam), i.e. on the side of 150 mm.
from the beam 100x100x6000 mm, the remaining rafters are installed

Lord, who advised you so, then !!!! It was necessary to take 50x200 - it would be
1. At the same price.
2. Four times stronger!
3. Then the inter-rafter space would be laid with a heater and you would get a fully insulated residential attic!
There was no need to sew up the board either - just a board of OSB. (She's easier!). If you put roofing material, then right - the crate is not needed! ..
..But why in two layers ??? Enough one, laid across the ramp with flaps. The second layer already really does not give anything !!!

P.S. Sorry for the criticism. Work done well. But in places excessively expensive it turned out without much benefit from this. And in the case of a tree - and a little to the detriment.))))
Since the span is large enough, we used a beam of 150x200x5000 mm, lying on the wide side

You didn’t make a mistake ??? ... If it really “lies” and not “costs” - then this is a gross mistake! And in general, a five-meter aperture is not a lot, therefore, after 50 cm it would be nice to put a bar 50x200. Of course, on the edge.
You took such a fat one for nothing. It is precisely its “height” that provides it with a mildness, forming a stiffener. In my house there were seven meter spans, so I put a 100x200 bar over 60 cm. (This is VERY STRONG!)))). And, if we add thickness (not height), then we won’t get anything plus - its own weight will negate its added strength. Strength is added only by the "rib", ie, the height of the beams. Simply put, ceilings from beams 50x200 lying after 50 cm are significantly stronger than ceilings from beams 100x200 lying across a meter!
but I hope you made a mistake, and 200 is, nevertheless, the height of the ceiling, and not the width of the beams! Otherwise, due to their insignificance, these beams will be equated with beams 150x100 laid with the same pitch, standing "on the edge".
He started writing even under the first article (about the foundation), but did not save the comment. I will continue here.
1. According to the foundation. Reinforcement is redundant! Are you going to make a basement under it then? ... Judging by the fact that the openings were not left, no! Then why such strength ??? I understand if this plate should hang in the air! But she lies on the ground! And its thickness is large. (This is correct when arranging a "floating plate" foundation). In order for heavy trucks to ride from above, you would have enough twelve-armature fittings with a step of 30 cm.
This is not to say a mistake, of course. You never know ... Suddenly, you have your own T-72 tank, and you are preparing a garage for it ...)))
There is a small mistake. Reinforcement too high. Judging by the fact that there are bricks under it (am I not mistaken?), It is raised seven centimeters from the bottom. And you could raise 2 cm from the waterproofing - it would be much stronger!
... But you certainly do not need to be stronger, so it’s so good.))). But it would be much cheaper with the same result.)))

We advise you to read:

Hand it for the smartphone ...