

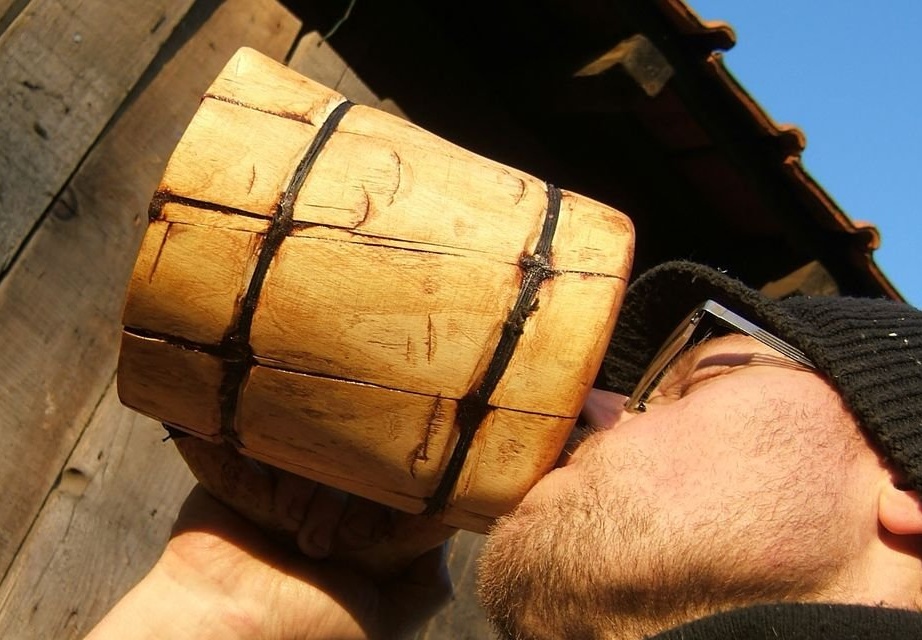

The author is very fond of beer, as well as wood, he likes to be on the street. So I decided to combine everything I like in a nice, old Viking style beer mug.
We can say that the mug was made in field conditions.
His goal was not to use power tools at all (in order to complicate his task a bit). Therefore, it took him much more time than he would spend with the right equipment. However, the process itself turned out to be one of the most interesting among its many homemade!
Put all your classic toolboxes aside, because you won't need them today.
Anything you need, - ax and knife. Good hatchet and good knife.
Back to the basics.
Several readers asked the author where he found such a wonderful hatchet. He replied:
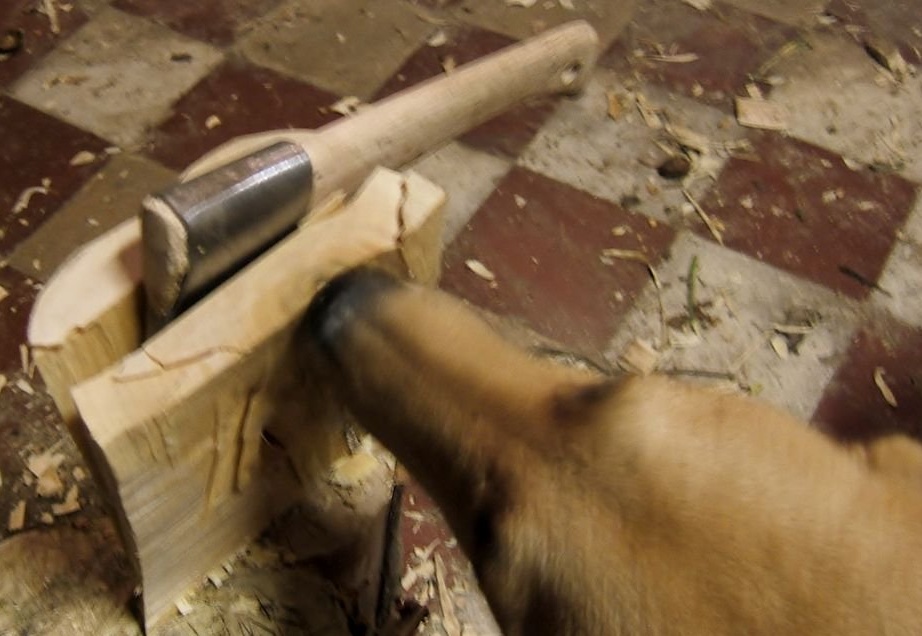
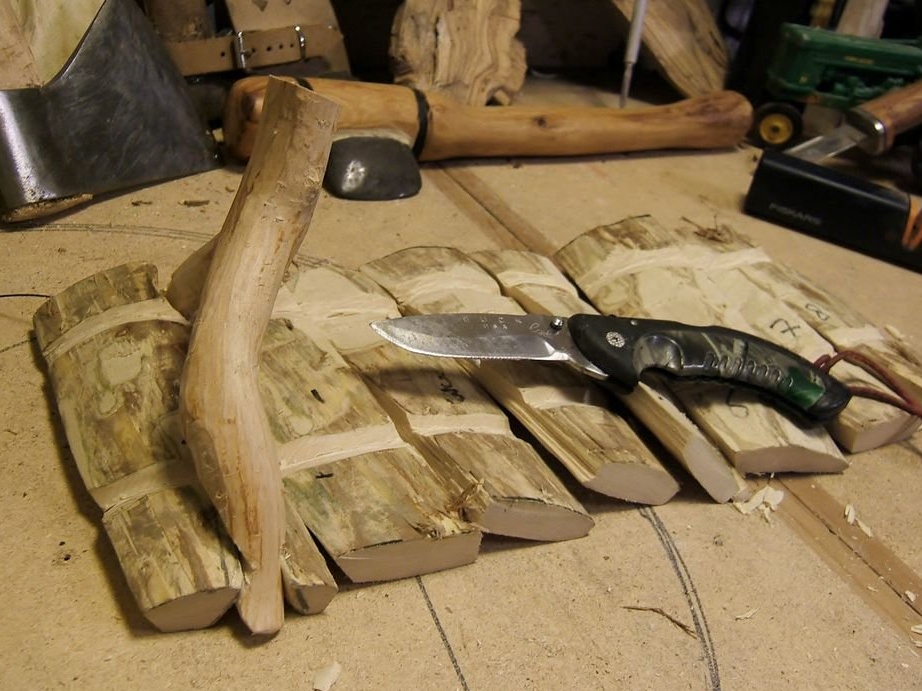
Step 1: Cut the deck
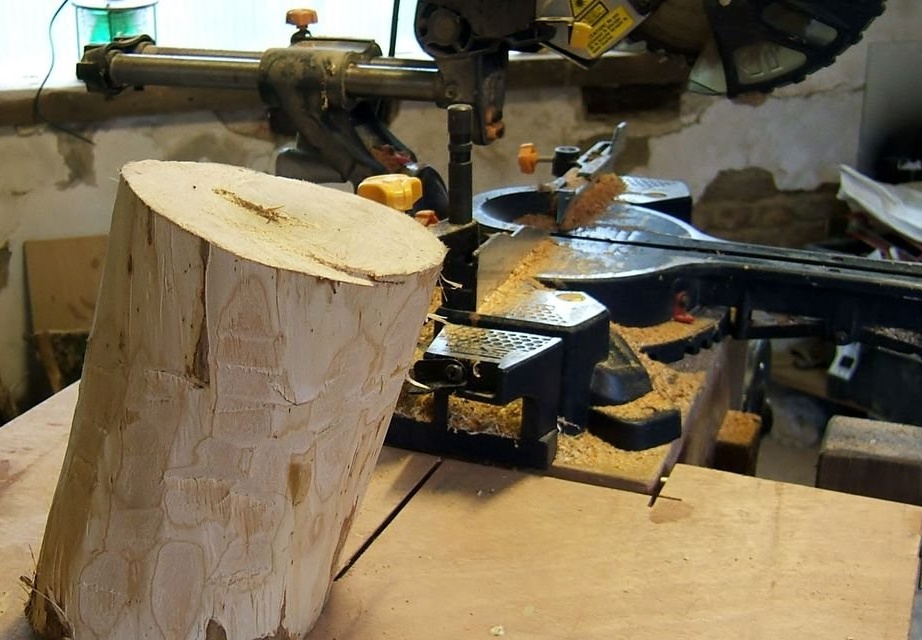
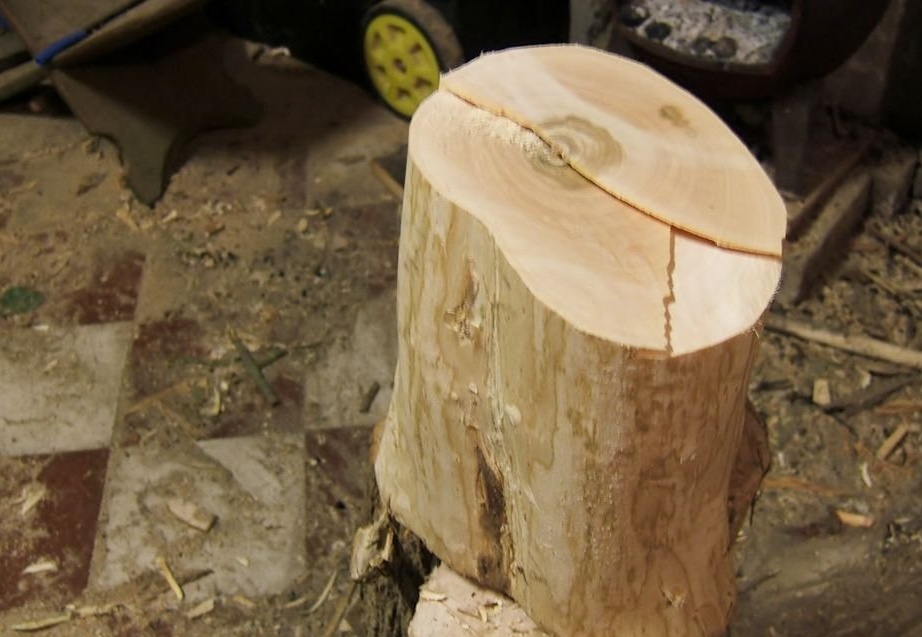
First you need to find some wood.
Choose straight-layered types of wood. The author had a piece of elderberry tree (not because it is a special grade for such mugs, but simply because I had a suitable piece lying around). Any straight or slant wood will do.
You need a deck the diameter of the size of your hand, so do not choose too small logs.
Cut down a suitable trunk with an hatchet (or cheat, like an author, use a saw - the first penalty point)
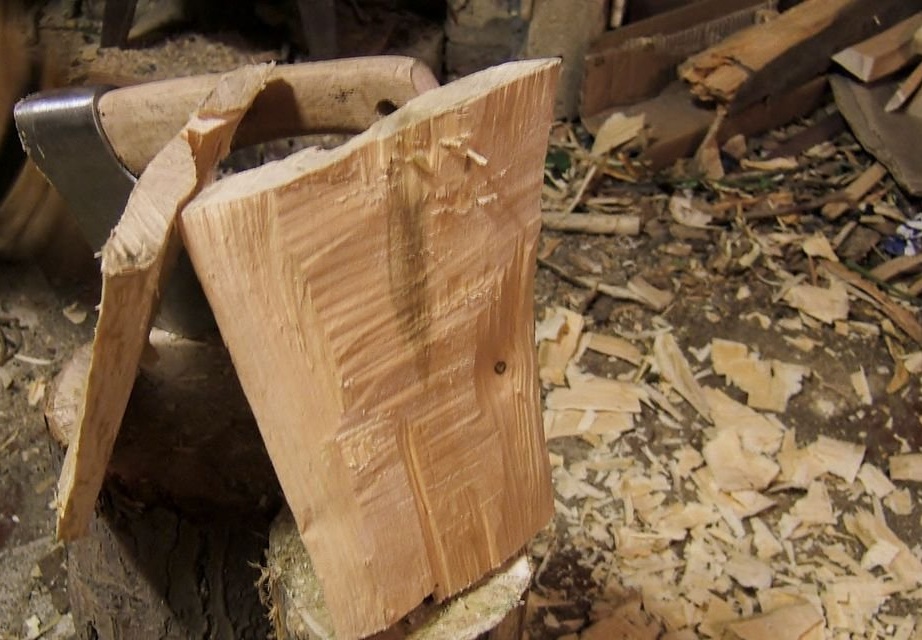
Step 2: Separate It
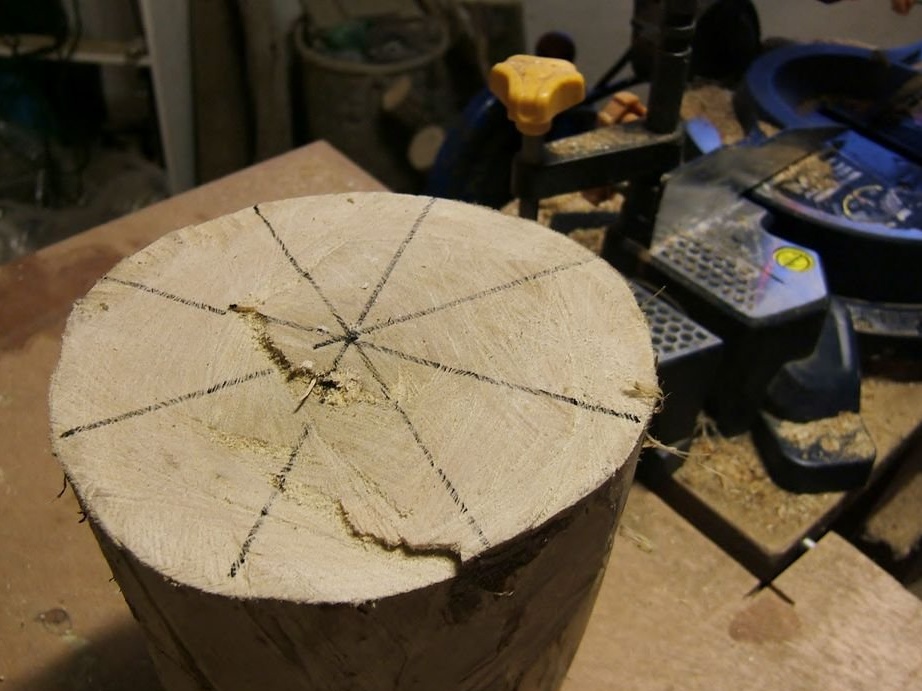
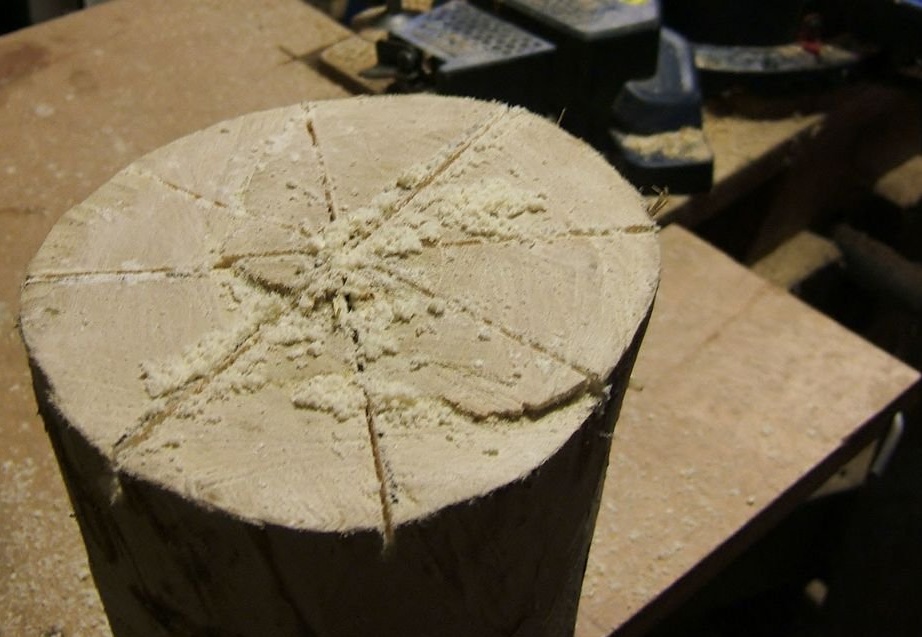
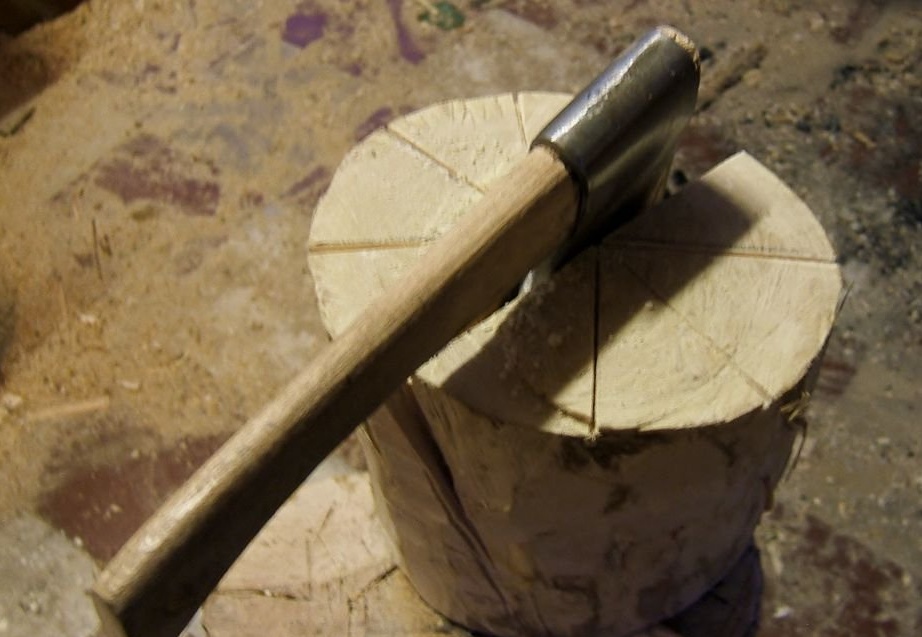

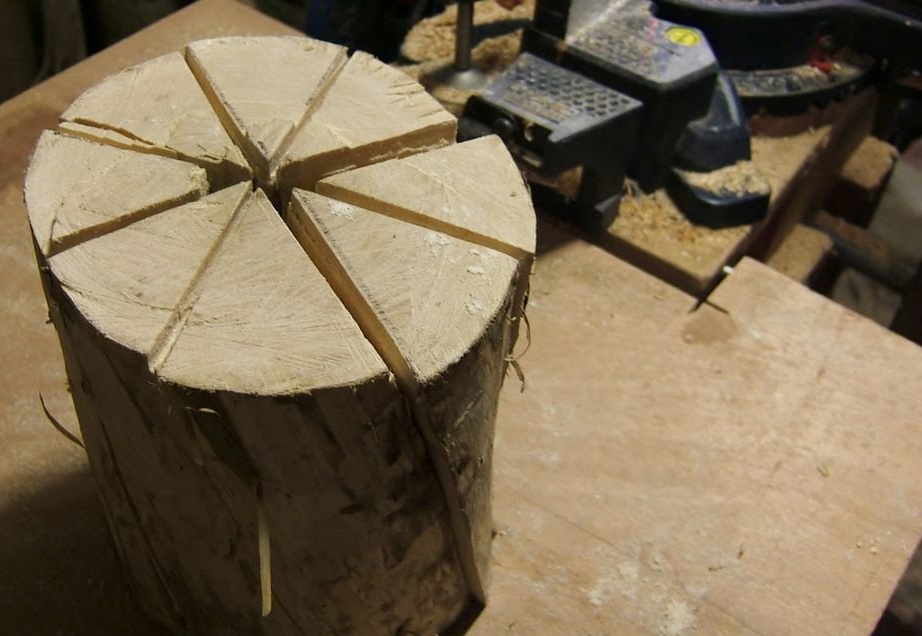
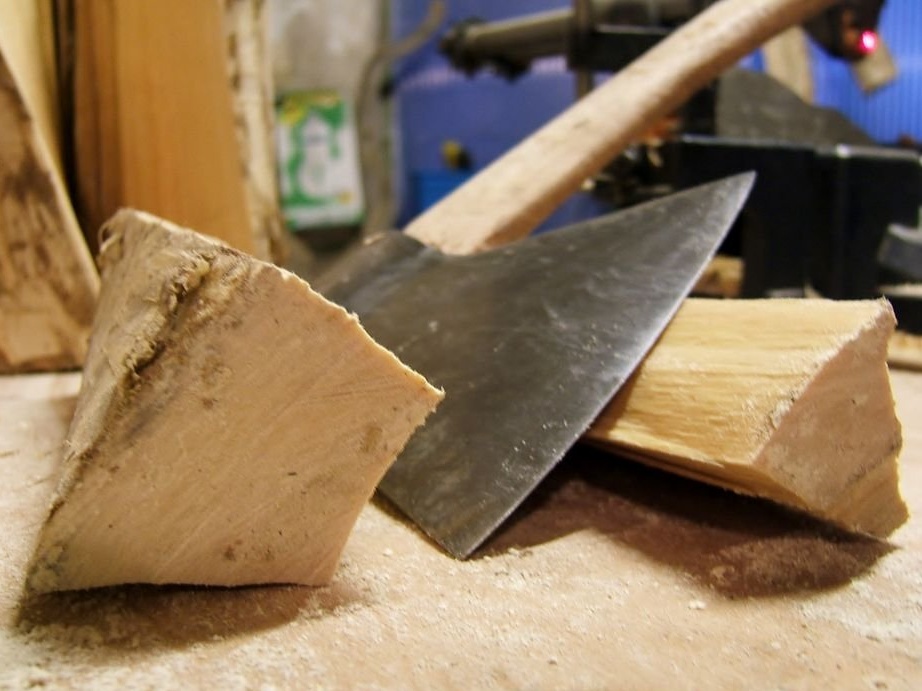
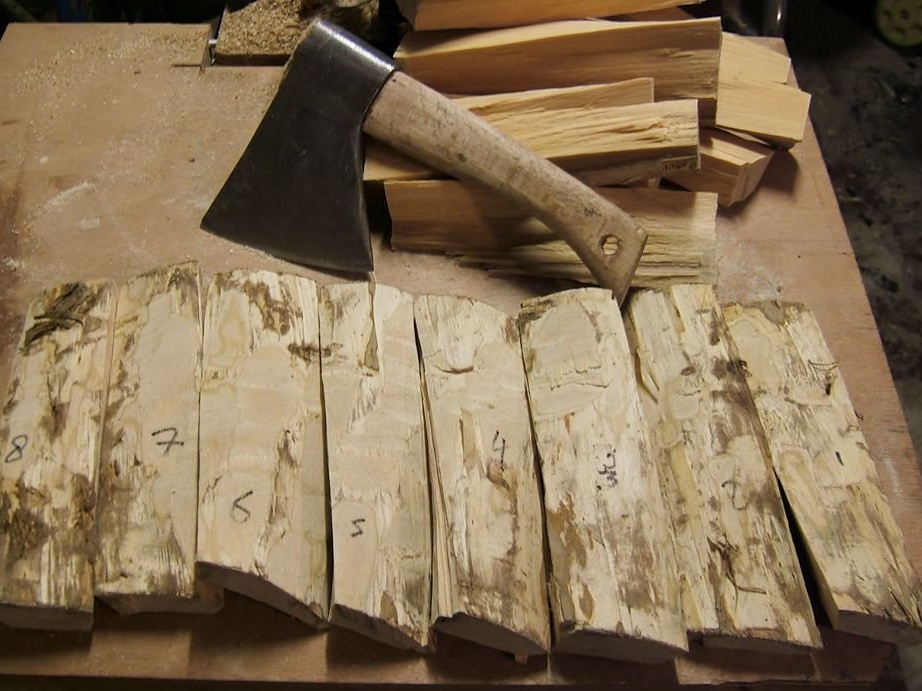
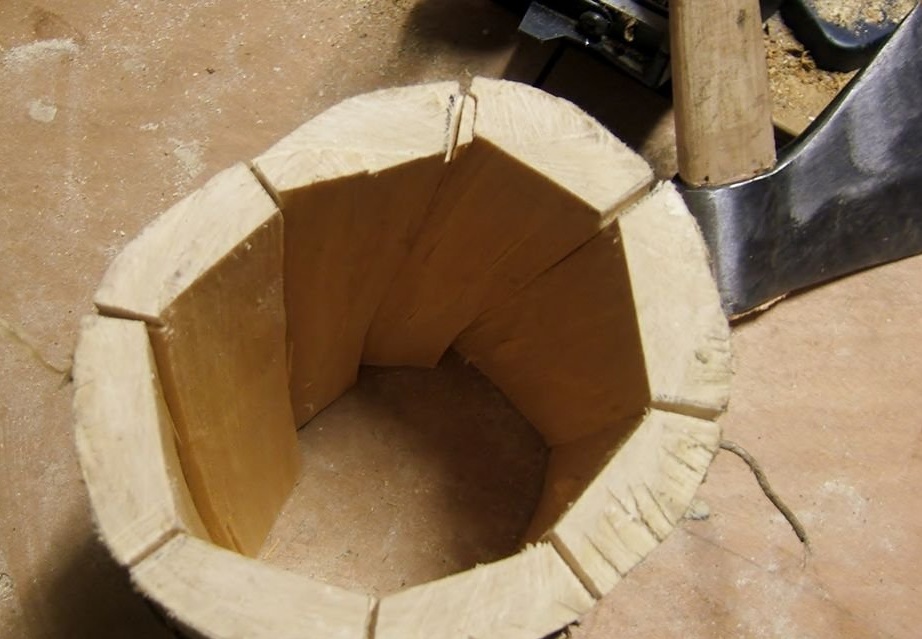
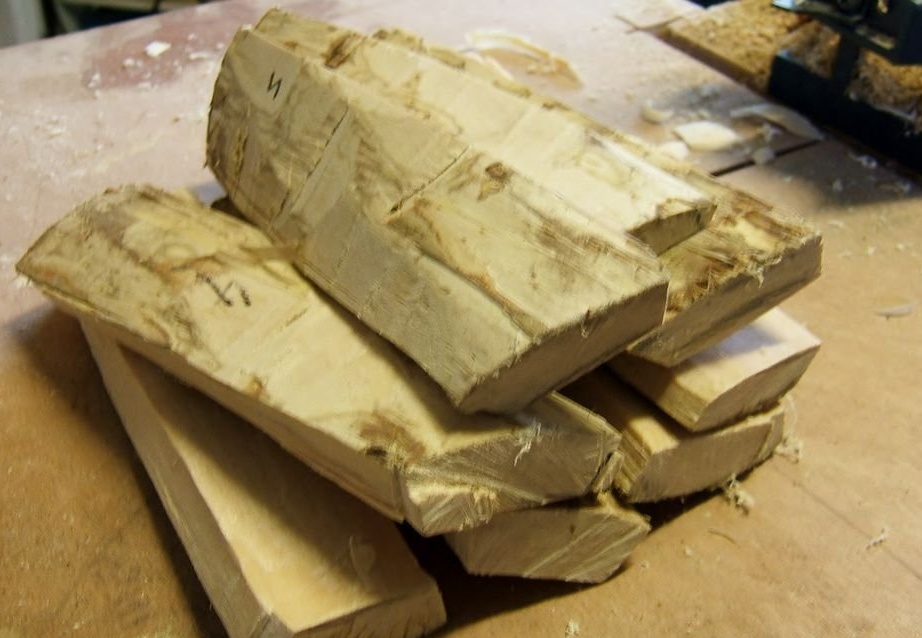
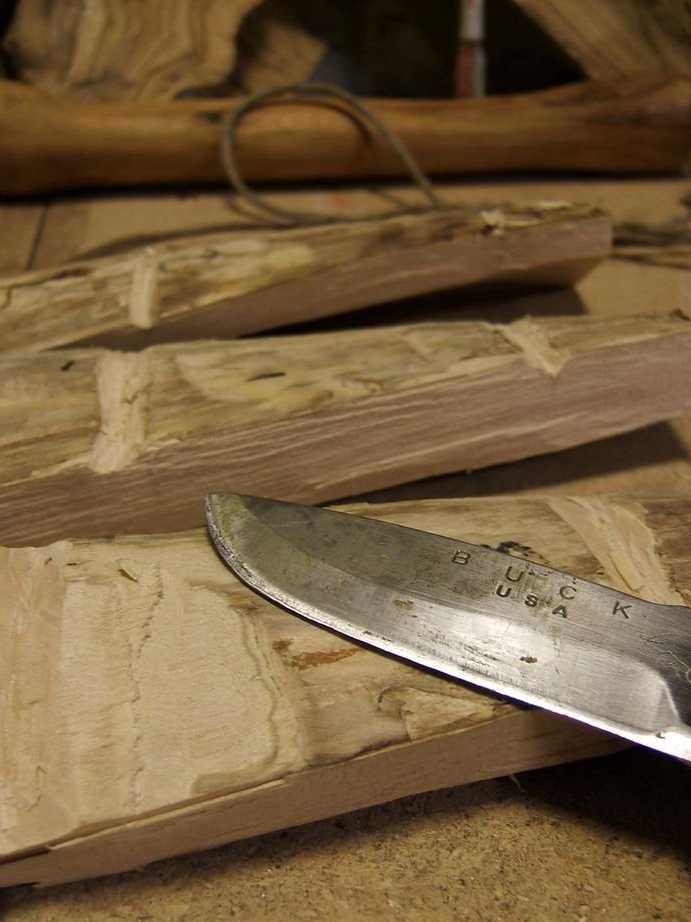
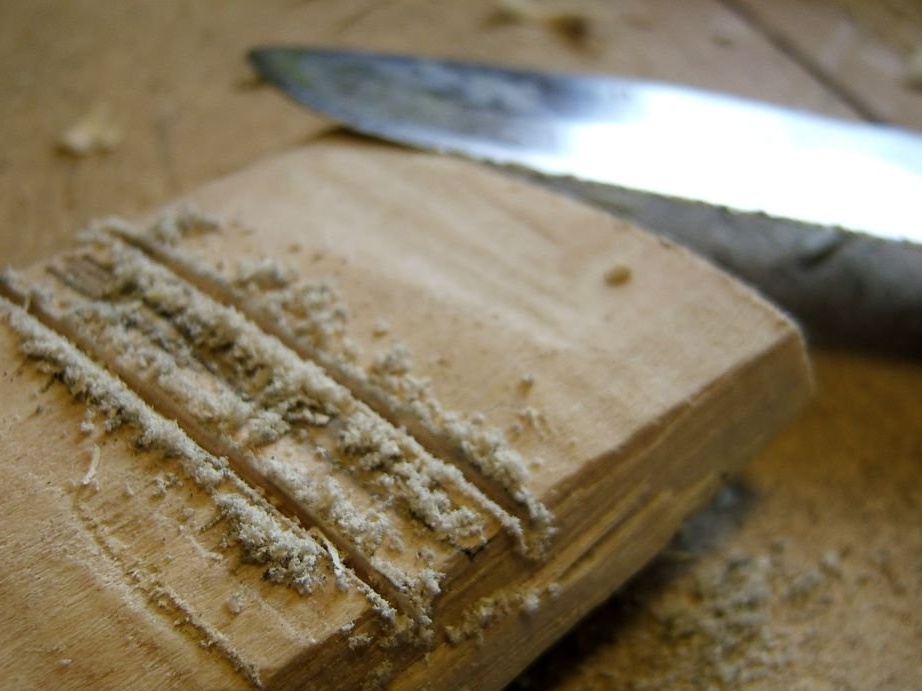
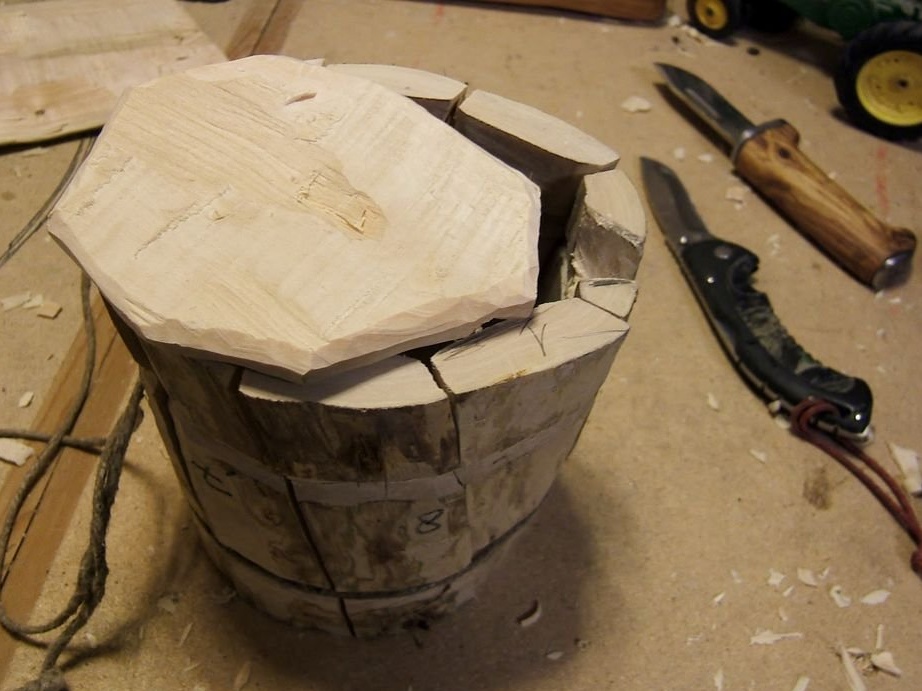
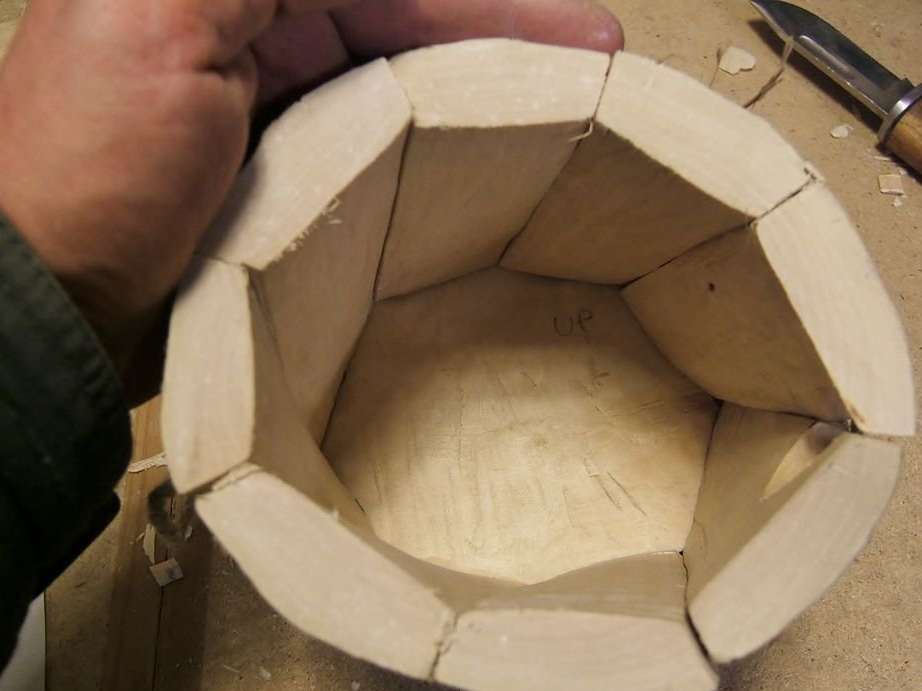
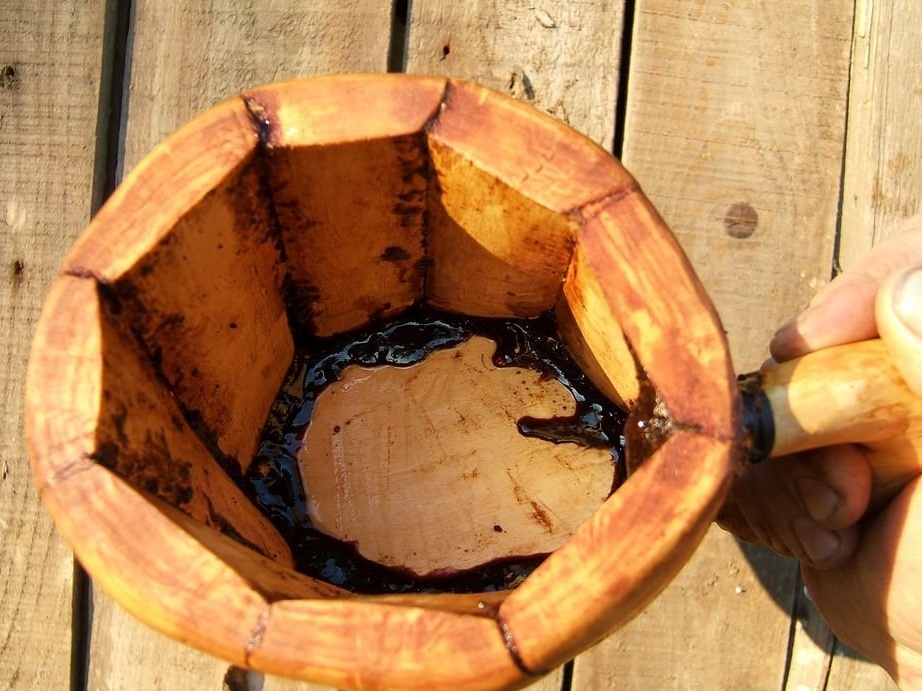
Now you need to make a notch inside. Mark the cut lines at the top of the deck (to get the same parts) and divide it with an hatchet into 8 parts. Now you understand why a straight-layered tree is better?
When you have divided the deck into 8 parts, you need to cut off the central edge of these sectors, leaving about 15-20 mm (half an inch) from the side. Wood splits will be made along the fibers without chopping them. So we will achieve the most optimal contact between the fragments of the circle.
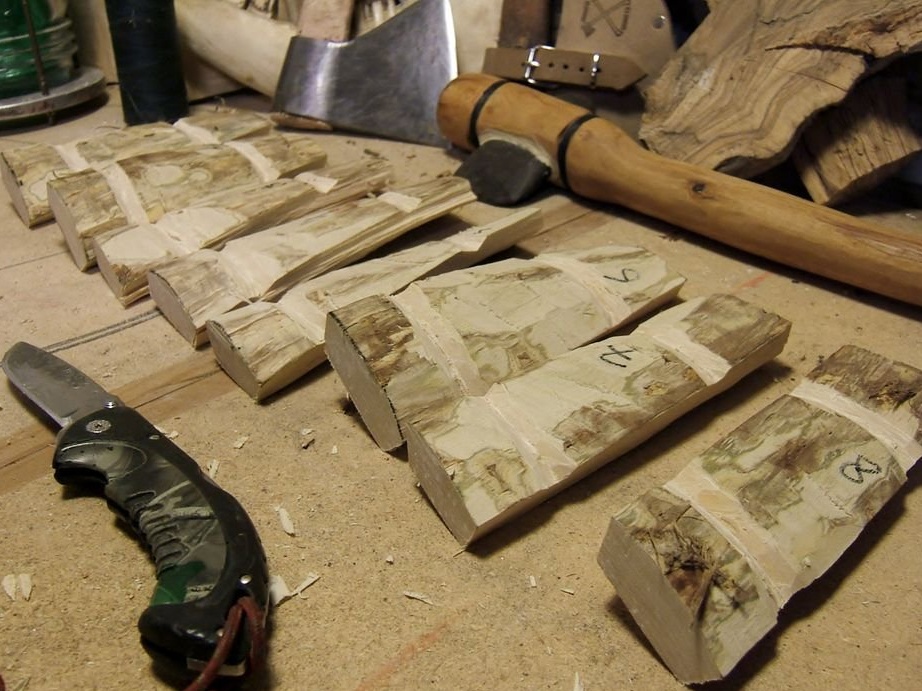
Let the tree dry in a well-ventilated area.
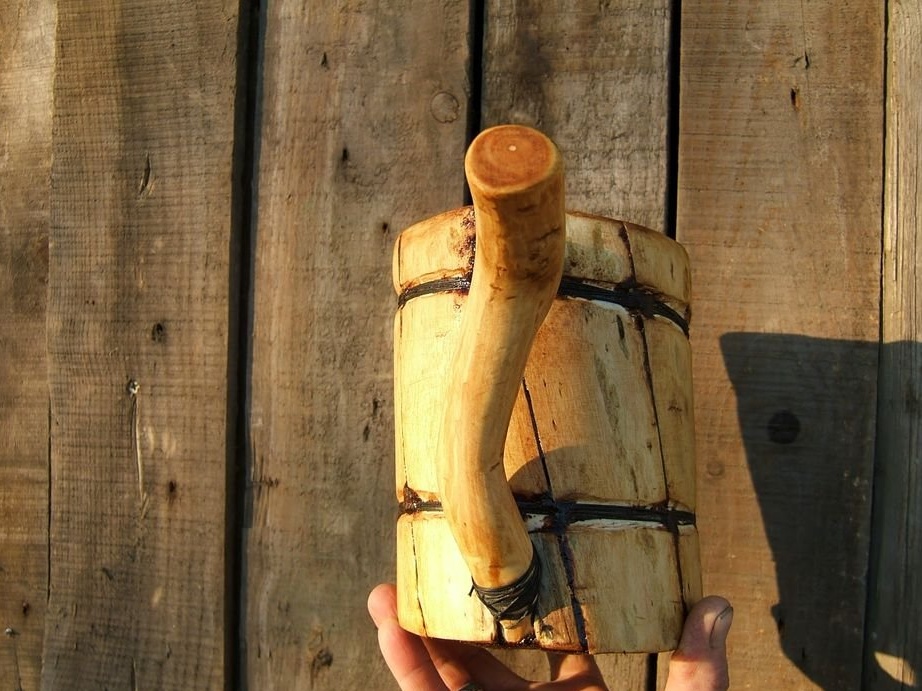
Step 3: pick up the handle
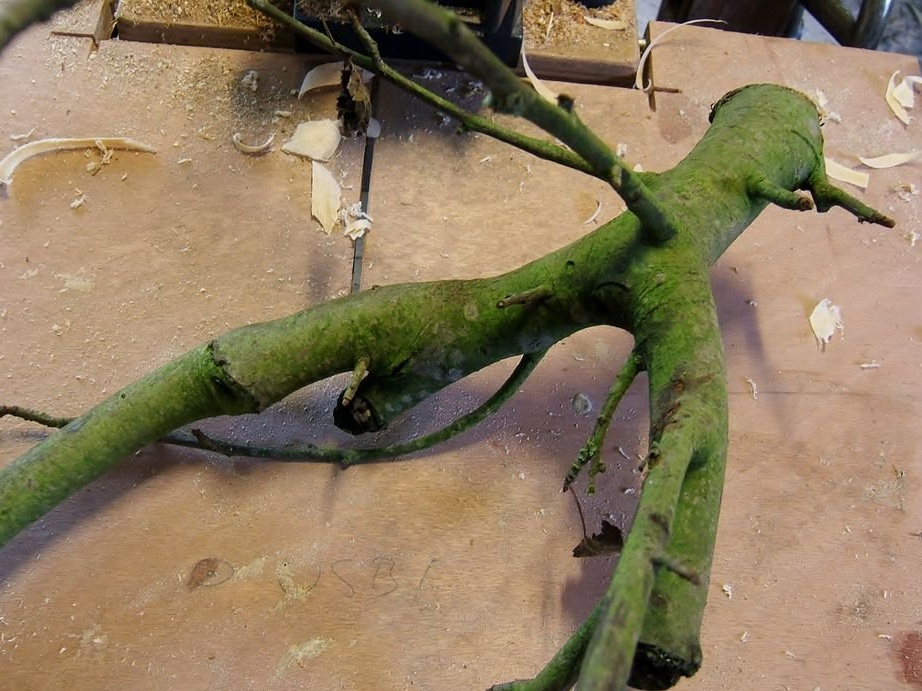

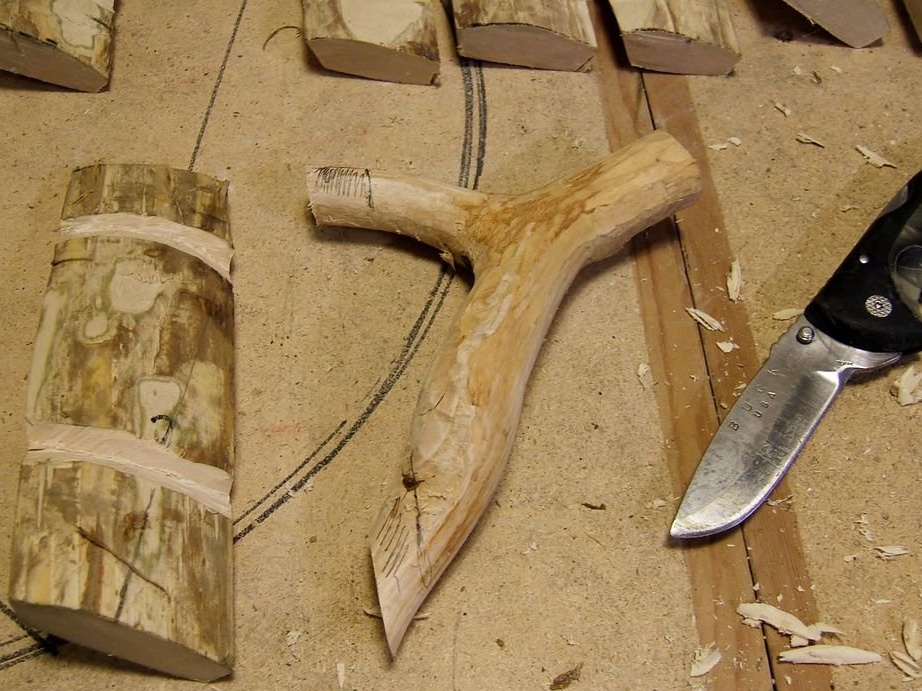
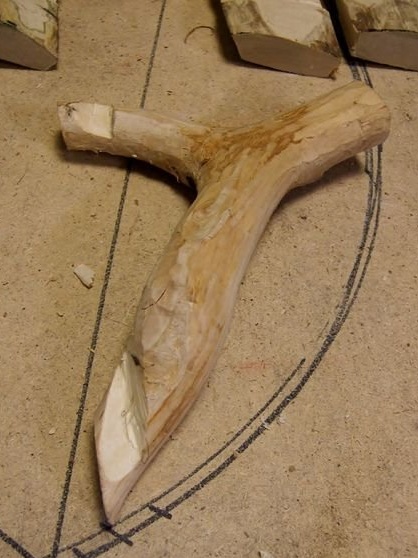
Your beer mug needs a good pen. Not just any, but a sturdy handle.You need to somehow hold all that amount of beer in your hand, right?
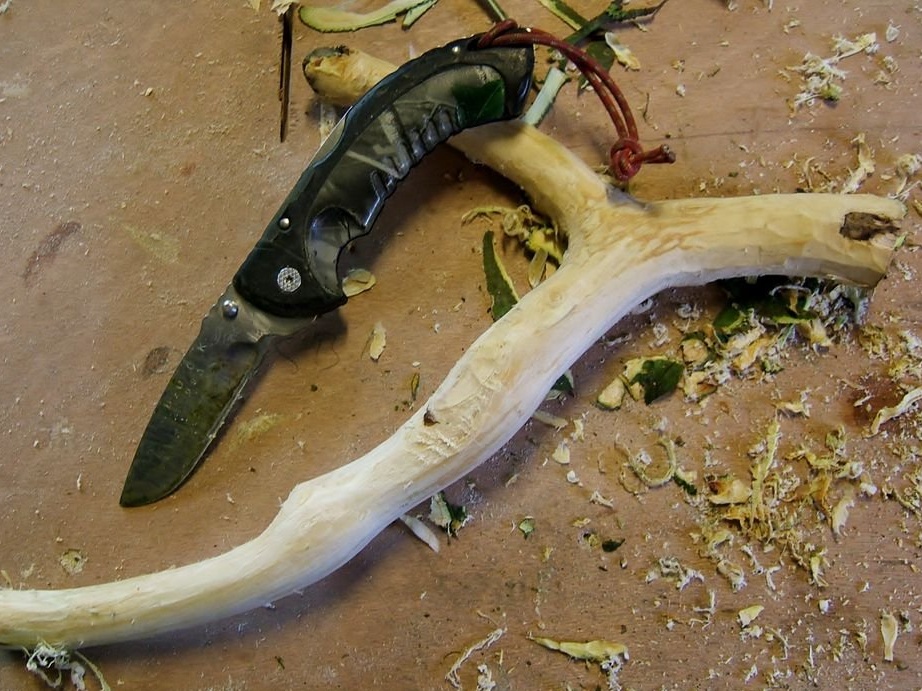
It is better to find a suitable shape from natural fork-like branches. Sand the surface and let the handle dry.
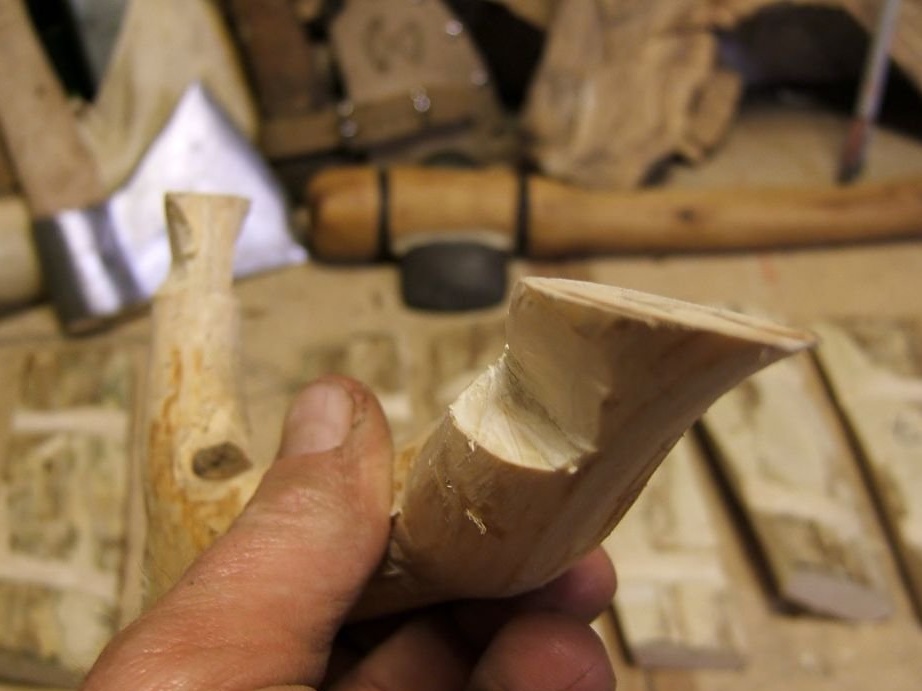
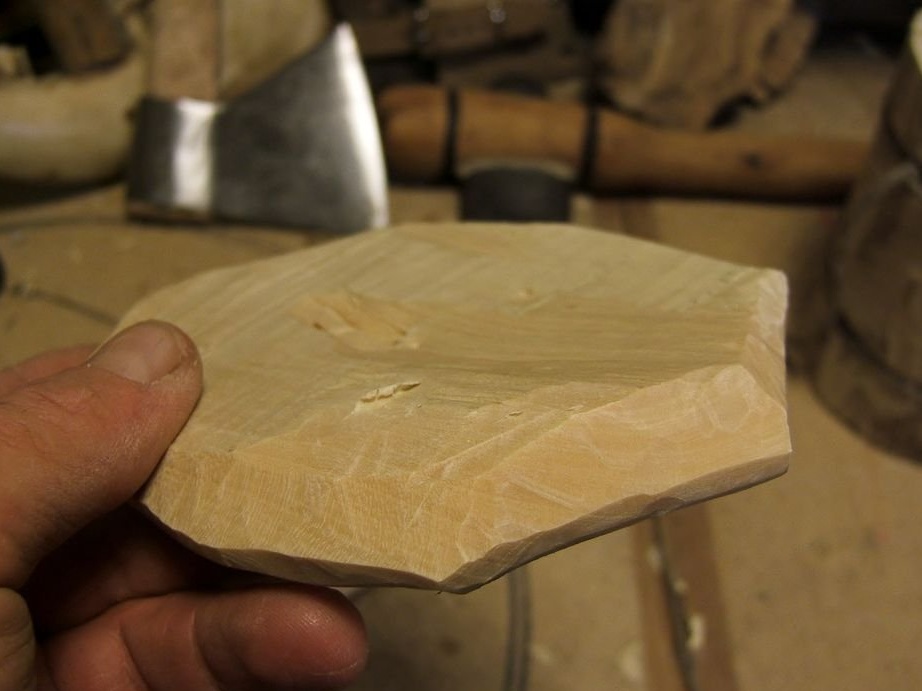
Step 4: Fine Work

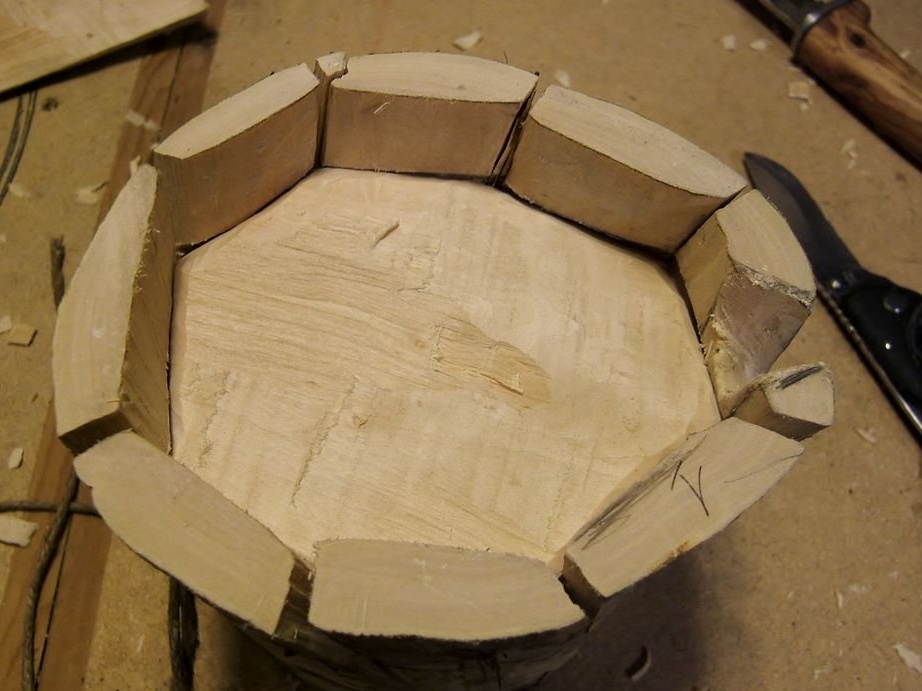
Once the wood has dried, re-assemble the mug. The goal is to get a relatively solid edge of the mug by cutting off the excess. Ax and knife, you don’t need anything else.
Step 5: make the bottom
Cut down a piece of the deck again, or swindle again.
Try to cut as even a bar as possible from this slice. The thickness should be a centimeter and a half. Cut the workpiece under the bottom and put to dry.
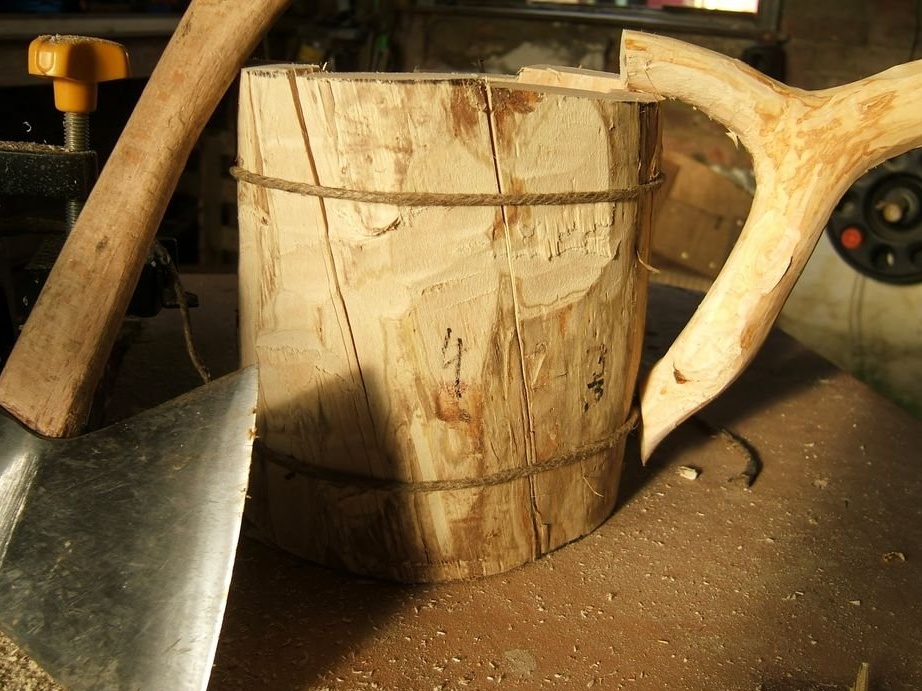
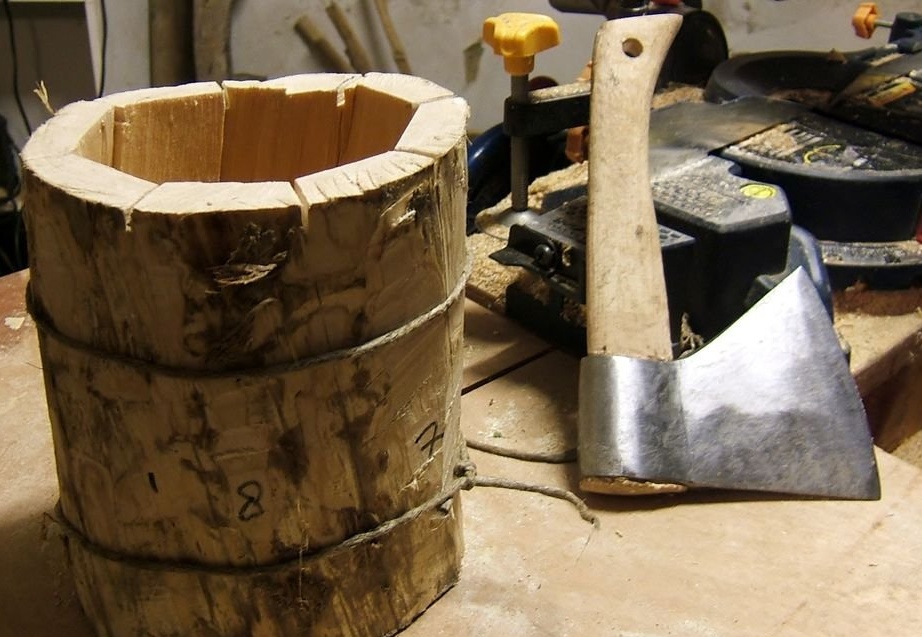
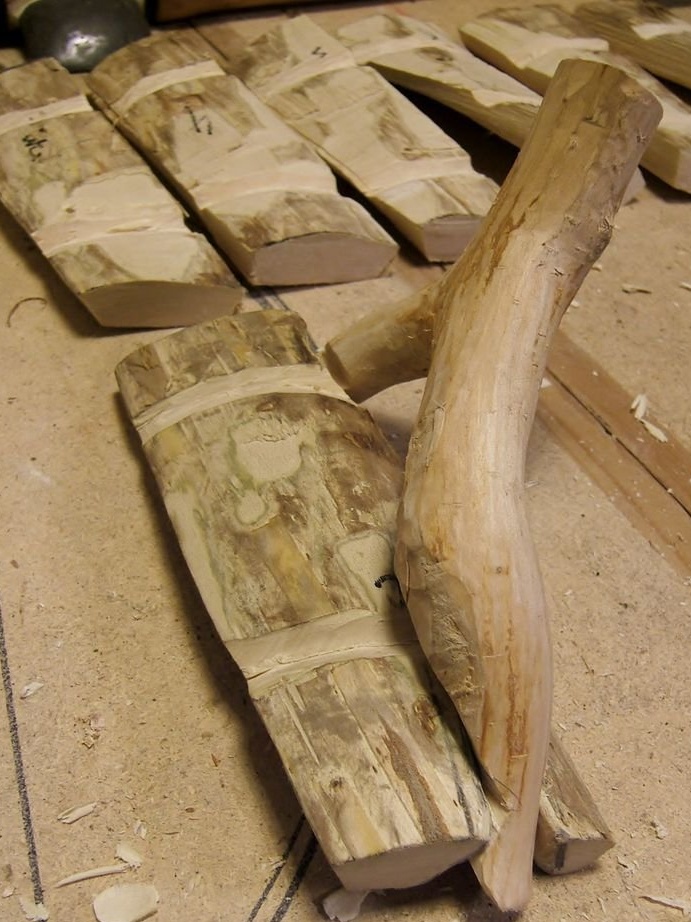
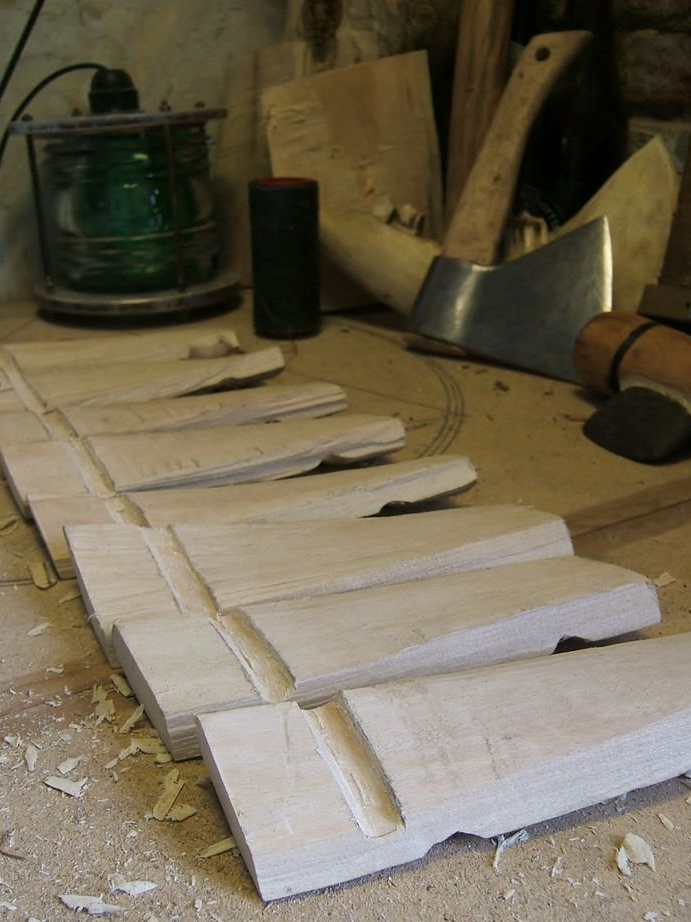
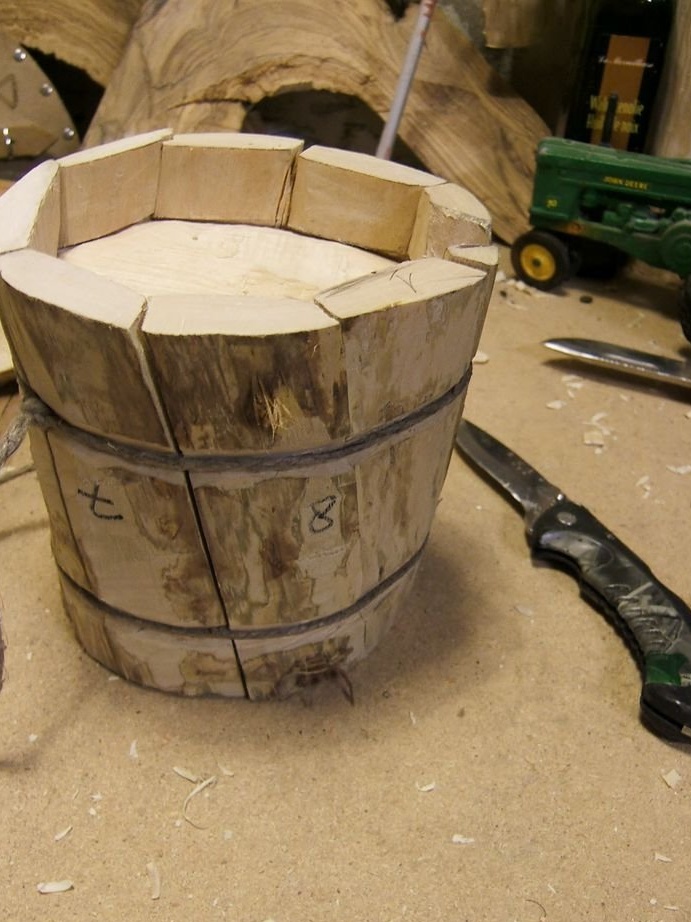
Step 6: External Furrows

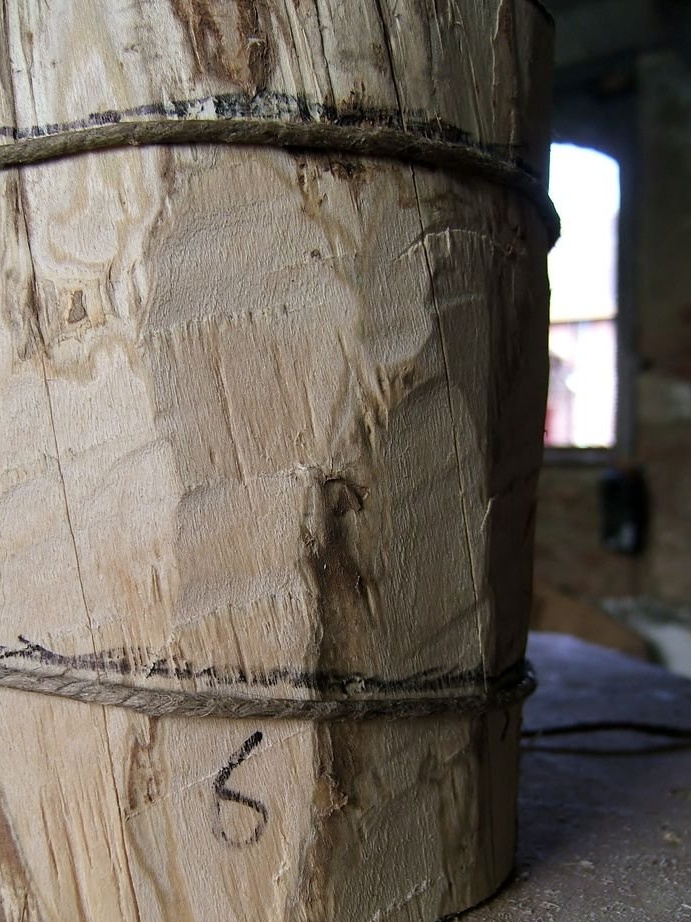
It is necessary to make furrows in a circle: two outside and one inside. External furrows will serve as a zone for screed, and the internal furrow is needed for fixing the bottom.
Reassemble the deck and mark the locations of future furrows. Start to cut.
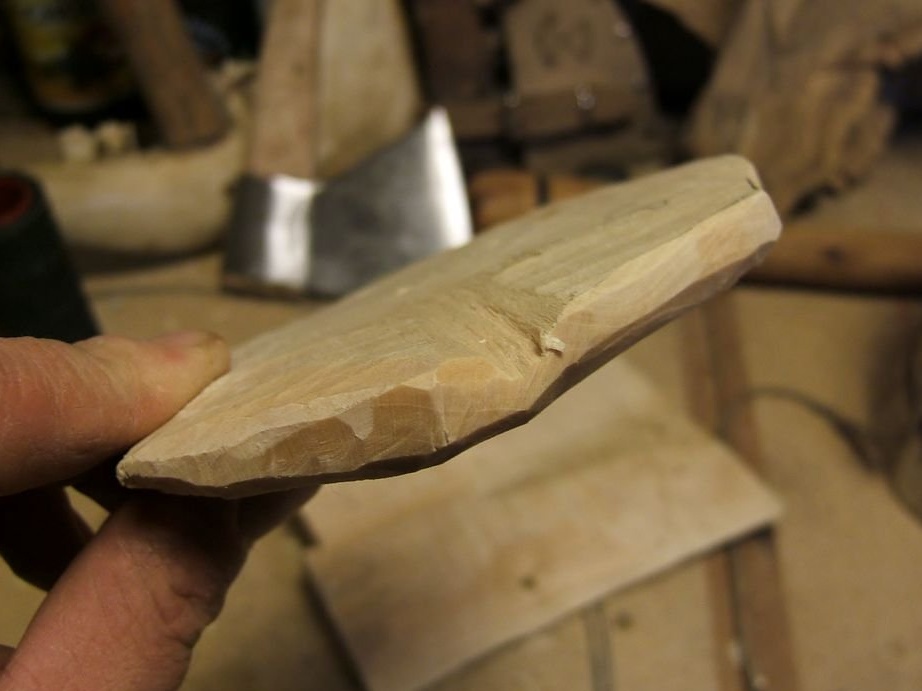
Step 7: shape the handle
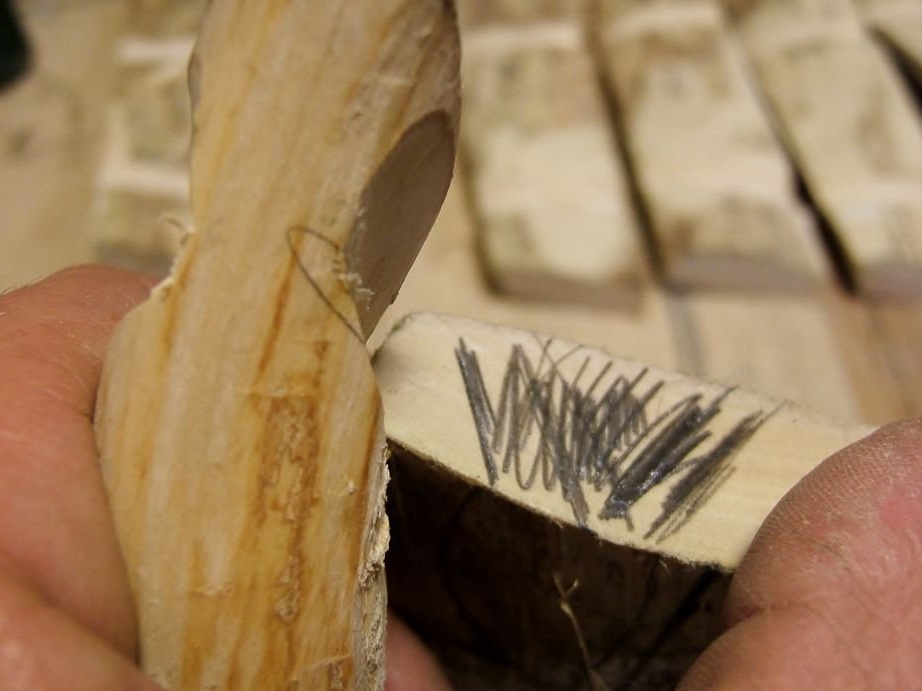

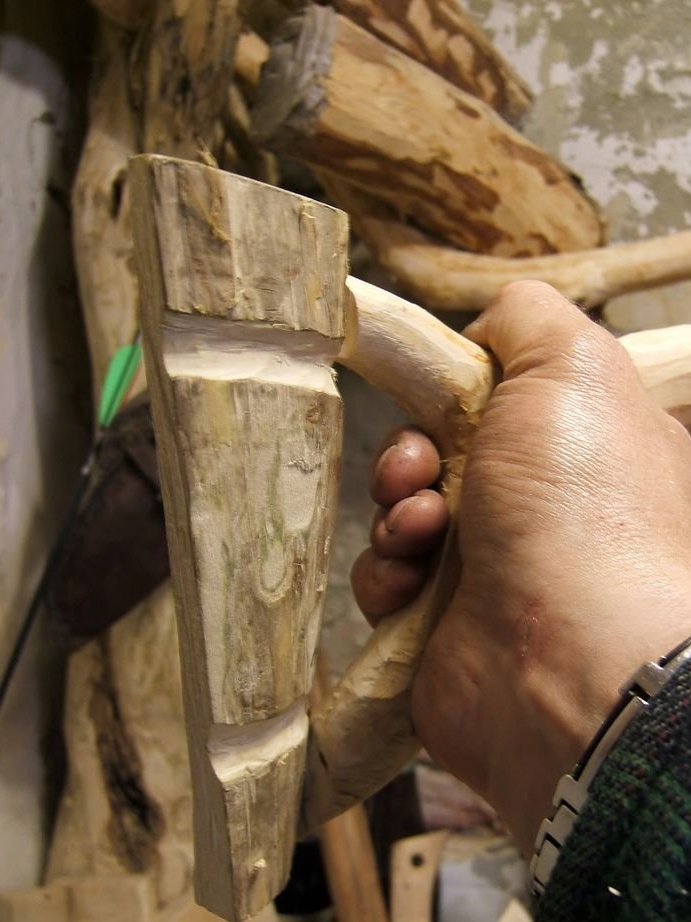
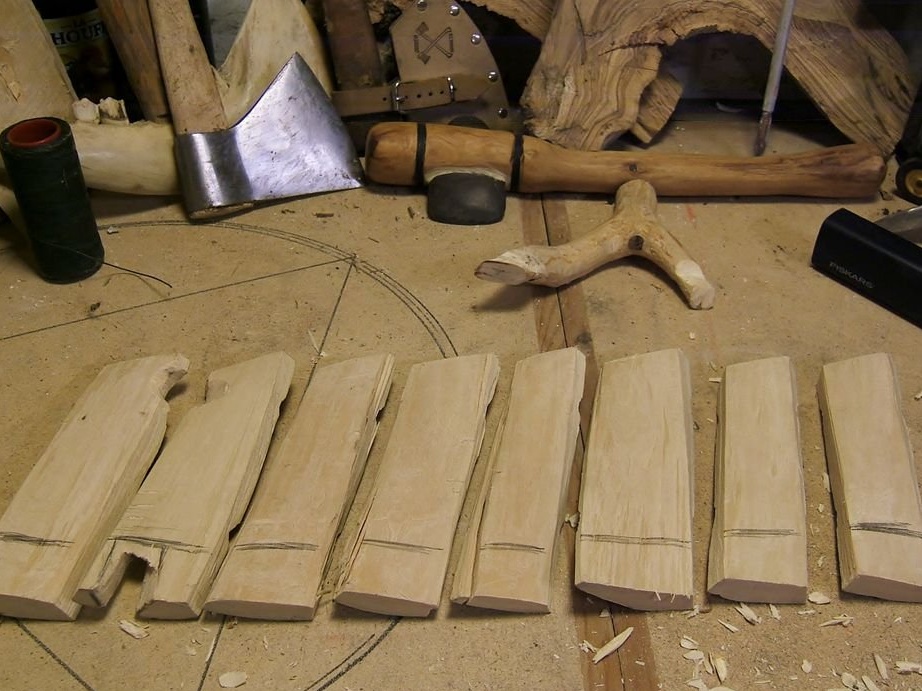
What is the strongest way to fasten wooden parts without glue and a nail? True, connecting “into a thorn”.
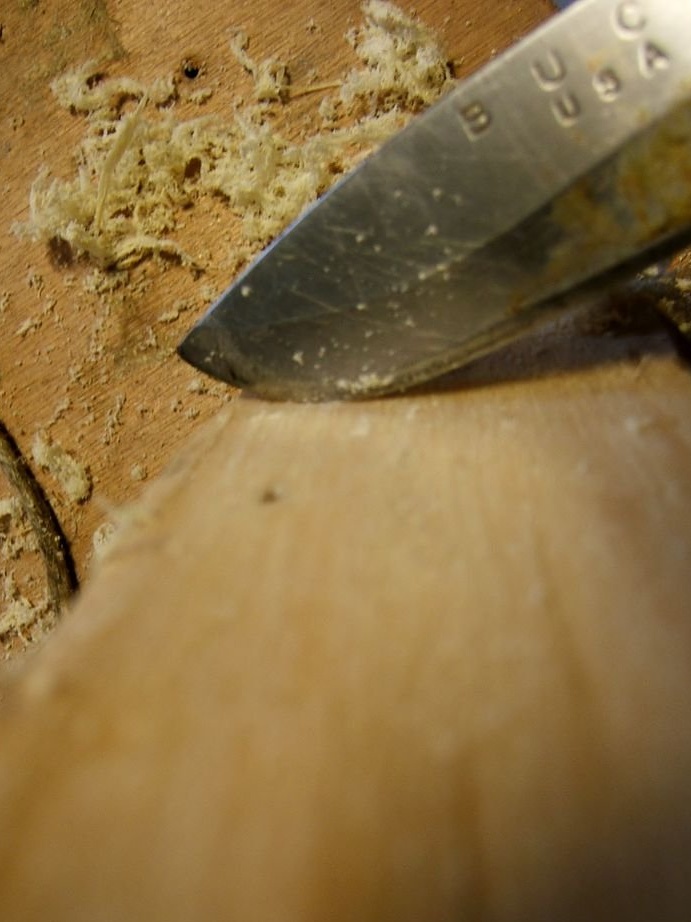
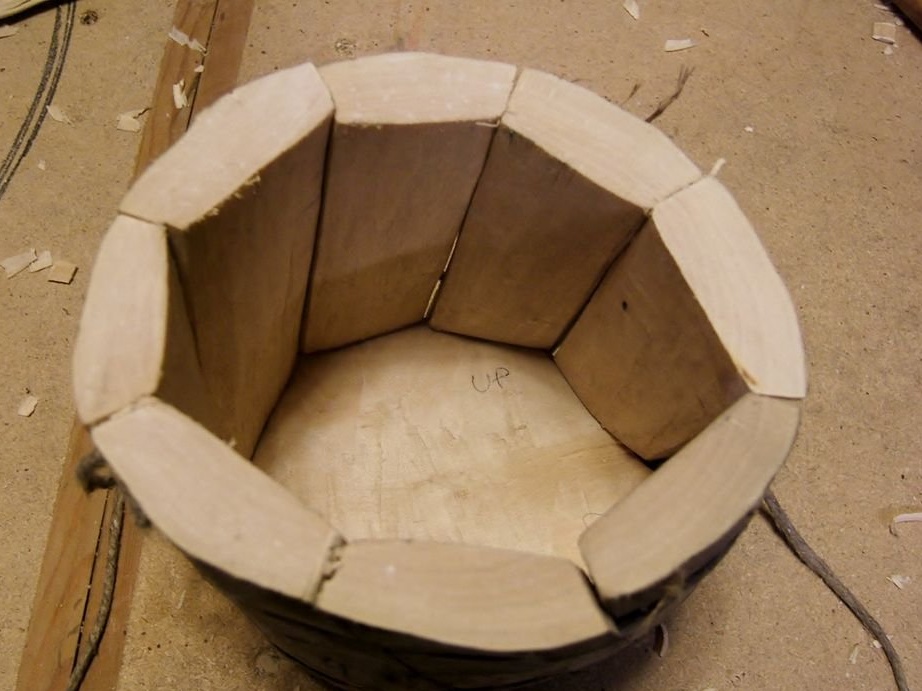
Step 8: We cut the inner furrow


The internal furrow will be much deeper than the external.
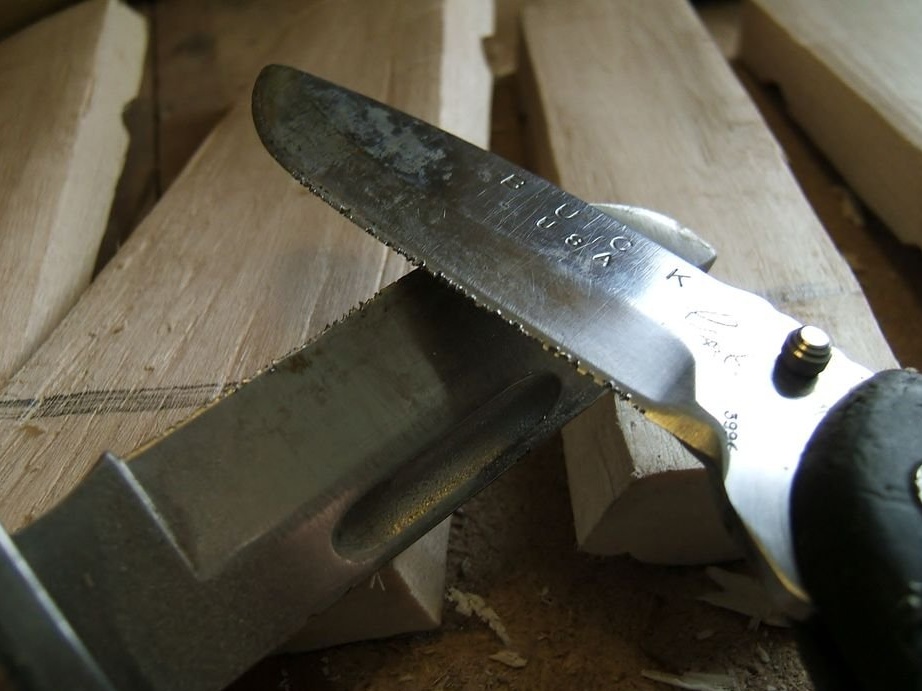
The author began to cut the internal furrow in the same way as the external, but after half an hour of work, he began to feel an urgent need for a saw. “Just a couple of minutes!” - begged his inner voice. Since he promised himself not to use this tool for anything other than sawing the deck, he decided to “cheat without cheating”.
He temporarily turned his knife into a saw, sharpening it on another knife to make the blade coarser. No need to hint that his work is not perfect. In this case, there are no special rules :)
Step 9: shape of the bottom
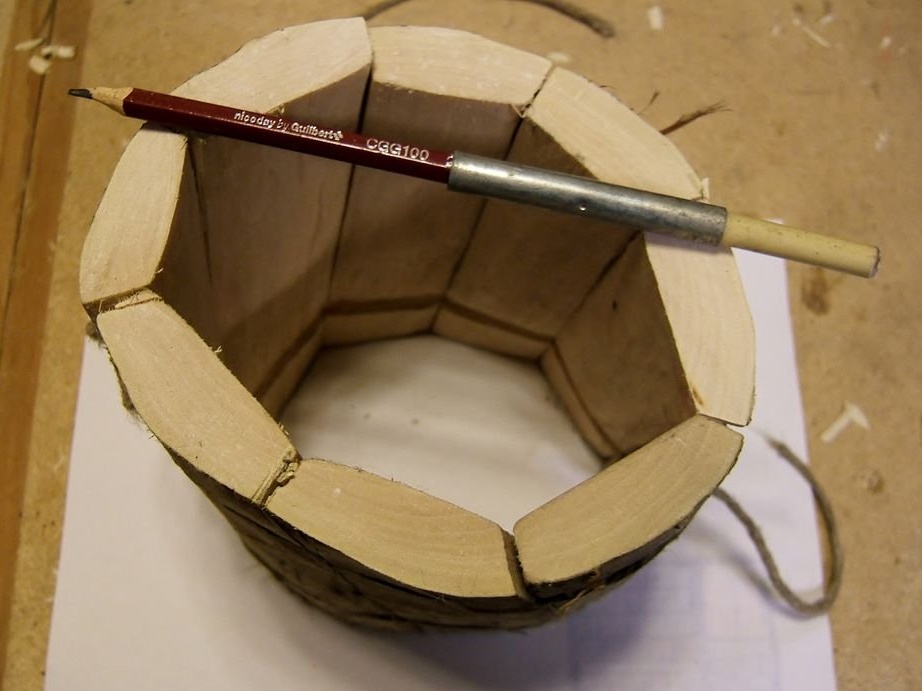
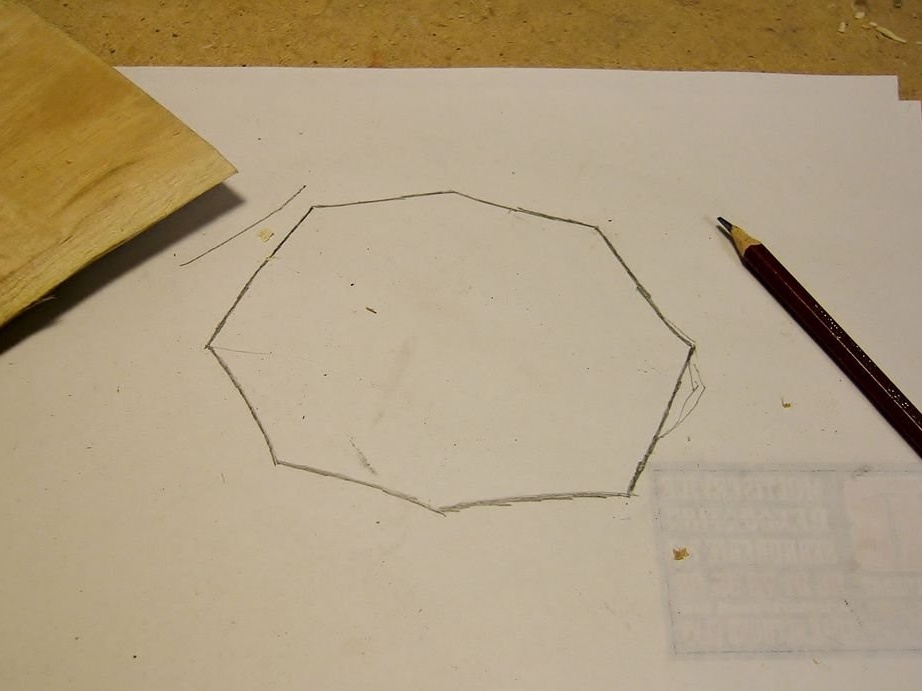
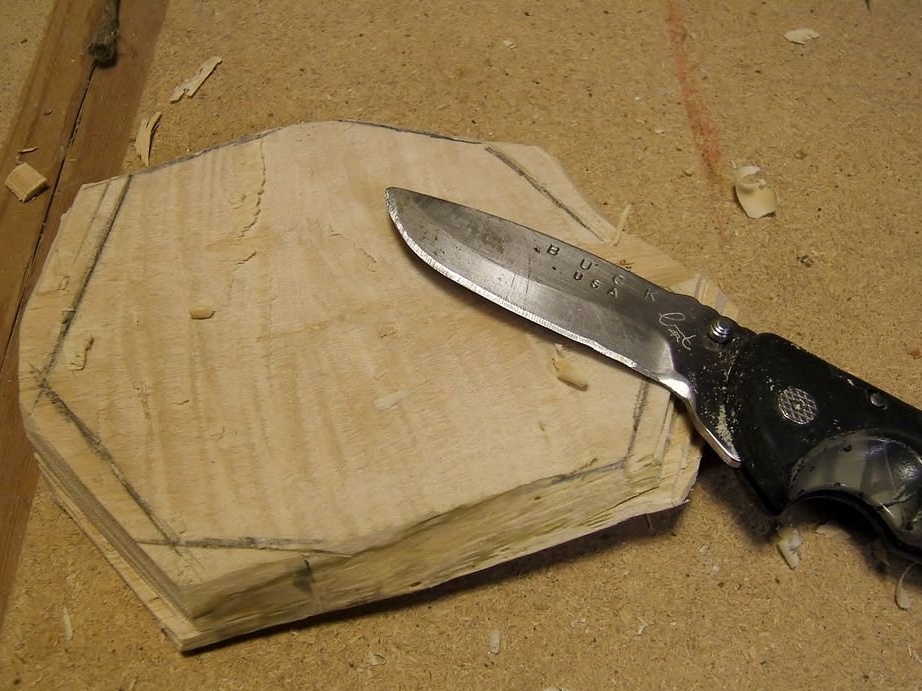
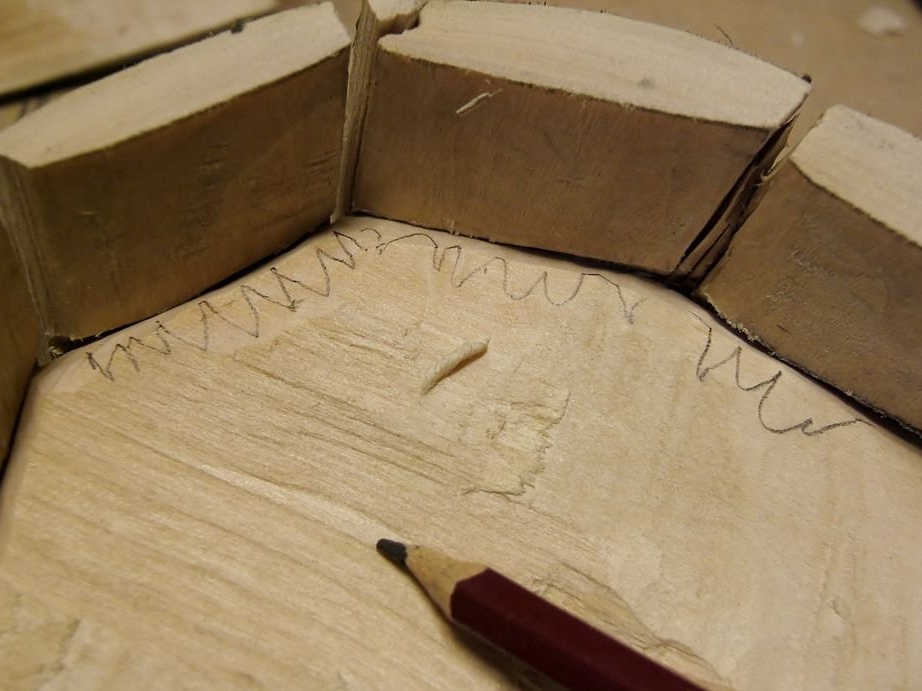

Reassemble the mug. Place it on a piece of paper and copy the shape of the bottom. Pre-extend your pencil to get to the top of the sheet.
Look inside the circles to determine the difference between the form that is now and what should happen after cutting off all the unnecessary parts.
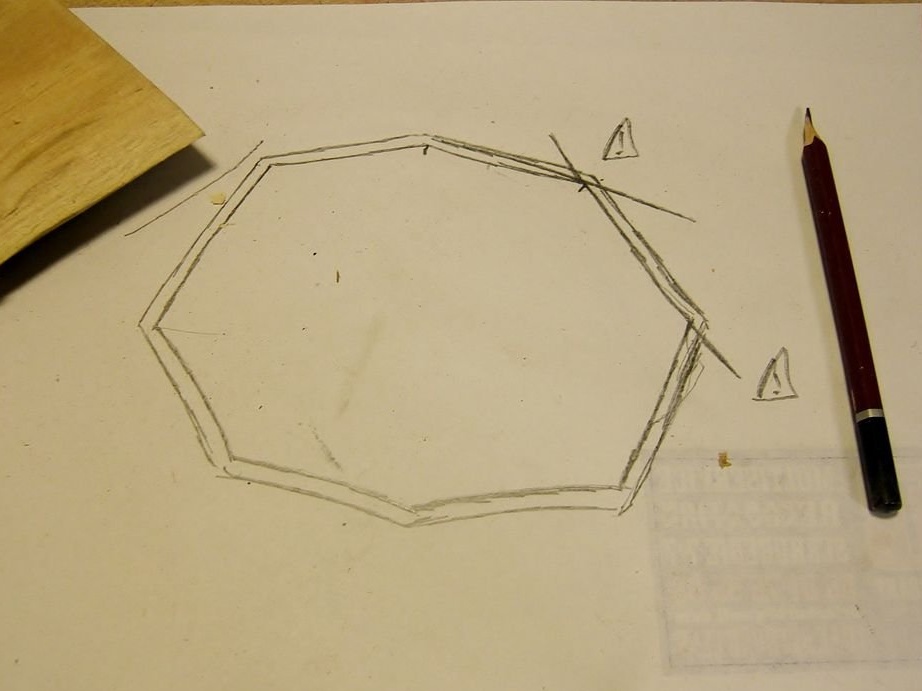
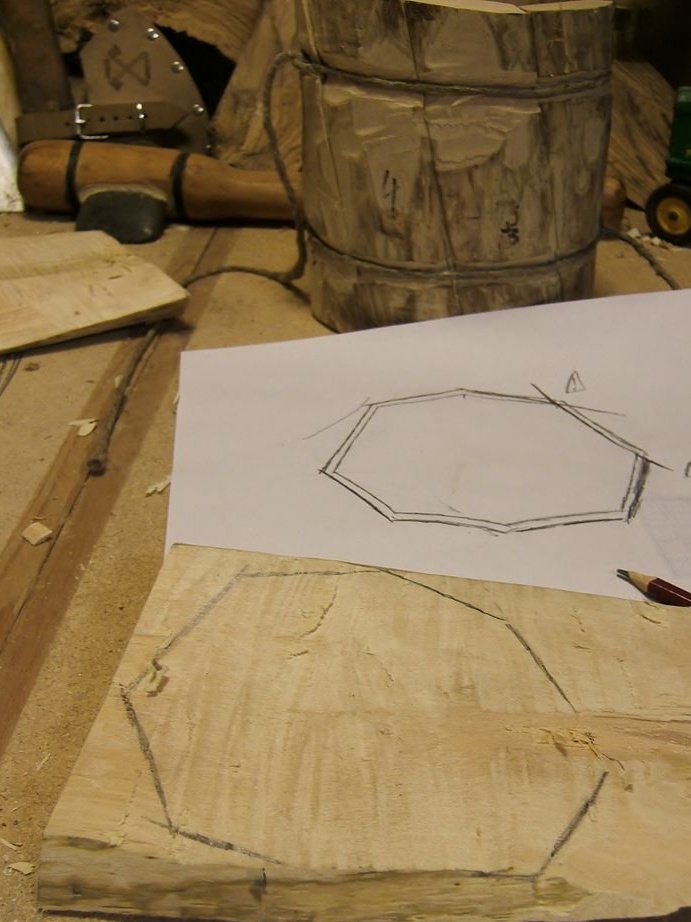
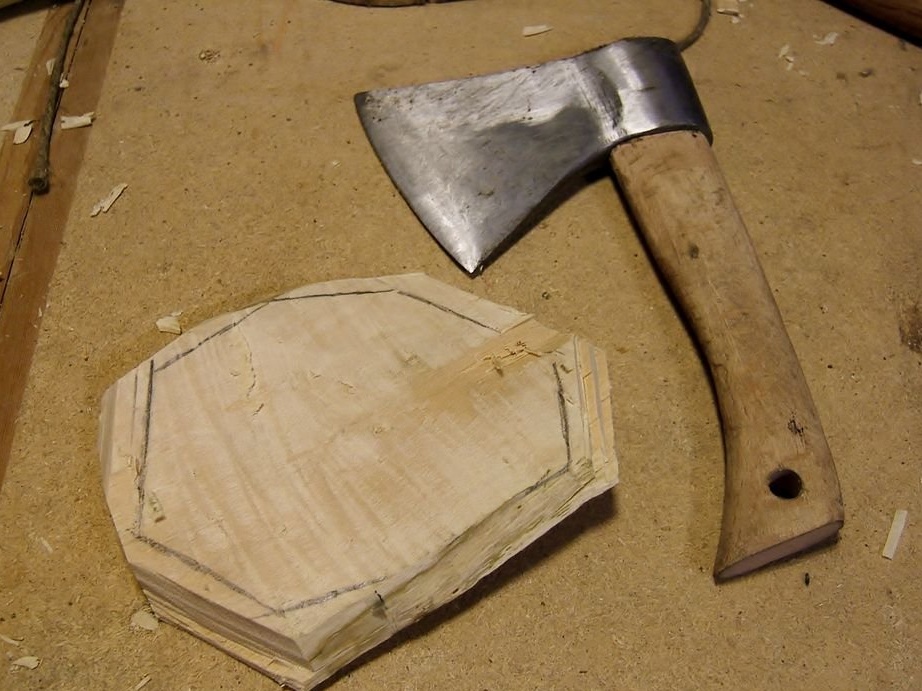
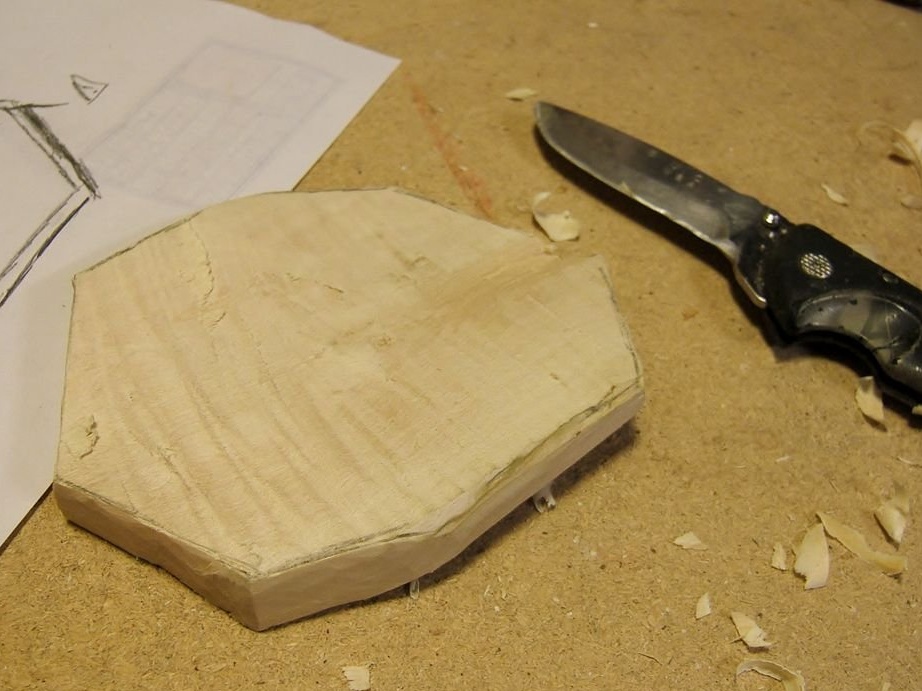
Correct the design on paper, transfer the sketch to the tree and begin to trim the bottom. Good old stomp can do the rough work, and apply the finishing touches with a knife.
To give the bottom an ideal shape, you will have to cut the tree several times until it enters the mug, as it should. When all the parts are ready, you need to disassemble the mug and allow them to dry well.
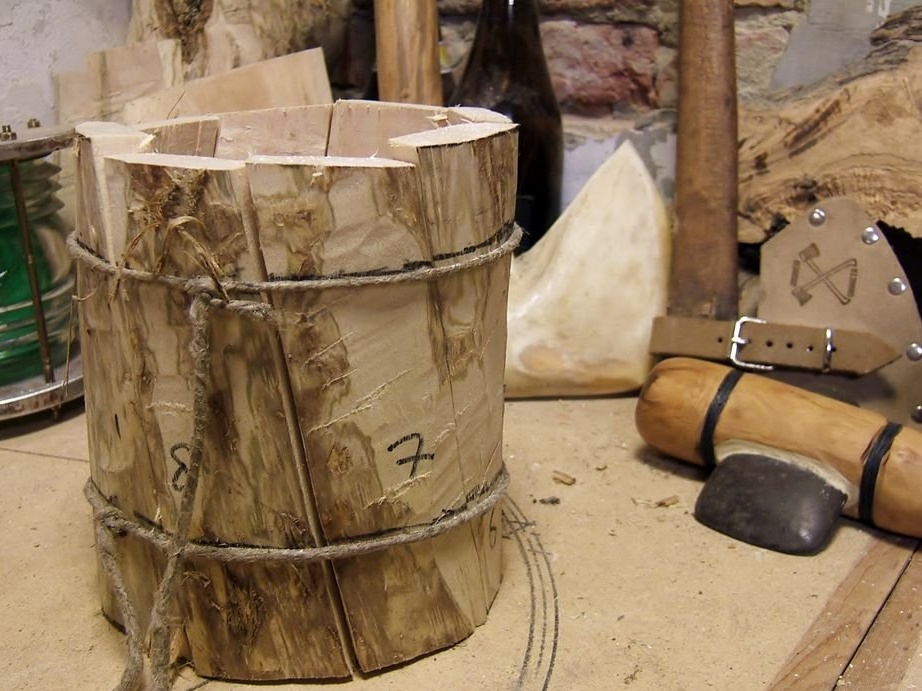
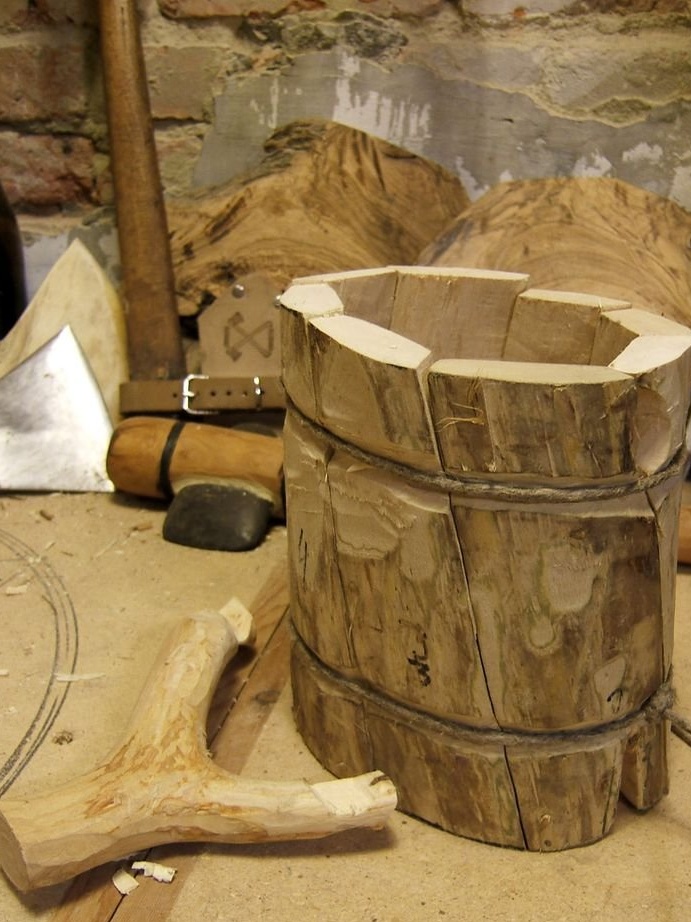
Step 10: Build
When all parts of the mug have dried properly, you can assemble them for the last time. In this step, your mug will come to life!
No matter how hard the author tried, his circle fell apart all the time.
And again, his inner voice began to give harmful advice, such as “YES ENOUGH, LET'S THROW IT IN A COSTER !!!”
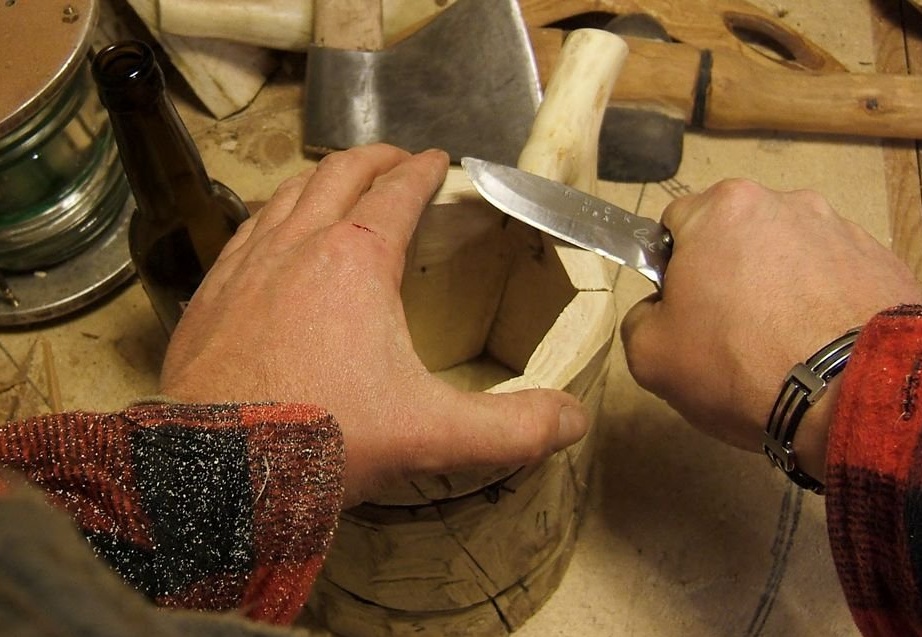
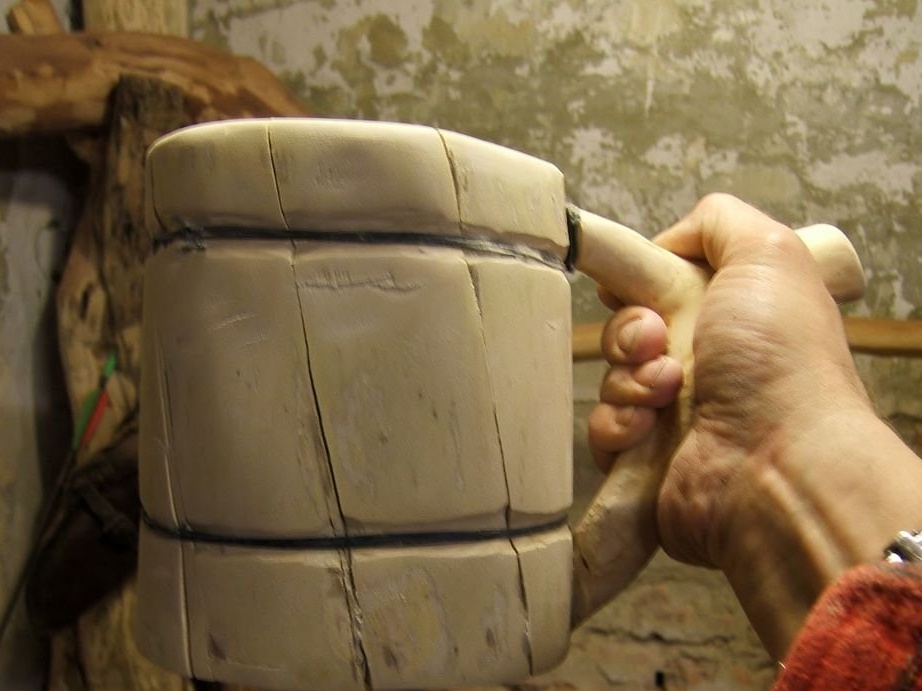
He still did not listen, tried to assemble the mug again and secured it with a synthetic cord, tied with ordinary sliding knots. When the mug is well pulled together, you can round the top edge, polish the place “where the lips touch the divine drink”. Again, carefully handle the knife.
Step 11: Fill the joints and oil
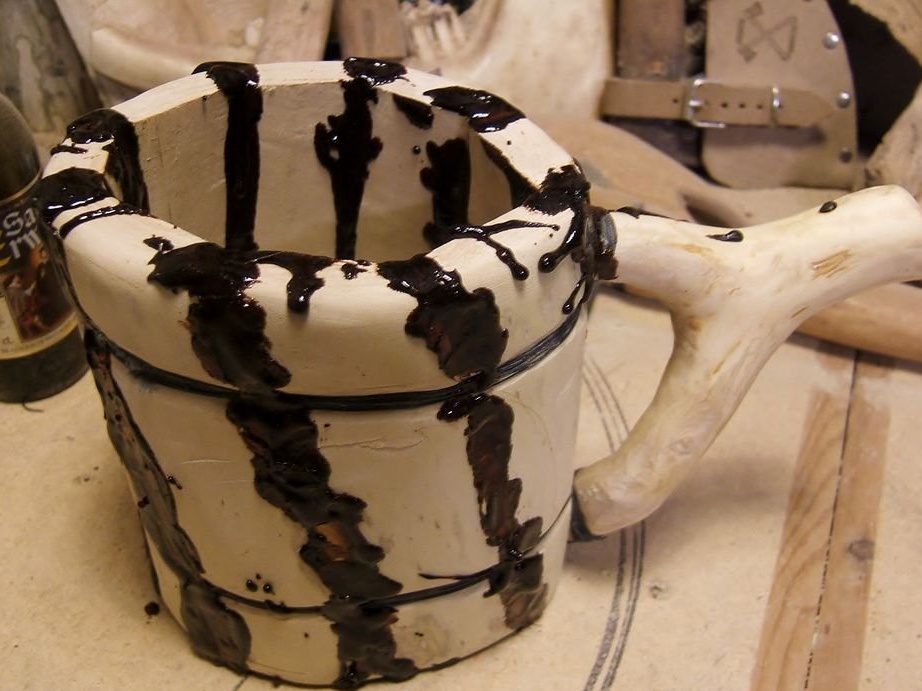
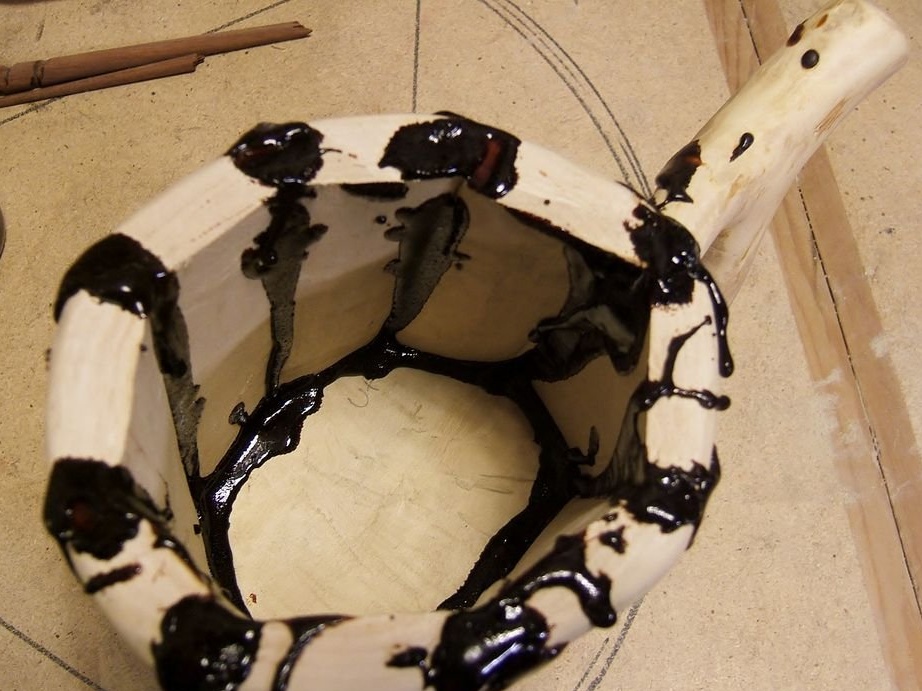
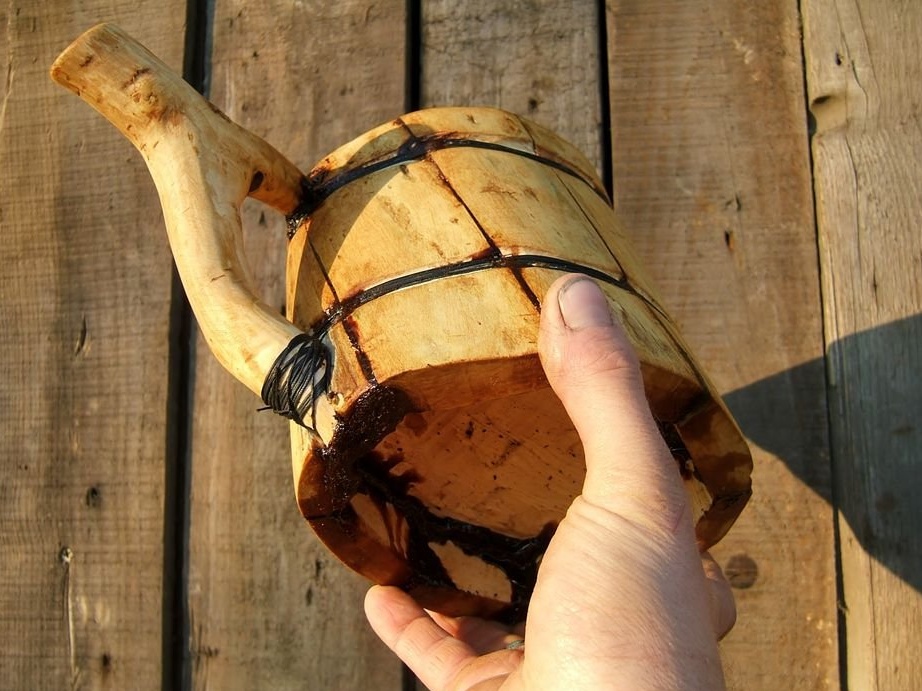
You want to make the mug airtight so that not a drop of beer is spilled in vain?
It doesn’t matter how tightly you connected the parts of the mug, how tightly all the faces fit together, there will still be leaks. It is necessary to close the seams of the mug.
The resin is perfect, but we have the same hiking conditions! So what?
And let's use bio-resin! Mother Nature endowed this world with a magical sticky substance - PROPOLIS! Produced by bees, this 100% natural product is the ideal seal material. It hardens at room temperature, it can be melted when heated, it is soooooo sticky, sticky, edible, it has excellent antibacterial and disinfectant properties.
Bees use it to close a draft hive. You can pick up in the wild :) or buy. The author borrowed a little from a beekeeper's neighbor.Heat propolis in a saucepan and apply it to the seams and joints of the mug. It quickly hardens. Then go a little sandpaper (yes, one more penalty point), and that’s it! You can also use beeswax: it is not so sticky and slightly weaker than propolis.
If you have peanut butter, you can use it in several layers.
Step 12: Hurray!
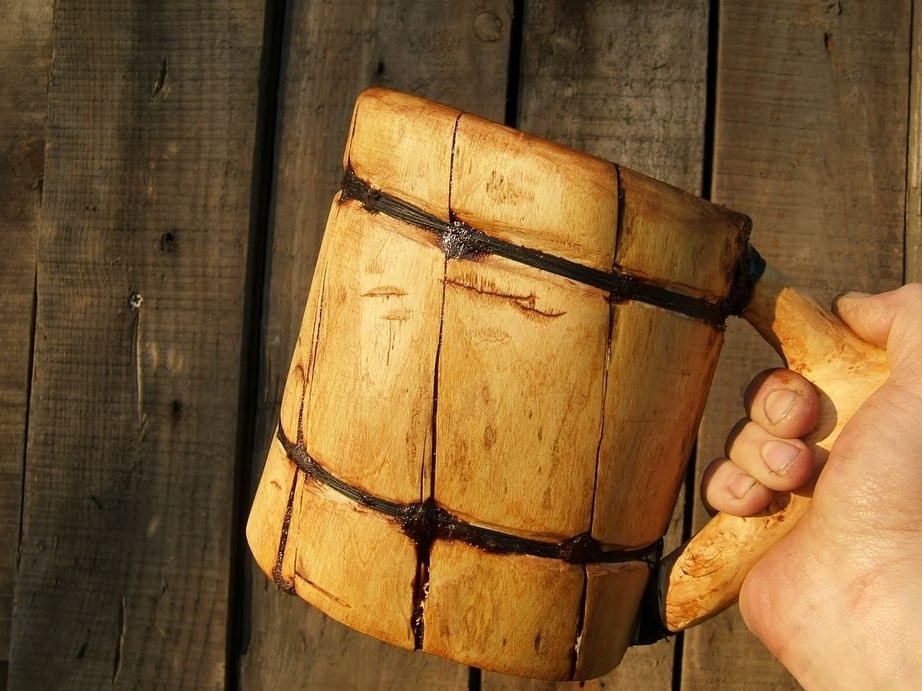
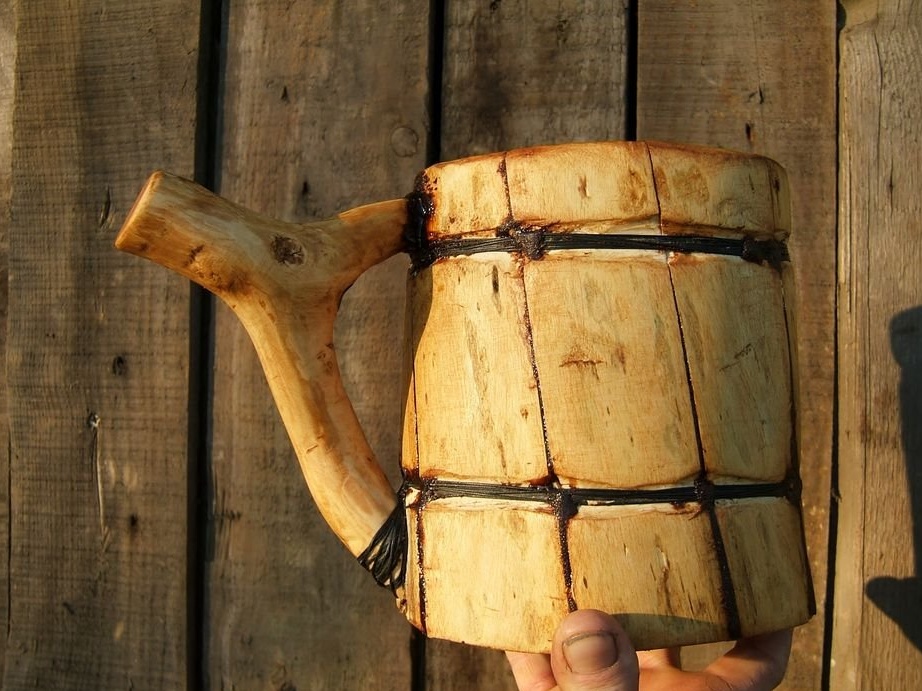

After hours of manual labor, finally, my beer mug was ready (the seams were still a little sticky).
What do you think about? The author, of course, is about beer!
I hope you enjoyed it!