
Christmas and New Year are very close. It's time to prepare gifts and surprises for your family.
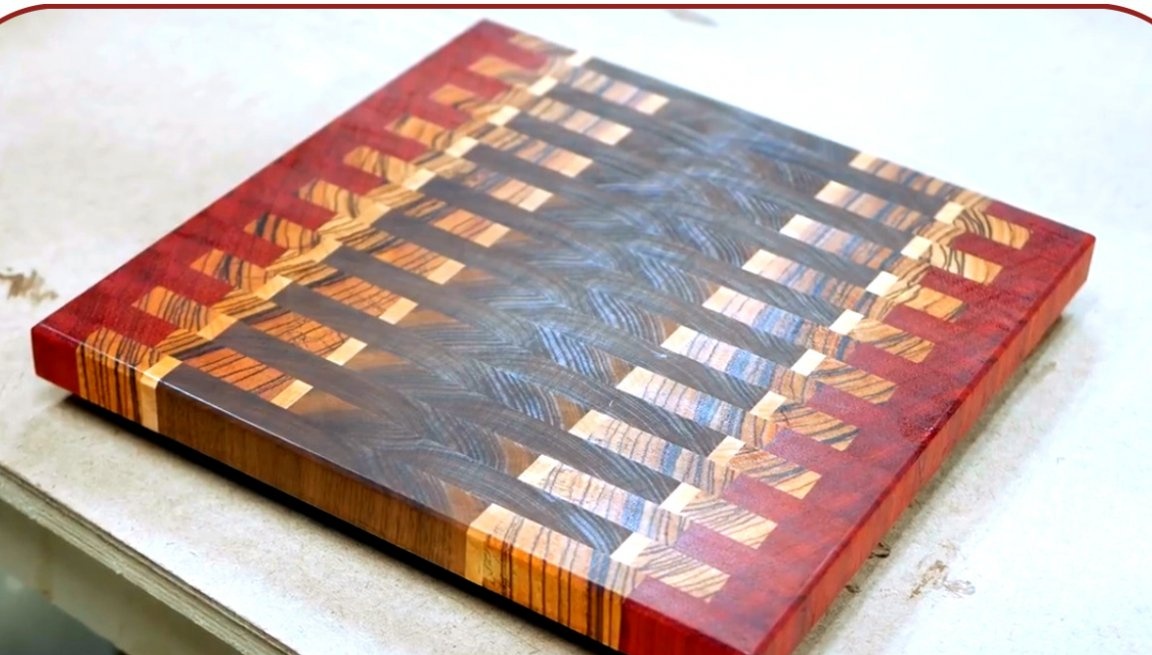
In this article, Zach, the author of the YouTube channel Workshop Edits, will tell you how to make an end cutting board, decorated in the style of a zipper. Agree, such a design is far from trivial!
Materials
- Boards of hazel, maple, paduk, ebony
- glue titebond II
- White Spirit
- Impregnation for wood
- Sandpaper.
Instruments, used by the author.
— A circular saw
— Clamps
— T-Track Clips
- Reysmus
— Orbital sander
— Milling machine
— Radius Mill with Thrust Bearing
— Glue gun
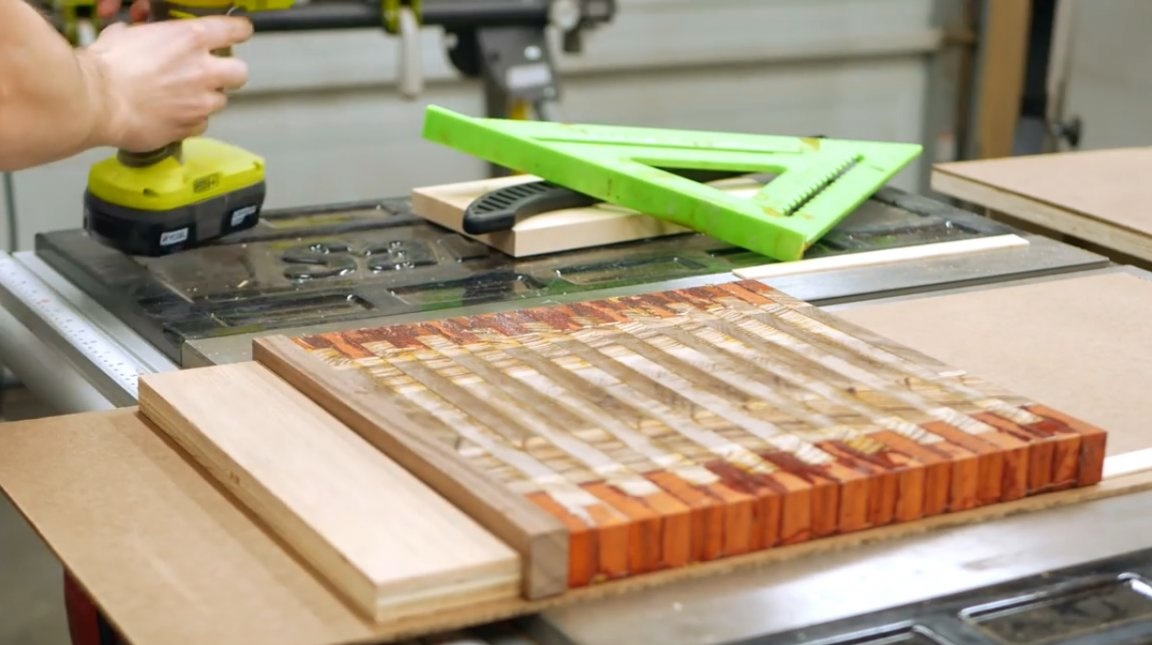
- Ruler, Svenson's squarea pencil.
Manufacturing process.
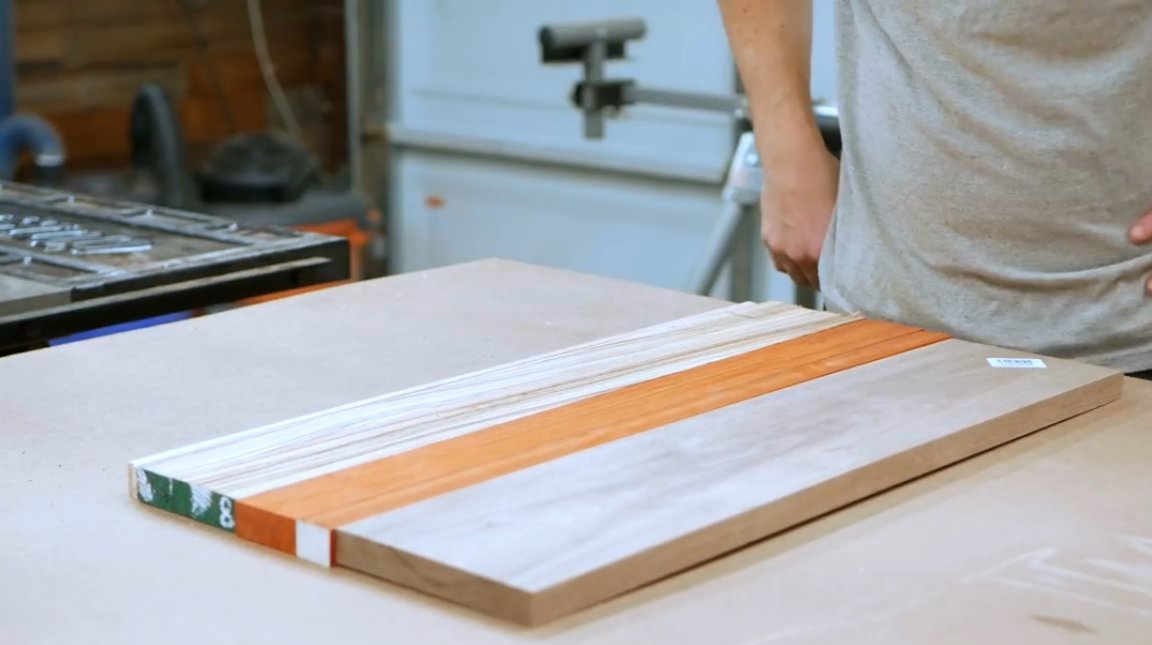
The main material for this board will be several hardwoods.

Unfortunately, the master does not have a jointer, and in order to get right angles on the edges of the boards, he uses this kind of carriage, processing the boards on a circular machine.
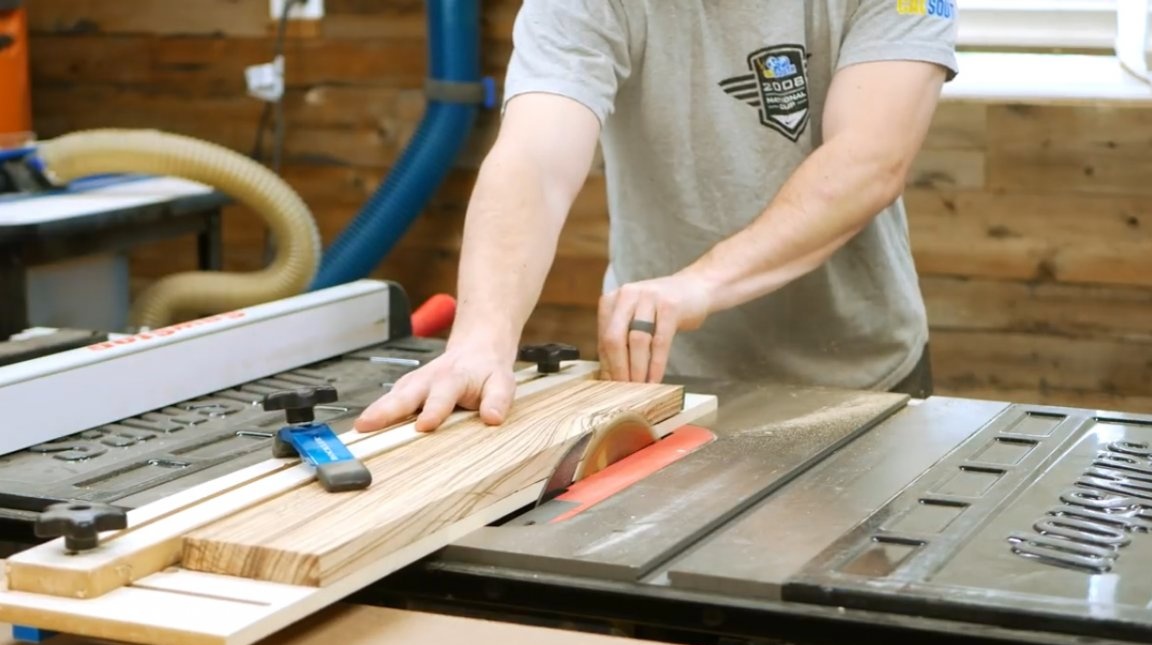
Then he checks the resulting angle on the most even surface.
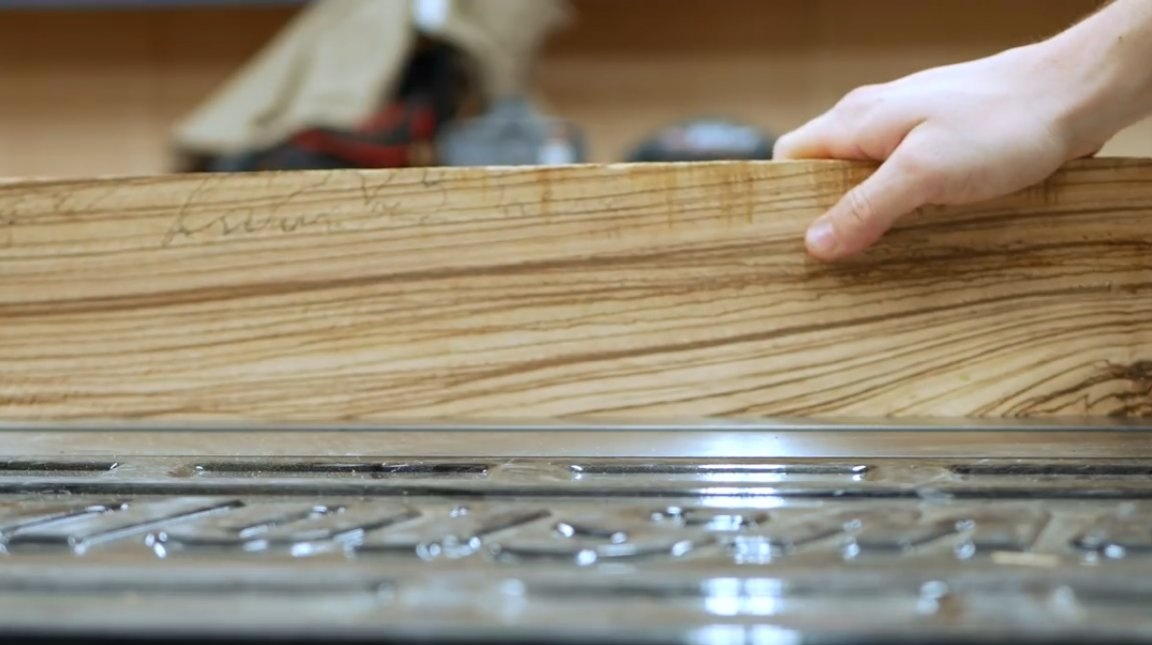
After that, on a circular saw, he saws the wood into beams of the required width, first an ebony tree, then a maple and a paduk.
Now all the cubes are laid out in a drawing, while the widest hazel board is placed in the middle. After, when the material is sawn into sections, and part of the bars will be turned back, the nut insert will shift from the center to the edges.

All strips of wood are carefully smeared with a brush and glued together. The master uses glue titebond 2, which is resistant to water, and harmless if ingested.
Since these types of wood are quite expensive, when gluing, the author tries to align all the strips as much as possible relative to each other so that when passing through the thicknesser a lot of material is not removed.
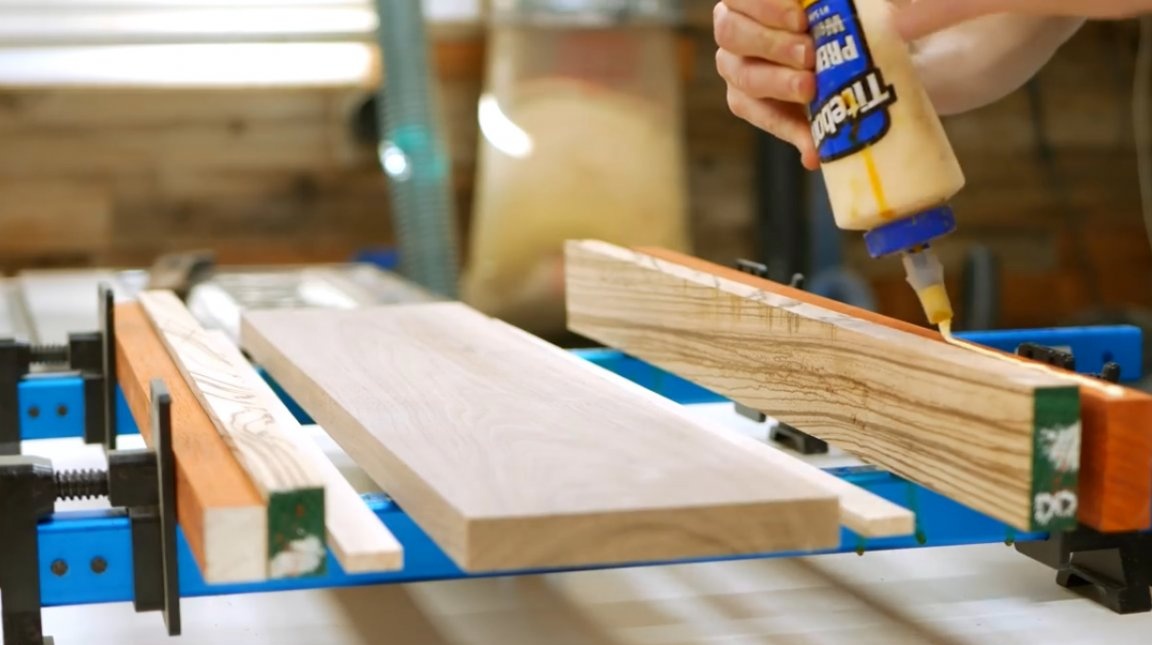
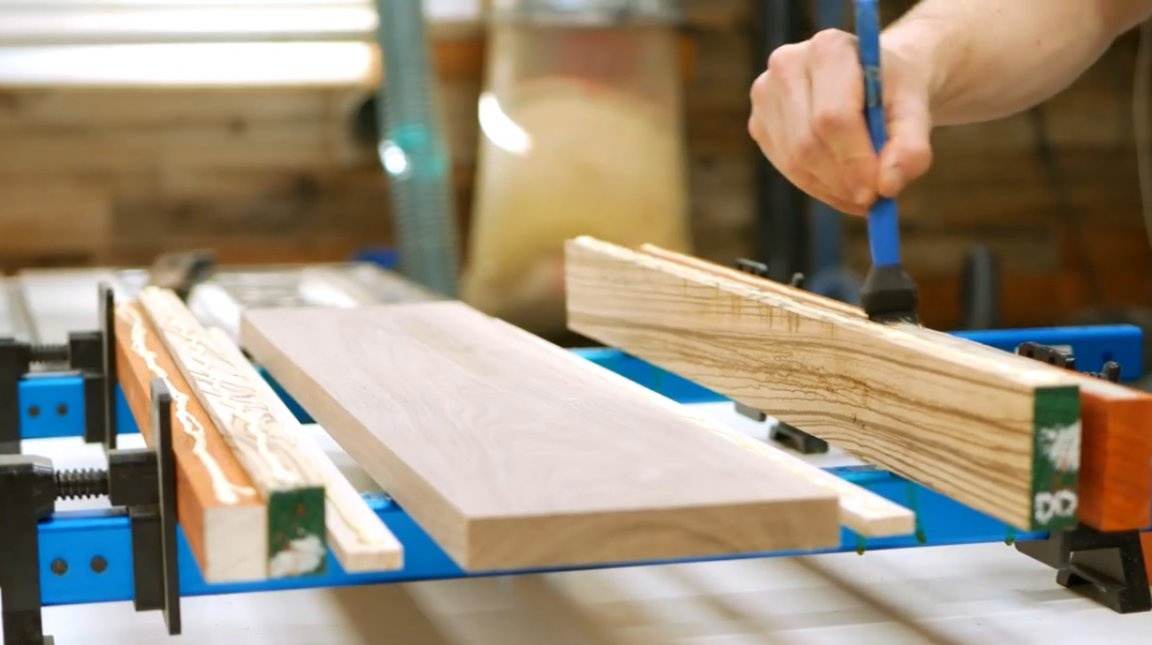
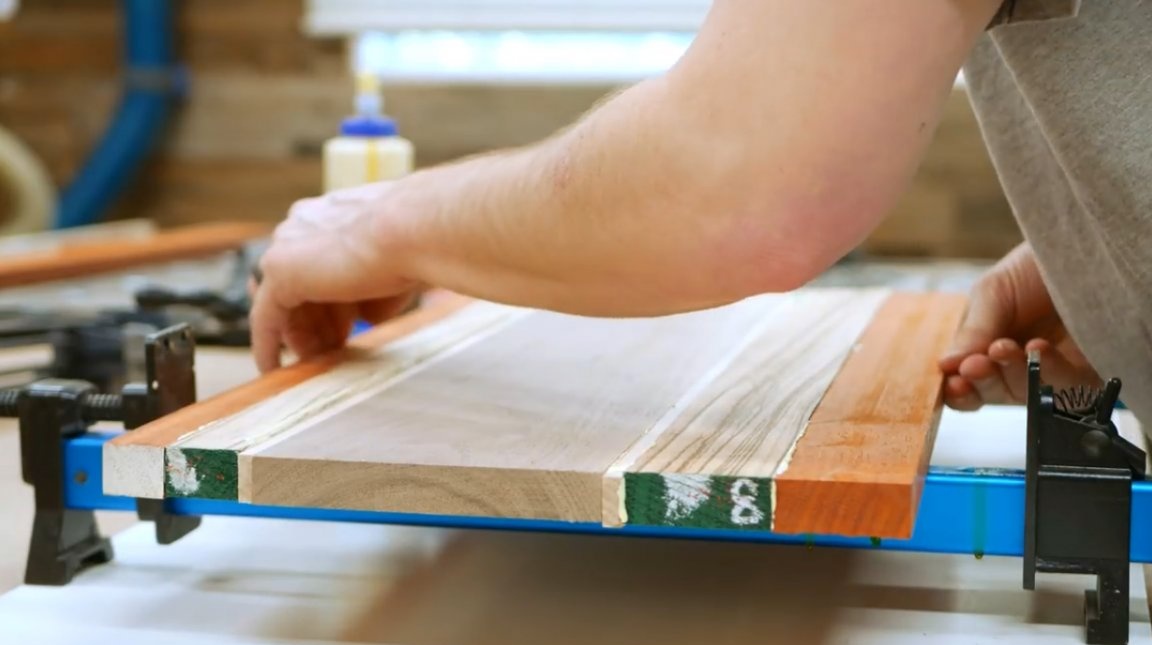
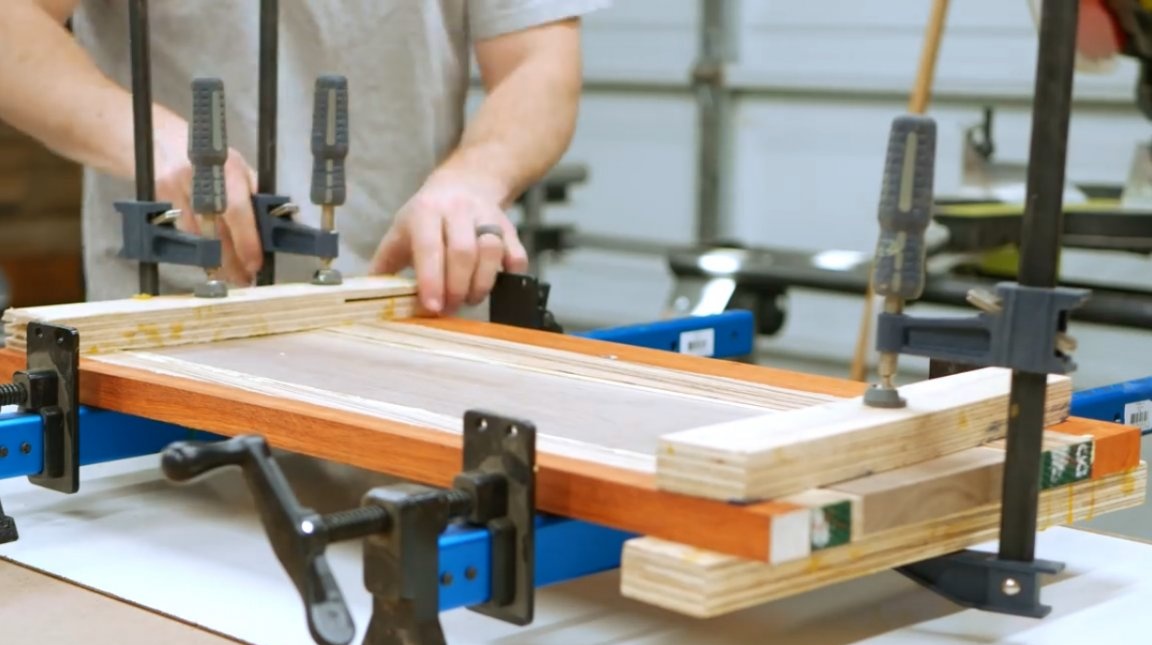
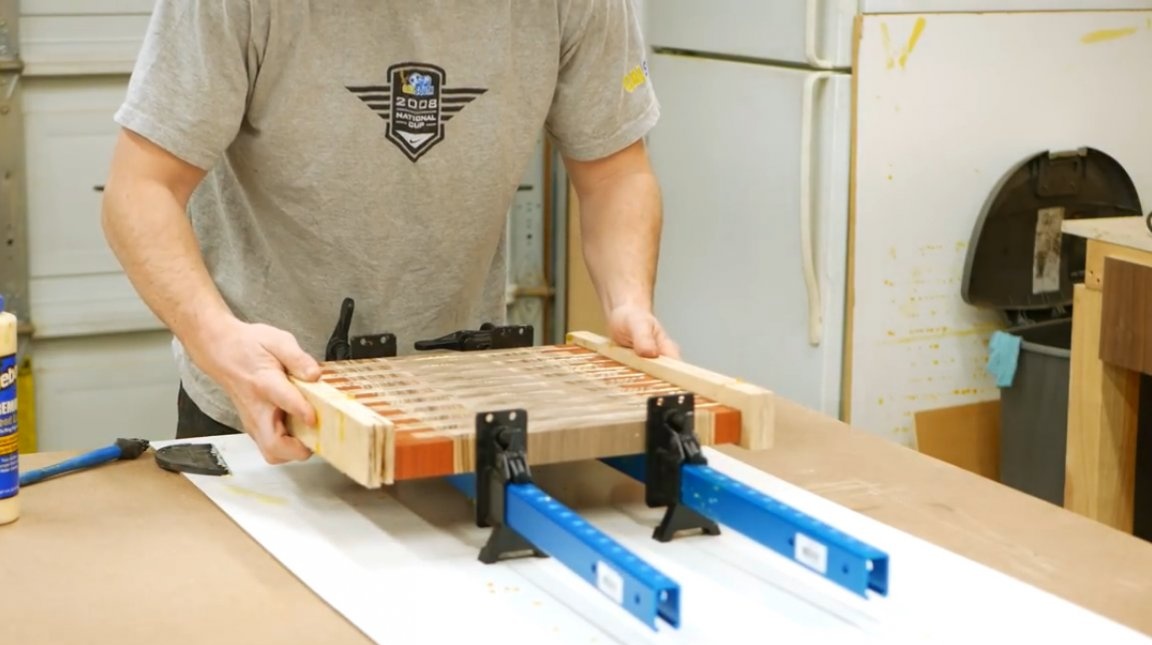
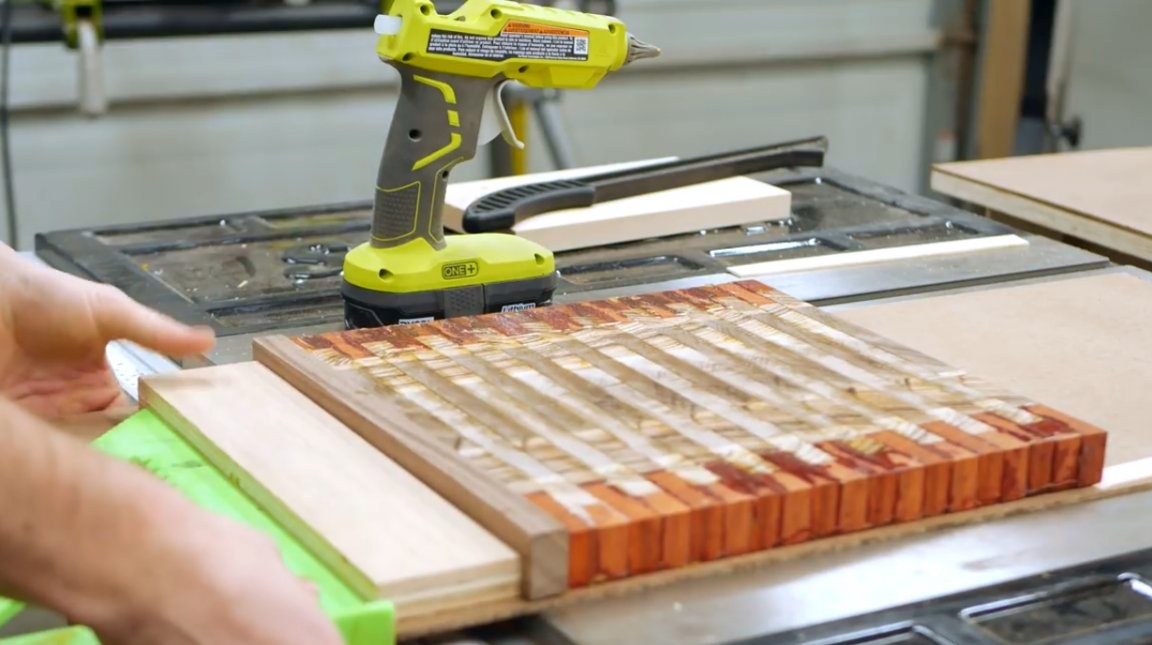
After that, he pulls the shield together with clamps, making sure that the compressive force is uniform and there is no displacement of the bars relative to each other.
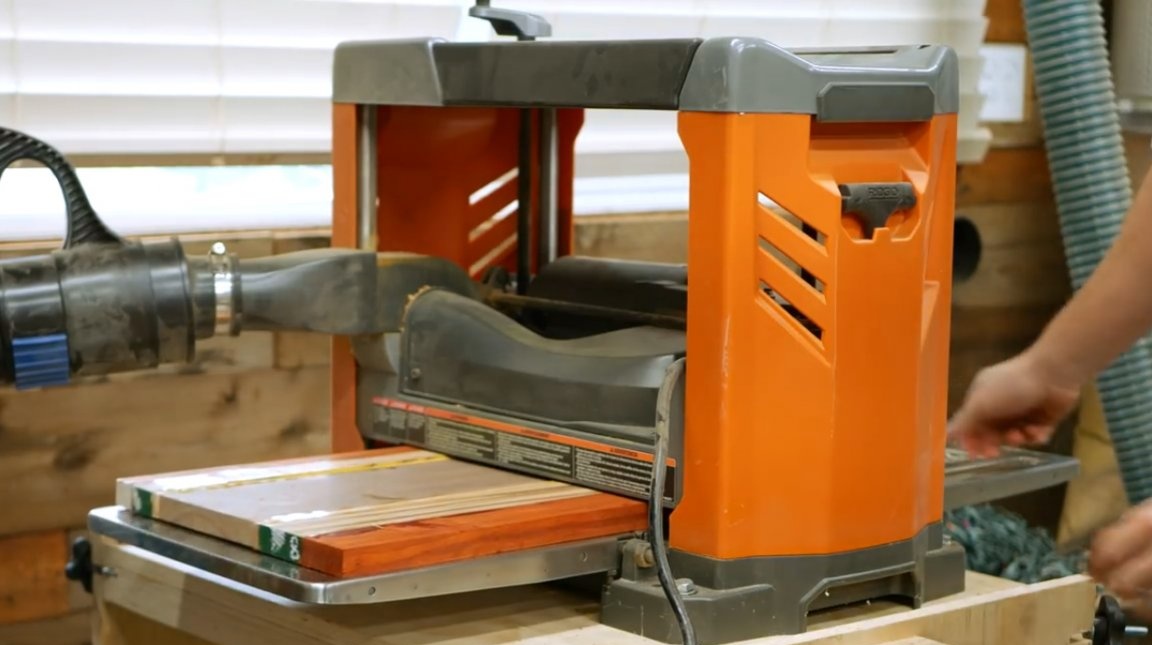
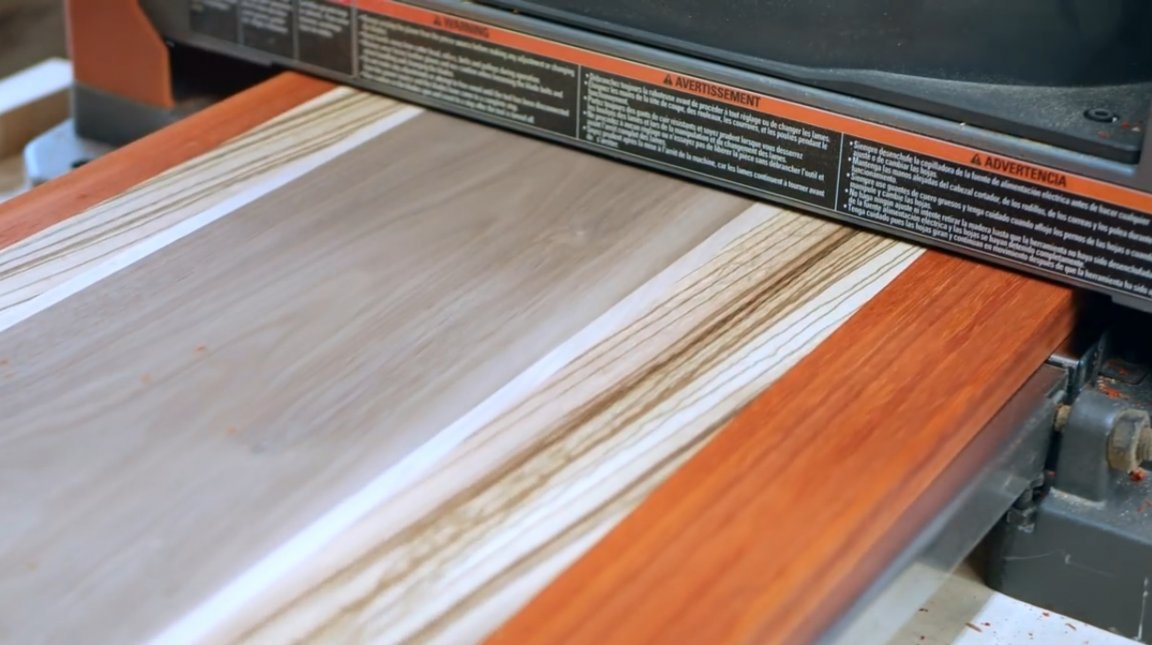
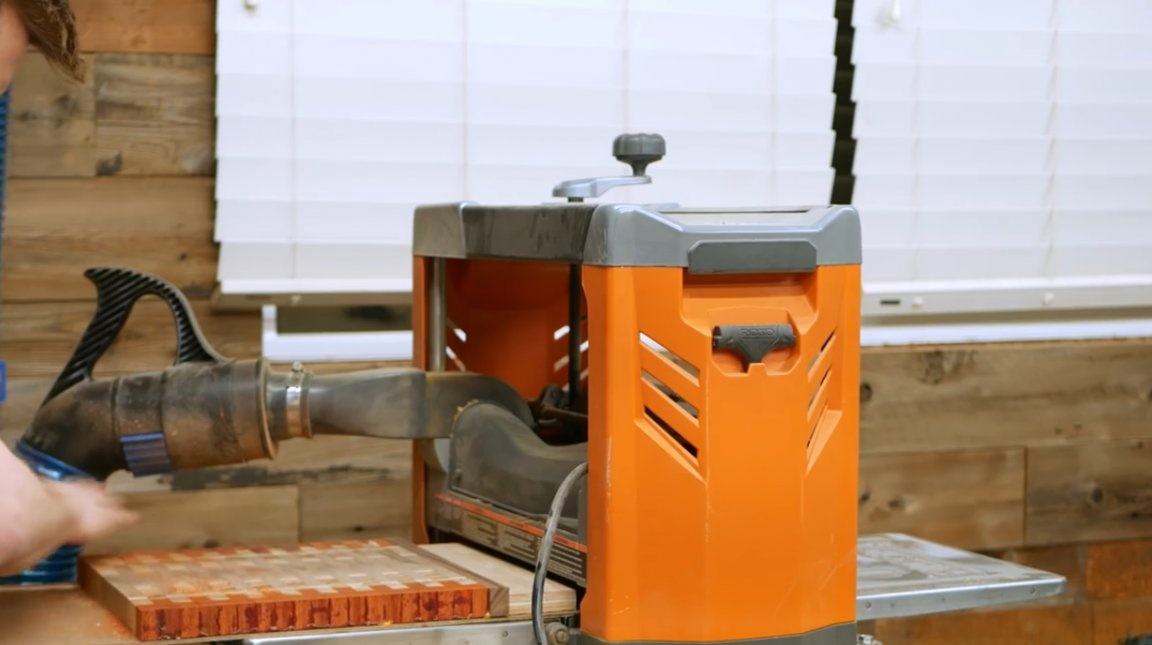
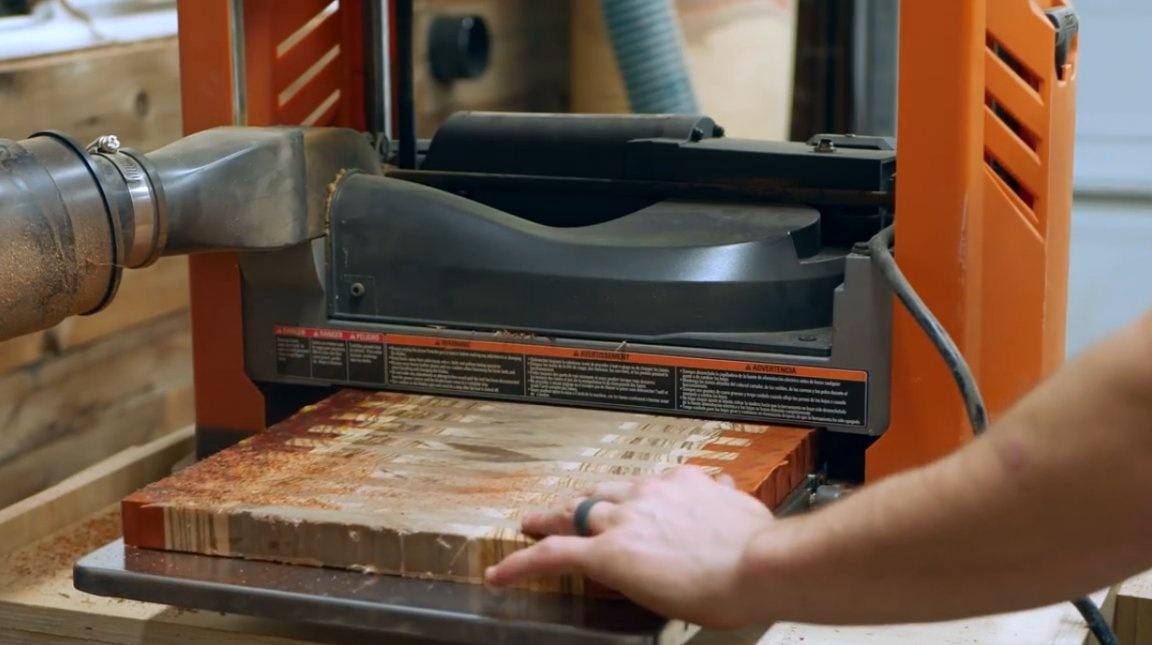
The next day, Zak passes the board through the thicknesser in order to remove the exposed glue, and remove a thin layer of wood. It processes both sides, twisting the adjustment handle of the surface gage for only a quarter of a turn with each pass.
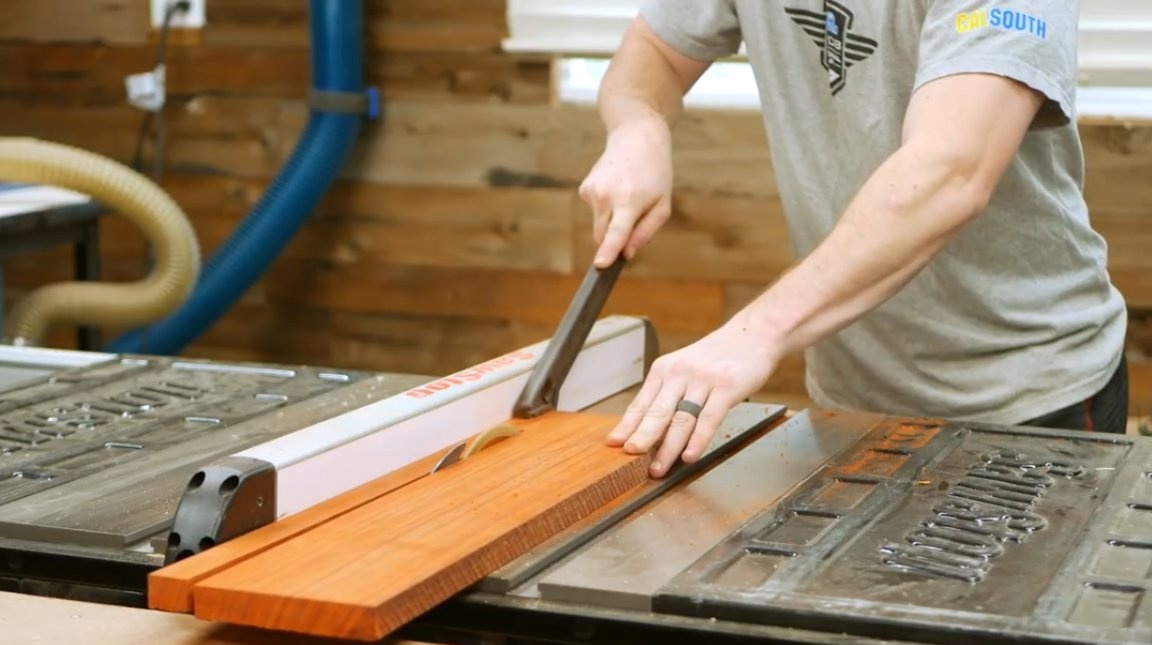
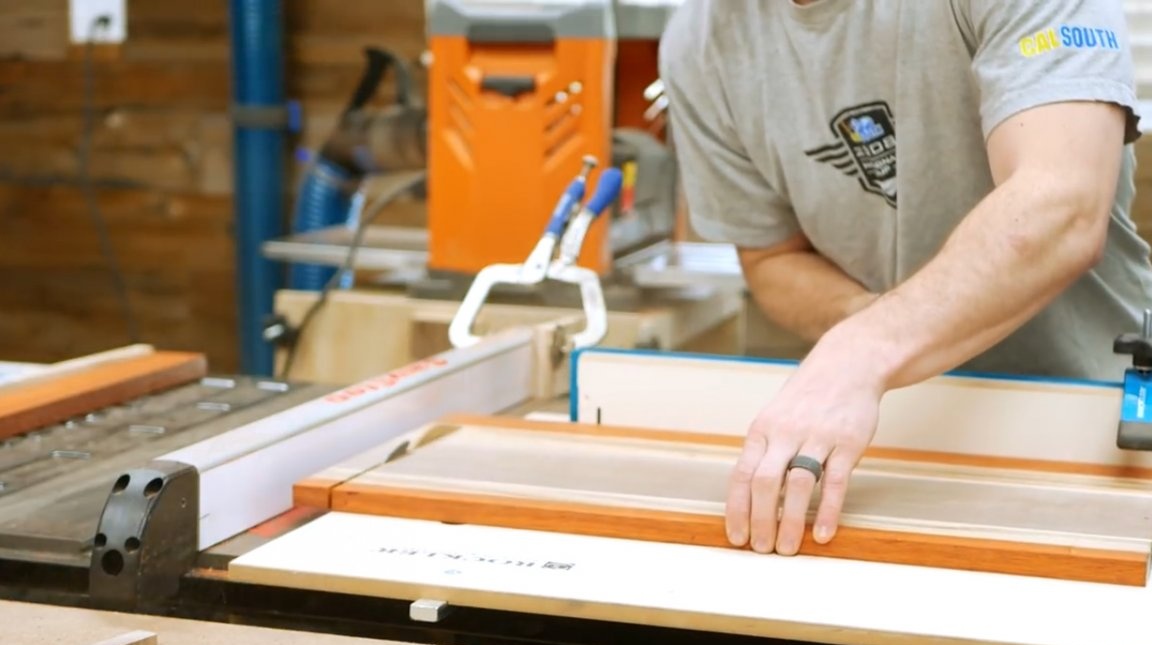
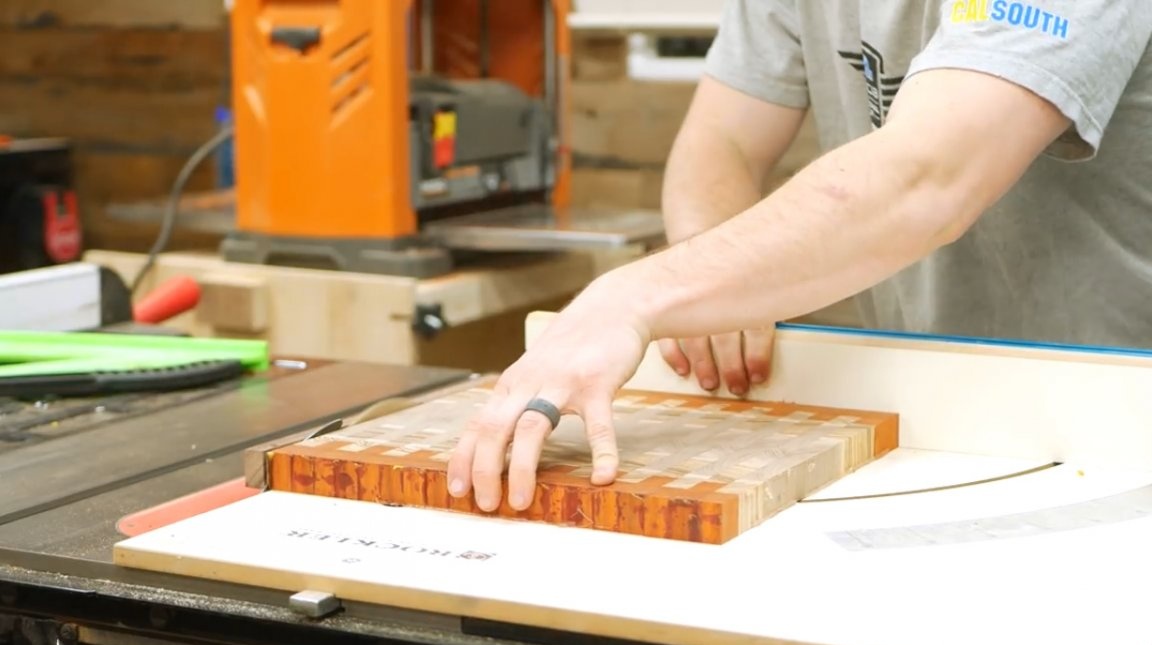
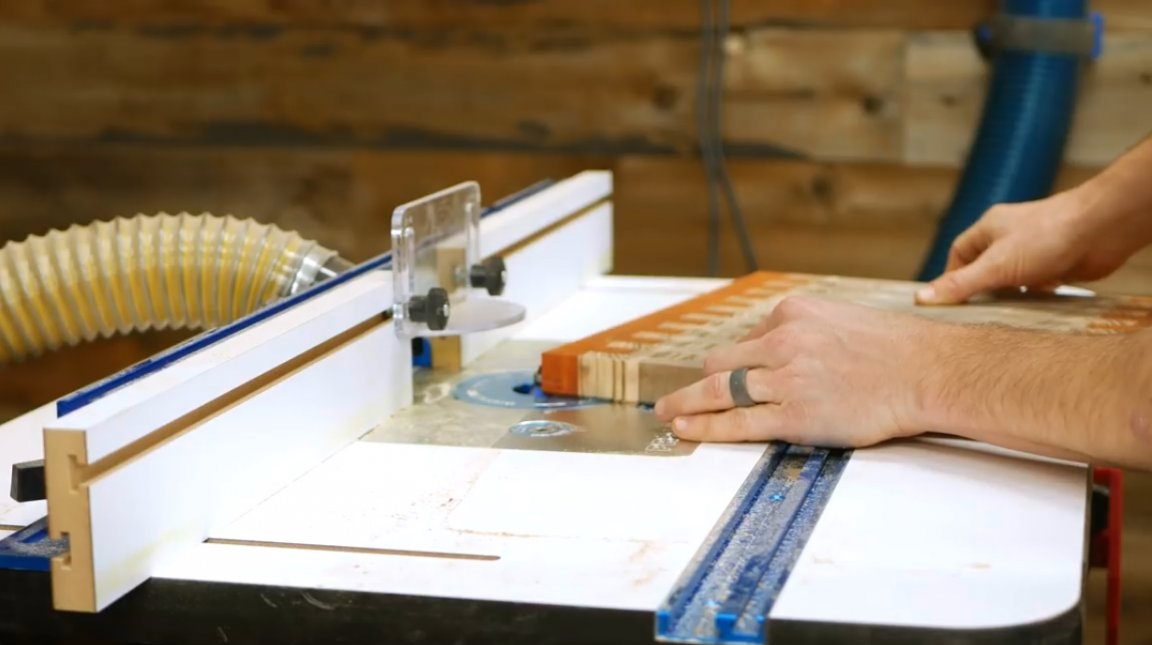
Now follows the alignment of the edges.Zack performs this procedure using the carriage of the circular machine. To do this, he sets the emphasis strictly at an angle of 90 degrees to the product.
Further, he breaks into cutting segments, each of which is a little more than an inch wide. These slides have an emphasis only on one side, so when making a series of cuts, the author has to use a restriction block to control the width of the strips.
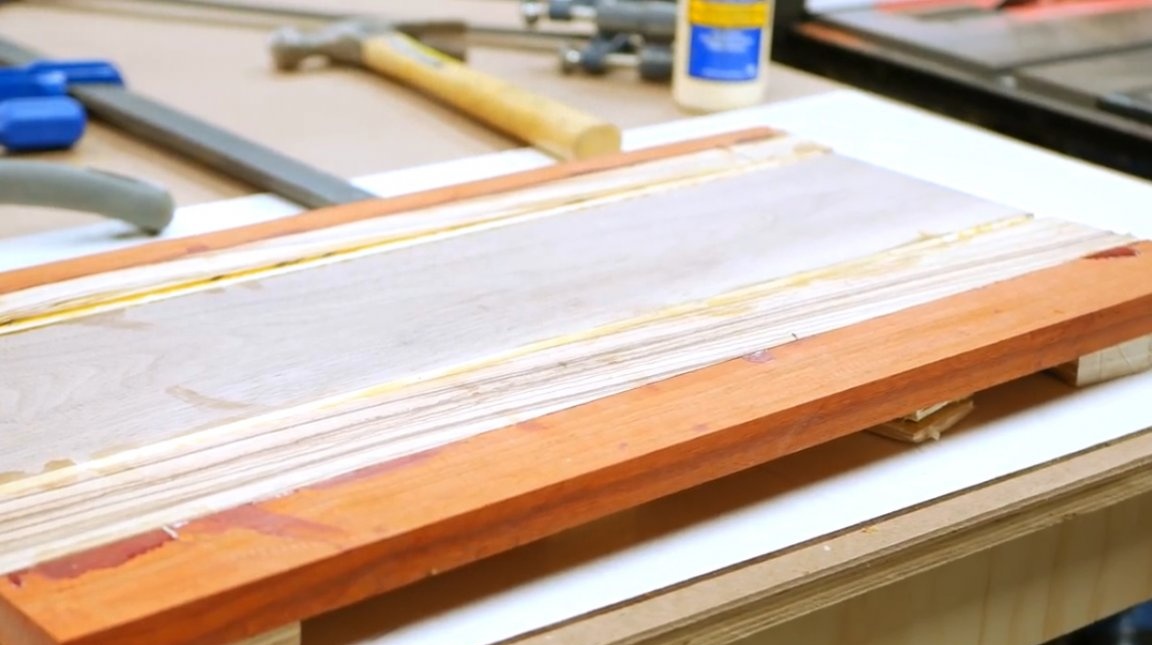
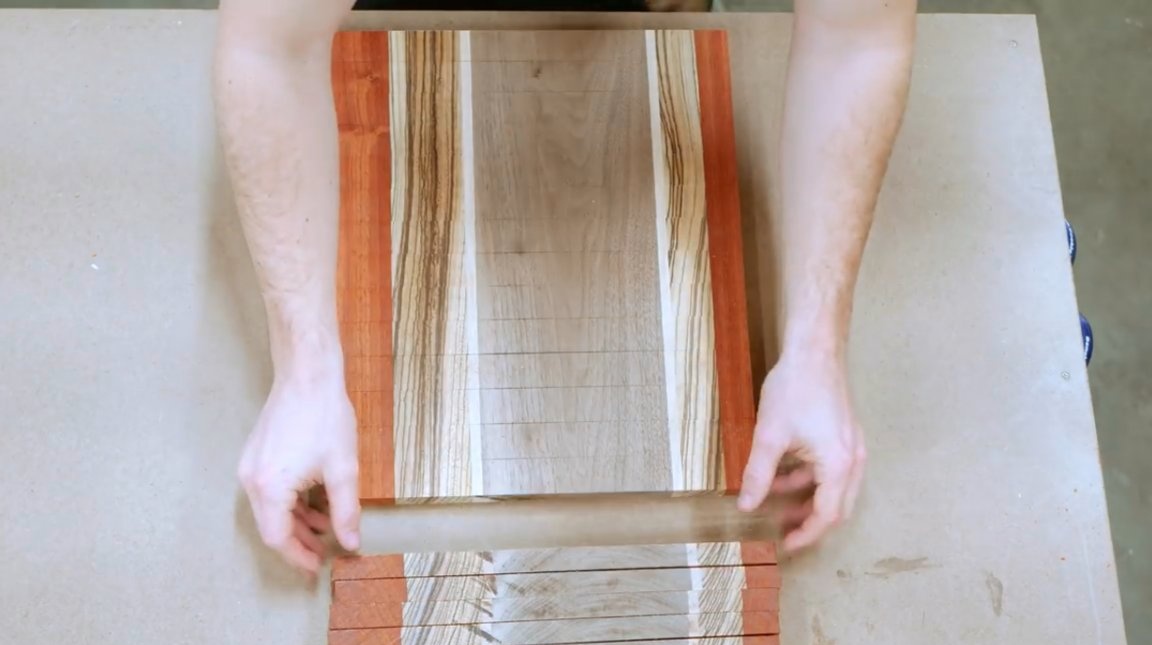
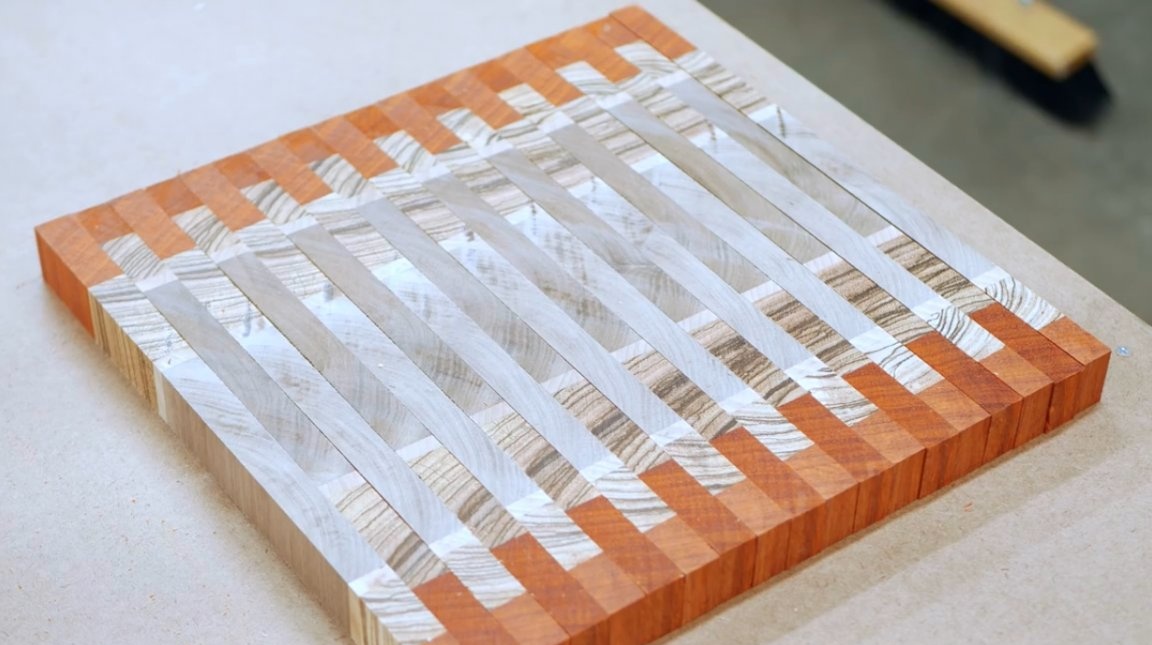
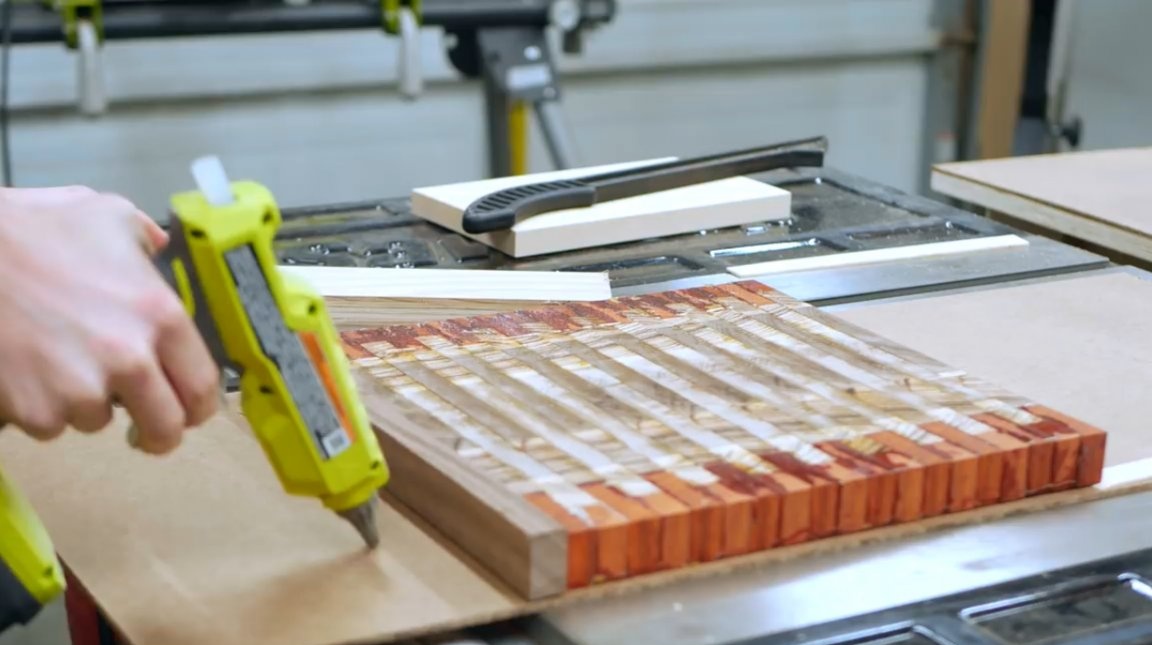
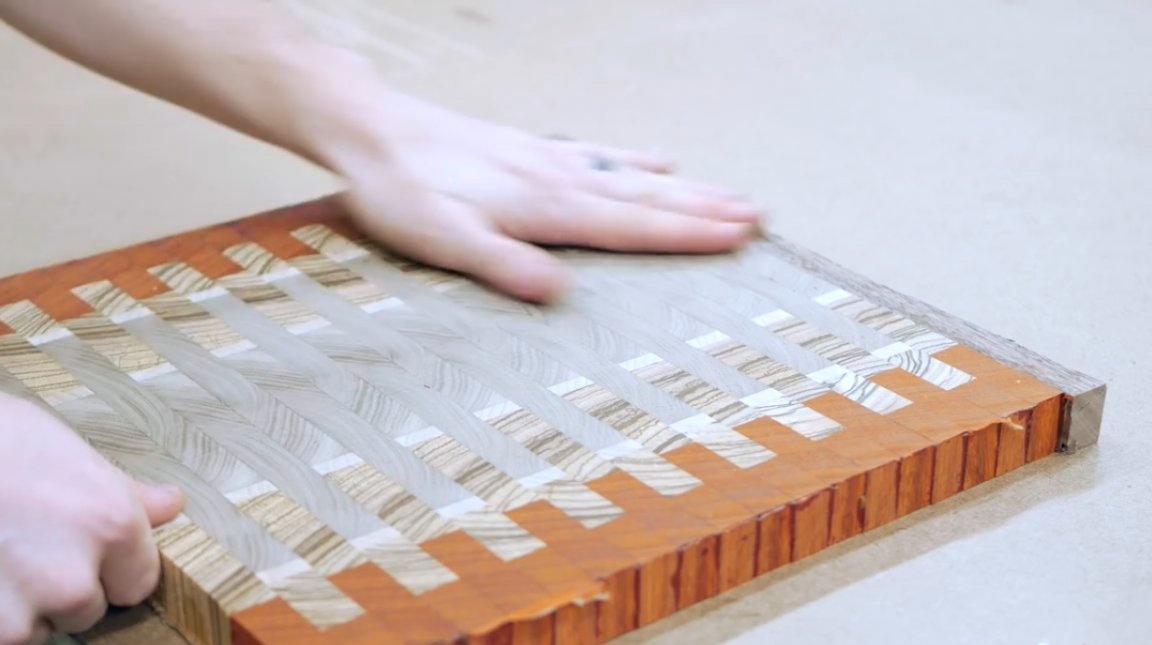
An interesting moment comes: the craftsman puts all the resulting cubes on the surface of the table and turns them 90 degrees with the end faces up.
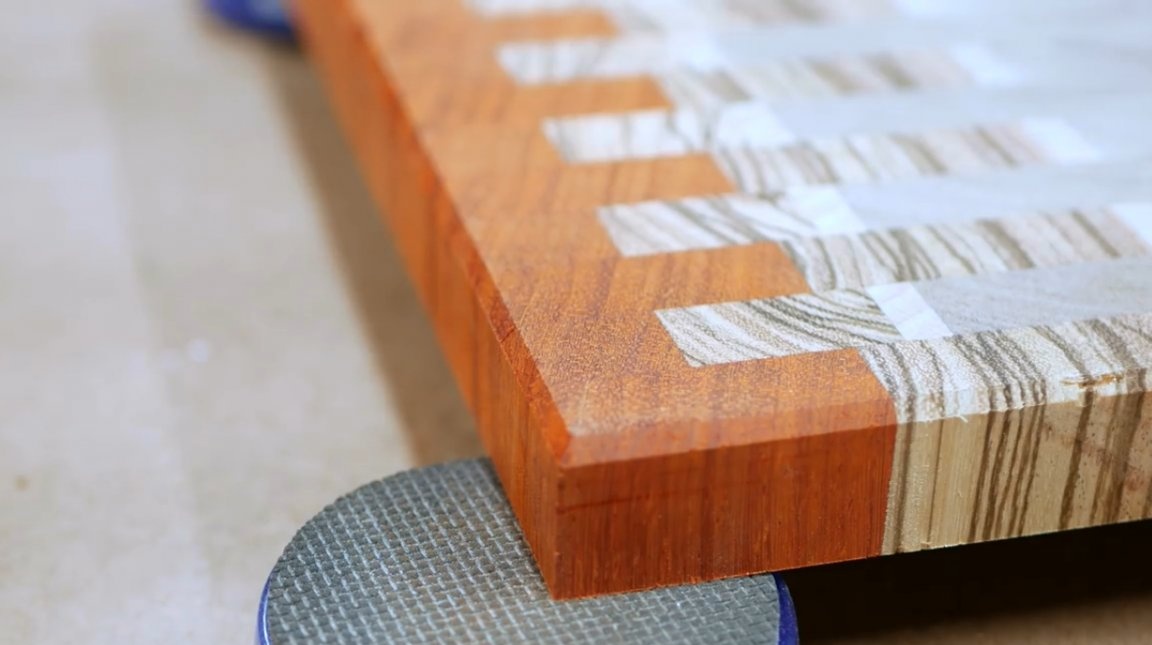
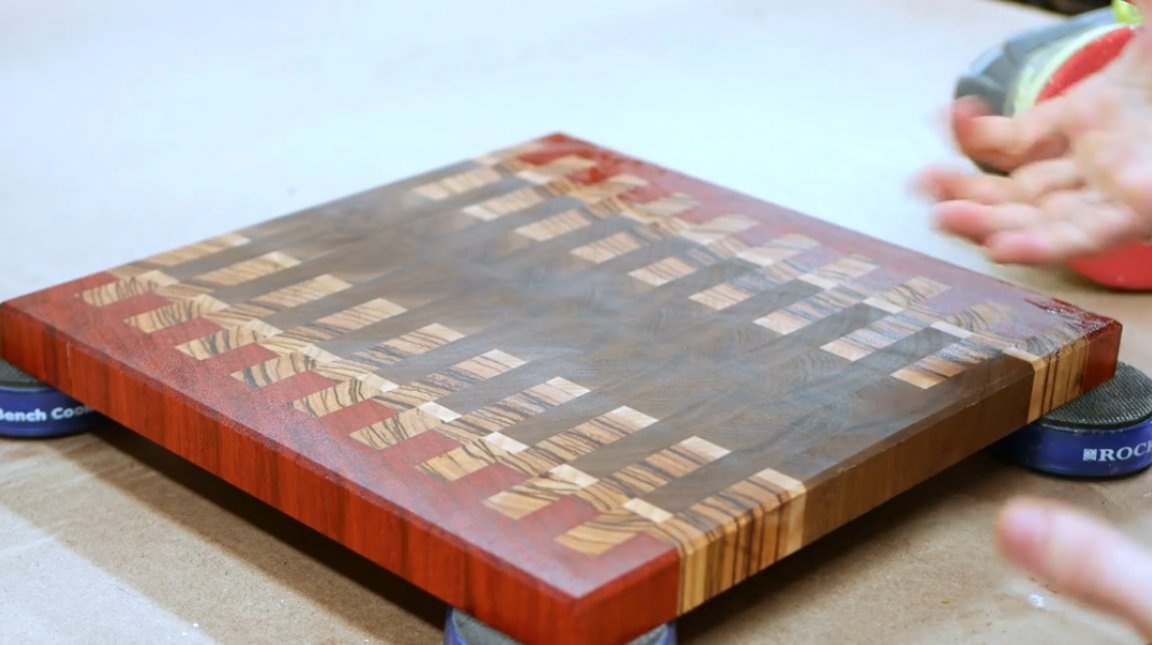
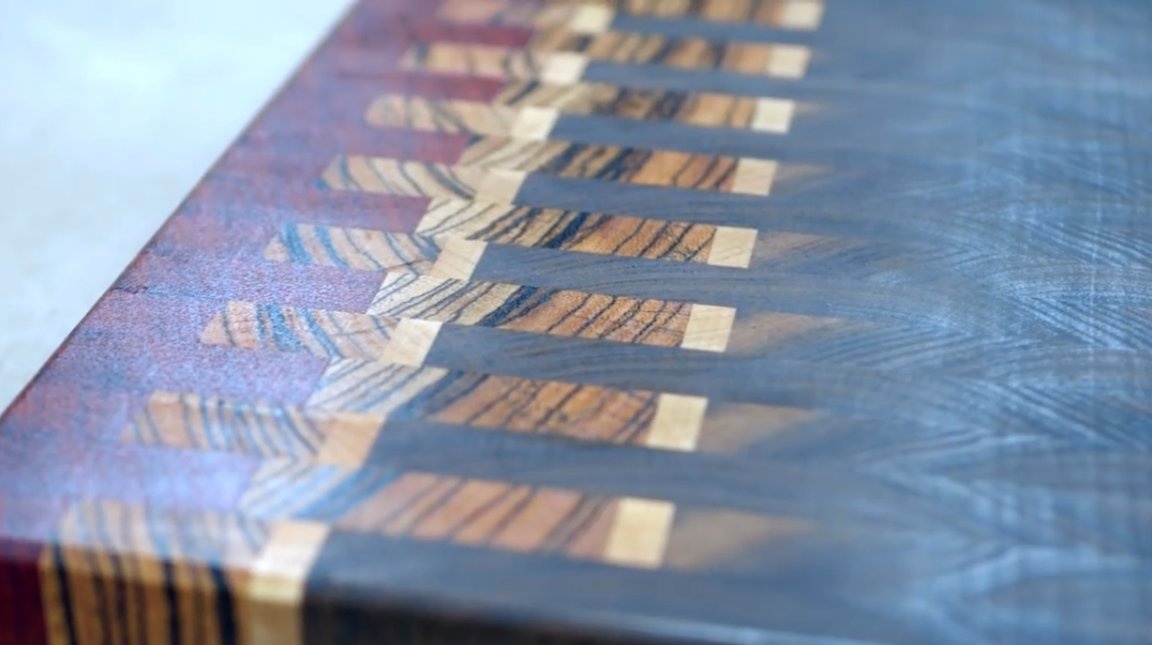
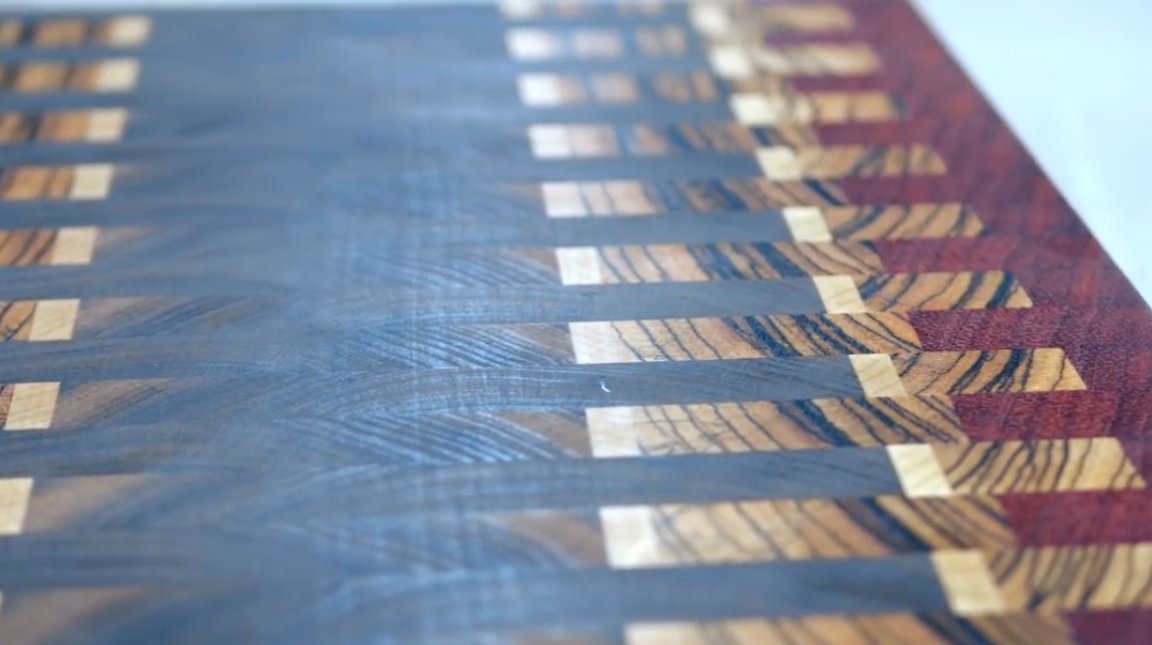
To form a zipper pattern, he flips every other strip 180 degrees. As a result, the hazel inserts are shifted and an amazing pattern is created.
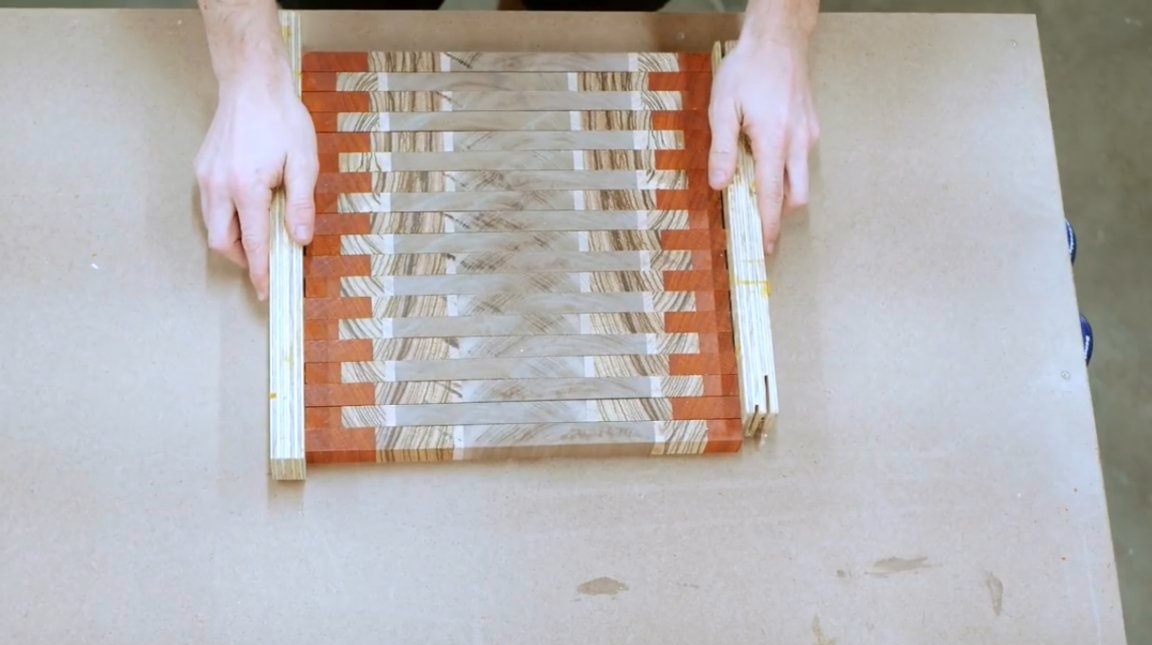
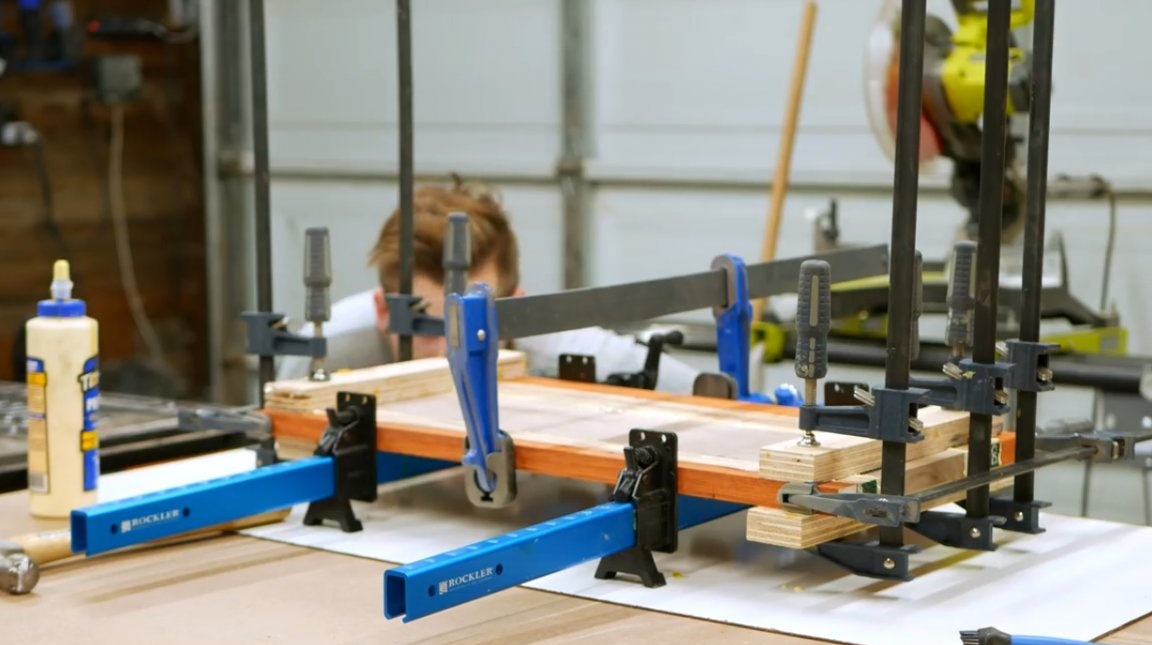
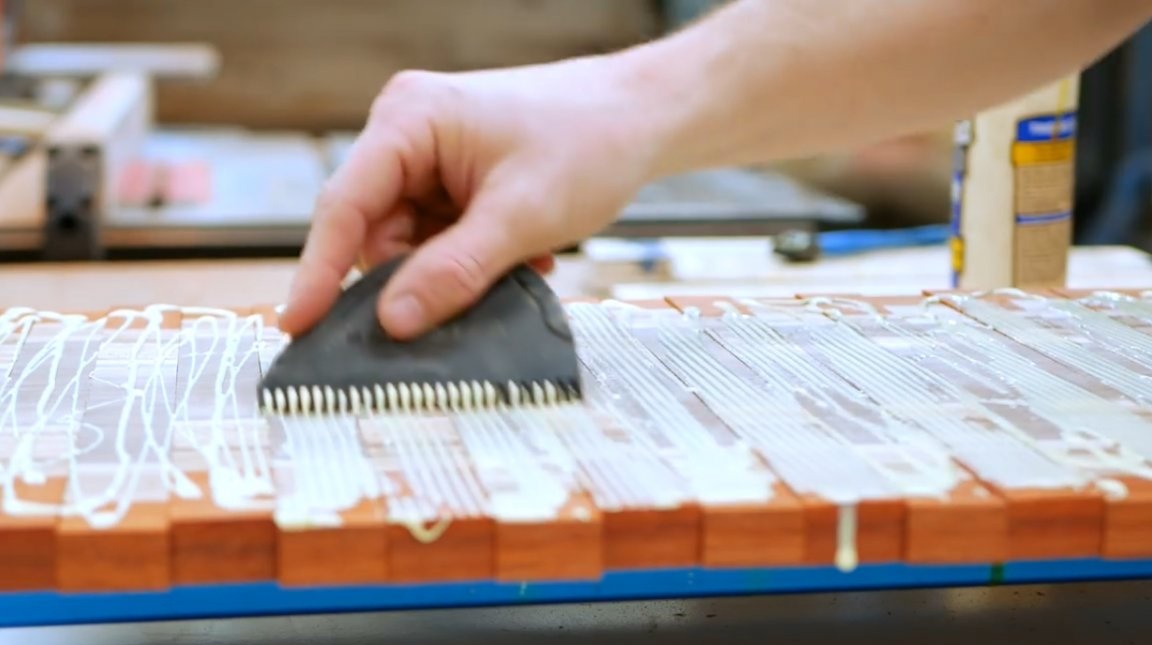
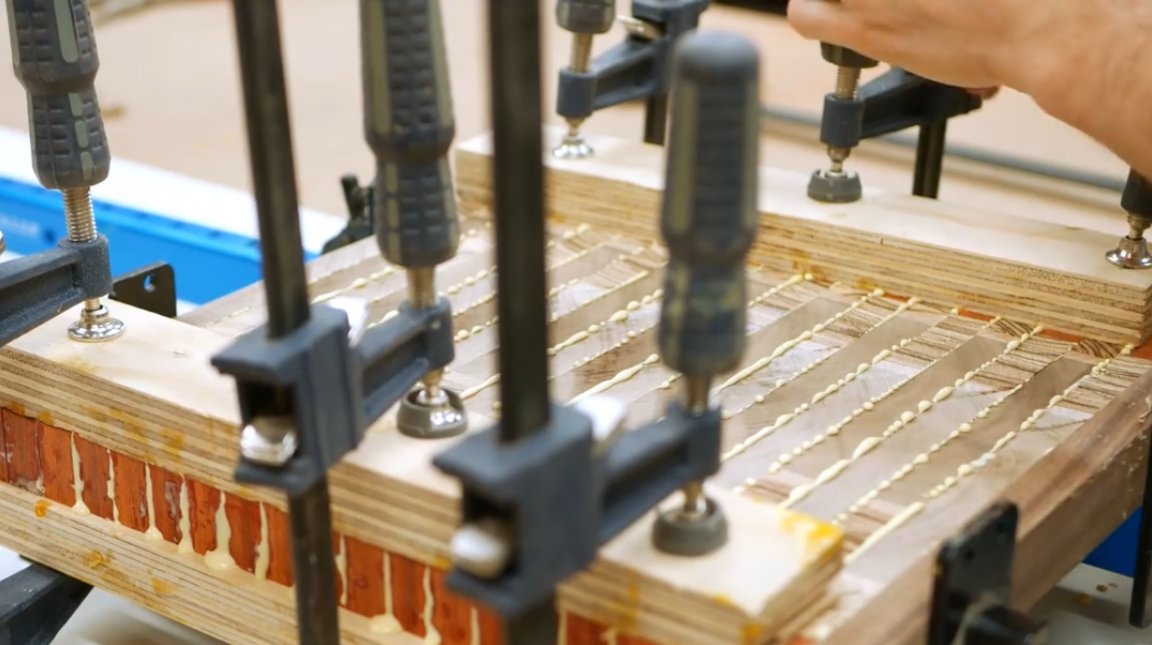
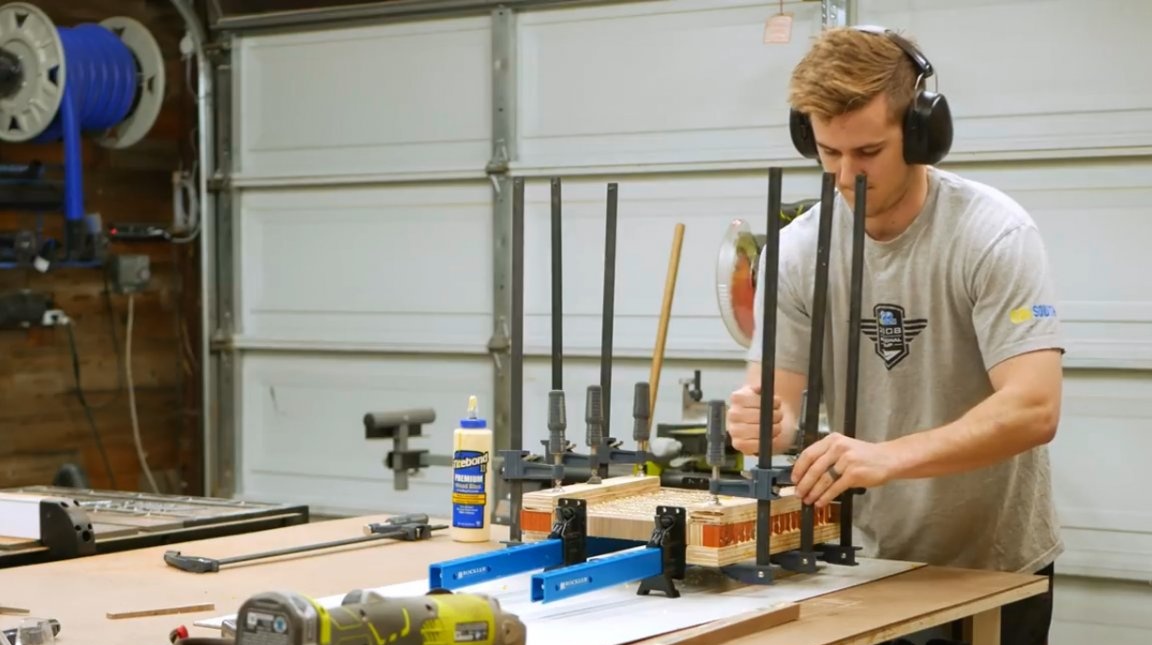
Next is again the bonding step of the elements. The author turns the bars down again with fibers and densely spreads the entire surface with glue, bearing in mind that a rather strong load is placed on the cutting board.

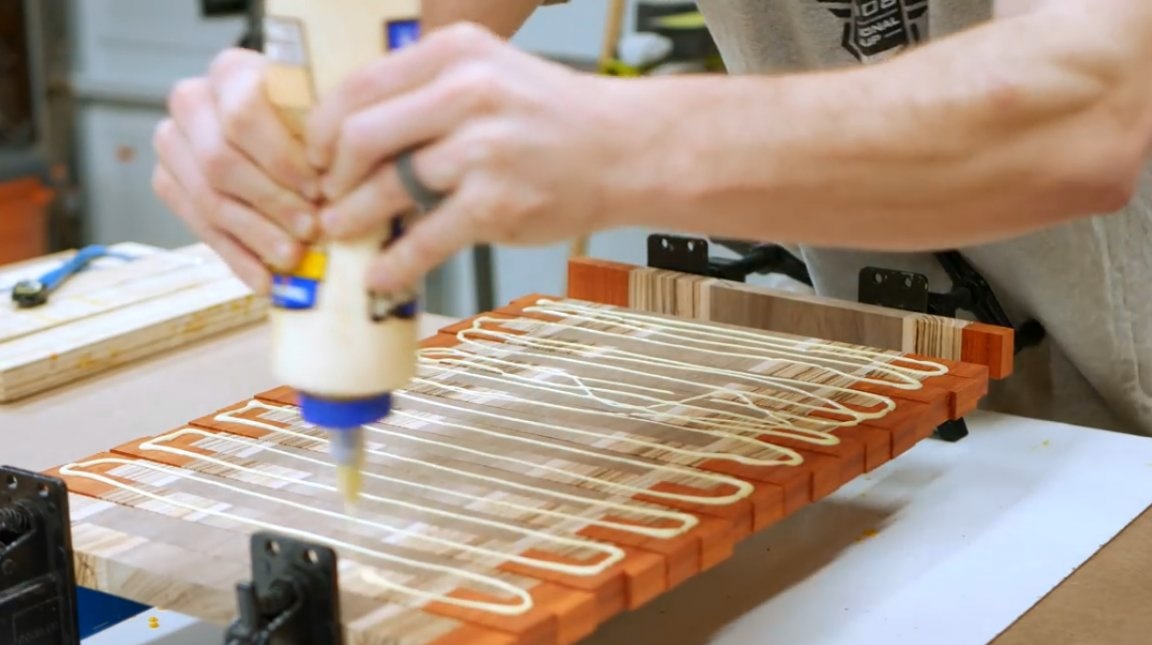
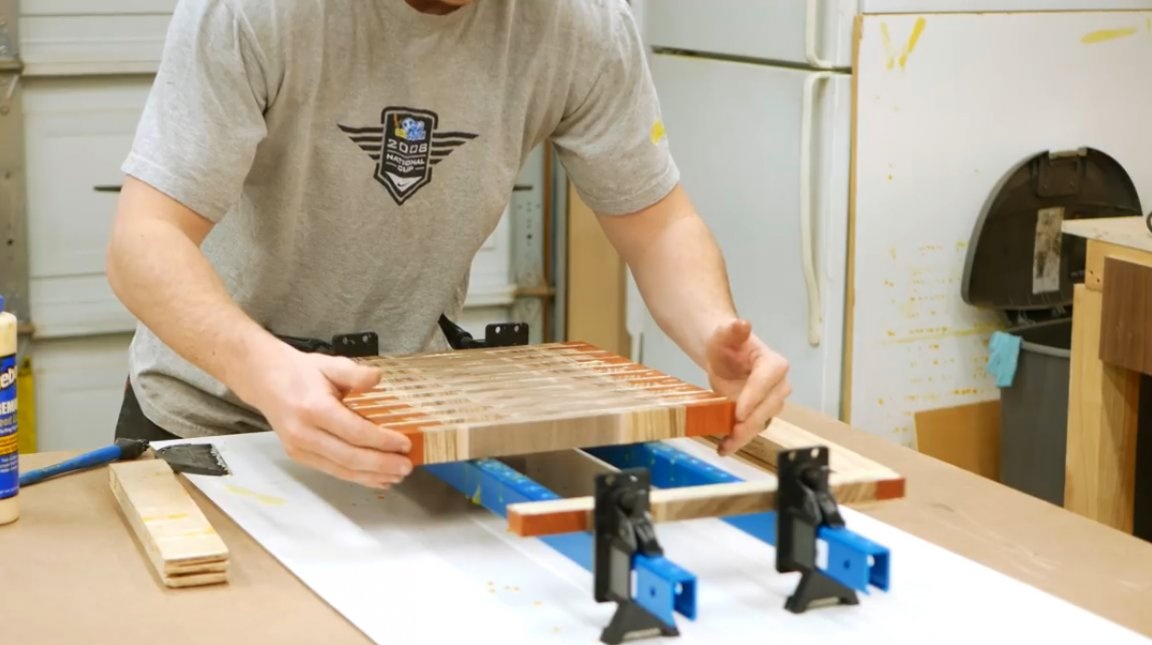
And again the product is pulled together with clamps from all sides. At the same time, it is important to ensure that all still moving elements are aligned with each other, and the pattern remains accurate and smooth. At this stage, the entire project may “fail” if the bars are allowed to slip and move under clamp pressure.
Now that the product has dried, the master passes it again through the thicknesser. But first, he puts the board on a flat slide that acts as a control surface. And on the one hand, close to the board, he attaches a thin wooden pad to hot melt adhesive. The latter is designed to protect the edge of the board when passing through the thicknesser.
Thanks to sharp blades and a thin layer removed from the product, the author managed to get a very smooth surface and a clear pattern.
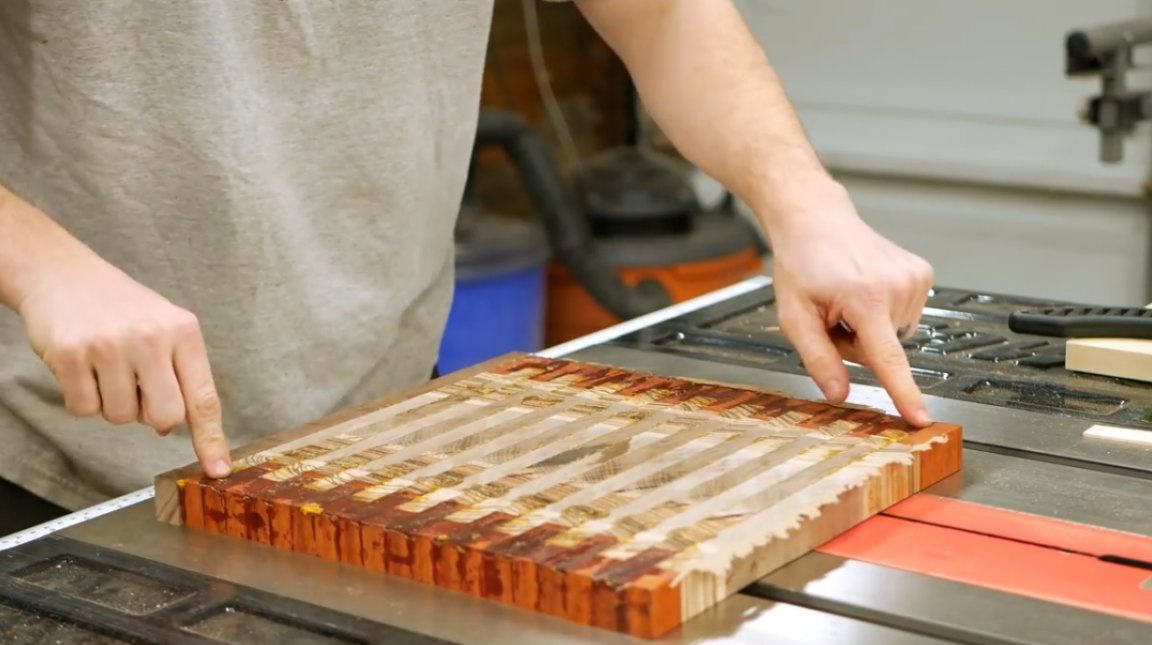
On a circular machine, he aligns the edges, focusing on the drawing of the board. At the same time, he tries to achieve right angles, avoiding tilting.
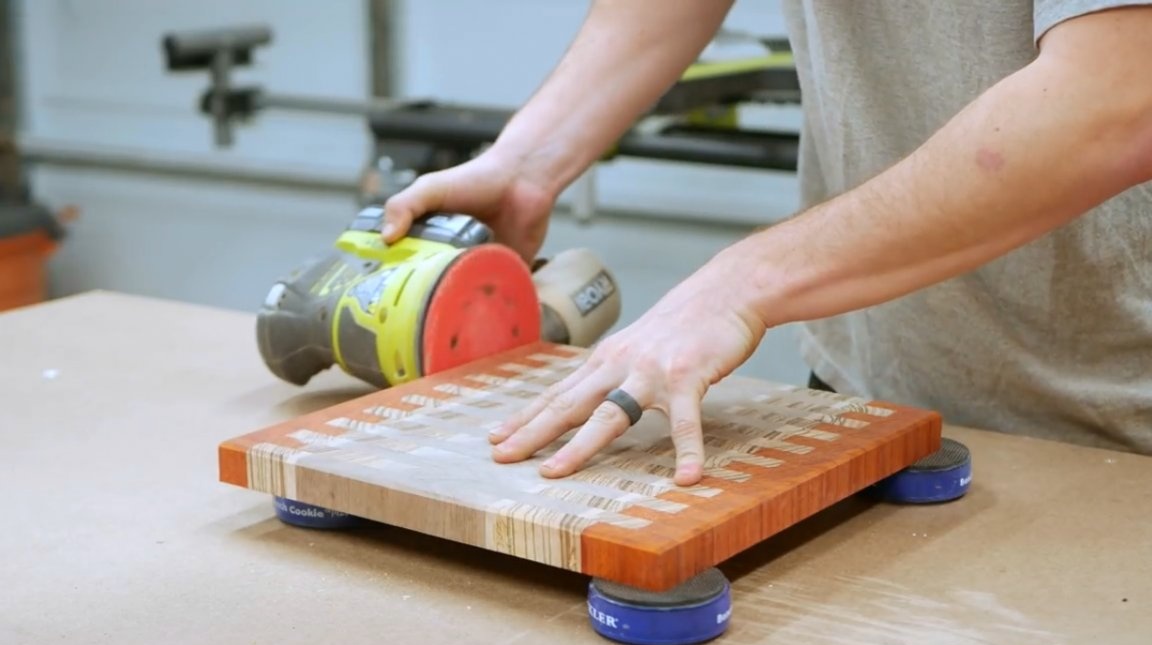
This was followed by processing with a manual orbital sander, sandpaper 80 grit. It took quite a bit of time, because the surface was already pretty neat after the thicknesser.

Further, the author decides to make a barely noticeable chamfer using a milling machine on all the upper and lower faces of the board.
Then he moistens both surfaces of the board to raise the pile, and again slightly wipes the product. Now, if the board gets wet during the first use, it will not become rough.
Next, the master polishes the product with an orbital sander. It passes the edges with 100 grit and 200 grit paper, and manually erases the chamfer with 220 grit and 400 grit paper. For them, the orbital machine would be too aggressive.
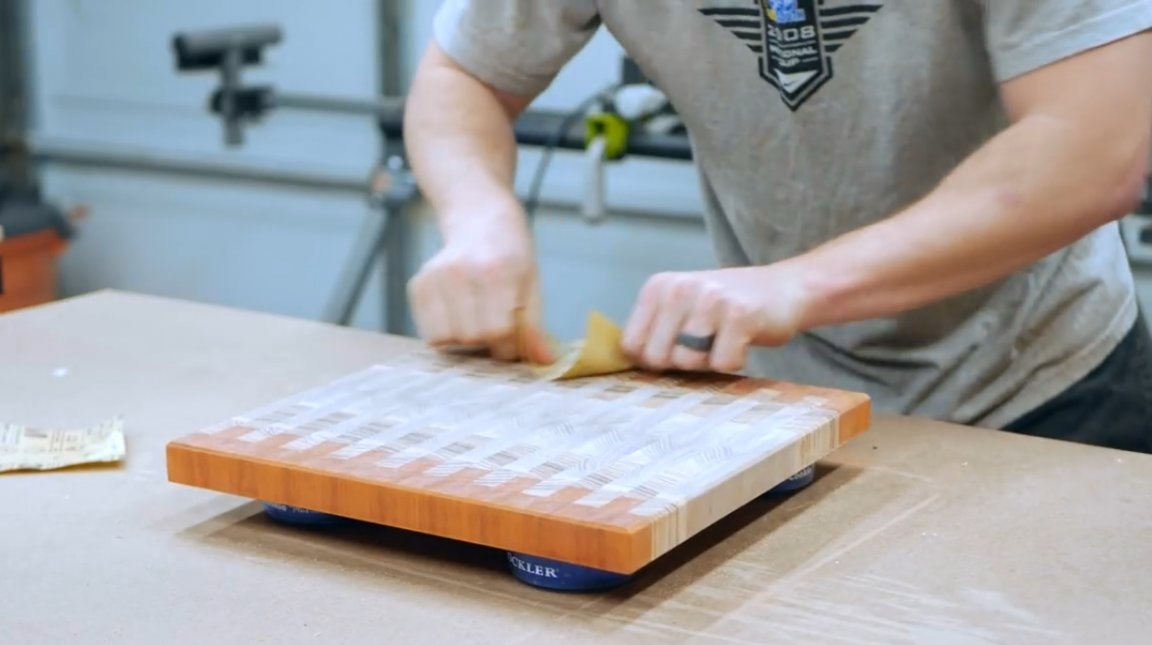
With a pneumatic pistol, Zack blows off fine dust from an almost finished product, and wipes it on all sides with white spirit, thus removing fiber particles stuck in the wood pores.
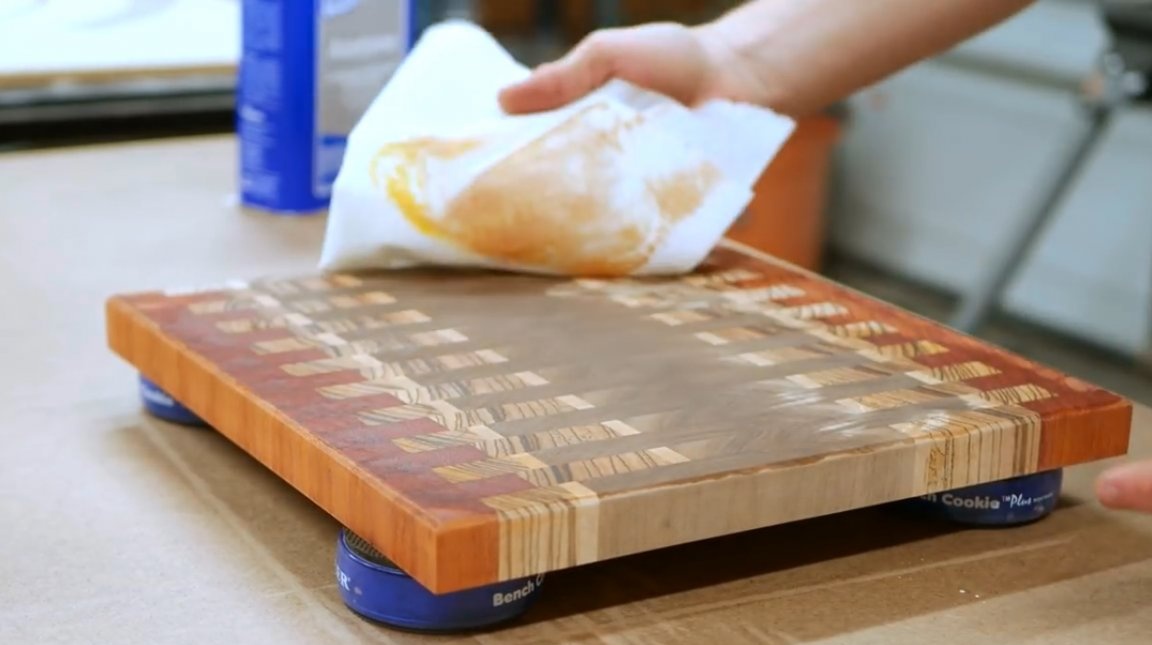
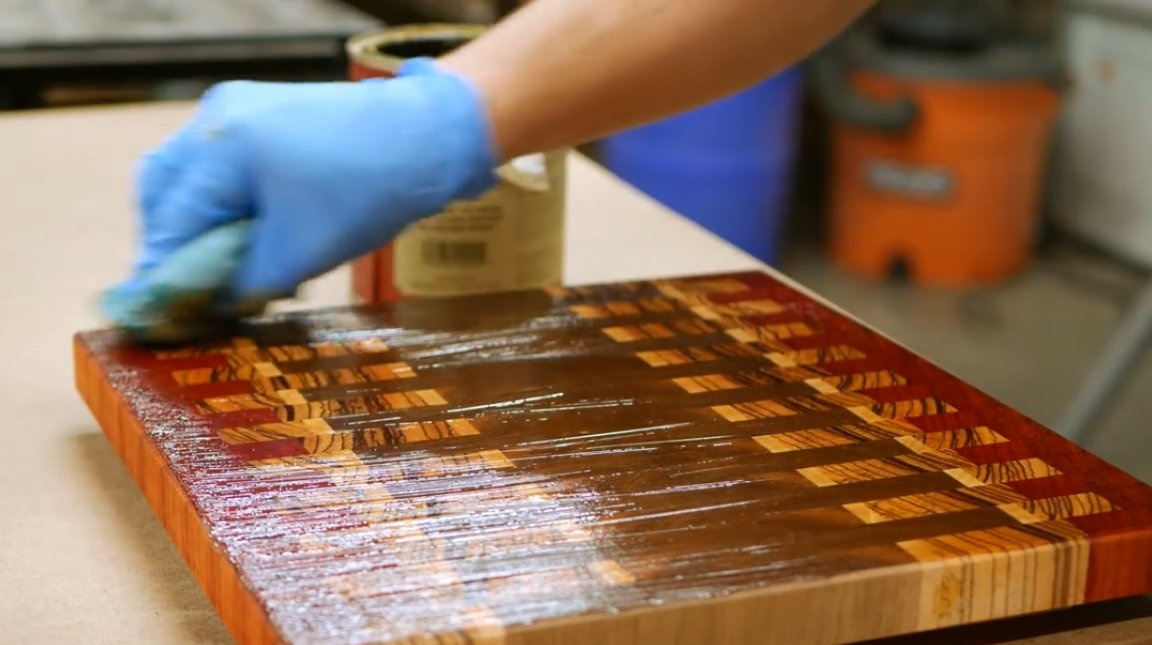
After that, the author covers the board with a layer of Emmett’s finish, rubbing it with a piece of canvas in circular motions. During the night, the product will be absorbed, show the texture of the wood, and give a silky surface.
You can also use a more affordable recipe impregnations from Vladimir Natynchik. Such impregnation is made from natural beeswax and rosehip oil. It is absolutely safe for contact with food, and is practically odorless.
I thank the author for an interesting technique for making an end cutting board!

If you have interesting homemade products, share them on this site. Here you will get real reward, but not a "bunch of brilliant green" on the entertainment forum.
All good mood, good luck, and interesting ideas!
Author video can be found here.