
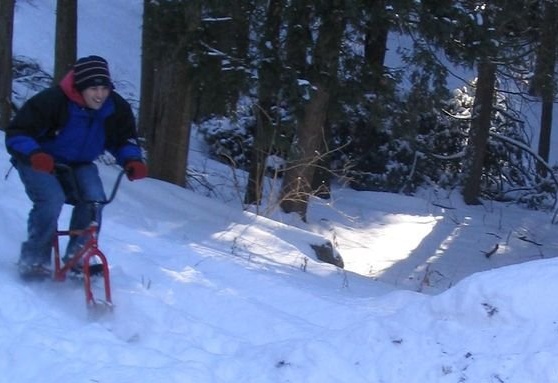
In this master class, you will learn how to make a sky-bike (it is also a sky-bike, a snow-bike or a sky-bike) yourself. This snowmobile is only suitable for downhill slopes and if you are a big fan of bicycles, a happy smile will not leave your face all the time during winter skiing on the snowy slopes! Managing such a bike is easier than it seems at first glance - it is quite stable in driving at high speeds (there is no exact data on what speeds can be achieved on a rolled ski track, but the bike went whistling along the usual hills in my area).
There are many ways to design a skibike, this is just one of them, simple.
Do it yourself! You definitely will not regret it.
Step 1: Take a bike
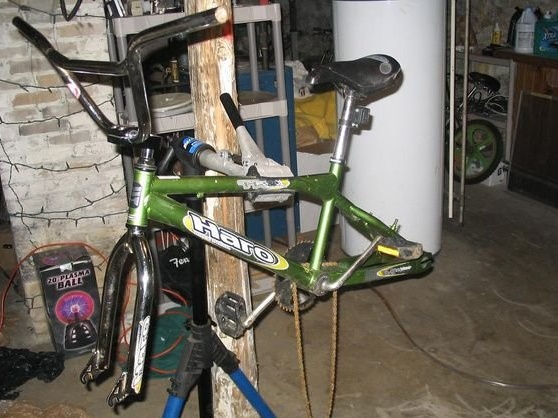
First you need to find the right bike. I prefer small models that are easier to push with your foot to accelerate, or start with a run and jump on the go. The smaller the bike, the lighter it is, which means easier climbing the slope. In addition, if you have to fall, you will be closer to the ground. I picked up this BMX in the trash. (Actually, the rim just burst in it, and the front wheel bent slightly, is it really necessary to throw such a decent car because of this?)
Remove all unnecessary parts from the bike - brakes, wheels and chain.
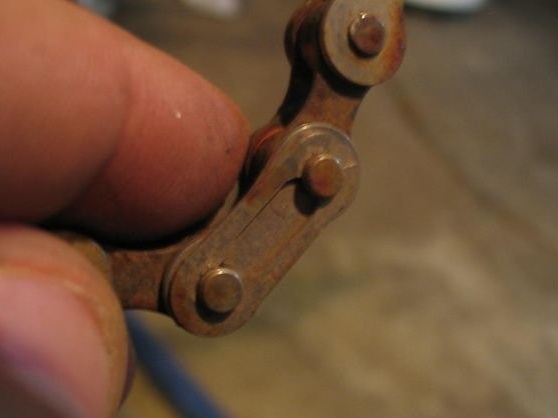
Find the chain link to make your life easier. If this was not found, then you need to use a special tool. In general, you can simply cut the chain.
Step 2: Remove the Sprocket
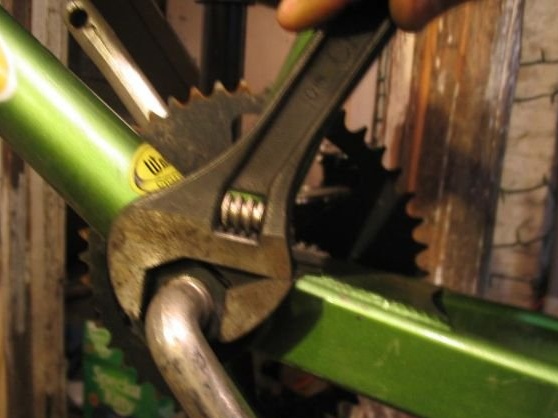
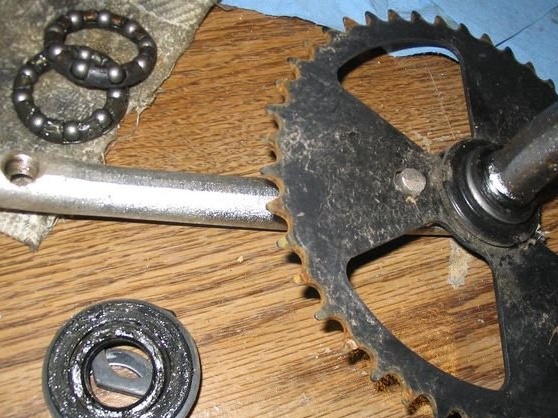
On the bracket, an asterisk is useless. I don’t know if you had to get injured due to an asterisk when falling from an ordinary bike, but this is not pleasant. This bike has a solid shaft, so just remove the sprocket. If you have a system with three leading sprockets, then you need to untwist the rings with a 5 mm hexagon.
Remove the pedals.
Unscrew the clamping nut on the non-drive side. Remember, there is a left-hand thread, so you need to twist it to the right to loosen it.
Remove the bearing track in the same way and the bearings themselves and set aside. Remove the connecting rod and also set it aside on a table or bench.
It remains to remove the second track of the bearing and release the front sprocket. Hope you have a suitable tool! If not, you can use a screwdriver and a hammer, or clamp in a vice and twist the thread. Get creative.
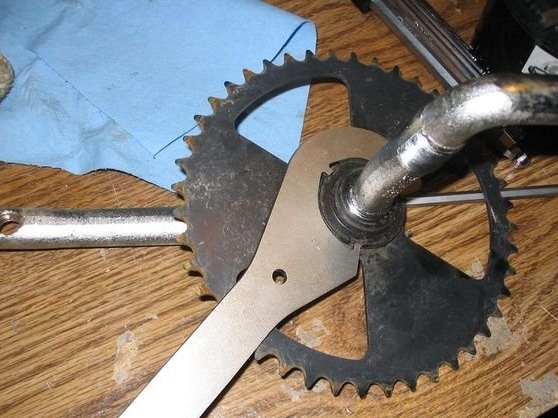
Reassemble everything except the front sprocket and tighten it tightly. Put the system on the snow bike again in the form in which the bearings were removed and adjusted. (Note: if you do not want the connecting rods to move too lightly while riding and you don’t care about the snow bike itself, you can retighten the bearings so that they do not rotate freely).
Now you have a clean, neat frame for the skibayka.
Step 3: Preparing the Ski
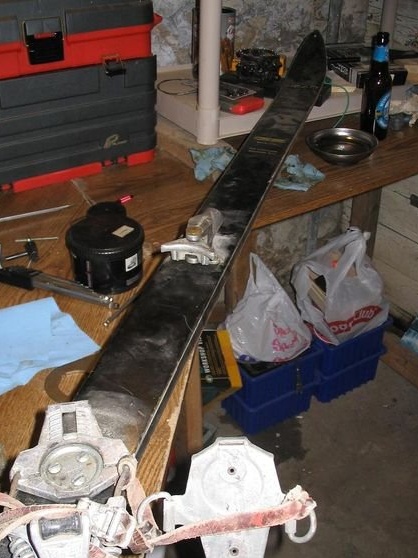
Find a cheap pair of old skis at a used goods store. My pair of Heads cost me $ 2 (about 65 rubles).
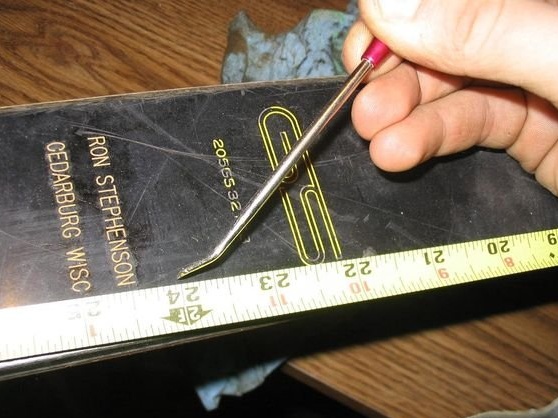
You need to decide how long you want to ski. As for me, a 60 cm track is just fine, but you can take a different size. Mark the place of the cut with a bold line, it will be easier to saw along it. I just scribbled a cut line under the ruler.
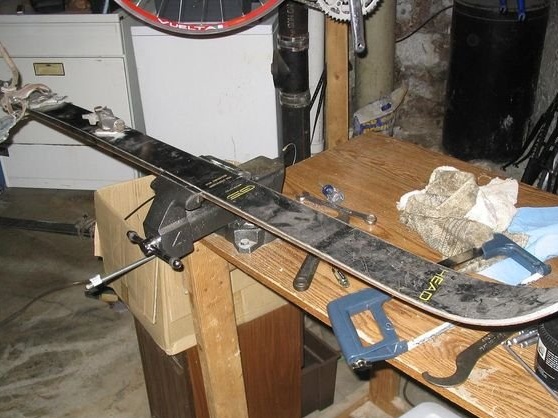
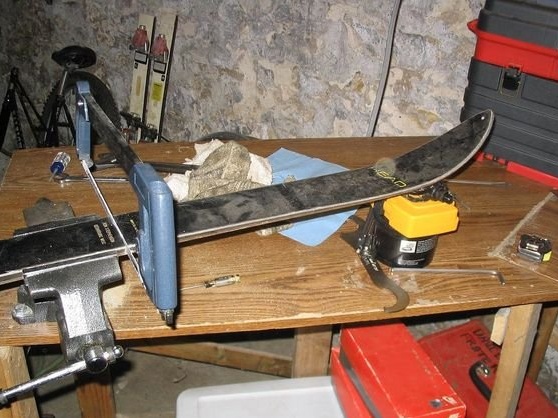
Grip the ski in a vice or lock it on the table to make a straight cut. Take your most reliable hacksaw for metal and saw your ski. It is better to put something under the edge of the track for support, so the cut will be smoother at the end.
Bonus: sometimes by the smell during the cut you can recognize the layers of which the ski is made! Mmmm, epoxy ... ..
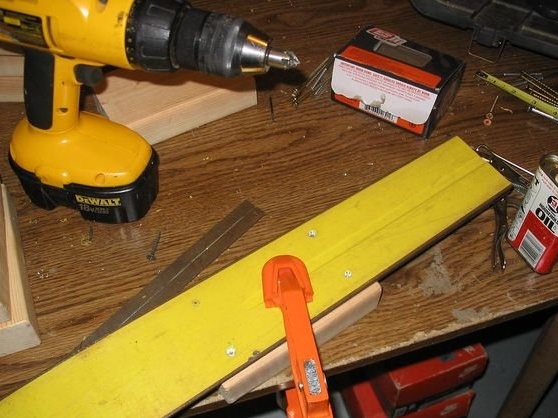
Step 4: Fix the axles
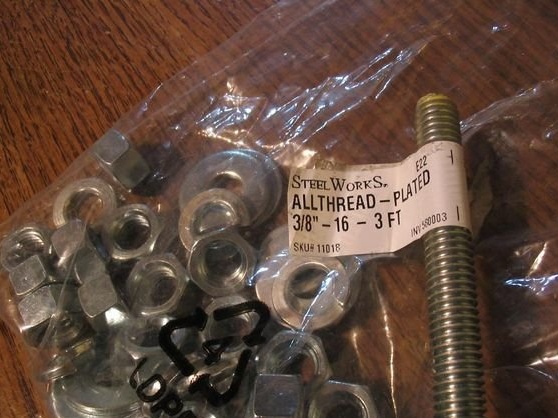
For my design, I decided to use a 3 / 8-16 threaded rod for reasons of low cost and the weight of compatible equipment. Buy the right nuts and washers, this good is inexpensive. I bought a double portion of nuts and washers for 30 rubles.
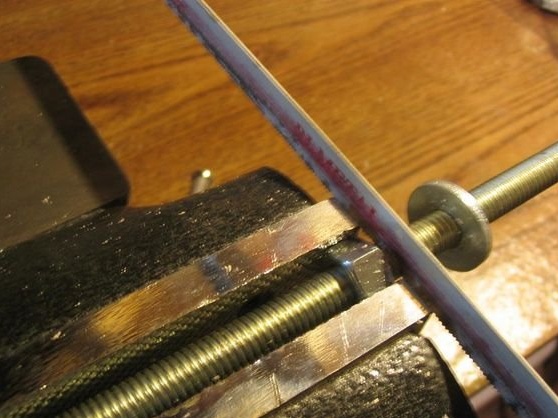
Determine how long the axles should be (given the space under the nuts and washers, as well as the pins or what else you would like to attach) and cut off the pieces of the studs of the desired size. You can screw the nut onto the stud and tighten it in a vice. Strip the edges after the cuts.
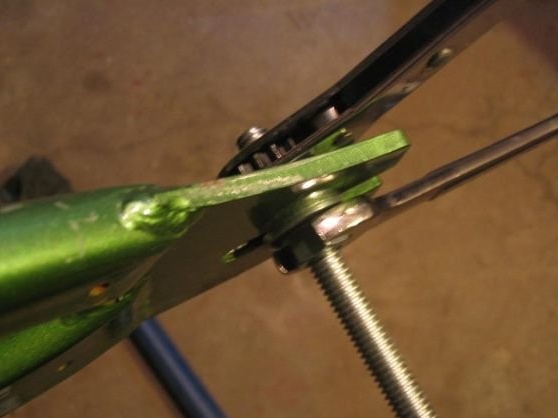
Now fasten the axle to the frame. I used 2 nuts and 2 washers for each dropout, tightening them against each other for a stable axle fit.
Step 5: Cut the tree to secure the ski
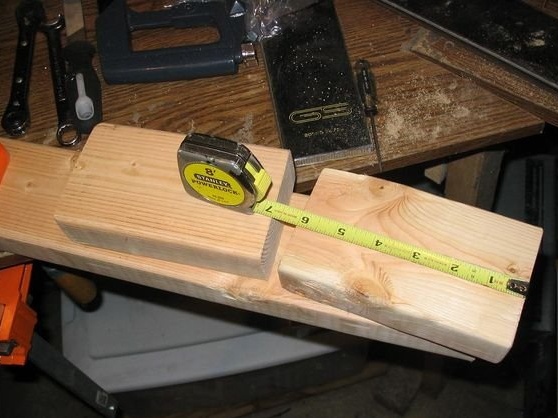
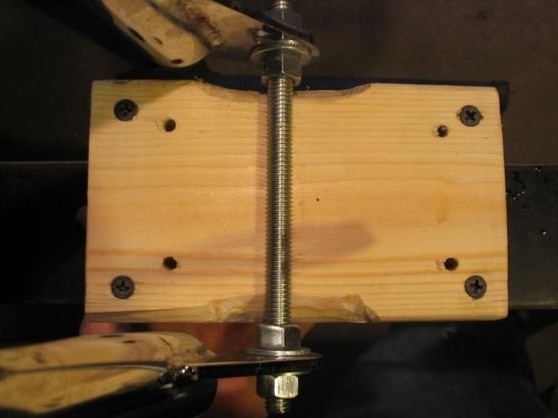
Take a piece of wood, which in width will be placed between the bike’s dropouts (the distance between the front ones is usually narrower, this should be taken into account) and rotate freely, without clinging to anything. The standard 2x4 bar was perfect for me. Cut the boards into decks of the appropriate size - mine were 15 cm. The number should be 3-4 for each track + one on top of the axles.
Note: Axis height clearly affects control. I took 3 pads per track, but I think I would soon go up to 4. The axis of my first bike was about 15 cm from the ground, and it was very convenient to control. This one is about 12 cm from the ground, and this height is not enough for me, although it is managed well.
Sand the edges of the bars and paint if you want.
Step 6: Attach the ski blocks
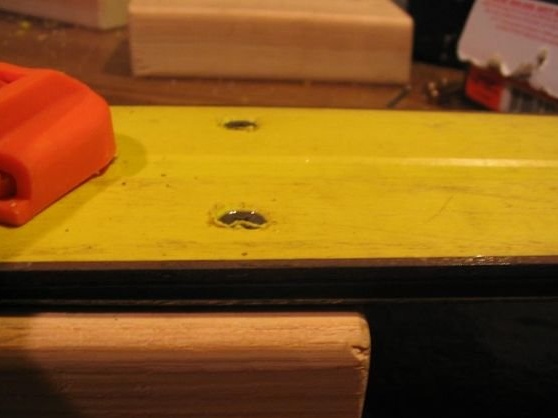

It is time to fasten the wooden bars to the skis. First you need to determine the place of attachment. I decided that my 60-centimeter skis would be attached to the wood at a distance of 16 cm from the rear edge. My design allows you to change this distance (there is a window of about 10 cm), so at what distance drilling skis is not critical.
Place the wooden block exactly under the ski and fasten both parts together. Drill holes through the skis into the tree. Now you need to take the countersink and countersink the holes! Always check with a screw until you get suitable holes so that the screw head is just below the surface of the ski. With a knife, you can cut off excess plastic along the edges of the holes. I took the usual 1.25 inch screws.
Now put another wooden beam exactly on top of the first and fasten them. Drill holes for 4 screws to fasten the boards together. But do not drill in the same places where you screwed the screws for the first time. Any self-tapping screw is suitable for fastening two bars, I used 2.5 inches self-tapping screws. The same procedure must be repeated for all blocks in the pile, and for each ski.
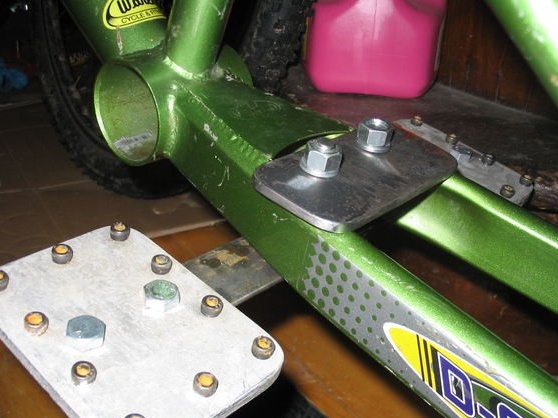
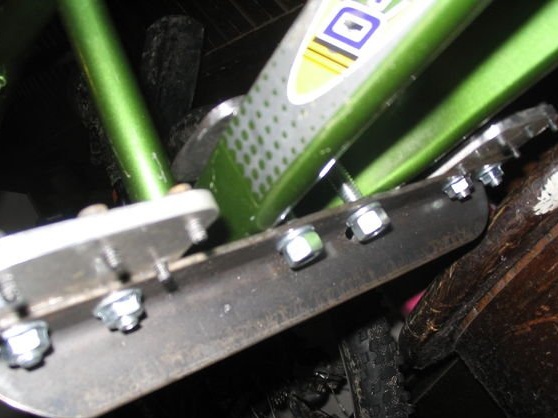
Step 7: Attach the Axis Clamp
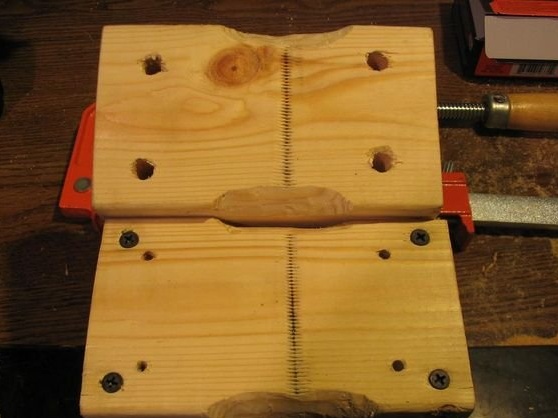
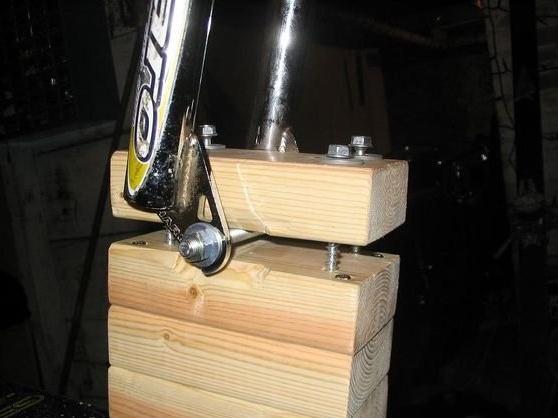
Now you need to attach the top block, which will hold the axis in place. My design, of course, is a bit strange, but I decided to use it because it allows you to adjust the skis in the longitudinal-transverse direction after everything is cut, drilled and twisted. It also allows you to adjust the resistance to bends, which is indispensable when flying above the ground :)
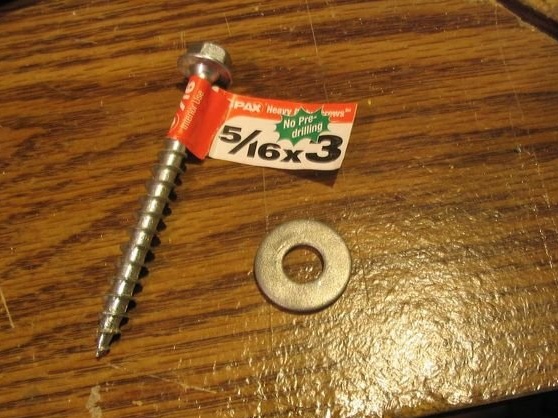
You will need one additional piece of 2x4 timber and 4 5/16 x 3 capercaillie bolts and washers on each axle.
The process is already familiar to you. Fasten the blocks and drill holes of the right size for the capercaillie. I placed the holes 2.5 cm from the cut and about 2 cm from the outer edge of the tree. Remove the clamp from the blocks and re-drill the upper block so that the capercaillie easily passes through the holes.
If necessary, cut off more wood with a knife so that there is enough space for the internal axial bolts, as I did for my front axle (shown in the photo).
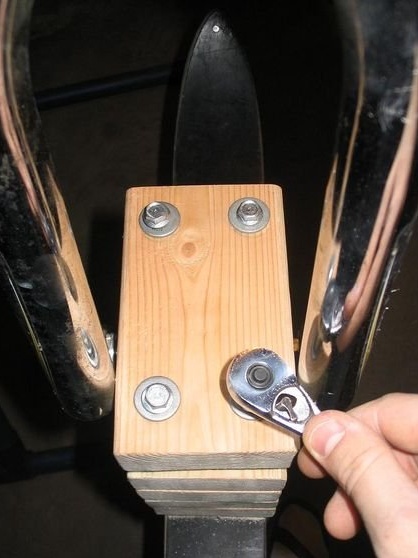
Install and tighten all the cap screws, but try to tighten all the bolts equally so that the wood does not crack. Tighten one at a time until you get the right resistance to turning the skis. You can tighten the bolts so that the axis fits tightly in the tree, and then loosen as much as necessary.
Do the same with the rear axle.
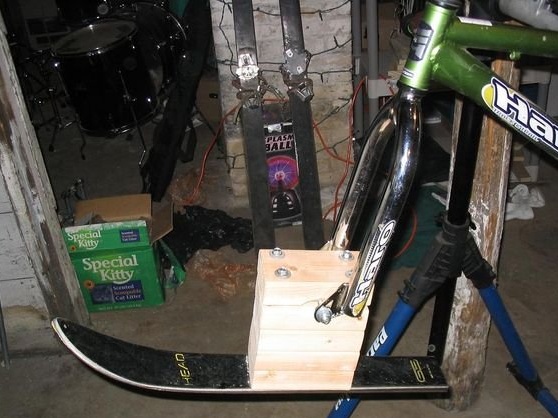
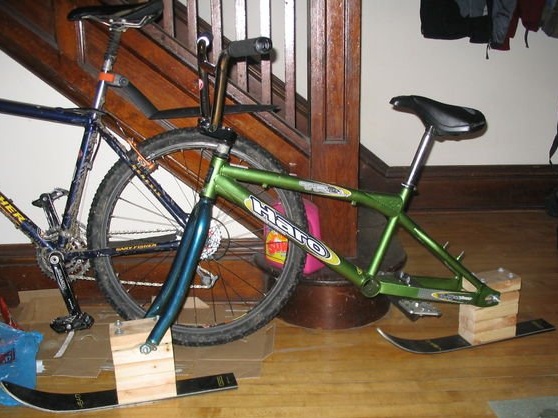
Step 8: Finished Skibike!
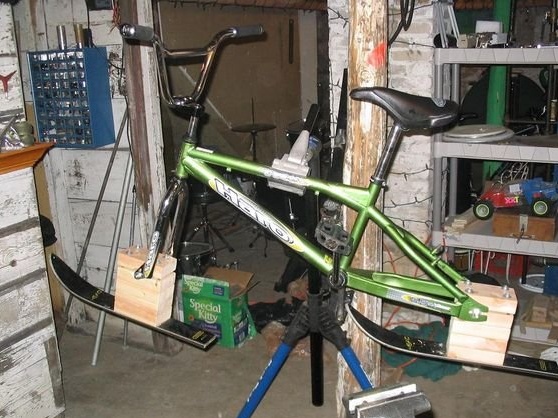
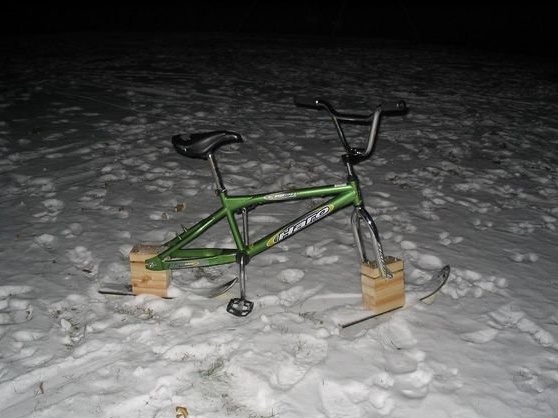
You did it! Now you need to make a test drive if it is already snowy in the yard. Adjust the seat and steering wheel heights to make it easier to control the snow bike.
For all skeptics who have complaints about the ski attachment system: I tested my bike a day after completing work on a rather steep, hilly track, and the snow bike was just amazing in motion. Skis did not relax and did not move from their position even on sharp turns and during one unpleasant fall. But, if you need something more secure, you can safely cut the furrows in the wooden blocks, in which the axes will sit more tightly and reliably.
Afterword:
I am thinking that it would be nice to cut the skis a little longer, especially after studying several commercial skibike models, all of which sat on a longer track. In commercial skibayki, the rear edge of the front ski almost touches the rear.
I lifted my snow bike from 3 wooden blocks to four, and I really liked this change. The bike was controlled more predictably, and the connecting rod did not touch the ground if I started pedaling, as was the case with 3 blocks. My old bike had a children's steering wheel, which is very convenient. A longer steering wheel looks a little strange, and here it is not needed.
What else would I change:
I would play with the position of the rear ski, I would try to move it forward to shorten the ski base.
It would also be nice to use a thread lock, lock washers or nuts to fix the axle more firmly to the frame. Conventional nuts and washers tend to loosen, so keep your wrenches handy and regularly check connections.
It would be nice to cover up the cut edges of the skis with something. A layer of silicone or epoxy, or other similar material is quite suitable for protecting the layers of the ski from water and freezing inside - this quickly spoils and delaminates the skis.
I would replace the system with some kind of footrests mounted on a carriage. This solution is used in commercial skibayk. In this case, it will be easier to jump onto the bike during acceleration. Large pedals and connecting rods sometimes interfere with this and knock down.
I would like a big soft seat, like a snowmobile. It is much more convenient to ride with it, it gives a better weight distribution, and the skibike will look better. Many manufacturers of commercial skibayk have already come up with this.
I am considering the idea of using a 26-inch plug for safer handling and less “accident” when driving. And of course, I’ll also experiment with the removal of the steering wheel and the steering wheel itself.
Other thoughts:
If you want to use such a snow bike on ski slopes, most likely you will want to make fastenings made of steel or aluminum, or other material that will safely pass security checks. Modern models have torsion springs integrated in the axis, which provide an inclined position of the skis in the air.Also, you probably need to mount on a chair lift.
Soon I will probably do another skibike (experiment and give a friend a gift for one) using a cheap two-hanging mountain bike and longer skis. You can read about the results soon.
Good luck and have fun!
Step 9: Extra Gadgets
After walking and thinking, I still decided to tune this skibike slightly.
I found and installed a 26-inch fork to reduce bending of the bike on bends and more precise control on sharp turns.
I also removed these unruly pedals and made stands for the legs of their steel corner, a piece of aluminum and socket wrench bolts.
What an improvement! Now the controls are much more predictable, steering in tight corners has become much easier, partly due to the long fork and partly thanks to convenient footrests. Great notions.