
Wow, a long time ago I did not post any workshops! I decided to use PVC again in my creations, and this time I made an excellent office desk out of it. I want to share with you how to make such a table, because judging by the number of letters in my mailbox, many are interested.
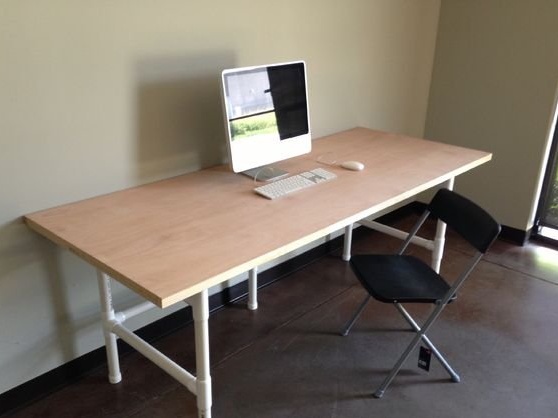
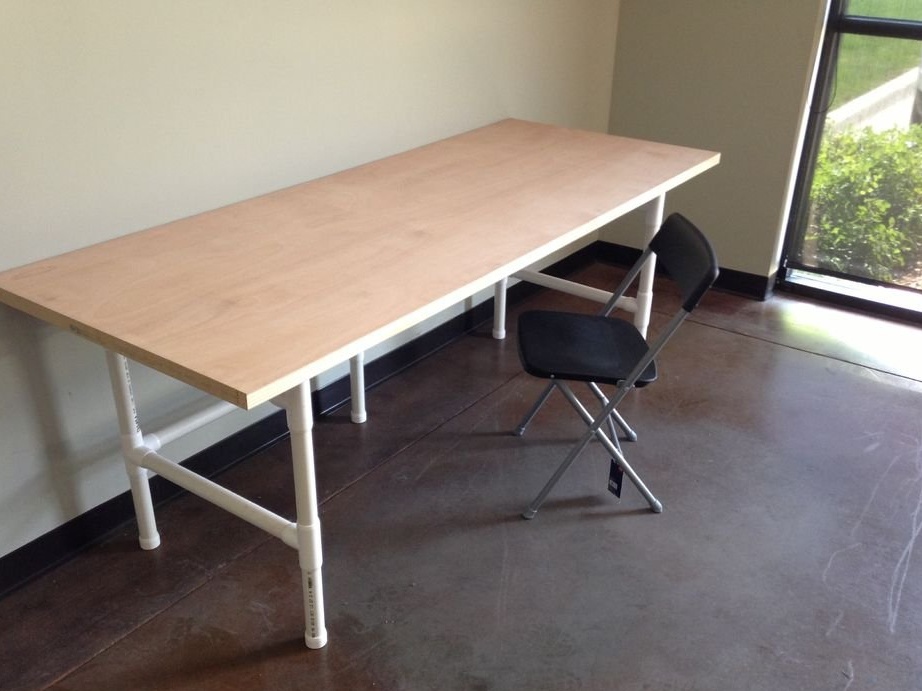
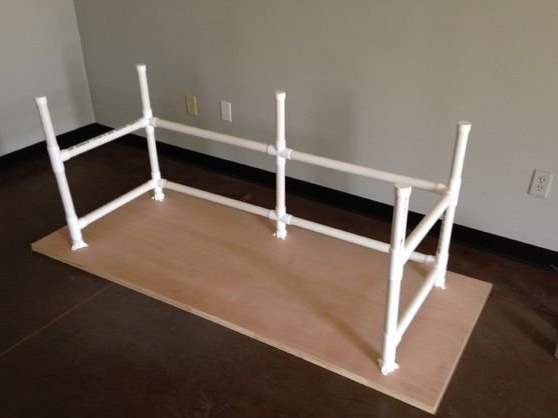
This master class will show you how to make a VERY large table from a hollow door and PVC pipes and fixtures. This table is suitable for workshops, offices, family dining rooms and even for children. I made a dozen of these as desktops in the office. The one you see in the photo was my first creation.
Each such table costs about 2500 rubles.
We could buy ready-made tables half the price, but these look much more respectable. They can be painted in any color, the surface is perfectly flat and smooth. And the biggest advantage is the size - 91.5 x 203 cm (36 x 80 inches).
A few important points:
1. Hollow placeholder vs. Solid aggregate: I chose hollow components to reduce costs. Since no one was going to use tables for heavy work, there was no need to use super durable materials. If you want to make a solid workbench, then it is better to take a solid door, which will cost an extra 800 rubles. And such doors are much heavier (which is not so bad, the design also withstands such weight). You can buy a finished countertop in Ikea, if there is such a store nearby.
2. Mounts: All PVC parts were bought by me on the Internet. You will need desktop plugs, 4-sided and regular T-shaped connectors. The total amount on one table is 970 rubles. These costs can be reduced if you use soldering instead of cross and T-shaped joints, but this can affect the appearance of the finished table worse.
3. Trumpet: I used PVC pipes from a regular plumbing store. With a big budget, I would take pipes not for plumbing, but for of furniturea class taller and looking better. They are stronger and more durable, but the savings have won. If we continue to develop PVC furniture, I will already use special materials for furniture.
Step 1: Tools
For this table you need to take the usual tools:
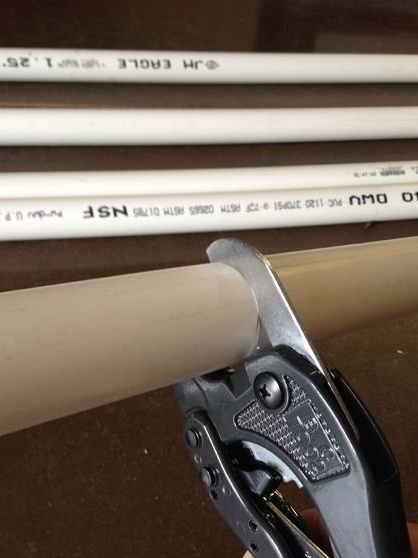
1. You will need some kind of tool for cutting pipes - a hacksaw, a special knife for plastic pipes or an electric miter saw. The choice is yours!
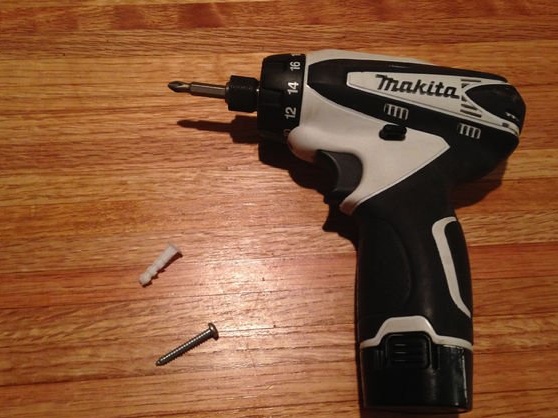
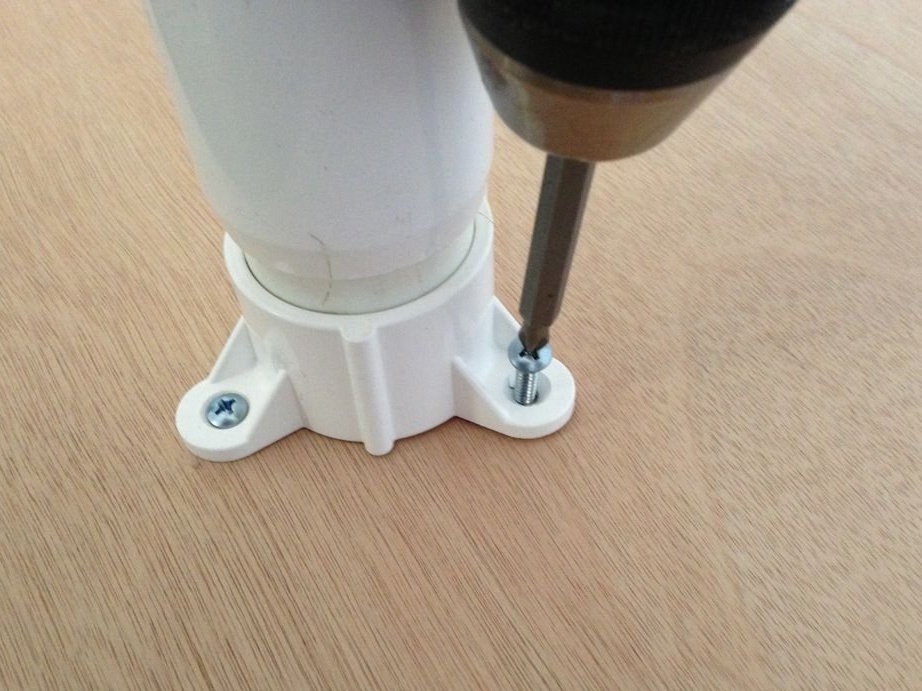
2.A rotary hammer or electric screwdriver for attaching table legs to the back of the countertop.
3. You need a minimum of 15 screws with a thread length of 1.25 - 1.5 inches and screwdrivers for screws. Helicopters are not always needed, but sometimes they are used to strengthen the fastening of plastic cups to the countertop.
4. PVC cement is needed to strengthen all fasteners. All plastic parts will be glued securely and will not fall apart. You can use small half-inch screws if there is no cement.
Step 2: Details
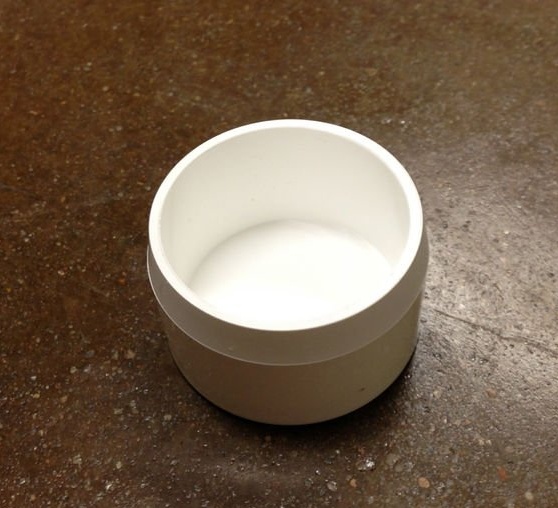
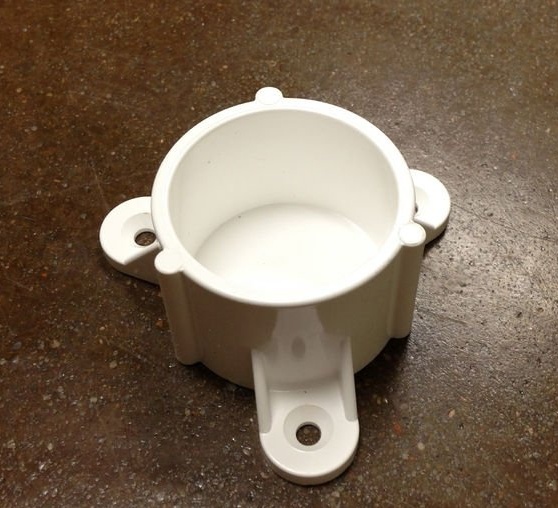

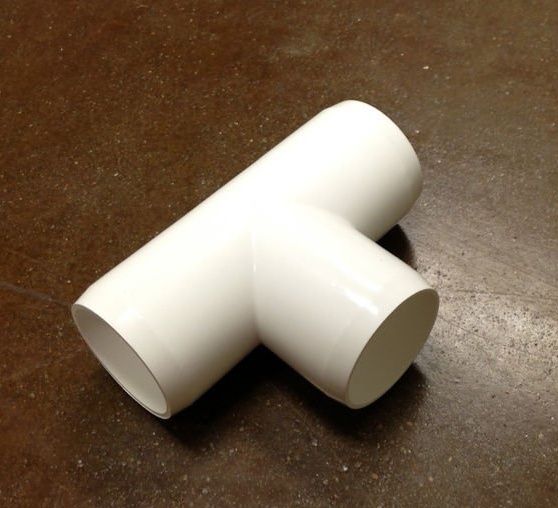
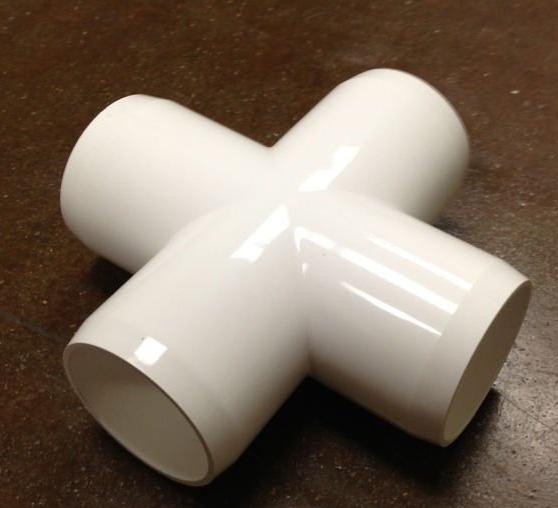
I used PVC furniture fittings. This is because I needed 4-sided T-joints, leg cups, and flat-top caps. The remaining elements may be from the plumbing class, but in terms of compatibility and depth of fit, the classes are practically the same among themselves.
I ordered all of these parts online. It does not matter in which store, if only the assortment contains all the set you need.
I ordered the following items:
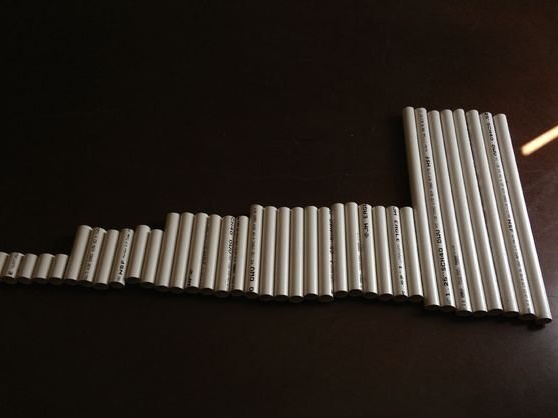
I used a plumbing pipe to save on the cost of materials, since furniture pipes can be much more expensive. About 12 m of pipes took me to one table, I bought 3-meter pipes, which I cut into such segments:
Step 3: Assembly: Side 1

I will demonstrate each assembly step in outline. I used the program SketchUp. This is better than showing you our dirty working office where we moved in photos.
Proceed:
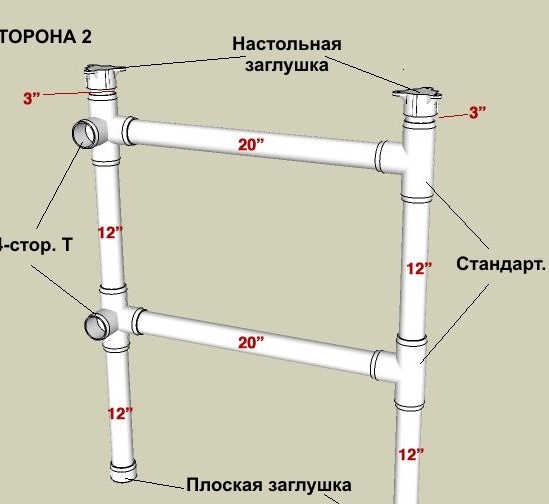
Side assembly 1
The first is to assemble one of the two sides of the PVC frame using conventional and 4-sided T-joints, flat plugs and tabletop plugs, which are marked in the figure. The fasteners themselves are signed BLACK, pipe lengths - RED. This will be “SIDE 1,” or the left side of the table.
First, I recommend dry assembly, and THEN you can already disassemble everything and cement it again. As you probably heard, after gluing with PVC cement, the parts can no longer be disconnected from each other by anything.
Apply PVC cement only on the inside of the connector, on the stop line. Make sure that all the parts are inserted into each other, as expected, and then press the pipe into the connector and hold for 30 seconds.
NOTE: Most people will recommend cementing both the connector and the pipe, but I personally made sure that this is not necessary.
ANOTHER IMPORTANT THING: If you do not want to use cement, as it is harmful when used indoors, use a screw between the connector and the pipe to seal the fixture.
AND ONE MORE NOTE: I tried to fix the pipes so that all their marks were directed back (the backside is where the 4-sided T-shaped connectors are). In this way, they will not be visible outside the table, and do not wash them with acetone for a more neat appearance. I still couldn’t hide all the inscriptions, as seen in the photo. Learn from my mistakes.
Step 4: Assembly: Side 2
This step faithfully repeats the previous one, but the design of “Side 2” mirrors “Side 1”. 4-sided T-shaped connectors look in the opposite direction when standing from the rear.
In this drawing, pipe sizes are also indicated. REDand connectors BLACK.
Step 5: Assembly: REAR
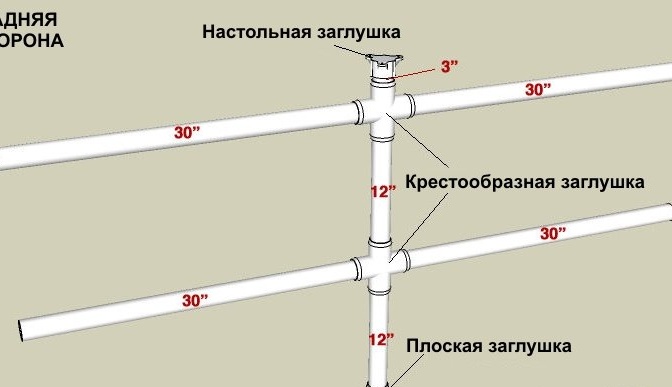
It is time to assemble the “Back” of the table, which is even simpler than the previous ones. You will need a desktop plug, a flat plug and two cross-shaped connectors (we have not used one yet). Connect them to long pipe sections (75 cm or 30 inches) so that the shape is something like a telephone pole.
To assemble the central “pillar”, lay everything on the floor so that all long pipes are parallel to each other. So it will be more convenient and more accurate.
Step 6: Assembly: Merging Fragments

Now you need to collect all the PVC fragments in one design.
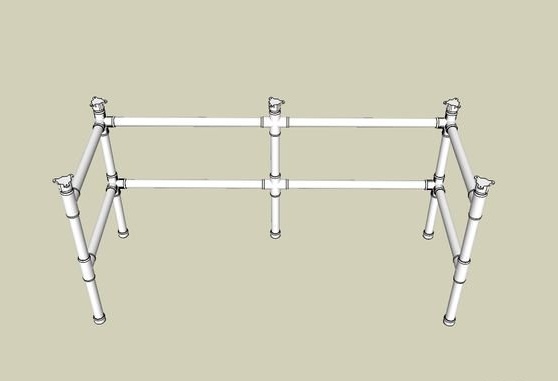
Insert the ends of the pipes from the “back side” into the corresponding connectors of PARTY 1 and PARTY 2. At the end, it should turn out as in the drawing.Again, I recommend that you first collect everything dry, and then glue it on cement.
As soon as the assembly is dry, separate the parts from each other and apply PVC cement to the connectors of the PART 1 and insert the pipes of the back into the 4-sided Т-shafts of the PART 1. Quickly make sure that everything is sitting as it should, squeeze for 30 seconds .
Next, apply PVC cement to the SIDES 2 connectors and insert the pipes from the back into the 4-sided T-pins of SIDES 2. Squeeze for 30 seconds.
So you have finished the frame! Already almost everything!
Step 7: Assembly: Countertop
Disadvantages of a hollow door:
Hollow doors consist of an external frame and various horizontal bars. Between them, the space is either filled with cardboard, or foam, or nothing at all.
From the outside, we cannot see what is inside the door, so that we can only screw in screws at random to fix the tabletop to the table cups. It is possible with equal probability to hit the bar or in soft cardboard. In those places where the cardboard, it is better to use a screwdriver to better fasten the structure. Here's how to do it:
1. Lay the hollow door on the floor with the side that will be the front panel of the table. Then lay the PVC construction on top, upside down, so that the table plugs are adjacent to the door.
2. Center the entire structure (by eye, of course) so that it is at the same distance from the edges of the door. Then, using a pencil, mark the places where the openings of the plugs are in contact with the door.
3. Remove the PVC structure from the door and set it aside. Using a drill or electric screwdriver, screw a screw into each marked point.
* If the screw passes easily, you are in the emptiness of the door. Remove the screw and insert a screwdriver into such holes (you can drill a larger hole if necessary)
* If the screw goes tighter, you hit the bar, and here you can do without a screwdriver. Remove the screw.
Once you have decided where the screwdrivers are and where not, make sure that all the screws are unscrewed from the door and put the PVC construction upside down on the door again, adjusting the position of the plugs for the holes made.
NOTE: All this can be avoided by using a solid solid door. It will be more expensive, but easier.
Finally, insert the screws and tighten, thereby securing the countertop and legs. Here is a finished table, though upside down.
Step 8: Finished: Flip and that's it!

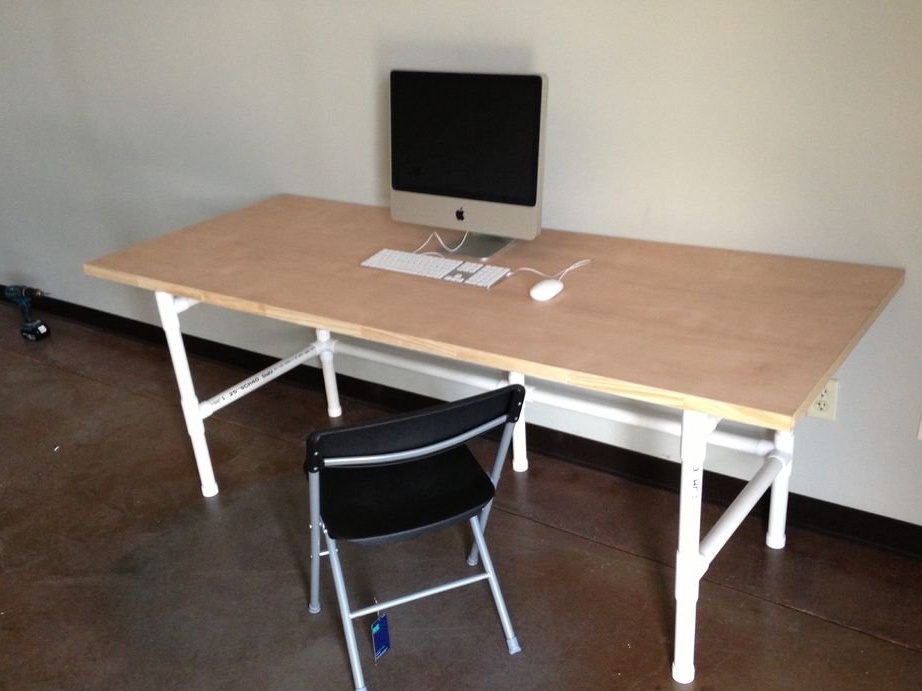
Put the table on its legs, and you can get to work at a convenient, huge and durable table! (of course, if I explained everything correctly, and you followed my instructions).
You can paint the table or varnish. We adhere to the "naturalness" in the design. However, something is dripping on the table, leaving traces behind it. So I still advise you to cover the countertop with some waterproof paint or other coating.
Alterations
As with any other PVC product and component parts, you can change the design to suit your specific needs. There are shorter doors, so you can replace pipe sections from 30 inches to 24 (60 cm) or another size. You can increase the height of the table by replacing 3-inch segments with longer ones. So the table will be more suitable for standing work.
I hope you enjoyed my idea and its implementation! Share your impressions in the comments, ask questions if necessary!