
Of course, almost every one of you has a screwdriver or a drill at home or in a workshop. However, the task often arises to drill a hole in a part or workpiece strictly perpendicular to its surface.
In this article, the author of the Amazing Woodworking Techniques YouTube channel tells you how he made a special nozzle for a drill or screwdriver that will allow you to perform this operation quickly and accurately.
This homemade product is not very difficult to manufacture, but it will require the purchase of some parts.
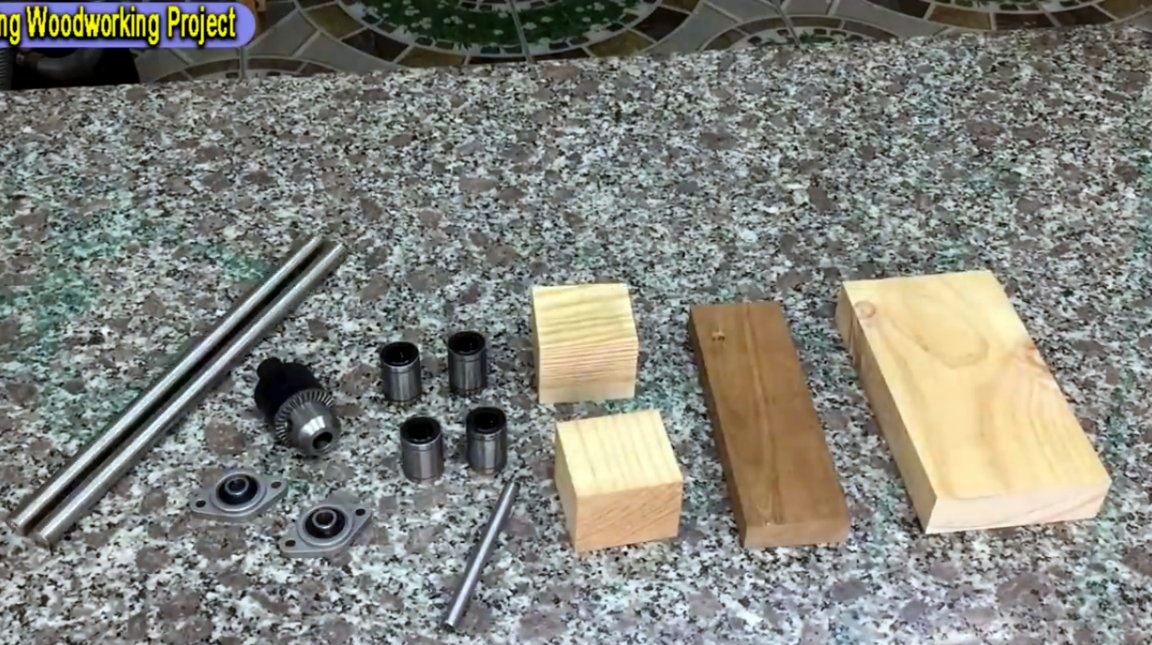
Materials
- Wooden beam, board
- Linear plain bushings
- Flanges with bearings
- Drill chuck
- Steel circle
- Springs
- Wood screws.
Instruments, used by the author.
— Screwdriverbits
— Countersink drill
- Drilling machine
— Forstner Drills
- Three-point wood drills
— Clamps
- Ruler, hammer, square, pencil, Allen key.
Manufacturing process.
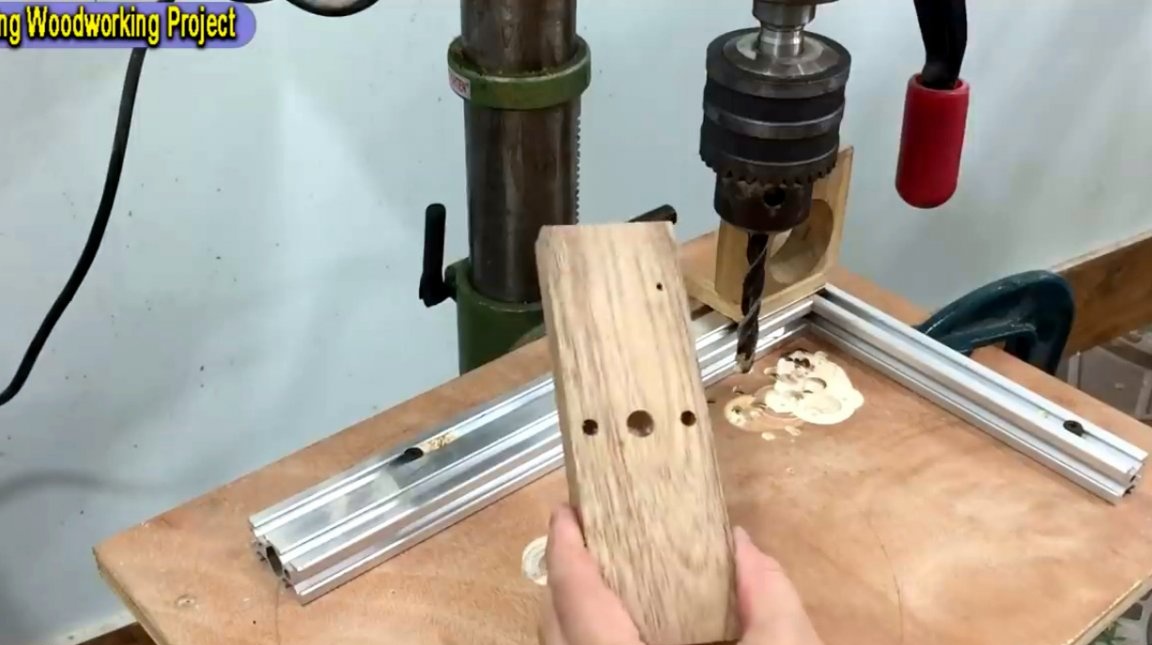
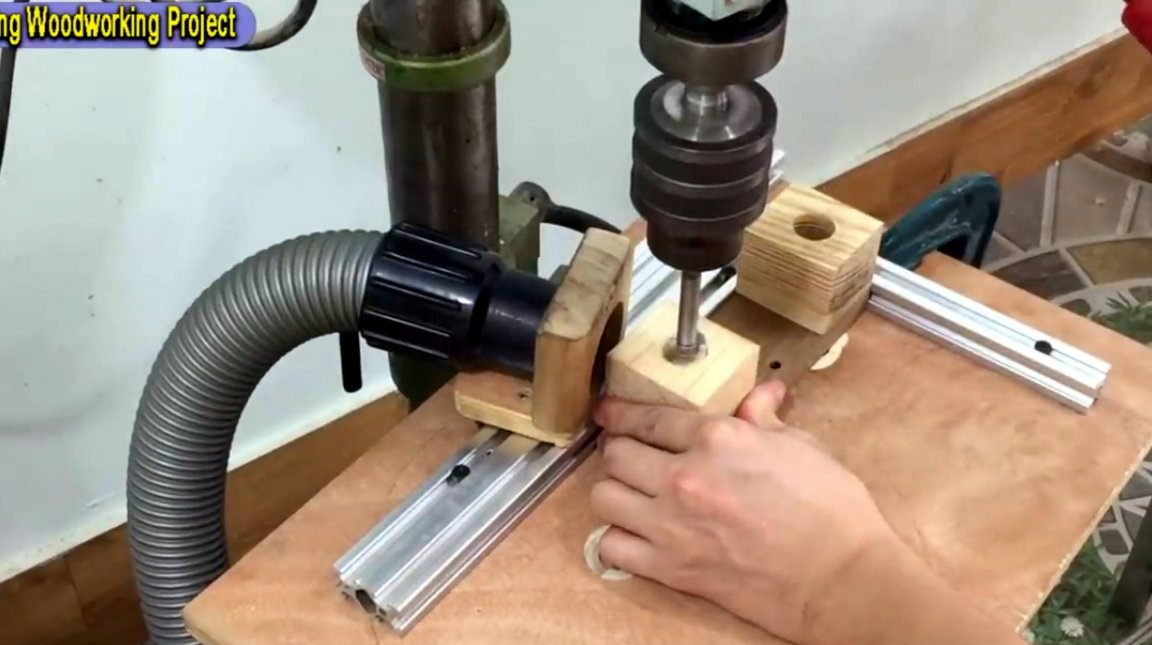
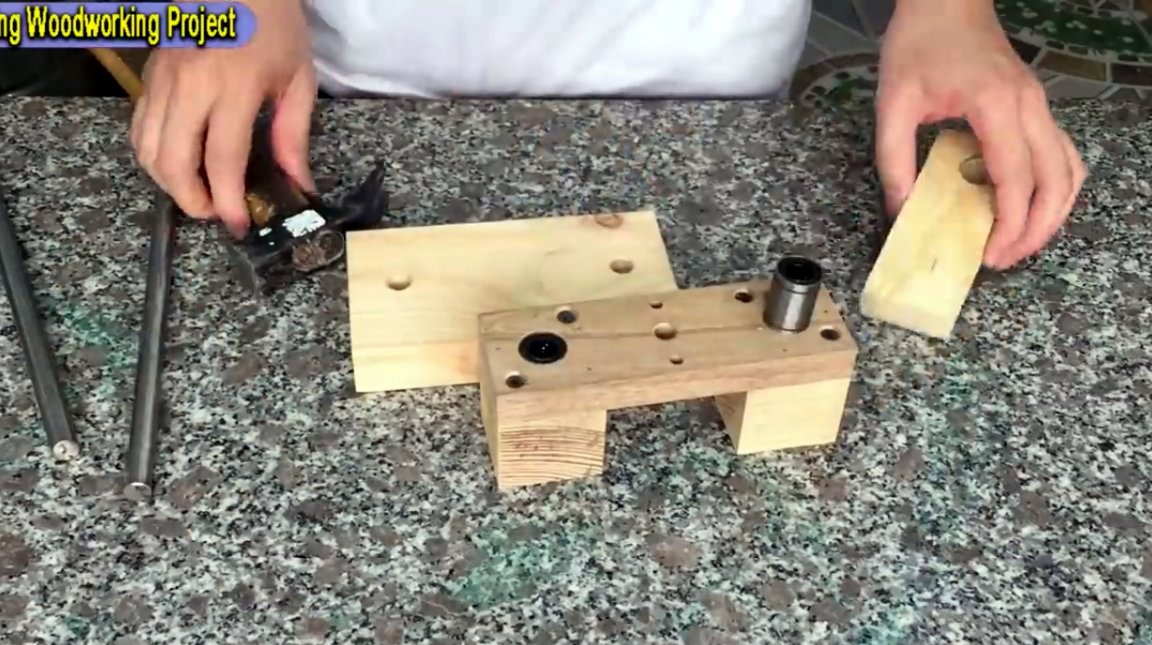
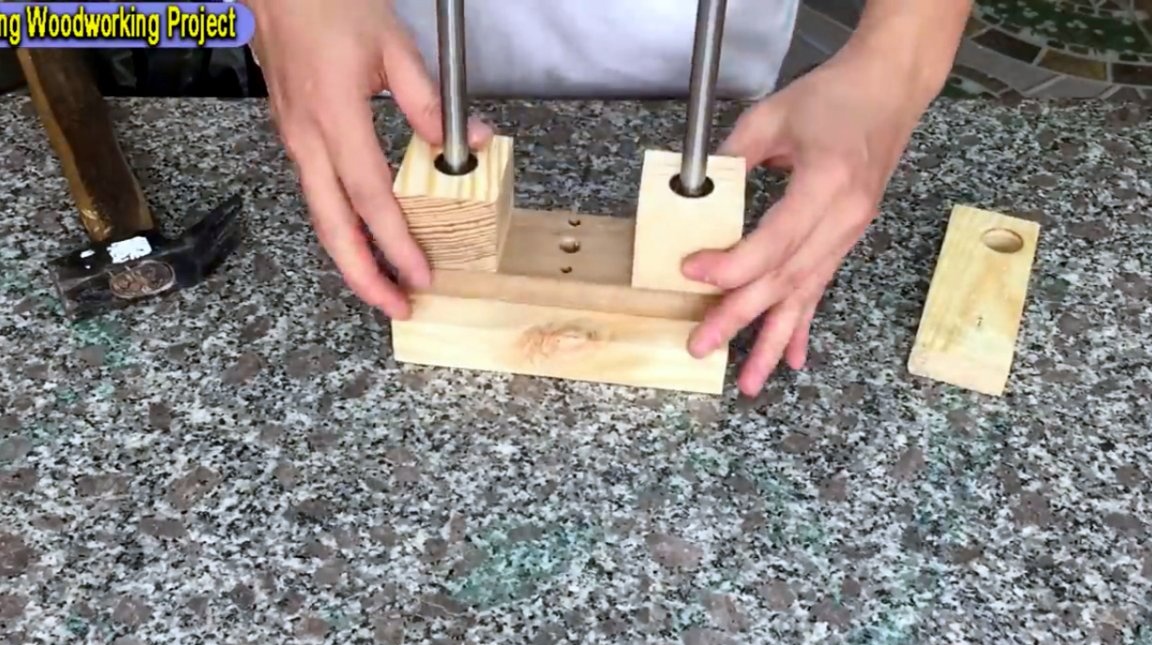
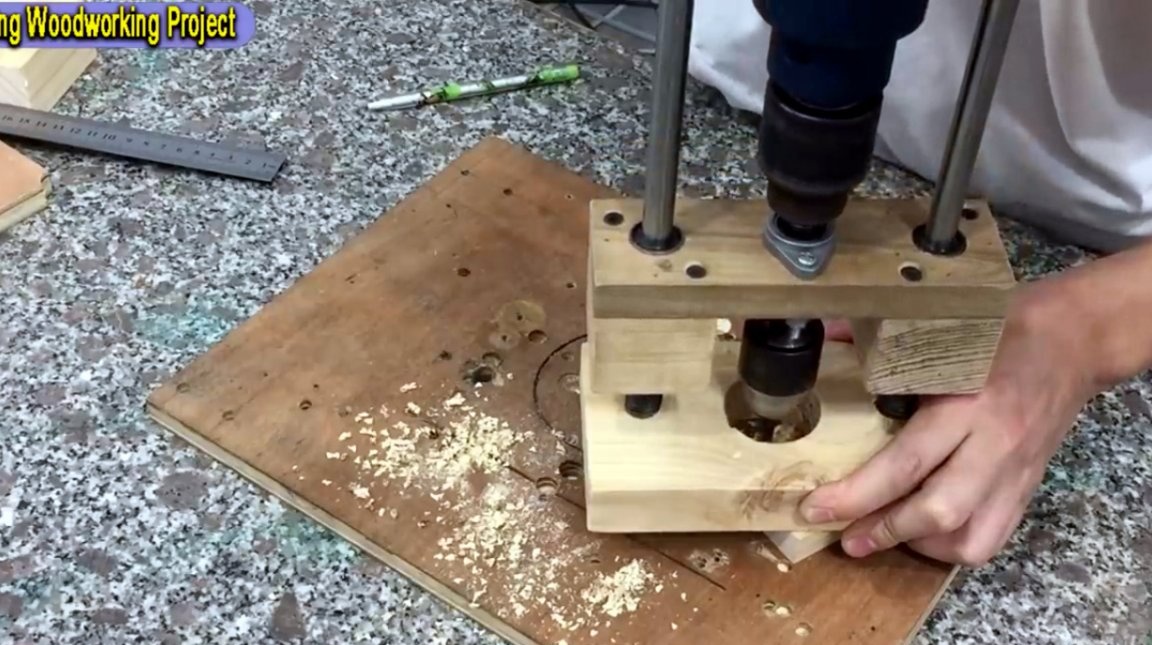
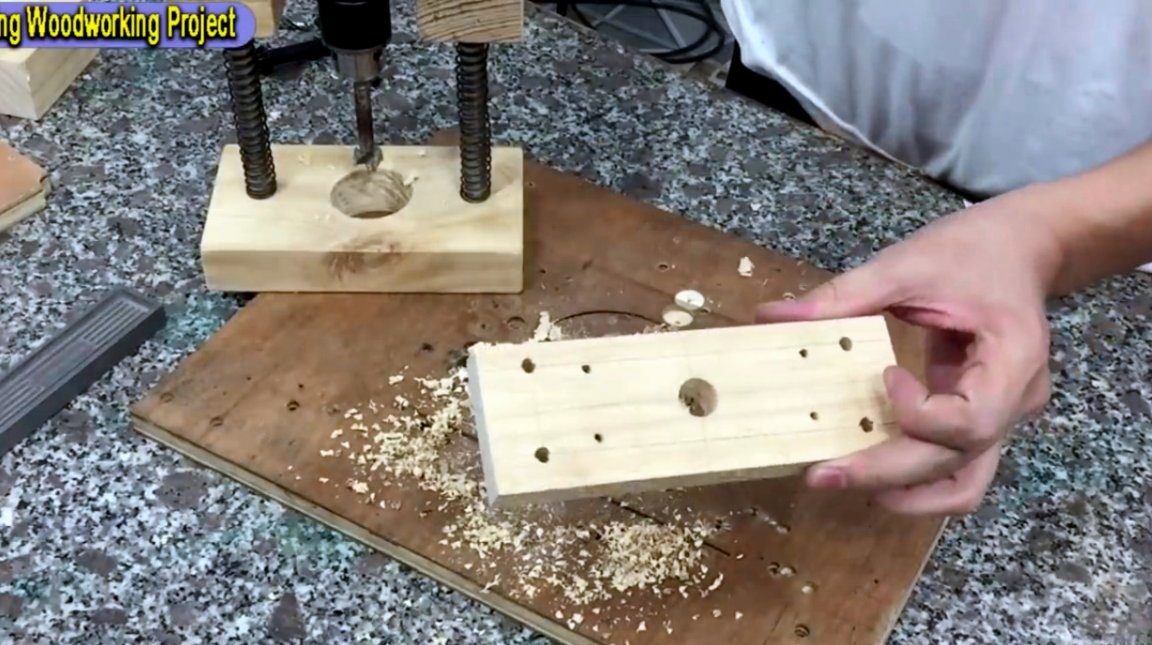
First of all, the master begins to manufacture the movable part of this fixtures. In a rectangular blank of a board 25 mm thick, two symmetrical through holes are drilled for flange mounting screws.
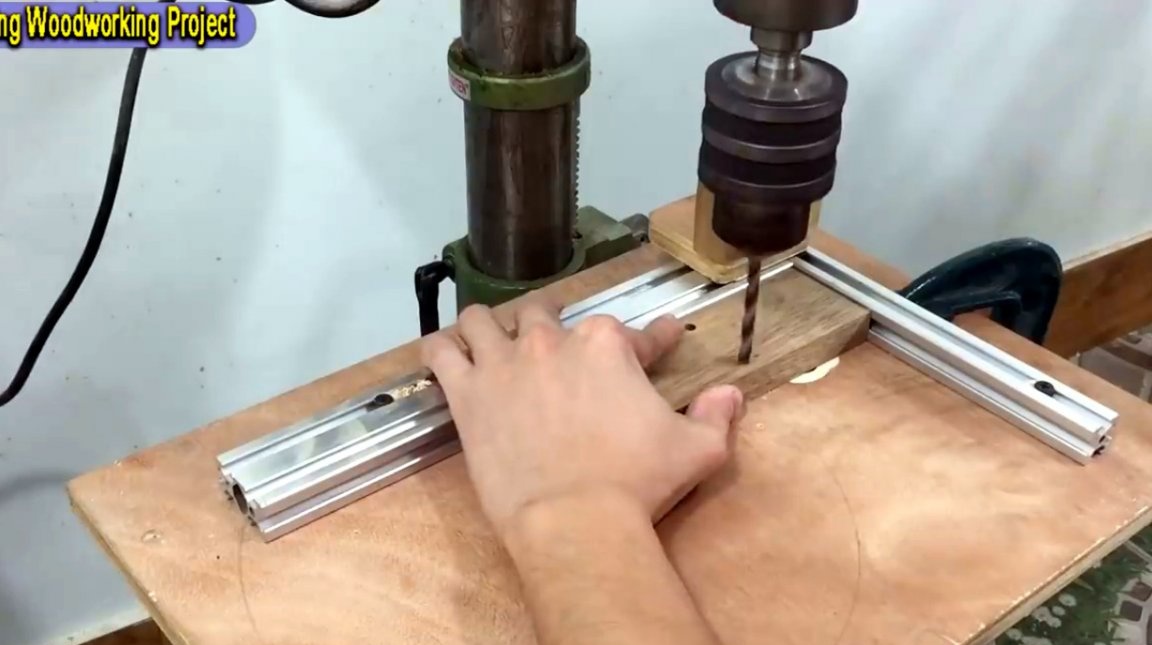
Next, a larger hole is drilled for the stem of the drill chuck.
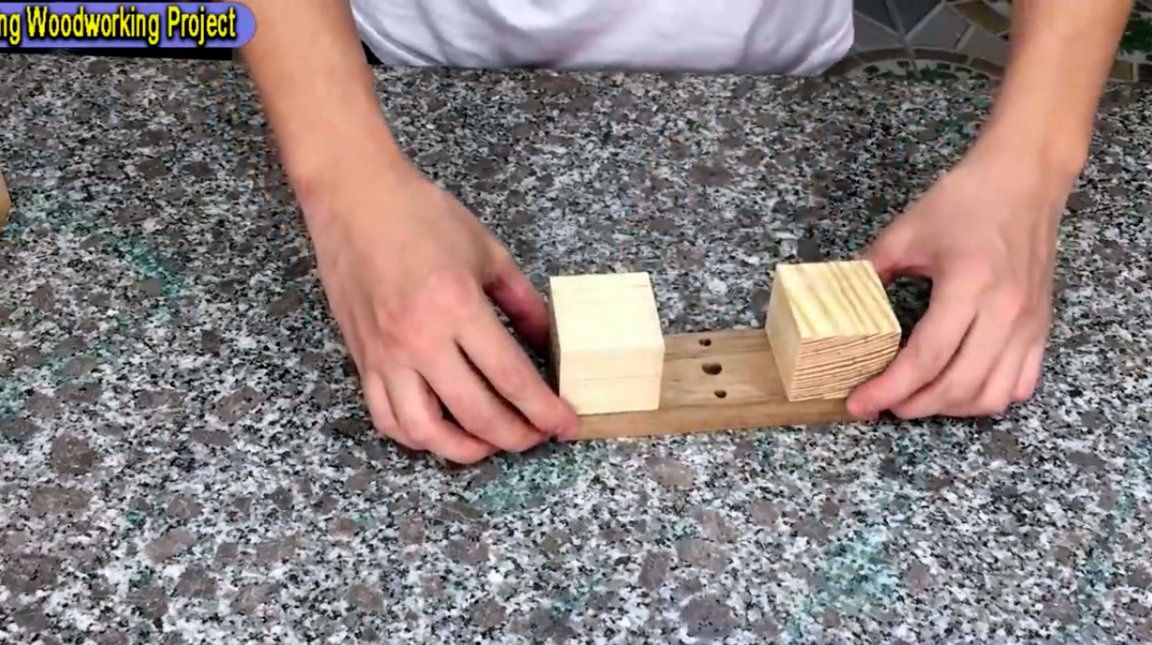
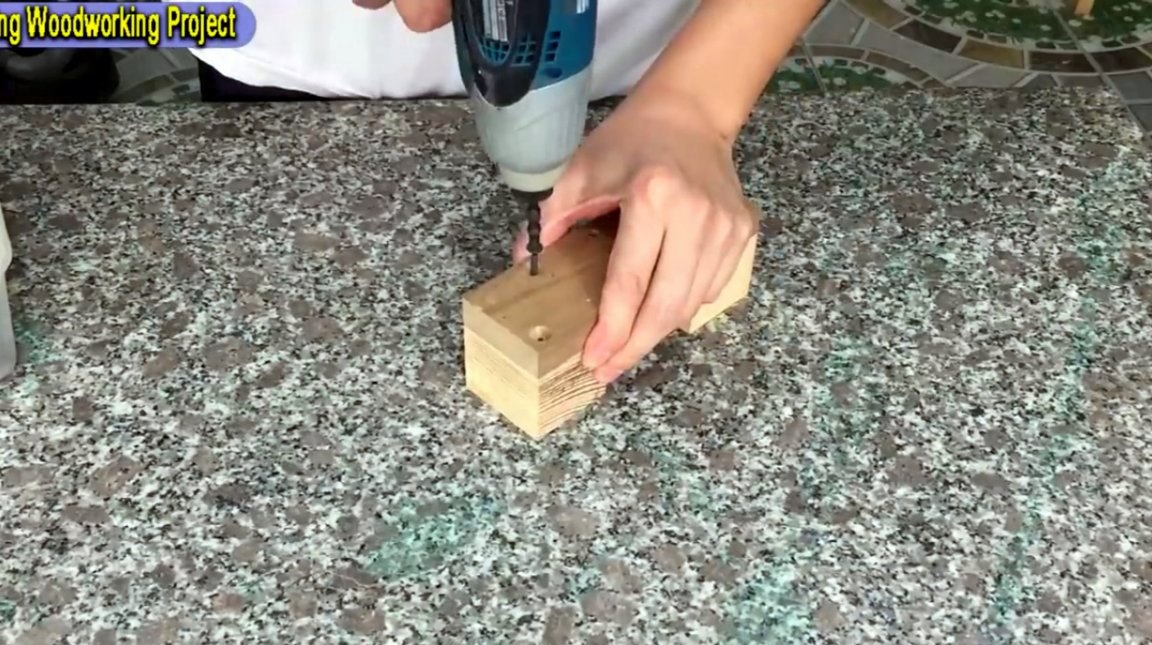
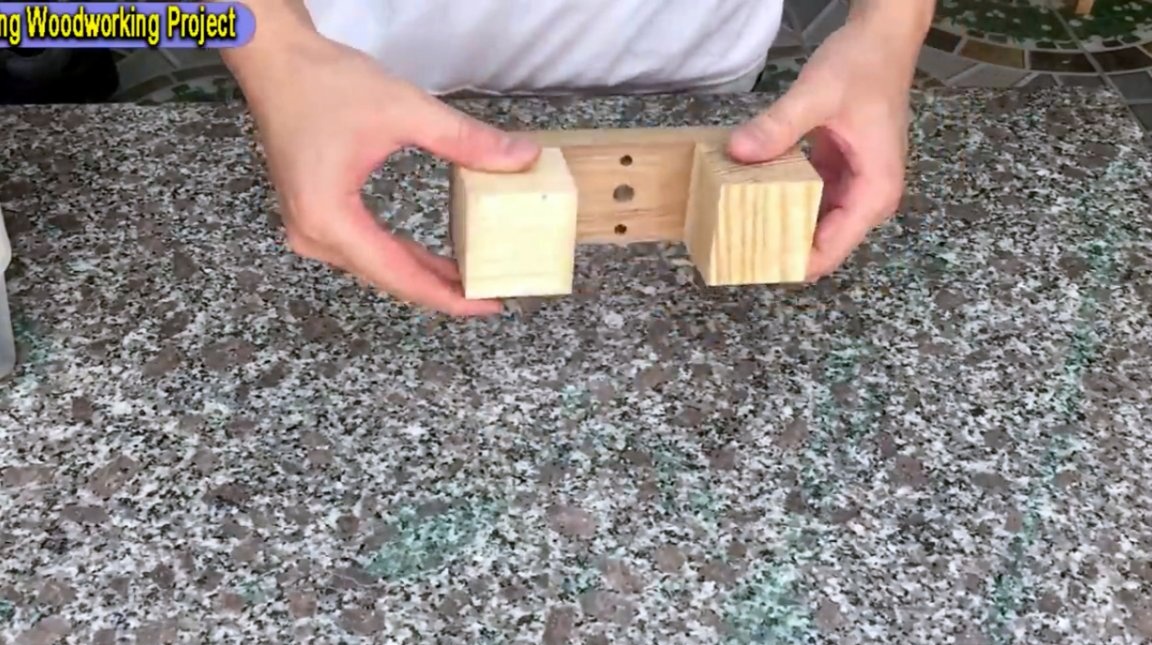
Also, the master will need to attach two such bars to which linear slide bushings will be pressed. To do this, pilot holes are drilled with a countersink drill, and wood screws are screwed into them.
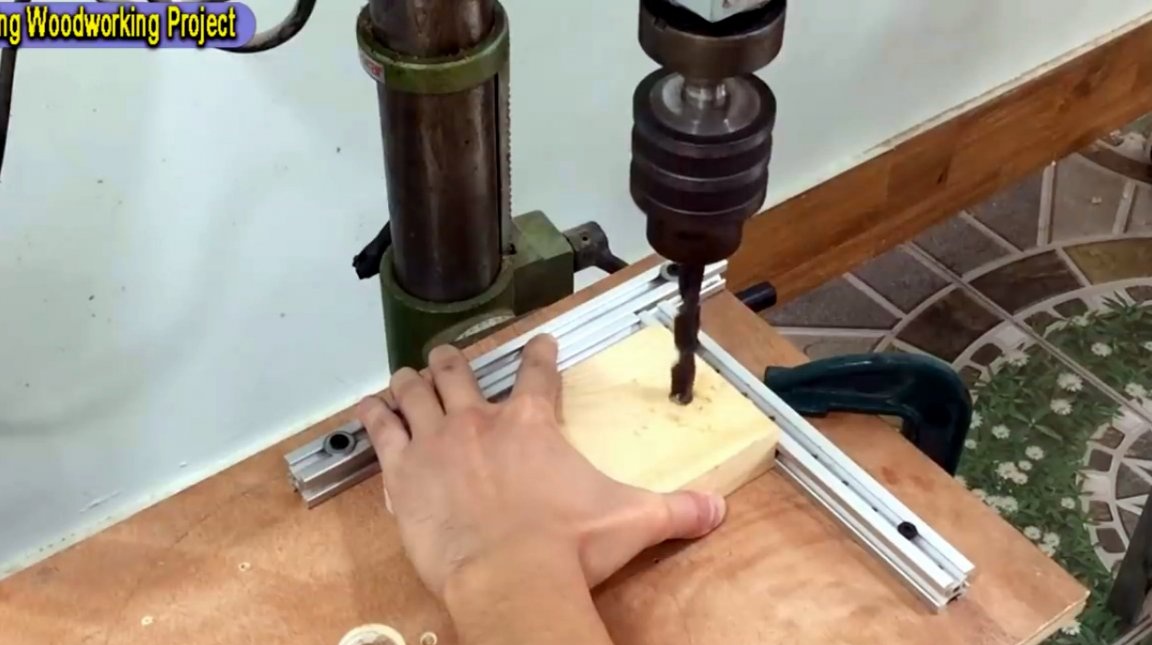
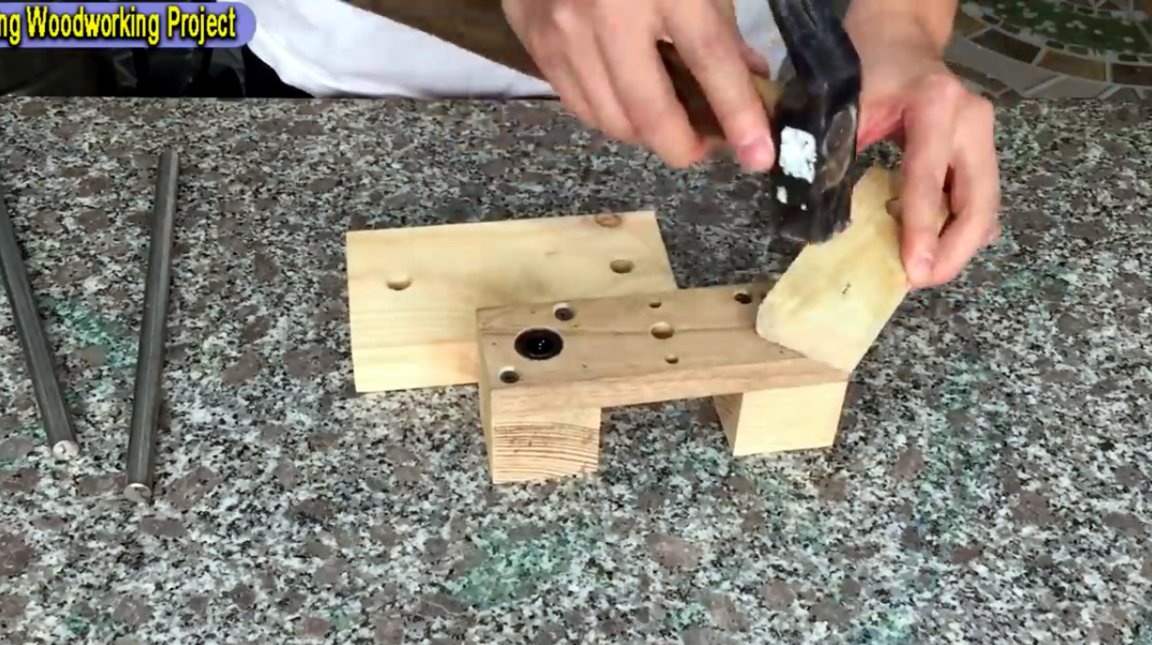
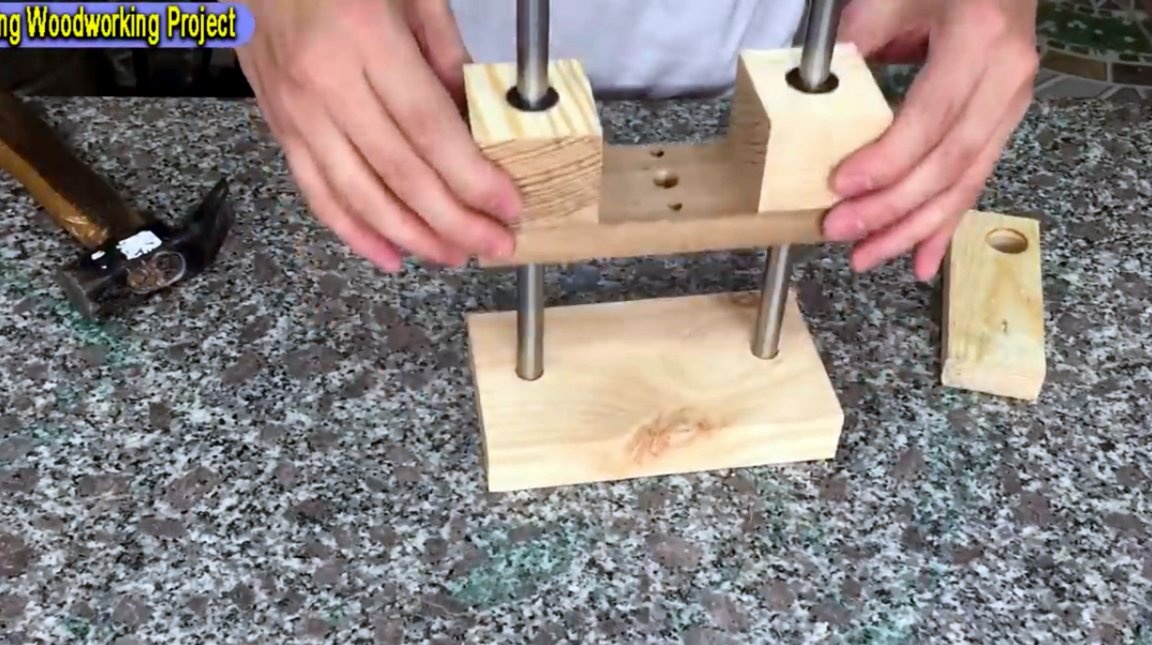
In the resulting part, it is necessary to drill two seats for the bushings. This must be done with high precision, and such a procedure can only be performed on a drilling machine using a Forstner drill.
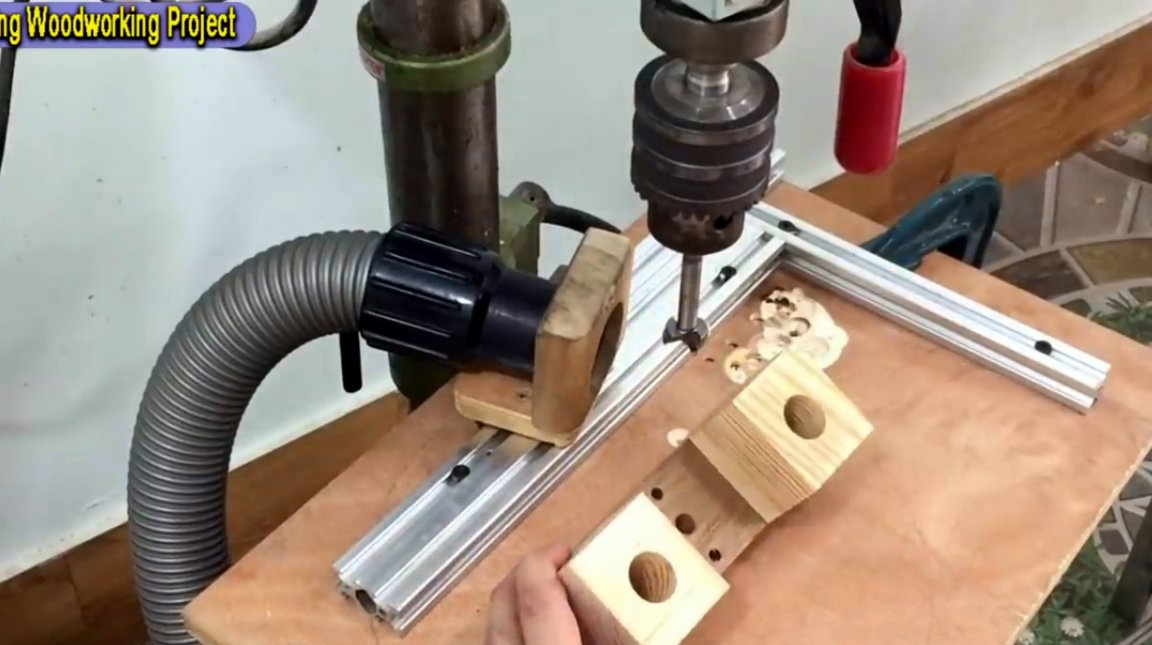
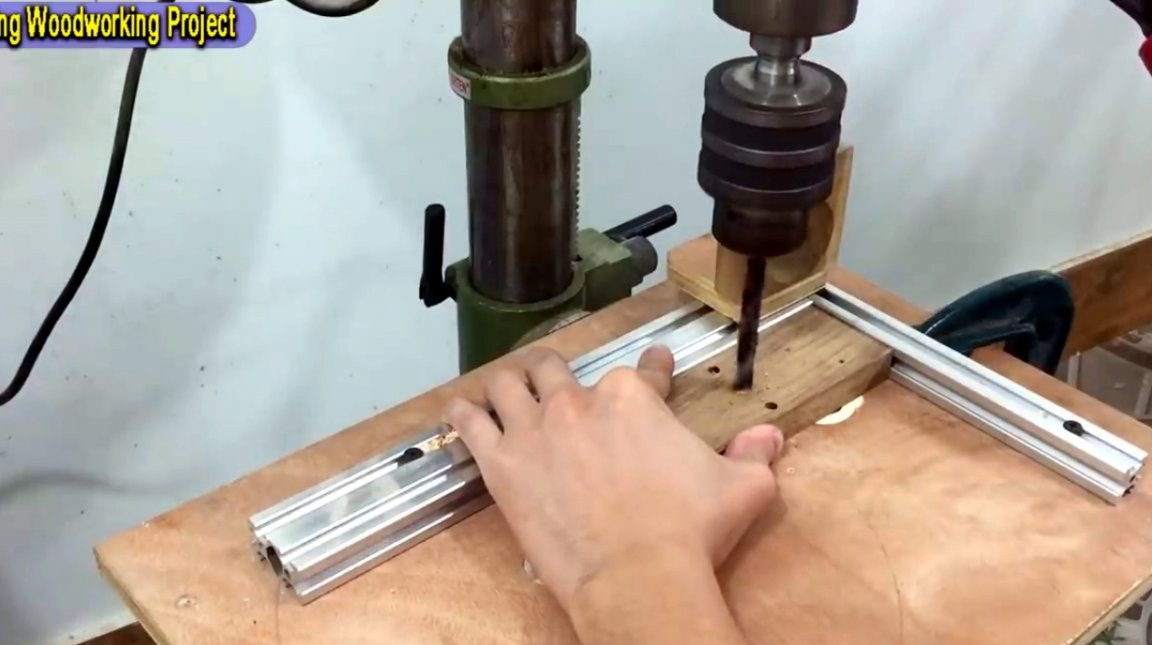
Now, the author drills mating holes for guides in the workpiece sole. Their centers must strictly coincide with the centers of the holes of the first part.
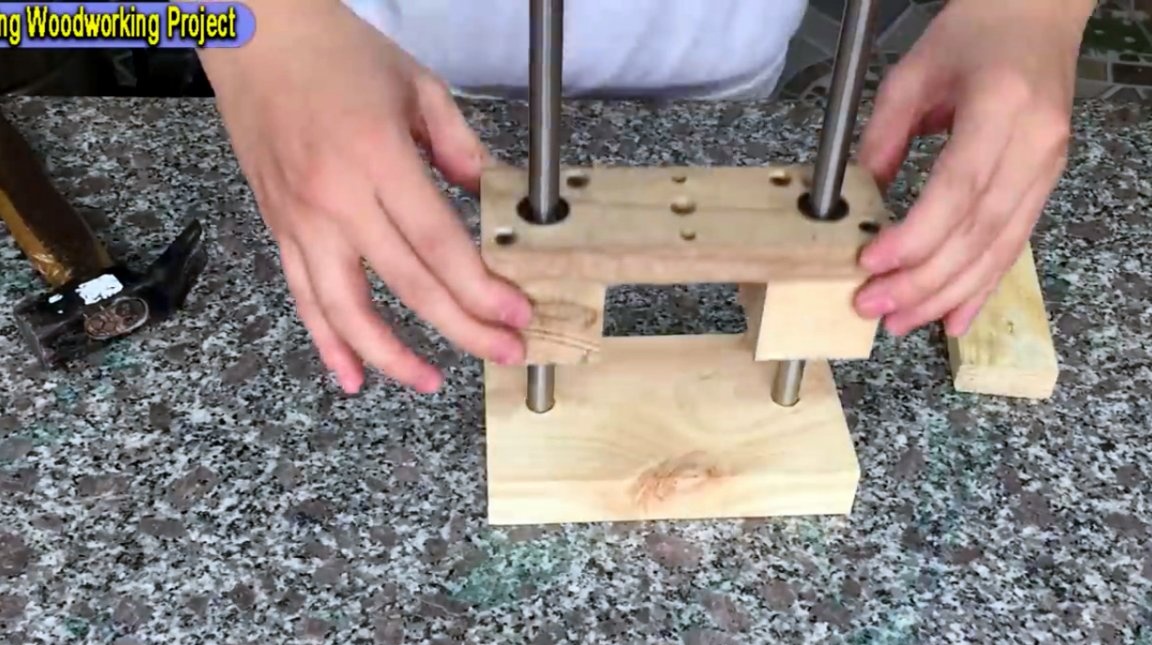
The linear slide bushings are then pressed into the cartridge holder. The author decided to install two on each side. Since he does not have a press, he used a board trimmer and a hammer for these purposes.
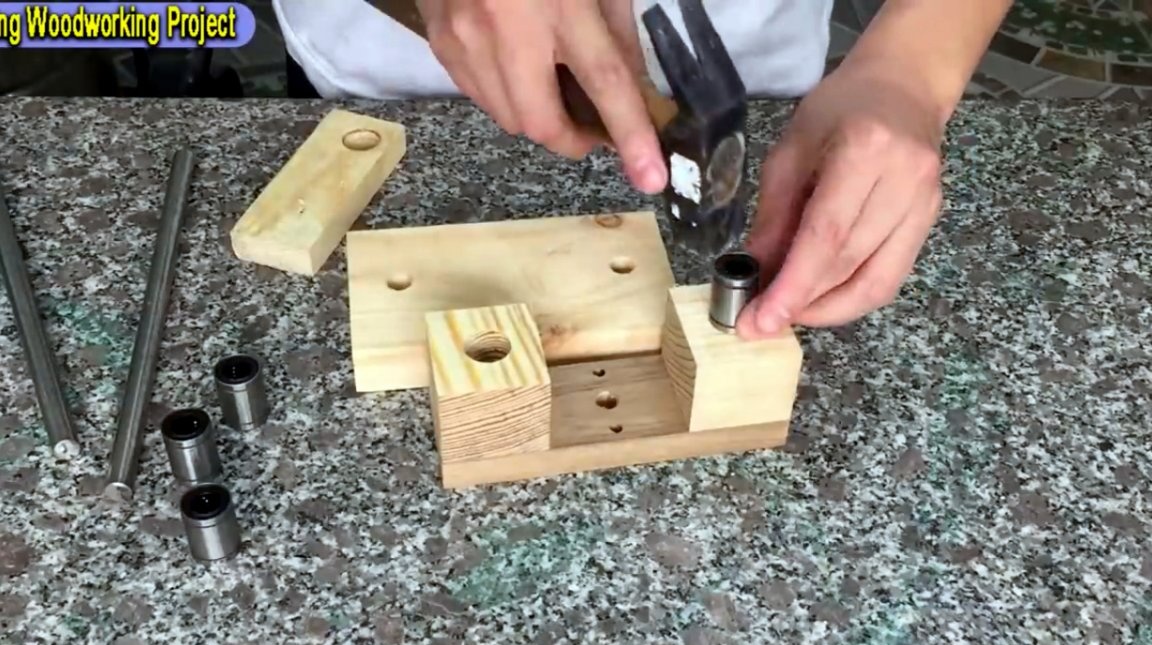
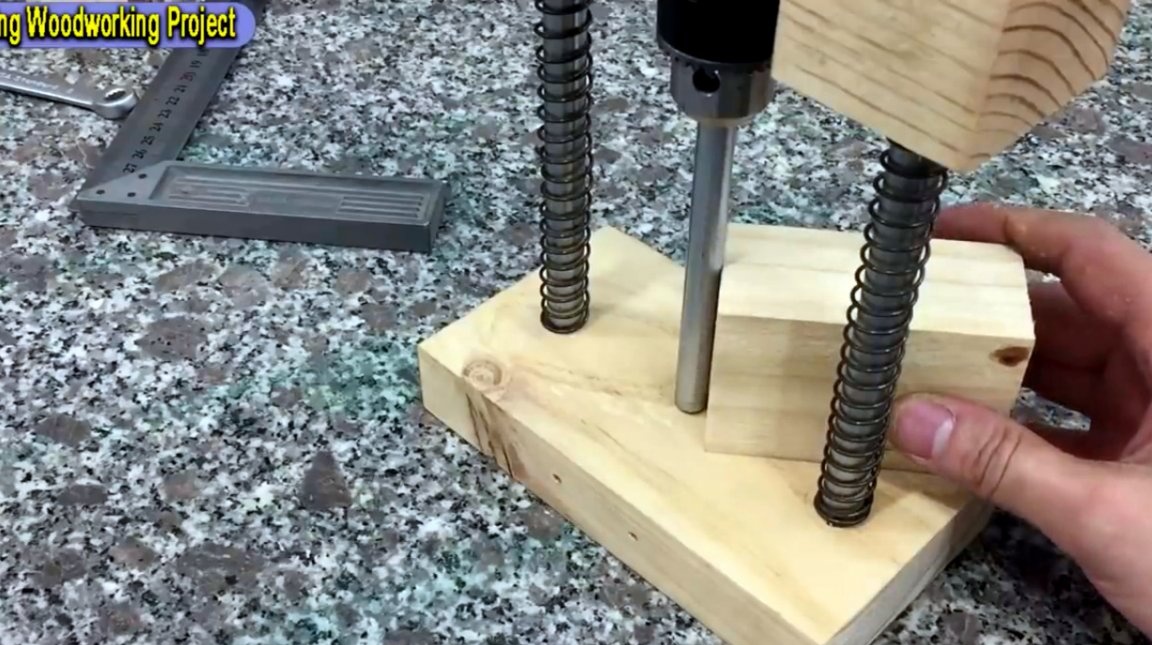
Steel guides are inserted into the bushings and clogged into the sole of the device.
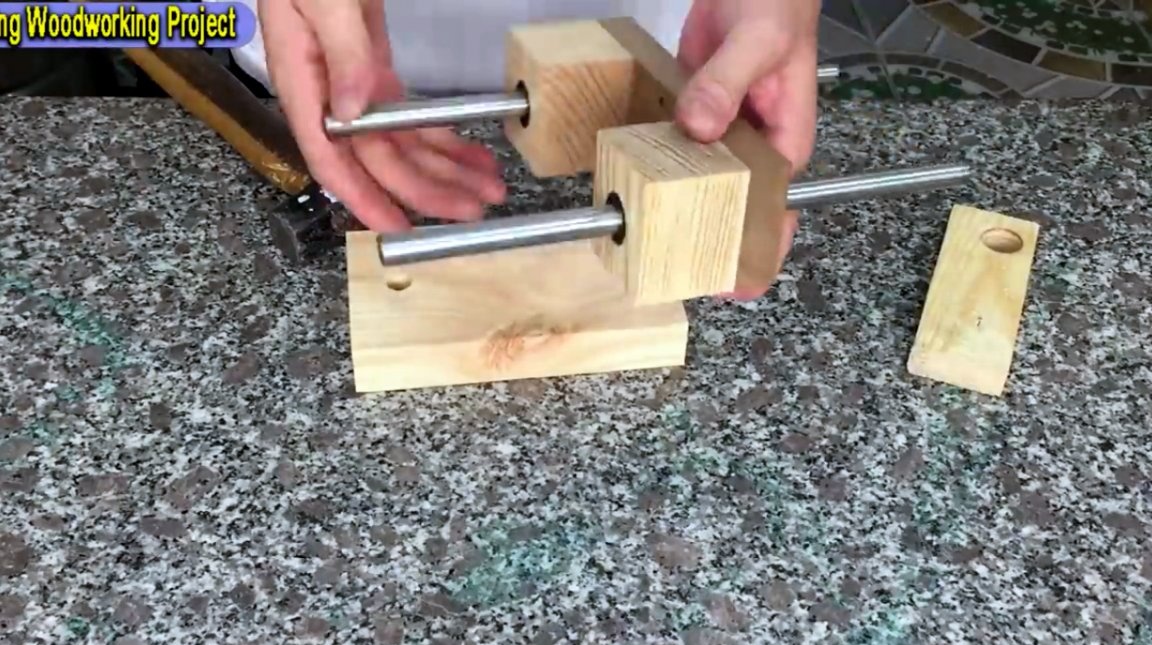
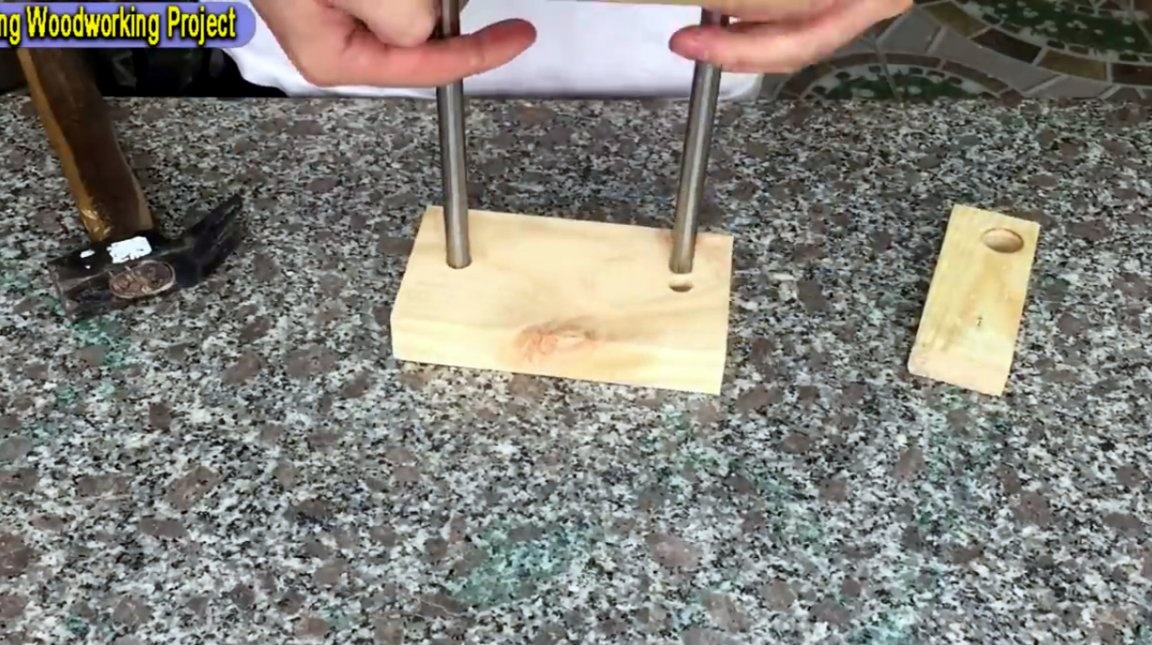
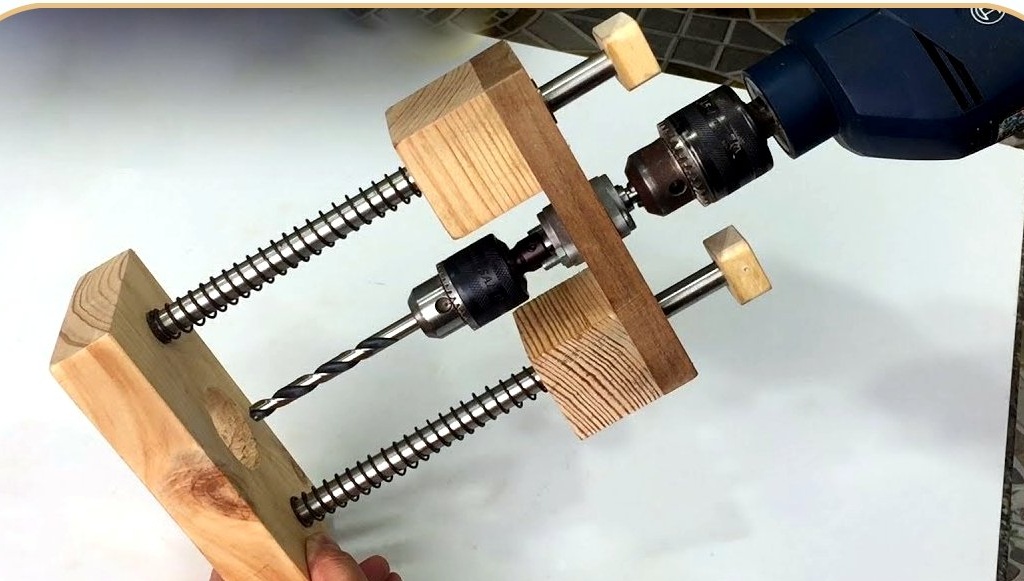
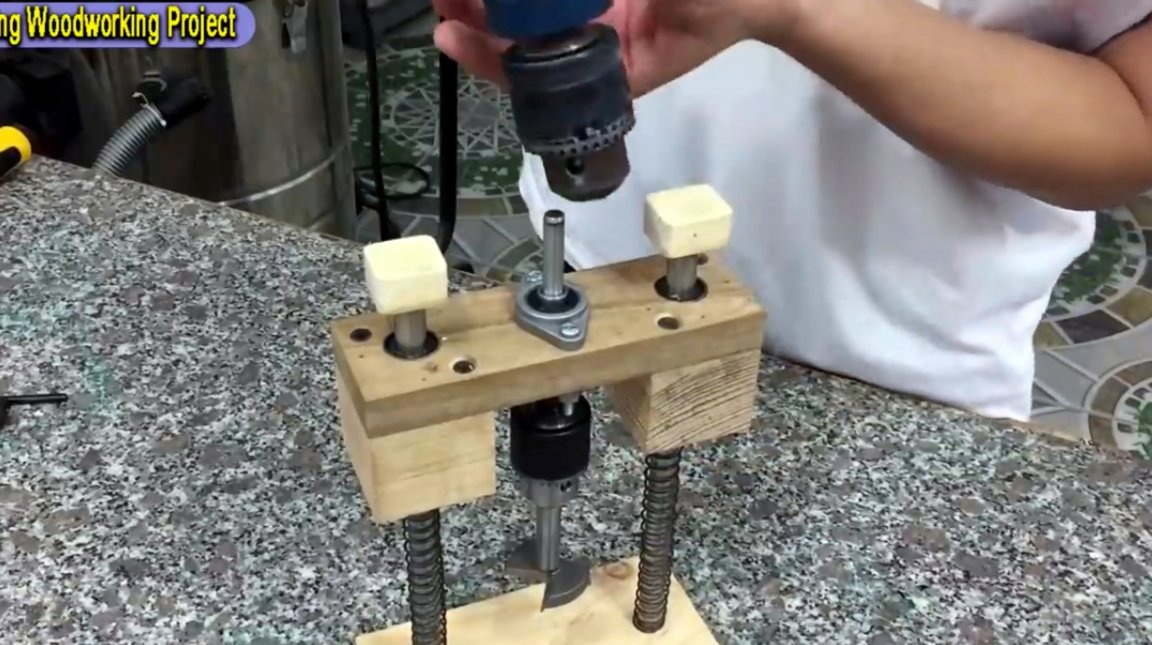
Now the holder can be turned to the working position, and check the ride.
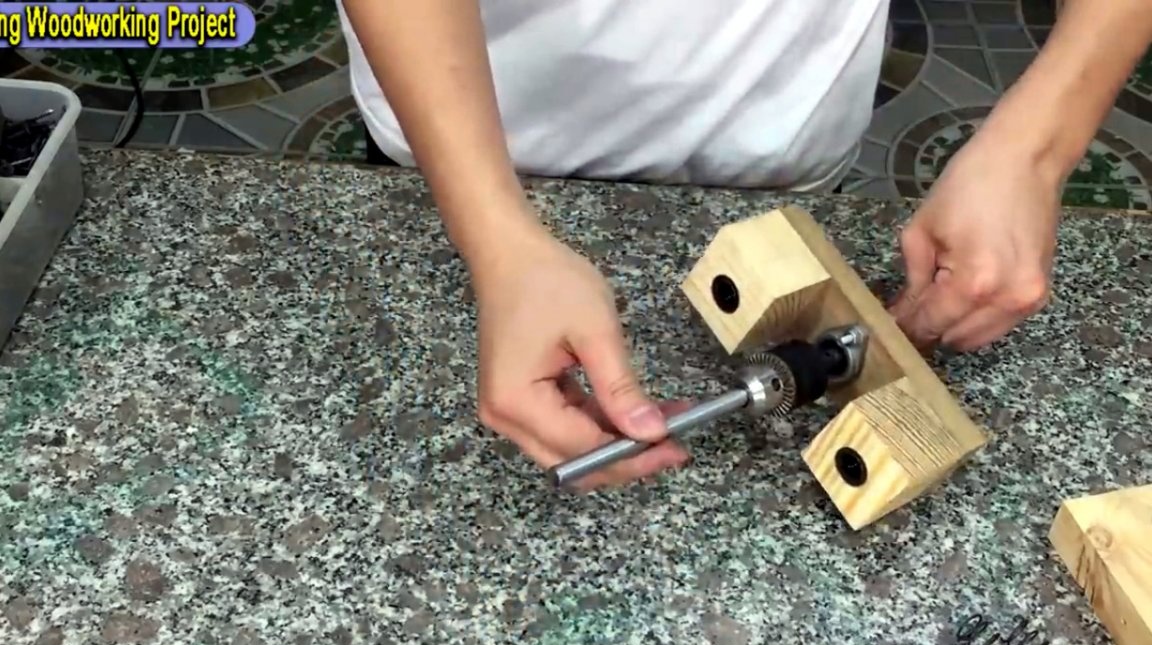
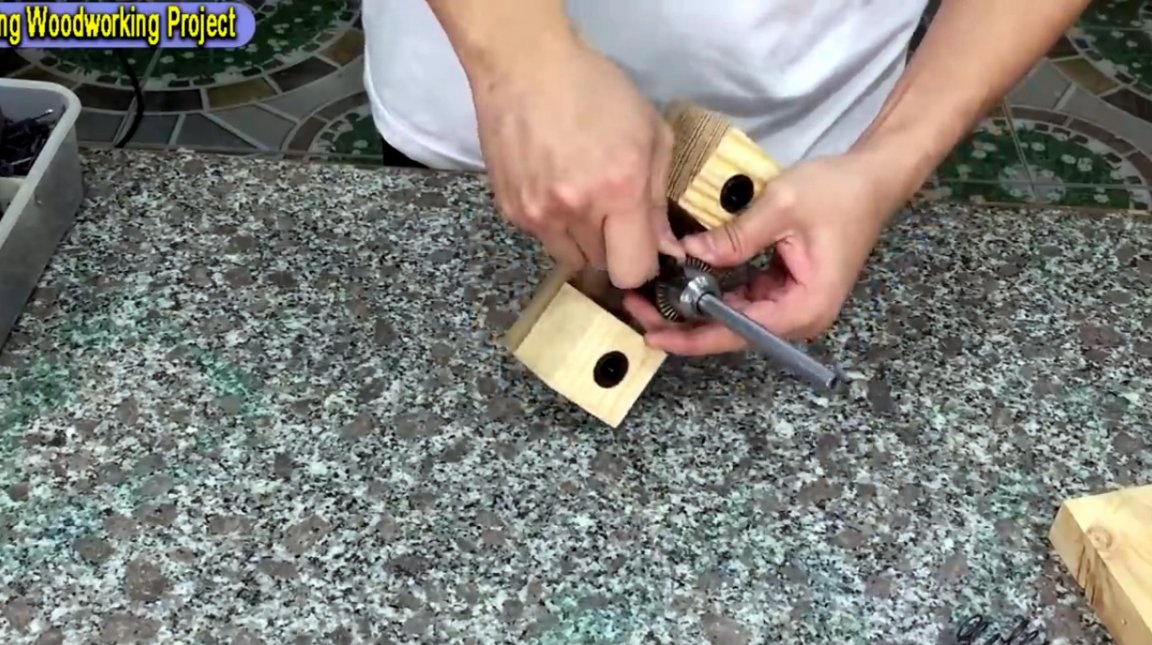
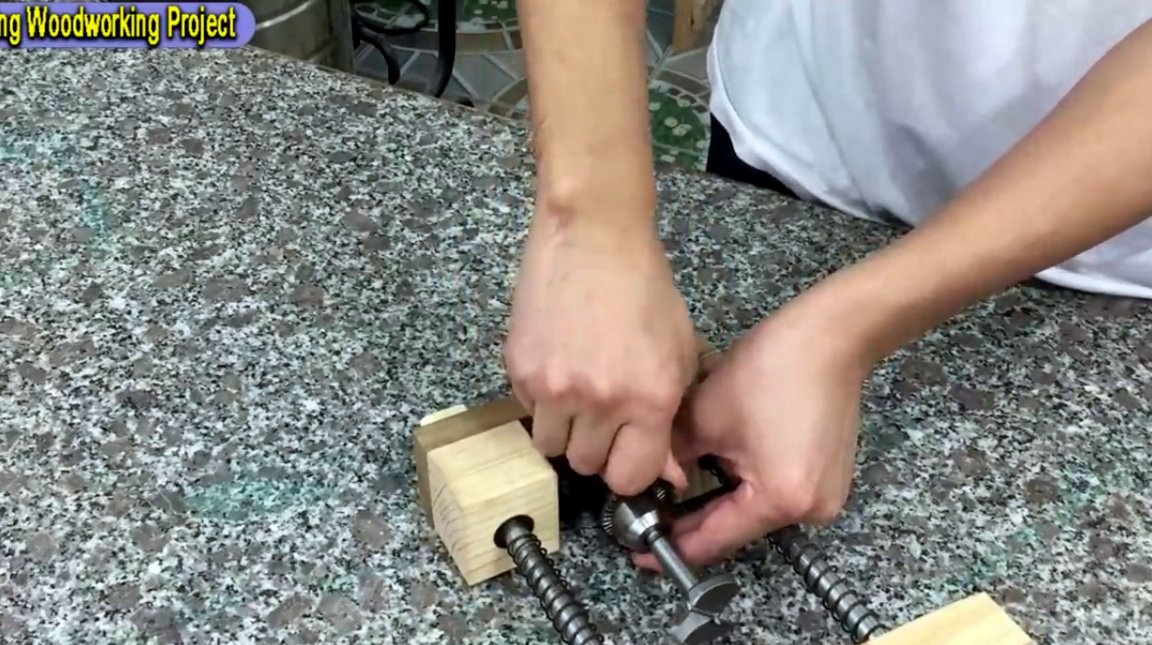
In the drill chuck, the master fixes the rod, fixing it with clamping screws using an Allen key.

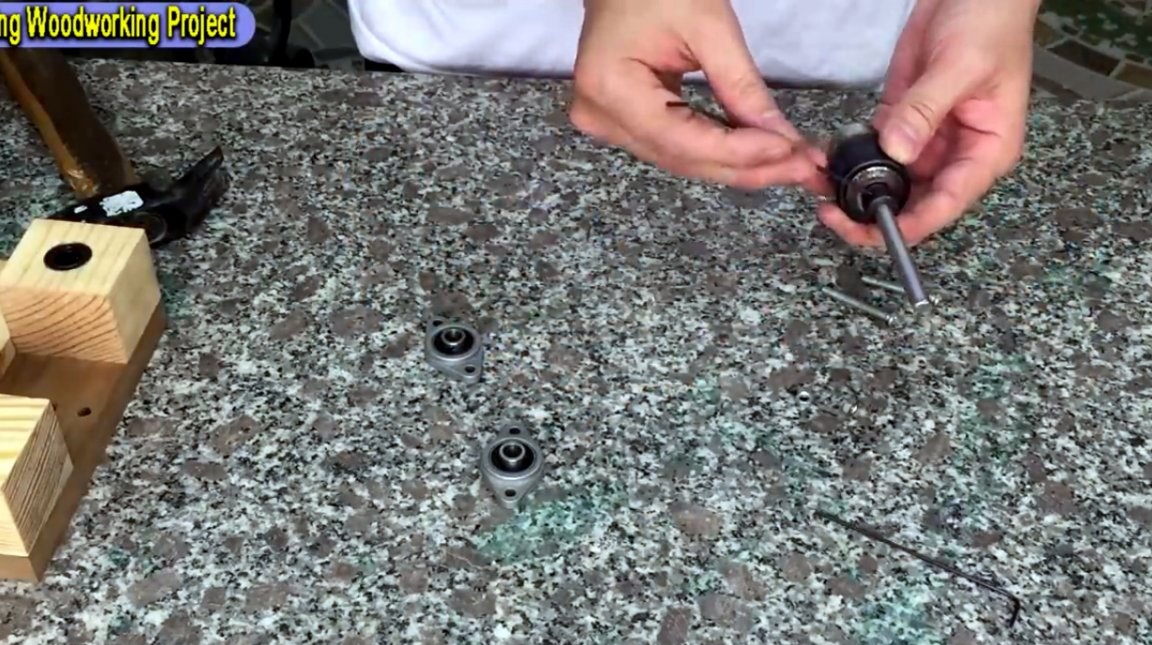
A flange is put on the rod and connected to the holder.
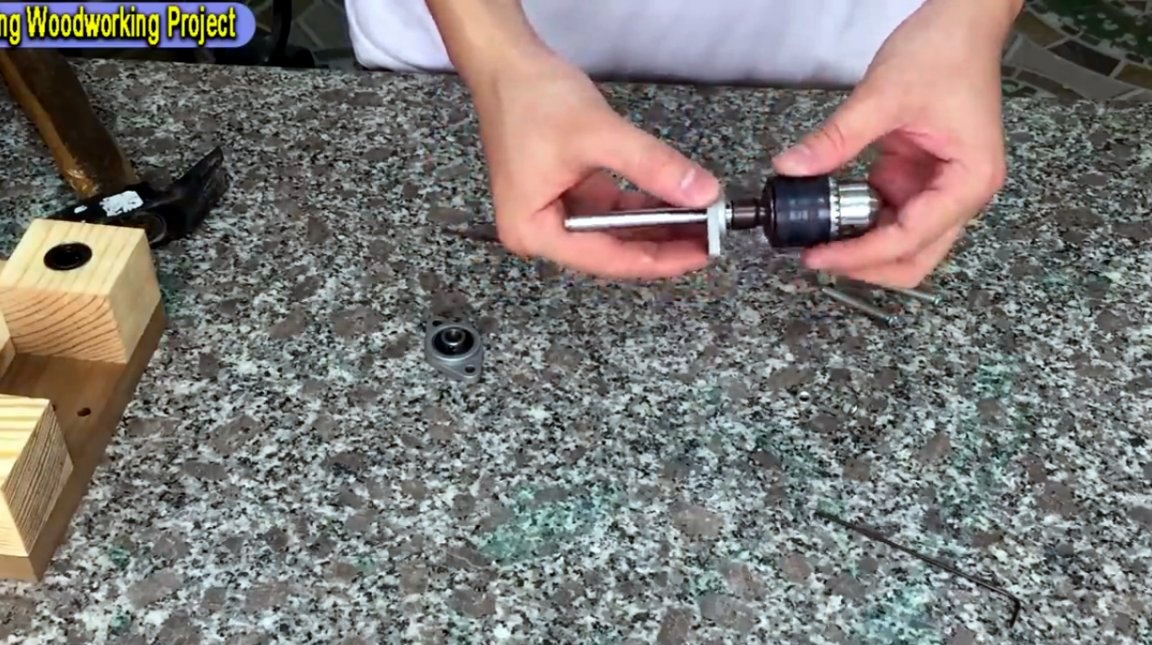
On the other side of the stem, a second flange is put on, and they are fixed together by screws and nuts.
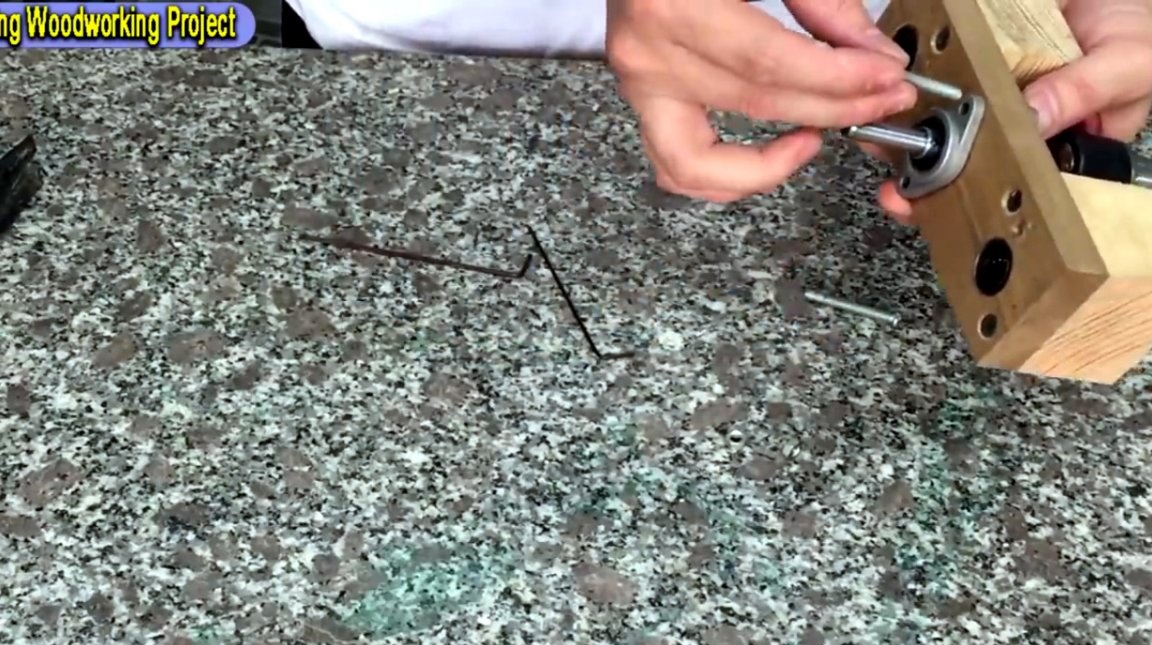
The author did not rigidly fix the flange screws, this is required for adjustment.
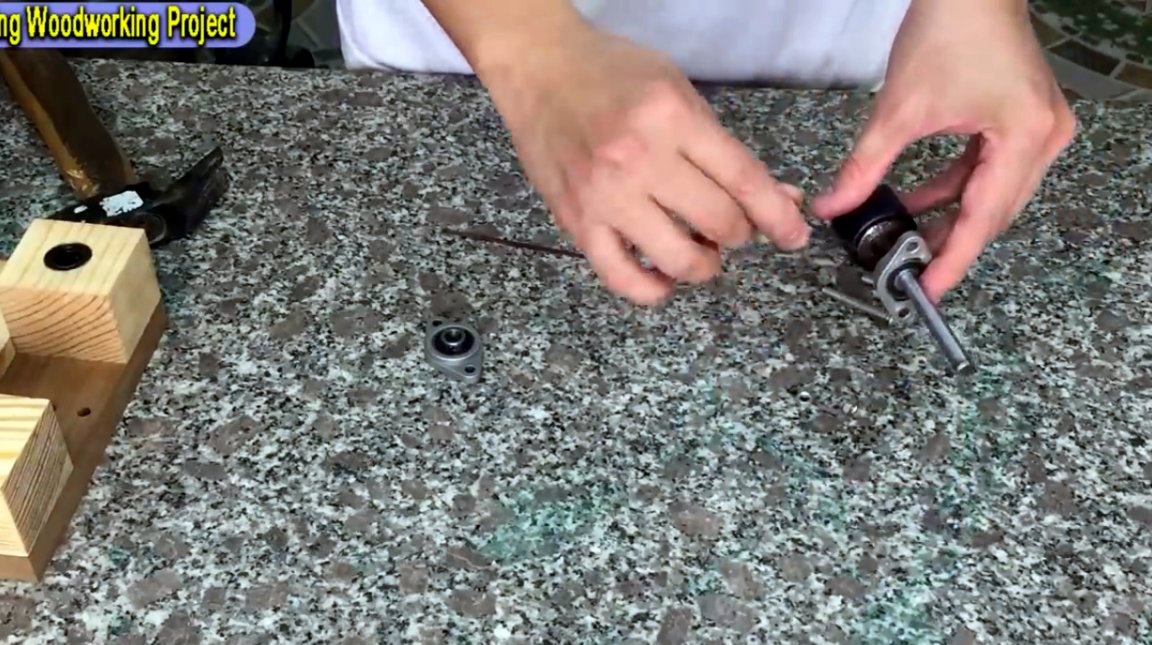
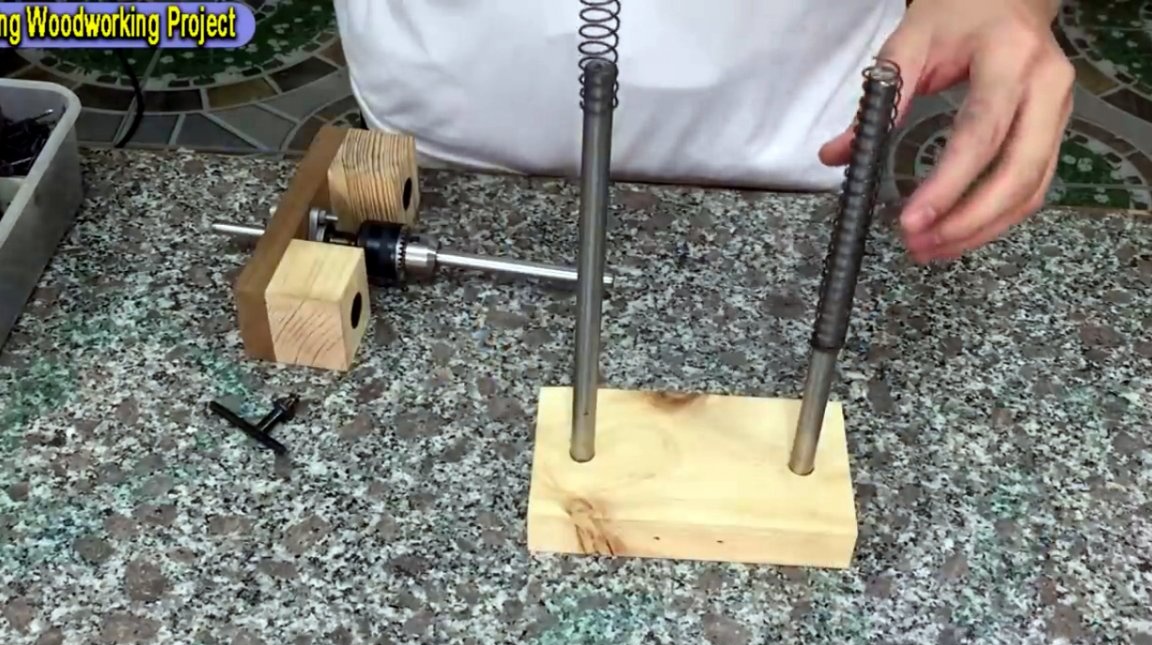
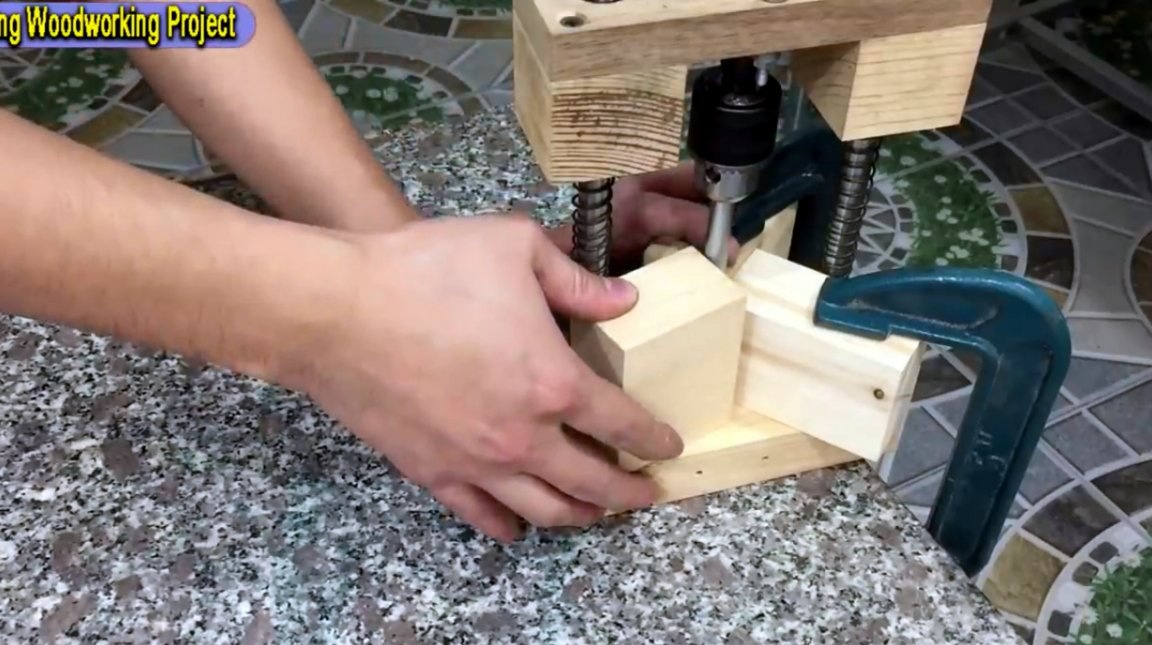
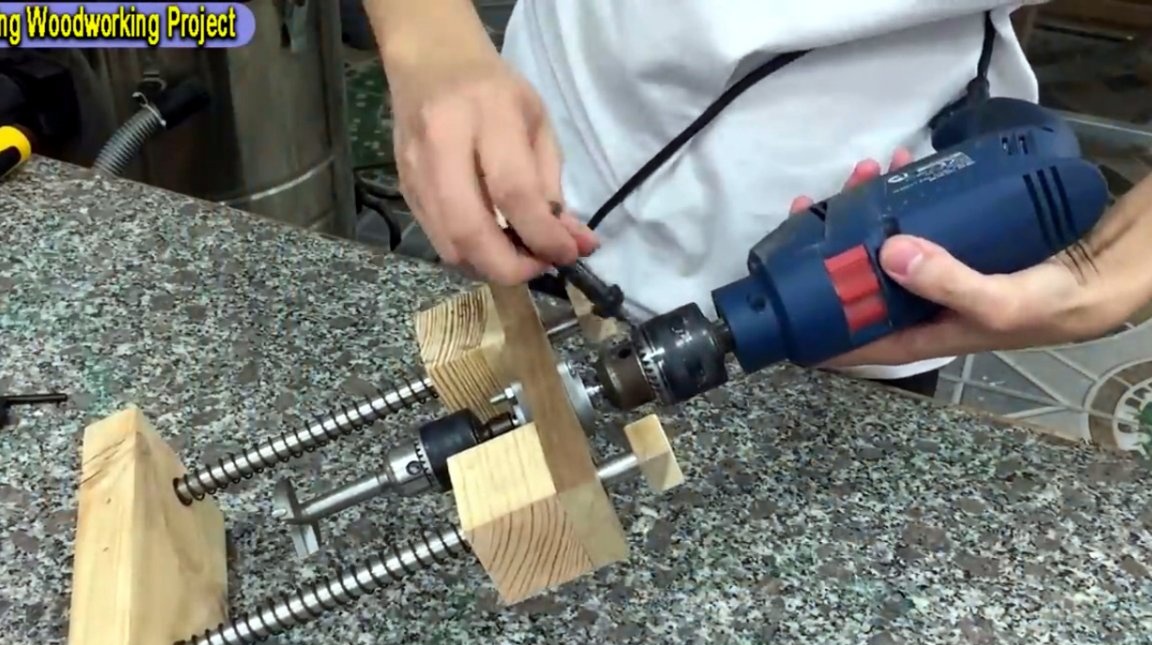
In the cartridge the tube of the maximum possible diameter is fixed.
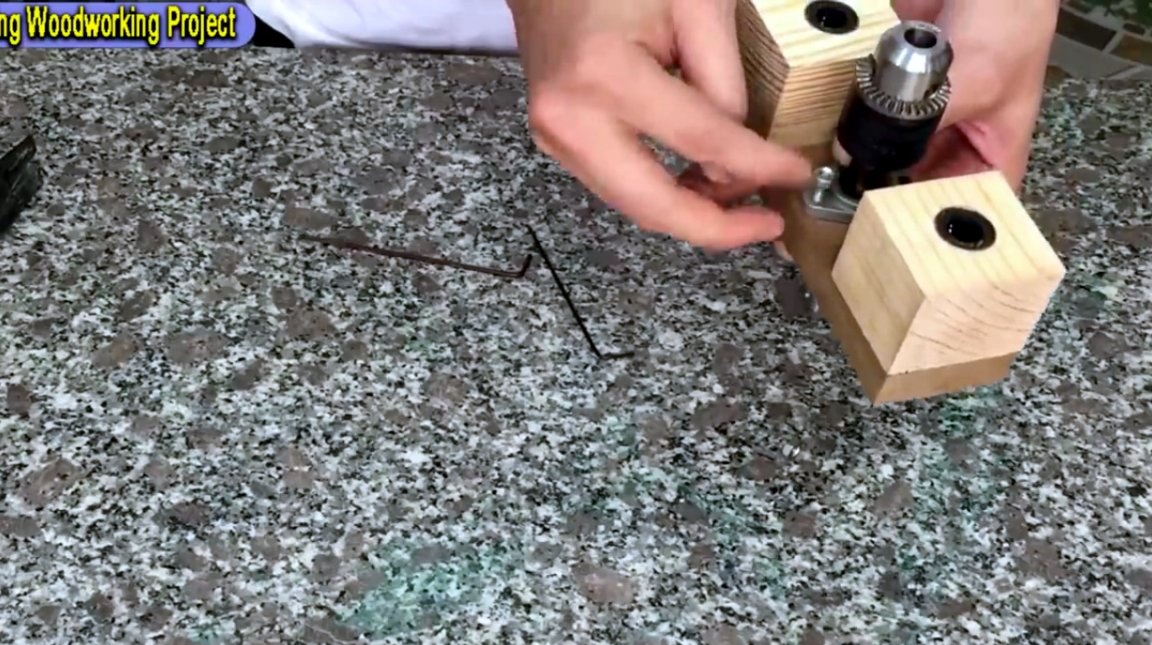
Then the springs are put on the guides, and a holder with a cartridge is installed.
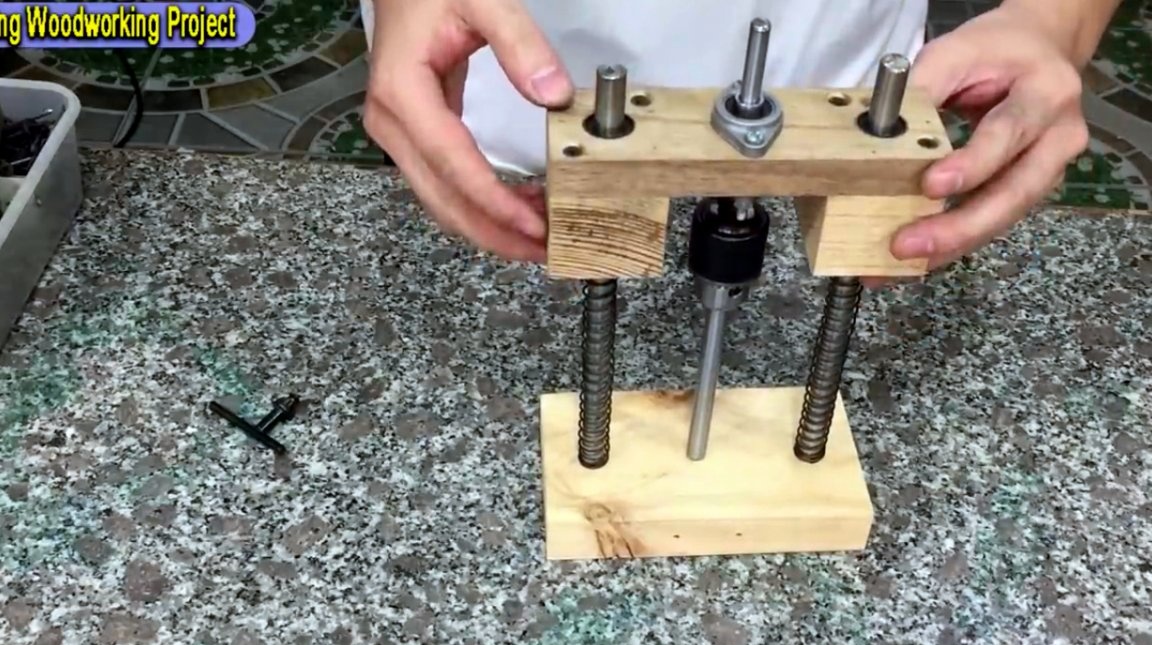
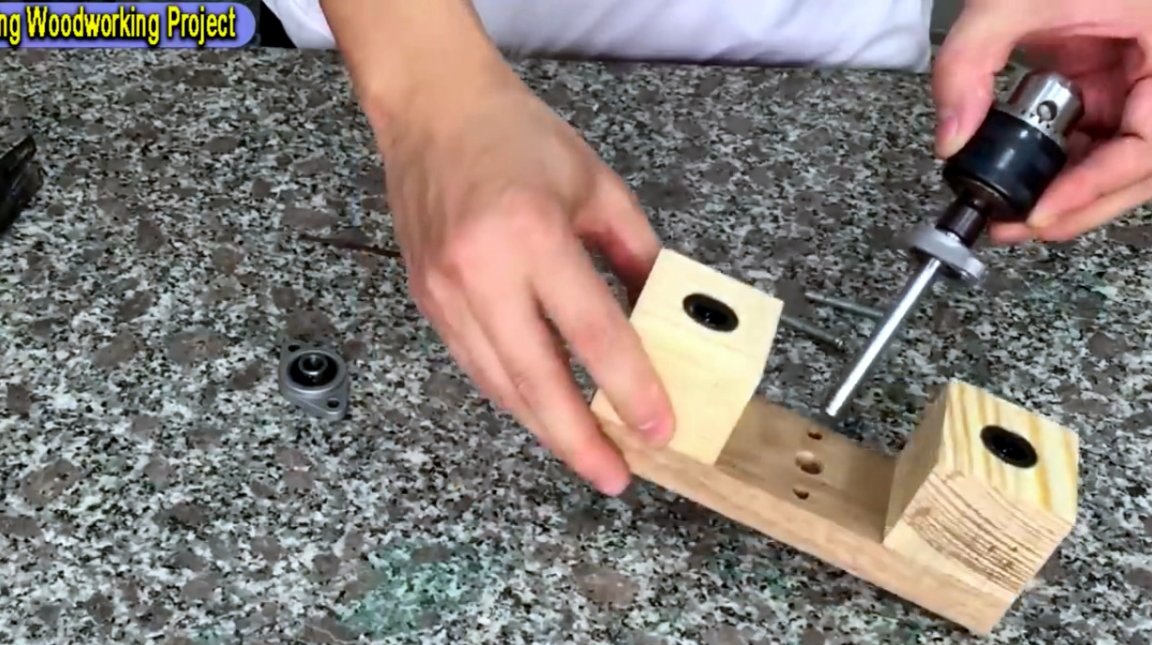
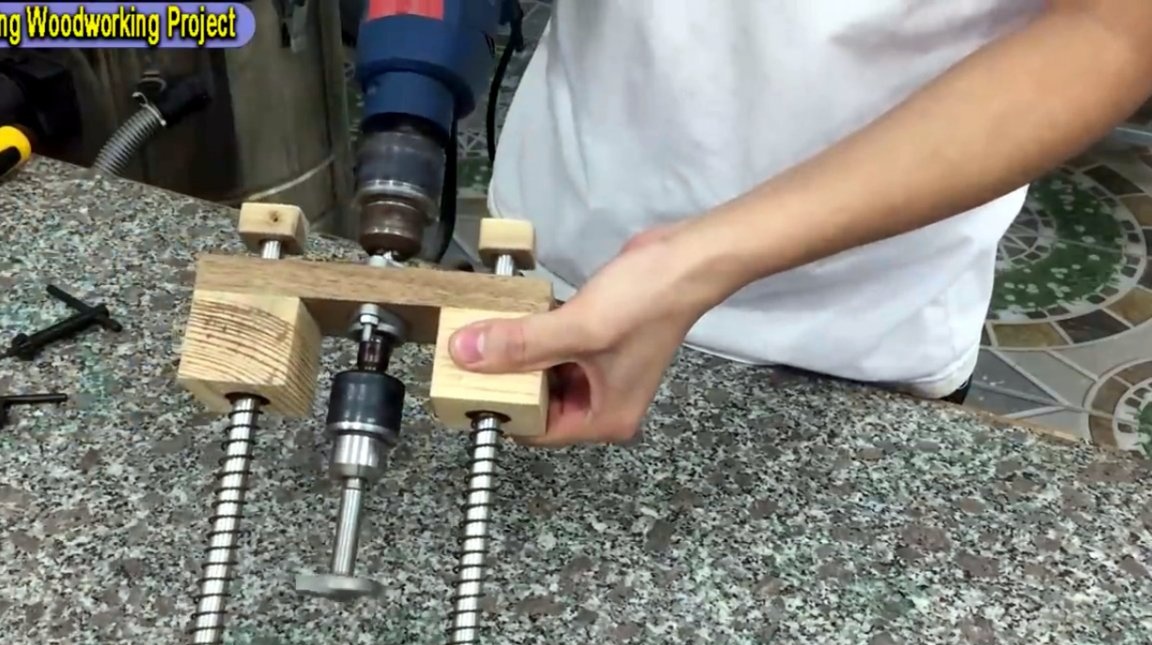
Now, with the help of three geometrically correct blocks, the author exposes the tube with the cartridge at an angle of 90 degrees to the surface of the base. Flange screws are tightened. The stem also locks above the holder.
So, the vertical is set, and an angle of 90 degrees is observed from all sides.
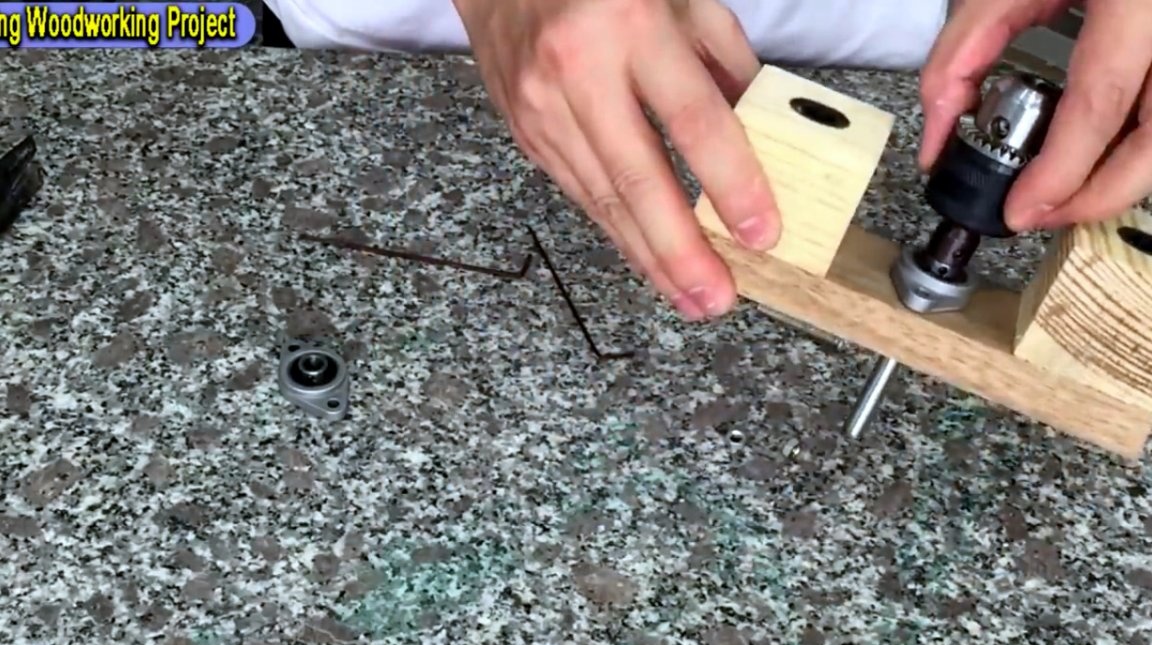
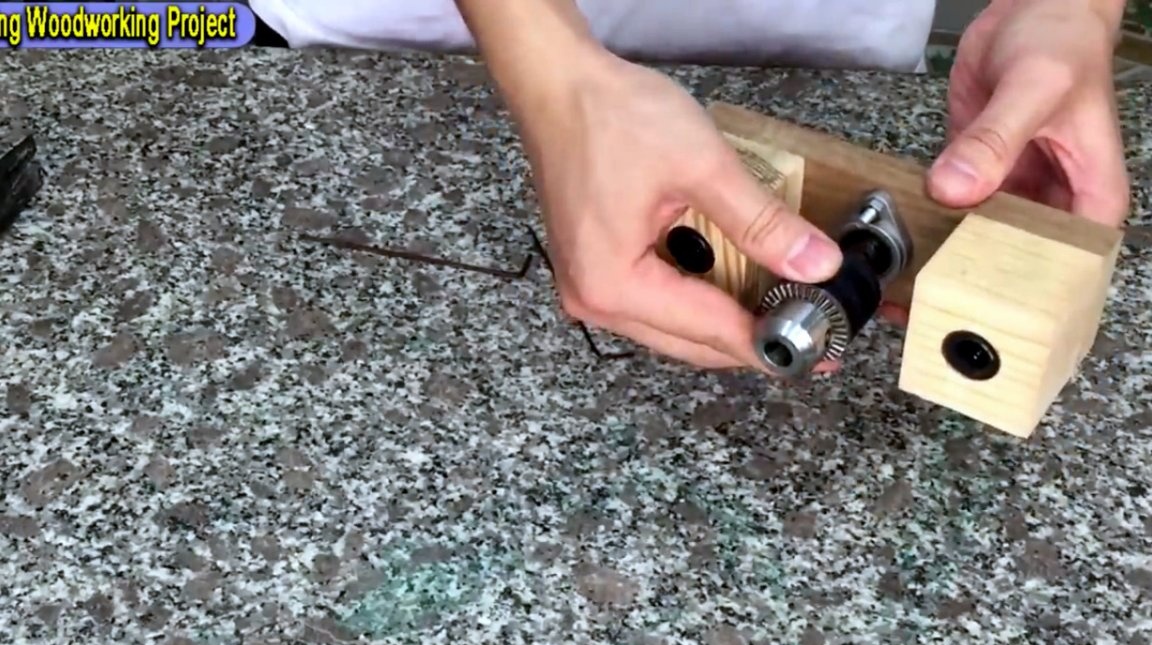
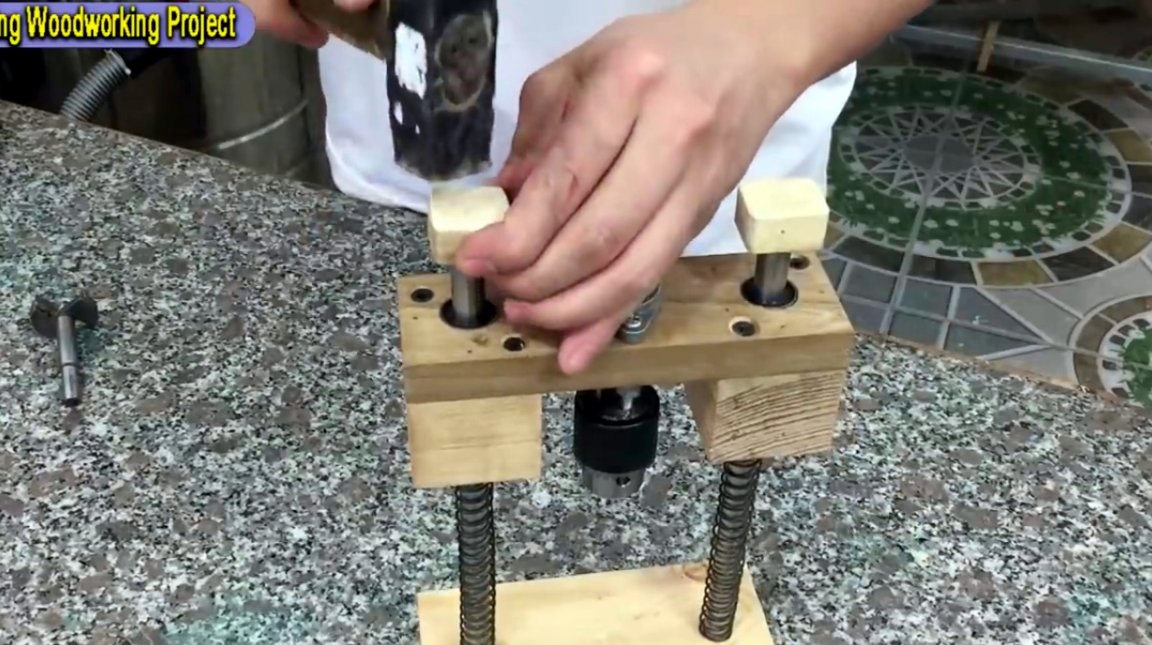
In order to prevent the holder from jumping off the guides, the master presses two plugs on them.
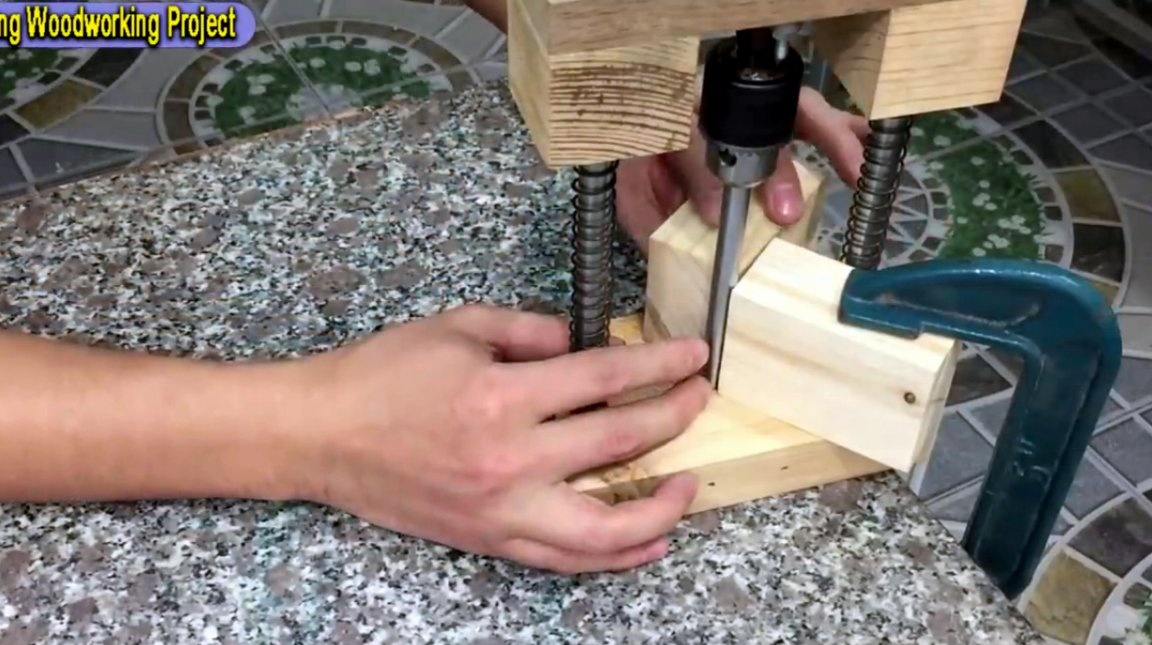
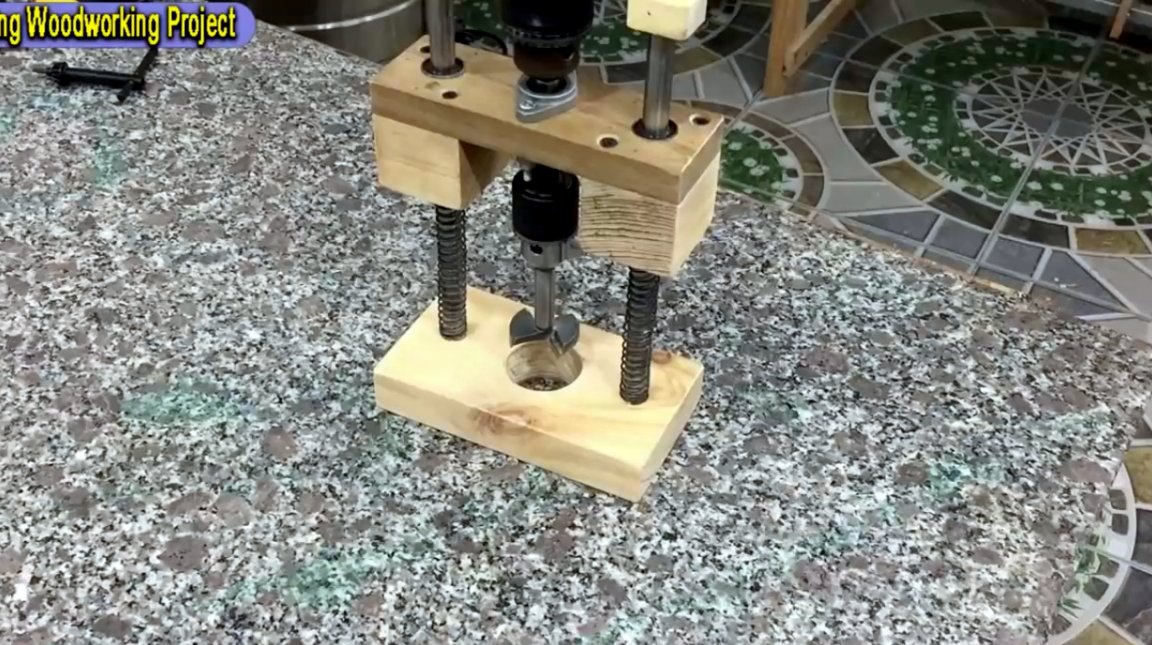
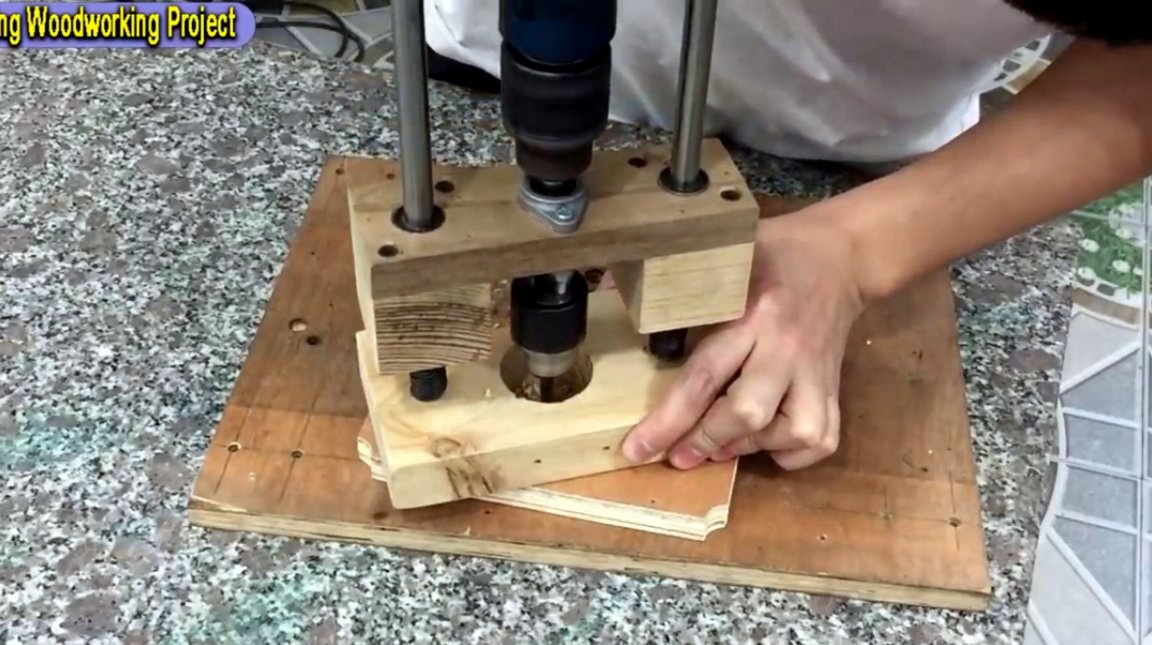
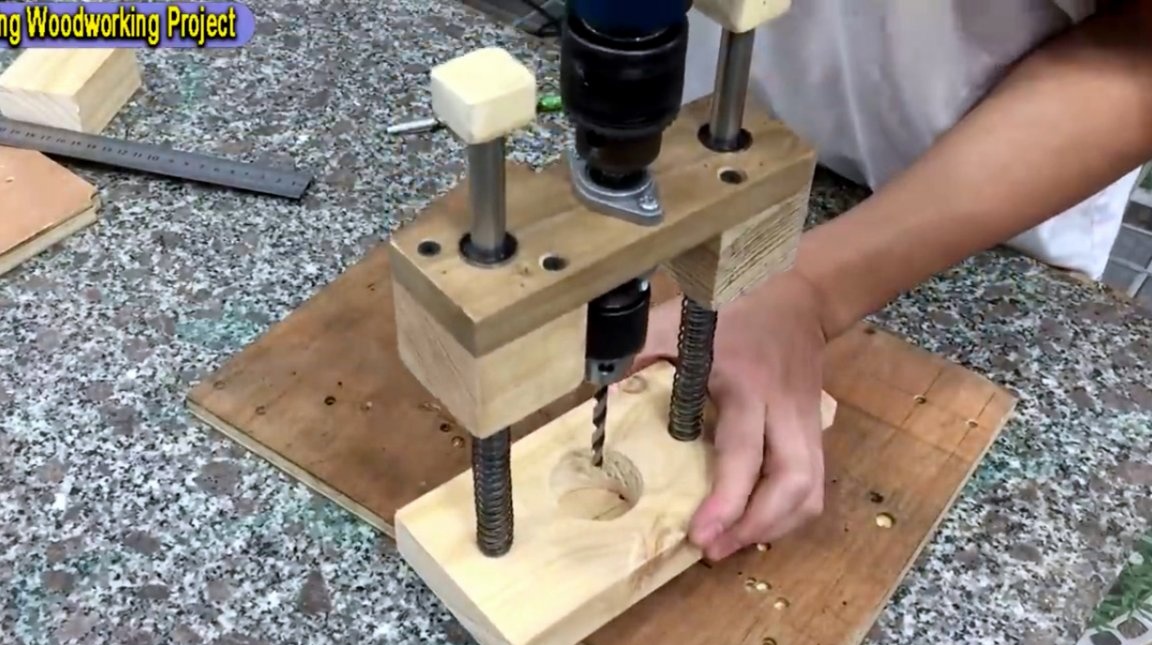
A Forstner drill is clamped in the holder chuck.
And the rod itself is clamped already in the drill chuck. It remains only to make a through hole in the sole of the device.
That's all, the hole in the sole, and the device itself is ready to go.

The author managed to drill a number of test holes in a few seconds. He also tried working with Forstner drills and pen drills on wood. The result is simply excellent.

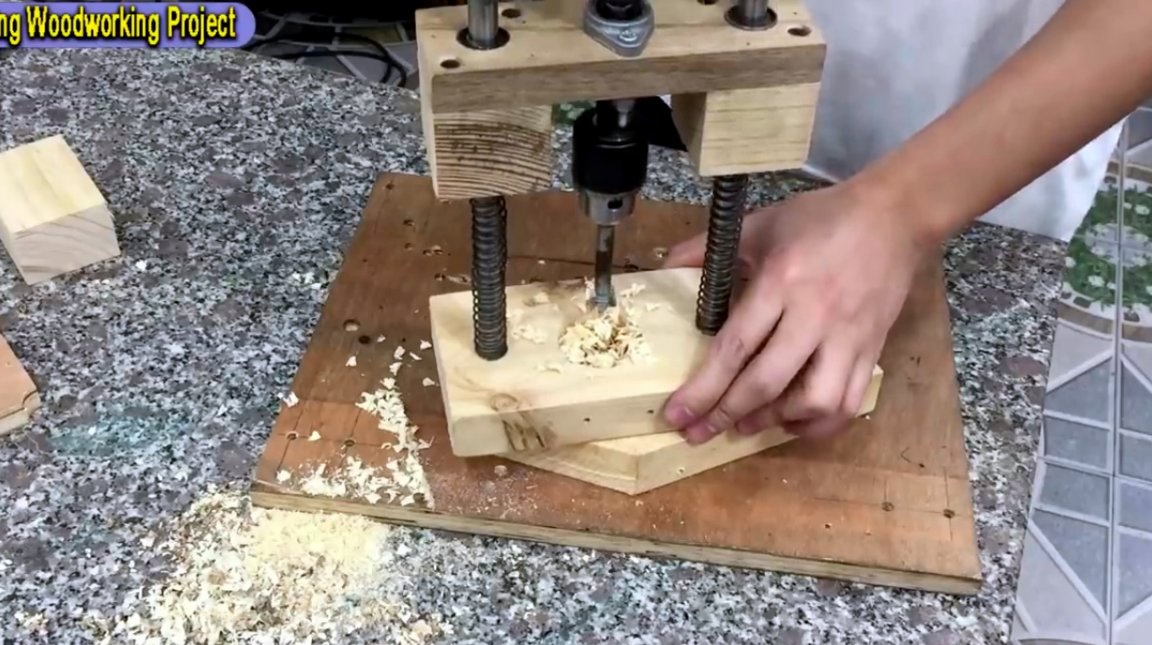
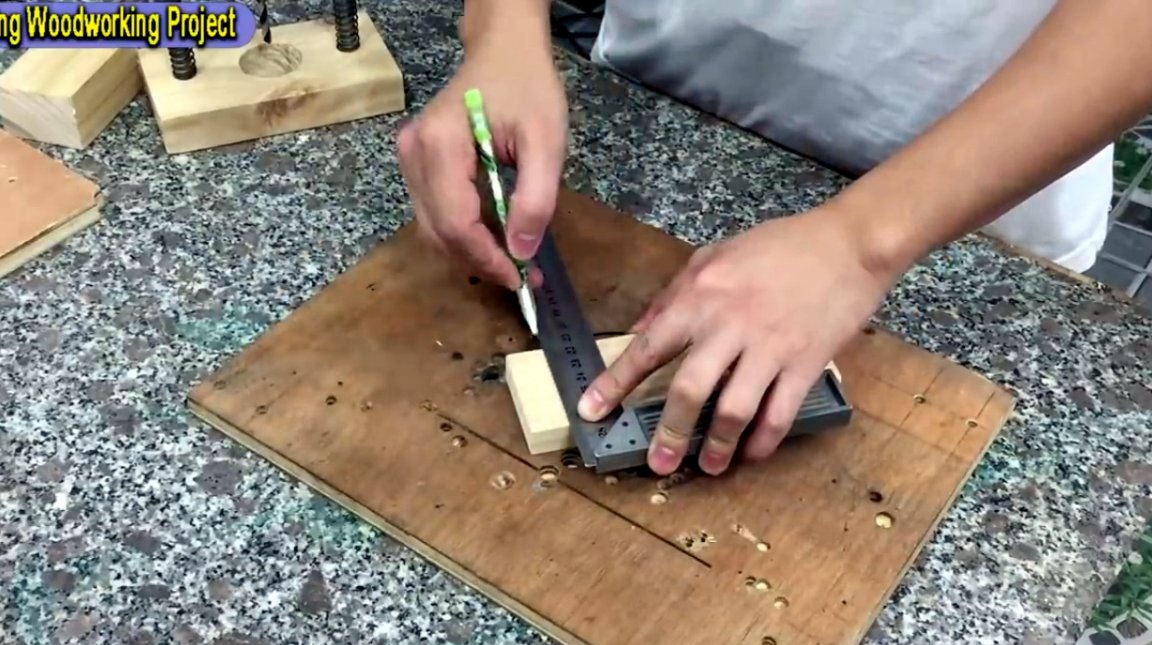
After trial tests, the author decided to make a check on the accuracy of drilling on the markup.
Now, with the help of such a device, it is possible to drill perpendicular holes not only in various details, but also in vertical walls, and even in ceilings. In terms of improving the device, I recommend sticking sandpaper or rubber on the bottom of the sole. In such a simple way it will be possible to avoid sliding along the workpieces, especially if the work will be done on smooth steel surfaces.
I thank the author for the simple design of a very useful nozzle for a drill and screwdriver!
All good mood, good luck, and interesting ideas!
Author video can be found here.