
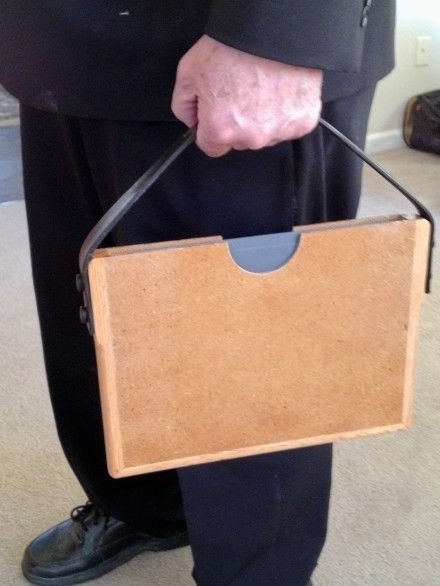
The iPad is a thin and lightweight gadget, but carrying it with you “without protection” is difficult because you can easily drop it and damage it. I wanted a bag for the tablet, which would be light, but at the same time provide the tablet with sufficient protection, preventing the tablet in the case from slipping out of my hand.
Materials:
Instruments
Step 1: cutting wood
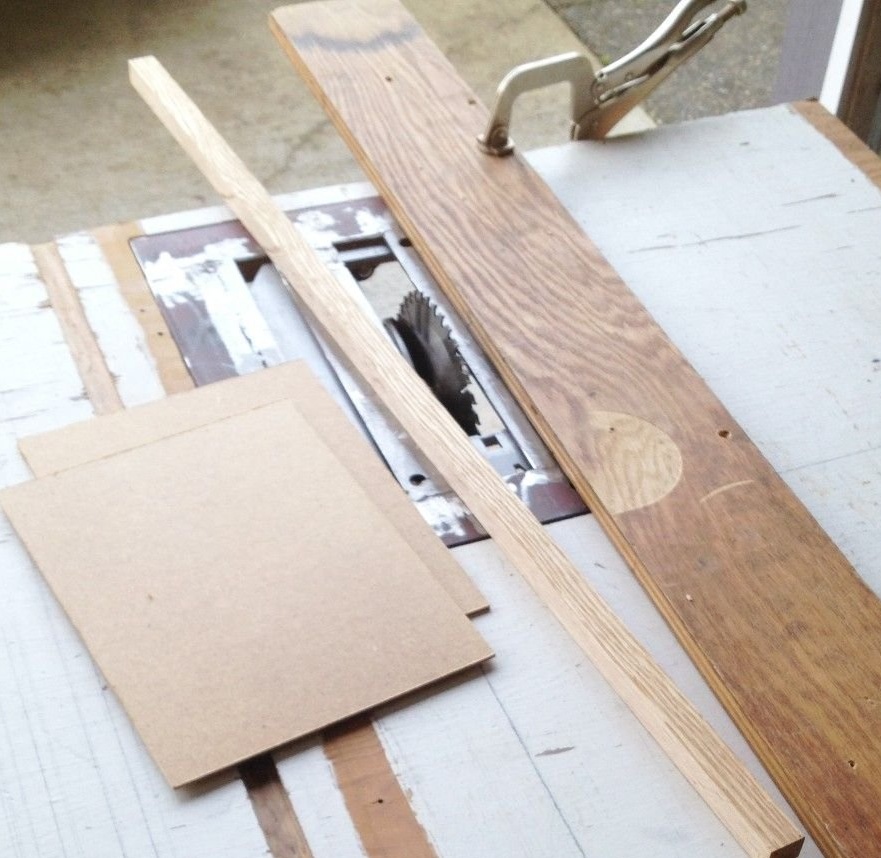
Cut 2 rectangular pieces of plywood about 20.5 x 26.5 mm in size. This is taking into account the grooves of about half a centimeter in a solid frame for a good adhesive surface. Cut a piece of wood of sufficient length to bend around the edges of the three sides of the plywood rectangles, as well as for joints at an angle of 45 degrees at the corners. The width and thickness of the beam should be approximately 2 x 2.2 cm (3/4 x ⅞ inch). I had a great red oak timber.
Step 2: Grooves
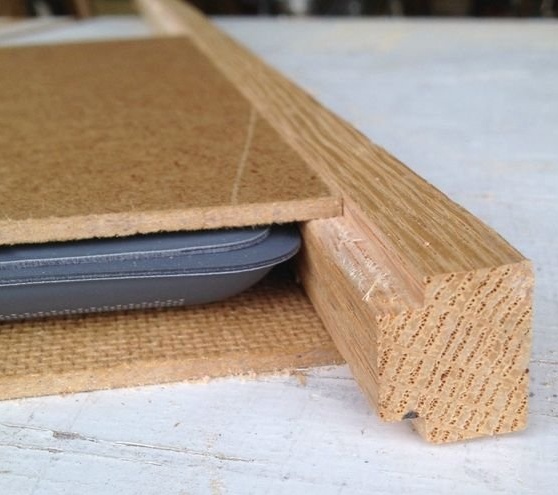
On the milling table, a straight cutter needs to cut out the grooves in the side beams. In the photo, the beam width is 2 cm, height 2.2 cm. At this height, there will be enough space to drill the grooves and leave space under the iPad inside the case. The thickness of the plywood is approximately 0.15 cm. If you use plywood thicker, you need to take wider wood.
Step 3: Edging and cutting wood to the desired size
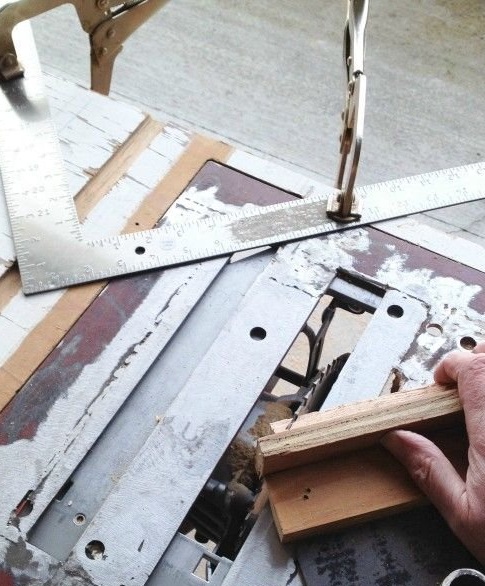
To cut the edges of the strips at the right angle, I installed a square on the machine, securing it with clamps on the table, as you see in the photo. The long piece of plank that runs along the bottom of the case must be accurate and of the correct length. Two pieces on the sides may be slightly longer. The second edge of each side strip must be cut at a right angle of 90 degrees. These sections are best done assembled (dry assembly of parts).
Step 4: Dry Assembly

In my dry assembly, all the parts are perfectly matched to each other. The side panels of wood are quite a bit longer. I really did not want to accidentally shorten them more than necessary. I marked the places to be cut with a sharp knife, and sawed it to the cut. I made this dry assembly and in order to check all the corners.
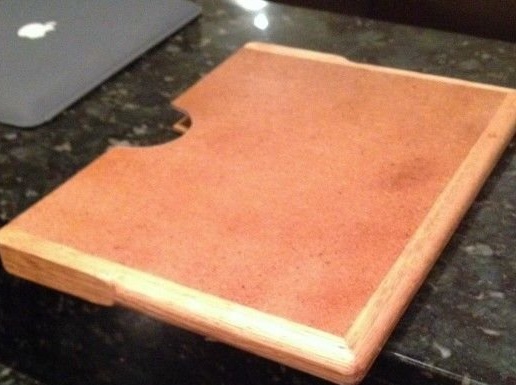
Step 5: Hole Saw
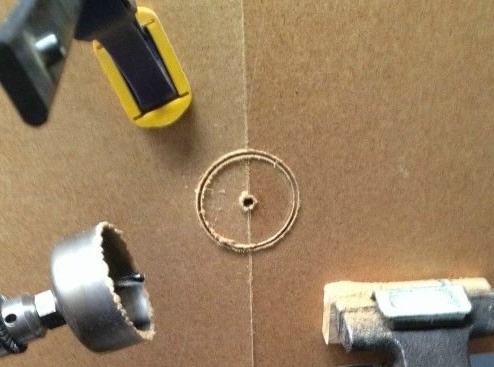
I used a 2.5 inch diameter hole saw to cut half circles in the middle of the top edge of the plywood. I cut them at the same time, fastening both plywood in one piece (as shown in the photo). So the semicircles will be exactly opposite each other.
Step 6: Sizing
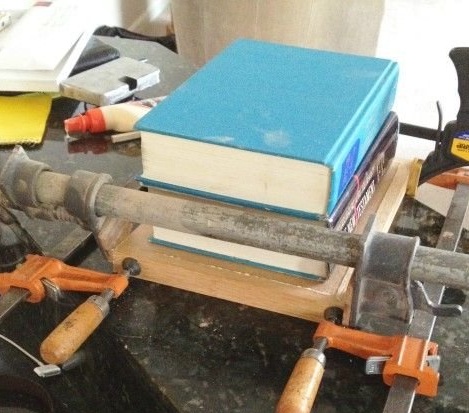
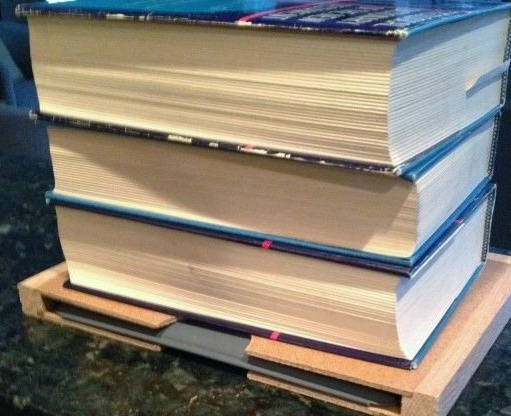
When sizing a case, a lot of things can go wrong. I checked the joints at an angle so that they did not move anywhere from the position in which they were fastened. I placed the bottom plywood in my position, and glued the top. On top of the case, I put some heavy books as oppression.
Look at the second photo. After one half of the case had dried in an hour, you could safely glue the second plywood to the corresponding grooves. Since the first plywood was already glued and the side panels were well bonded, it was not difficult to adhere the second plywood without clamps. After gluing, I also put several heavy books on top of the plywood so that the plywood does not puff up and snuggle more tightly at the seams when it dries.
Step 7: Polishing Wooden Parts
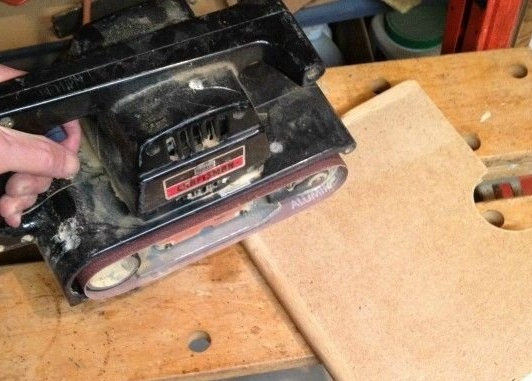
The side planks slightly exceeded the plywood. I combed this ledge with a grinding machine, and smoothed the corners of the case. With a finer sandpaper, I sanded all the nicks that the grinder left.
Step 8: Rounded Corners
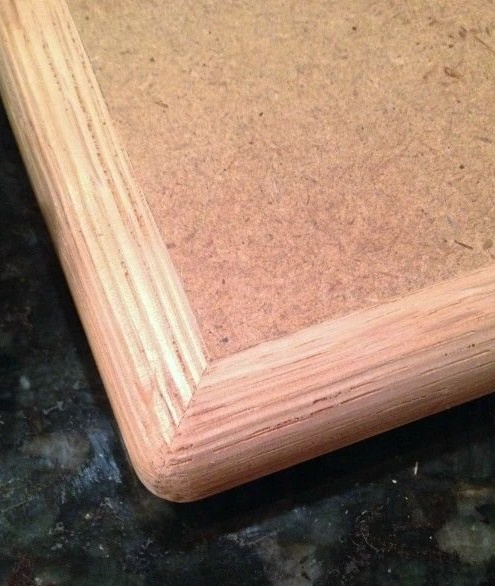
It is necessary to round the corners of the case with a mill. I made some very light incisions so as not to split and ignite the tree. All nicks and potholes can be sanded with sandpaper. Note: I left the top of the side slats flat. I plan to use a leather strip as a handle, and these parts of the side panels are needed to attach the skin. Look at the second photo.
As a finish, I coated my case with clear spray varnish.
Step 9: pen
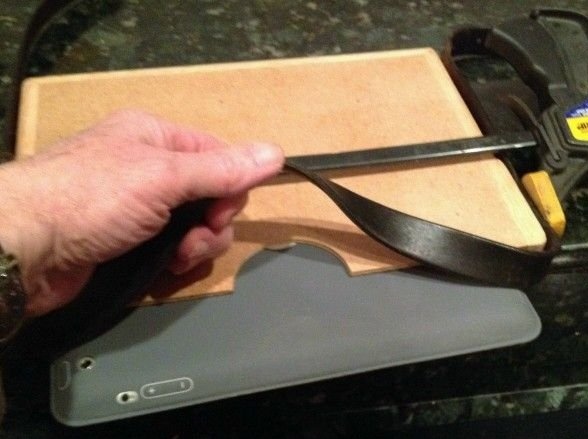
I used a wide clamp to secure the position of the old leather belt to the case. This will be my pen for carrying the tablet in a case with me. Such a handle should be flexible enough so as not to interfere with removing the tablet from the case. I could screw the belt with one screw and it could rotate without stopping me from taking out the iPad. But I do not want to risk it: the screw can relax and fall out over time. Two screws on each side will be more reliable.
Step 10: cutting the belt and attaching it to the case
As soon as I decided on the desired length for the handle, I cut off the corresponding piece from the belt, given the margin for attaching the handle. I didn’t want a long handle to wear a case on my shoulder, I made a short one to just carry it in my hand.
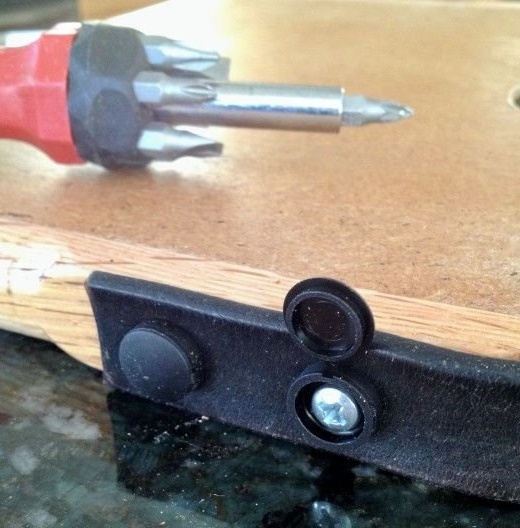
I used plastic caps on metal screws to fasten the belt to the case. Two screws on each side. I bought these plastic plugs at a local hardware store.
They are designed for flat head screws. There are also plugs for conical heads. They give a big fulcrum, like a washer. Available in different colors - I took black, they fit under my belt. The caps of the plugs snap into place, hiding the screw inside, which looks very neat.
This case for my iPad fits perfectly in a bag or diplomat, it can also be carried separately, as in the first photo in the post. In a diplomat or bag, other things will not press on the tablet screen if you wear it in this case.