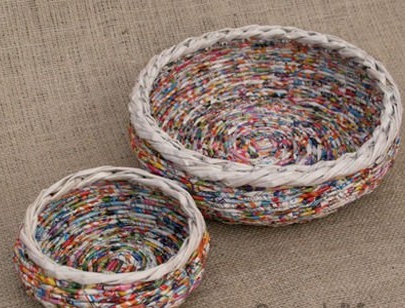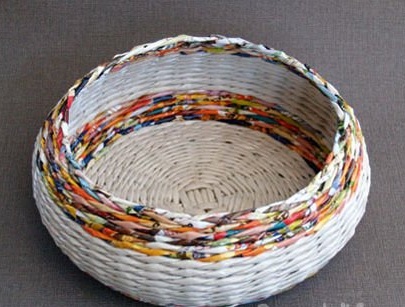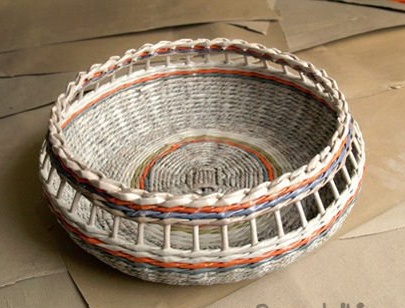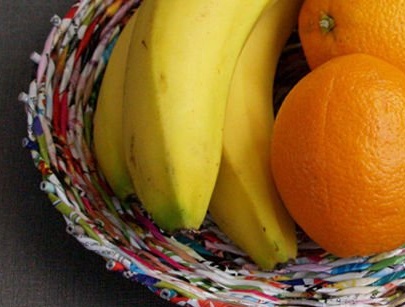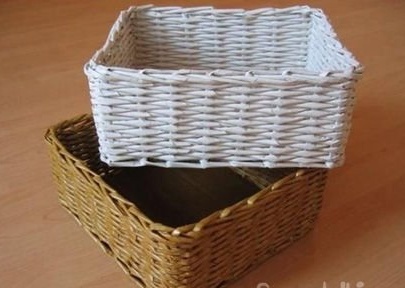
I recently discovered how easy it is to weave newspaper baskets! So just fold the sheets into tubes and then weave them into the basket. I will make a bunch of these baskets for future projects, as well as for home needs
I found instructions on how to do this on one site, the instructions seemed very simple, so I immediately set about recycling my old newspapers, with which I usually wash my windows or cover my work surface while I make my own crafts.
Step 1: Weaving Paper Tubes
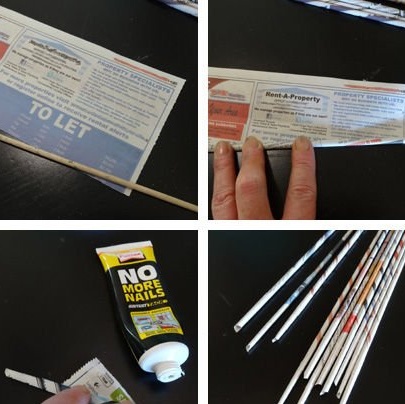
1. You need to cut long strips of newsprint, approximately 10 cm wide. Fold the newspaper in half horizontally, and then again in half, and cut into strips with a sharp knife. I twisted the tubes of their strips with a wooden skewer. You can use a thin knitting needle or any other 3 mm shaft. Place the rod on the corner of the strip at an acute angle, this will result in a more authentic tube.
2. Fold the corner of the paper and then fold the strip with your hands onto the bar. There are different methods of folding newspaper tubes, and after a couple of experiments you will determine exactly how you prefer to do this. I started wrapping the paper with my fingers, and then gently with my left palm the whole tube, holding the skewer with my right hand.
3. When you get to the end, apply a small amount of glue to the edge, and fasten the tube. No More Nails glue seemed to me the best - it dries quickly, holds firmly.
4. When you make a few tubes, you will notice that one edge is always slightly thinner than the other. Do not worry about this, you will soon find out why.
Step 2: Base the basket
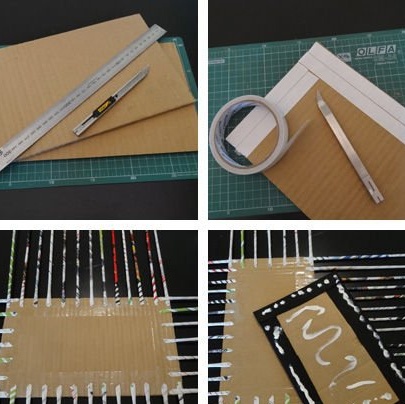
1. For the base of the basket, cut out two rectangular pieces of cardboard. The size can be whatever you need.
2. On the edges, on one side, glue two strips of double adhesive tape.
3. Stick the paper strips onto the tape, distributing them evenly and evenly on the sides. It took me 13 tubes on each long side and 7 on the short side.
4. Double-tape over one side of the remaining piece of cardboard. Apply glue to the back and press it against the cardboard with newspaper tubes.Put a heavy book on top of the cardboard so that it does not bristle when dry. Leave the cardboard to dry for an hour.
NOTE: To base the basket, you can use mazonite (pressed cardboard) or make the bottom wicker, as I will teach you soon.
Step 3: Finished Base

This is the base of a rectangular basket. The top of the bottom can be covered with a cloth. I chose black, but next time I’ll try burlap.
Step 4: start weaving
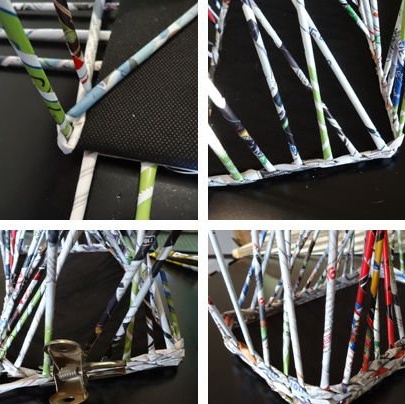
1. To begin, bend one tube in half, and round it with the first tube fixed at the bottom. It is difficult to explain, but from the photo, I think it’s clear what to do. The principle is this: we pick up one tube from the bottom in front of a horizontal one, and the other behind it. Try it and you will understand what I mean.
2. In the process of weaving, make sure that the tubes neatly fit one another and the weave is tight. When the first, lower row is intertwined, now we need to weave already with tubes fixed at the bottom. To do this, take one tube and wrap it around the next one, and bend it again so that it looks up. And so do with all the tubes.
3. If you need to break off, squeeze the end of the weave with a hair clip or clothespin so that nothing will open.
4. In the corners, before crossing to the other side, additionally cross the tubes.
Step 5: How to Extend the Tubes
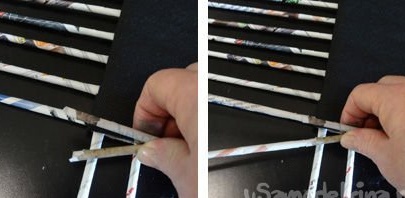
How to make long tubes
When you get to the end, take a new tube and insert a narrower tip at the end of the one you are weaving. Scroll lightly so that the new duct fits tightly inside the old one. You can also drop a drop of PVA inward for a stronger hold.
Step 6: Continue Weaving
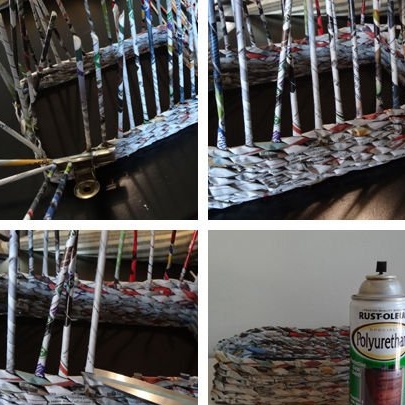
1. Since you weave and bend up each tube, they are consumed fairly quickly, and you need to lengthen them.
2. Continue lengthening the tubes until you have reached the basket to the desired height.
3. This is my first experiment with this type of weaving, and I was not sure how to finish the weaving upstairs. So I just cut off the strips. And only after about 10 minutes after that I realized that you could just bend them and weave them from the inside!
4. After weaving, I covered the basket with two layers of a polyurethane spray finish. It protects the paper from damage and adds gloss to the product.
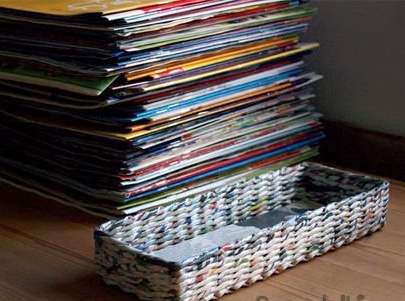
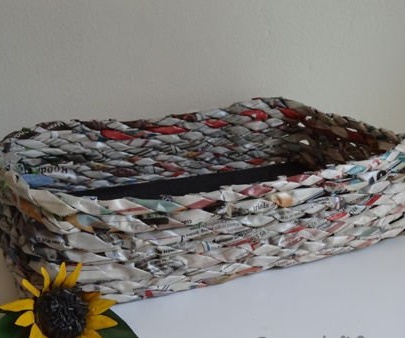
My first basket in my life took about 4 hours, including twisting the tubes. It was not difficult for me, and I enjoyed the process. Now I can practice the variations of finish and shape of the baskets.
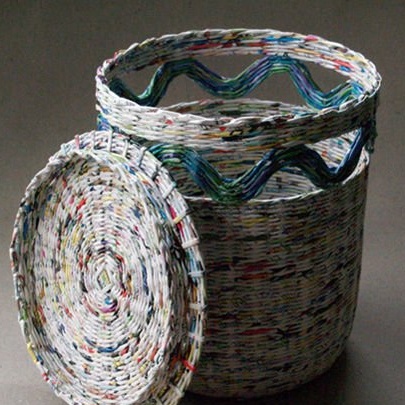
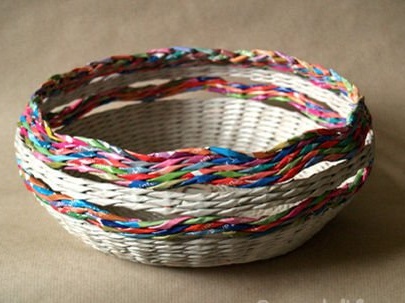
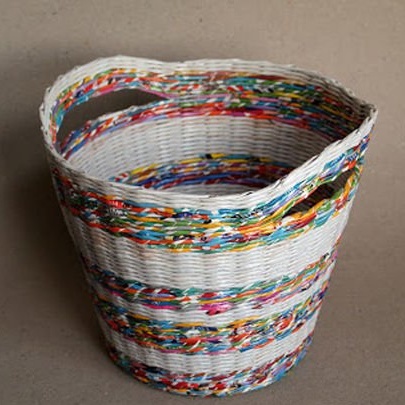
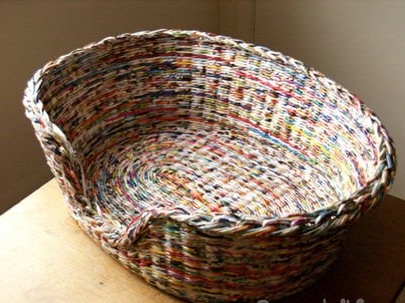
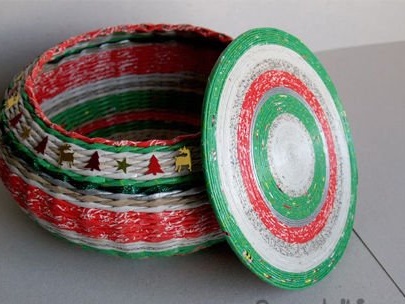
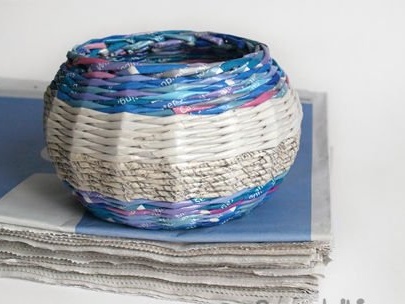
Step 7: Some New Ideas