

This is my greenhouse, made mostly of 110 year old lead glass windows. I cost her a year and a half in my free time. This is a memorial in honor of my departed mother and 16-year-old daughter. This photo was taken on one hot day in August 2013. I have always had, and probably will always have problems with adjusting the temperature. I tried to use a 70% shading cage at the top and sides, and it really helped, as did the hoods with fans. Inside, I made a hydroponic canal system on one side and planted pepper in pots on the other.
Step 1: Channel system 15 cm (W) x 6.7 cm (D), supply side
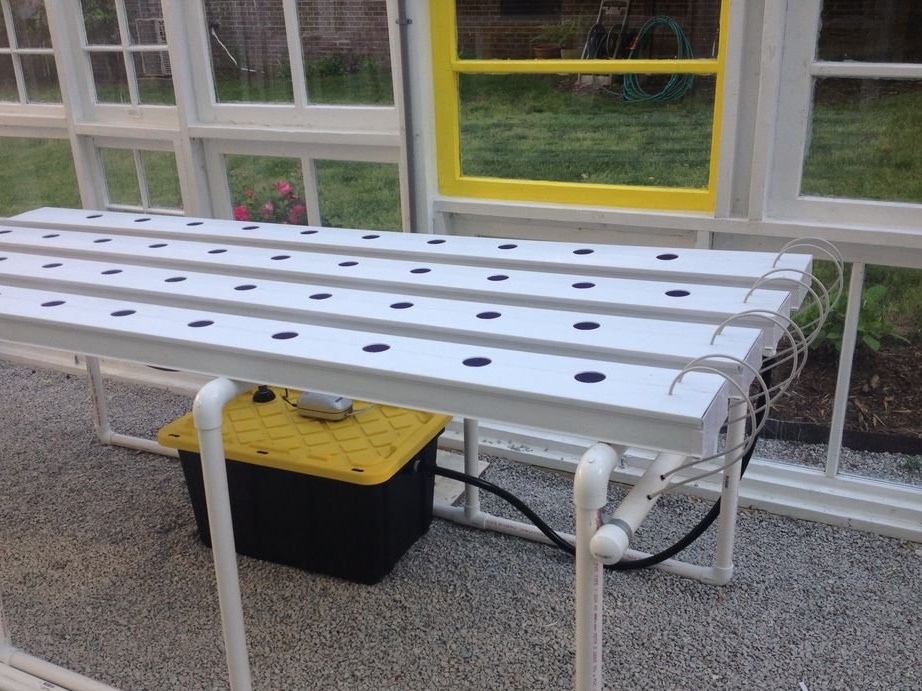
This system is built to grow plants in tubes through which a nutrient solution is supplied. The solution itself is fed through channels made of recycled UV-resistant plastic from scrap, 15 cm wide and 6.7 cm deep. Such channels are suitable for large deciduous plants, vegetables, such as tomatoes, cucumbers, peppers, zucchini. The channels feed the nutrient solution around the clock.
You see that I have channels, openings for small, 5 cm pots, a tank with a pump inside, an air blower as an aerator for the tank. Water is supplied through hoses for each channel in pairs. I have seen many similar systems; I myself have developed only one. But, as they say, you need to have the second as a backup option, if the first fails (this will definitely come in handy to me).
Step 2: Channel system 15 cm (W) x 6.7 cm (D), reverse
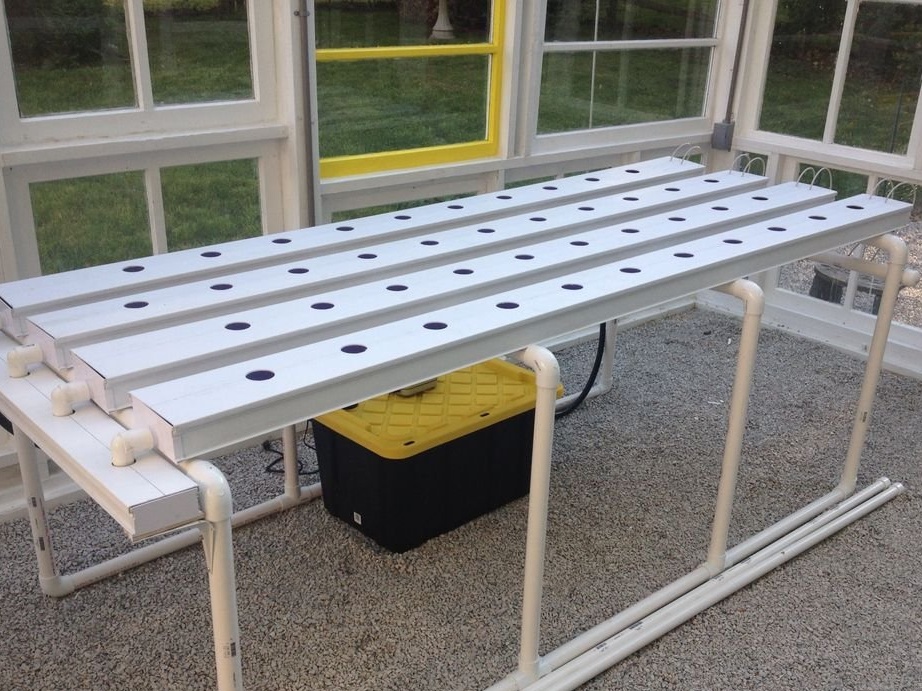
then the flip side of my system. All channels are tilted. I forgot at what angle exactly. A slight slope is needed so that water can flow smoothly from one end to the other. Water flowing through the channels, flows back into the tank. Since I used PVC plastic for the construction, the material is too smooth, the channels glide slightly. To get rid of this, I used Velcro (contact tape) under the channels. It works great.
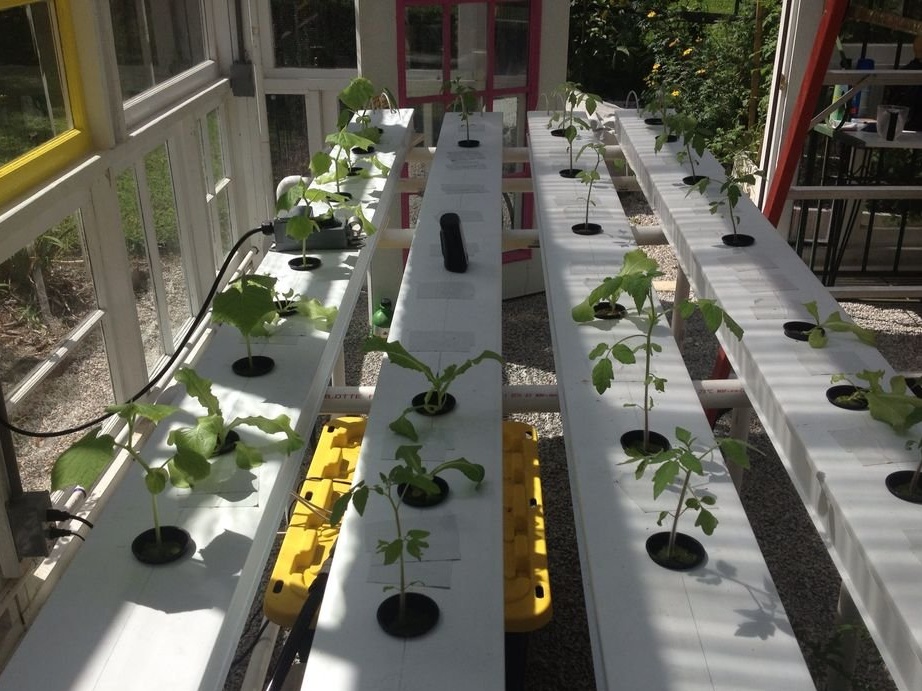
Step 3: Cucumber Seedlings, Week 1
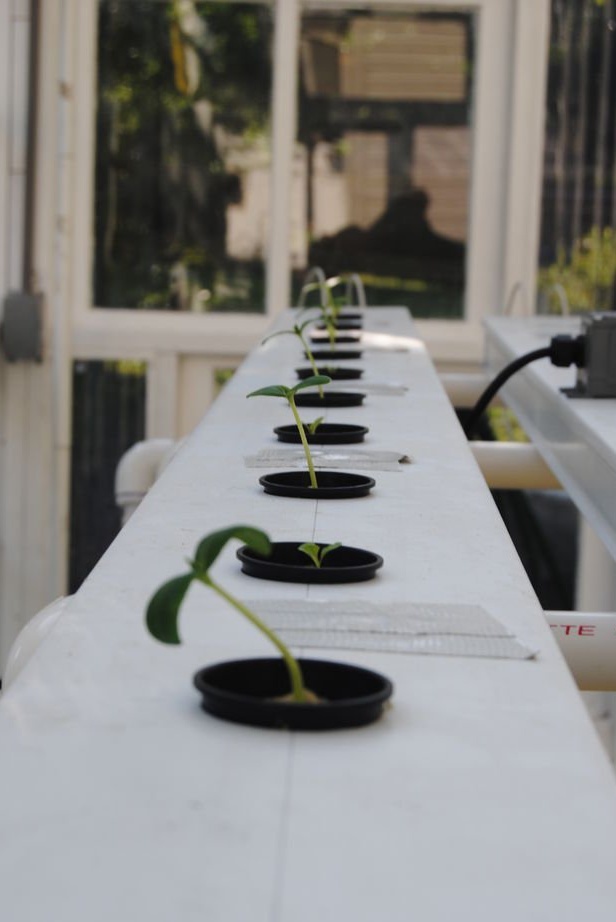
I planted the seeds in the greenhouse in small, 4-centimeter seedling pots, combined in a tray, placed it under a cap (greenhouse). Seedlings should be moistened with PH-balanced water. Google how to adjust the pH balance of irrigation water, carefully study this issue. I usually moistened the seedlings in the morning and evening. As soon as the seedlings appeared, I took them out from under the hood and placed them in my channels.You see this stage in the photo. I also planted tomatoes, lettuce and several varieties of peppers, including the sharpest varieties in the world: “Ghost chilli”, “Scotch Bonnet”, “Scorpion”, “Habanero” ), “Chipotle” and simply sweet varieties of “Bell” (Bell).
Step 4: Tomatoes, cucumbers, peppers, week 3
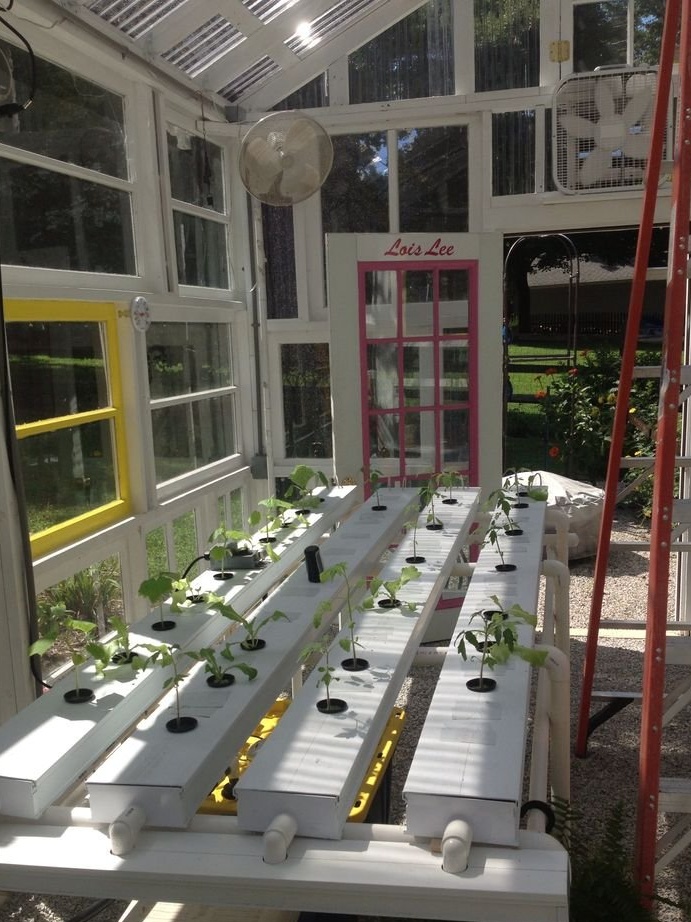
Everything looks very good, I like to observe the growth of plants. After a little research, re-reading a bunch of materials, I can assess the future yield. For nutrition, I chose General Hydroponics Flora Series QT products - FloraGro, FloraBloom and FloraMicro, each bottle of 907 ml (32 ounces). GH Flora Series contains a complete range of nutrients for improved germination and better crop quality. You can make different mixtures for specific plants, depending on their needs. Improves the characteristics of plants, taste, smell, essential oils both in hydroponics and in cultivation in the soil.
These liquids are composed of highly purified concentrates for maximum solubility. They are already PH balanced for convenience. Scientists from NASA and Antarctic preferred the Flora Series because of the successful formulas of mixtures and reliable quality. In some source, I read that it is recommended to change the nutrient mixture once every 2 weeks. Other sources claim that you need to run the solution through the system only twice. That is, it is necessary that the solution is consumed to the bottom, to the pump, then fill the tank with water again and allow to be consumed before the pump. I did so.
Considering the summer heat and high evaporation of moisture, about 2 weeks will pass between changes in mixtures. I think the shift frequency is not very important. You need to make sure that the channels do not dry out, and it does not matter which approach you choose for nutrition.
I almost forgot, when re-pouring water into the tank, watch for its PH.
Step 5: Week 3
As you can see, plants like in my greenhouse. Every day I look at them, and I see a noticeable increase. Some cells are not busy yet, I wait until new plants ripen for planting in pots. In the meantime, I just keep them sealed.
Step 6: Week 6
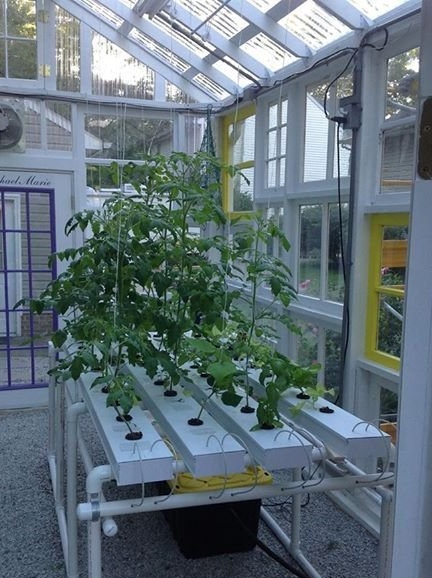
See what I was talking about. The previous photo was taken at 3 weeks, and this is at 6 weeks. Small tomatoes have already appeared on the greens! Lettuce generally impresses with its size. In the channel system, the roots have grown strongly. I make sure that there is enough moisture and the PH level is about 5.5. It is not difficult, but try not to forget to do it, otherwise you can spoil your entire garden. See the inscription on the door. This is the name of my 16 year old daughter who left us last year. This greenhouse was built in her memory, it was her favorite color.
Step 7: Tomato Forest
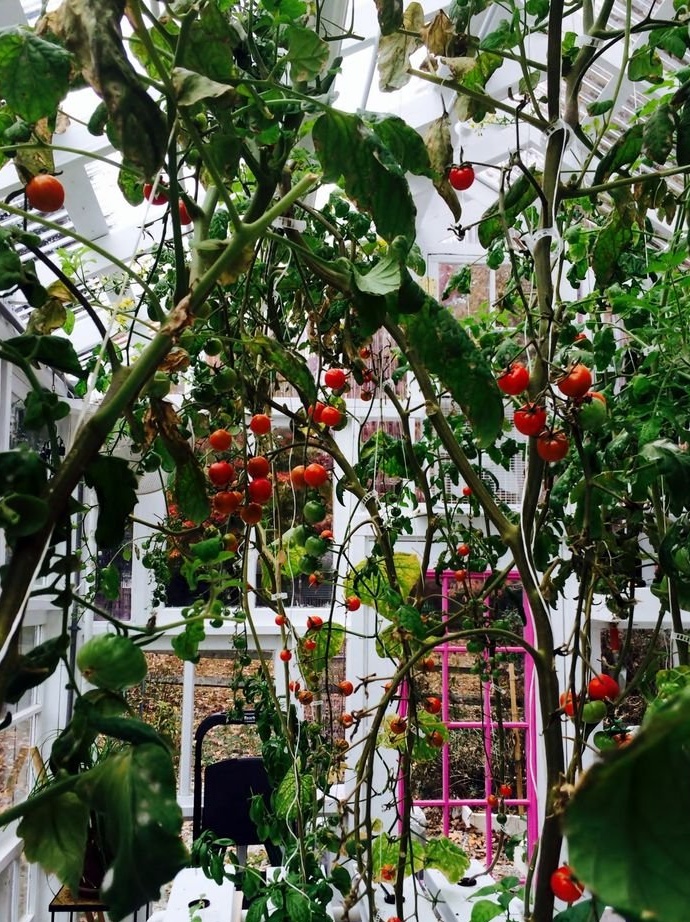
Have you had dinner yet? There are many sweet, juicy tomatoes! They really taste good. I often pick them straight from the shoots and eat on the go. I am very pleased with such results. I even put the photo as a screensaver on my computer. It looks very good.
I liked how the tomatoes grew and developed - one long trunk came out of the pot, and along the entire length they were strewn with inflorescences. Since there are no bees in the greenhouse for pollinating flowers, I had to use a battery-powered toothbrush. I will tell you how it works.
In the center of the flower there is a thing called anther. There are several of them. When I see that they swell, I touch them with a toothbrush, and a cloud of yellowish dust crumbles, pollinating the pistils. Flowers can also be pollinated in the wind, so bees are not the only helpers in this matter.
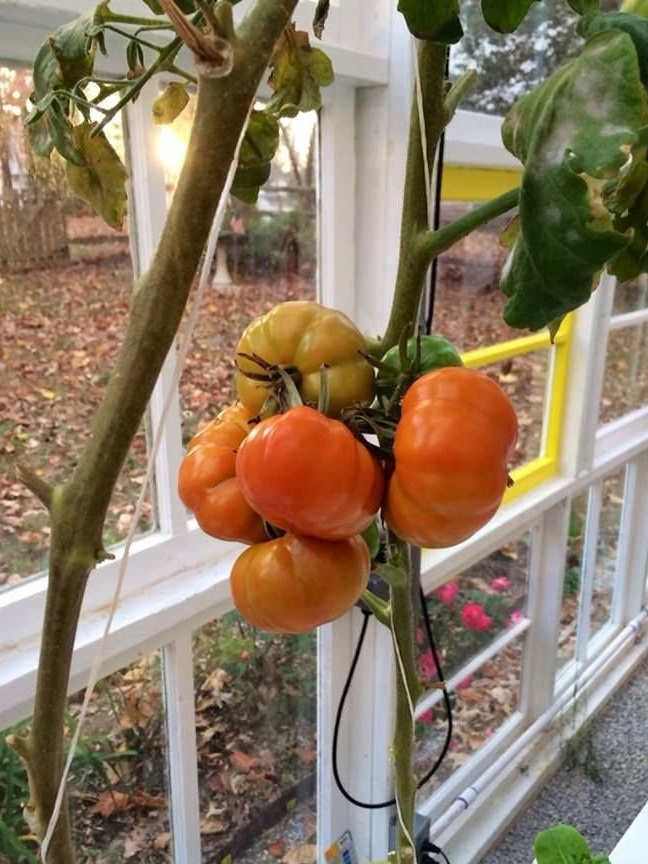
Step 8: Bull Heart Tomatoes, Week 9
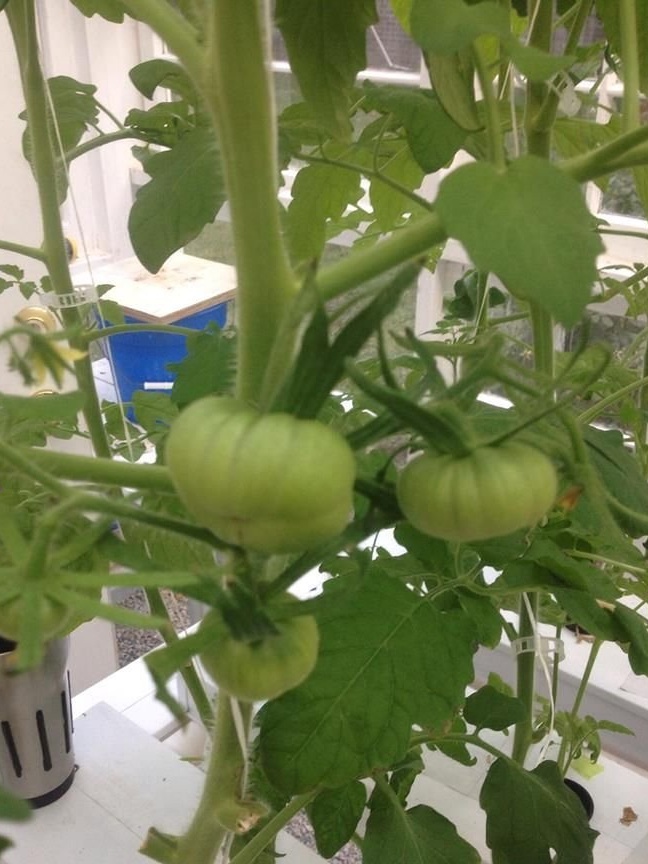
Here is my bunch of tomatoes “Bull’s heart”. They are still small, but later you will see what came of them. It just captures me! I forgot to mention that for the stems you need to stretch the rope or something else as a support to the plants. See, in the photo I support the stems with plastic clamps. These are special clamps for plants, sold in gardening stores.
Step 9: Ripening Bull Hearts

Everything goes according to plan. I continue to feed my tomatoes with nutrient solutions and monitor the level of PH in the liquid. You see that outside the window is already autumn. All the tomatoes on the street have long been harvested, the season for these vegetables is already over.But not for those that grow in my greenhouse :)
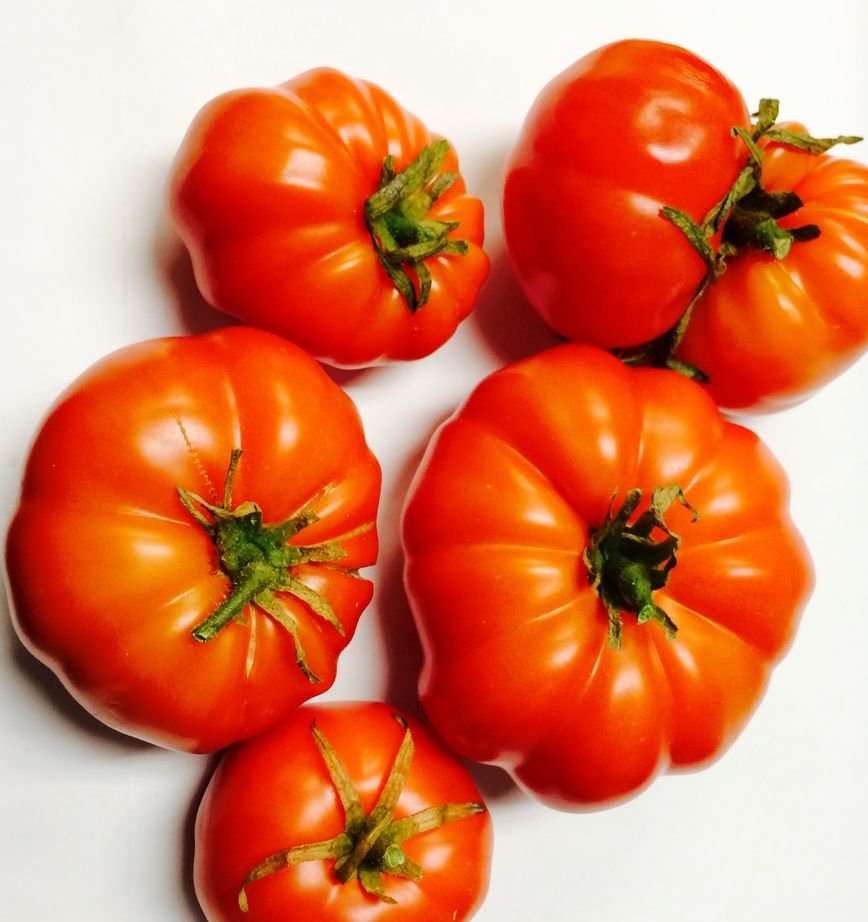
Step 10: A Large, Juicy Bunch of Tomatoes
That's what all this was up to. For months I have been working on this greenhouse, growing my vegetables, and finally reaping the benefits. You ask why I just did not go to the store and did not buy tomatoes instead of spending a lot of time and money on my own. And I will answer: I would do so if I liked the taste of cardboard: P. The photo is already late November.
Step 11: Starting The Day With Bull Hearts
Every morning, around 5-30, I go to my greenhouse to check how things are going and whether everything is in order. Sometimes I collect peppers to take with me to work, but lately I have been taking mainly these tomatoes from there. There is nothing nicer than such a juicy tomato at lunchtime! I sprinkle the tomato with salt and pepper, and eat it with cheese and avocado. This is an excellent, low-calorie and nutritious snack. Today I ate one of the sharpest peppers in the world with them. Yummy!
Step 12: Here the Cucumbers Ripened
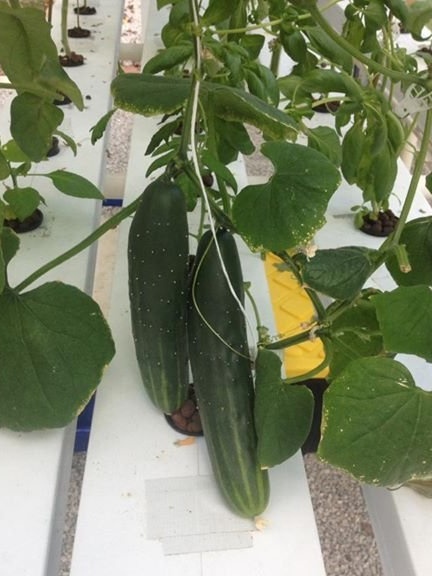
I forgot to say that I also grew cucumbers. I did not show the seedlings earlier, since only 1 survived out of 6. When the seedlings are planted in pots, you need to cover them with water to the top until the plants form their own root system in order to get enough nutrients. For some reason, the roots did not sprout through the planting substrate. I do not understand what's the matter. This bush gave me three cucumbers. But look at these two:) I hope to get better results in the second crop. On December 15, we ate the last cucumber in the salad along with cherry tomatoes.
Step 13: The World's Hotest Peppers
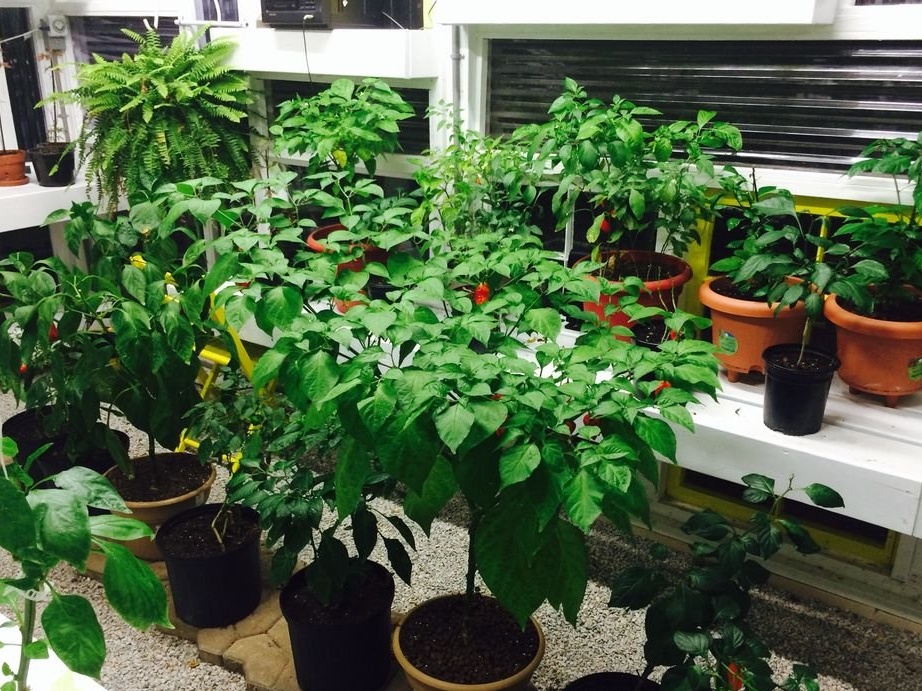
And this is already half of the greenhouse, where I grow plants in the soil. I decided to combine soil gardening and hydroponics. All these plants were planted from seeds last spring. In the back row are the plants that my friend brought. He brought them here in late autumn, so as not to destroy the first frost. So these pots will keep my peppers company this winter. Here I have 5 grades of pepper - gost, scorpion, bonnet tape and chipotte. Next, I will tell you about them in detail.
You ask - why all the solid peppers? Because these are simple plants to grow, plus they look very beautiful when ripe, and in terms of energy, they are very powerful plants. Since this greenhouse is a memorial in memory of my mother and daughter, I want to grow just such plants here. Such plants help me think that life goes on, that my loved ones are still with me. Maybe nonsense, but I think many will understand me.
Did I say that these hot peppers are just breathtaking? I always liked to eat hot peppers, but these give the word “hot” a new meaning. I decided that if you grow them, then you need to eat them, right? So I take one such “gost” grade pepper to work, and decided to eat them during lunch. I eat them a little bit, otherwise it will not work ....
Step 14: Still About the Hot Peppers ...
....... I cut off a small tip of pepper, put it in my mouth and chewed it. He spat out, and then he began to feel a fire in his mouth. It was like gulping boiling water, or as if a thousand needles were stuck in the tongue. This feeling is like when you hit the finger hard with a hammer or when you drink hot resin. My throat was hot, as was my esophagus. I felt like I had a runny nose, and I even sweated. And all this lasted as long as 20 minutes. Among other things, I felt some strange buzz. This is due to the release of endorphins (in their action they resemble opiates in terms of analgesic effect and pleasant sensations). Pretty good feeling. I read that the component in the composition of pepper (capsaicin) has such an effect.
I told this so that you understand what to expect from these hot peppers. After the first such experiment, I did not abandon this venture, and I continue to eat my crop in small doses during meals.I even put it in my morning porridge. Give it a try.
Step 15: Caution !! The zone of increased friability!

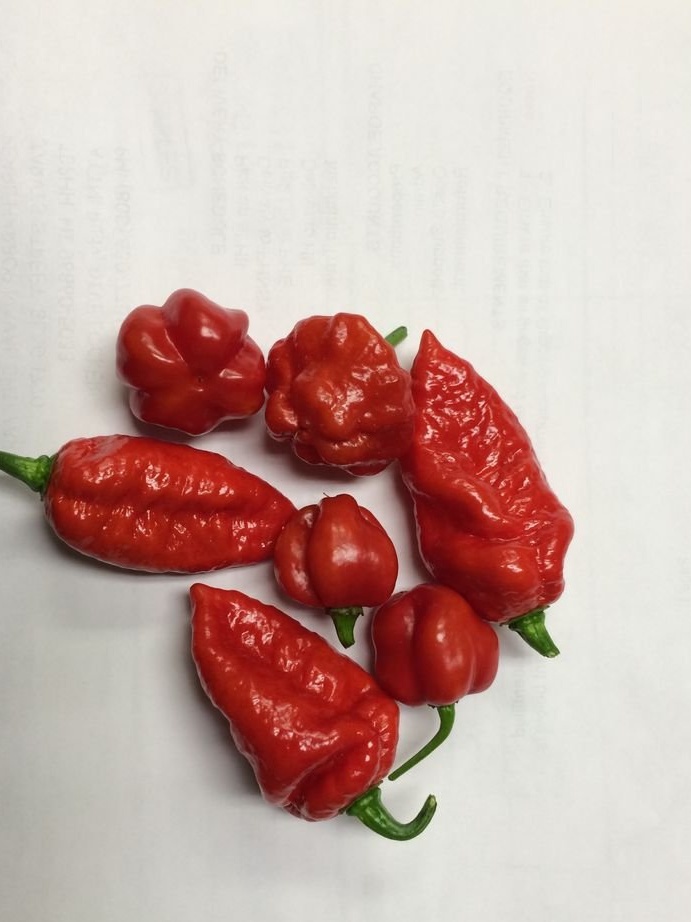
These peppers were grown from the seeds that my friend gave me. I sowed them in seedling pots under a cap. When the seedlings appeared and got stronger, I removed the cap and placed the sprouts under the light. Lighting is provided by T-5 lamps, before that I had never used such. But in reality they turned out to be excellent. It is necessary to monitor the humidity of the substrate. I checked my seedlings twice a day. When the seedlings reached 5 cm in height, I planted them in small pots, and they began to take root. For a couple of weeks they grew in these pots under the lamps, and then I planted them in large pots. Then he transferred them to the greenhouse and watched the growth.
The photo shows 3 types of peppers, and their hotness is measured on the Scovilla scale. This scale measures the hotness of chilli peppers or other hot foods in units of the Scovilla scale (ECU), a function of the concentration of capsaicin. The scale is named after the creator, American pharmacist Wilbur Scoville. His method, discovered in 1912, is known as Scoville's organoleptic text. Here are the indicators of my varieties:
Step 16: Hydroponics and Greenhouse Gardening in Winter

Thank you for taking an interest in my experience. I tried to make my post not only informative, but also interesting. I have tried a lot of things in my life, but this hobby has become the most saving and effective for me. It helped me cope with the most difficult and painful year of my life. Now it is my source of pleasure and my outlet.