
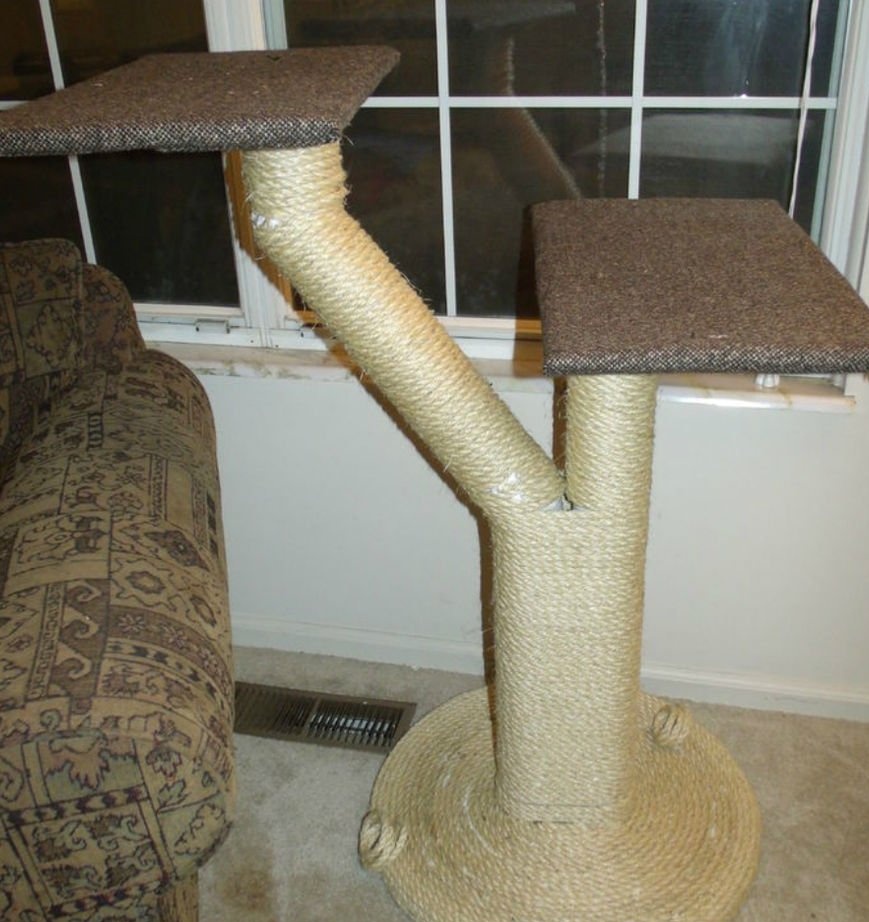
I recently moved to a new home. A window in it gives my cats a view of the beautiful landscape with a bunch of birds, which was not in the same place. The problem is that both cats have nowhere to sit in front of the window to watch this picture. Therefore, there was a need to make a double saddle.
I wanted to share with you my idea of creating a simple, inexpensive place for home favorites that I once made myself. That double roost cost me about 500-600 rubles, and my cats loved her very much. This option is a bit more expensive due to the sisal rope, but it can be replaced with any other material cheaper.
Step 1: Tools and Materials
Instruments:
- pencil or marker
- screwdriver or screwdriver
- jigsaw
- hot air gun or propane burner, a regular hair dryer is also suitable (I never tried it myself)
- silicone gun, optional
Materials:
- 3 pieces of pressed wood or plywood ¾ inch thick
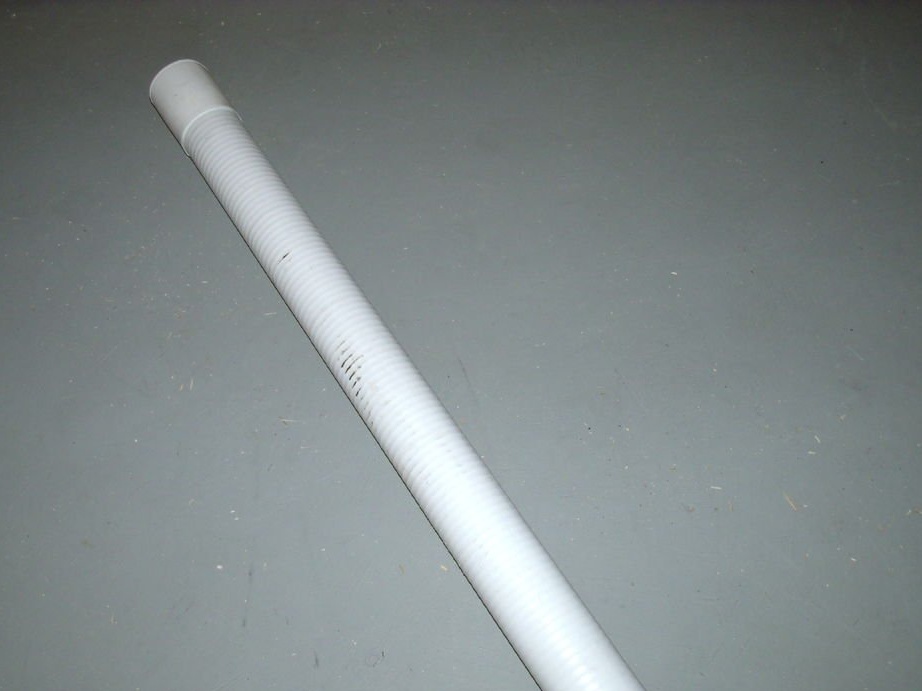
- PVC tube with a diameter of 4 inches (10 cm). I used a drainage pipe, which is easier and cheaper (costs about 250 rubles per 3 m)
- 75-80 m sisal rope. 15 meters of rope cost about 270 rubles. If it’s not suitable for you, you can buy a cheaper rope, if only the cats liked it.
- 4 end caps with a diameter of 4 inches (10 cm)
- ¾ inch golden screws
- glue. I used construction adhesive in sealed packaging. Hot glue or PVA will also work.
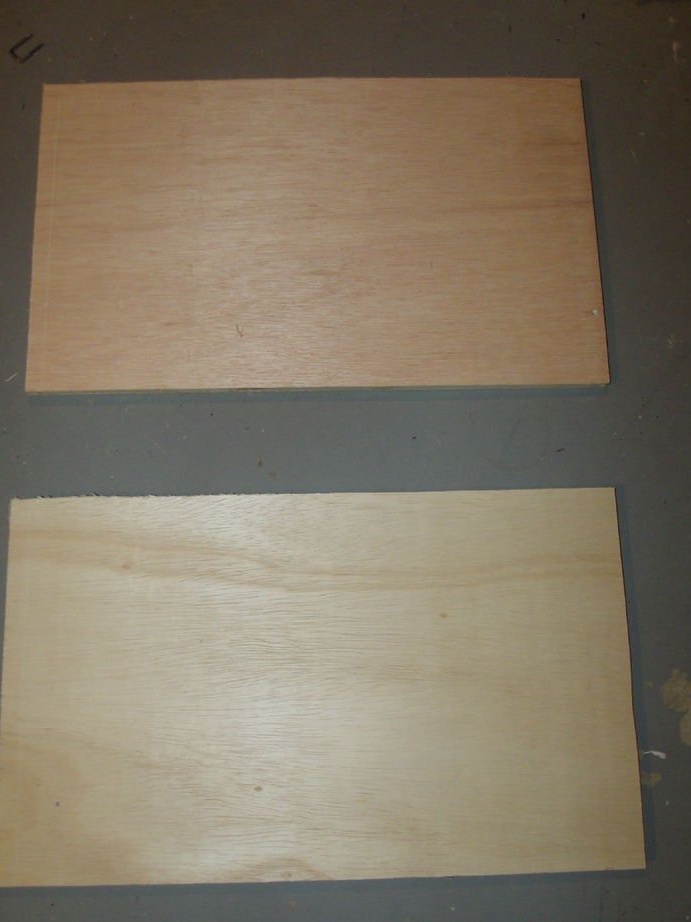
Step 2: Foundation
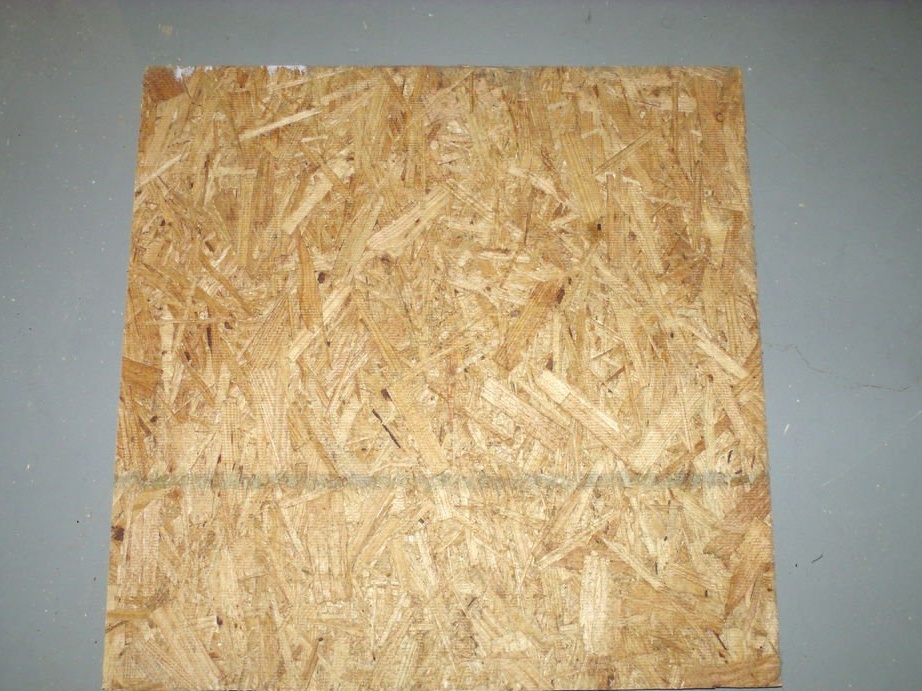
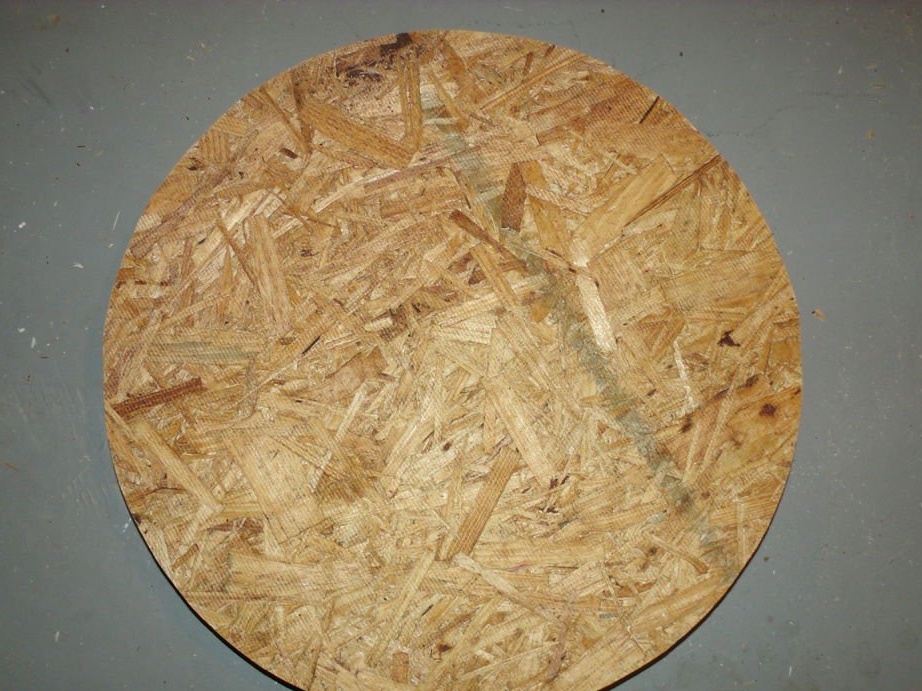
The base of the stand will be made of ¾ inch plywood. You can cut out the base of any shape you want. For this sisal rope stand, it is best to cut a round base. If you will make a winding from fabric, it is better to make a square or rectangular base.
Draw the base shape on the plywood. Keep in mind that the size must be large enough for the stability of the entire structure. I think that for one cat, a base of 40-45 cm will be enough, for two, about 60 cm is already better.
Use a jigsaw to cut the base outlined. For this stand, I cut a circle because I wanted to wind the rope from the center to the outer edge. If you use fabric, then a rectangular base is easier to upholstery.
Step 3: Coasters
This is an example of a double shelf, but you can make a single, if you want. First you need to decide on the height. My cats jump about a meter, easily reaching most of the windows. I decided to make the lower tier at a height of about 70 cm, and the upper one at a height of 1 m.
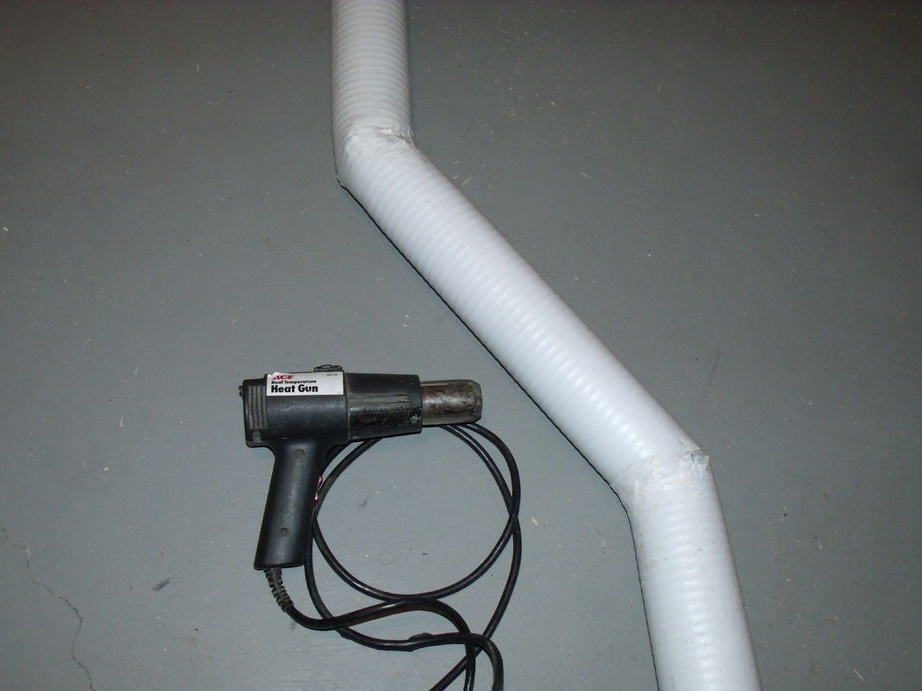
If you are making a two-tier stand, first cut the shorter PVC pipe (70 cm).
The second, longer piece of pipe is not yet necessary to cut. First you will need to bend this part so that you can fasten both tiers together. Mark with a pencil or felt-tip pen first at a length of 40 cm, and then at 70 cm. Heat one side of the tube to a softened condition with a hot air gun and bend at an angle of about 45 degrees. Keep the pipe bent until it cools.
Now heat the pipe at a higher mark on the back side, and also bend at an angle of 45 degrees, hold it until the pipe cools down.
As a result, a pipe should be obtained, which first bends to the side, and then aligns again and looks up.
Now cut the second piece of pipe with bends so that it is about 1 m in height (measure from the ground in an upright position).
Step 4: Attaching the Covers
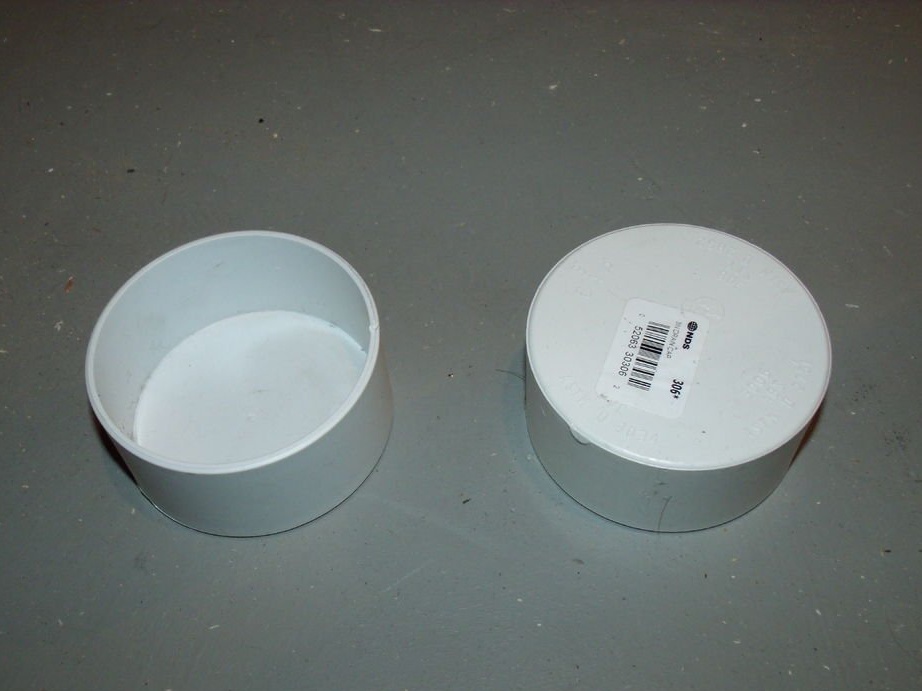
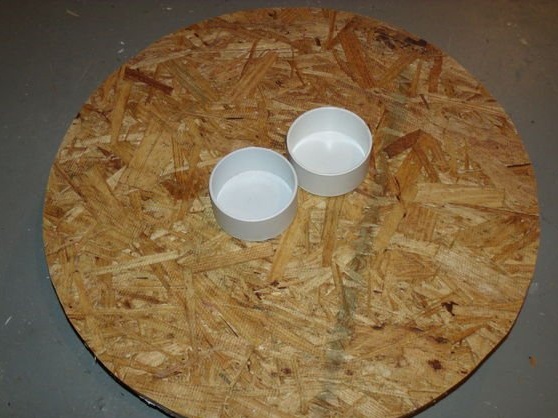
Find the center of the base. Screw the two end caps with screws. If you are doing a single stand, you need to fix only one cover.
NOTE: if you want to cover the stand with cloth, you need to cover the base before screwing on the covers. The process is described in step 9.
Step 5: winding the rope
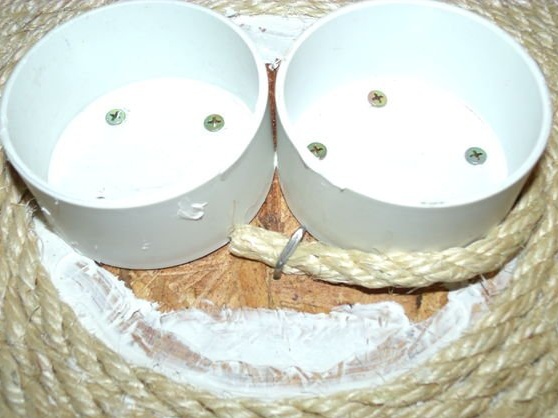
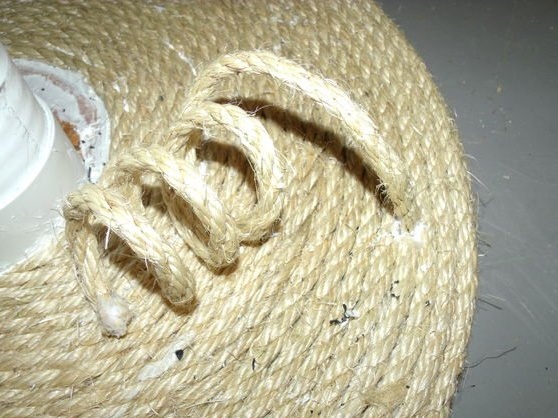
Unscrew part of the skein of skein and put a tube of glue into the gun. Screw the tip of the rope with a screw or secure with a bracket in the center of the stand, next to the plastic plugs. From the center, squeeze the glue in a spiral pattern onto the plywood, evenly distribute it with a spatula approximately 15 cm apart. Start wrapping the rope in circles around the center, firmly pressing it into the glue. As the glued surface covers the rope, add glue to the outer edge, and continue to wind the rope.
There will be an unwound part of the surface on the sides of the plugs. When you have finished wrapping the base, measure and cut small pieces of rope to fill these non-glued parts with them.
The skeins of rope were 15 meters each. And one such coil is not so much and enough. Most likely, you will finish one such, not even completely wrapping the base. I fixed the edge so that it stuck up, as a toy for my cats.
Step 6: Connect the pipes
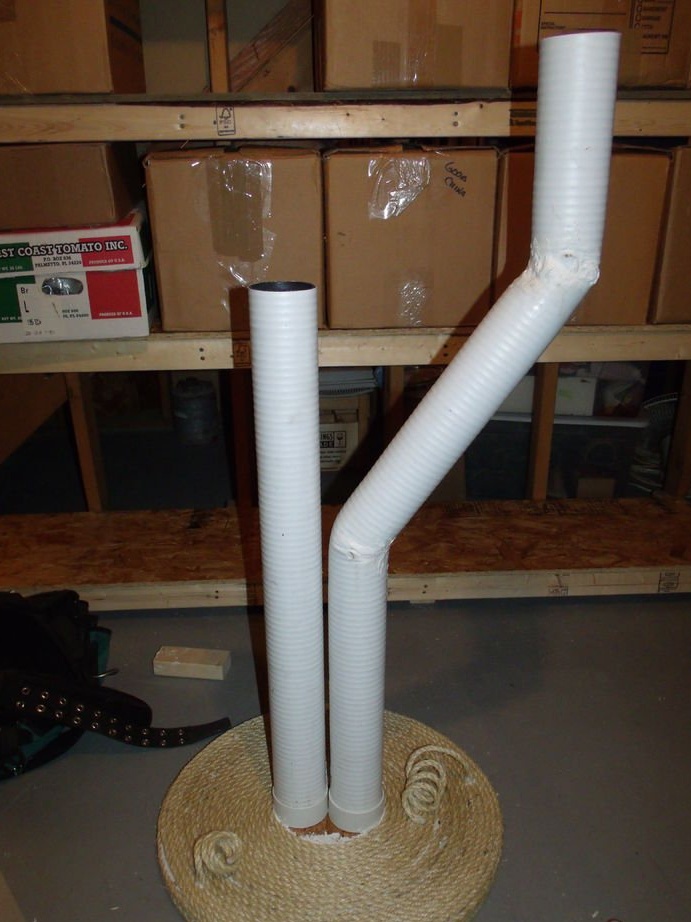
Take the cut pipes and insert them into the end caps on the base. I glued them with Gorilla Glue. The pipes must sit tightly in the covers, and not necessarily glue. If you do without glue, this whole structure can be easily disassembled and folded somewhere if necessary.
Step 7: Tube Wrap.
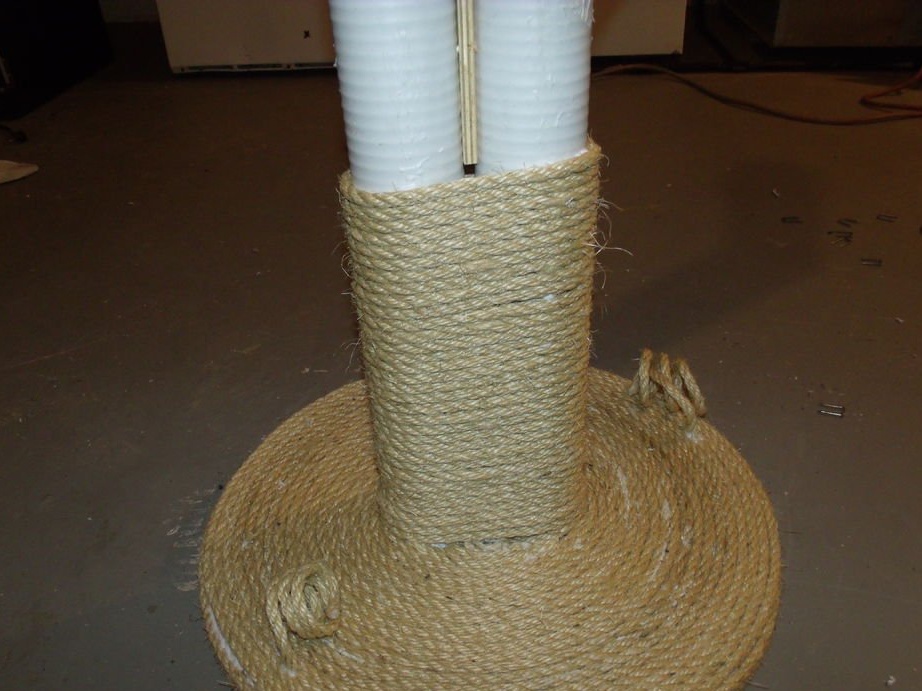
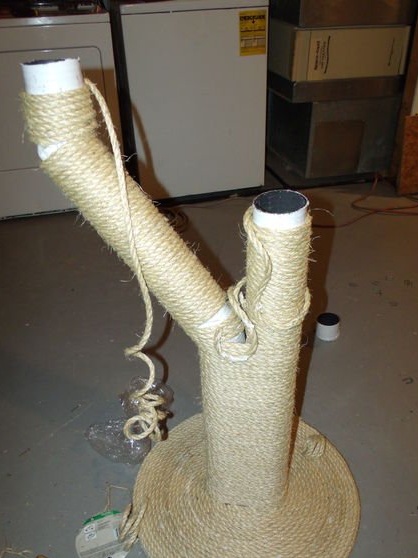
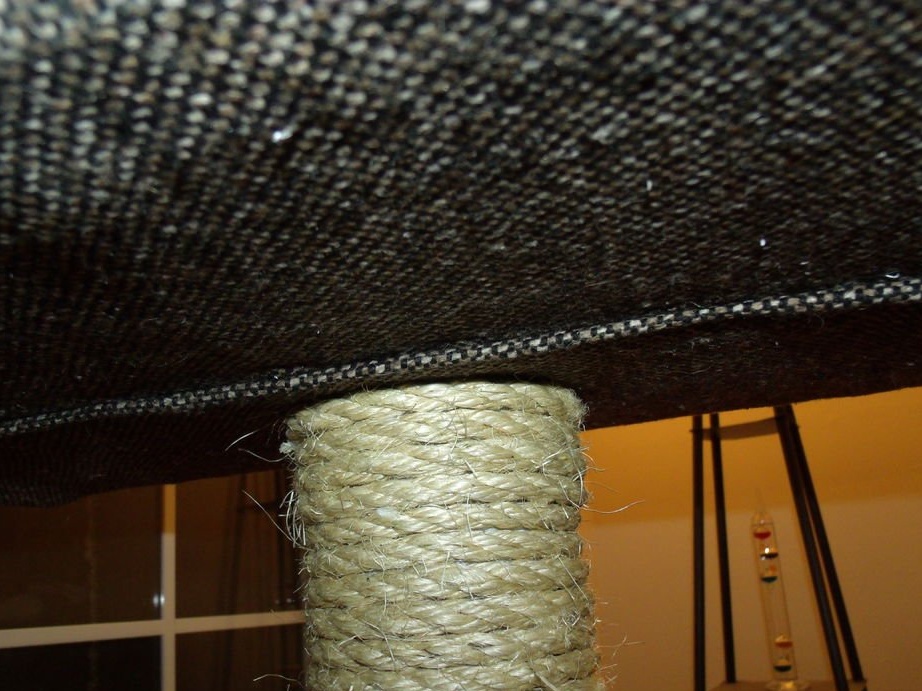
Nail with a paper clip or screw the end of the rope to the base at the center. Glue pipes on all sides and wrap rope around both pipes at once. If you choose upholstery with a cloth, then you need to cut a piece to size and stick it around the parts of the tubes that go in parallel. In the place where the tubes diverge, continue wrapping, only individually. Start a new skein of rope for the remainder of the other tube. Remember to apply glue first. At the upper edges of the tubes about 5 cm of uncoiled area should remain. This will be used to secure the seats.
Step 8: Cutting the Seats
Measure and cut the saddle boards from the two remaining pieces of wood. Squares are the easiest to upholstery, but there should be no difficulty with other shapes. So choose the shape you like. From past shelves for cats, I know that the “peanut” (oval) shape is great, and it’s convenient for cats to lie back or sit down, hanging their tail or even paws from the edges. It’s difficult to upholstery such saddles; additional cuts must be made on the fabric from the edges.
Step 9: Upholstery
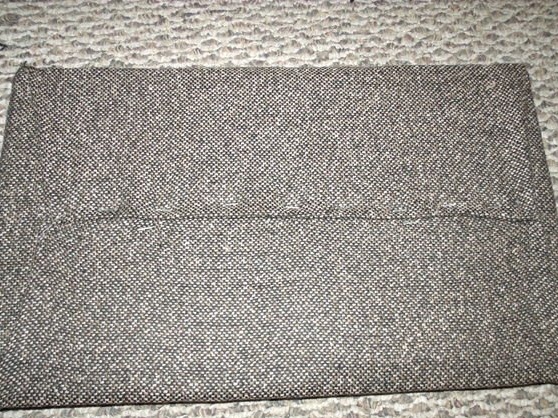
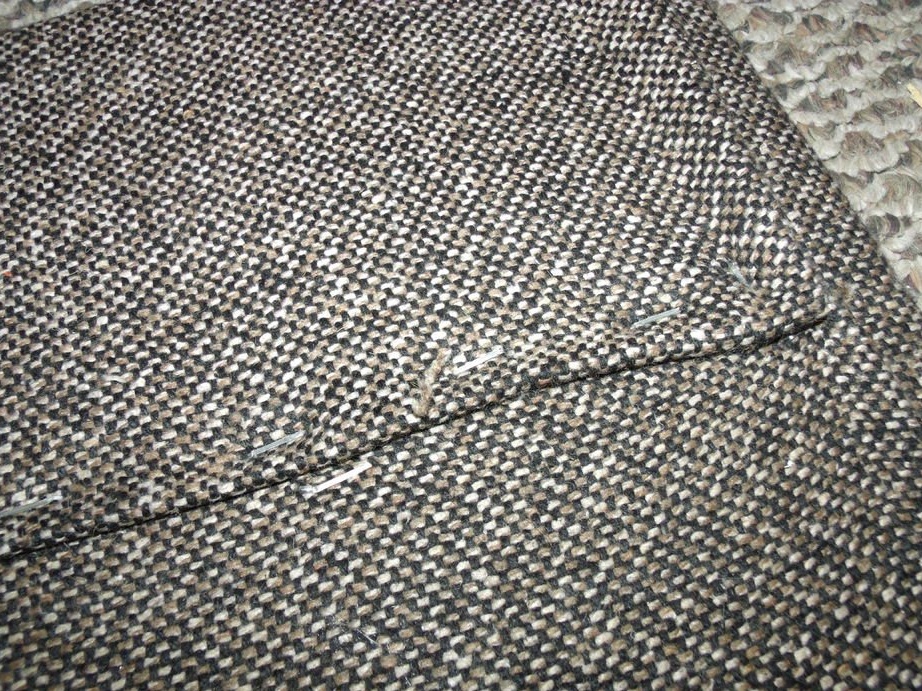
Apply glue to the plywood seats and wrap them in cloth or fasten the cloth with staples. As I said, rectangular or square seats are easier to upholstery. If you choose a more rounded shape, many notches will need to be made around the perimeter, and each piece must be glued or secured with a bracket. To mask all these staples, you need to glue a layer of fabric on the bottom.
Step 10: Fixing Seat Covers
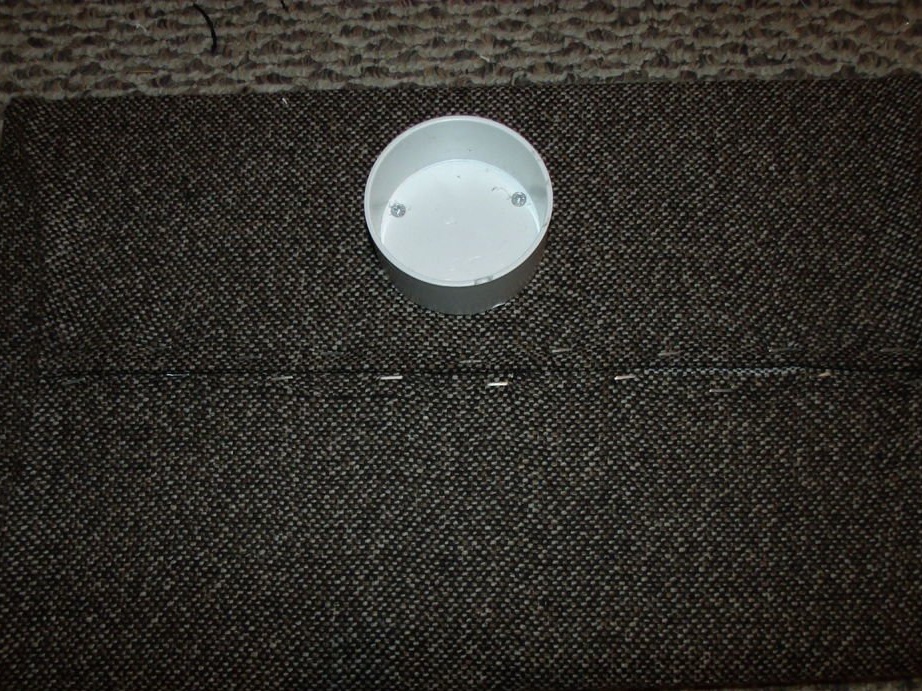
The second pair of plugs must be screwed to the seats (one for each). You can fix them in the middle or a little to the side.
Step 11: Securing the Seats and Finishing the Upholstery


Fasten the seats to the ends of the tubes by fitting plugs on them.If you want, the covers can be glued. Lubricate the non-wrapped ends of the tubes with glue and wrap them with rope or cloth all the way to the seats. If there are gaps in the folds, cut off small pieces of rope and close them.
Step 12: Test Drive
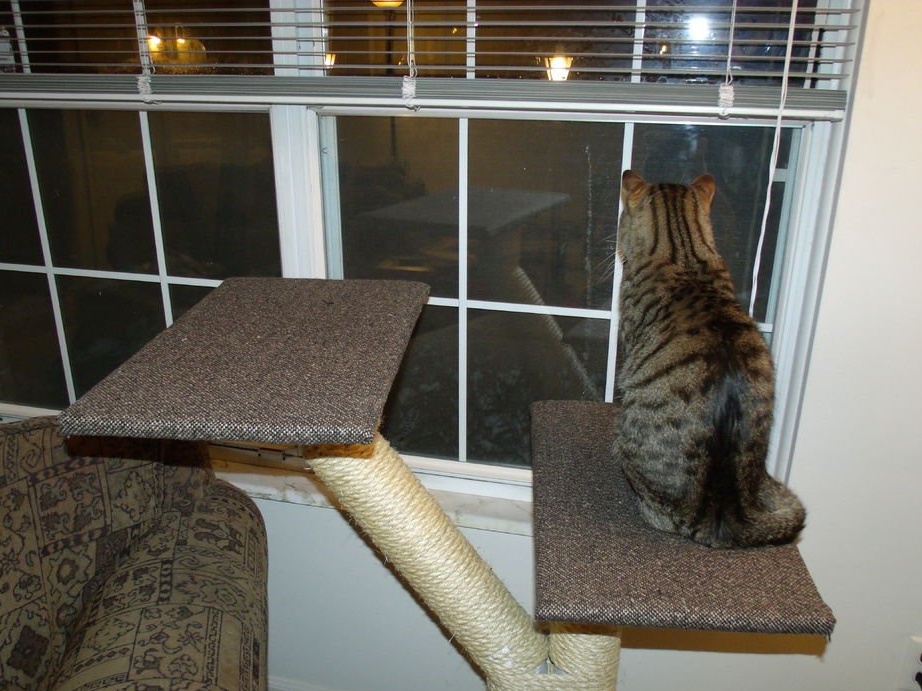
A strong perch for cats, which pets will definitely like, is ready. My cats love to fight, each sitting on their own tier, and although this can annoy them, it gives me great pleasure to watch their showdowns.