
Why pay a ton of money (or even some money) for a program that shows how to make a solar battery, if you can get the same for free?
I will tell you how to make a solar panel, the cost of which will be half that of the purchased analogue. Similar systems are made from materials sold at local hardware stores and electronics stores. You can also buy materials online. Time to collect sunlight and make electricity free!
Step 1: How it all began
I watched my electricity bills grow year after year, simply because modern appliances are constantly on in standby mode. And this is not only harm to the environment, but also harm to my bank account, because I actually pay for “nothing”. I could not constantly turn off the devices from the network, as this complicated their use and took extra time for constant settings. Gradually, I began to look for renewable energy sources to offset my unnecessary expenses. Wind power was not an option, I live in a very quiet area without winds. Hydroelectricity is also not suitable, since I live on a plain with almost no rivers. Therefore, solar energy seemed to me the most successful choice.
The cost of finished solar systems is simply enormous, such a installation will not pay for itself in 20 years of continuous operation. I tried to win one of the government grants for such a system, but there are very few of them, and I did not receive mine. But this did not make me abandon the goal, although I did not want to pay so much money for the system. The logical decision was to make it yourself. Yes, you understood correctly, I wanted to make my own solar system. Now I can say for sure that it is quite possible, all materials are available in local stores or on the Internet. I am not a technical genius and do not have much experience in working with electricity, I just studied the design of solar panels, what they are made of, how to assemble a solar system do it yourself. The result was this master class.
Step 2: Getting Started
For one panel you will need:
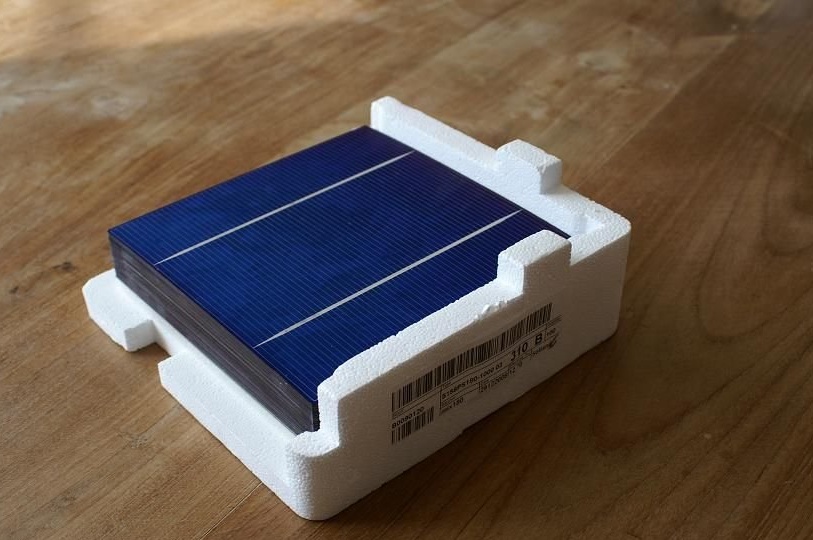
- 28 solar cells with a peak power of 3.1 W
- 2 sheets of glass
- 6A blocking diode
- 24 m ribbon wire 2 mm wide
- 2 m ribbon wire 5 mm wide
- flux
- junction box
- terminal block
- solder
- 1 m heat shrink tube
- 100% silicone sealant
- crosses for tiles
- 2 aluminum corners
In addition, installation materials will be needed. The total cost of one panel was 211.36 euros. I gave a list of the necessary materials for the ond panel, and the design provides for two, one inverter and a device for measuring output. In total, the cost of materials is 441.72 euros or 20778 rubles.
Soon after planning the right materials, I found solar panels online. After collecting information from various sources, I made a wiring diagram and bought ordinary glass at a local store. Tools were also purchased locally.
I did not buy mounting materials, such as wires, a mounting box, screws, mounting brackets, because all this was already gathering dust in the barn.
Step 3: Production Process
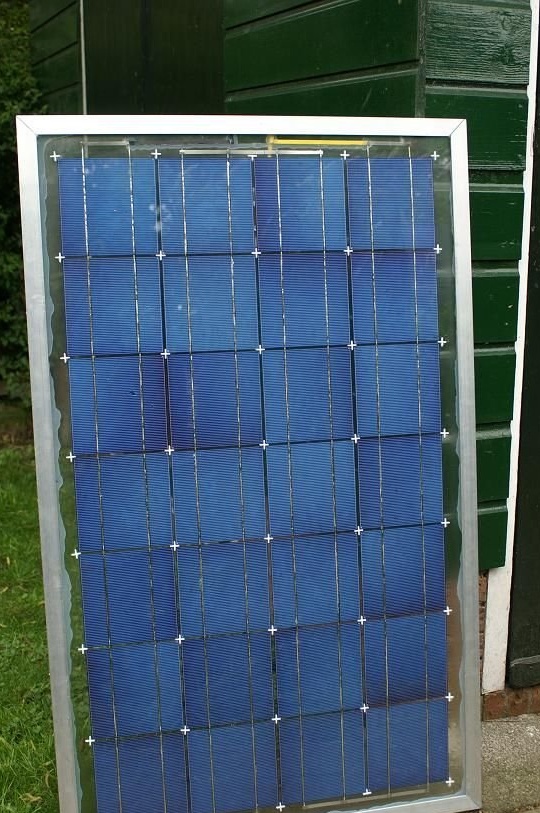
I soldered the solar cells according to the wiring diagram in groups. This summarized the voltage of all cells to achieve the desired output (maximum possible). I made a panel of 28 cells (4 rows of 7 elements). In this arrangement and size, the panel fit perfectly in a place in my garden. As a result, I got 28x0.5V = 14V (in theory). I still did not know the current strength, because I bought inexpensive Class B elements for this experiment (I just saved it).
When I finished soldering the cells, they were all upside down (since I was soldering from the back). I put silicone on each panel and glued them to a 4 mm sheet of glass (this sheet will be the back of the panel).
I left it all to dry, so that the silicone evaporates sufficiently (it is really important that all the extra fumes go away, since they react with the solder on the batteries).
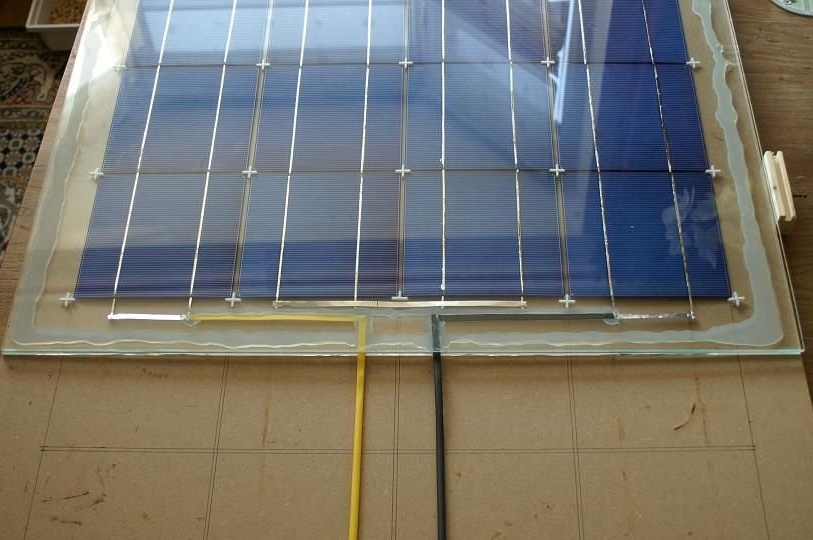
Then I turned the glass sheet over and inserted small crosses for the tile between the sections (they are usually used when laying tiles on the walls to maintain the same gap on all sides). I did this so that, together with the second sheet of glass, the whole structure is more dense and durable. After arranging the crosses, I applied a layer of silicone at the edges of the glass sheet at a distance of about 3 cm from the edge (we need this edge for sealing in the next steps).
Then I placed another sheet of glass on top of the elements, so that the solar elements are now enclosed between two sheets of glass 4 mm thick (you can say I glazed the elements, this was my simple plan).
Step 4: Evaporation
I left this entire structure to dry for at least a day. The longer the better. Between two sheets of glass there was an empty space at the edges. I filled this space with sealant. I sealed the cells with two layers of silicone, and if one of them is depressurized, the second will reliably protect the batteries inside. After applying the second coat, I left the construction to dry for another 3 days. When the silicone is completely dry, I made an aluminum profile frame to protect the glass panel body.
Step 5: Mounting Box
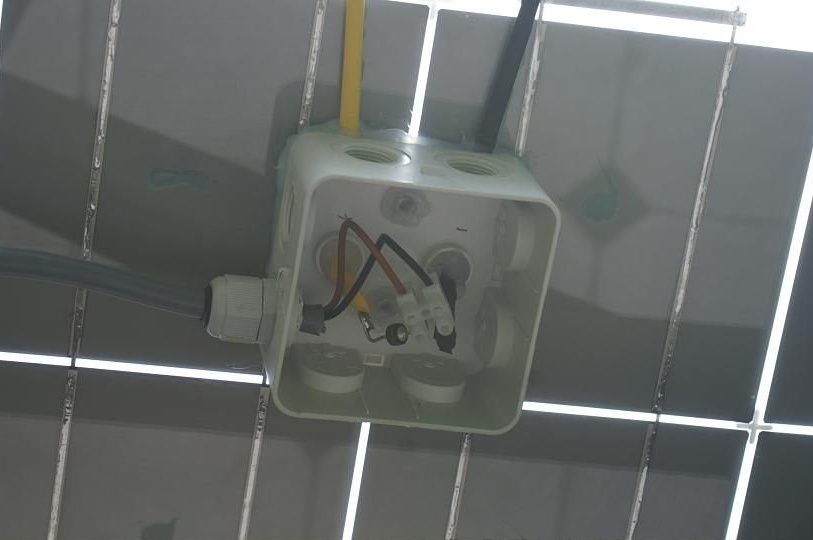
On the back of the panel, I made an installation box with a terminal block. On one side of the block goes +, and on the other side there will be a wire to the inverter. Also in the mounting box there is a diode between + from the panel to + going to the inverter, this prevents the flow of electricity to the panel when the panel does not produce any electricity (for example, in the dark).
Step 6: Inverter
I contacted the seller of solar panels to order a suitable inverter. I need a small inverter (I'm going to produce a small amount of electricity with my system). I took an inverter OK-4, designed for 24 - 50 V, maximum 100 watts. It was the smallest inverter. It turns out that one panel will not be enough, because it produces a maximum of 14V. I needed a second panel, and in total I get 28V, which will be enough for the inverter. Given that this is not a strong current, then two panels could be few. And I made the third panel, which achieved consistently high performance.
I know that this inverter is designed for 100 W as much as possible, and my three panels will give more (135 W), but this maximum from the panels will be extinguished by the inverter. Everything that goes above the permissible power will be released in the form of heat. Yes, I know what you think: I'm wasting electricity.It’s true, but such a search will be only in the brightest hours, only a few hours a day. For most of the day, panels do not get enough light to produce in excess of 100 watts. But with this design, I constantly produce electricity in sufficient quantities - from sunrise to sunset, simply because the inverter is able to operate at low voltage. I get much more power by feeding the panels all day than I lose by cutting maximum power during the zenith hours.
Step 7: Facts and Figures
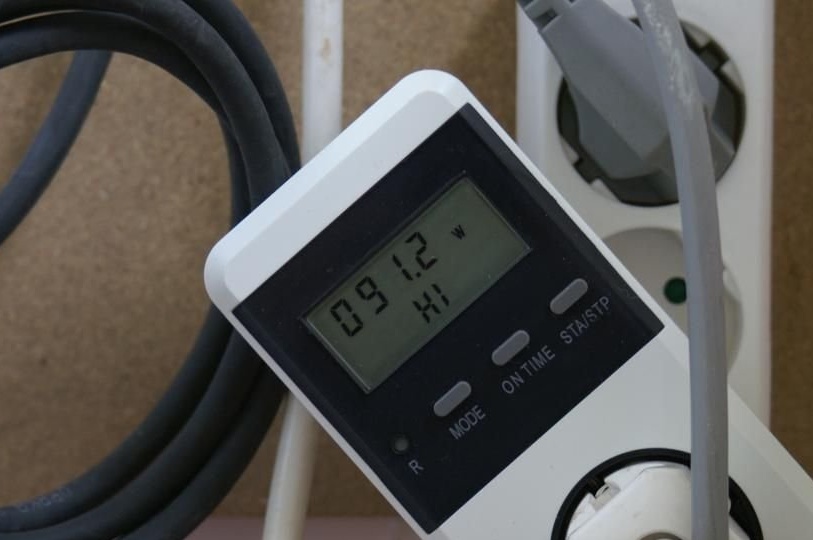
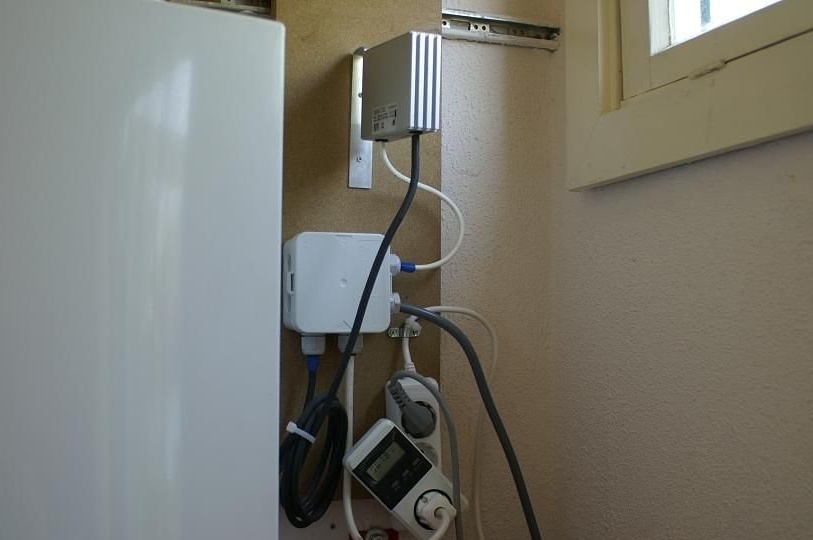
My OK-4 inverter did not have a built-in display to show the output, so I needed a separate meter.
Well, again, I did not want to lay out a lot of money for this device. I bought one at a local store model - ELRO M12 Power Calculator, which is designed to calculate the consumption of electricity by household appliances, but works well and to calculate the generation of solar electricity (this calculator works in both ways, it can either take or send electricity to the network).
And this calculator is plugged directly into the outlet without super complicated wiring (just what you need).
Each solar cell produces 0.5V x 6A = 3W, but this is maximum power, under ideal conditions. For the entire panel, this maximum power is 28 cells x 3W = 84W.
But from experience I know that these are very optimistic figures, which in fact are usually 20% less. So in real life, I expect a performance of about 67W.
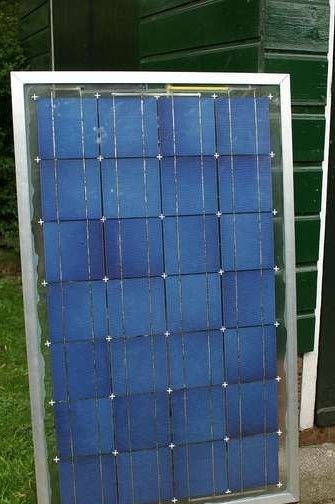
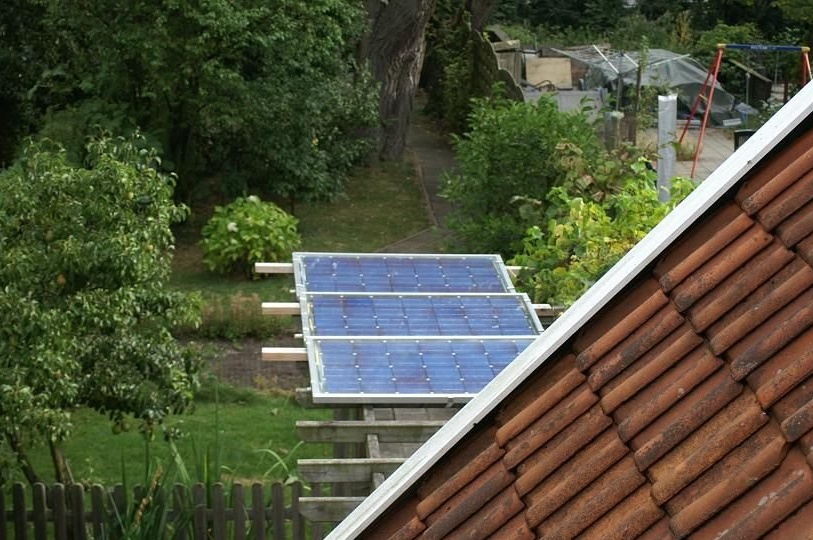
My panel is not exactly located perfectly to the sun, but now it is not so important. The panels are located at an angle of 10 degrees (instead of 35) and not exactly south.
But this is a temporary installation, I just want to see how they behave in real conditions with cold air temperature, heap of rains and foggy sun.
In the near future I will fix the installation.
Considering all factors, the panels produce 15V x 3A = 45W each, provided that the voltage of the cells is used to the maximum.
The current strength can increase by changing the angle of inclination of the panels more towards the sun, but now this is not possible in the place where I placed them.
Step 8: Performance Indicators
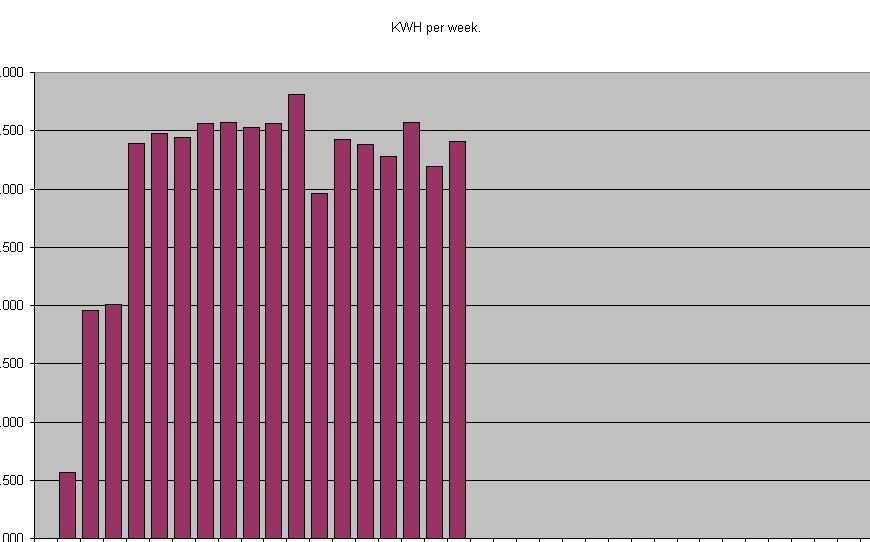
On average, panels produce 500 watts per week, given that everything works under normal conditions. Now critics will say that this is nothing at all, but considering that the panels can give more if I change the angle / location, and that my panels are smaller than the standard ones plus just 3 panels, the numbers do not seem so small. My goal was to compensate for the waste of energy on household appliances that work in standby mode. And in this I succeeded. Not considering the reliability of the structure (it takes more time to check), I can say that a home-made solar system works just as well as those that you can buy in a store.
Step 9: Thoughts for the Future
In the future I plan to test the panels for strength, as I do not yet know how they will behave in the long term, given the variety of weather conditions in which they will have to function.
After that I want to make a system for following the sun and larger panels.
So I will be able to get more electricity, as these will be more powerful panels that will always be optimally directed towards the sun.
And of course, I will share all the knowledge gained with readers so that everyone can repeat it at home.
Especially for critics: yes, you're right, this is not free electricity, as I pay for materials. But over time, my panels pay off, and begin to work for me, bringing in crops from the sun.
Why wait tomorrow if you can start saving today?