
This project should appeal to most car owners. Everyone must have tried to find the shoes under the seats and knows that the lights in the cabin are so dim that it's pretty hard to do. So why don’t you make the car interior LED lights do it yourself, and not distinguish it, thus, among others?
Necessary note: I did not want to risk the integrity of my wiring and therefore did not cut anything, but only threw wires from above. Well, now let's get down to business.
What do we need for backlighting? So:
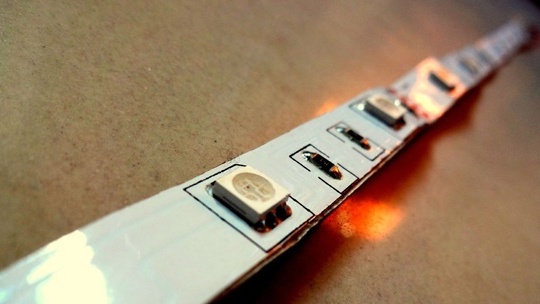
- LED strip. I prefer to use RGB tapes, which allow me to choose among a certain number of colors, and not be content with just one color.
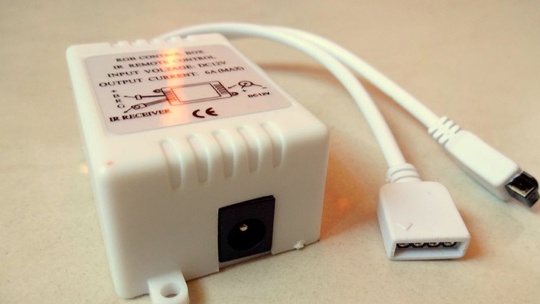
- Controller of RGB LED strip with remote control.
- Four-wire cable. Usually V + (white), R (red), G (green) and B (blue) wires come from the LED strip.
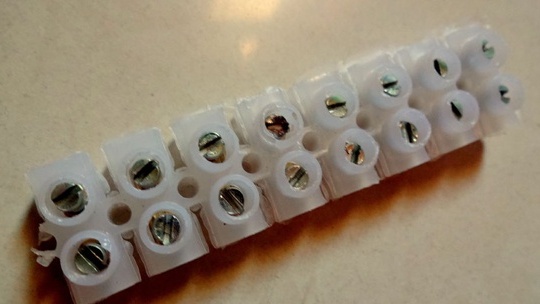
- Connectors.
- Soldering iron.
- Silicone glue.
You will also need brains and patience. Because, as soon as you make this LED illumination of the passenger compartment, you will begin to beg the sun for sunset to ride on your pumped car))).
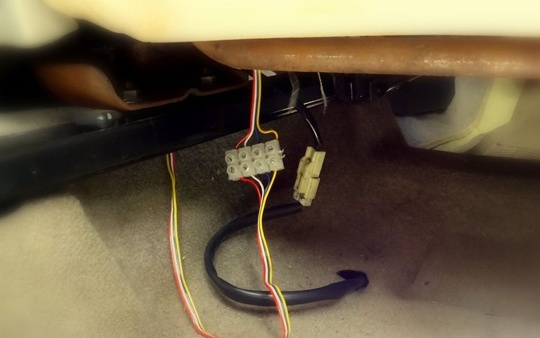
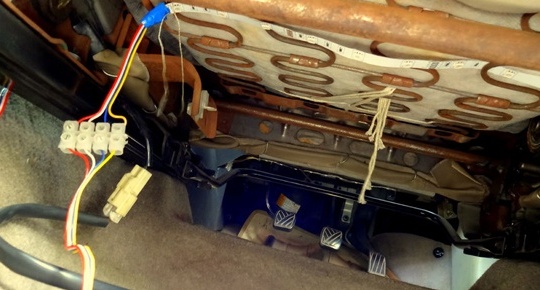
As soon as the plan has become clear, we proceed to the design of wiring taking into account the connectors. Why connectors? They play an important role in both the connection and the protection of the connection. Let's say several LEDs are out of order. No one wants to pull out all the wiring. When using connectors, you will only need to remove the defective portion of the tape, repair or replace them and insert them into place.
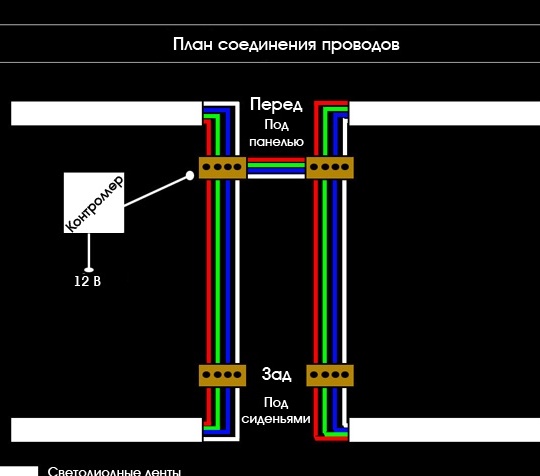
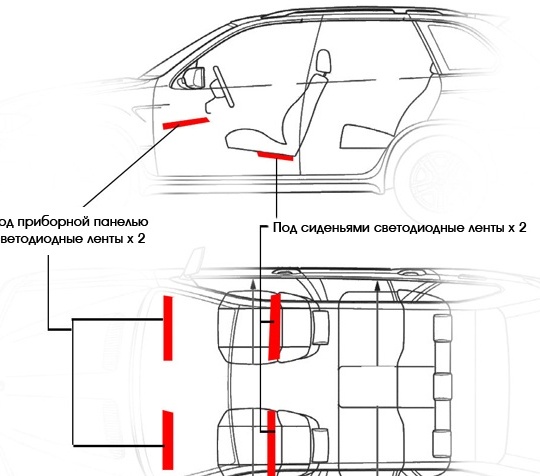
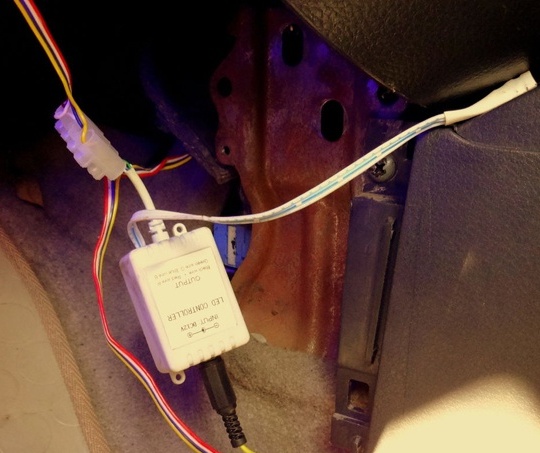
In the following image, we see four connectors in pairs located behind and in front. Thus, the wire to each tape passes between them. The LED controller is connected to a 12 V power supply.
Now, since I do not want to cut the wiring and include additional fuses in the circuit, I will power it from the cigarette lighter or charge, which will be very simple to do. Also in this case, when removing the ignition key, the lighting will go out.
Now that everything is planned, the next very important step awaits us - measurements. The importance of this stage is to place the elements in the right places without tensioning the wires.
The first measurements we make for that section of the interior lighting, which is located under the dashboard, determining the total length of the two front LED strips. Secondly, we take measurements for tapes located behind, under the seats.
After this part of the work is done, we proceed to determine the length of the wires, bearing in mind that you need to have a margin of length for the possibility of fitting in the place of their attachment to the tapes. To determine the length of the wires, we measure the following sections:
- from the controller to the front left connector;
- from the front left connector to the front right connector;
- from the front left connector to the rear left connector;
- From the rear left connector to the rear right connector.
When connecting the backlight scheme under the chairs, leave an extra length of wires so that the connections do not break when the chair moves forward or backward.
After taking the measurements, the time comes for cutting the LED strips in length.
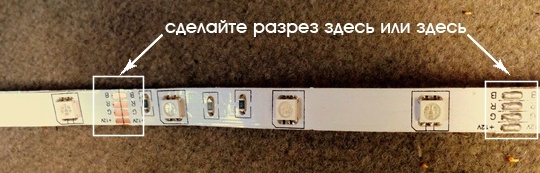
For our project, four segments of LED strip are needed. All LED strips have cut lines every three LEDs. Keep in mind that it is better to make the segment shorter than longer, since the extra “tail” of the tape will hang, and this will give the appearance of an incomplete design and spoil the impression.
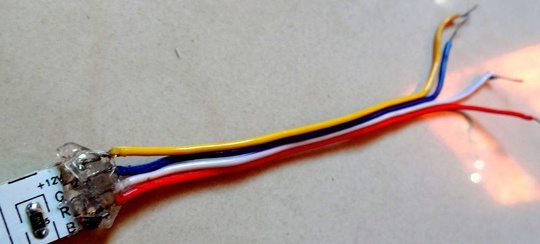
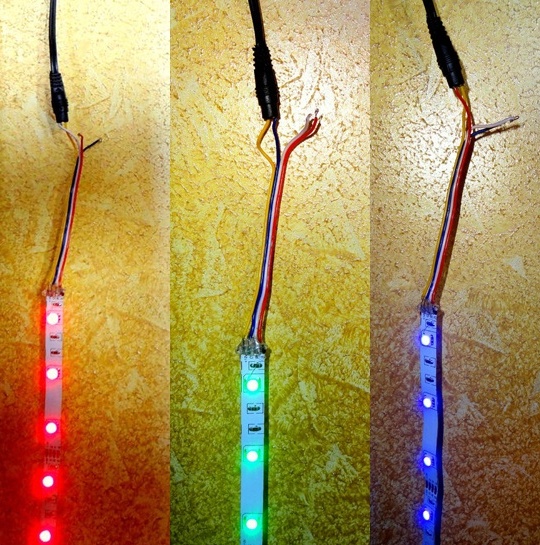
After soldering, it will be best to check its quality by lighting all the colors of the LEDs in sequence. So, in the images we see that checking the three primary colors - red, green, blue.
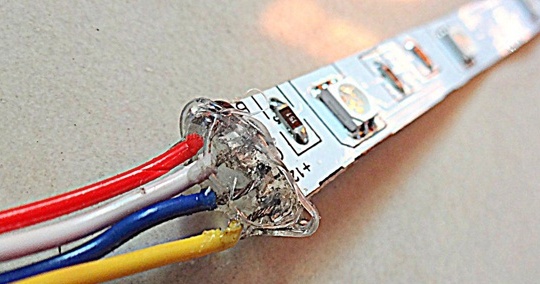
If they light up without any problems, it is necessary to ensure the safety of the adhesion points. One of the methods is the application of silicone glue, which will prevent the wires from contacting each other and provide a stiff connection.
ready to install in car. In the same way, we will do three more, which in total will give us four sections of the interior illumination of the car.
Now is the time to go to the car and start connecting the circuit.
As you can see, first of all, we attach the LED strip located under the dashboard to the glue. Then we attach the connector to it. Pay attention to the photos - they clearly show what is said here.
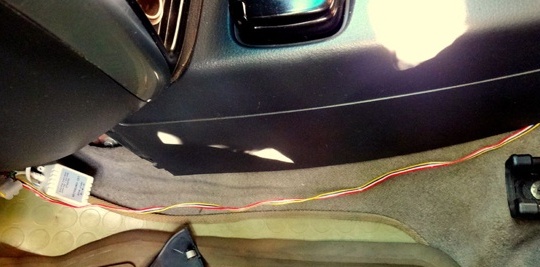

After the job is done, let's hide our wires. It is enough to put the wires inside the panels and stretch them to the seats, where the next section of the LED illumination of the passenger compartment will be installed.
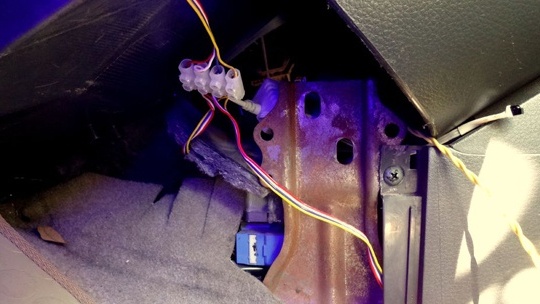
Under the chairs, segments of the LED strip should not be glued with glue or adhesive tape, but skip between the springs and strings and tied at the ends. It should be noted that I left a sufficient margin of wire length so that the movement of the chair forward or backward does not affect the integrity of the connections. When this step is completed, we proceed to redo the charger.
There are several different ways to power our interior light:
- from unused fuses from the fuse box using jumpers;
- through the door panel. In this case, the backlight will shine when the doors are open, and go out when they close;
- from the headlights (either from the main fuse box or from the cut wiring supplying the headlights).
But we will use a charger. Why?
The reason for altering the charger is that I do not use a cigarette lighter in any way, except for charging the phone. So why not modify the “charging” if it is often used and, thus, facilitate its simultaneous use for two tasks.
Most phone chargers give 4 V output (which is not enough for our LED backlight). That is, they lower the voltage of the car battery from 12V to 4V. All we need is to run the wires past the voltage regulator.
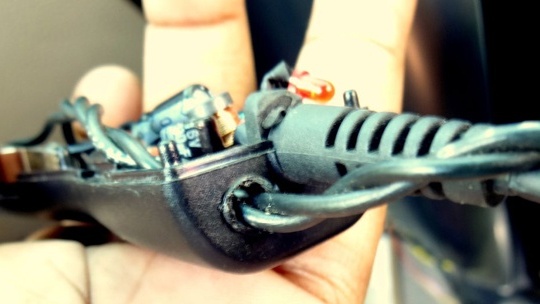
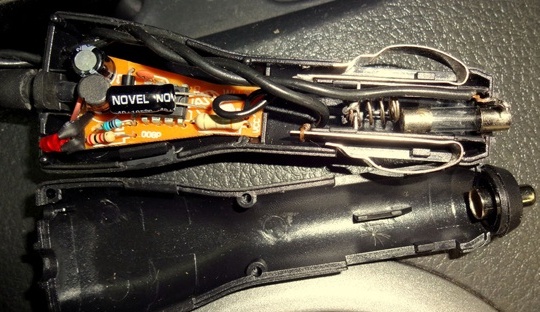
When we open the charger, we will see a fuse (protects against overloads) and a stabilizer circuit (which lowers the voltage). Solder our wires to the fuse and to the "ground" bypassing the stabilizer. So we get the 12V we need!
Thus, we power up our LED interior lighting. As soon as all connections are made, we proceed to verify our work.
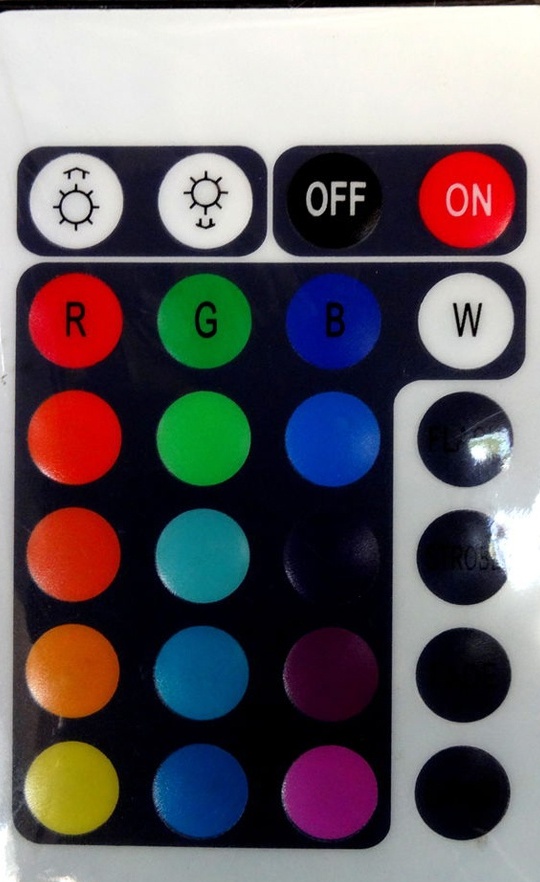
Using the remote control you can:
- turn on / off the backlight;
- change colors;
- adjust the intensity;
- use fading effects.
Now it remains to wait for the sunset, and it will be possible to roll out our pumped car from the garage!
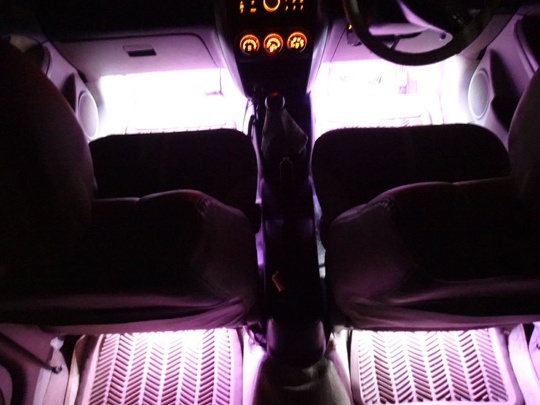

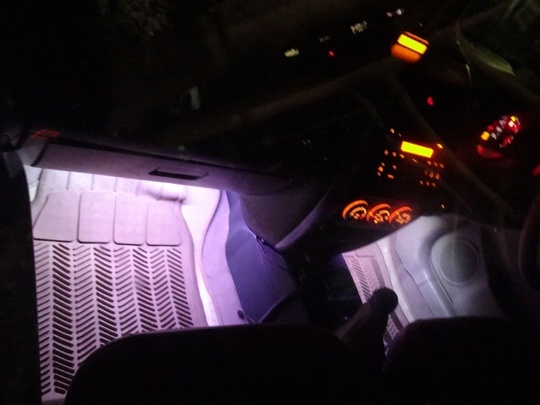
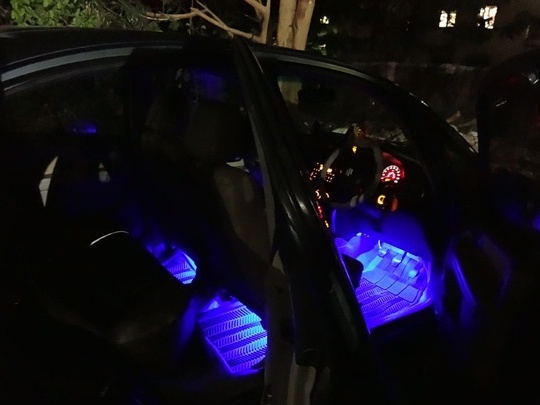
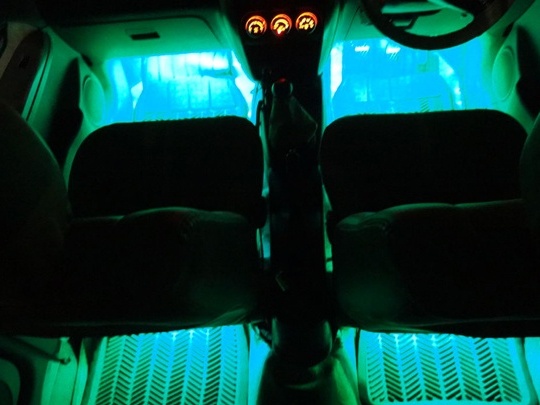
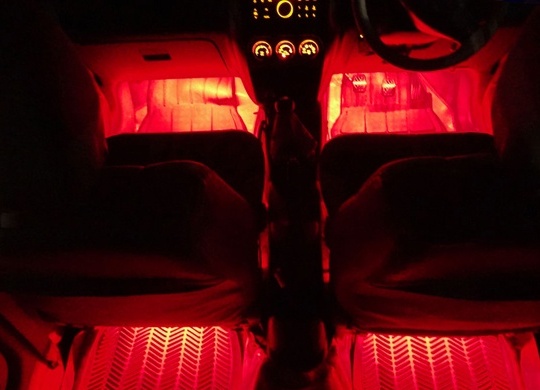
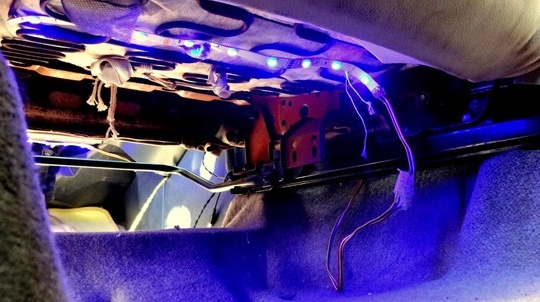
Testing the interior lighting in the morning.
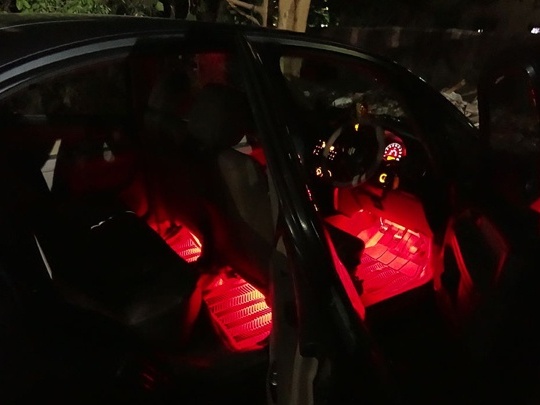
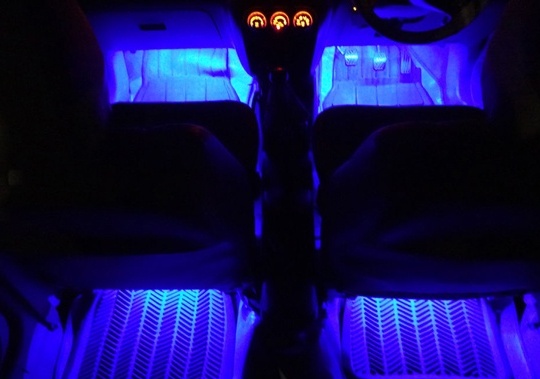
Testing interior lighting at night.
Now let's pay a little attention to troubleshooting.
LEDs do not light up.
Check the junction of the wires and connectors. If this fails, check the power source. Do not forget to insert the key into the ignition switch for the cigarette lighter to work.
The LEDs light up, but some sections of the LED strip glow with a different color.
The reason for the error is when connecting the wires. Make sure that red is connected to red and so on.
What to do if in some segments of the LED strip some colors do not glow?
To check the connection of the LED lights on the passenger compartment, turn on the white color. If all sections glow white - the connection is correct. If not, check the red, green, and blue colors separately. Accordingly, the color for which there are problems in the connection or soldering of wires will not light.
A source