
Decor, decoration, interior creation - all this is done by specialists, specially trained people who create the interior. However, ordering such a master is not a cheap pleasure. But everyone wants to create an unusual interior. But you can make unusual gizmos for the interior with your own hands. It will be much cheaper and more original. You can create your own masterpiece, unlike anything. And the main plus of the products that you create yourself is that you show your imagination, which means you create exclusive little things, and you can realize even the most unusual ideas.
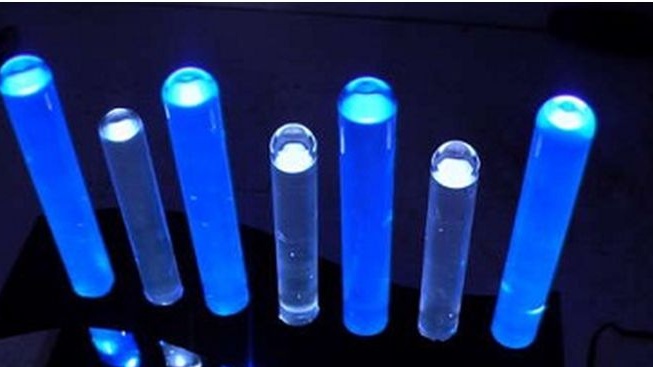
As an option for an unusual decoration of the room - this is an LED lamp made by their own pens. If you are tired of ugly, outdated lamps, then it is time to replace them with LED lamps, which everyone can make on their own. And such a lamp is made of test tubes. At first glance, it seems that this is a super complex product, but everything is done quite simply and does not take much time.
In order for a new and unique interior item to appear in the house - an LED lamp - you will need:
- test tube
- Silicone
- A piece of plywood or plank
- LEDs
- glue
- paint
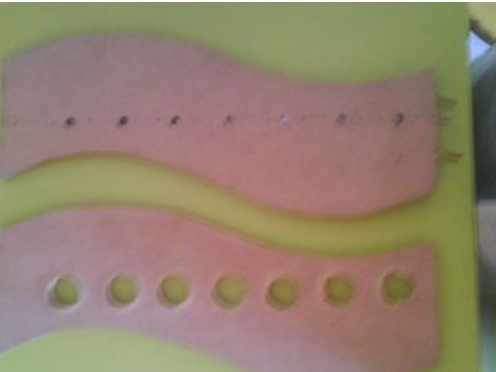
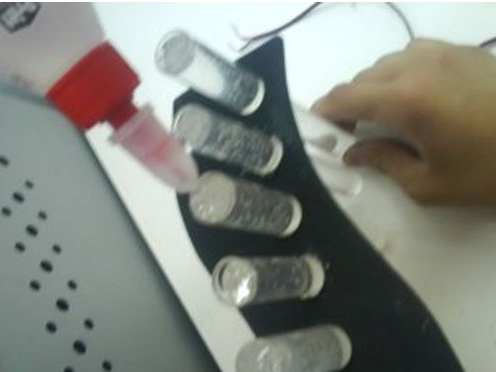
The first thing to do is to cut two pieces of the same shape from a piece of plywood or board. The figures can be different - ordinary geometric figures, or for example, figures of animals. After the figures are ready, in one of them you need to cut holes of the same diameter as the test tube. And in the second figure, you need to make holes the same in diameter with the LEDs. Holes can be easily drilled with a drill, knife or good scissors.
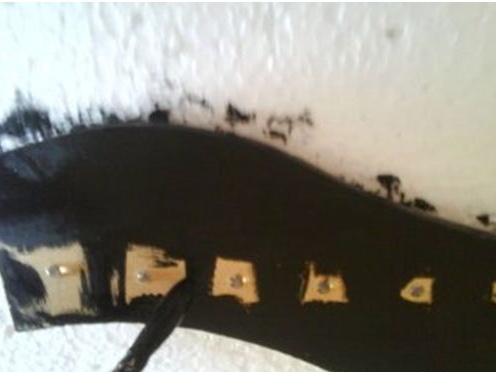
The next step is to paint the finished figures. The resulting figures with holes need to be painted. Which color to choose - this decision is yours. When the paint dries, it is necessary to strengthen the LEDs in the prepared holes. This can be done easily and quickly with reliable glue.
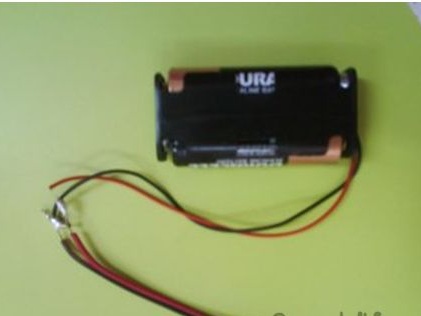
Step three - preparation of test tubes and connection of LEDs. First you need to pour liquid silicone into the tubes.After this, you need to wait a while until the silicone hardens. Next, you need to connect the LEDs, for this you can use the usual "finger" batteries. They will serve as a source of nutrition.
There was the last, fourth step. Test tubes with solidified silicone must be installed on the LEDs. Reliable "super" glue will help you with this again. When the design is assembled, it means now you can install the lamp in any room and is proud that you can make all this miracle with your own hands. Such a lamp will perfectly fit into any interior, will give an atmosphere of comfort and warmth.