Preparatory stage
Before starting work, we organize the working environment in the room and free it from all interior items, thereby eliminating their dustiness. Roughly at eye level, draw a small line around the entire perimeter of the room under repair, using the level and thread. We stretch the thread along the wall and measure the horizon with a level (the air bubble in the horizontal meter should be between two lines). Thus, we draw lines on all walls, as a result, they should coincide at one point. Then we draw another line around the perimeter, but this time backing 5-7 centimeters from the ceiling.
Rail mounting
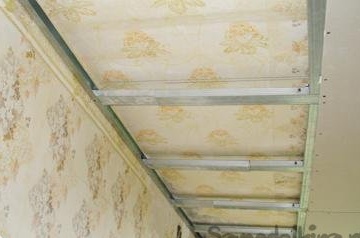
For fastening drywall, first prepare the surface by attaching special guides using screws and dowels. Excluding hits in power wires, we carefully look where they can be (photo 1). To ensure greater security, this part of the wiring is de-energized and the entire used power tool is powered from the next room (the input shield of each apartment, as a rule, has 2 or more switches, which will allow to de-energize the room we need).
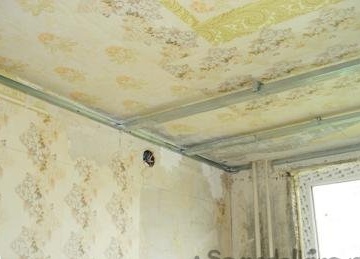
ATTENTION! After all the necessary holes have been drilled, make sure that all the wiring is intact and only after that start mounting the guides. To avoid warping the guides, do not overtighten them.
Construction gratings
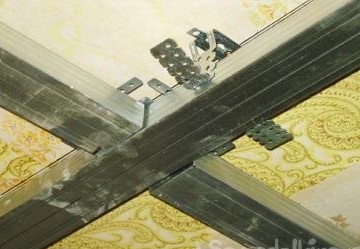
All guides, as a rule, are mounted at a distance of 60 cm using special screws or rivets. Carefully watch for deflections, exclude their appearance as much as possible. (photo 2).
To extend the guides, you need to insert an additional segment of the desired length into them and then fasten with rivets. (photo 3).
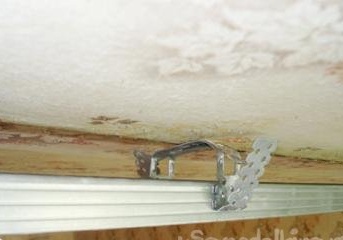
After installing the first lattice, we begin to build the second one, for this we use crabs (photo 4), I use the same distance between the guides - 60 cm.There is one feature that you need to know: one of the guides should be 2.5 meters from the wall, since the drywall sheet has dimensions 2.5x1.2 m. After all the measures, we check the grating for deflections and concavities, for this it is necessary to stretch the thread along each wall and visually verify everything.
Drywall Mount
Before starting work, inspect each sheet, pay attention to the feature that it has a back and front side! We fasten all sheets with metal screws, slightly recessing the heads in drywall, the minimum distance between the screws is 20 - 25 cm (photo 5). All these works are recommended to be performed by two!
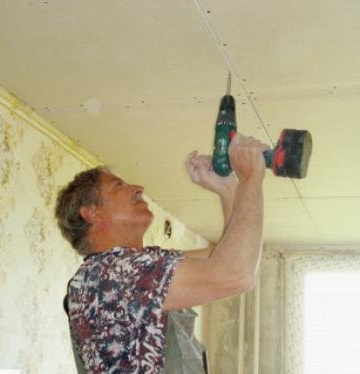
If the edges of the sheets are joined by the narrow side, they must be cut at an angle of 45 degrees, be sure to leave a gap of 2 - 3 mm between the sheets. There are also special designs that allow you to hang the ceiling alone. (photo 6).
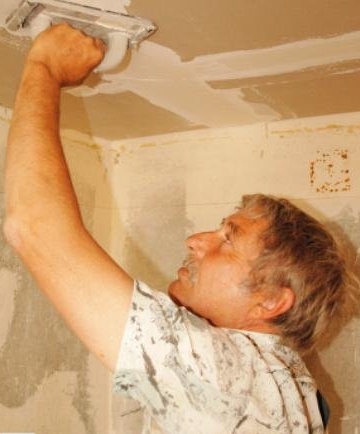
Putty
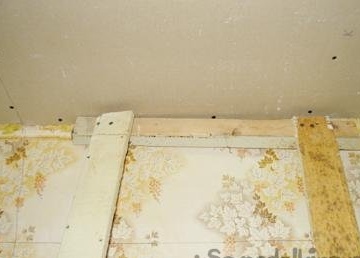
Masking tape is glued to all joints and putty. You won’t be able to get a beautiful joint right away, for this you will have to process it 2 or 3 times. It is absolutely necessary to putty all the heads of self-tapping screws. Having dried, we clean the entire surface with an abrasive mesh (photo 7). And before painting, carefully inspect the ceiling, if there are any defects, we eliminate them without fail, otherwise they will ruin the whole impression of the work.
Painting
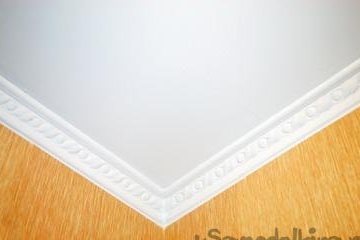
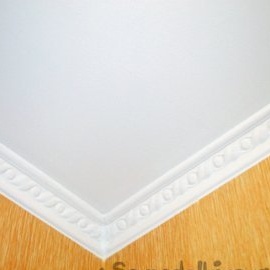
Any white acrylic paint is suitable for painting. For its application to the surface, a wide roller with a nozzle made of foam rubber or short pile is required. The paint must be evenly applied to the ceiling, using the following technology: the first layer is always parallel to the wall, with the window located on it. Subsequent - perpendicular to the window (photo 8). The final touch is the ceiling plinth, we paste it after all the work done and paint it in the color of the ceiling!