
There is no point in proving the need to have a supply of water for irrigation on the site. If something happens with the irrigation system, your flowers and vegetables in the days of the July heat will turn into hay. When my old steel tank was leaked, there was a need to urgently find a replacement for it. Assessing the harsh reality, I decided to make a design that would decorate the site, was durable, inexpensive, did not attract "guests". After going through different options, I chose, it seems to me, the most successful: to make the base of the tank from sheets of galvanized steel, “dressing” it in concrete.
Sheets of steel with a size of 1000 x 2000 mm connected to each other in a ring. So that the container had a volume of 1 m3, I made a ring of 2 sheets. The seam before “pressing” was treated with a sealant for plumbing, as well as all subsequent seams. It turned out a springy flexible ring, which can be given any shape.
For a capacity of 1 m3, it is enough to make a foundation with a thickness of 120-150 mm, laying it on a pillow of crushed stone. The area of the foundation should be greater than the area of the tank. Having chosen a place, he took out the soil to a depth of 200 mm, covered a hole with rubble with sand, rammed it, spilled it abundantly with water, and prepared concrete. I laid half of it on the rubble, on it - reinforcement from steel rods and pipes and poured the rest of the concrete on these structures. Water should be added to concrete so that it does not spread, but resembles a gingerbread dough. At the same time, formwork is not required, and the edge of the foundation will look like stone “flows”. Concrete does not pour into place, but is laid with a shovel and rammed, you can use a wooden mallet.
The next operation is the installation of a metal base. The laid concrete is carefully leveled. For this, a cement-sand mixture (1: 3) of the consistency of liquid sour cream was poured onto the foundation and dispersed with a straight rail. Letting the leveling layer dry (lose fluidity), put a sheet of galvanized steel on it and pressed it with bricks. This is the bottom of the future capacity. Previously, the sheet was cut so that it corresponded to the configuration of the container and protruded around the perimeter by 20 ~ 30 mm. In this state, the foundation left to dry for a day.
A day later, I installed a manufactured galvanized steel ring at the bottom, after making 2 holes in it: one at the bottom on the very edge under the drain pipe, the other 300-400 mm above the edge for the selection of clean water. If all the previous work was done carefully, then between the wall and the bottom, gaps in separate places of no more than 5 mm are permissible - they will not affect the quality of the tank.After installing the wall and fixing it with bricks, he overlaid the joint between the wall and the bottom with a steep but plastic “dough” made of a mixture of cement and sand (1: 1) with the addition of PVA glue (1 spoon of glue per 0.5 l of water). After drying the “dough” for a day, he removed the bricks and completed the joint repair in the places occupied by the bricks. After completing the joint, I installed a tube (aluminum, stainless steel, plastic) in the hole in the wall at the bottom, carefully coated it with a cement mortar. Then he proceeded to the construction of a concrete wall.
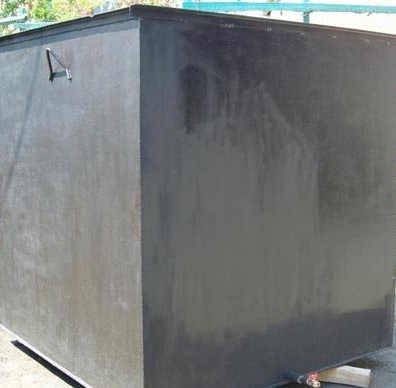
Concrete for the wall is prepared the same as for the foundation. The work was carried out as follows: he took a piece of concrete with a trowel, laid it against a steel wall (it played the role of a one-sided formwork), tamped it lightly so that the concrete would spread and snug against the wall. And so on around the perimeter. When laying concrete, we must strive to ensure that the wall thickness is not the same. Then a surface resembling the natural texture of the stone is formed. At the same time, you can show your abilities as a sculptor, guided by a sense of beauty and harmony.
When constructing the wall, one should not forget that a drain pipe should go outward at the bottom, and at a height of 200-300 mm from the bottom, another pipe with a thread for the valve must be mounted in the wall to select clean water. In order to prevent the steel base from deforming during masonry, it is advisable to stack the support columns from bricks inside the tank, which do not allow the wall to "go" inside under the pressure of concrete.
Finishing the masonry, you need to make a small influx into the container on the edge of the steel base, so that it does not peel off from the concrete.
The last stage is finishing. Different options are possible using ceramics, bottle glass, natural stone, etc. I chose a simple option: the entire surface of the container is smeared with cement-sand mortar (1: 1) and treated with a wet broom. The gray color of cement looks good in the greenery of the garden.
Such a container has many advantages, it is rather cheap, there is one drawback: it cannot be moved. Therefore, the place must be chosen carefully, remembering that a major structure is being built.