

Many of you must have seen resistors without knowing their names. Resistors have a cylindrical shape, colored stripes are applied to them. Often on printed circuit boards there are rectangular resistors. In any case, regardless of the shape, the resistors have one purpose - current limitation. But what if you try to make a resistor from a regular sheet of paper and a regular graphite pencil.
Let's watch a video of a variable resistor:
We will need:
- A plain sheet of paper;
- Graphite pencil;
- Light.
Graphite is known to conduct electrical current well. This feature can be used to obtain our paper resistor. To do this, we take the most ordinary graphite pencil and on our piece of paper we draw a strip 5-7 cm long and a centimeter wide.
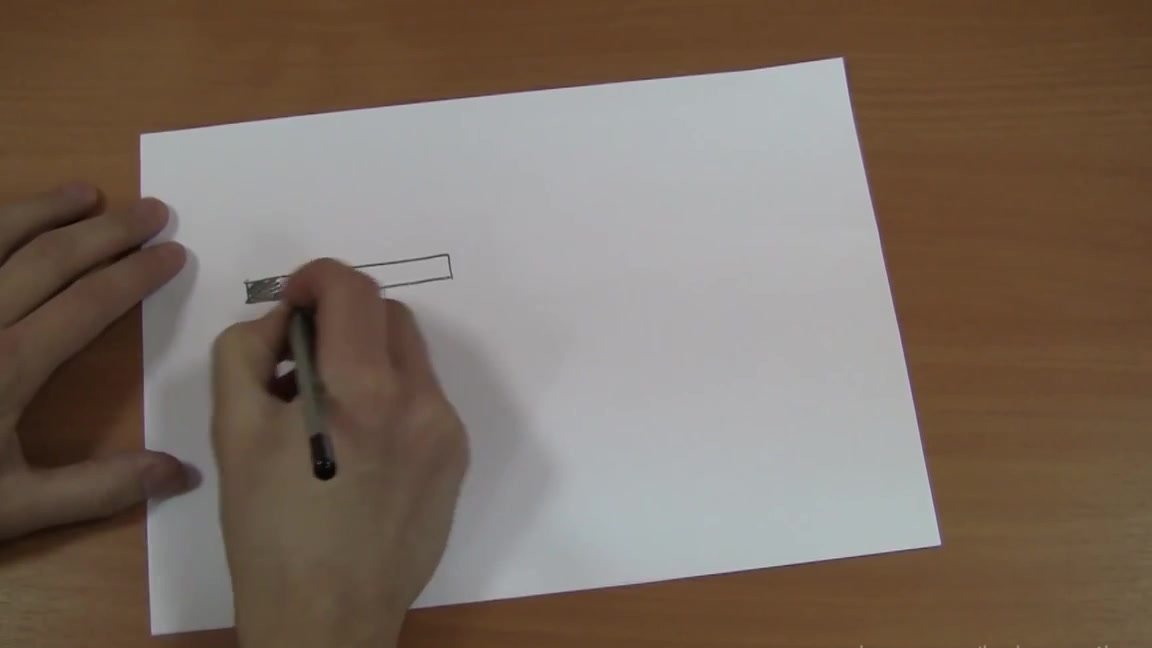
For best results, it is recommended to use a pencil with maximum softness. However, if there is no such pencil, pencils 5B or 6B can be used as an alternative.
When the outer lines of the strip are drawn, it must be painted. This should be done denser and as carefully as possible so that there are no shaded areas left.
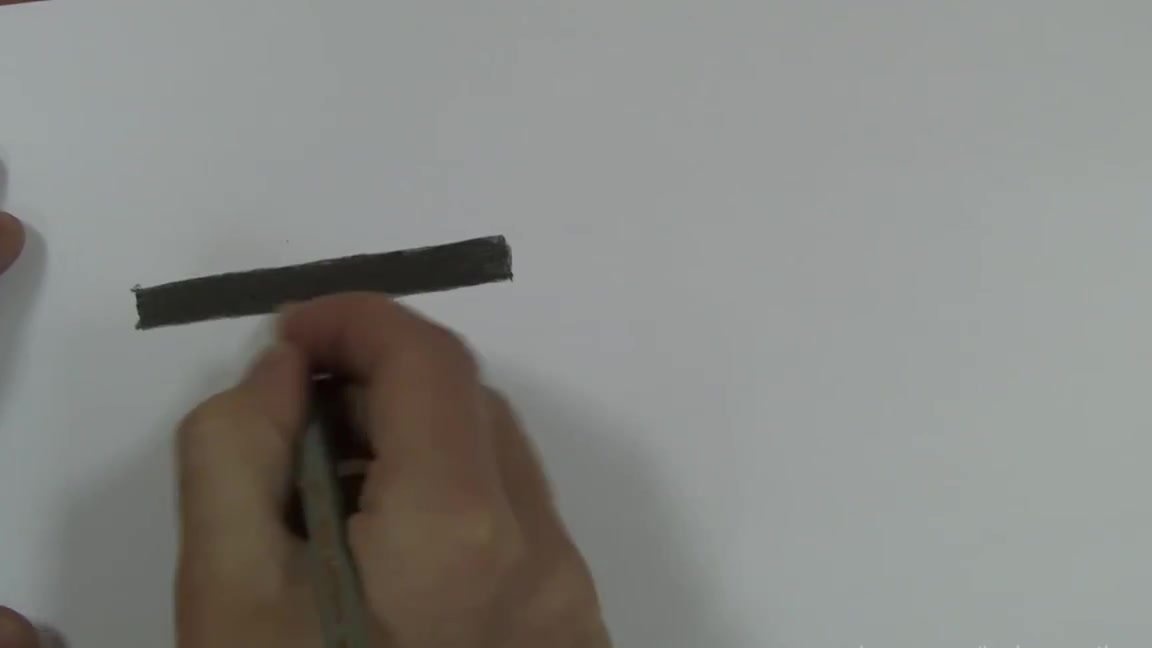
The strip of our variable resistor is ready. It can be tested using a conventional voltmeter. A positive contact must be placed at one end, and a negative contact at the other end. Gradually bringing the negative contact closer to the positive one, we see that we have got a real variable resistor.
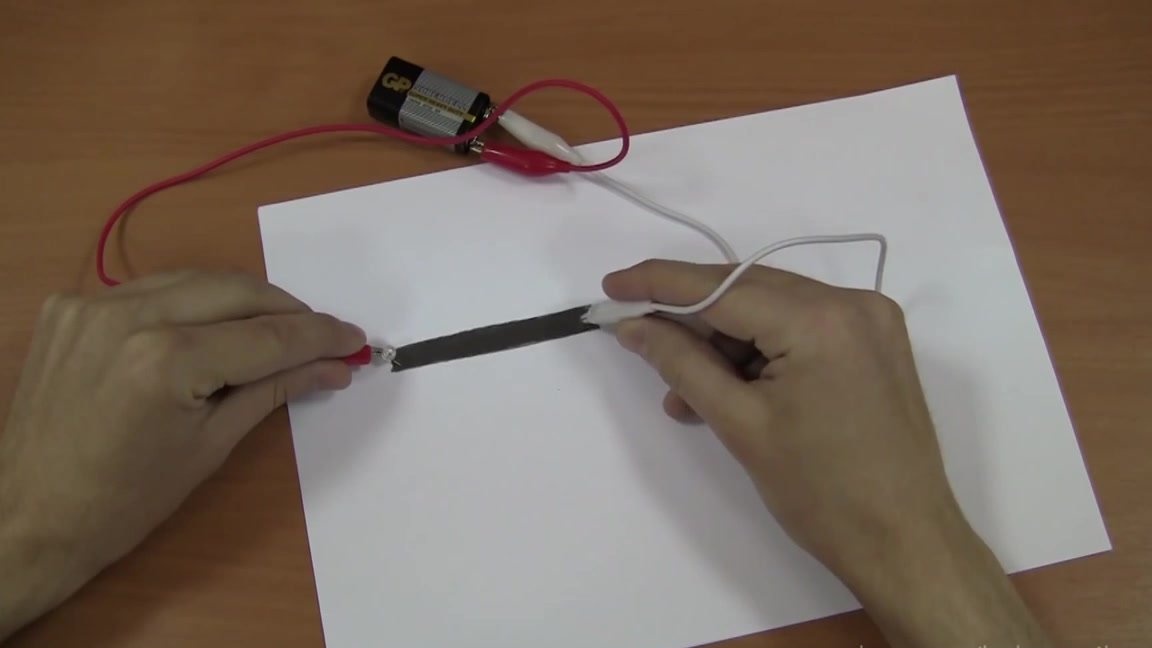
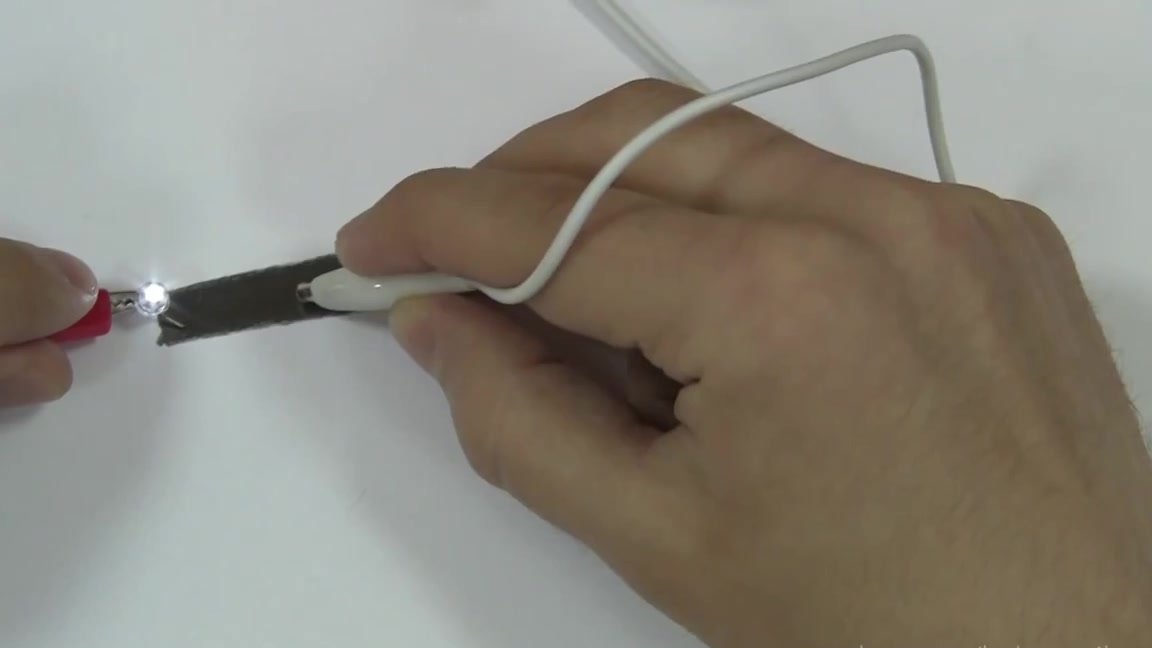
Now let's try our resistor with an ordinary LED bulb. To do this, we need to connect two contacts to a nine-volt battery.
Next, you need to connect the positive contact to the LED bulb. The minus contact of the light bulb should be slightly driven away so that it is better in contact with the paper.
Now that everything is ready, you need to connect the free contact of the bulb to one end of the graphite strip, and the second contact coming from the battery to the second end of the strip.
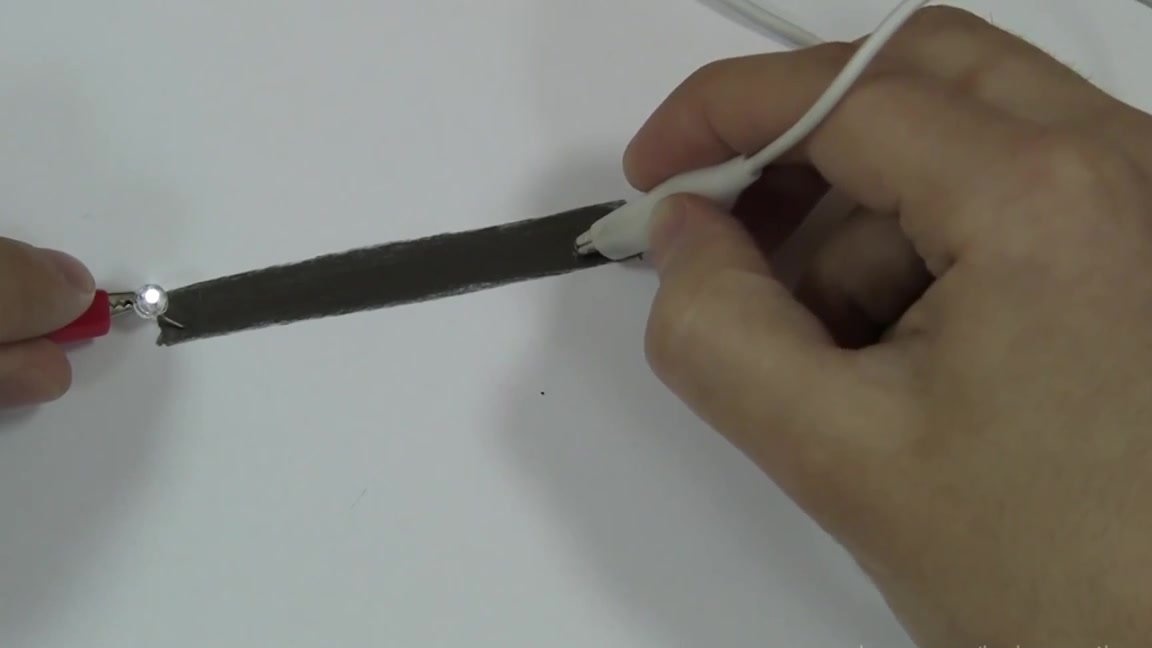
Slowly moving the second contact of the battery to the LED, you can see how the brightness of the LED bulb increases.This means that the closer to the LED, the less resistance in our paper resistor.
The greater the softness in the pencil, the more the resistor will have conductivity. You can also try drawing lines of different shapes and widths.