
How to do metal detector in home conditions? This question is asked by many adventure lovers. There are more and more people who want to find the treasures of the Second World War, and maybe royal coins. Metal detectors come across not only antiques, but also rings, earrings, bracelets and other jewelry that fell on the beach.
We invite you to familiarize yourself with the manufacturing process homemade:
[media = http: //www.youtube.com/watch? v = HsXYlwycvVc]
Want to try yourself as a treasure hunter, then stock up on the following tools:
- calculator without solar battery;
- headphones;
- electrical tape;
- CD-R and DVD-R discs;
- 9 volt battery of the crown type;
- glue;
- scissors.
Our first action will be to remove the headphone plug, this can be done using an office knife or scissors.
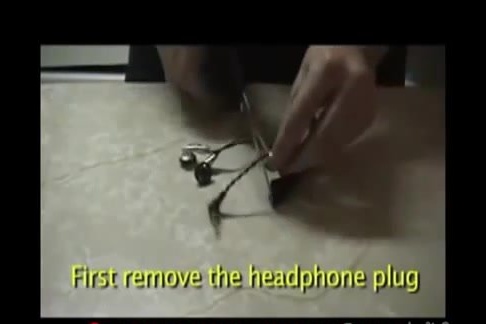
Two wires must be cleaned from gum.
Each of the wires should have two wires: one copper, and the second colored. There are headphones where two wire-wires have different colors, for example red and blue.
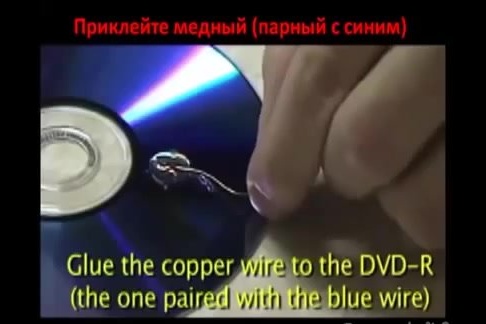
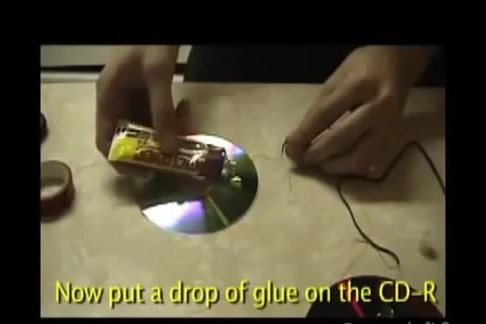
Now we need a DVD disc, on which you need to drop a drop of glue on the silver side.
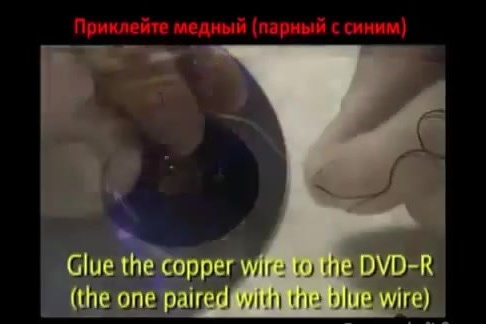
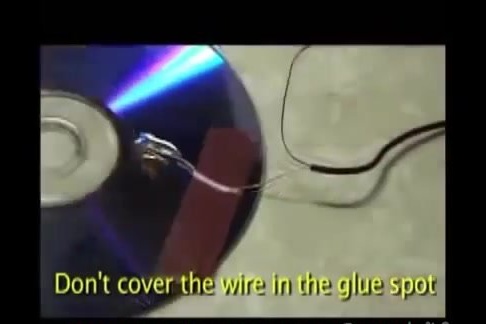
Glue the copper wire from the headphones to the disk in the place where we poured glue.
The glue should dry completely. As soon as the glue hardens, stick the tape to the disk. The electrical tape should hold the wire at its base on the disk, but should not come in contact with a drop of glue.
Now we need a CD. You also need to drip a little glue on it and stick the second wire to the CD.
As in the case with the DVD disc, we need to let the glue dry and fix the wire with electrical tape. Insulating tape should not come into contact with glue.
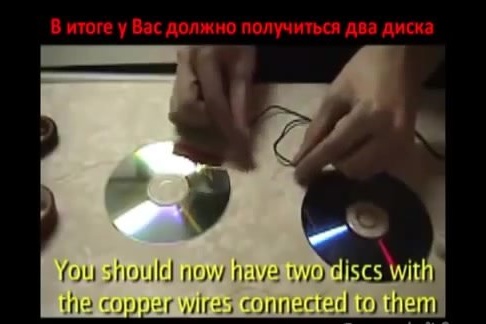

As a result, you should get 2 disks with copper wires glued to them.
Next, you need a battery. If it has clamps, then use them as a mount to the wire. There is no mount - use electrical tape.
Connect the blue wire to the “minus” and the red to the “plus”. The figure shows how the wires should be attached to the battery.
Next, turn on the calculator and place it on the CD disc face up.
Securely attach the calculator face to the CD with electrical tape. Fasten to the silver side.
We put a DVD disc on the calculator, with the silver side up. On the calculator we should have a side with a picture.
We fix both discs on both sides with electrical tape. The calculator inside should be well clamped.
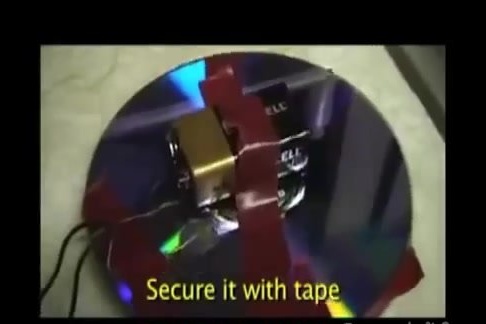
Place the battery in the center of the DVD disc and secure with electrical tape.
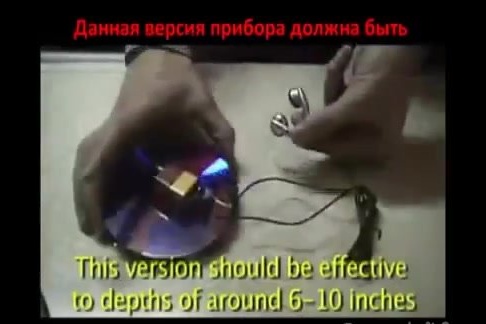
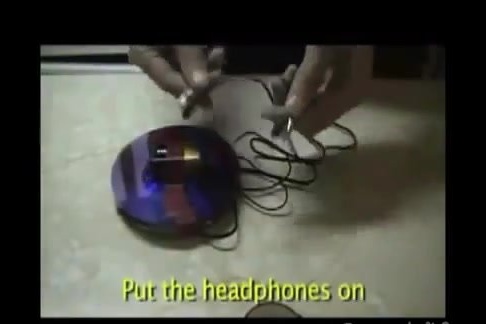
The whole device is ready, put on your headphones and start scanning the area you are interested in.