

It often happens that the house turned off the light, it took an urgent call somewhere, and the phone charge is zero. Or the phone is discharged on a trip and there is nowhere to charge it. Making a charger for any phone from a DVD drive is an ideal solution in such situations. Moreover, this is done quite simply and does not require large expenses.
In our video you can see step-by-step instructions in creating such a charger.
To work, we need:
- DVD drive;
- screwdriver;
- a small file or hacksaw;
- glue gun;
- metal cover
- a case from a helium pen;
- a candle;
- USB-mama jack.
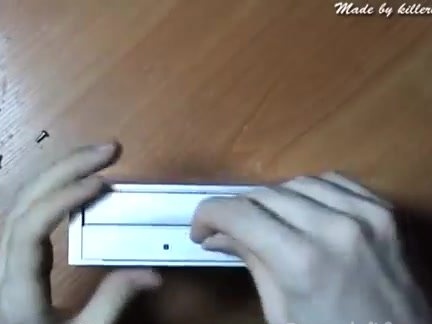
First of all, we unscrew the bottom panel of the DVD drive with a screwdriver. To open the tray, insert the needle into the appropriate hole and open it. Now remove the front panel, which covers the outgoing part of the drive.
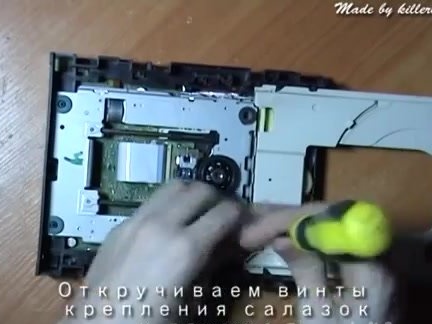
Separate the bottom cover of the housing. We unscrew the screws securing the slide and the engine, remove the tray. Disconnect all connected loops from the connectors. We completely remove the slide with all its components.
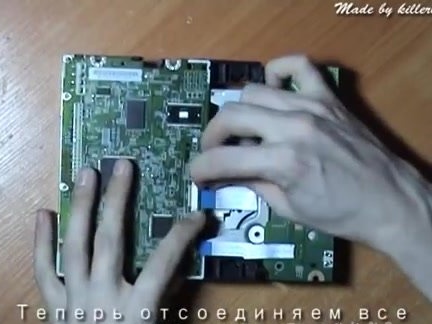
For work, we leave only the motor unit and gearbox.
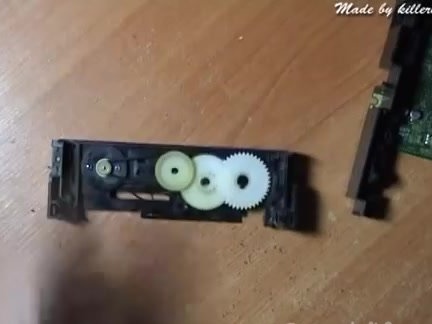
Saw off the excess plastic parts on both sides of the remaining body. And then again all the excess from the sides of the blocks we need. As a result of sawing, only the structural element of the DVD drive we need remains.
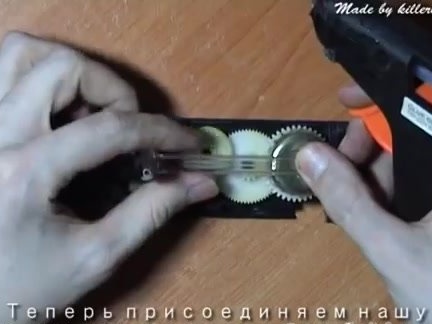
Now, using a glue gun, glue the metal cover from beer or lemonade to the larger gear. Glue is applied to the edges of the lid. To keep it more secure, we go through the glue gun again around the perimeter of the gluing place.
The body of the helium pen is heated above the candle and bent at an angle of 90 °. Bending should be done in about 1/3 of the pen. When heating it above a candle, do not forget to turn the handle so that it warms up evenly and begins to melt, rather than catching fire. Fix it in a bent position with your fingers until the plastic cools.
After that, glue the bent handle to the metal cover on the main unit with a glue gun. We position the handle in this way. To the longer part is located horizontally, and the short - vertically. This will be the handle of our charger. We check the performance of the design.
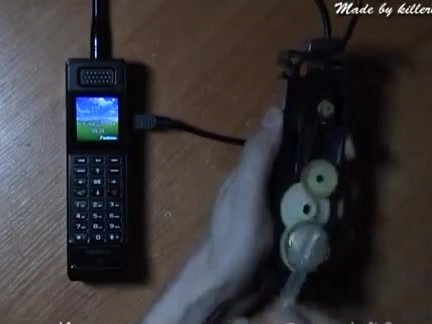
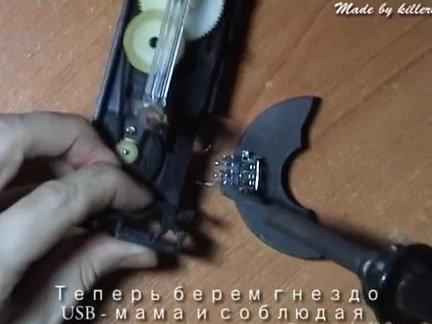
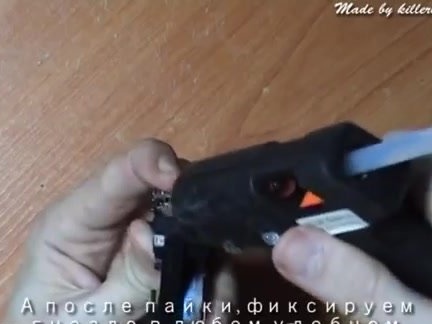
We take the USB-mother socket and, observing the polarity, solder it to the motor terminals. After that, we fix the nest in any convenient place on hot melt adhesive.
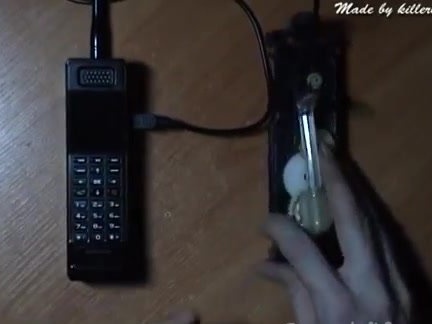
Our charger is ready, it remains only to test it. We connect the phone and begin to twist the handle, while we twist - the charge goes on, when we stop - there is no charge.