For beginner hams, the following lesson on making a bug might seem a bit overwhelming. Transmitter circuits are quite simple, but tuning the radio transmitter loop can cause some difficulties. This circuit uses a minimum of detail. The transmitter power is not so big, the range is about 100 meters in direct line of sight. But for a makeshift radio bug it is very good.
We will need
It is not necessary to purchase parts for the circuit. For instance, electronic You can pull out the M1 microphone from the old Chinese voice recorder. Capacitors and resistors can be removed from any radio card. Remove the transistor VT1 C3013 from the old transistor Chinese player. Coil L1 is easy to make yourself. To do this, take a varnished copper wire (diameter 0.5 mm), wind it round to round on a mandrel of 3 millimeters and bite off the excess with nippers. Strip the tips off the varnish. For the antenna, copper wire is also suitable. Just cut off 30 cm from the wire, bend one tip into the ringlet, the second - strip, tin. Also purchase a 3V battery. That's all the parts we need.
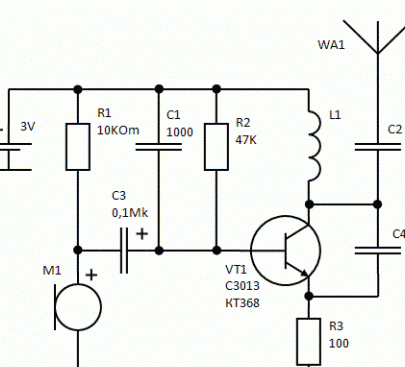
And here is a diagram in which only the most necessary details are left, with which we have already become familiar.

Mounting a radio bug
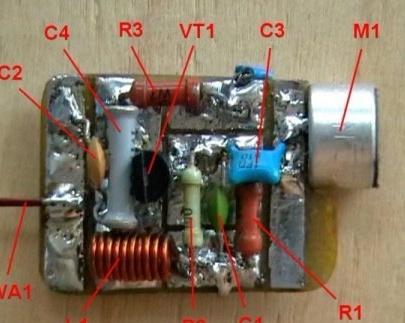
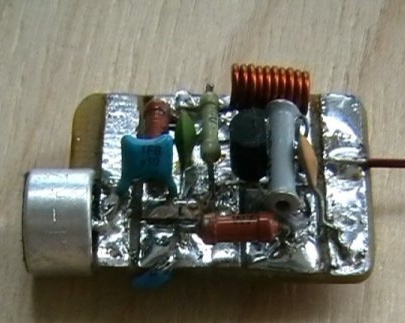
To assemble the circuit, you can not develop the board yourself. Just take a small piece of double-sided foiled 2 x 3 cm PCB. On one side of the PCB, cut the foil into a couple of parts with a cutter (how much is needed for mounting parts). All then must be carefully tinned. As you can see, there’s not so much complexity in this, if you already have little experience in creating electronic homemade.

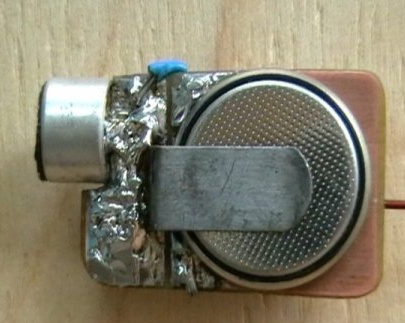
On the second side, cut into two parts - larger / smaller. Most should be made to fit the size of the battery. It will turn out a positive contact, and for negative contact, take a curved piece of copper stripped wire or a small rectangular piece of spring (you can take it from a watch).Make a small cutout for the microphone on the board - this will reduce the size of the entire structure.

Now solder all the parts according to the scheme. Solder the negative contact for the battery on the other hand, do not forget about the connecting wires for power. Also solder the microphone in the correct polarity.
Radio Bug Tuning

So is the build over? Now the most interesting thing: insert a battery in the bug, take any FM-receiver, try to catch your voice in the speakers. If this does not work the first time, try slightly pushing the turns of the L1 coil, then try again. When the signal is caught, you can already achieve the desired frequency without problems: when shifting the turns, the frequency of the transmitter decreases, when moving apart, it increases. Just tune in to the frequency you need and enjoy the work done!
