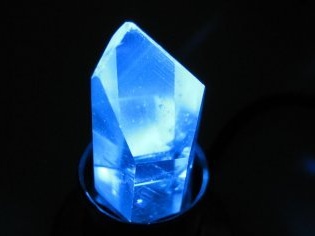
With the help of improvised and also inexpensive materials, you can construct a mysterious and mysterious shimmering crystal. Such a thing is great as a decoration and decor of the room. To implement the project, we need to know the basics in electrical engineering.
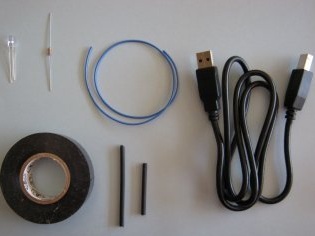

What is needed:
- Crystal made of quartz (bottom diameter should be about 2 cm)
- LED bulb with interchangeable colors (RGB is red, blue and green). This type is very difficult and problematic to find in ordinary departments of electrical engineering, it is better and less expensive to immediately find such diodes in specialized online stores
- Thick conductor
- Resistors at 82 ohms and 0.25 watts
- USB cable with a type a connector installed on one end
- Heat-shrinkable pipes (with a diameter of "0.31 cm") or electrical tape
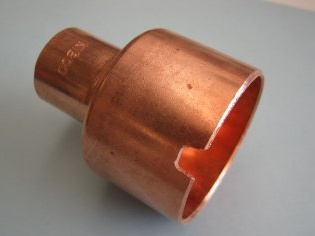
- Copper fitting "2.5 cm" as well as "4.5 cm"
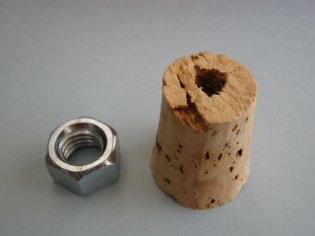
- Cork (bottom diameter is “2.5 cm” and top is “3.2 cm”)
- Nut, with inside diameter "1.3 cm" and outside "2 cm"
- soldering iron
- pliers
- Knife
- Hacksaw
- Scissors.
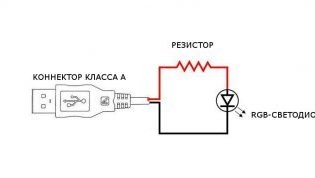
 Scheme homemade
Step # 1: Assembly preparation
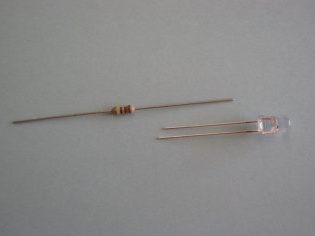
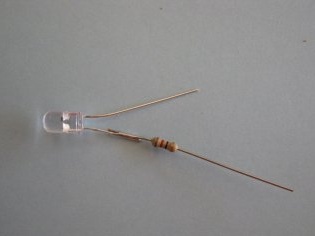
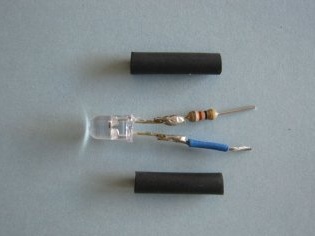
Cut off approximately two-thirds of the part from the anode (the longest leg) from the diode and the same from any of the legs of the resistor.
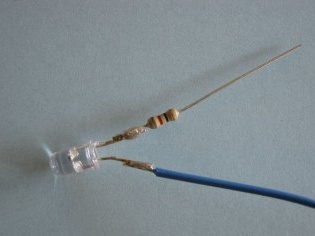
We make anode solder to the leg of the (short) resistor.
Next, you should expose the wire (or use a conductor with stripped insulation). Cut two-thirds of the part from the cathode (long leg) of the diode and solder it directly to the wire itself.
Then cut the wire along the entire length of the resistor and anode connections.
Step number 2: Isolation
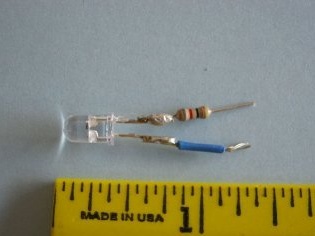
Cut shrink tubing to the size of the anode and cathode with a small margin for the place of attachment to the USB cable.
Mark with a marker the leg itself with the resistor.
Install ducts using a heat gun or other alternative heat source. The tubes should compress the cathode and anode when exposed to heat.
Instead of shrink tubing, you can also use electrical tape.
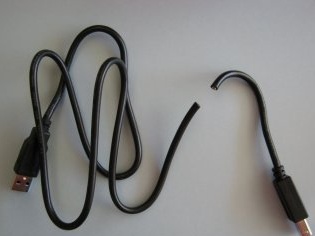
Step number 3: Cord
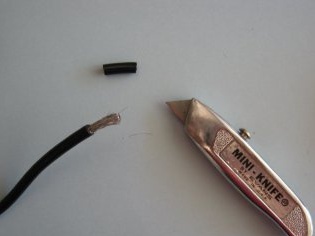
Cut off the excess connector on the USB cable.
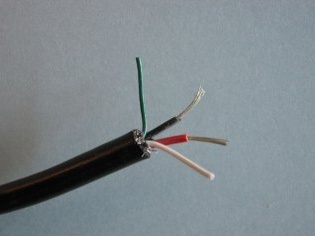
Using a knife, get rid of the outer insulation and get to the shielded part of the cord.
Remove the shielding with a knife or scissors.
You should notice 4 colored wires. Black and also red are power wiring. The other 2 are not needed - they just need to be left in place.
Strip red and black wires.
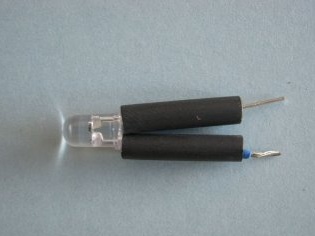
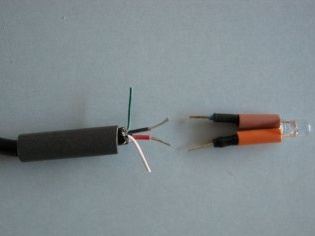
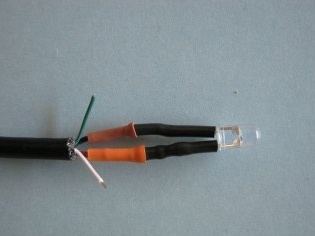
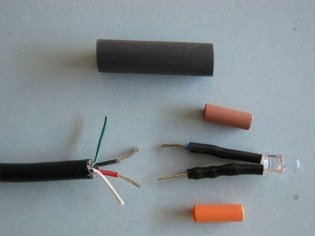
The figures show the process of insulation of all these wires using heat shrink tubing. We repeat everything.
Next, the combined leg from the diode and resistor is soldered to the red wiring from the USB cable. Another, to black.
We finish the insulation with heat shrink tubing.

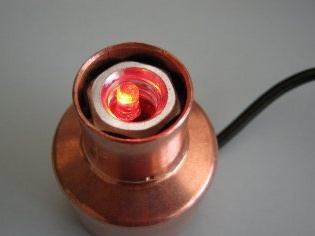
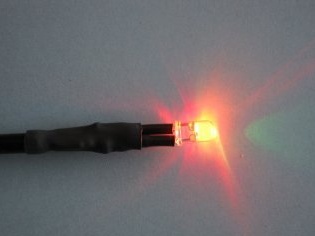
Step 4: Testing
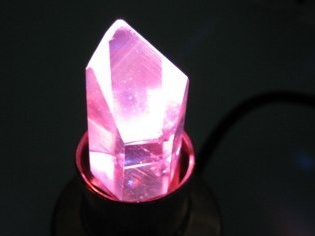
Make sure that the diode glows in all shades, while plugging in the power cord.
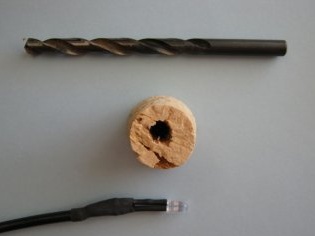
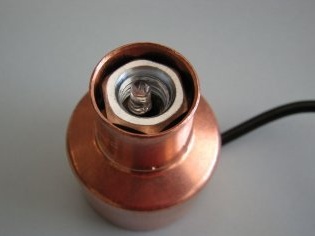
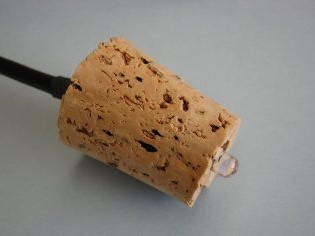
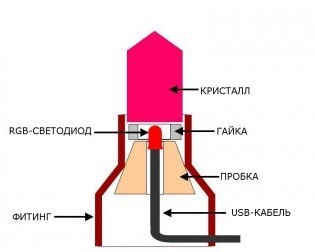
Step number 5: Base
Make a hole in the plug with a diameter of "0.64 cm."
Pass the cord through the hole so that it is clear that there are no obstructions in the plug hole.
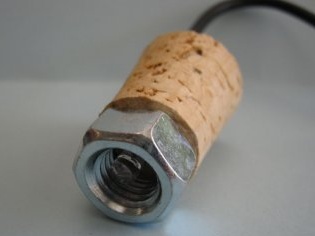
Using a hot melt adhesive, install the nut on the bottom of the plug.
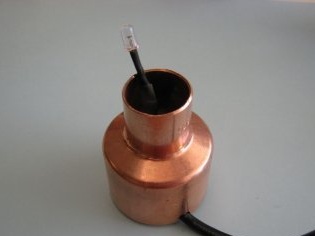
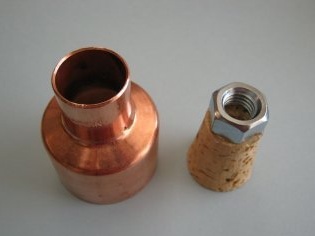
Step 6: Assembly assembly
Make a small recess in the fitting for the USB cable. Insert the plug with the nut into the fitting itself. Connect the cable to the network and check the diode.
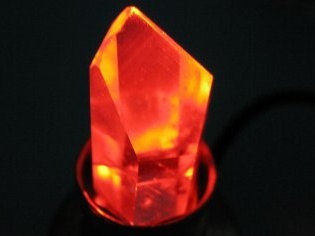
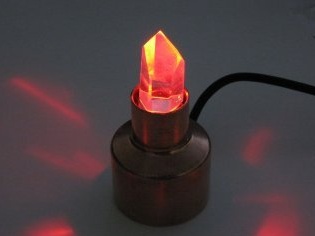
Step number 7: Crystal
Install the crystal at the top of the fitting.
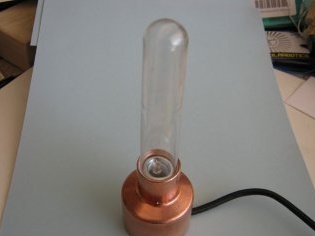
Step number 8: Lamp
You can also improve this product with a plastic tube designed for single roses, thereby making it a lamp.