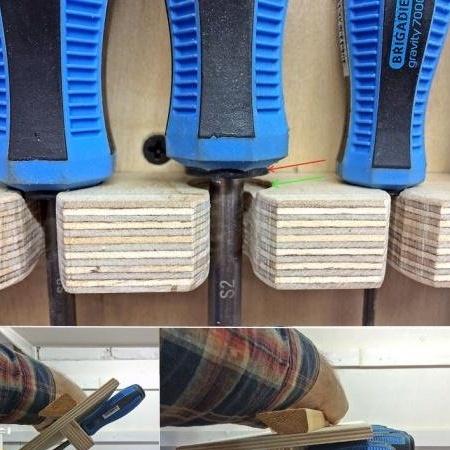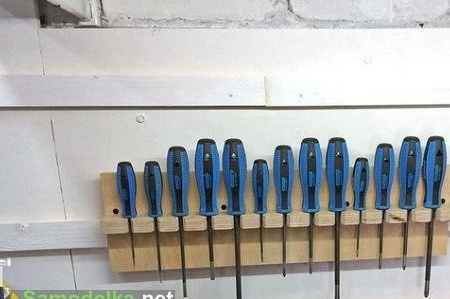
Keeping the workshop clean is very difficult. It is no less difficult to ensure that all tools and materials used in the work are organized and assembled. In this article we will talk about a universal holder designed for screwdrivers, which will allow you to store screwdrivers in one place, which will greatly facilitate the work and will save time, which, as a rule, masters spend on searches.
We will need:
1. plywood 9mm thick;
2. plywood 20 mm thick;
3. drill or screwdriver;
4. Fostner drill;
5. drill.
We will use the first piece of plywood, which is thinner, to make the base, and from the second piece, that is, thick, we will make the holder itself.
Let's start with the markup. We take a thick piece and mark the holes that we will drill for screwdrivers. It makes no sense to give specific sizes, because the holder for different people will turn out different, because it will be designed for a different number of screwdrivers of different sizes. It is only necessary to take into account that the screwdrivers must be suspended on the holder, therefore, grooves and cuts must also be made so that the screwdriver handles do not touch each other.
We start manufacturing by drilling grooves. This is a kind of recesses that are designed for each screwdriver individually. This can be done with a special drill, which is known as a fostner drill.
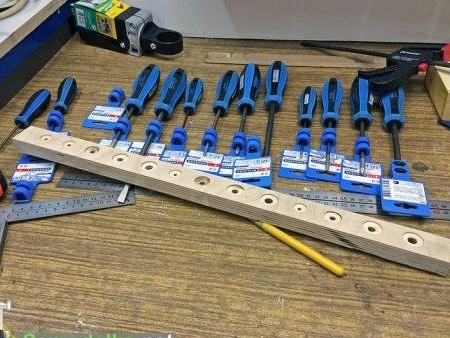
After that, you can drill through holes for each screwdriver.
After that, we make cuts that will go to the holes. This will provide additional fixation.
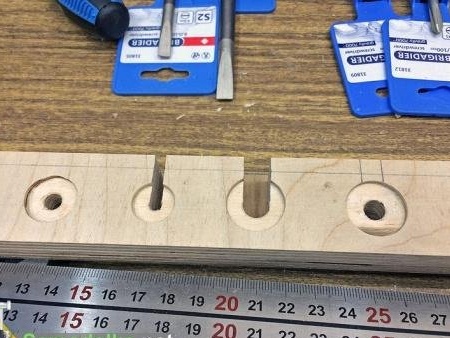
We round off the edges of the cuts, thus obtaining the shape of the necks. This is intended to simplify the work with the holder, so that every time you do not aim for hours to get into the hole.
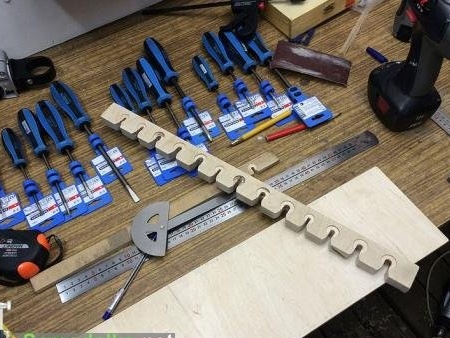
We fix the finished bar to thin plywood with screws. If desired, you can apply a layer of varnish or paint on it.
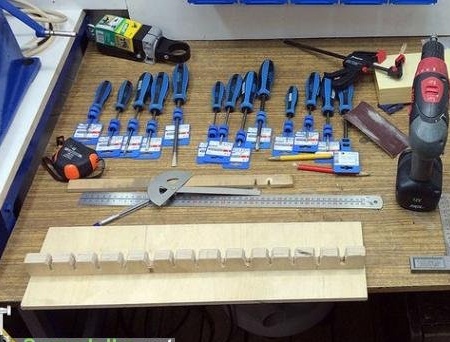
This completes the manufacture of the shelf - holder for screwdrivers. You can also improve it by doing something like the French bar. To do this, take another bar and saw it at an angle of 45 g. We fasten one side of the strip to the wall, the second side - directly to the shelf.This will allow the shelf to be suspended with greater ease, as well as more easily remove it from the wall.
